This survey will take about 1 minute.
Your answers will help us to improve our website.
Kirby and the Forgotten Land
Forgo Wasteland Leon's Soul Locations and Walkthrough

This is a walkthrough for the Forgo Wasteland stage in Kirby and the Forgotten Land. Read on to see the location for all of Leon's Souls, as well as a guide on how to beat the boss Phantom Sillydillo, and more!
| Previous Stage | Next Stage |
|---|---|
| Forgo Horns | Forgo Zone |
List of Contents
Forgo Wasteland Walkthrough Video
Forgo Wasteland All Leon's Souls
Leon's Souls Per Area
| Area 1 | 9 Leon's Souls |
|---|---|
| Area 2 | 7 Leon's Souls |
| Area 3 | 10 Leon's Souls |
| Area 4 | 9 Leon's Souls |
| Area 5 | 9 Leon's Souls |
| Boss | 5 Leon's Souls |
| Total | 49 Leon's Souls |
Forgo Wasteland Area 1 Soul Locations
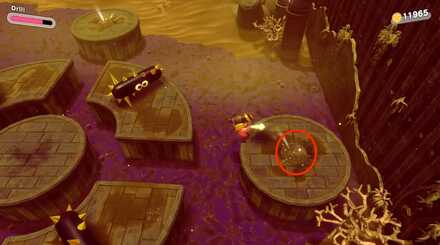
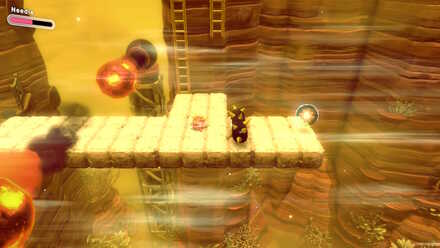
1: Above the Three Enemies on the Main Path
The first soul is easy to spot since it is on the main path. Defeat the three enemies first before getting the soul.
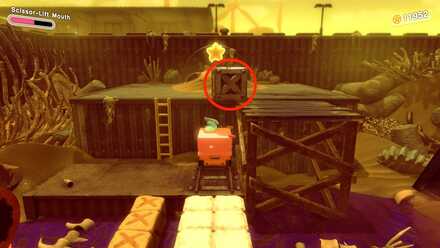
2: On the Scissors-Lift Track
The second soul is on the scissors lift track. Use Mouthful Mode to get it.
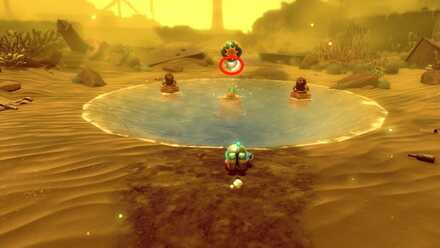
3-5: Rewards for Defeating Fleurina
You get 3 souls for defeating Fleurina. As some of the souls in this area require the Tornado Ability, it's a good idea to absorb her upon winning the battle.
6: On the Platform Left of Fleurina's Stage
The dirt pile on the platform to the left of where you defeated Fleurina contains a soul. Blow it with away Tornado to grab it.
7: Dig in the Far Right Dirt Patch
Use the Drill Ability on the lone platform on the right to find the next soul.
8: In the Dirt Pile Near the Dome
Use Tornado to blow away the pile of dirt and get the hidden soul.
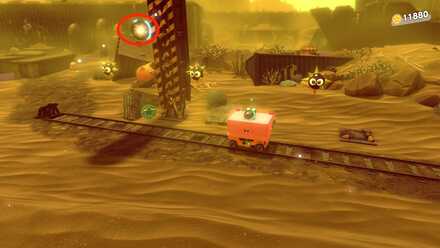
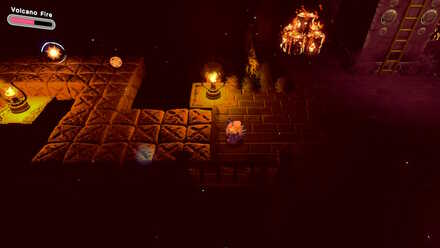
9: Break the Block as Scissors-Lift Kirby
Break the block right before the warp star as Scissors-Lift Kirby to get the final soul for this area. Open the dome near the third soul to allow the scissors-lift to pass through.
Forgo Wasteland Area 2 Soul Locations
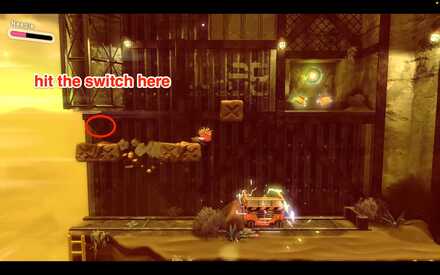
10: Hit the Three Switches
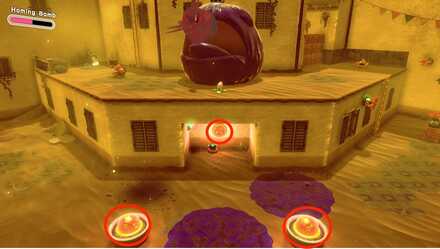
Hit the three switches below the poison Croakam within the time limit to make the soul appear.
11: Check the wall Near the Ladder
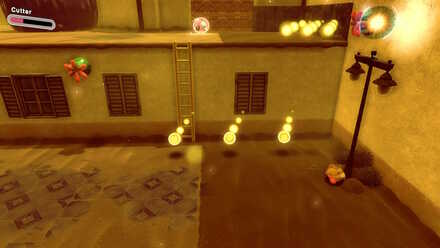
After you've climbed the ladder, grab the soul on the wall with either the Cutter ability or by hovering.
12: In the Area Near the Poison Croakam
Check the space to the right of the Poison Corakam to get another soul.
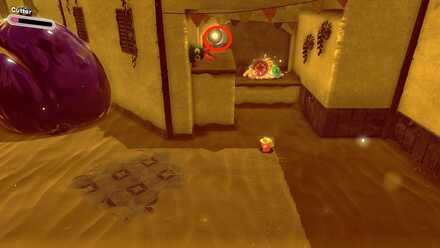
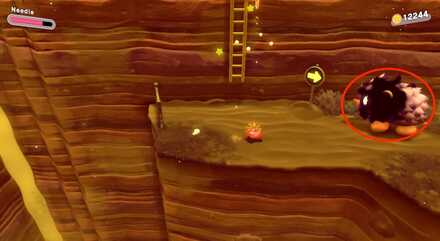
13: Destroy the Shadowy Enemy
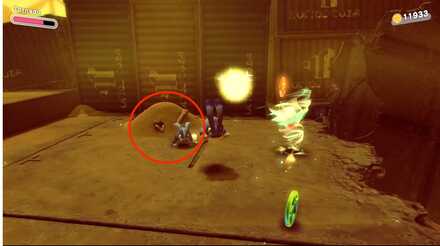
Destroy the shadowy enemy on the middle platform to get the next soul.
14-16: Water the Five Wilted Flowers
After Defeating the Poison Croakam, Water the 5 wilted flowers to get the final souls for this area.
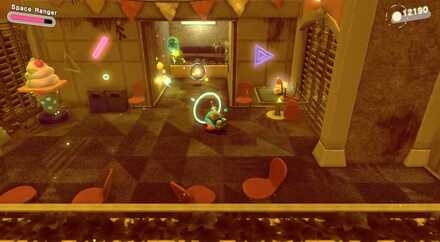
Forgo Wasteland Area 3 Soul Locations
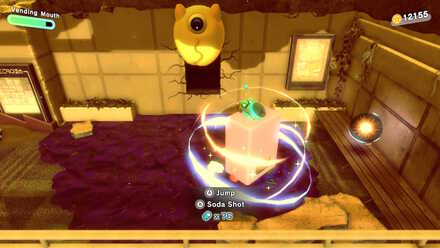
17: Destroy the Crates with Soda Shot
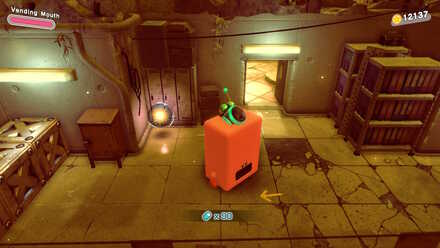
Use Vending Mouth Kirby to destroy the blocks and get the first soul for this area.
18: Cross the Poison Area with Invincibility Candy
The next soul is located across a poisoned area. Use the Invincibility Candy to reach it without taking damage.
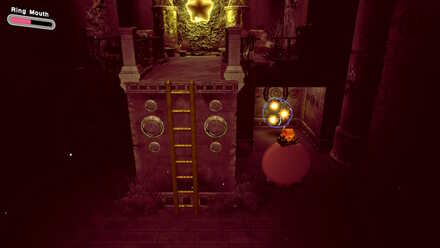
19-21: Break the Wall With Ring Mouth Kirby
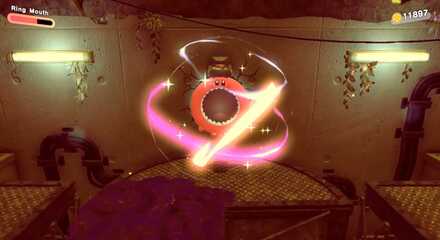
Break the wall above the spinning platform with Ring Mouth Kirby to get to a room that contains 3 souls.
22: On the Bottom Floor Next to the Ice Cream Cone
Go past the triangular hole and break the block on the right side of the room to get to the lower level. The soul is behind the giant enemy.
23-25: Break the Wall with Cone Mouth Kirby
After swallowing the Ice Cream cone on the bottom floor, return to the hole in the wall and jump into it to break it open. There will be three souls on the other side.
26: On the Table in the Next Room
After breaking open the wall with Cone Mouth Kirby, return to the area on the right and go through the door blocked by the enemy. You will find the last soul for this area on a table to your right.
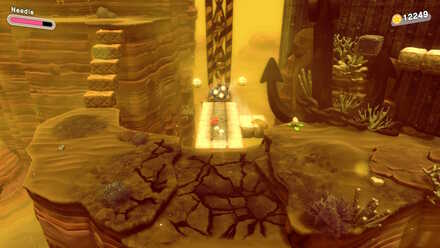
Forgo Wasteland Area 4 Soul Locations
27: On top of the First Ledge
Break the bomb block that you find on top of the first ledge that you climb to get the first soul for this area.
28: Climb Down the Ledge Next to the Cannon
Break the bomb blocks to proceed along the top of the canyon. When you see a cannon, jump down the ledge to find the next soul.
29: Across the Bridge By the Cannon
If you cross the bridge next to the cannon where you found the previous soul, you will see the next one at the end.
30: Use Scissors-Lift Kirby to reach the Switch
Climbing up the ladder near the cannon will take you to an area with a scissors lift. Use Mouthful Mode to get high enough to hit the switch, which will reveal the next soul.
31: Defeat the Shadow Enemy
Climb down the ladder near the scissors lift and defeat the giant shadow enemy to get the next soul.
32-34: Right Below the Pillar
Activate the bomb block in front of the pillar to make 3 souls appear. Make sure to move out of the way once you grab them, as the pillar will fall when you get too close.
35: By the Sparkling Area on the Anchor
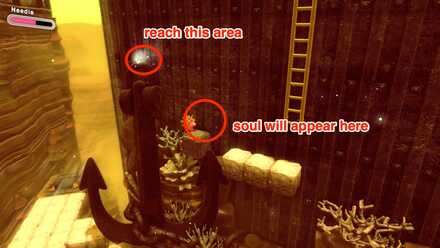
Make your way to the top is the anchor by the giant wall to find a sparkling area. Touching it will cause the last soul for this area to appear.
Forgo Wasteland Area 5 Soul Locations
36: On the Ledge Near the First Torch
Upon entering, pick up the Fire Copy Ability and light the first torch you see. You will then be able to see the soul on the ledge to your left more easily.
37: On top of the Torch
You will need to light many torches in order to safely proceed. Be sure to check the torch surrounded by spikes to find a soul located on top of it.
38-40: Hit the Blue Switch to FInd the Open Space
Use the Fire Ability to light torches in order to see the path. You will eventually come across torches on moving platforms near a blue button. Hit the button and head to the newly opened area on the right to collect three souls.
41: In the Area Left of the Warpstar
Continue to proceed through the area, lighting torches to help you see what's ahead. Eventually, you will come across a platform where the Warpstar is located. Head left of this ledge and light the torch to reveal a path where the next soul is located.
42-44: Behind the Burning Barrel on the Right of the Exit
Continue along the path where the previous soul was located to find a metal Ring. Transform into Ring Mouth Kirby and return to the ledge where the Warpstar is located and get rid of the burning barrels on the right with Windblast to get the final 3 souls.
Forgo Wasteland Rare Stone Location
Near the End of the Fourth Area
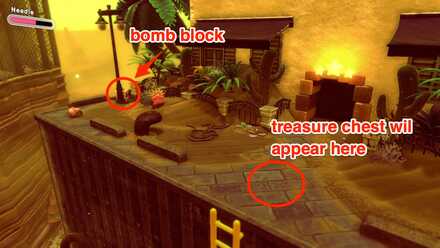
Look for the bomb clock behind on the left side near the exit to make a treasure chest appear. The rare stone is inside.
Forgo Wasteland Figure Location
Before the End of the Third Area
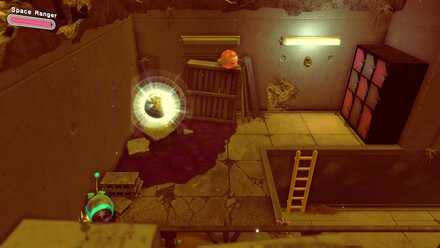
Before you use Storage Mouth Kirby to remove the storage locker in the final section of the third area, activate the sparkling area near the sleeping enemy to cause a figure to appear.
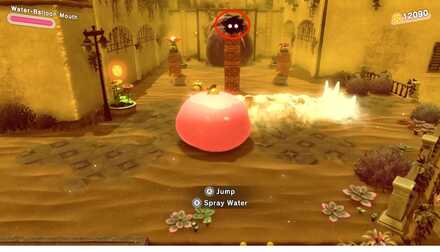
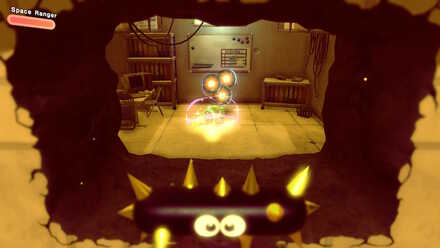
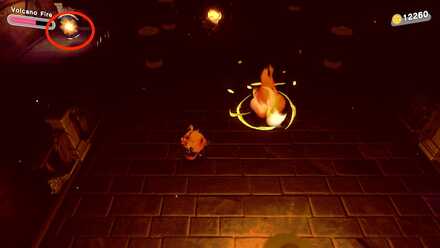
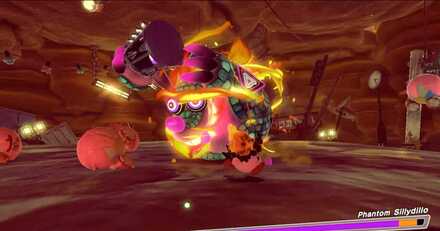
How to Beat Phantom Sillydillo
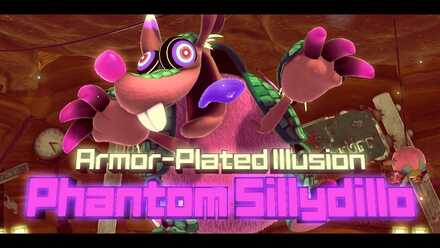
Recommended Ability
 Dragon Fire Dragon Fire
|
Constant Burn Damage Will End the Battle Quickly
Since a good portion of Phantom Sillydillo's battle involves dodging and waiting, Dragon Fire's residual damage allows you to deal damage, even when you are defending.
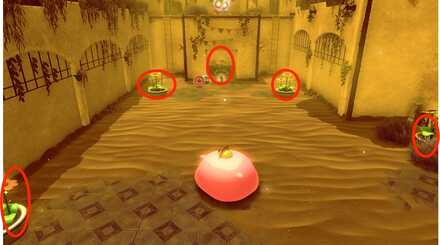
Attack Patterns
| Phantom Sillydillo Moveset |
|---|
Dodge Phantom Sillydillo's Attacks to find an Opening.
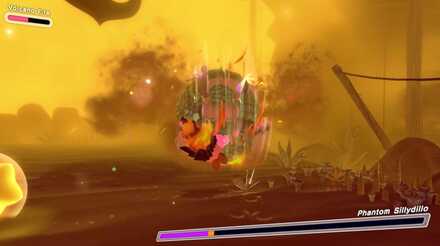
Phantom Sillydillo only pauses very briefly between attacks, giving you only a few seconds to counterattack. Instead of running from Phantom Sillydillo's attacks, dodge them at the right time in order to stay close and immediately attack when the moment arises.
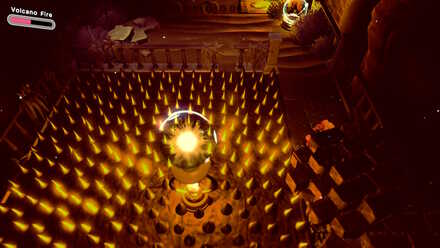
Don't Jump During the Second Capture Attempt
When Phantom Sillydillo tries to capture you in a cage, he will attack you on the ground, which you can dodge by jumping and hovering. However, when he immediately tries to capture you again, he will attack high instead of low. If you do not jump on the second attempt, Phantom Sillydillo's attack will miss, and allow you to deal lots of damage.
Kirby and the Forgotten Land Related Guides

Isolated Isles: Forgo Dreams Walkthrough and Stage List
| List of Stages | |
|---|---|
 Forgo Plains Forgo Plains
|
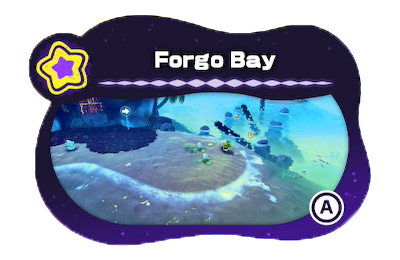 Forgo Bay Forgo Bay
|
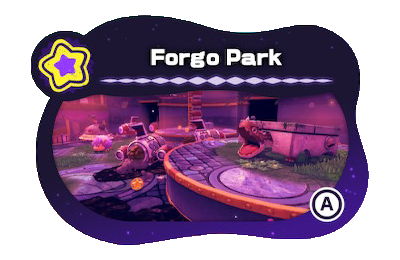 Forgo Park Forgo Park
|
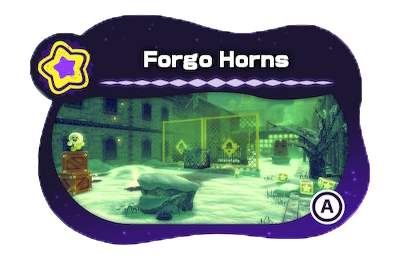 Forgo Horns Forgo Horns
|
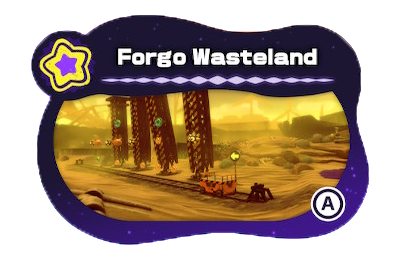 Forgo Wasteland Forgo Wasteland
|
 Forgo Zone Forgo Zone
|
 Forgo Land Forgo Land
|
|
Author
Forgo Wasteland Leon's Soul Locations and Walkthrough
Please participate in our site
improvement survey
04/2026
improvement survey
04/2026
Would you assist in
improving Game8's site?
improving Game8's site?

×
We are listening to our users' valuable opinions and discussing how to act on them.
The information collected through this survey will be used for the purpose of improving our services. In addition, the information will only be disclosed a part of a statistic in a format that will not allow identification of personal information.
Begin Survey
Not Now
×
Please rate each item regarding Game8.co's Advertisements.
Amount of Ads
Very Dissatisfied
Somewhat Dissatisfied
Fine
Somewhat Satisfied
Highly Satisfied
Placement of Ads
Timing of Ad Display
Ad Loading Speed
Safeness of Ads
Content of Ads
×
Please rate each item regarding Game8.co's Quality of Articles.
Amount of information
Very Dissatisfied
Somewhat Dissatisfied
Fine
Somewhat Satisfied
Highly Satisfied
Frequency of updates
Speed of new information
Accuracy of articles
Understandibility of articles
Readability of sentences
×
Please rate each item regarding Game8.co's Usability of the Site.
Ease of finding information
Very Dissatisfied
Somewhat Dissatisfied
Fine
Somewhat Satisfied
Highly Satisfied
Loading Speed
Use of Color
Font Size
Visibility of Images
Easy to Understand Layout
×
Please rate each item regarding Game8.co's Message Boards, Comments.
Ease of Writing
Very Dissatisfied
Somewhat Dissatisfied
Fine
Somewhat Satisfied
Highly Satisfied
Readability
Ease in Finding Information
Comment Quality
Comment Quantity
Admin Response
×
Please rate each item regarding Game8.co's Site's new design.
Please rate our site's new design
Very Dissatisfied
Somewhat Dissatisfied
Fine
Somewhat Satisfied
Highly Satisfied
Do you think that the website's design change makes the site easier to use?
Has the new design made it easier for you to find information on the site?
Has the new design improved the overall visual appeal of the site?
How would you rate your overall satisfaction with the new design of the site?
×
How likely are you to recommend Game8 to someone you know?
Very Unlikely
0
1
2
3
4
5
6
7
8
9
10
Very Likely
If you have other opinions regarding potential improvement to the website, please share them with us. We would appreciate your honest opinion.
Note: This is a free response section, so you can proceed without entering anything.
Note: Please be sure not to enter any kind of personal information into your response.
Note: Please be sure not to enter any kind of personal information into your response.
×
Thank You
×
Thank you for participating in our survey! Your answers will help us to improve the quality of our website and services.
We hope you continue to make use of Game8.
We hope you continue to make use of Game8.
Close
Rankings
- We could not find the message board you were looking for.
Gaming News


![Forza Horizon 6 Review [Preview] | Beautiful Roads With a Whole Lot of Oversteer](https://img.game8.co/4460981/a7254c24945c43fbdf6ad9bea52b5ce9.png/thumb)
Popular Games

Genshin Impact Walkthrough & Guides Wiki
Crimson Desert Walkthrough & Guides Wiki
Umamusume: Pretty Derby Walkthrough & Guides Wiki
Honkai: Star Rail Walkthrough & Guides Wiki
Monster Hunter Stories 3: Twisted Reflection Walkthrough & Guides Wiki
Wuthering Waves Walkthrough & Guides Wiki
The Seven Deadly Sins: Origin Walkthrough & Guides Wiki
Pokemon TCG Pocket (PTCGP) Strategies & Guides Wiki
Pokemon Pokopia Walkthrough & Guides Wiki
Zenless Zone Zero Walkthrough & Guides Wiki


Recommended Games
Monster Hunter World Walkthrough & Guides Wiki
Fire Emblem Heroes (FEH) Walkthrough & Guides Wiki
Pokemon Brilliant Diamond and Shining Pearl (BDSP) Walkthrough & Guides Wiki
Super Smash Bros. Ultimate Walkthrough & Guides Wiki
Diablo 4: Vessel of Hatred Walkthrough & Guides Wiki
Cyberpunk 2077: Ultimate Edition Walkthrough & Guides Wiki
Yu-Gi-Oh! Master Duel Walkthrough & Guides Wiki
Elden Ring Shadow of the Erdtree Walkthrough & Guides Wiki
The Legend of Zelda: Tears of the Kingdom Walkthrough & Guides Wiki
Persona 3 Reload Walkthrough & Guides Wiki


All rights reserved
© HAL Laboratory, Inc. / Nintendo
The copyrights of videos of games used in our content and other intellectual property rights belong to the provider of the game.
The contents we provide on this site were created personally by members of the Game8 editorial department.
We refuse the right to reuse or repost content taken without our permission such as data or images to other sites.