Forgo Zone Leon's Soul Locations and Walkthrough
This is a walkthrough for the Forgo Zone stage in Kirby and the Forgotten Land. Read on to see the location for all Leon's Souls, as well as a guide for how to beat the boss Phantom Forgo Dedede, and more!
| Previous Stage | Next Stage |
|---|---|
| Forgo Wasteland | Forgo Land |
List of Contents
Forgo Zone Walkthrough Video
Forgo Zone All Leon's Souls
Leon's Souls Per Area
| Area 1 | 8 Leon's Souls |
|---|---|
| Area 2 | 8 Leon's Souls |
| Area 3 | 10 Leon's Souls |
| Area 4 | 9 Leon's Souls |
| Area 5 | Leon's Souls |
| Boss | 5 Leon's Souls |
| Total | 51 Leon's Souls |
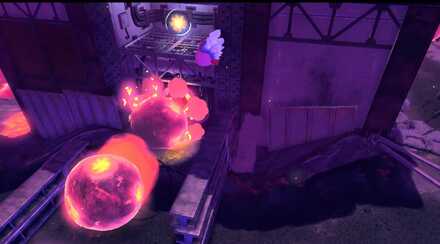
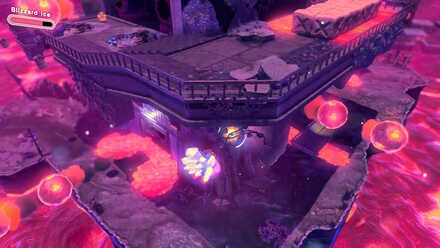
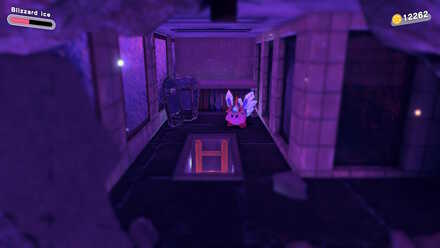
Forgo Zone Area 1 Soul Locations
1: Use Tornado To Get the Soul on the Right
Use Tornado to grab the soul to the right of the enemy.
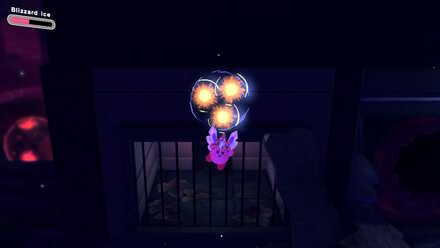
2: Grab the Distant Soul on the Far Left
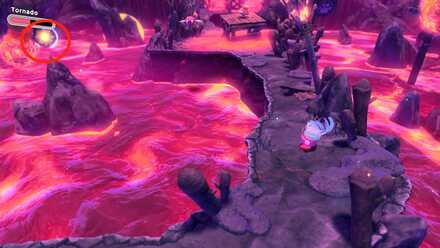
Use the Tornado to grab the soul located on the far left side. Since you can't land on the rock, make sure to turn back as soon as you grab the soul.
3: Use Tornado to Grab the Revolving Soul
Since the soul is constantly revolving around the rock, you will have to time your use of Tornado in order to grab the soul without missing it.
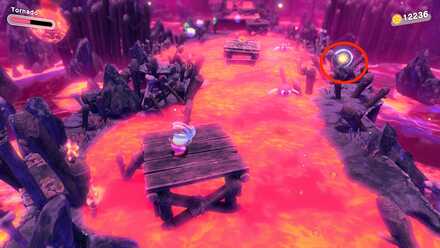
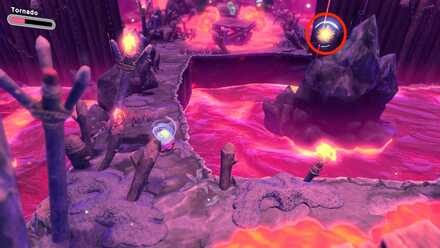
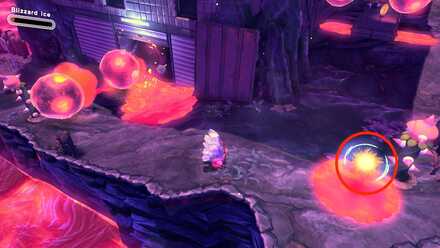
4: Grab the Soul in the Middle of the Lava
The next soul is located over a pool of lava. Watch out for the falling lava balls, and grab the soul without getting hit.
5: Grab the Soul to the Right of the Exit

Use Tornado or hovering to grab the soul located in the area to the right of the exit.
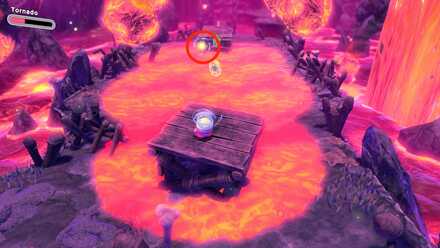
6-8: Grab the Souls on the Distant Platform
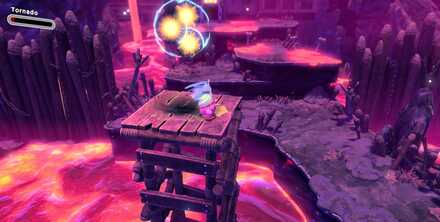
On the way to the exit, you may have noticed a tall platform that was too high to reach. The final three souls for this area are located there.
How to get the last 3 souls
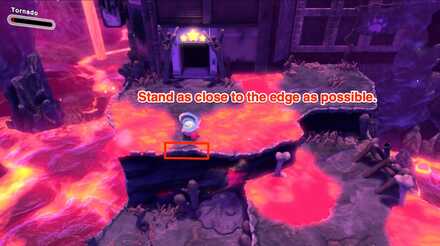 Stand near the edge of the area near the exit. |
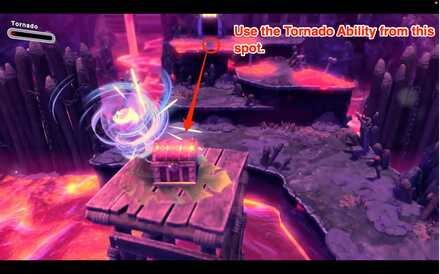 Use Tornado to reach the treasure chest on the high platform. |
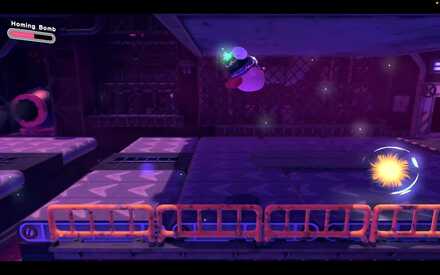
Forgo Zone Area 2 Soul Locations
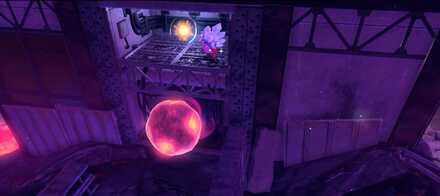
9: Above a Patch of Lava Past the first Cannon.
Proceed along the main path to find a soul floating over a patch of lava.
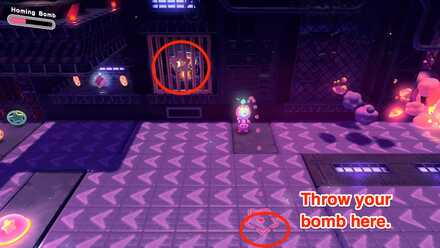
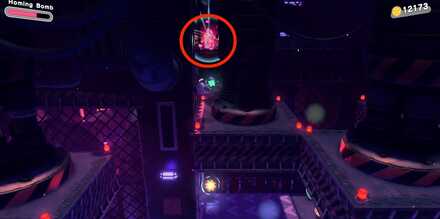
10: Open the Secret Path to Get the Hidden Soul
Destroy the bomb block near the cannon to expose a secret area where the next soul is located.
How to get the hidden soul
 Destroy the hidden bomb block. |
 Hover up to the newly opened room. |
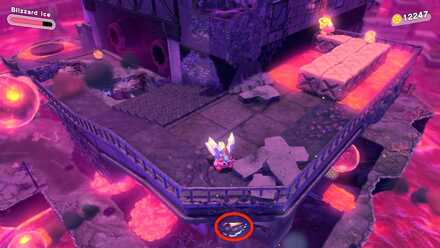
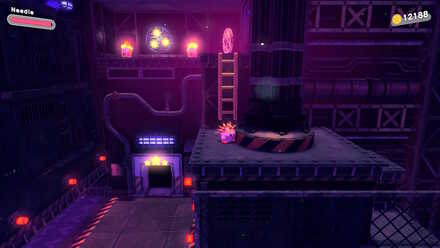
11: Climb Down the Ladder in the Corner
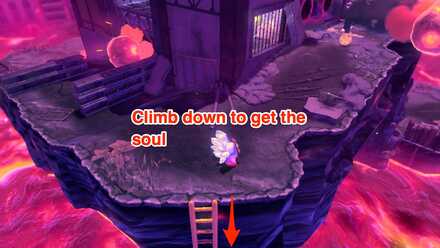
There is a ladder located not too far from where the 10th soul is located. Climb down it to grab the soul at the bottom.
12: Check Below the Ledge Near the Sparkling Area
Jump to the sparkling area near the giant ladder to grab the soul. Don't worry if you can't make it back up, as you will land on the lower part of the main path.
How to get the soul under the ledge
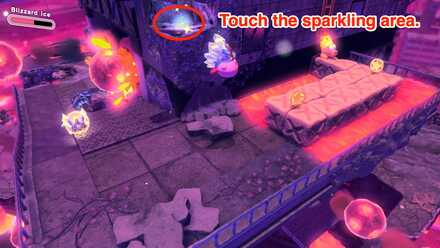 Activate the sparkling area. |
 Hover down to grab the soul. |
13: Defeat the Enemies in Front of the Tall Ladder
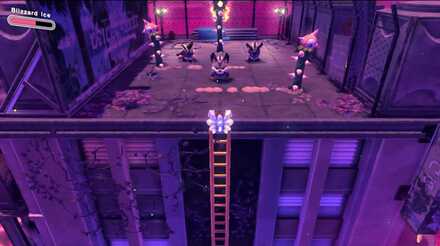
After climbing the tall ladder, defeat the enemies to get the next soul.
14-16: Check Inside the Giant Building
To get the last three souls for this, you must first head to the top of the tall ladder near the exit.
How to get the last souls for this area
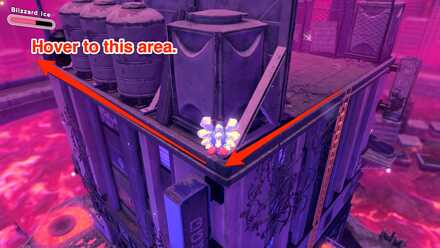 Hover to the far end of the building. |
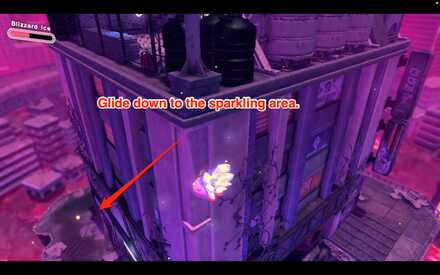 Hover down to the sparkling area. |
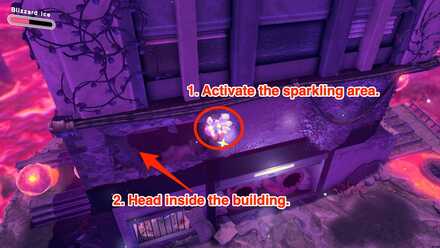 Activate the sparkling area to get rid of the blocks in the building. |
 Go down the ladder to get the final souls for this area. |
Forgo Zone Area 3 Soul Locations
17: Destroy the Bomb Block to Make the Soul Appear
Destroying the bomb block will cause the soul to appear. Make sure to not get squished as you grab it
18: Break the Block with the Sleeping Enemy on Top
Destroy the block with the sleeping enemy on it to get the next soul.
19: Check the Left Corner of the Conveyor Belt
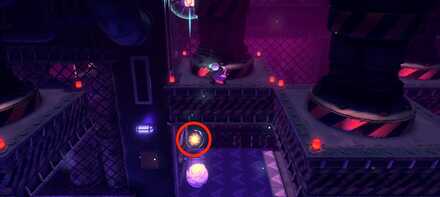
As you go along the conveyor belt, check the left corner to find the next soul.
20-22: Hit the Switch to Open the Cage
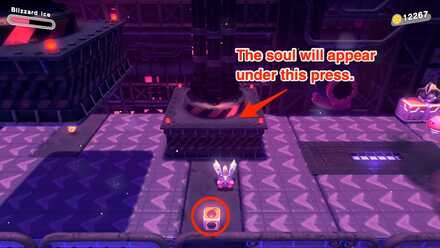
Use bombs to activate the switch to open the cage containing three souls. If you try to hit the switch by directly touching it, you will not make it back to the cage in time.
23: Check Under the Giant Press
Check under the giant press to grab the next soul.
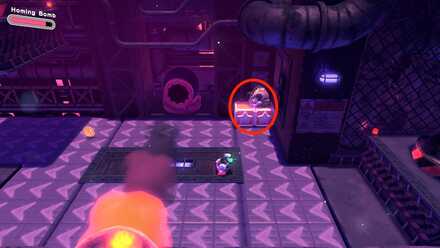
24-26: Climb the Ladder on Top of the Giant Press
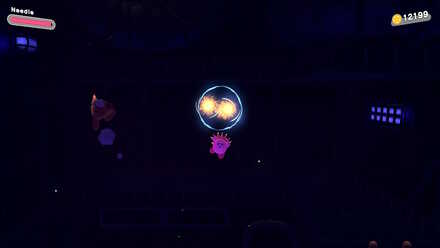
Before leaving the area, grab the final 3 souls above the door. You will need the Needle Copy Ability in order to get them.
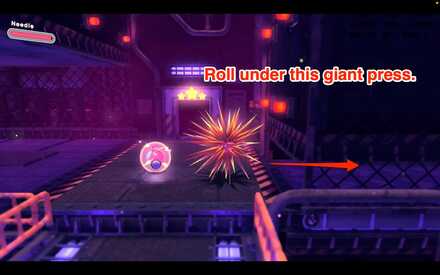 Swallow the enemy to grab the Needle Copy Ability (if needed) and Press the B button twice to squeeze in the tight area. |
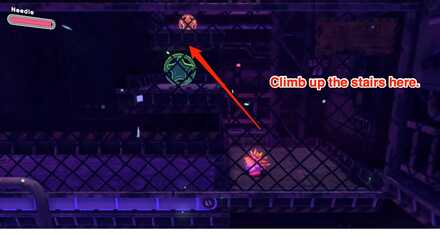 Climb up the giant press to reach the ladder. |
 Climb the ladder to get the final souls. |
Forgo Zone Area 4 Soul Locations
27-31: Defeat the Shadowy Enemies
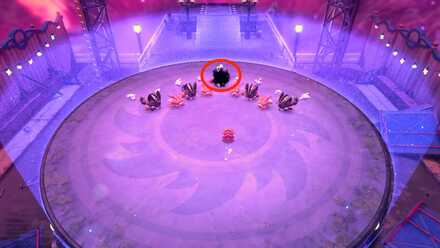 Shadow Enemy 1 |
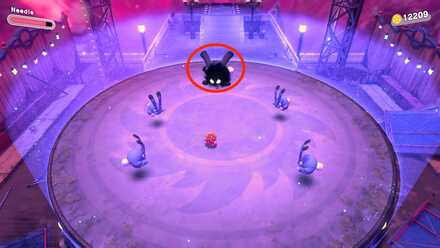 Shadow Enemy 2 |
 Shadow Enemy 3 |
 Shadow Enemy 4 |
 Shadow Enemy 5 |
Upon entering the arena, you will face a gauntlet of enemies. Defeating the 5 shadowy enemies that appear will earn you a total of 5 souls.
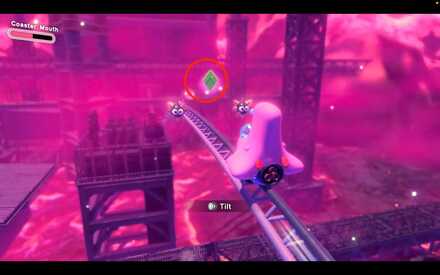
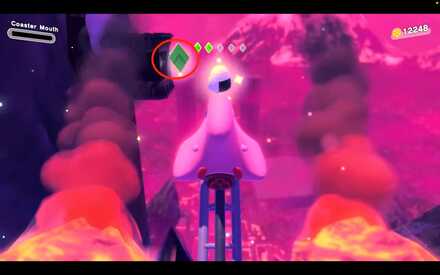
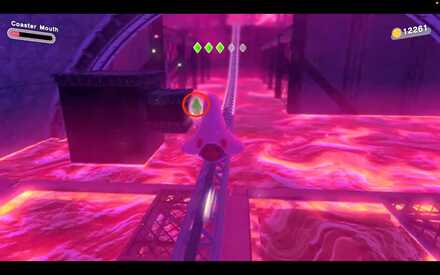
32-34: Collect the 5 Crystals on the Rollercoaster
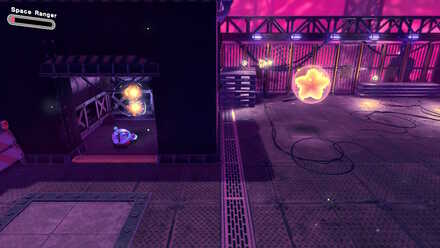
As Coaster Mouth Kirby, tilt at the proper time to get all 5 crystals. Four crystals are found on the track, while the last one is obtained at the end of the section.
How to get the 5 Crystals
 |
Stay Straight. |
 |
Tilt left. |
 |
Tilt left. |
 |
Tilt left. |
 |
Found at the end of the track. |
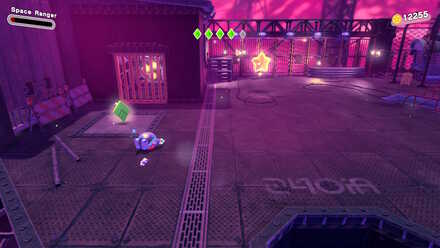
35 Check the Area to the right of the Warpstar
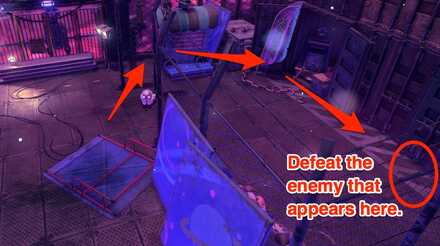
The area located to the right of the warp star contains the final soul for this area. Defeat the shadowy enemy that appears to get it.
Forgo Zone Area 5 Soul Locations
36: Defeat Wild Edge

Although you transform into Water-Balloon Kirby before the battle with Wild Edge, you can defeat him rather easily since his attacks and movements are rather slow.
37: Fill the Hole With Water-Balloon Kirby
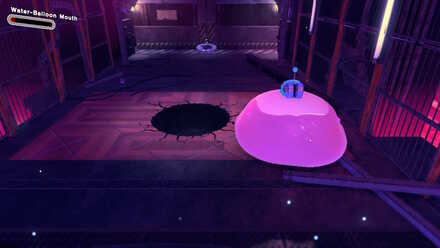
After the fight with Wild Edge, fall into the hole as Water-Balloon Kirby breaks open the floor. The soul is located in a treasure chest.
38: Defeat Wild Bonkers
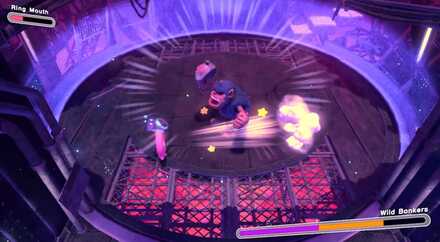
Much like the fight with Wild Edge, Wild Bonkers is easily defeated by Ring Mouth Kirby. Since Wild Bonkers moves much more quickly than you, make sure to keep your distance.
39: Fill the Hole in the Wall With Ring Mouth Kirby

Hurry across the crumbling path and make a hole in the wall to get the next soul.
40: Defeat both Fleurina and Wild Frosty

While fighting both Fleurina and Wild Frosty may sound difficult, Vending Mouth Kirby makes this battle rather easy. You have a lot of ammo available for this fight, so do not hesitate to fire at will.
41: Use Vending Mouth to Break the Hole
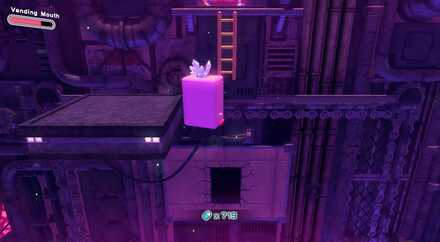
You cannot reach the hole from the bottom, as Vending Mouth Kirby cannot jump very high. You will have to drop into it from the bottom. Inside the newly made hole is the next soul.
42-43: Defeat the Shadowy Enemies
Although the area is small, none of the enemies are difficult to defeat. Stay near the center of the arena so that you do not fall off the edge.
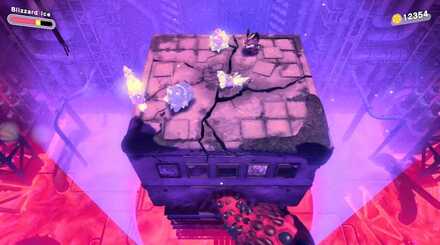
44- 46 Use Cone Mouth to defeat the Tortuilding
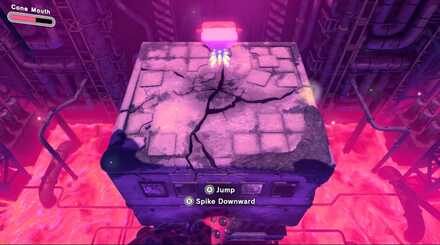
Defeating the enemies will cause a traffic cone to appear, use it to defeat the Toruilding you are standing on to get the final souls for this area.
Forgo Zone Rare Stone Location
Above the 3rd Soul in the 3rd Area
Hover above the area where you found the 3rd (19th) soul to find the rare Stone for this stage.
Forgo Zone Figure Location
Next to the Tall Ladder in the Second Area
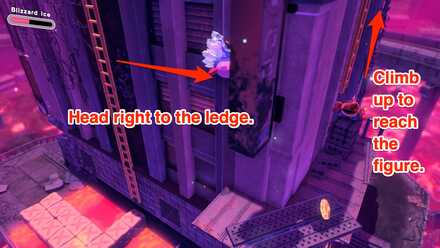
If you head right as you climb the tall ladder near the end of the second area, you will find a ledge and a ladder that will lead you to the figure for this stage.
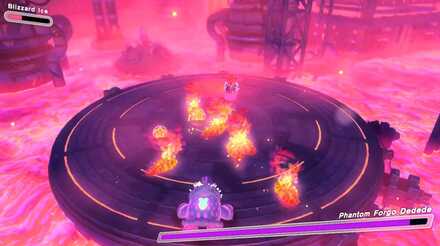
How to Beat Phantom Forgo Dedede

Recommended Ability
 Ice Ice
|
Ice will allow you to survive Phantom Forgo Dedede's onslaught of attacks
Phantom Forgo Dedede's attacks are not only fast and powerful, but the time between each attack is very small. Since guarding with the Ice Ability makes Kirby immune to Phantom Forgo Dedede's attacks, it is the ideal choice for this battle.
Attack Patterns
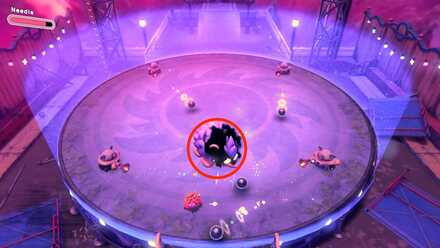
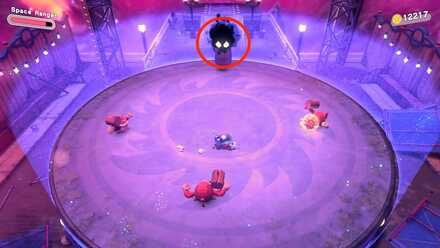
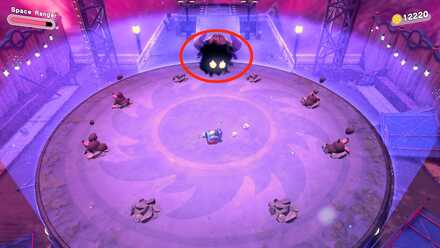
| Phase 1 |
|---|
|
|
Phase 2 |
|
|
Battle Strategy
Keep your distance and hover to avoid attacks
Phantom Forgo Dedede's attacks are very fast and constant, making dodging them very difficult. Instead of dodging on the ground, keep your distance and hover in order to reduce damage from his attacks.
Wait until he finishes attacking to go on the offensive
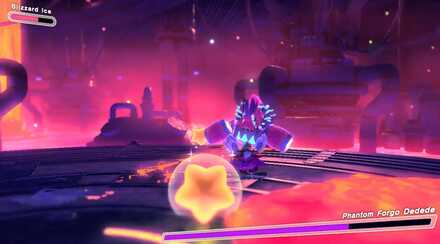
The brief moment between Phantom Forgo Dedede's attacks is the prime opportunity to attack. By hovering you can stay close to him and use the brief moment to launch a counterattack.
Stay clear of the lava surrounding the stage
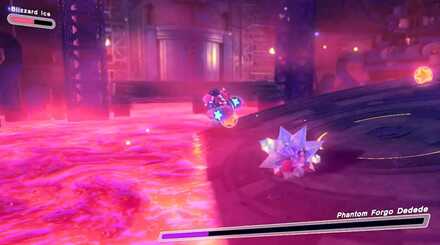
Many attacks by Phantom Forgo Dedede uses will cause the lava surrounding area to enter the stage. Touching the lava can not only damage you but will also waste your opportunity to attack due to the hit stun. Make sure to stay away from the lava to make the best use of any attacking opportunities.
Kirby and the Forgotten Land Related Guides

Isolated Isles: Forgo Dreams Walkthrough and Stage List
| List of Stages | |
|---|---|
 Forgo Plains Forgo Plains
|
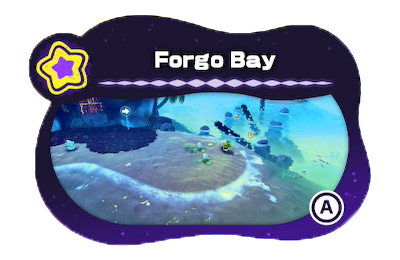 Forgo Bay Forgo Bay
|
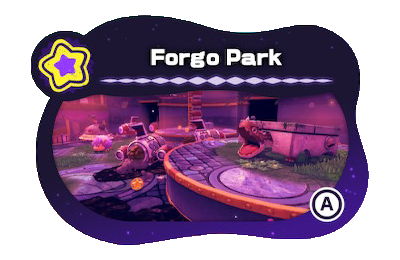 Forgo Park Forgo Park
|
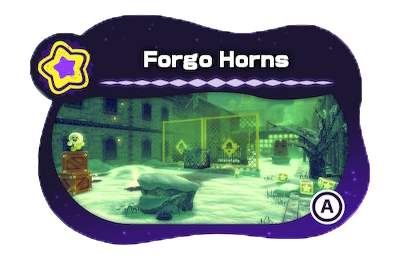 Forgo Horns Forgo Horns
|
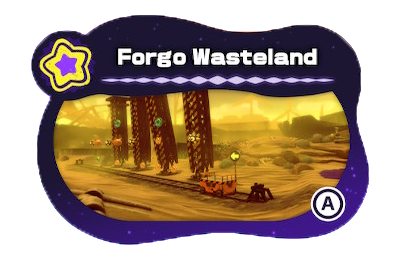 Forgo Wasteland Forgo Wasteland
|
 Forgo Zone Forgo Zone
|
 Forgo Land Forgo Land
|
|
Comment
Author

Forgo Zone Leon's Soul Locations and Walkthrough
Rankings
- We could not find the message board you were looking for.
Gaming News

![Death Stranding 2: On The Beach [PC] Review | A Port That Delivers](https://img.game8.co/4447392/15310a0c9aa1b6843bb713b2ea216930.jpeg/show)


Popular Games

Genshin Impact Walkthrough & Guides Wiki
Umamusume: Pretty Derby Walkthrough & Guides Wiki
Crimson Desert Walkthrough & Guides Wiki
Monster Hunter Stories 3: Twisted Reflection Walkthrough & Guides Wiki
Honkai: Star Rail Walkthrough & Guides Wiki
Pokemon Pokopia Walkthrough & Guides Wiki
The Seven Deadly Sins: Origin Walkthrough & Guides Wiki
Wuthering Waves Walkthrough & Guides Wiki
Zenless Zone Zero Walkthrough & Guides Wiki
Arknights: Endfield Walkthrough & Guides Wiki


Recommended Games
Fire Emblem Heroes (FEH) Walkthrough & Guides Wiki
Diablo 4: Vessel of Hatred Walkthrough & Guides Wiki
Cyberpunk 2077: Ultimate Edition Walkthrough & Guides Wiki
Yu-Gi-Oh! Master Duel Walkthrough & Guides Wiki
Super Smash Bros. Ultimate Walkthrough & Guides Wiki
Pokemon Brilliant Diamond and Shining Pearl (BDSP) Walkthrough & Guides Wiki
Elden Ring Shadow of the Erdtree Walkthrough & Guides Wiki
Monster Hunter World Walkthrough & Guides Wiki
The Legend of Zelda: Tears of the Kingdom Walkthrough & Guides Wiki
Persona 3 Reload Walkthrough & Guides Wiki


All rights reserved
© HAL Laboratory, Inc. / Nintendo
The copyrights of videos of games used in our content and other intellectual property rights belong to the provider of the game.
The contents we provide on this site were created personally by members of the Game8 editorial department.
We refuse the right to reuse or repost content taken without our permission such as data or images to other sites.