Story Walkthrough
☆ Recruit Yuj and Pekotte with the newest Gift Codes!
★Monster List Guide
☆Beginner Guides
★ Best Monsters and Best Party guides!
☆ How to Redeem Gift Codes
★ List of Food and Effects and Recipes!
This is a complete walkthrough for the Story Quests of Dragon Quest Treasures. Read on for a list of Story Quests, how many chapters are in the game, as well as other walkthrough information!
List of Contents
Story Walkthrough and List of Chapters
List of Chapters
| Chapter | Rec. Level | Gang Level | Est. Time |
|---|---|---|---|
 Prologue Prologue |
1 - 3 | - | 90 mins |
 Restoring the Trans-Draconic Railway Company Restoring the Trans-Draconic Railway Company |
3 - 6 | 1 | 2 hours |
 The Amber Horn The Amber Horn |
6 - 15 | 1 - 4 | 4 hours |
 The Citrine Talon The Citrine Talon |
16 - 20 | 6 | 2 hours |
 The Lapis Tail The Lapis Tail |
20 - 25 | 6 | 2 hours |
 The Emerald Wing The Emerald Wing |
26 - 30 | 8 | 2 hours |
 The Sapphire Eye The Sapphire Eye |
30 - 36 | 8 | 5 hours |
 The Amethyst Fang The Amethyst Fang |
36 - 40 | 10 | 3 hours |
 The Ruby Heart The Ruby Heart |
40 | 10 | 30 mins |
 The Treasure of Treasures The Treasure of Treasures |
40 | 10 | 2 hours |
Prologue Walkthrough
| Objectives | |
|---|---|
| 1 | Enter the next room for a cutscene |
| 2 | Walk to the other side of the room and crouch through the opening You can crouch/stand by pressing the Left Analog Stick. |
| 3 | Head upstairs to the deck and find Mia |
| 4 | Knock down the cage by launching three Pebbles Press and hold ZR to aim then release the button to shoot. |
| 5 | Talk to Mia and set sail |
| 6 | Follow Mia down the ruins |
| 7 | Stand on the switch at the center |
| 8 | Crouch through the gate and stand on the other switch |
| 9 | Examine the left dagger |
| 10 | Pull the dagger from the ground Mia will obtain the Dragon Dagger. |
| 11 | Examine the locked gate Oozabella will join the party. |
| 12 | Find the hidden treasure You can find it by the large tree, next to the water lilies. You can also check its location again through the Monster Vision by pressing L + B. |
| 13 | Examine the locked gate again |
| 14 | Pass through the tunnel |
| 15 | Approach Shady and Shambles Shady is the ghost-like character from earlier and Shambles is a boar wearing a witch hat (or a witch hat possessing a boar?). |
| 16 | Find Shady's treasure The treasure is buried in front of the boxes near the tunnel entrance. |
| 17 | Return to Shady and Shambles You will also receive the Map of the Paternoggin and some Pebbles! |
| 18 | Make your way to the next objective marker where you will fight a Dracky |
| 19 | Follow Porcus Admiral Mogsworth and Goonther will join your party. Reach the top with the Boost Forte by pressing L + Y/X/A. |
| 20 | Go through the tunnel to reach the next objective marker |
| 21 | Hop on the lift and activate it |
| 22 | Fight your way through The Forgotten Factory |
| 23 | Go through the giant door and defeat the Heartless Hunter Make sure to rest at the campfire before proceeding! |
| 24 | Approach Erik |
| 25 | Follow Erik and board the train |
Restoring the Trans-Draconic Railway Company Walkthrough
| Objectives | |
|---|---|
| 1 | Talk to Mr. Euston |
| 2 | Talk to the three staffs with objective markers These staffs are Muddimer, Miss Cecily, and Porcus. |
| 3 | Return to Mr. Euston |
| 4 | Examine the device near the railroad and head back to The Paternoggin |
| 5 | Head southeast to the objective marker where Royal Soil can be found You need to gather three urns of Royal Soil. |
| 6 | Continue south to find the Orc spot You need to defeat an Orc for a chance to scout it. |
| 7 | Follow the path southeast to the Sylphanian Stockade (Plains) and talk to Captain Levanter |
| 8 | Head west to find Gayle |
| 9 | Talk to Gayle again and defeat her team in a Gang Battle You will be able to use the Fortune Finder after the fight. |
| 10 | Use the Fortune Finder to track the Sanguinite The compass will lead you back to the Palatial Plains. |
| 11 | Head west for the gale and use a Dracky's Forte to ride it back to the station |
| 12 | Return to Eggshell Island and speak with Miss Cecily to recruit the Orc from earlier |
| 13 | Talk to Mr. Euston to report each completed quest |
| 14 | Follow Mr. Euston to the cellar |
| 15 | Open the large chest to obtain the Company Banner You will also find the Tail Trailer's Tablet inside. |
| 16 | Return the Company Banner to Mr. Euston In addition to unlocking the surrounding islands, you will also be able to name your own gang! |
| 17 | Talk to Porcus to access the Vault |
| 18 | Find Mia next to the device near the railroad From this point onward, you can switch between Erik and Mia before exploring an island. They will share the same stats and abilities so no need to worry about who to choose! |
Restoring the Trans-Draconic Railway Company Quest Walkthrough
The Amber Horn Walkthrough
| Objectives | |
|---|---|
| 1 | Explore the surrounding islands and collect treasures to reach Gang Rank 4 You will need to achieve 10,000,000 Vault Value to reach rank 4. |
| 2 | Enter the B1 portal and clear up to level 10 You will obtain 5 Sanguinites and the Horn Hoarder's Tablet on the last level. |
| 3 | Take the train to Cinderback Ridge |
| 4 | Head to the center of Backatoa on the west side of the map We recommend setting The Giant's Horn as the active quest so you can easily follow the objective marker on your minimap. |
| 5 | Fight Magmantes This is an unwinnable battle, so you can just run around until a cutscene starts. After the cutscene, you will receive the Stun Pellet Formula. |
| 6 | Craft some Stun Pellets This is only possible after getting Axel back to the base. Axel is found west of the Cold Shoulder Central Station. |
| 7 | Return to Magmantes with the Stun Pellets |
| 8 | Pinch the Amber Horn from Magmantes You don't really need to use the Stun Pellets. As soon as the battle starts, crouch then hold the A button to Pickpocket. |
| 9 | Return to your base |
The Amber Horn Quest Walkthrough
The Citrine Talon Walkthrough
| Objectives | |
|---|---|
| 1 | Increase your Gang Rank to 6 You will need to achieve 35,000,000 Vault Value to reach rank 6. |
| 2 | A cutscene will occur at the base after reaching rank 6, unlocking the second floor of the Snarl You will also obtain the Talon Tracker's Tablet after the cutscene. |
| 3 | Travel to The Wingswept Moors |
| 4 | Head to the western end of the map in Pinion Plateau for the Citrine Talon We recommend setting Run Like the Wind as the active quest so you can easily follow the objective marker on your minimap. |
| 5 | Grab the Citrine Talon from a chest within the ruins Be careful around this area as high level Gigantes and Great Sabrecats are roaming outside! |
| 6 | Return to base with the Citrine Talon |
The Citrine Talon Quest Walkthrough
The Lapis Tail Walkthrough
| Objectives | |
|---|---|
| 1 | Clear the B2 portal in the Snarl You will be rewarded with 5 Sanguinites and the Tail Taker's Tablet. |
| 2 | Take the train to the Hinterquarters |
| 3 | Head north to Mount Numbumb where the objective marker is We recommend setting The Snowbound Tail as the active quest so you can easily follow the objective marker on your minimap. |
| 4 | Use the Fortune Finder to find the exact spot of the treasure Be careful of the lv35 Killing Machines guarding the area. |
| 5 | Return to the base with the Lapis Tail |
The Lapis Tail Quest Walkthrough
The Emerald Wing Walkthrough
| Objectives | |
|---|---|
| 1 | Increase your Gang Rank to 8 You will need to achieve 100,000,000 Vault Value to reach rank 8. |
| 2 | A cutscene will occur at the base after reaching rank 8, unlocking the third floor of the Snarl You will also obtain the Wing Winner's Tablet after the cutscene. |
| 3 | Approach the Mazing Mirror |
| 4 | Take the train to the Wingswept Moors |
| 5 | Head north to Mount Greywing where the objective marker is We recommend setting Flight of the Fallen King as the active quest so you can easily follow the objective marker on your minimap. |
| 6 | Rest until evening at the nearby campfire You won't be able to talk to the wight at daytime. |
| 7 | Talk to the wight and purchase the treasure for 777,000 Gold We recommend completing treasure dungeons and defeating Gold-colored monsters in the field for farming the gold you need. |
| 8 | Return to base with the Emerald Wing |
The Emerald Wing Quest Walkthrough
The Sapphire Eye Walkthrough
| Objectives | |
|---|---|
| 1 | Clear the B3 portal in the Snarl You will be rewarded with 5 Sanguinites and the Eye Earner's Tablet. |
| 2 | Take the train to the Maneland |
| 3 | Head to the Sylphanian Stockade (Desert) where the objective marker is We recommend setting Eye of the Beast as the active quest so you can easily follow the objective marker on your minimap. |
| 4 | Talk to Captain Levanter |
| 5 | Talk to Gayle |
| 6 | Take the train to the Paternoggin |
| 7 | Head to the Sky Lift Platform and ride it to the ruins under Palatial Plains |
| 8 | Exit through the nearby door and follow the objective marker to find Princess Anemone |
| 9 | Head northwest and defeat the Tanzaknight The Tanzaknight will drop Monument Fragment upon defeat. |
| 10 | Return to Princess Anemone and hand over the fragment |
| 11 | Go back to the station and travel to the Hinterquarters If you already unlocked it, go straight to the Derriere Glacier station as this is closer to the objective. |
| 12 | Talk to Zephyr to obtain the Lexicon She's just at the base of the station. |
| 13 | Go back to the Paternoggin and return the Lexicon to Princess Anemone |
| 14 | Return to your base and find Princess Anemone in the Snarl |
| 15 | Travel to the Maneland and receive the map from Captain Levanter |
| 16 | Follow the road east until you reach the objective near Hollowhead Cavern A teleportal will appear upon reaching the marked spot. |
| 17 | Take the Sapphire Eye back to the base |
The Sapphire Eye Quest Walkthrough
The Amethyst Fang Walkthrough
| Objectives | |
|---|---|
| 1 | Increase your Gang Rank to 10 You will need to achieve 250,000,000 Vault Value to reach rank 10. |
| 2 | A cutscene will occur at the base after reaching rank 10, unlocking the fourth floor of the Snarl You will also obtain the Fang Finder's Tablet after the cutscene. |
| 3 | Take the train to the Paternoggin |
| 4 | Talk to Bonnie near Tangletongue Falls You'll have to take the Sky Lift Platform to the lower layer to find her. |
| 5 | Defeat Bonnie's squad |
| 6 | Return to base with the Amethyst Fang |
The Amethyst Fang Quest Walkthrough
The Ruby Heart Walkthrough
| Objectives | |
|---|---|
| 1 | Clear the B4 portal in the Snarl You will be rewarded with the Ruby Heart after the boss fight. |
| 2 | Exit the portal and have the Ruby Heart appraised |
The Ruby Heart Quest Walkthrough
The Treasure of Treasures Walkthrough
| Objectives | |
|---|---|
| 1 | Talk to Mr. Euston |
| 2 | Examine the company flag and defeat the Thunderous Plunderers |
| 3 | Head down the Snarl between B5 and B4 and examine the mirror Choose Captain Levanter when asked who to find. |
| 4 | Take the train to the Paternoggin and talk to Captain Levanter |
| 5 | Talk to Wyndy when you're ready Be sure to stock up and prepare before leaving! |
| 6 | Head down the ruins to the objective marker |
| 7 | Proceed to the other side and defeat Silverbones |
| 8 | Place the Dragonstones on the altar |
| 9 | Examine the teleportal to return to base |
| 10 | Talk to Erik/Mia in front of the vault to proceed |
| 11 | Insert your dagger into the pedestal |
| 12 | Go back to the altar where Purrsula, Porcus, and the dragon is |
The Treasure of Treasures Quest Walkthrough
Dragon Quest Treasures Story Synopsis
Two Siblings Seeking the Grandest Treasures
Erik and Mia are siblings who lived most of their youth on a Viking ship. One night aboard the ship, they sneak past the reveling Vikings and rescues two mysterious creatures, Purrsula and Porcus.
With their newly found friends, the four forms a group and escapes the ship. Purrsula and Porcus then lead the siblings to an undiscovered island where they found two Dragon Daggers.
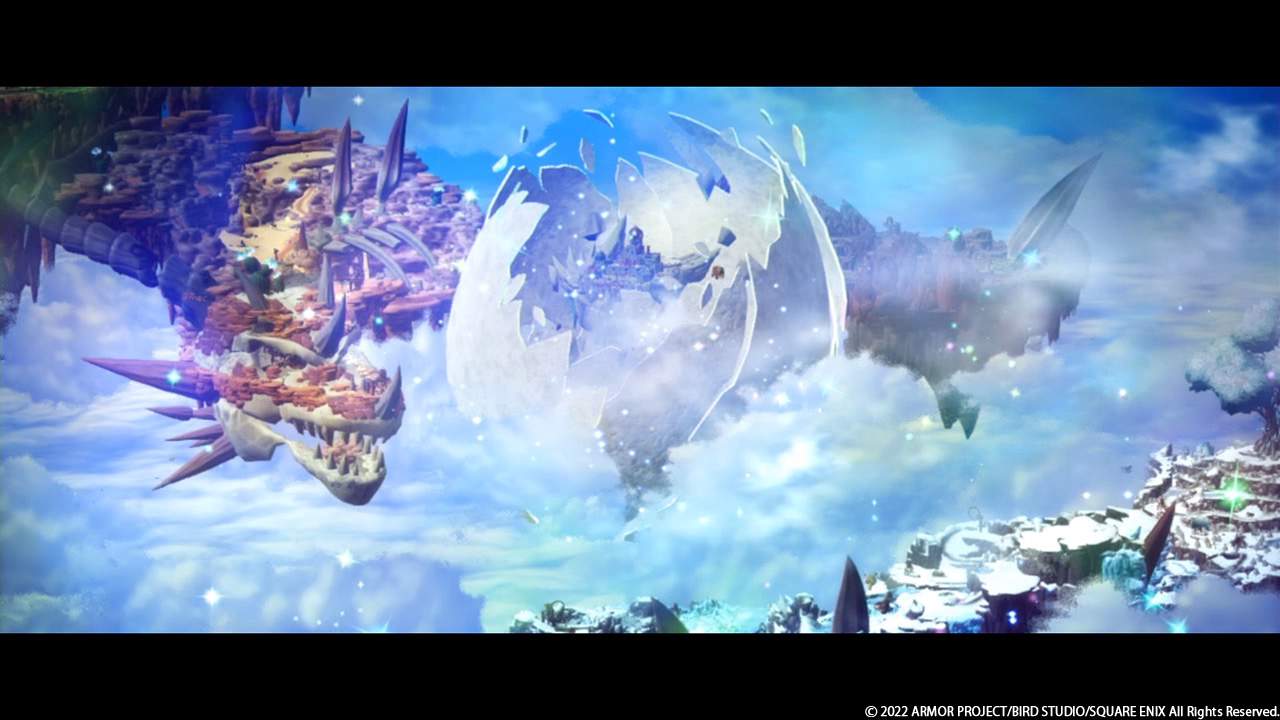
Shortly after obtaining the daggers, the siblings are magically transported to Draconia—a floating island which used to be the bodies of two golden dragons and is filled with unimaginable treasures.
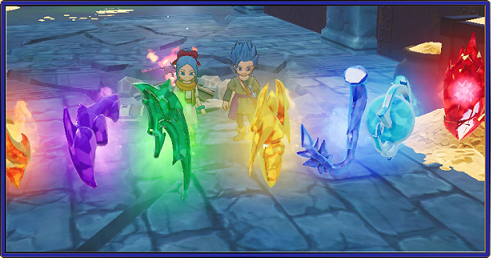
Now, their journey begins as treasure hunters and it's up to them to forge new bonds and make allies that will help them seek the grandest treasures of Draconia and obtain the seven mythical Dragonstones!
Dragon Quest Treasures Related Guides
Dragon Quest Treasures Wiki Front
 Story Walkthrough
 List of Bosses
 Tips and Tricks
 List of Monsters
 List of Side Quests
 List of Treasures
 List of Maps
 List of Abilities
 List of Items
 List of All Traits
 News and Events
 List of Characters
 List of Medals
Author
Story Walkthrough
Rankings
- We could not find the message board you were looking for.
Gaming News


![The Seven Deadly Sins: Origin [First Impressions] | A Promising Start](https://img.game8.co/4440581/584e0bfb87908f12c4eab6e846eb1afd.png/thumb)
![The Liar Princess and the Blind Prince Review [PC] | Lovely to Look at but Tedious to Play](https://img.game8.co/4442586/8d95f5faf05780f1765ce7e0938bd825.jpeg/thumb)
![Marathon Cryo Archive Map Teased as [REDACTED] on Selection Screen](https://img.game8.co/4442236/6357203e58172f6de57f1991e7c39b22.png/thumb)
Popular Games

Genshin Impact Walkthrough & Guides Wiki
Umamusume: Pretty Derby Walkthrough & Guides Wiki
Pokemon Pokopia Walkthrough & Guides Wiki
Honkai: Star Rail Walkthrough & Guides Wiki
Monster Hunter Stories 3: Twisted Reflection Walkthrough & Guides Wiki
Arknights: Endfield Walkthrough & Guides Wiki
Wuthering Waves Walkthrough & Guides Wiki
Zenless Zone Zero Walkthrough & Guides Wiki
Pokemon TCG Pocket (PTCGP) Strategies & Guides Wiki
Monster Hunter Wilds Walkthrough & Guides Wiki


Recommended Games
Diablo 4: Vessel of Hatred Walkthrough & Guides Wiki
Cyberpunk 2077: Ultimate Edition Walkthrough & Guides Wiki
Fire Emblem Heroes (FEH) Walkthrough & Guides Wiki
Yu-Gi-Oh! Master Duel Walkthrough & Guides Wiki
Super Smash Bros. Ultimate Walkthrough & Guides Wiki
Pokemon Brilliant Diamond and Shining Pearl (BDSP) Walkthrough & Guides Wiki
Elden Ring Shadow of the Erdtree Walkthrough & Guides Wiki
Monster Hunter World Walkthrough & Guides Wiki
The Legend of Zelda: Tears of the Kingdom Walkthrough & Guides Wiki
Persona 3 Reload Walkthrough & Guides Wiki


All rights reserved
© 2022 ARMOR PROJECT/BIRD STUDIO/SQUARE ENIX All Rights Reserved.
© SUGIYAMA KOBO
Nintendo Switch is a trademark of Nintendo.
The copyrights of videos of games used in our content and other intellectual property rights belong to the provider of the game.
The contents we provide on this site were created personally by members of the Game8 editorial department.
We refuse the right to reuse or repost content taken without our permission such as data or images to other sites.