
This survey will take about 1 minute.
Your answers will help us to improve our website.
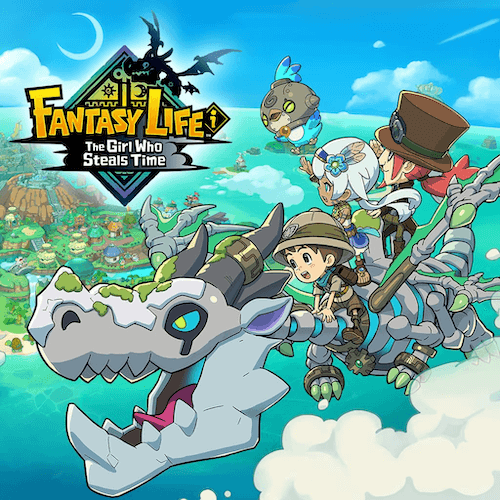
FANTASY LIFE i: The Girl Who Steals Time (FLi)
Chapter 7: Crack the Cog, Free our Future Walkthrough Guide
This is a walkthrough guide for Chapter 7, Crack the Cog, Free our Future, in FANTASY LIFE i: The Girl Who Steals Time (FLi). Check out a step-by-step guide to beat Chapter 7 here.
| ◀ Previous Guide | Next Guide ▶︎ |
|---|---|
| Chapter 6 | Post-Game |
List of Contents
Crack the Cog, Free our Future Walkthrough Guide
Visit Rem in the Capital
| Step-by-Step Guide | |
|---|---|
| 1 | 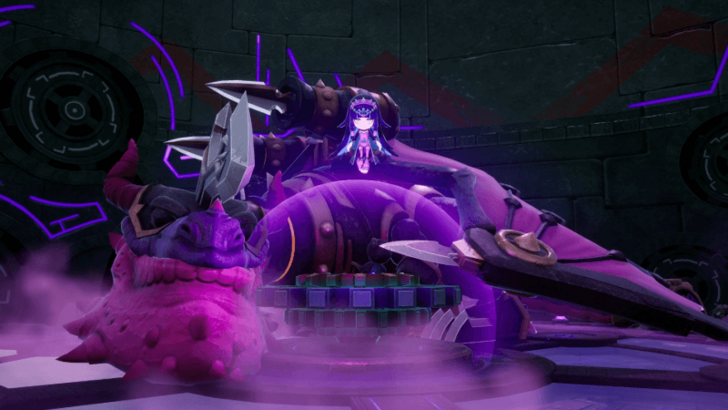 As soon as you enter B4, a cutscene will play revealing the Cog of Time, as well as the Dark Dragon and Carla. |
| 2 | Once the cutscene's over, you'll be back at the Depths Entrance and you'll now need to visit Rem back at Mysteria Castle. |
| 3 |  When you're ready, teleport to the capital and walk to the castle's entrance to start a cutscene with Rem, Ranoah, and Mira. |
Rest at the Inn in the Capital
| Step-by-Step Guide | |
|---|---|
| 1 | 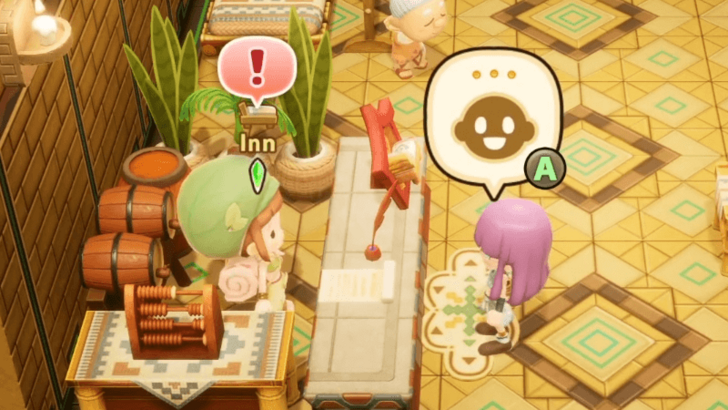 To pass the time while waiting for Mira, go to the inn in the capital and rest. |
Stroll Around the Capital
| Step-by-Step Guide | |
|---|---|
| 1 | 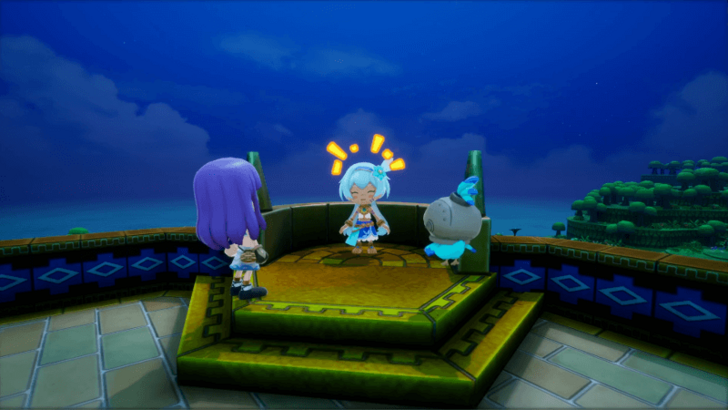 After a short cutscene, go up to the middle layer of the castle and talk to Rem for another cutscene. Once that's done, it'll be the next day. |
Go to Mysteria Castle
| Step-by-Step Guide | |
|---|---|
| 1 | 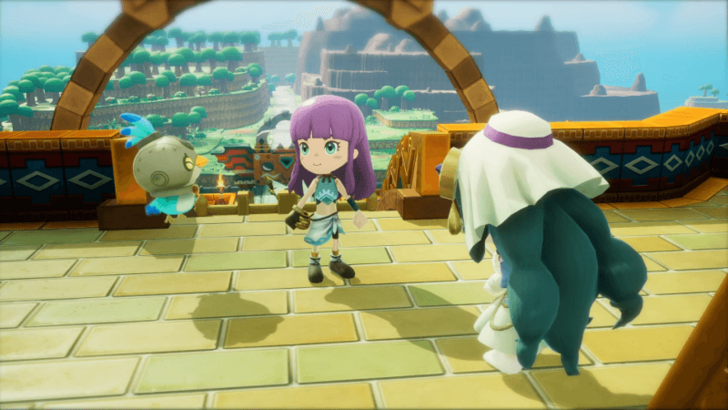 Exit the inn and head up the stairs to talk to Mira. She's devised a way to destroy the Cog, and she'll give you the recipe so that you can show it to Edward. |
Report to Edward
| Step-by-Step Guide | |
|---|---|
| 1 | 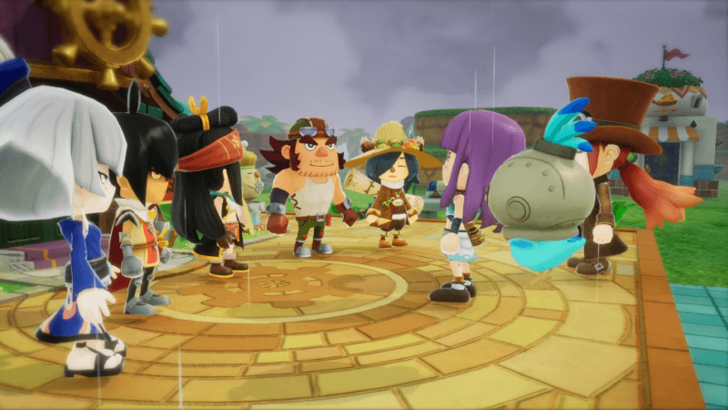 When you're ready, head back to your Base Camp and talk to Edward. He will gather your allies so that you can discuss how to complete the recipe. |
Visit Rem
| Step-by-Step Guide | |
|---|---|
| 1 |  To find the materials that you'll need, you'll have to go back to the past and talk to Rem. |
| 2 | 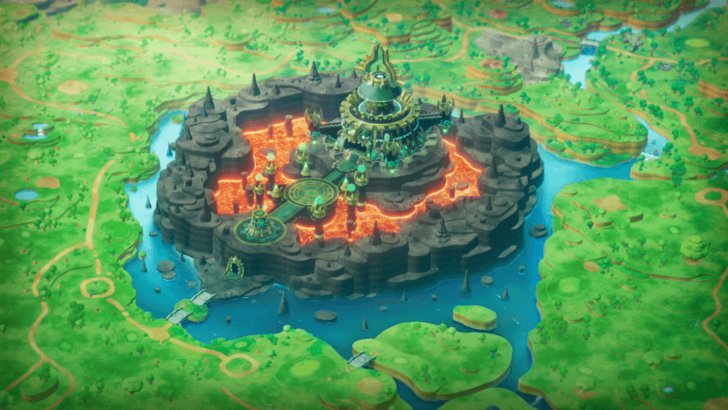 Aside from telling you where to get the materials that you need, she'll also mentioned that the Crow Feather that you got might be the key to accessing the castle in Ginormosia. |
| * | The castle is an optional dungeon that can be cleared to weaken the Dark Dragon. If you want to make the fight versus it easier later, then it's highly recommended to clear Fort Gardhart. |
Collect the Eternian Materials
| Step-by-Step Guide | |
|---|---|
| 1 | 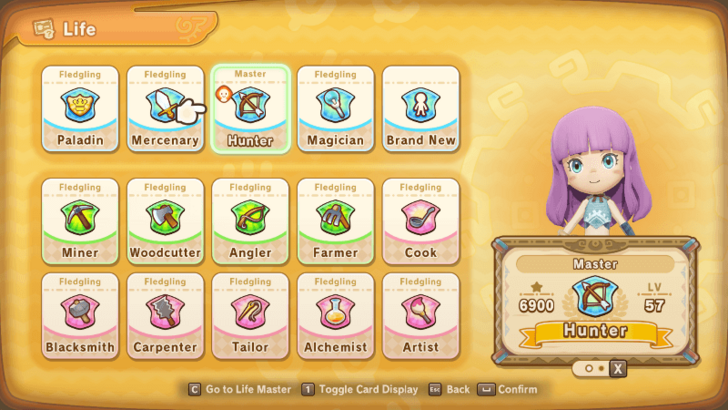 For the next part of the main quest, you will need to have 1 of each Life levelled and equipped, whether it be yourself or a Buddy. If you still need to level up a Life or Buddy, try to aim for around 350 for the Life's Skill to be safe. The only exception to this are the Combat Lives, since you're just hunting a boss, and you don't need a specific Life to do that. ▶︎ List of All 14 Lives and Jobs |
| 2 | Now that Rem has given you the locations of the materials you need, you can go off and collect them in any order that you wish. List of Materials: ・Eternia Gem ・Eternian Log ・Eternia Fern ・Eternian Flying Fish ・Eternian Fleece ▶︎ Jump to Next Section |
Gather an Eternia Gem
| Step-by-Step Guide | |
|---|---|
| 1 |  To get the Eternia Gem, you will need to head inside Warren Willow Hollow. |
| 2 | 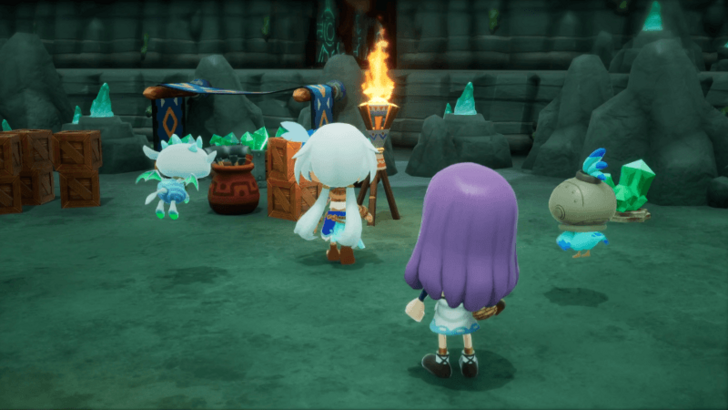 Go inside and head to the end of the dungeon, and a cutscene revealing a new area will play. The newly unlocked part of the dungeon has some pretty tough enemies, so make sure you're prepared before going down. |
| 3 | 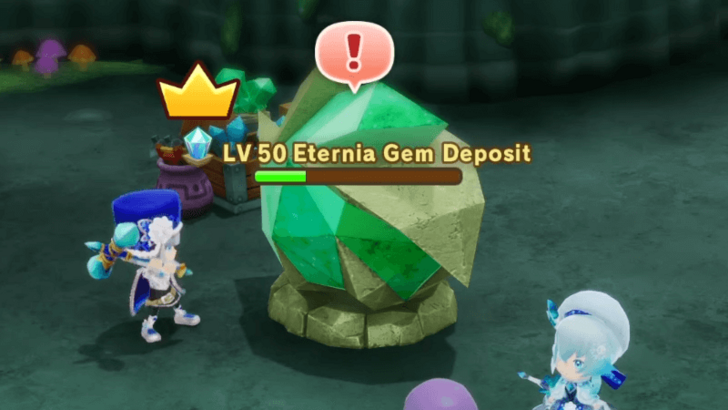 Explore the new area, and, once you're done, head to the northernmost room to mine the Eternia Gem Deposit. |
| 4 | Once you've got the gem, you're free to leave the cave and hunt for any other materials that you may need. |
Gather an Eternian Log
| Step-by-Step Guide | |
|---|---|
| 1 | 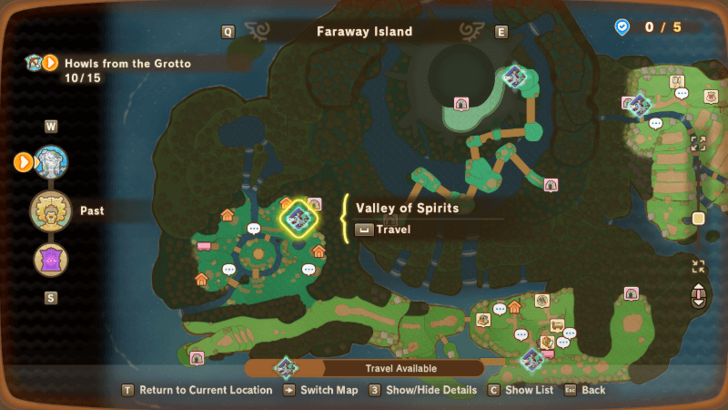 To get the Eternian Log, you'll need to go to Lulab Forest. Just make sure that you teleport to the Valley of Spirits since the tree is on that side of the forest. |
| 2 | 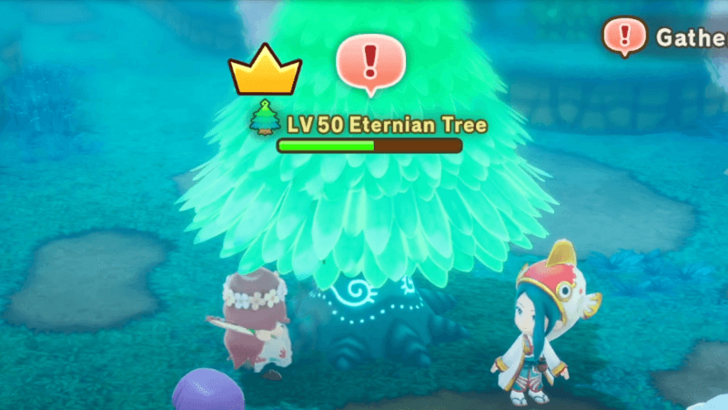 Go inside and head to the area with a seal to chop down the Eternian Tree. |
| 3 | Once you've got the log, you're free to leave the forest and hunt for any other materials that you may need. |
Gather an Eternia Fern
| Step-by-Step Guide | |
|---|---|
| 1 | 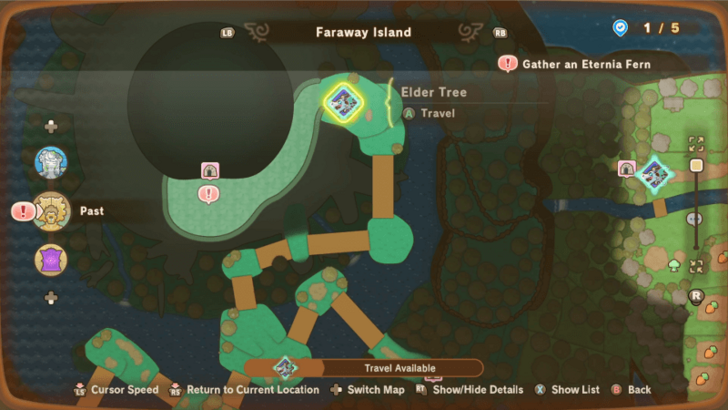 To get the Eternian Fern, you will need to go inside the Elder Tree. |
| 2 |  When you reach the entrance, you will encounter a short cutscene with Leafah and Johannes. |
| 3 | 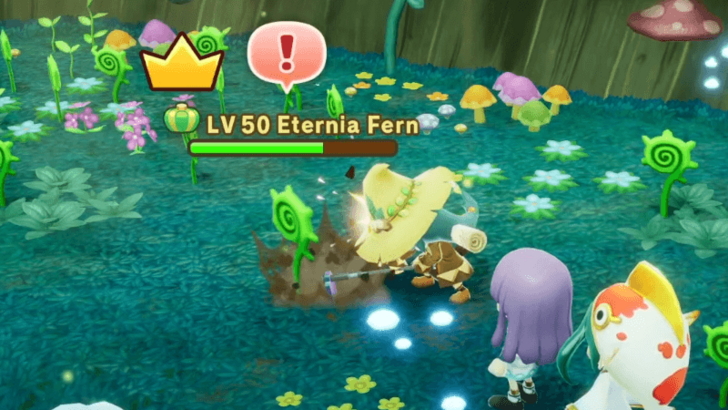 From there, go inside and head to the back to farm the Eternia Fern. |
| 4 | Once you've got the fern, you're free to leave the tree and hunt for any other materials that you may need. |
Catch an Eternian Flying Fish
| Step-by-Step Guide | |
|---|---|
| 1 | 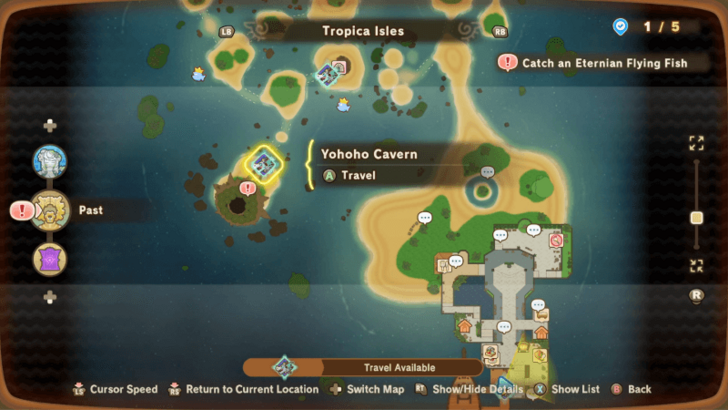 To get the Eternian Flying Fish, you will need to head to the cove inside Yohoho Cavern. |
| 2 | 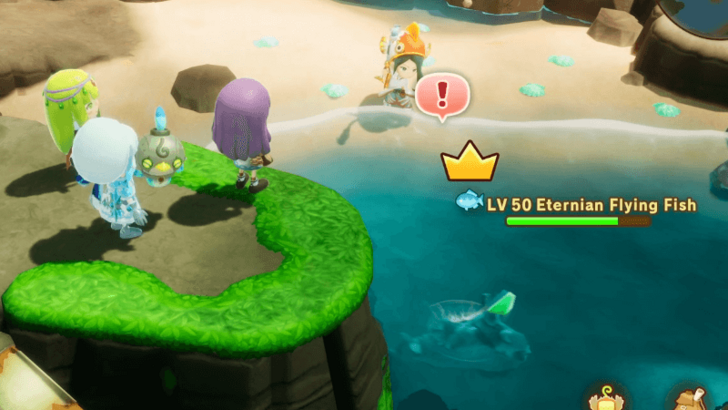 Go in the cave and head to where you met Kikyo so that you can fish up the Eternian Flying Fish. Just make sure that you're on the beach with all the shells, or the fishing prompt might not pop up. |
| 3 | Once you've got the fish, you're free to leave the cove and hunt for any other materials that you may need. |
Gather an Eternian Fleece
| Step-by-Step Guide | |
|---|---|
| 1 | 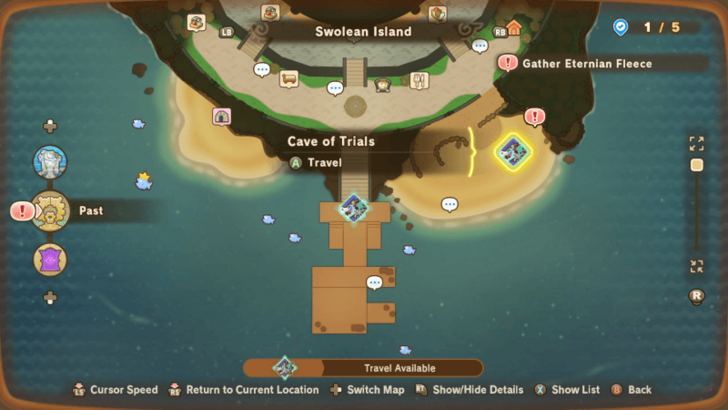 To get the Eternian Fleece, you will need to defeat an Eternia Woolie located inside the Cave of Trials. When you're ready, teleport to Swolean Island and enter the cave. |
| 2 | 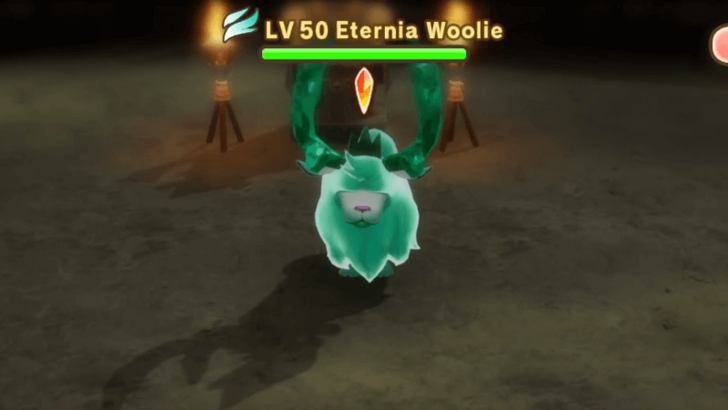 Head down to B2, where you found Rem before, and defeat the Eternia Woolie. This fight shouldn't be hard as long as you're not standing in front of it. ▶︎ How to Beat Eternia Woolie |
| 3 | Once you've got the fleece, you're free to leave the cave and hunt for any other materials that you may need. |
Report to Edward
| Step-by-Step Guide | |
|---|---|
| 1 | Now that you've gathered all the materials, head back to your base camp and talk to Edward. |
| 2 | 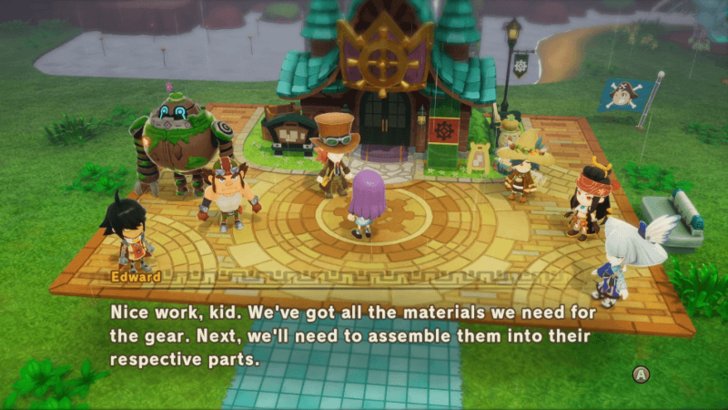 The next step now will be to transform all the materials into parts for the gear. Thankfully, there's a workbench inside the Guild Office, so you won't need to go far to complete the task. |
Craft the Four Gear Parts
| Step-by-Step Guide | |
|---|---|
| 1 | 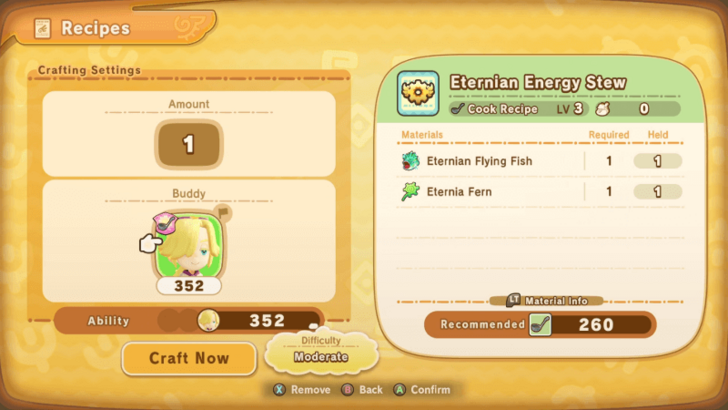 The first piece that you need to make is the Eternian Energy Stew, which requires at least 260 Cooking. |
| 2 | 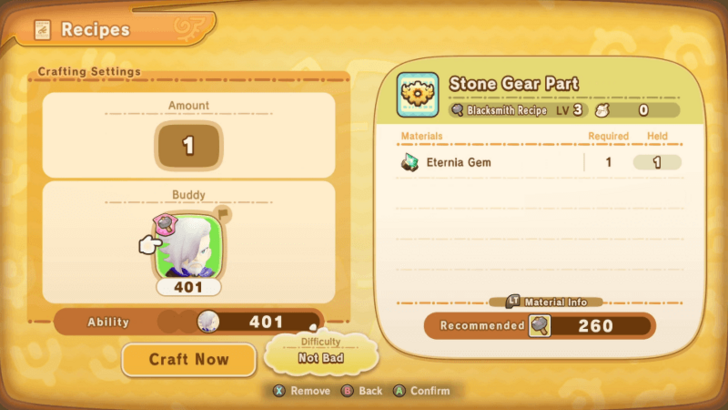 Next, you'll need to make the Stone Gear Part, which requires at least 260 Blacksmithing. |
| 3 | 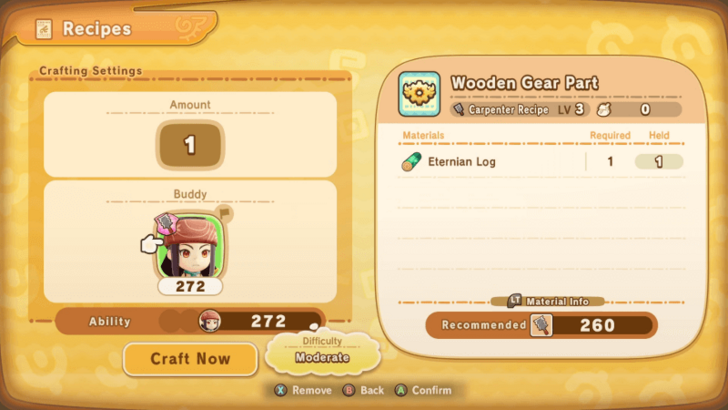 After that, you'll need to make the Wooden Gear Part, which requires at least 260 Carpentry. |
| 4 | 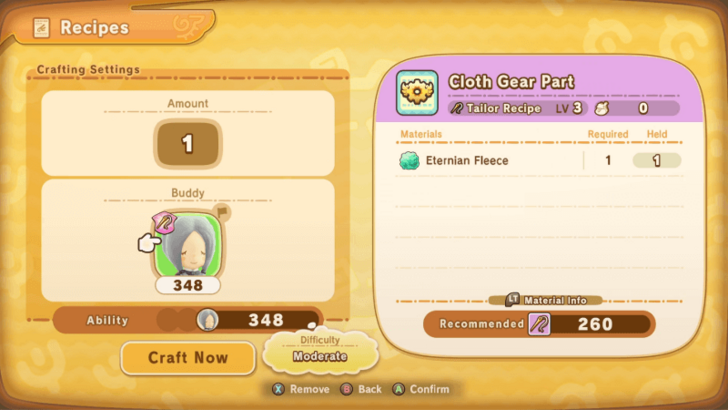 Finally, the last piece you need to make is the Cloth Gear Part, which requires at least 260 Tailoring. |
Craft the Interfere Gear
| Step-by-Step Guide | |
|---|---|
| 1 | 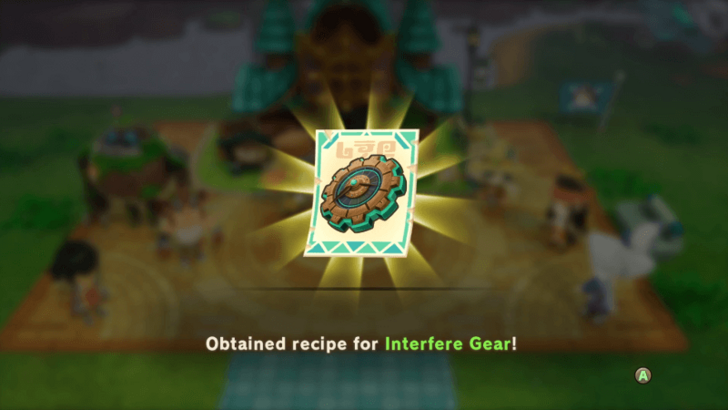 Now that you have all the parts, report back to Edward to get the recipe to make the Interfere Gear. |
| 2 | 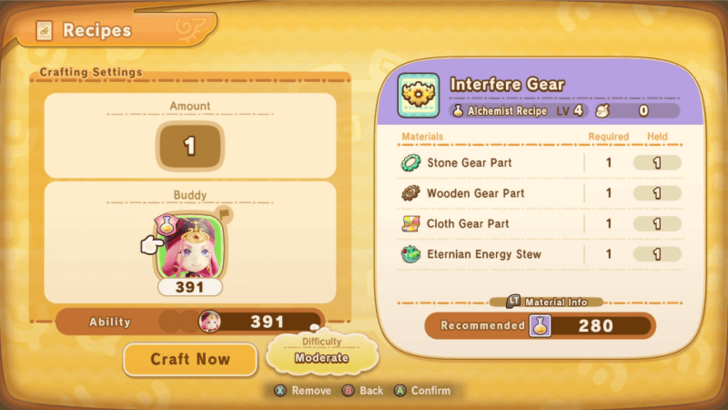 Go back to the workbench and craft the Interfere Gear, which requires at least 280 Alchemy. |
Complete the Interfere Gear
| Step-by-Step Guide | |
|---|---|
| 1 | 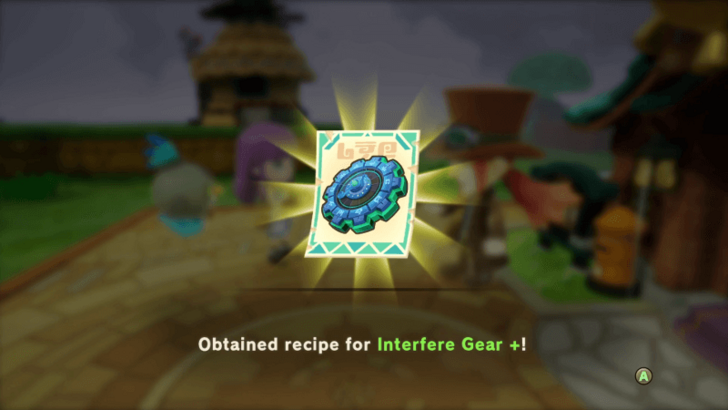 Head back to Edward, but he's not pleased with the appearance of the gear. He will then give you a new recipe to make it look cooler. |
| 2 | 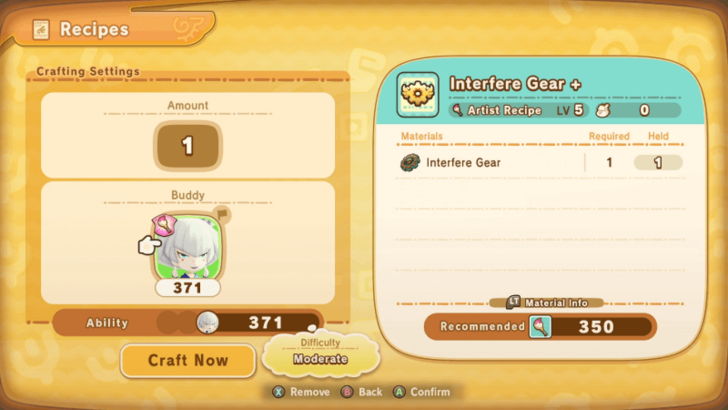 For the last time, head to the workbench and craft the Interfere Gear +, which requires at least 350 Artistry. |
Talk to Edward
| Step-by-Step Guide | |
|---|---|
| 1 | 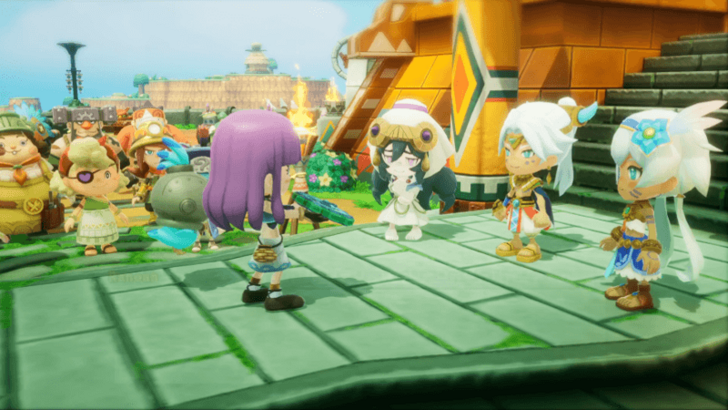 Now that the Interfere Gear has finally been completed, a cutscene will play with all the important characters you've met throughout the game. |
| 2 | 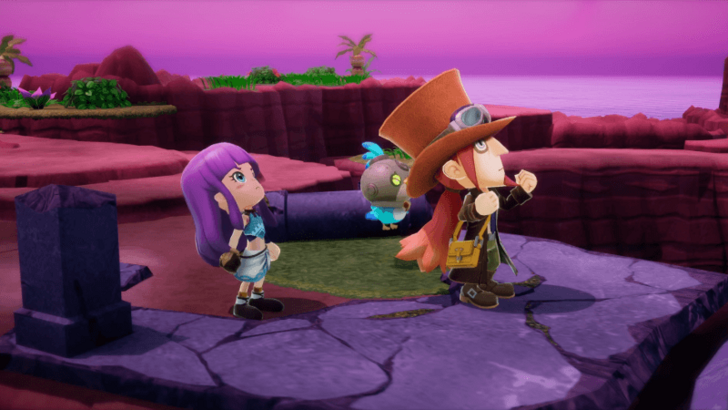 From there, head back to your Base Camp for a quick cutscene, and, once that's done, go meet Edward at the Depths Entrance. |
| 3 | After the cutscene's over, make any final preparations before talking to Edward again to face the final boss. As a note, this is the last chance for you to clear the optional dungeon in Ginormosia, so make sure to do it now if you haven't done so yet. |
Defeat the Dark Dragon
| Step-by-Step Guide | |
|---|---|
| 1 | 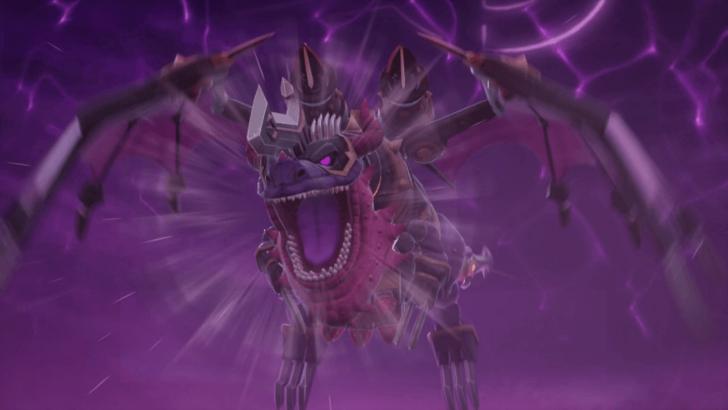 When you're ready, talk to Edward so that you can fly up to the cog and face the Dark Dragon. This boss is quite difficult since it has a lot of AoE attacks, so try to stand to its sides so that you can dodge its attacks. ▶︎ How to Beat Dark Dragon |
Destroy the Cog
| Step-by-Step Guide | |
|---|---|
| 1 | 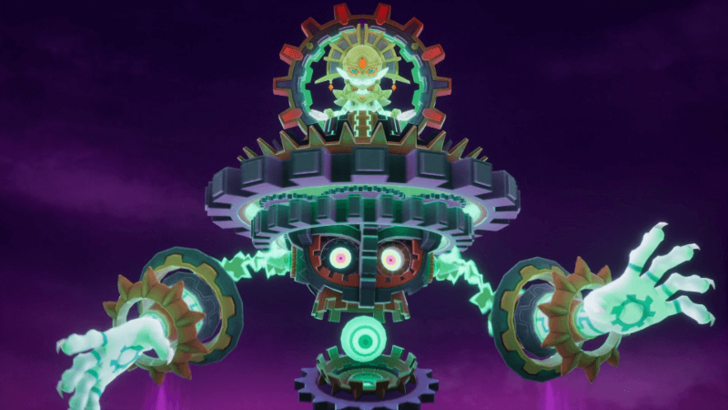 After the dragon has been defeated, Xernes will appear and he'll merge with the Cog of Time. This is the final boss of the game, so make sure to give it all you got! ▶︎ How to Beat Gear-Xernes |
| 2 |  Once Gear-Xernes has been defeated, the final cutscene will play and you'll have successfully beaten FANTASY LIFE i's main story! ▶︎ Post-Game Content Guide |
FANTASY LIFE i: The Girl Who Steals Time Related Guides
List of All Main Quests
| List of All Main Quest Walkthroughs | |
|---|---|
| 1 | Chapter 1: Life on a Mysterious Island |
| 2 | Chapter 2: Leap of a Thousand Years |
| 3 | Chapter 3: Digging Up Secrets of the Past |
| 4 | Chapter 4: The Polturnip and the Leafe |
| 5 | Chapter 5: The Artist's Treasure Hunt |
| 6 | Chapter 6: The Island of Trials |
| 7 | Chapter 7: Crack the Cog, Free our Future |
| 8 | Post-Game Content |
Author
FANTASY LIFE i: The Girl Who Steals Time Walkthrough & Guides Wiki
Chapter 7: Crack the Cog, Free our Future Walkthrough Guide
Please participate in our site
improvement survey
03/2026
improvement survey
03/2026
Would you assist in
improving Game8's site?
improving Game8's site?

×
We are listening to our users' valuable opinions and discussing how to act on them.
The information collected through this survey will be used for the purpose of improving our services. In addition, the information will only be disclosed a part of a statistic in a format that will not allow identification of personal information.
Begin Survey
Not Now
×
Please rate each item regarding Game8.co's Advertisements.
Amount of Ads
Very Dissatisfied
Somewhat Dissatisfied
Fine
Somewhat Satisfied
Highly Satisfied
Placement of Ads
Timing of Ad Display
Ad Loading Speed
Safeness of Ads
Content of Ads
×
Please rate each item regarding Game8.co's Quality of Articles.
Amount of information
Very Dissatisfied
Somewhat Dissatisfied
Fine
Somewhat Satisfied
Highly Satisfied
Frequency of updates
Speed of new information
Accuracy of articles
Understandibility of articles
Readability of sentences
×
Please rate each item regarding Game8.co's Usability of the Site.
Ease of finding information
Very Dissatisfied
Somewhat Dissatisfied
Fine
Somewhat Satisfied
Highly Satisfied
Loading Speed
Use of Color
Font Size
Visibility of Images
Easy to Understand Layout
×
Please rate each item regarding Game8.co's Message Boards, Comments.
Ease of Writing
Very Dissatisfied
Somewhat Dissatisfied
Fine
Somewhat Satisfied
Highly Satisfied
Readability
Ease in Finding Information
Comment Quality
Comment Quantity
Admin Response
×
Please rate each item regarding Game8.co's Site's new design.
Please rate our site's new design
Very Dissatisfied
Somewhat Dissatisfied
Fine
Somewhat Satisfied
Highly Satisfied
Do you think that the website's design change makes the site easier to use?
Has the new design made it easier for you to find information on the site?
Has the new design improved the overall visual appeal of the site?
How would you rate your overall satisfaction with the new design of the site?
×
How likely are you to recommend Game8 to someone you know?
Very Unlikely
0
1
2
3
4
5
6
7
8
9
10
Very Likely
If you have other opinions regarding potential improvement to the website, please share them with us. We would appreciate your honest opinion.
Note: This is a free response section, so you can proceed without entering anything.
Note: Please be sure not to enter any kind of personal information into your response.
Note: Please be sure not to enter any kind of personal information into your response.
×
Thank You
×
Thank you for participating in our survey! Your answers will help us to improve the quality of our website and services.
We hope you continue to make use of Game8.
We hope you continue to make use of Game8.
Close
Rankings
- We could not find the message board you were looking for.
Gaming News


![Everwind Review [Early Access] | The Shaky First Step to A Very Long Journey](https://img.game8.co/4440226/ab079b1153298a042633dd1ef51e878e.png/thumb)

![Monster Hunter Stories 3 Review [First Impressions] | Simply Rejuvenating](https://img.game8.co/4438641/2a31b7702bd70e78ec8efd24661dacda.jpeg/thumb)
Popular Games

Genshin Impact Walkthrough & Guides Wiki
Honkai: Star Rail Walkthrough & Guides Wiki
Umamusume: Pretty Derby Walkthrough & Guides Wiki
Pokemon Pokopia Walkthrough & Guides Wiki
Resident Evil Requiem (RE9) Walkthrough & Guides Wiki
Monster Hunter Wilds Walkthrough & Guides Wiki
Wuthering Waves Walkthrough & Guides Wiki
Arknights: Endfield Walkthrough & Guides Wiki
Pokemon FireRed and LeafGreen (FRLG) Walkthrough & Guides Wiki
Pokemon TCG Pocket (PTCGP) Strategies & Guides Wiki


Recommended Games
Diablo 4: Vessel of Hatred Walkthrough & Guides Wiki
Fire Emblem Heroes (FEH) Walkthrough & Guides Wiki
Yu-Gi-Oh! Master Duel Walkthrough & Guides Wiki
Super Smash Bros. Ultimate Walkthrough & Guides Wiki
Pokemon Brilliant Diamond and Shining Pearl (BDSP) Walkthrough & Guides Wiki
Elden Ring Shadow of the Erdtree Walkthrough & Guides Wiki
Monster Hunter World Walkthrough & Guides Wiki
The Legend of Zelda: Tears of the Kingdom Walkthrough & Guides Wiki
Persona 3 Reload Walkthrough & Guides Wiki
Cyberpunk 2077: Ultimate Edition Walkthrough & Guides Wiki


All rights reserved
©LEVEL5 Inc.
The copyrights of videos of games used in our content and other intellectual property rights belong to the provider of the game.
The contents we provide on this site were created personally by members of the Game8 editorial department.
We refuse the right to reuse or repost content taken without our permission such as data or images to other sites.
What happens if you fail to craft one of the items? Can you go back and collect it a second time?