This survey will take about 1 minute.
Your answers will help us to improve our website.
FANTASY LIFE i: The Girl Who Steals Time (FLi)
Chapter 1: Life on a Mysterious Island Walkthrough Guide
This is a walkthrough guide for Chapter 1, Life on a Mysterious Island, in FANTASY LIFE i: The Girl Who Steals Time (FLi). Check out a step-by-step guide to beat Chapter 1 here.
| Next Guide ▶ |
|---|
| Chapter 2 |
List of Contents
Life on a Mysterious Island Walkthrough Guide
| Jump to Walkthrough Section | |||
|---|---|---|---|
| 1 | Talk to Everyone | 2 | Find Edward |
| 3 | Chase Off the Lizards | 4 | Search for the Bone Dragon |
| 5 | Talk to the King | 6 | Visit the Guild Office |
| 7 | Talk to the Life Master | 8 | Reach Fledgling Rank |
| 9 | Talk to Auntie Anne | 10 | Go to Mysteria Castle |
| 11 | Talk to the Life Master | 12 | Visit the Bone Dragon |
| 13 | Pay Back Auntie Anne's Dosh | 14 | Visit the Bone Dragon |
Talk to Everyone
| Step-by-Step Guide | |
|---|---|
| 1 | 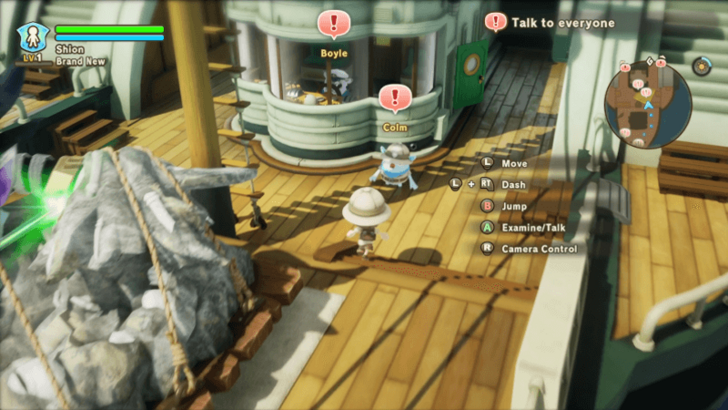 Once you've started the game and created your character, you will need to talk to everyone aboard the ship. |
| 2 | 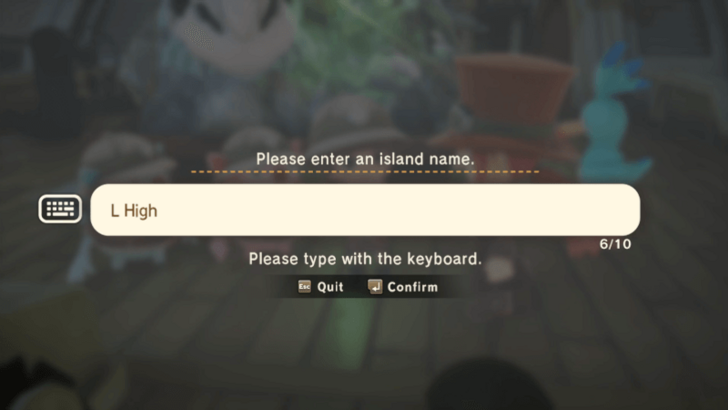 After that, a cutscene will start, and you will come across a deserted island. Since you and the ship's crew are the ones who found it, you also get to name the island! Similar to your character, you can always go back and change the name later. |
| 3 | 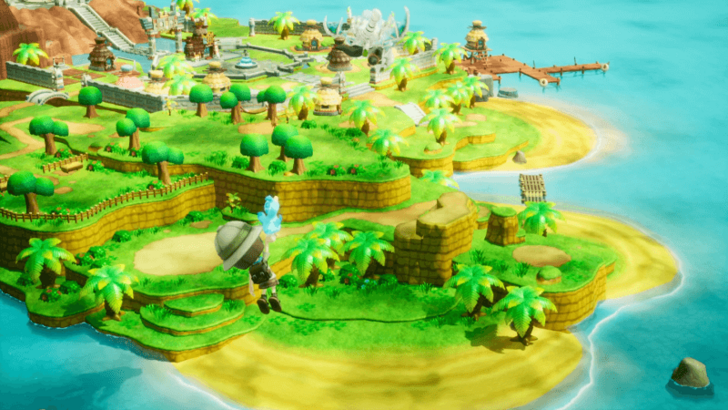 Once you're done, another cutscene will play and the Bone Dragon will take you to a new uncharted island. |
Find Edward
| Step-by-Step Guide | |
|---|---|
| 1 | Once you've regained control of your character, get familiar with the new menu options available to you and go towards the map marker afterwards. |
| 2 | 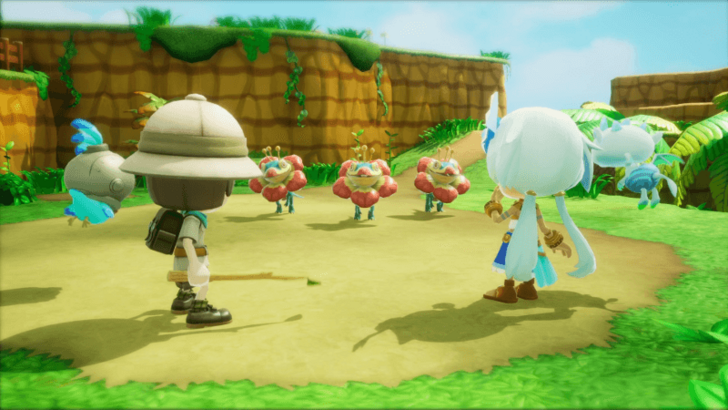 Instead of finding Edward, you'll run into a mysterious girl and three Tunoco Lizards. |
Chase Off the Lizards
| Step-by-Step Guide | |
|---|---|
| 1 | 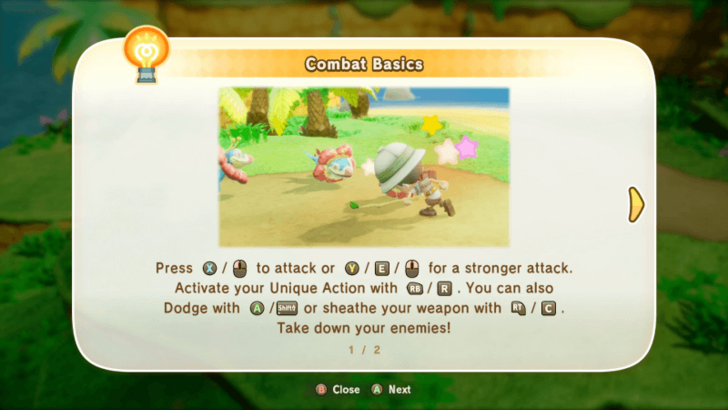 The fight with the lizards will serve as the combat tutorial section of the game, and it shouldn't be too hard unless you're standing still and not fighting back. |
| 2 | 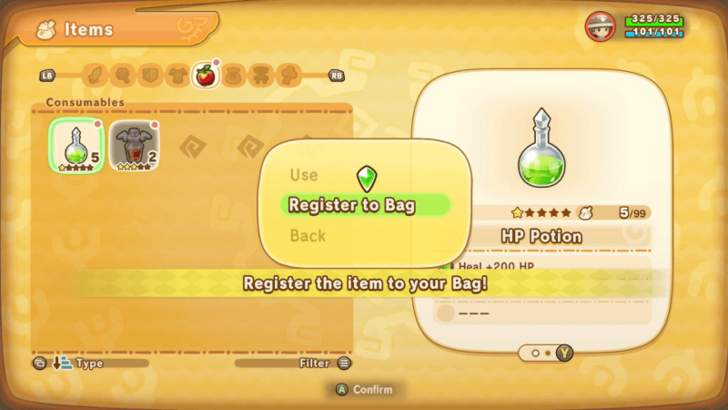 Once the fight's over, the girl will leave and you'll get a quick tutorial for registering items to your bag. Afterwards, you're free to go around and look for the dragon. |
| * |  Take this opportunity to explore the island some more so that you can collect items, look for treasure, and defeat enemies for EXP. |
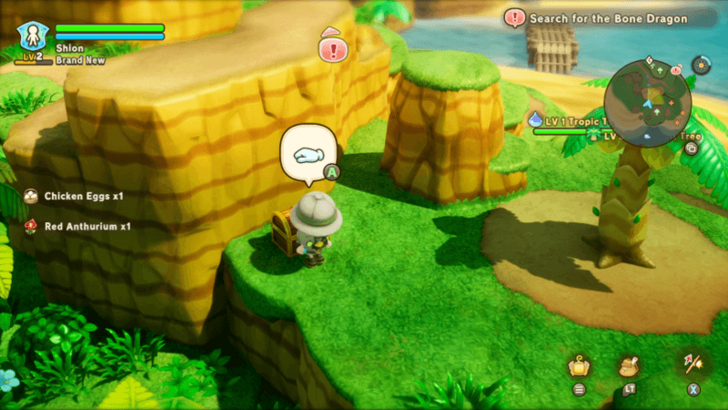
Search for the Bone Dragon
| Step-by-Step Guide | |
|---|---|
| 1 | 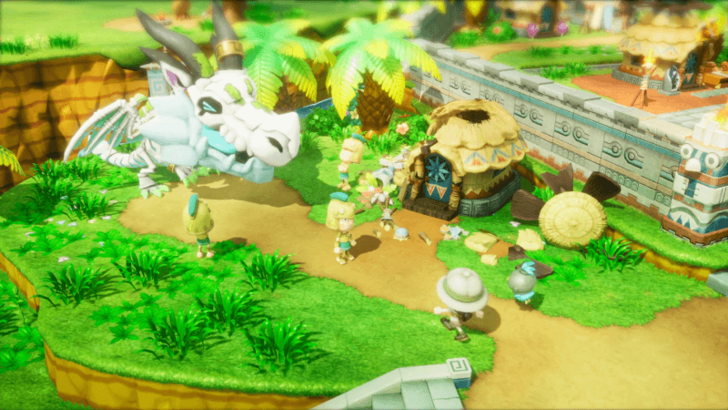 Once you're done exploring, follow the quest marker to find the Bone Dragon surrounded by some guards. |
| 2 | After the cutscene, you will be automatically teleported to the next part of the quest, where you'll need to talk to the King. |
Talk to the King
| Step-by-Step Guide | |
|---|---|
| 1 | 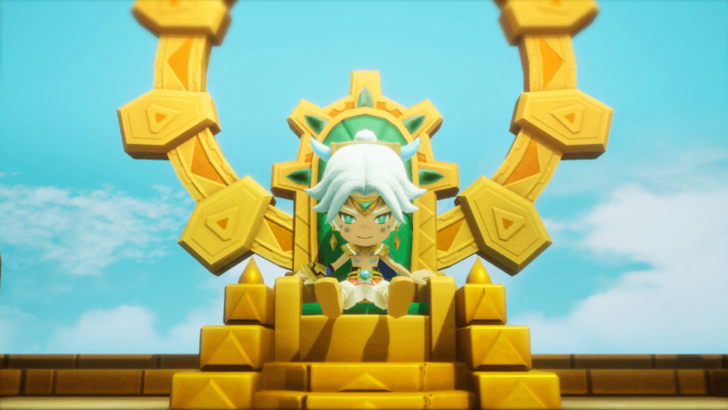 Head all the way up to the top of the stairs to meet the King of Mysteria, Ranoah. |
| 2 | 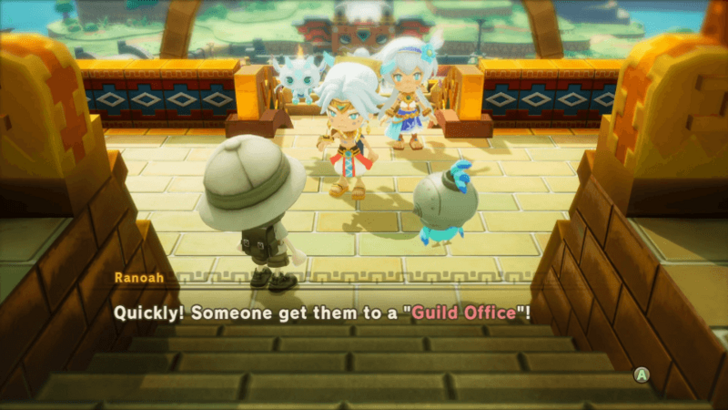 Unfortunately, he won't help you just yet since you currently don't have a Life. He will then send you away to the Guild Office so that you can pick one for yourself. ▶︎ List of All 14 Lives and Jobs |
Visit the Guild Office
| Step-by-Step Guide | |
|---|---|
| 1 | Thankfully, you will be transported right outside the Guild Office after the cutscene ends, so head inside once you're ready. |
| * | 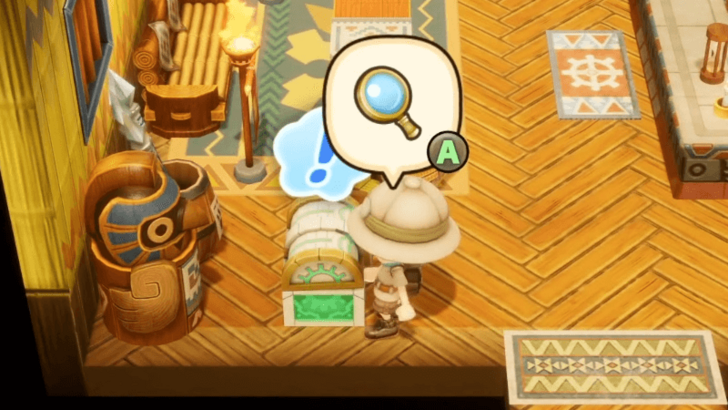 If you've pre-ordered or purchased the Deluxe Edition of the game, then you can find the bonus items inside a chest in the Guild Office. |
| 2 | 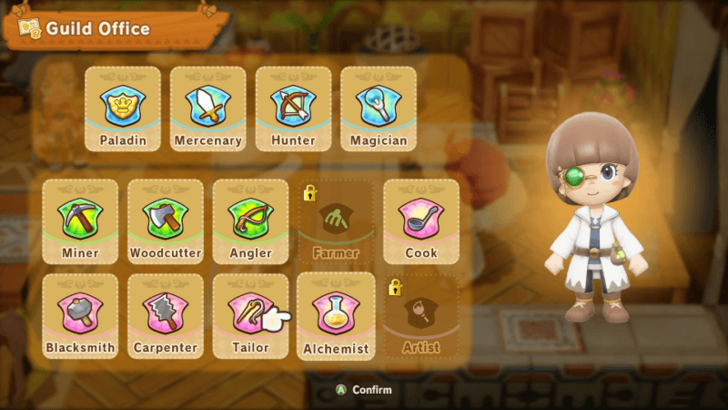 Head to the desk and talk to Auntie Anne so that you can select your first Life. Unfortunately, the Farmer and Artist are unavailable for now, so choose one of the other 12 available Lives instead. ▶︎ List of All 14 Lives and Jobs |
| 3 | 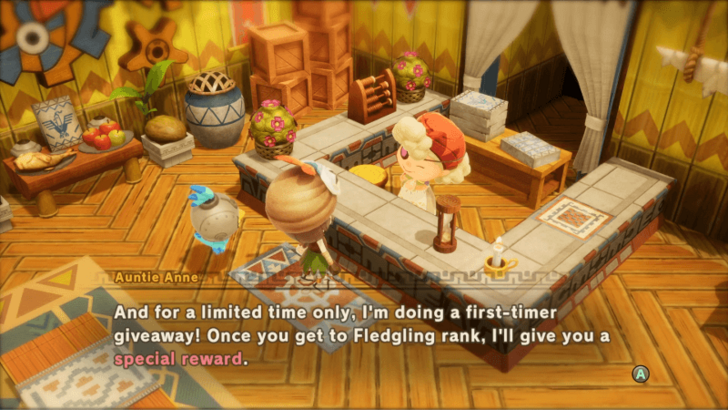 After selecting your life, you will be tasked with ranking up your chosen Life first before you can proceed with the main quest. |
| * | Also, you'll now have access to a ton of new menu options. Take some time to explore some of the new things that are available to you before you proceed onwards. |
Talk to the Life Master
| Step-by-Step Guide | |
|---|---|
| 1 |  Depending on the Life that you've chosen, you will end up talking with the Master of that specific Life. Thankfully, they will be marked on the map so you won't need to run around looking for them. |
| * | Before approaching them, you can also explore the island some more first, since it's opened up and you now have a Life selected. |
Reach Fledgling Rank
| Step-by-Step Guide | |
|---|---|
| 1 |  Upon talking to your respective Life Master, you will be tasked with a Life Challenge that needs to be completed so that you can rank up. Again, this challenge will differ depending on the Life that you've chosen, so just follow the quest marker until you've completed it. ▶︎ List of All Life Challenges |
| 2 | Once you're done and you've reported back to the Life Master, you can head back to the Office Guild to claim your reward. |
Talk to Auntie Anne
| Step-by-Step Guide | |
|---|---|
| 1 |  Now that you've reached the Fledgling Rank, you can talk to Auntie Anne so that you can claim your special reward of 1000 Dosh. |
| 2 | 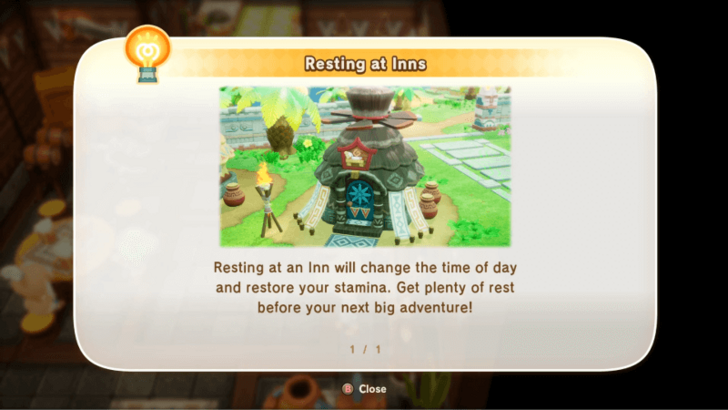 Since you now have a Life, you can report back to Ranoah so that he can help you. However, it's late, and you'll need to rest at an inn first. Thankfully, there's one right across from the Guild Office, and it also happens to be where the Mercenary Life Master's located if that was the initial Life that you chose. |
Go to Mysteria Castle
| Step-by-Step Guide | |
|---|---|
| 1 | 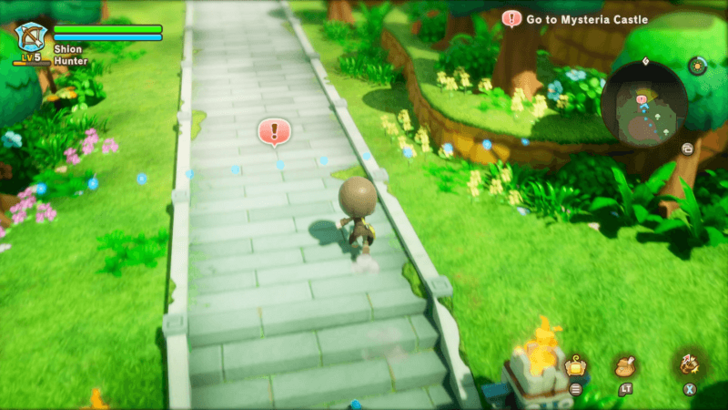 Once you've woken up the next day, follow the marker to the back of the village so that you can go to the Capital of Mysteria. |
| 2 | 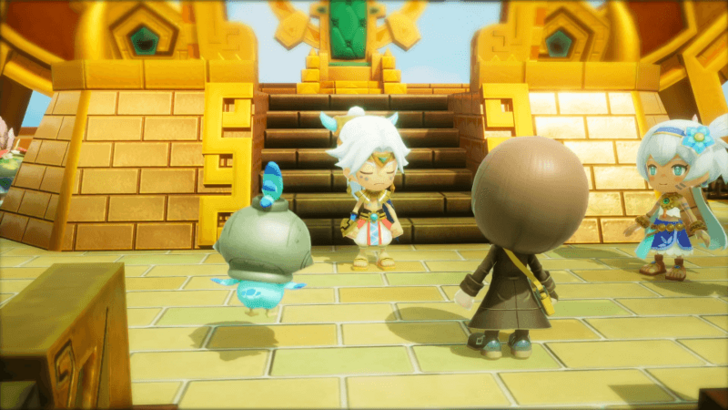 From there, just continue following the marker back up to where Ranoah is so that you can talk to him and get 3000 Dosh for your efforts. |
Talk to the Life Master
| Step-by-Step Guide | |
|---|---|
| 1 | During the cutscene with Ranoah, you will learn that you'll need to feed the Bone Dragon a Dragonut so that it will recover and take you back to where Edward is. To get one, you will need to talk to your Life Master since all of the masters have some. |
| 2 | 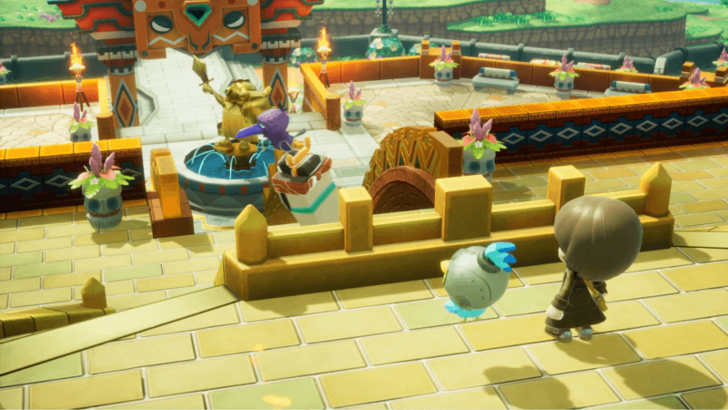 Before going to your Life Master, head down the stairs first to trigger a shortcutscene where a crow is carrying a Strangeling away. Once that's done, you're free to go to your master. |
| * | 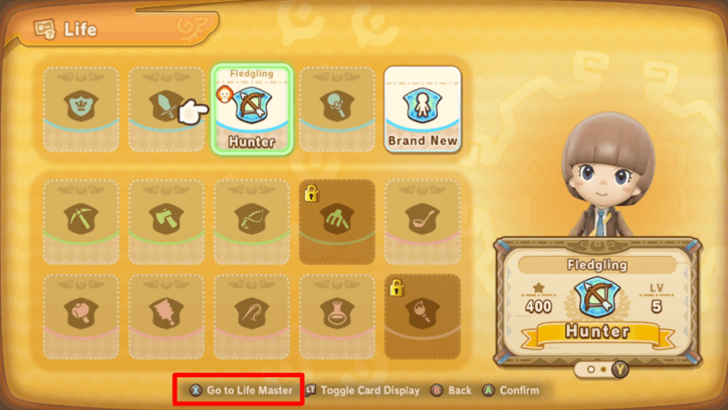 To quickly teleport to a Life Master, you can simply go to the Life Menu and select "Go to Life Master" when hovering over a Life. |
| 3 | 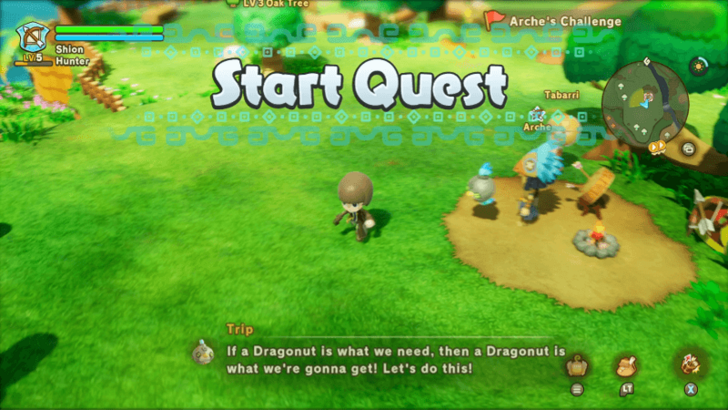 When you're ready, talk to your Life Master so that they can have you complete a Life Challenge in exchange for the Dragonut. Again, this will differ depending on the Life you've chosen, so check the Quests Menu to see what you need to do. ▶︎ List of All Life Challenges |
Visit the Bone Dragon
| Step-by-Step Guide | |
|---|---|
| 1 |  Once you've completed the challenge and gotten the Dragonut, you can head back to where the Bone Dragon is so that you can give it the nut. |
| 2 | 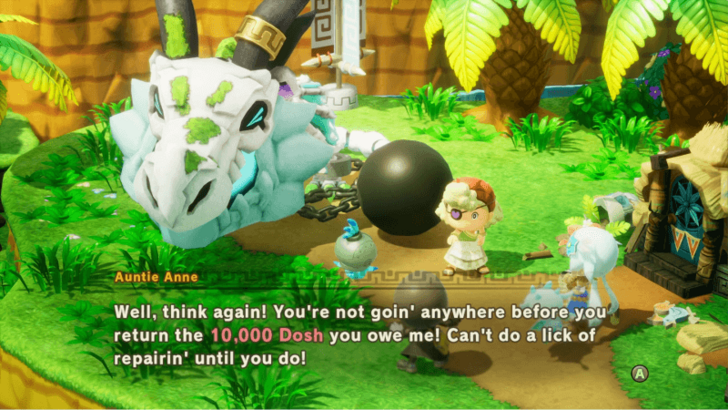 Unfortuntately, you can't leave just yet since Auntie Anne will demand that you pay her 10,000 Dosh to repair her broken house. |
Pay Back Auntie Anne's Dosh
| Step-by-Step Guide | |
|---|---|
| 1 | 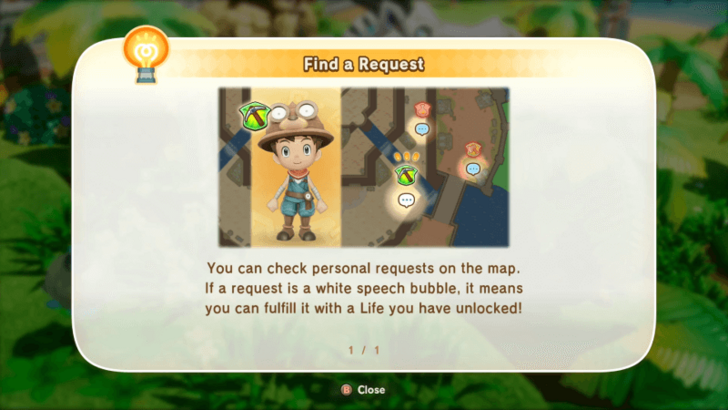 To pay back Auntie Anne, you will need to complete various different Requests and get some Dosh as a reward. Thankfully, as mentioned in the cutscene, you can get enough from completing both Feelings Sway, Emotions Weigh and Ranoah's Treasure. |
| * | As a note, you can take this opportunity to complete other Requests that you come across since it's always nice to get more rewards. |
| 2 | 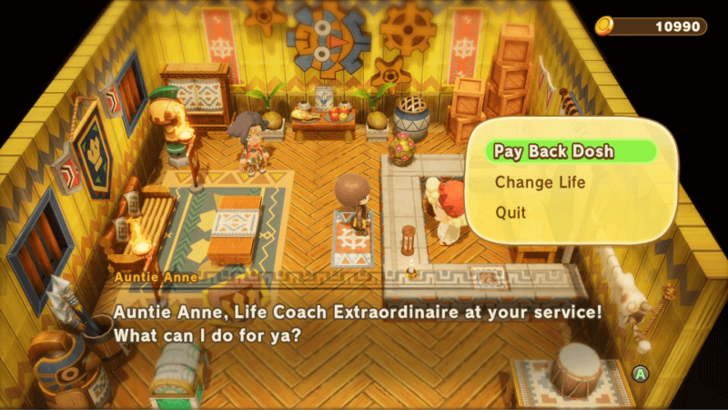 Once you've gathered enough Dosh, you can head back to the Guild Office so that you can pay Auntie Anne. |
Visit the Bone Dragon
| Step-by-Step Guide | |
|---|---|
| * | 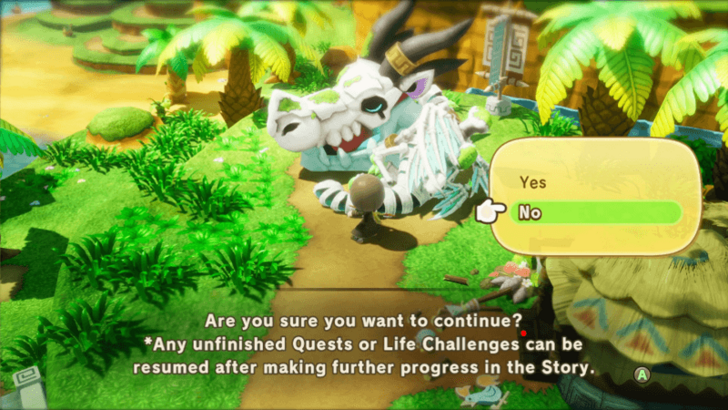 Before proceeding onwards, it's highly recommended to fully explore the island, unlock every available Life, and complete every available Request. Once you interact with the Bone Dragon, you won't be able to return until you're taken back as part of the story. |
| 1 | When you're ready, approach the Bone Dragon and select Yes to continue to Chapter 2, Leap of a Thousand Years. |
FANTASY LIFE i: The Girl Who Steals Time Related Guides
List of All Main Quests
| List of All Main Quest Walkthroughs | |
|---|---|
| 1 | Chapter 1: Life on a Mysterious Island |
| 2 | Chapter 2: Leap of a Thousand Years |
| 3 | Chapter 3: Digging Up Secrets of the Past |
| 4 | Chapter 4: The Polturnip and the Leafe |
| 5 | Chapter 5: The Artist's Treasure Hunt |
| 6 | Chapter 6: The Island of Trials |
| 7 | Chapter 7: Crack the Cog, Free our Future |
| 8 | Post-Game Content |
Comment
Author
FANTASY LIFE i: The Girl Who Steals Time Walkthrough & Guides Wiki
Chapter 1: Life on a Mysterious Island Walkthrough Guide
Please participate in our site
improvement survey
03/2026
improvement survey
03/2026
Would you assist in
improving Game8's site?
improving Game8's site?

×
We are listening to our users' valuable opinions and discussing how to act on them.
The information collected through this survey will be used for the purpose of improving our services. In addition, the information will only be disclosed a part of a statistic in a format that will not allow identification of personal information.
Begin Survey
Not Now
×
Please rate each item regarding Game8.co's Advertisements.
Amount of Ads
Very Dissatisfied
Somewhat Dissatisfied
Fine
Somewhat Satisfied
Highly Satisfied
Placement of Ads
Timing of Ad Display
Ad Loading Speed
Safeness of Ads
Content of Ads
×
Please rate each item regarding Game8.co's Quality of Articles.
Amount of information
Very Dissatisfied
Somewhat Dissatisfied
Fine
Somewhat Satisfied
Highly Satisfied
Frequency of updates
Speed of new information
Accuracy of articles
Understandibility of articles
Readability of sentences
×
Please rate each item regarding Game8.co's Usability of the Site.
Ease of finding information
Very Dissatisfied
Somewhat Dissatisfied
Fine
Somewhat Satisfied
Highly Satisfied
Loading Speed
Use of Color
Font Size
Visibility of Images
Easy to Understand Layout
×
Please rate each item regarding Game8.co's Message Boards, Comments.
Ease of Writing
Very Dissatisfied
Somewhat Dissatisfied
Fine
Somewhat Satisfied
Highly Satisfied
Readability
Ease in Finding Information
Comment Quality
Comment Quantity
Admin Response
×
Please rate each item regarding Game8.co's Site's new design.
Please rate our site's new design
Very Dissatisfied
Somewhat Dissatisfied
Fine
Somewhat Satisfied
Highly Satisfied
Do you think that the website's design change makes the site easier to use?
Has the new design made it easier for you to find information on the site?
Has the new design improved the overall visual appeal of the site?
How would you rate your overall satisfaction with the new design of the site?
×
How likely are you to recommend Game8 to someone you know?
Very Unlikely
0
1
2
3
4
5
6
7
8
9
10
Very Likely
If you have other opinions regarding potential improvement to the website, please share them with us. We would appreciate your honest opinion.
Note: This is a free response section, so you can proceed without entering anything.
Note: Please be sure not to enter any kind of personal information into your response.
Note: Please be sure not to enter any kind of personal information into your response.
×
Thank You
×
Thank you for participating in our survey! Your answers will help us to improve the quality of our website and services.
We hope you continue to make use of Game8.
We hope you continue to make use of Game8.
Close
Rankings
Gaming News


![Everwind Review [Early Access] | The Shaky First Step to A Very Long Journey](https://img.game8.co/4440226/ab079b1153298a042633dd1ef51e878e.png/thumb)

![Monster Hunter Stories 3 Review [First Impressions] | Simply Rejuvenating](https://img.game8.co/4438641/2a31b7702bd70e78ec8efd24661dacda.jpeg/thumb)
Popular Games

Genshin Impact Walkthrough & Guides Wiki
Honkai: Star Rail Walkthrough & Guides Wiki
Umamusume: Pretty Derby Walkthrough & Guides Wiki
Pokemon Pokopia Walkthrough & Guides Wiki
Resident Evil Requiem (RE9) Walkthrough & Guides Wiki
Monster Hunter Wilds Walkthrough & Guides Wiki
Wuthering Waves Walkthrough & Guides Wiki
Arknights: Endfield Walkthrough & Guides Wiki
Pokemon FireRed and LeafGreen (FRLG) Walkthrough & Guides Wiki
Pokemon TCG Pocket (PTCGP) Strategies & Guides Wiki


Recommended Games
Diablo 4: Vessel of Hatred Walkthrough & Guides Wiki
Fire Emblem Heroes (FEH) Walkthrough & Guides Wiki
Yu-Gi-Oh! Master Duel Walkthrough & Guides Wiki
Super Smash Bros. Ultimate Walkthrough & Guides Wiki
Pokemon Brilliant Diamond and Shining Pearl (BDSP) Walkthrough & Guides Wiki
Elden Ring Shadow of the Erdtree Walkthrough & Guides Wiki
Monster Hunter World Walkthrough & Guides Wiki
The Legend of Zelda: Tears of the Kingdom Walkthrough & Guides Wiki
Persona 3 Reload Walkthrough & Guides Wiki
Cyberpunk 2077: Ultimate Edition Walkthrough & Guides Wiki


All rights reserved
©LEVEL5 Inc.
The copyrights of videos of games used in our content and other intellectual property rights belong to the provider of the game.
The contents we provide on this site were created personally by members of the Game8 editorial department.
We refuse the right to reuse or repost content taken without our permission such as data or images to other sites.