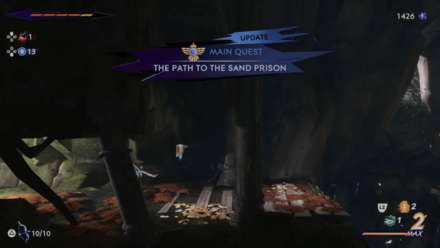
The Path to the Sand Prison Walkthrough
△ Check out our review for the game!
△ Complete the story and all 9 Side Quests!
△ Traverse Mount Qaf using Time Powers!
△ Get all the weapons, amulets, and Athra Surges.
△ Earn platinum with our Trophy Guide!
The Path to the Sand Prison is a main quest in Prince of Persia: The Lost Crown. Continue reading for a detailed walkthrough, quest location, and quest rewards on completing The Path to the Sand Prison.
List of Contents
The Path to the Sand Prison Overview
Quest Information
| Locations Explored | Catacombs Sunken Harbor Sacred Arhives Temple of Knowledge Soma Tree |
|---|---|
| Bosses Fought | Kiana, the Forest Queen |
| Time Power Unlocked | Dimension Claw Clairvoyance |
The Path to the Sand Prison Walkthrough Guide
- Find a Way to Enter the Pit of Eternal Sands
- The Path to the Sand Prison - 1st Time Power
- The Path to the Sand Prison - 2nd Time Power
- Enter the Pit of Eternal Sands
Backtrack to Enter the Pit of Eternal Sands
After chasing the Old Man in the Depths and obtaining the Shadow of the Simurgh, you must now find the Pit of Eternal Sands. However, it is so you'll need to backtrack a bit.
Use Shadow of the Simurgh to Pass Through the Rotating Spikes
Backtrack to the left of the Wak-wak tree then use Shadow of the Simurgh to pass through the previously unpassable rotating spike.
Head North Until You Encounter Neith

Continue backtracking until you encounter Neith for a short dialogue. Once the short scene is over, continue backtracking until you reach an area with the lift.
Use the Lift and Return to the Wide Area with Rotating Spikes
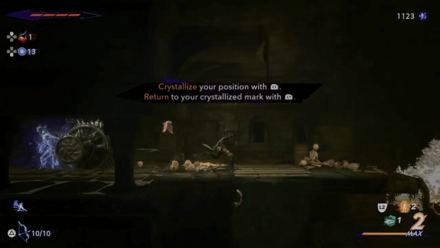
After using the lift, head right and navigate through the area with toxins to reach the previous area with rotating spikes. Once here, you can use the lever to push the spikes downward then use Shadow of the Simurgh while staying near it to pass through.
Head Right Past the Poisonous Area to Reach the Catacombs
Right after dropping off after using Shadow of the Simurgh, you'll drop straight into a poisonous marsh. Immediately head right to reach a new area, the Catacombs.
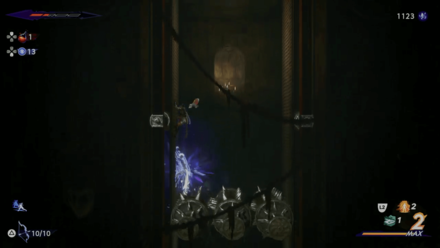
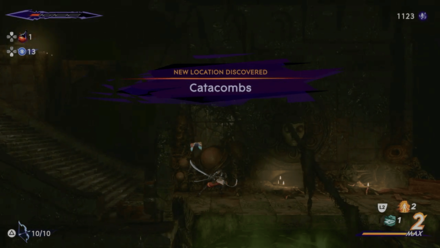
From the Catacombs Entrance, Keep Heading Southeast
Once you enter the catacombs, you'll encounter stairs that'll lead downward. Continue following the path leading southeast. Eventually, you'll reach an area with a spiked mouth. Attack and destroy it to open up the path!
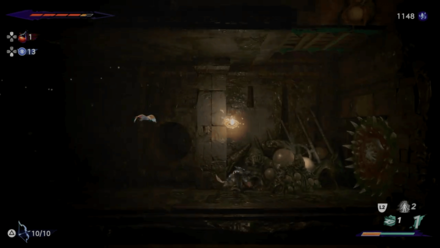
Use Shadow of the Simurgh to Pass Through the Shielded Enemy
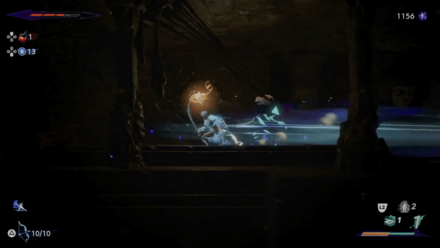
As you trudge along the Catacombs and continuously head southeast, you'll encounter an enemy with a giant shielded face. It will chase you forward when it attacks you. Use Shadow of the Simurgh then teleport to it after luring the enemy forward enough.
Continue to Follow the Linear Path until You Reach the Sunken Harbor
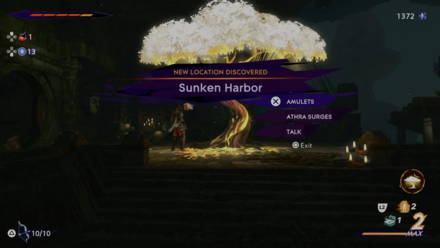
After passing through the giant enemy, follow the linear path once more until you reach your first Wak-wak Tree. This marks your first checkpoint and the time you reach the next area, the Sunken Harbor. From here, continue along until you reach the Pit of Eternal Sands.
The Path to the Sand Prison - 1st Time Power
After reaching the entrance of the Pit of Eternal Sands, you'll have to acquire two new Time Powers after breaking the seal to unlock it. You'll have to solve two riddles from the old man to further progress the game.
Head Northeast to Obtain a Map of the Sunken Harbor
We'll have to leave the area and obtain two new Time Powers. Head northeast and use the lift but don't go straight to the top.
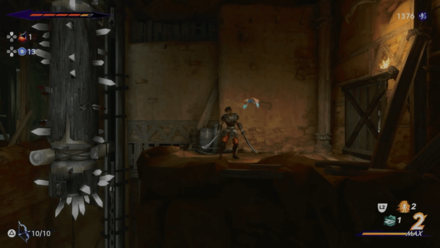
Drop down to the path you can take on the right side til you encounter an area with several spikes and hanging platforms. Try to head to the upper left side of this area to encounter Fariba to obtain a map of the area.
Continue Climbing the Hanging Platform Then Head West At the Top
Once you navigate through the hanging platforms, head west then north once again. Continue heading westward from here to find a Wak-wak Tree for a resting point.
Continue Heading Northeast From Here
After the Wak-wak tree, you'll want to continue trudging northeast. Eventually, you'll encounter an area with huge spiked lumbers. Navigate through the edges of the area and circle the area to reach the next objective.
After the Spiked Lumber, Continue Heading East
Continue clearing the rest of the obstacles until you reach the next Wak-wak tree. This is also the checkpoint to your next destination: the Soma Tree which is where you will get your first Time Power.
From the Soma Tree, Continue Heading Up North
From here, you'll want to navigate the forest area and continue heading upwards. After heading to the top side, head left and you'll find a giant treant, pass through it or defeat it then head left.
Unlock the Homa Statue then Head Left
Unlock the Homa Statue first after heading left to make it easier to backtrack later on. Head left then defeat the enemy gauntlet then continue heading north.
Continue Heading Northeast until the next Homa Statue
Continue heading northeast until you find the next Homa Statue. This is your next checkpoint since it, again, allows you to retrace your steps to explore the area further.
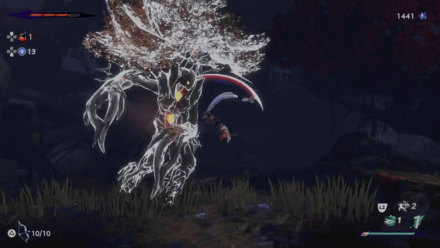
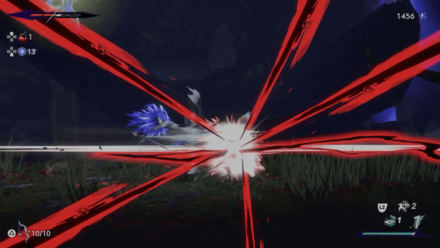
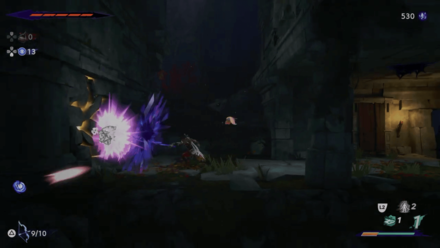
Head Left From This Homa Statue to Encounter Your Next Boss Fight Kiana
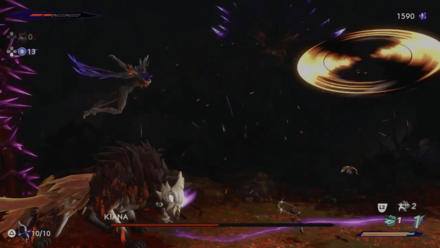
Kiana is your major obstacle in this area and is your final hurdle to getting the first power you need to unlock the Pit of Eternal Sands.
How to Beat Kiana, The Forest Queen
Follow the Path and Obtain the Dimension Claw Time Power
After defeating Kiana, further head left and traverse past the explosive blobs.
At your main objective, you'll be able to obtain the Dimension Claw which will allow you to store enemies and projectiles and resummon them in a different location.
The Path to the Sand Prison - 2nd Time Power
Defeating Kiana and obtaining the Dimension Claw opens up the map by granting us the ability to destroy golden walls. Use this ability to store the purple bulbs and throw them at the walls.
Use this to navigate the map and reach the 2nd Time Power we need to unlock the Pit of Eternal Sands!
Use the Blobs in the Area and Break the Golden Cracked Walls Using Dimension Claw
With our new Time Power, use the Dimension Claw to store the explosive blobs in the area and throw them on the golden walls to destroy them. Break the walls on the path westward to explore the area.
Head Back to a Homa Statue then Teleport back to Sacred Archives
After exploring the area, you'll want to go back to a Homa Statue and make your way back to the Sacred Archives to get our next Time Power.
Head to the Temple of Knowledge
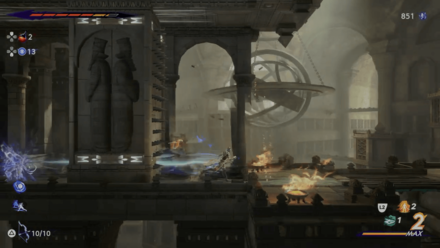
You'll want to head to the northwest area of the Sacred Archives to reach the Temple of Knowledge. With Shadow of the Simurgh, you'll be able to pass through the moving spiked walls on the left side at the upper area.
Head Up Northwest and use Shadow of the Simurgh to Solve the Platform Puzzle
After entering the inner area of the Temple of Knowledge, you'll immediately encounter a three-row platform puzzle.
Quickly Pass Through Areas with Red Marks on the Wall
During your exploration in the Temple of Knowledge, you'll encounter walls with red marks on them. Don't stay idle on these areas as they will close down and damage you.
After Defeating the Mage, Drop Down then Head Left

Once you reach an open area, head downward. From here, you'll encounter enemies with a golden symbol above them. These enemies are invulnerable.
To remove this effect, you must defeat the enemy with a golden barrier to remove their invincible status.
Hit the Bell then the Lever on the Spiked Area
Once you defeat the enemy with the golden barrier, you'll reach an area with a bell and a lever just beneath it. Shoot the bell first then shoot the lever as well to unlock the door beneath you and proceed to the area.
After Unlocking the Door, Head North on the Area with Branching Paths
Once you reach an area that has two paths that lead up or down, take the upward path first.
Here, you'll encounter two invulnerable alchemists, solve the puzzle by using Shadow of the Simurgh then defeat the enemy with the golden barrier first.
Return to the Previous Area then Head Downward
On the open area, you'll encounter a mage and an Alchemist, defeat them then use Shadow of the Simurgh on an open platform. Then, dash into the wall with the red sign in the center to be able to wall hop from it to solve the puzzle.
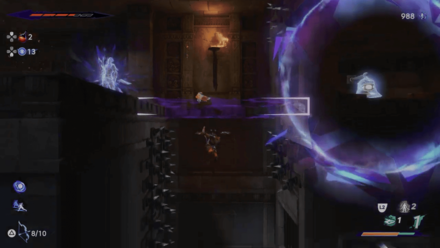
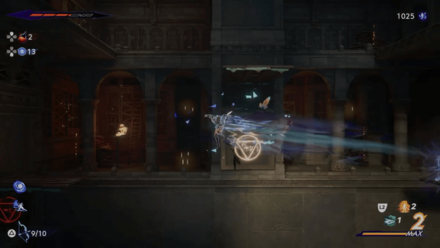
Use Shadow of the Simurgh as Resets on the Bell Puzzle
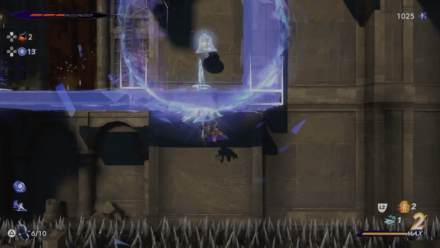
After the previous puzzle, you'll encounter a puzzle that requires you to shoot a puzzle from below but there will be spikes to prevent you from doing so.
Use Shadow of the Simurgh then jump in to shoot the bell then reset back to your original position. Do the same for the second part of the puzzle.
Head Forward then North and Solve the Puzzles in Each Golden Doors
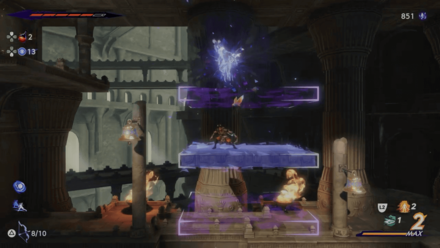
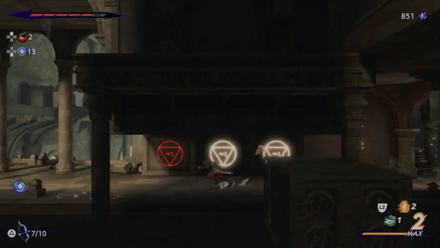
After solving all the puzzles so far, you'll reach an open area with multiple rows of platforms in the center. From here, you'll need to solve four puzzles inside the golden doors. Below are the solutions for each of the four puzzles.
| Lower Left Puzzle | Stand in the center then hang on one platform for the first and second countdown then get the golden stone inscription. |
|---|---|
| Upper Right Puzzle | Complete the obstacle course using the Shadow of the Simurgh. Run as far as you can on the first run and leave a shadow. Then, use your shadow on the 2nd run and reach the platform up top to open the door. Finally, use your last run to get the inscription. |
| Lower Right Puzzle | Use your first run to hang on the right handle then jump at a few intervals to stand on the switch in the center. Use your second run to hang on the second handle. Finally, use your third run to complete the obstacle course using the platforms raised by your first and second runs. |
| Upper Right Puzzle | 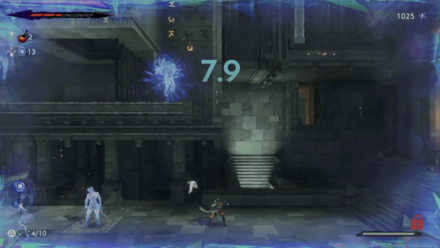 Use your first run to stand on the switch on the center. Try to stand on it on the 9 or 10 second mark. Use your second run to go on the activated platform, then climb up to turn on the switch. Before this run ends, climb down to the platform then go left. Jump and hang on the wall, then leave a shadow with the Shadow of the Simurgh. Then on your final run, jump back to your shadow. At the moment you fall, use your dash and leave a shadow at the very right of the platform. Once its raised and the switch in your second run is activated, you can climb the wall and reach the inscription. |
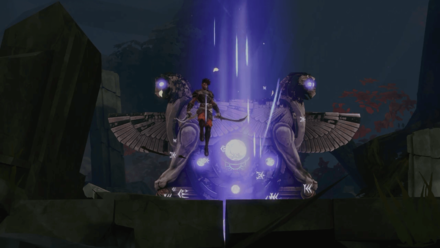
Use the Portal in the Center of the Four Golden Doors to Unlock Your 2nd Time Power
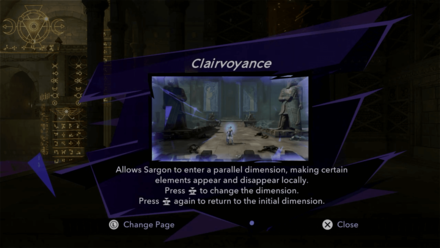
After solving the four golden door puzzles, head to the center and obtain your 2nd time power, Clairvoyance. Clairvoyance allows you to make certain transparent walls appear or disappear which will be essential to solving some of the upcoming puzzles.
Enter the Pit of Eternal Sands
After the long and arduous journey to get two Time Powers, return to the entrance to the Pit of Eternal Sands to complete the current chapter!
The Path to the Sand Prison Tips and Tricks
You Can Get 1 of the 2 Time Powers in Any Order
This current chapter requires you to journey and obtain two Time Powers to progress the story. You can choose 1 of the 2 given Time Powers in any given order!
If you want a more combat-focused run, we highly recommend going for the Dimension Claw first. If you want a puzzle-focused run, go for Clairvoyance!
All Time Powers and How to Unlock Them
Activate Homa Statues Along the Way
The map of the game will start opening up as you gain more time powers to access areas that were previously inaccessible. Be sure to always explore each area thoroughly and activate Homa Statues as you see them!
Prince of Persia: The Lost Crown Related Guides

Complete Story Walkthrough
| No. | Chapter |
|---|---|
| - | The Battle of Persepolis |
| 1 | Lost in Mount Qaf |
| 2 | The Abducted Prince |
| 3 | The Tiger and The Rat |
| 4 | The Path to the Sand Prison |
| 5 | The Darkest of Souls |
| 6 | The Celestial Guardians |
| 7 | Return to the Past |
| 8 | Father and Son |
| 9 | The Crossroads of Time |
Comment
Author

The Path to the Sand Prison Walkthrough
Rankings
- We could not find the message board you were looking for.
Gaming News


![Monster Hunter Stories 3 Review [First Impressions] | Simply Rejuvenating](https://img.game8.co/4438641/2a31b7702bd70e78ec8efd24661dacda.jpeg/thumb)
Popular Games

Genshin Impact Walkthrough & Guides Wiki
Honkai: Star Rail Walkthrough & Guides Wiki
Umamusume: Pretty Derby Walkthrough & Guides Wiki
Pokemon Pokopia Walkthrough & Guides Wiki
Resident Evil Requiem (RE9) Walkthrough & Guides Wiki
Monster Hunter Wilds Walkthrough & Guides Wiki
Wuthering Waves Walkthrough & Guides Wiki
Arknights: Endfield Walkthrough & Guides Wiki
Pokemon FireRed and LeafGreen (FRLG) Walkthrough & Guides Wiki
Pokemon TCG Pocket (PTCGP) Strategies & Guides Wiki


Recommended Games
Diablo 4: Vessel of Hatred Walkthrough & Guides Wiki
Cyberpunk 2077: Ultimate Edition Walkthrough & Guides Wiki
Fire Emblem Heroes (FEH) Walkthrough & Guides Wiki
Yu-Gi-Oh! Master Duel Walkthrough & Guides Wiki
Super Smash Bros. Ultimate Walkthrough & Guides Wiki
Pokemon Brilliant Diamond and Shining Pearl (BDSP) Walkthrough & Guides Wiki
Elden Ring Shadow of the Erdtree Walkthrough & Guides Wiki
Monster Hunter World Walkthrough & Guides Wiki
The Legend of Zelda: Tears of the Kingdom Walkthrough & Guides Wiki
Persona 3 Reload Walkthrough & Guides Wiki


All rights reserved
© 2023 Ubisoft Entertainment. All Rights Reserved. Based on Prince of Persia® created by Jordan Mechner. Ubisoft and the Ubisoft logo are registered or unregistered trademarks of Ubisoft Entertainment in the U.S. and/or other countries. Prince of Persia is a trademark of Waterwheel Licensing LLC in the US and/or other countries used under license. Content made in collaboration with Ubisoft.
The copyrights of videos of games used in our content and other intellectual property rights belong to the provider of the game.
The contents we provide on this site were created personally by members of the Game8 editorial department.
We refuse the right to reuse or repost content taken without our permission such as data or images to other sites.