Chapter 19: Harbor of Souls Secrets and Walkthrough
☆ Doom: The Dark Ages is live now!
★ Collectibles | Secrets | Walkthrough
┗ Resources | Codex | Toy
★ Trophies | Beginner's Guide | Enemies
☆ Skins: Twitch Drops | Prince St. Pizza
★ FAQs: Co-op | DLC | Specs | Glory Kills
Chapter 19: Harbor of Souls in Doom: the Dark Ages contains 10 secrets and 5 collectibles. Learn how to get all the secrets, gold, and collectibles, as well as how to complete the Mission Challenges in this Chapter 19 walkthrough guide.
| ◄ Previous Chapter | Next Chapter ▶ |
|---|---|
| Belly of the Beast | Resurrection |
Harbor of Souls Secrets and Collectibles
Harbor of Souls Interactive Map
| Jump to a Collectible! | |
|---|---|
| Toys | 1 |
| Codex | 2 |
| Life Sigils | 2 |
| Gold | 294 |
| Rubies | 1 |
| Wraithstone | 1 |
| Demonic Essence | 2 |
| Secrets | 10 |
Harbor of Souls Toys
| Item | How to Get |
|---|---|
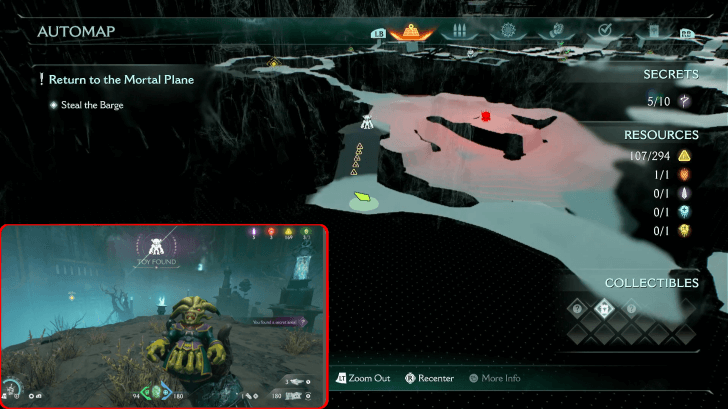 (Secret 5/10) |
Head to the blue gate after obtaining the Blue Skull Key Blue Skull Key 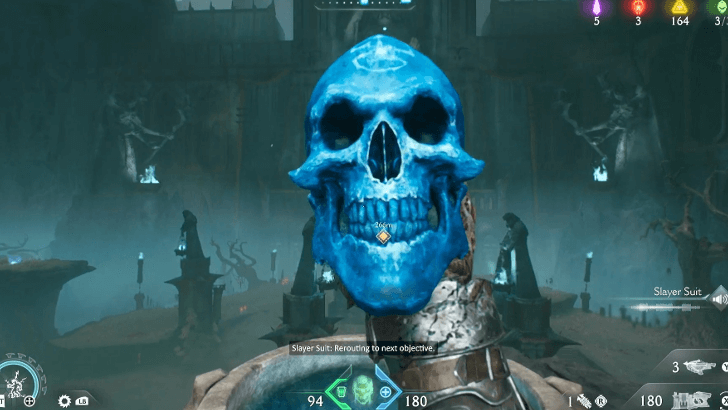 |
Harbor of Souls Codex Entries
| Item | How to Get |
|---|---|
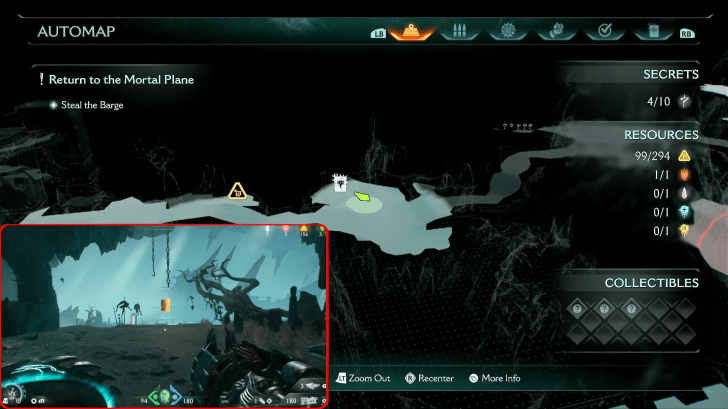 |
After jumping the ledge near Gold Trail 8, continue across the gate, then head right to grab the codex page. This can be obtained during the first objective ▼. |
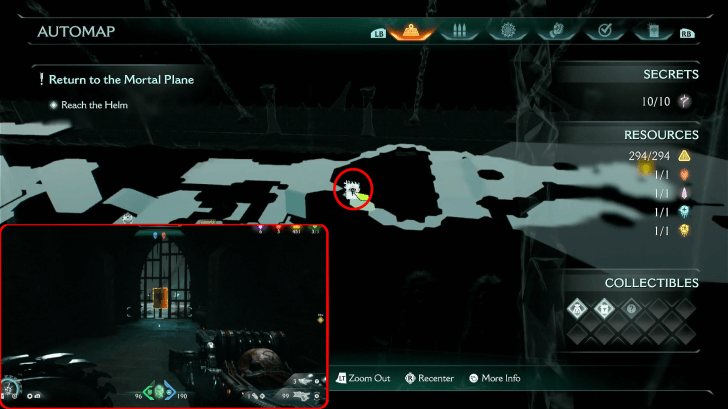 Hell Priests Codex Hell Priests Codex |
Go off the beaten path, in the final area before the chapter ends, and you should be able to find the Hell Priests Codex. This can be obtained during the second objective ▼. |
Harbor of Souls Life Sigils
| Item | How to Get |
|---|---|
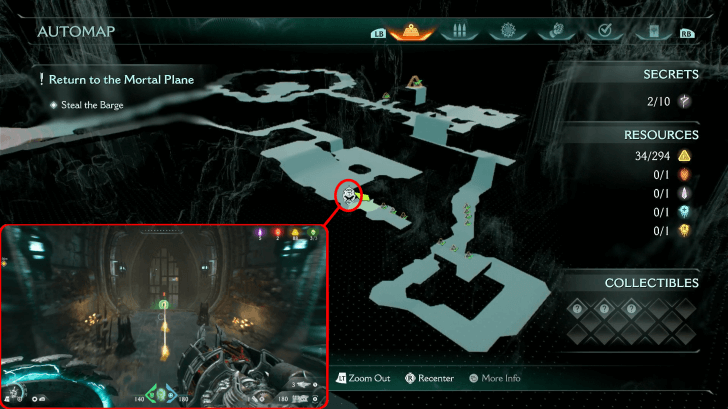 (Secret 2/10) |
To get the first Life Sigil, head to the end of the path after getting Gold Trail 4. Hit the switch to open up the wall, and defeat the enemies to get to the secret area. This can be obtained during the first objective ▼. |
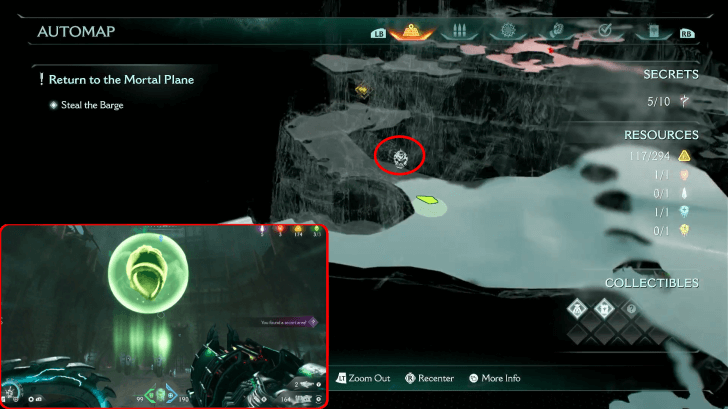 (Secret 6/10) |
Head behind the giant skull and you'll find a blue jump booster. Hop on it to reach the second Life Sigil. This can be obtained during the first objective ▼. |
Harbor of Souls Gold
| Item | How to Get |
|---|---|
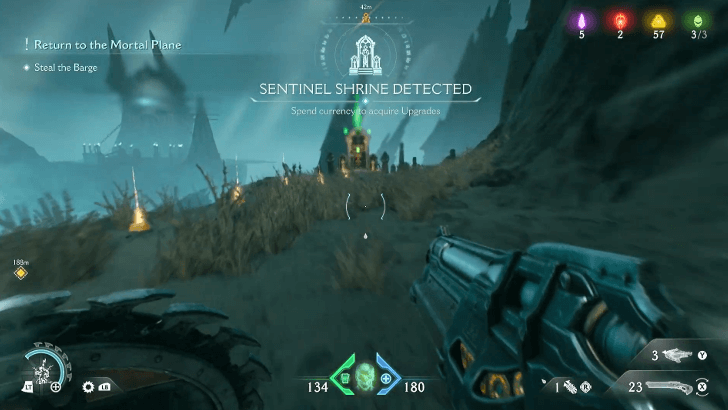 |
Pick these up on your way to the first Sentinel Shrine. This can be obtained during the first objective ▼. |
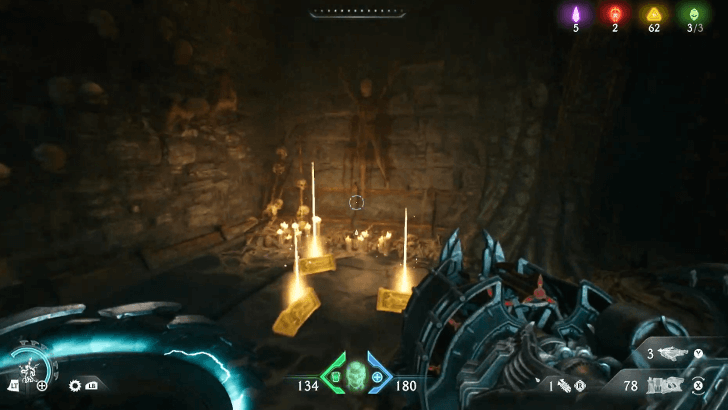 |
It can be found in one of the hallways bombarded with fireballs, guarded by an Arachnotron. This can be obtained during the first objective ▼. |
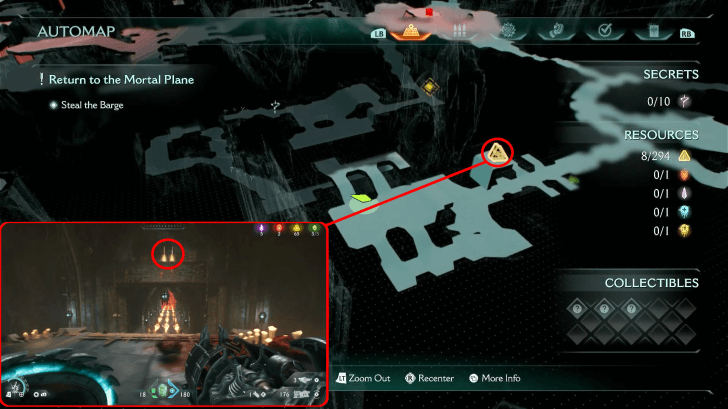 (Secret 1/10) |
Can be reached by sprint jumping across the ledge and climbing the wall. This can be obtained during the first objective ▼. |
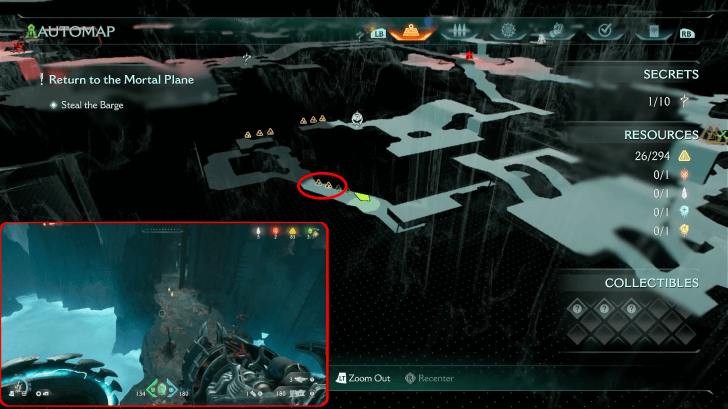 |
Accessible by jumping down to the lowest level, just below the first Life Sigil you see locked behind a gate. This can be obtained during the first objective ▼. |
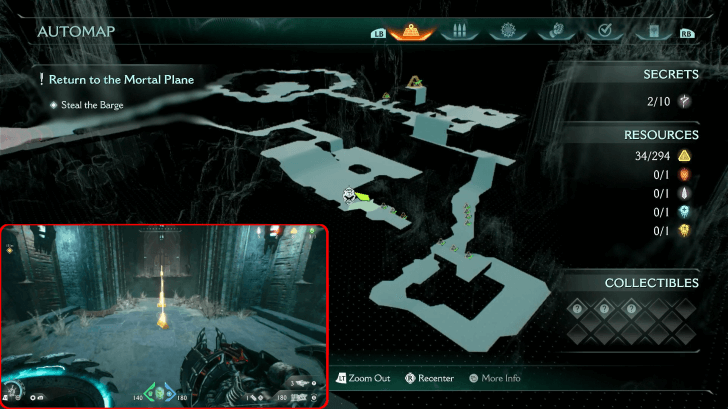 |
Upon obtaining Gold Trail 5, keep heading towards the end of the path, where you will find a switch that opens a door behind you. Defeat the enemies, and jump across the ledge to grab all of the gold. This can be obtained during the first objective ▼. |
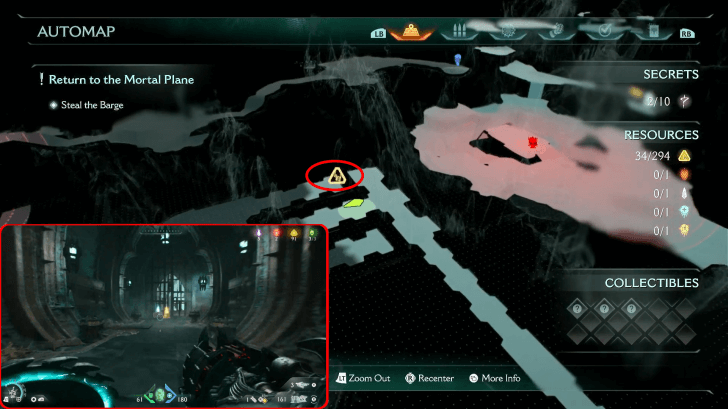 |
Defeat the demon demon 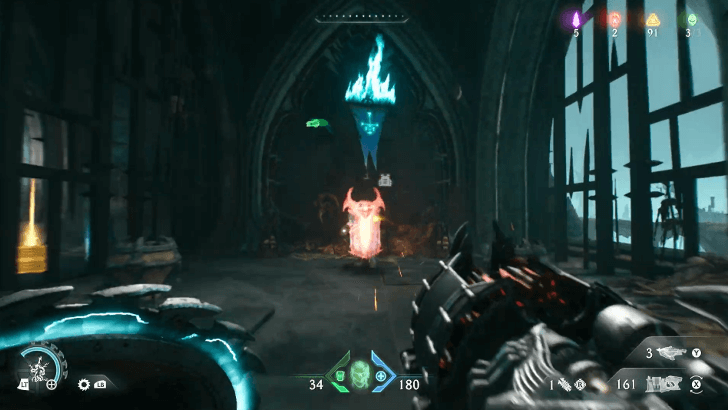 |
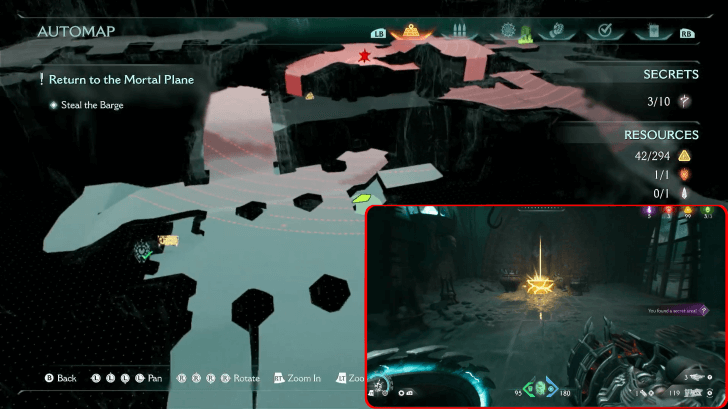 (Secret 4/10) |
Near the jump boost, hop to the ledge ledge 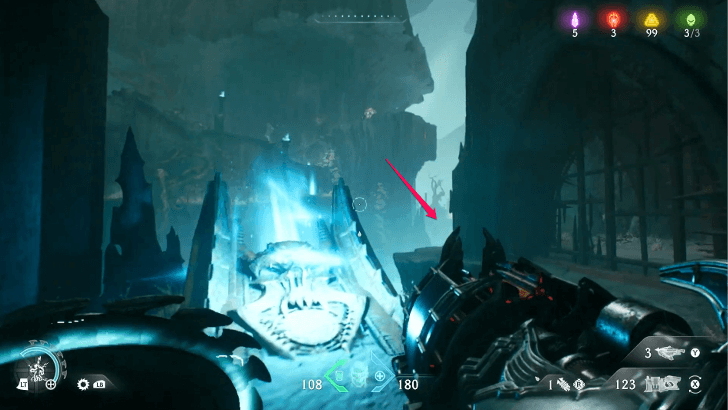 |
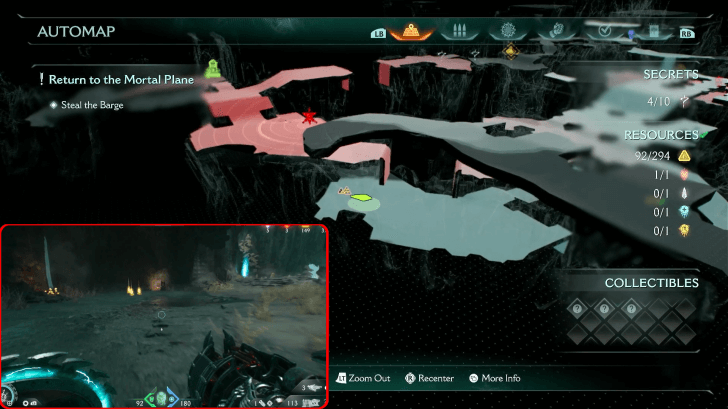 |
Found on the lowest level, just opposite the side of the Sentinel Shrine. This can be obtained during the first objective ▼. |
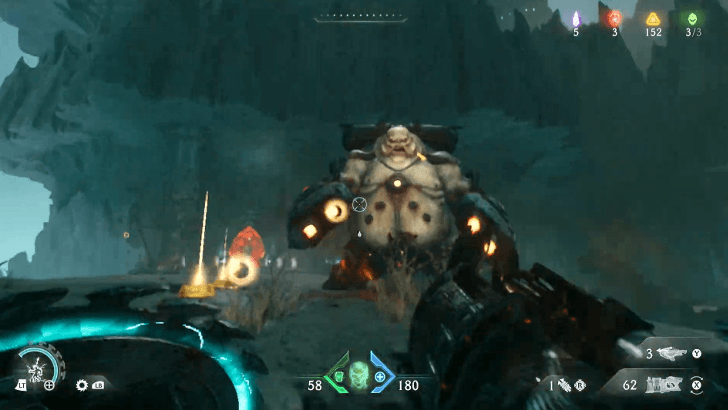 |
Located just to the left of the Mancubus near the bridge, just before the ledge. This can be obtained during the first objective ▼. |
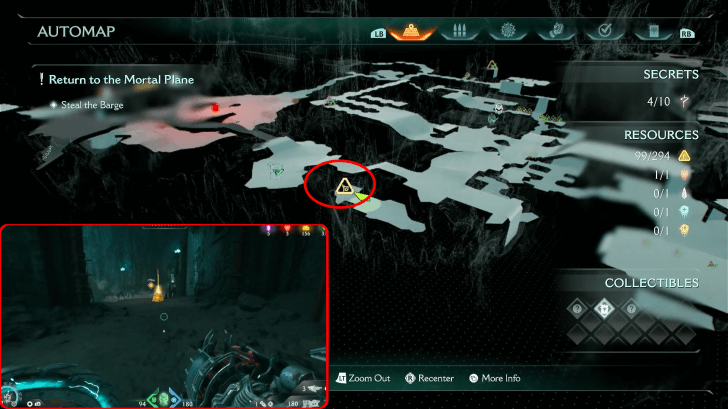 |
Head to the ledge on the opposite side of Harbor of Souls Codex, and drop down to get the Gold Trail. This can be obtained during the first objective ▼. |
 (Secret 5/10) |
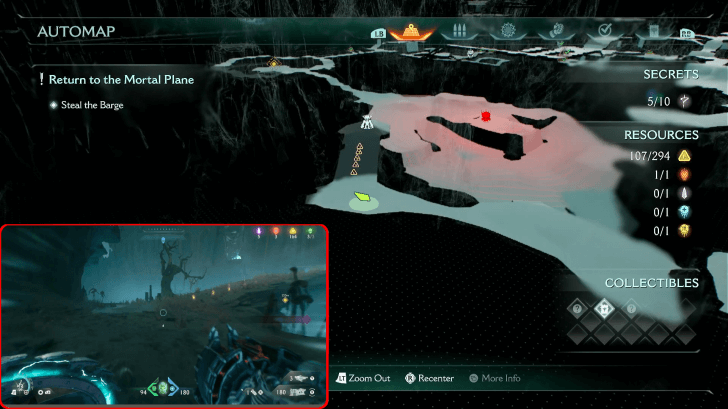
Head to the blue gate after obtaining the Blue Skull Key Blue Skull Key  |
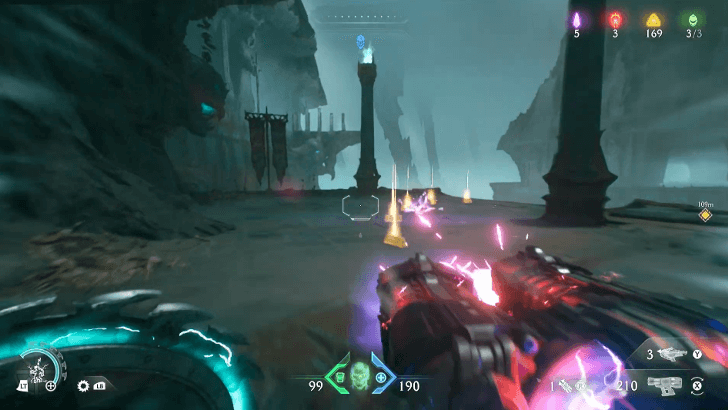 |
Go to the left of the giant skull, and you'll find the gold trail near the ledge. This can be obtained during the first objective ▼. |
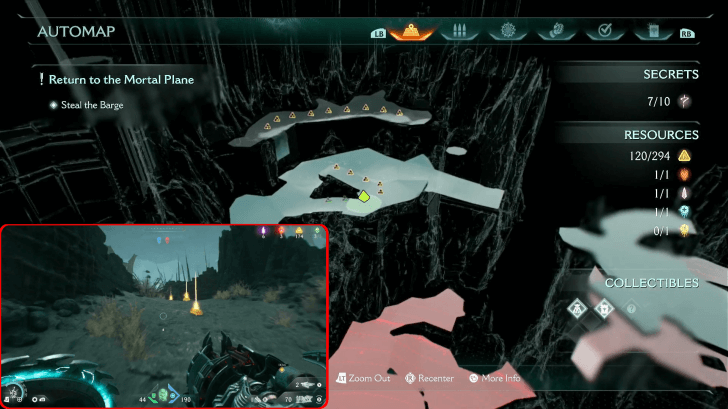 |
Follow the path and ascend the slopes to get to the 12th gold trail. Keep following the path, and sprint jump towards the wall towards the wall 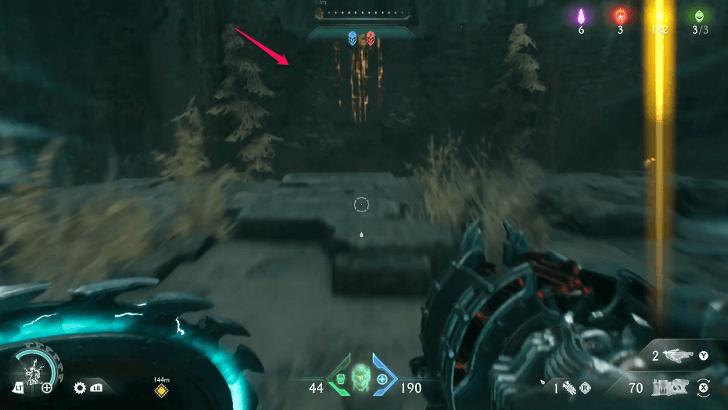 |
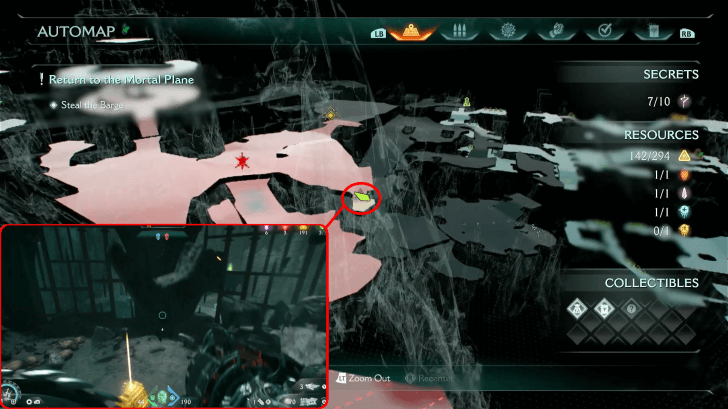 |
Destroy the wall wall 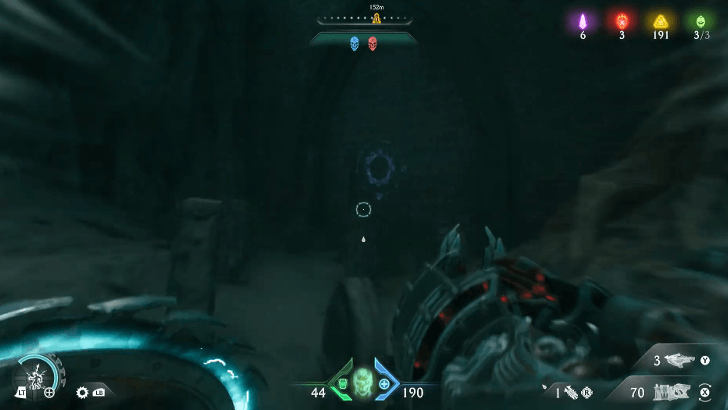 |
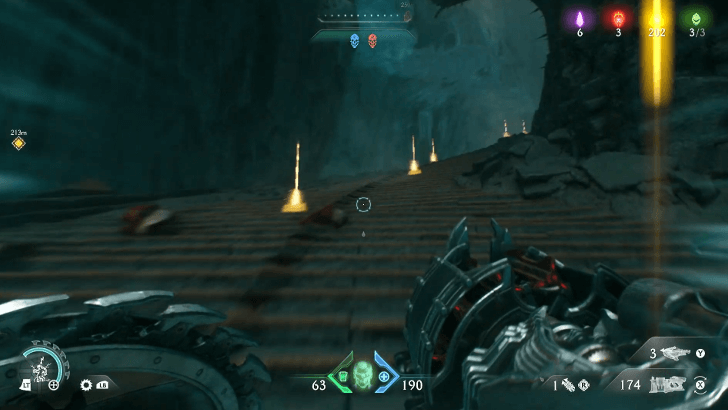 |
The Gold can be found on the stairs, just past the stationary fire traps. This can be obtained during the first objective ▼. |
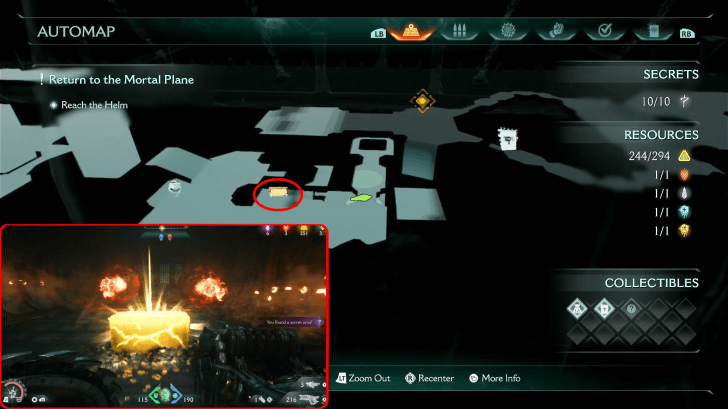
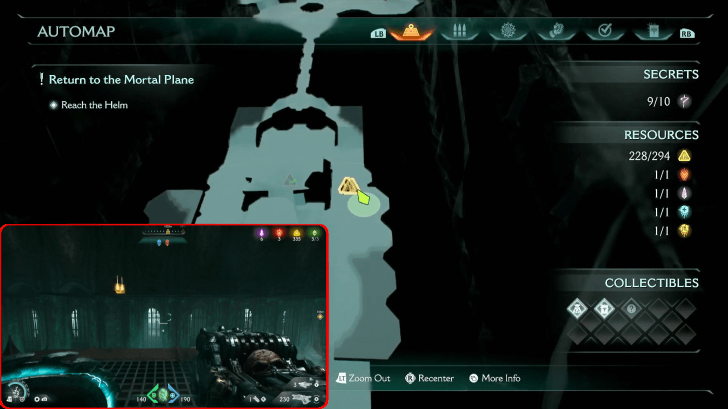 (Secret 8/10) |
Use the elevator in the middle of the room, then use sprint jump to be able to go to the ledge, and you will be able to get the gold trail. This can be obtained during the second objective ▼. |
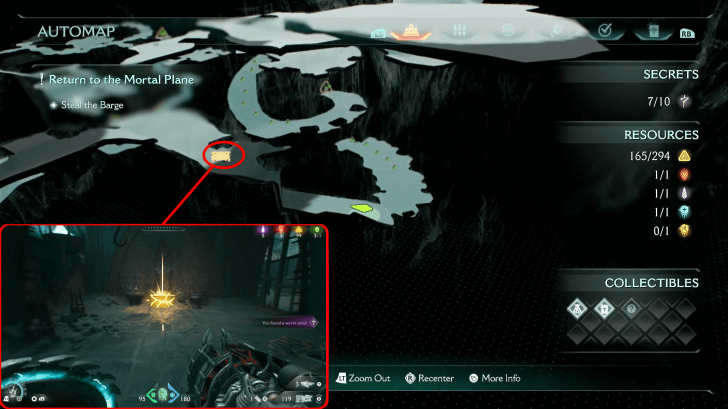 (Secret 9/10) |
To get to the secret area, use shield throw shield throw 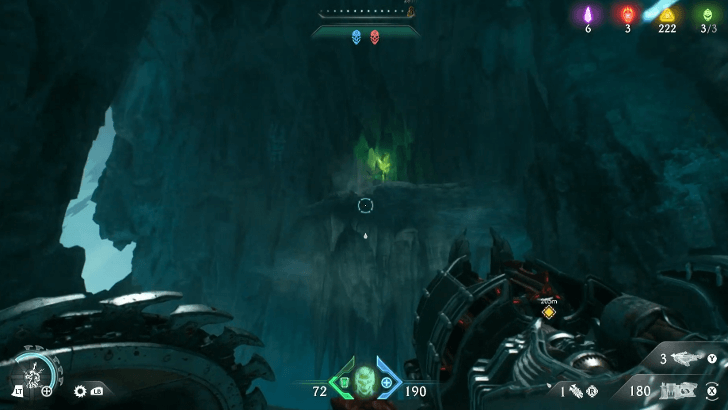 |
 |
Use Shield charge off the ledge and into the wall into the wall 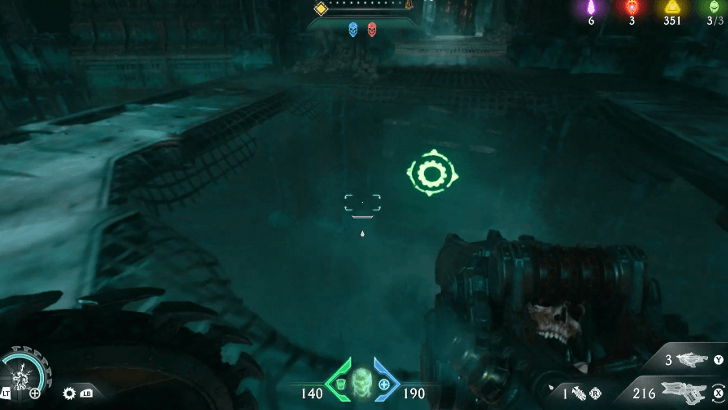 |
Harbor of Souls Rubies
| Item | How to Get |
|---|---|
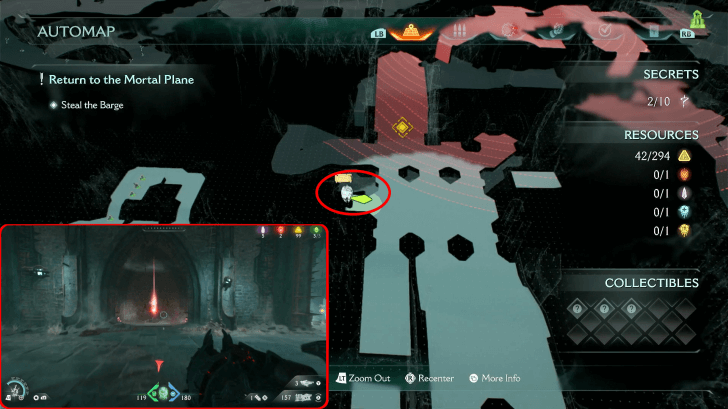 (Secret 3/10) |
To open the gate barring the way to the Ruby, use the elevator in the middle of the room and jump to the opposite side of the Ruby. Once you're there, use shield throw on the mechanism mechanism 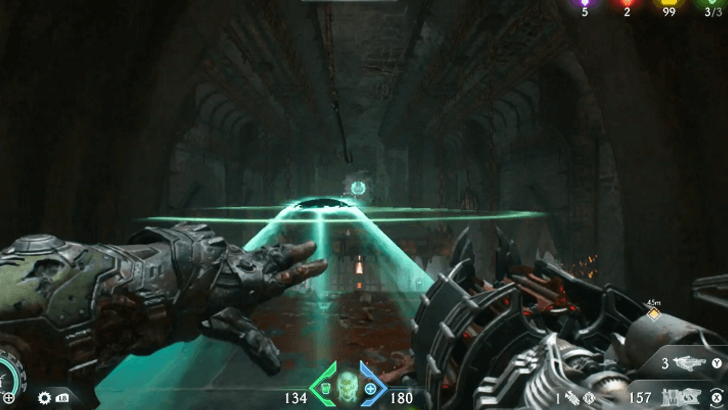 |
| Ruby 2 | Complete the Berserker Mission Challenge to obtain the second ruby in the level by defeating 75 demons while under the influence of Berserk. |
Harbor of Souls Wraithstone
| Item | How to Get |
|---|---|
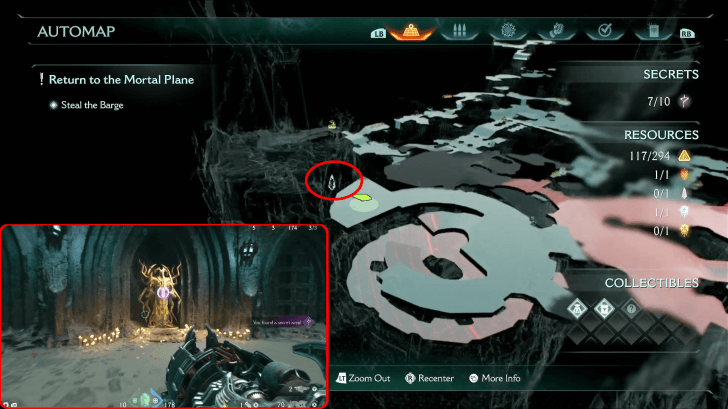 (Secret 7/10) |
Hit the blue mechanism blue mechanism 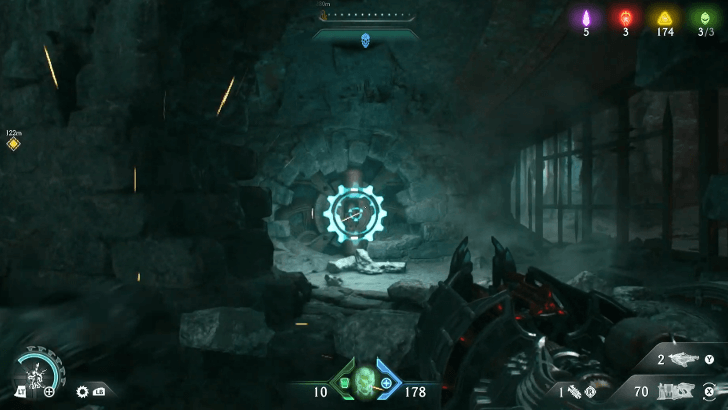 |
Harbor of Souls Demonic Essence
| Item | How to Get |
|---|---|
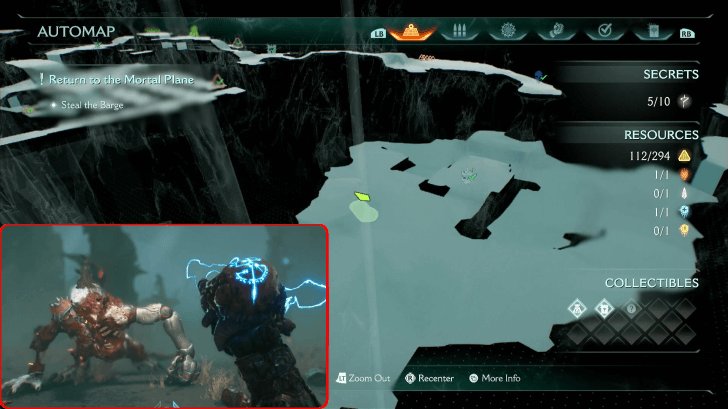 |
Defeat the armored pinky rider in the open area. There will be one other unarmored pinky rider, but only the armored one will provide the demonic essence. This can be obtained during the first objective ▼. |
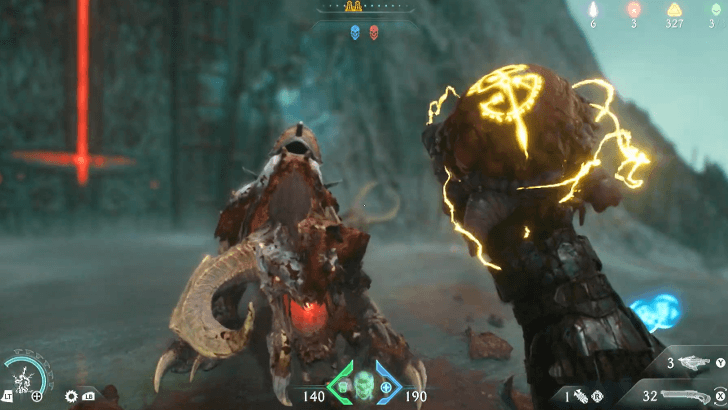 |
Obtainable by defeating the empowered Pinky Rider, encountered just before reaching the door that leads to the helm area. This can be obtained during the first objective ▼. |
Harbor of Souls Walkthrough
| Main Objectives | |
|---|---|
| 1 | Steal the Barge Secrets: Gold Trail 3 (x16) - Secret #1 Gold Trail 5 (x6) & Life Sigil 1 - Secret #2 Ruby 1 - Secret #3 Gold Cache 1 (x50) - Secret #4 Gold Trail 10 (x5) & Acolyte Toy - Secret #5 Life Sigl 2 - Secret #6 Wraithstone 1 - Secret #7 |
| 2 | Reach The Helm Secrets: Gold Cache 2 ( x50) - Secret #8 Gold Trail 16 (x16) - Secret #9 Gold Cache 3 ( x50) - Secret #10 |
1. Steal the Barge
| 1 | 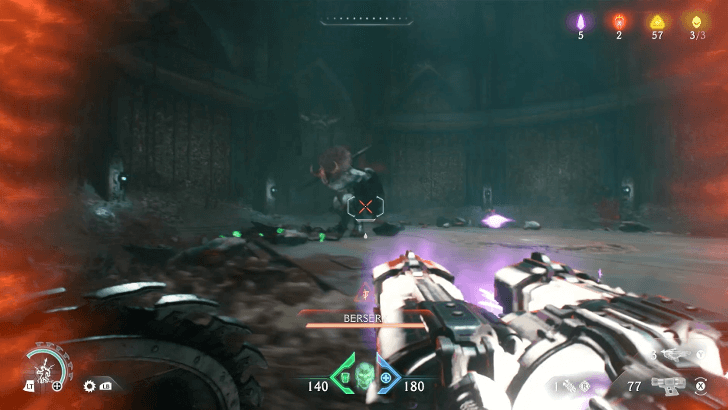 Defeat all the demons in the enclosed area to lower the barrier. An Agaddon Hunter will spawn once the area is clear. Defeat it to proceed. |
|---|---|
| 2 | 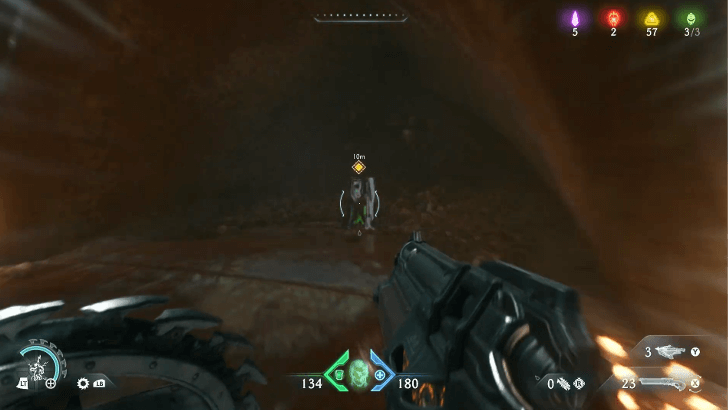 Continue through the level, using Shield Charge and Shield Throw to advance through the mechanisms. Follow the objective markers until you reach the switch. Interact with the switch to raise the water level, allowing you to swim up to the next section. |
| 3 | 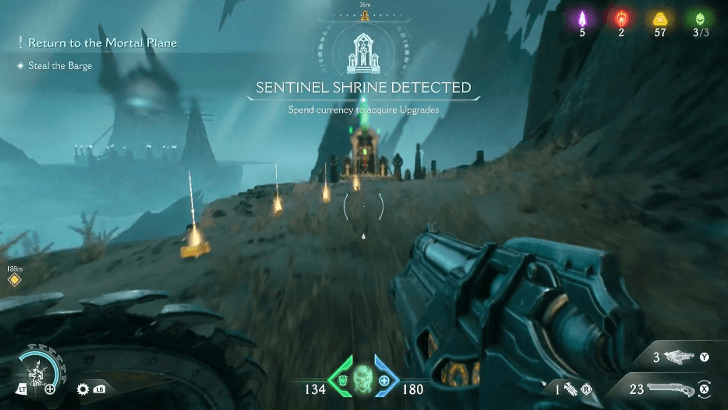 Head to the Sentinel Shrine to purchase any upgrades you want. Then, head to the path directly opposite to it to continue. Collectible: Gold Trail 1 |
| 4 | 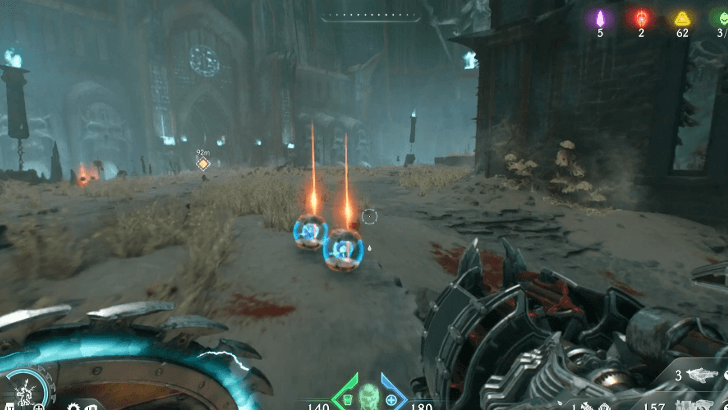 Keep heading towards the objective until you arrive at the main entrance to the barge. You can head inside once you've cleared the area of demons. |
| 5 | 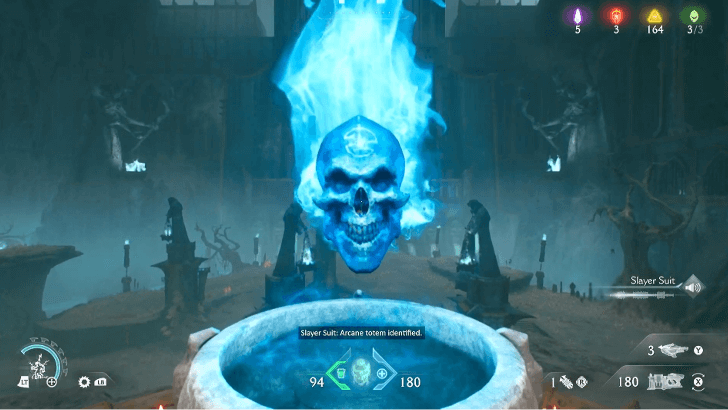 Make your way towards the interiors, and fight your way until you circle back outside. Grab the Blue Skull Key and use it to open the gate. Collectible: Gold Trail 1-9, Gold Cache 1, Ruby 1, Harbor of Souls Codex, Life Sigil 1 |
| 6 | 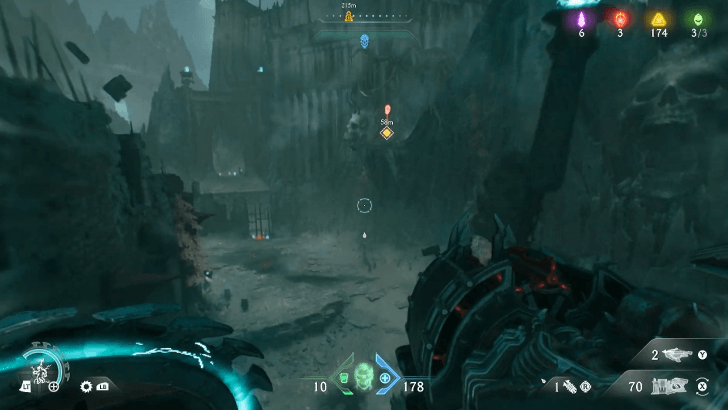 Use the Blue Skull Key to access the elevator to get up a level. Make your way through the area until you reach the Red Skull Key. After grabbing it, circle back to the area where the gate is. Fight your way through the horde to reach the helm. Collectible: Wraithstone 1, Gold Trail 10-15, Life Sigil 2, Acolyte Toy, Demonic Essence - Ammo |
2. Reach The Helm
| 1 | 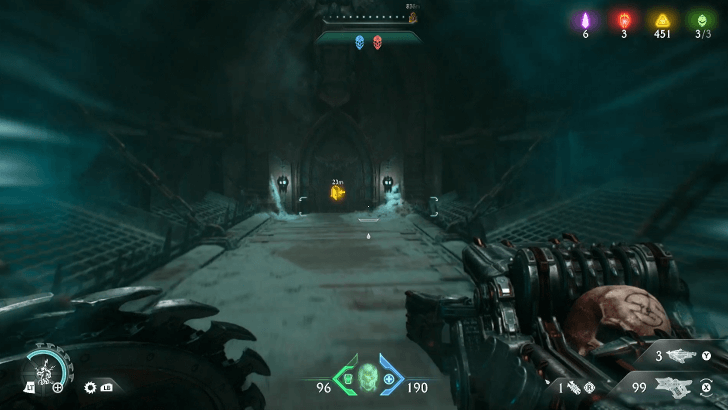 Once you get to the helm area, keep following the objective markers until you reach the helm right at the very top, ending the chapter once you arrive. Collectible: Gold Trail 16, Gold Cache 2-3, Hell Priests Codex |
|---|
Harbor of Souls Mission Challenges
| Challenge | Details and Reward |
|---|---|
| Berserker | Kill 75 demons while under the influence of Berserk Reward: 1 Ruby |
| Dragon Hoard | Smash open 3 gold chests. Reward: 50 Gold |
| Executioner | Perform an Execution on 25 demons. Reward: 50 Gold |
Berserker
This challenge can only be completed with the berserk power-up active. The earliest berserk power-up can be found at the beginning of the first area, so try to kill as many demons as possible while it's active.
Dragon Hoard
To complete this mission, you must find all three gold caches in the level. Gold cache 1 is located on the way to the barge. Gold Caches 2-3 are located near the helm section.
Executioner
This mission is simple because it can be completed through normal gameplay. Executions are often used to finish off enemies with low health. If you're having trouble because your enemies die too quickly, consider adjusting the difficulty settings.
Doom: The Dark Ages Related Guides

Full Walkthrough and List of Chapters
Comment
Author
Chapter 19: Harbor of Souls Secrets and Walkthrough| Doom: The Dark Ages
improvement survey
03/2026
improving Game8's site?

Your answers will help us to improve our website.
Note: Please be sure not to enter any kind of personal information into your response.

We hope you continue to make use of Game8.
Rankings
- We could not find the message board you were looking for.
Gaming News
Popular Games

Genshin Impact Walkthrough & Guides Wiki

Honkai: Star Rail Walkthrough & Guides Wiki

Umamusume: Pretty Derby Walkthrough & Guides Wiki

Pokemon Pokopia Walkthrough & Guides Wiki

Resident Evil Requiem (RE9) Walkthrough & Guides Wiki

Monster Hunter Wilds Walkthrough & Guides Wiki

Wuthering Waves Walkthrough & Guides Wiki

Arknights: Endfield Walkthrough & Guides Wiki

Pokemon FireRed and LeafGreen (FRLG) Walkthrough & Guides Wiki

Pokemon TCG Pocket (PTCGP) Strategies & Guides Wiki
Recommended Games

Diablo 4: Vessel of Hatred Walkthrough & Guides Wiki

Fire Emblem Heroes (FEH) Walkthrough & Guides Wiki

Yu-Gi-Oh! Master Duel Walkthrough & Guides Wiki

Super Smash Bros. Ultimate Walkthrough & Guides Wiki

Pokemon Brilliant Diamond and Shining Pearl (BDSP) Walkthrough & Guides Wiki

Elden Ring Shadow of the Erdtree Walkthrough & Guides Wiki

Monster Hunter World Walkthrough & Guides Wiki

The Legend of Zelda: Tears of the Kingdom Walkthrough & Guides Wiki

Persona 3 Reload Walkthrough & Guides Wiki

Cyberpunk 2077: Ultimate Edition Walkthrough & Guides Wiki
All rights reserved
© 2025 ZeniMax Media Inc. All Rights Reserved.
The copyrights of videos of games used in our content and other intellectual property rights belong to the provider of the game.
The contents we provide on this site were created personally by members of the Game8 editorial department.
We refuse the right to reuse or repost content taken without our permission such as data or images to other sites.




![Monster Hunter Stories 3 Review [First Impressions] | Simply Rejuvenating](https://img.game8.co/4438641/2a31b7702bd70e78ec8efd24661dacda.jpeg/thumb)


