Chapter 1: Village of Khalim Secrets and Walkthrough
☆ Doom: The Dark Ages is live now!
★ Collectibles | Secrets | Walkthrough
┗ Resources | Codex | Toy
★ Trophies | Beginner's Guide | Enemies
☆ Skins: Twitch Drops | Prince St. Pizza
★ FAQs: Co-op | DLC | Specs | Glory Kills
Chapter 1: Village of Khalim in Doom: the Dark Ages contains 6 secrets and 5 collectibles. Learn how to get all the secrets, gold, and collectibles, as well as how to complete the Mission Challenges in this Chapter 1 walkthrough guide.
List of Contents
Village of Khalim Walkthrough
| Main Objectives | |
|---|---|
| 1 | Get to the Village And Cull the Demons Secrets: Life Sigil - Secret #1 |
| 2 | Find the Key and Open the Gate Secrets: Imp Toy - Secret #2 |
| 3 | Destroy the Demonic Portals Secrets: Soldier Toy - Secret #3 Nightmare Combat Shotgun Skin - Secret #4 Purple Key - Secret #5 |
| 4 | Defend the Beach and Eliminate the Titan Secrets: Village of Khalim Codex - Secret #6 |
1. Get to the Village And Cull the Demons
| 1 | 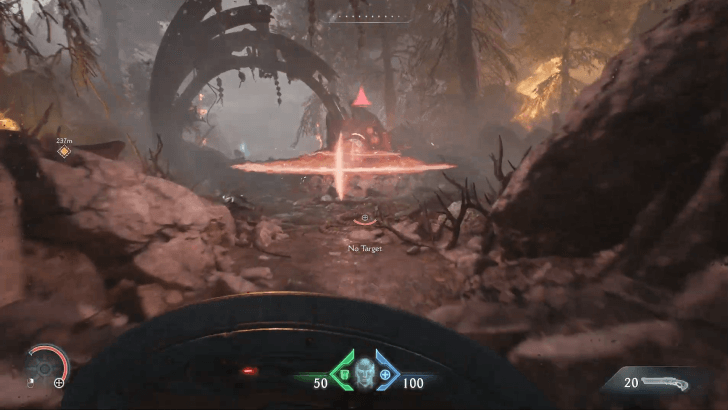 On the first mission, familiarize yourself with your newest weapon, the Shield. Defeat 15 Demons with Shield Charge. |
|---|---|
| 2 | 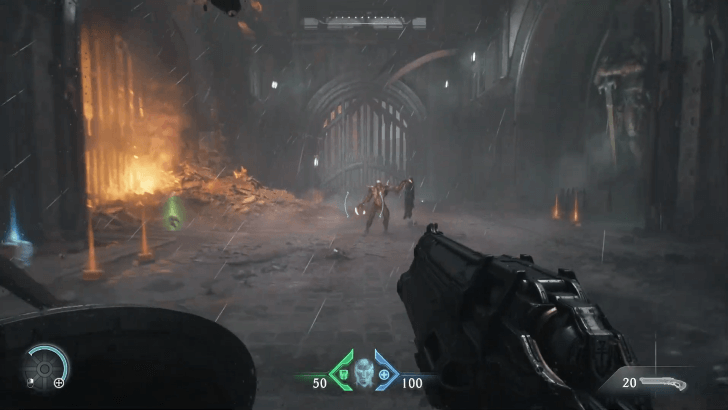 Following the objective marker leads to a single demon waiting for you, where a new feature called Execution will be introduced. Proceed to the next area after slaying it. |
| 3 | 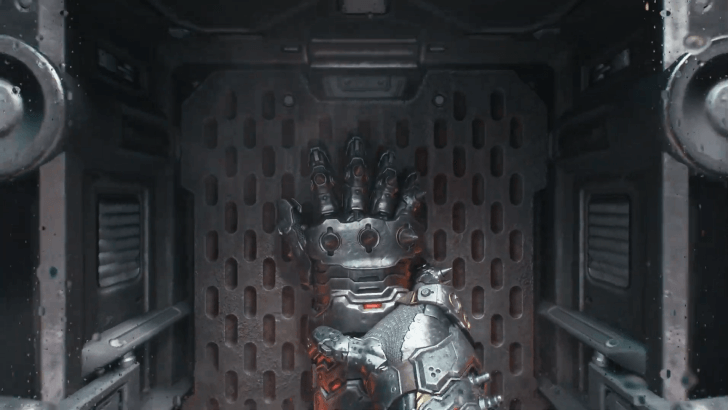 Pick up the Power Gauntlet in the clearing and test it out against tough enemies in the next area. Use this opportunity to practice Melee combos! |
| 4 | 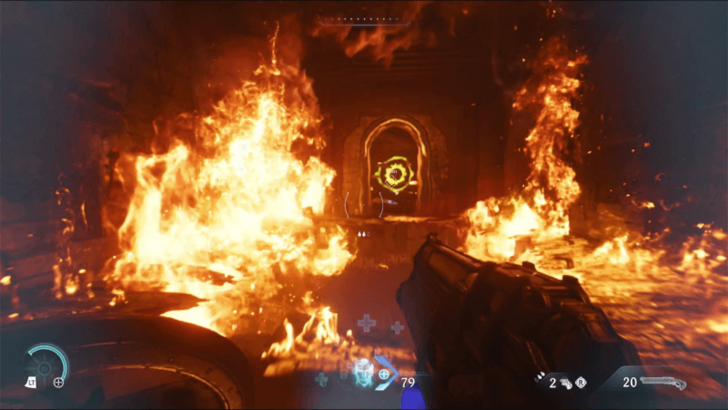 Once you're done with the challenge, head to the next area by going through the burning building entrance, up a Wall Scramble, and through a wooden barrier. Collectible: Life Sigil 1 |
2. Find the Key and Open the Gate
| 1 | 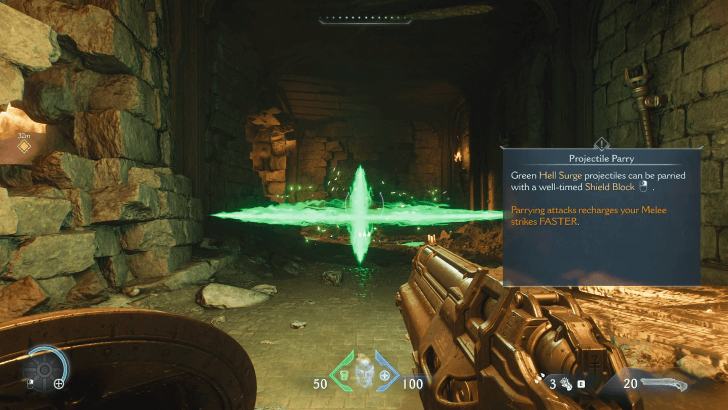 After clearing the enemies on the plaza, make your way through the plaza's broken gate and into the church. Stronger demons will start blasting powerful projectiles so use your shield to parry away their blasts. |
|---|---|
| 2 | 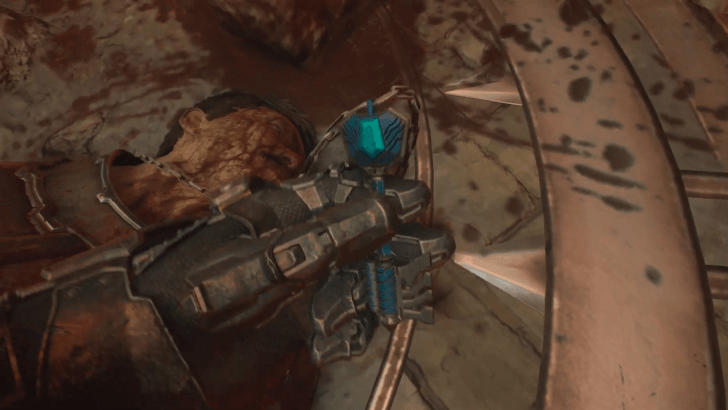 Inside the church you'll find cultists circling around a demonic ring. Head to the altar where the key is wrapped around the neck of a fallen soldier. |
| 3 | 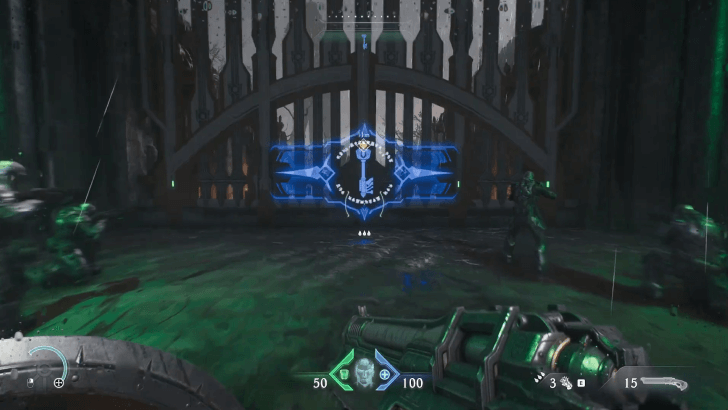 Burst through the wooden blockade inside the church to land in front of the gate that will lead to the next area. Collectible: Imp Toy |
3. Destroy the Demonic Portals
| 1 | 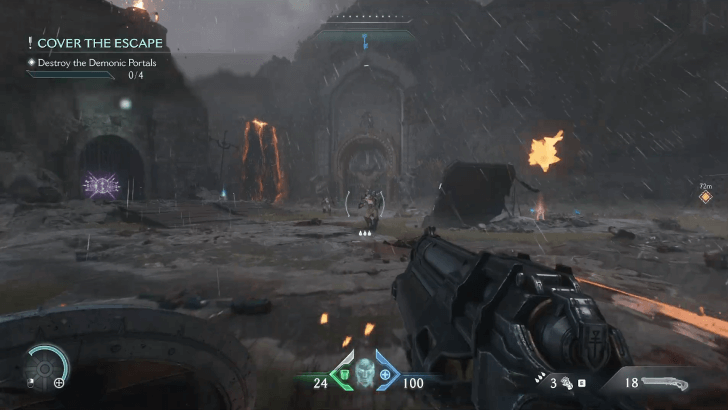 Once you've entered the next area, you'll be tasks of destroying 4 portals. Destroy the first Demonic Portal by eliminating all the enemies in front of the gate. |
|---|---|
| 2 | 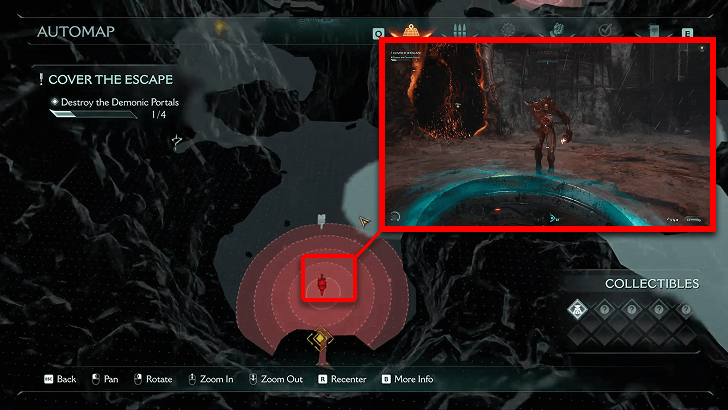 Another Demonic Portal is around the corner teeming with more demons. Here you'll encounter a new demon with a metallic shield. With your current weapons, the best way to deal with this enemy is by quickly sidestepping and shooting it on the side. |
| 3 | 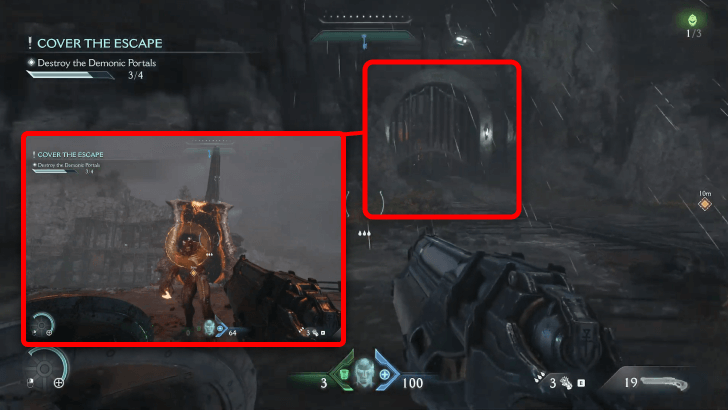 Defeat the demons after picking up the Rail Spike Shredder, then head to the path underneath the giant crane. When the demons in that area is culled, the third portal will collapse. ┗Purple Key Location Collectibles: Nightmare Combat Shotgun Skin, Soldier Toy, Life Sigil 2 |
| 4 | 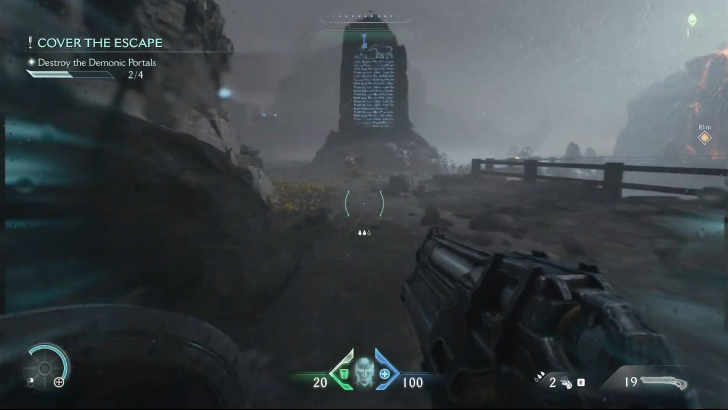 Across the gate underneath the giant crane is a path that leads back to the first area. Head down the path towards the left, and cull the demons littered below the runic tablets. The last Demonic Portal will fall afterwards. Collectibles: Doom Slayer Codex, Life Sigil 3 |
Purple Key Location (Secret 5/6)
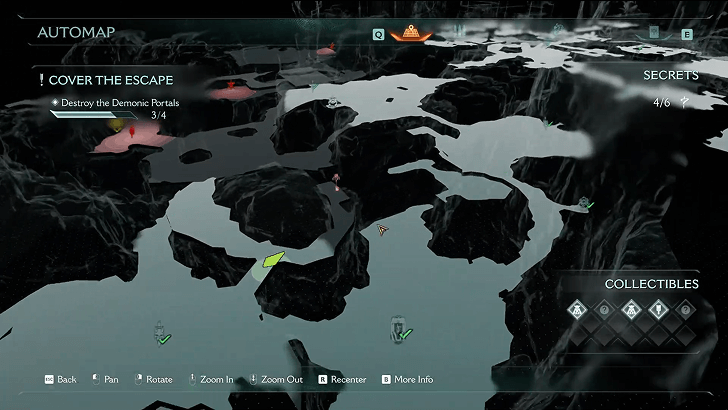
Around the corner of the giant crane is a small pathway to reach a cliffside. The purple key will be waiting here.
4. Defend the Beach and Eliminate the Titan
| 1 | 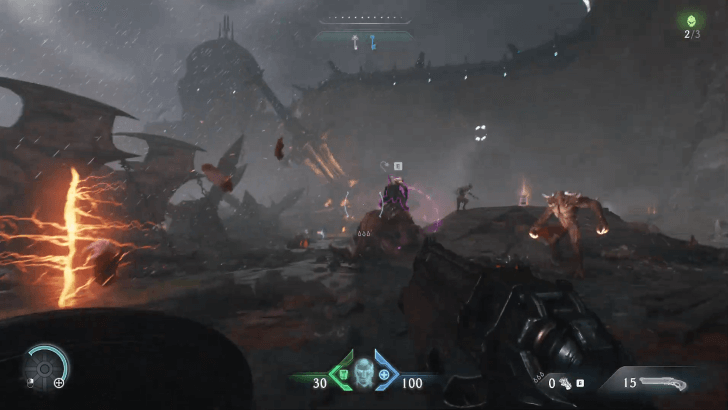
After cleansing the village of the demon infestation, another horde will be coming in waves near the beach. Before proceeding, turn around the corner to find a page of the codex! Collectible: Village of Khalim Codex |
|---|---|
| 2 |  A turret to defend the Barrier is here. Mount it, and defend yourself from the waves of demons running to invade the village once more. |
| 3 |  The Titan in the background will at some point make its way towards you. Keep firing until you're able to shoot out three Blue Bolts at it to defeat it, though compensate for the arc by aiming higher. |
Village of Khalim Secrets & Collectibles
Village of Khalim Interactive Map
| Jump to a Collectible! | |
|---|---|
| Toys | 2 |
| Skins | 1 |
| Codex | 2 |
| Life Sigils | 3 |
| Secrets | 6 |
Village of Khalim Toys
| Item | How to Get |
|---|---|
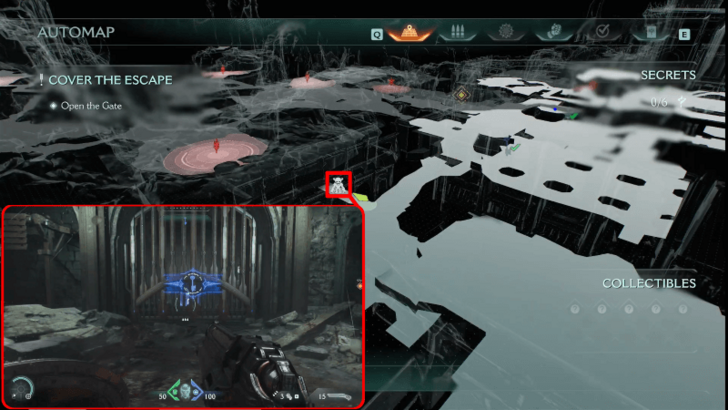 (Secret 2/6) |
The Imp Toy can be found near the plaza, locked by the Blue Key that you'll obtain from the cultists. After getting out of the church, follow the trail to the left until you see another gate that can be unlocked using the key you just found. You can find this near the second objective ▲. |
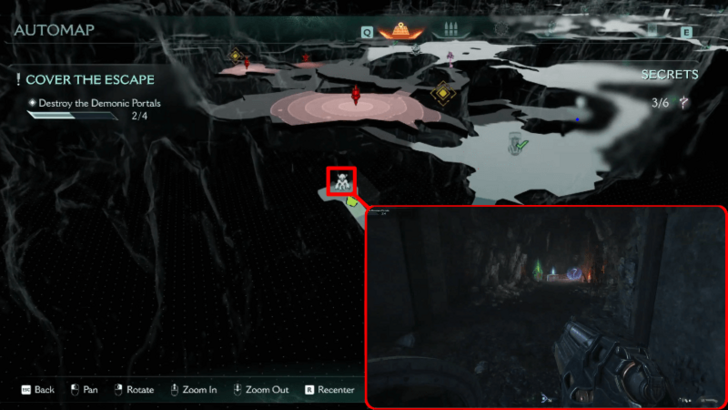 (Secret 3/6) |
Head towards the cliff behind the Shredder weapon drop, and you'll see a ledge that will take you down a cave with resources to refill on, as well as the Soldier Toy collectible. This can be obtained during the third objective ▲. |
Village of Khalim Skins
| Item | How to Get |
|---|---|
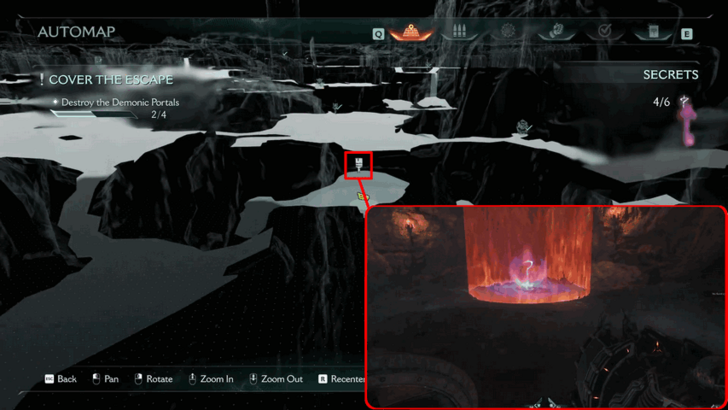 (Secret 4/6) |
The Combat Shotgun Nightmare skin can be located in a cave near the Shredder weapon drop. From the drop area, head towards the cliff where the weapon case is facing, and you'll see another hidden cave you can jump to. Make sure to sprint while jumping to reach the cave entrance! This can be obtained near the third objective ▲. |
Village of Khalim Codex Entries
| Item | How to Get |
|---|---|
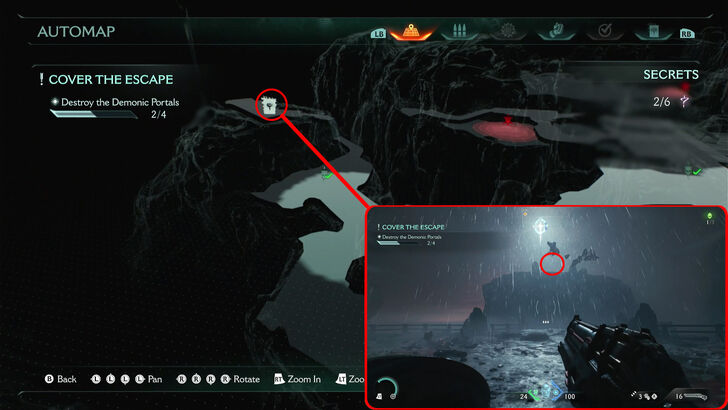 |
Behind one of the large portals, you will see a plateau where you can find the Doom Slayer codex. Destroy the portal first, then make your way up to get this collectible. The entry can be obtained while completing the third objective ▲. |
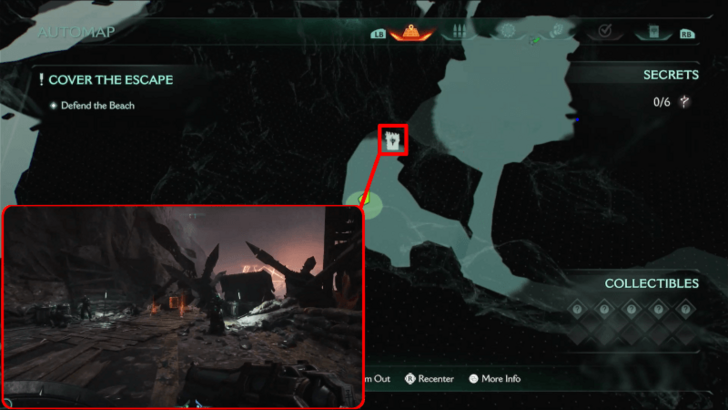 (Secret 6/6) |
Towards the path leading to the final objective, you'll find a Wall scramble you can climb up to your left. There, you'll find the first Codex page for your dossier. The Codex entry is found during the fourth objective ▲. |
Village of Khalim Life Sigils
| Item | How to Get |
|---|---|
 (Secret 1/6) |
Found in the room after the Melee combat tutorial. Use your shield to break the
wooden barrier wooden barrier 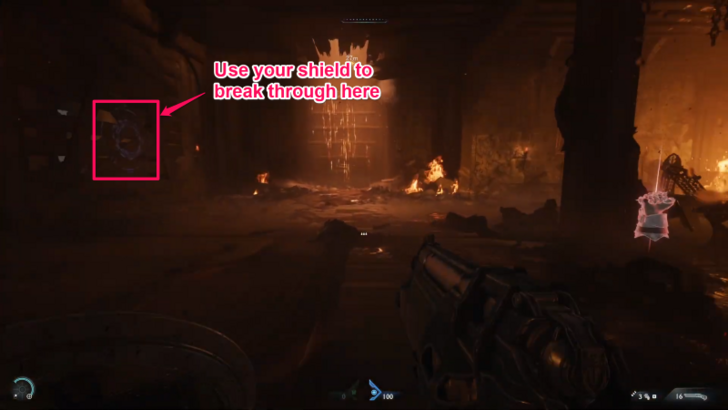 |
 |
On your way to one of the portals, you'll find a path towards a cave that will trap you until you kill all the spawned enemies. Doing so will unlock the gate inside the cave where you can get another Life Sigil. This is obtained during the third objective ▲. |
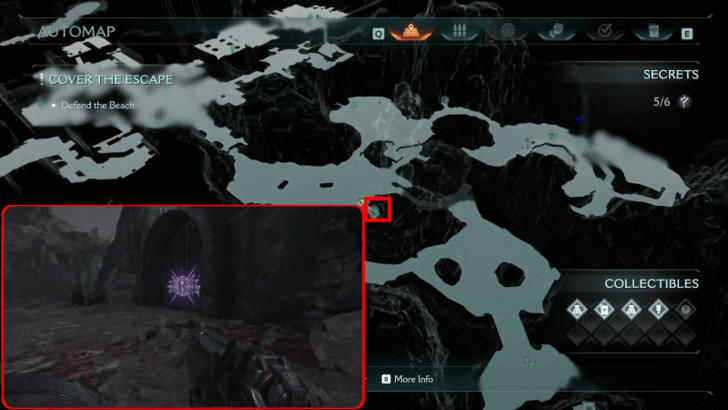 |
After obtaining the Purple Key near one of the portals, head back to where the first portal was. There, you'll see a locked gate with the Life Sigil inside. This is found after the third objective ▲. |
Village of Khalim Tips
|
|
Use the Shield Charge as an Offensive and Mobility Tool
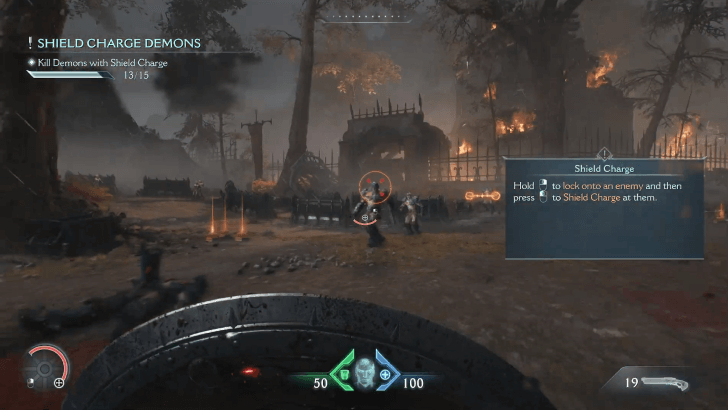
Using Shield Charge after eviscerating your enemies lets you quickly move on to the next target instantly, making the combat extremely fast paced.
A well-timed Shield Charge combo could clear out the battlefield in seconds, making this ability handy for immediate crowd control.
Use the Power Gauntlet to Recover Bullets
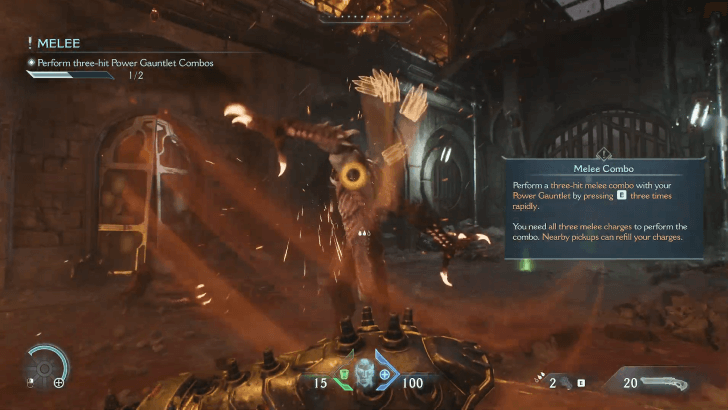
The Power Gauntlet is useful for moments when using your ammo isn't an option. On top of being a renewable resource, slaying enemies with the Power Gauntlet lets you recover ammo when needed.
Use the three-hit melee combo to rip an enemy into pieces! Keep in mind that it needs all three melee charges to perform the combo.
Execute or Use Glory Strikes on Elite Enemies to Defeat Them Fast
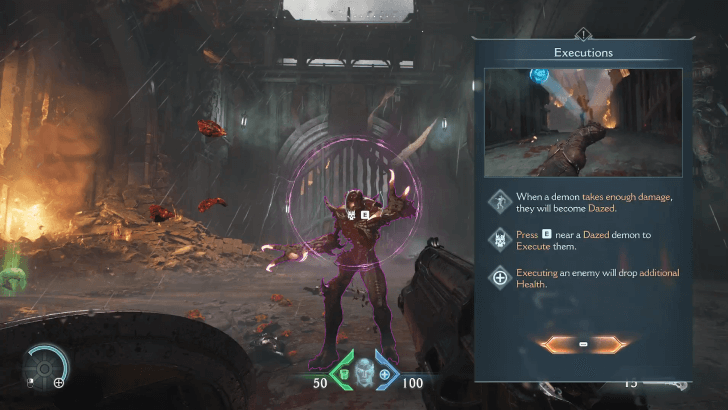
Make use of executions and Glory Strikes when prompted with the purple cue to instantly dispose of foes. This ability allows the Slayer to keep a brutal pressure over his enemies.
Enemies slain by Executions drop precious Health for a quick recovery in the battlefield.
Practice Parrying Green Projectiles
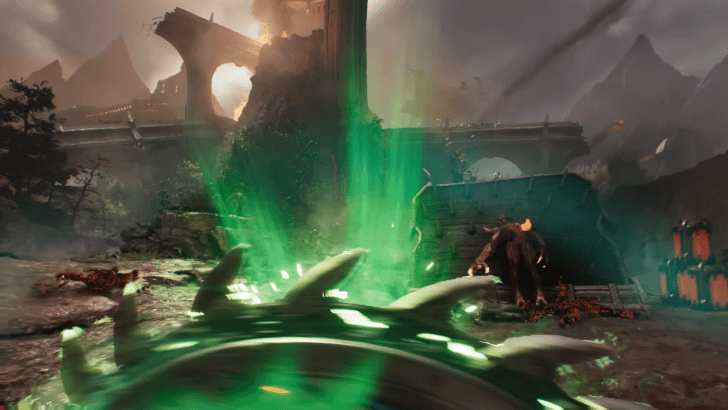
After heavy enemy encounters, handling their projectiles will start getting harder and harder. Luckily, parrying away green projectiles will make it work towards your favor. Keep in mind that this also applies to melee strikes marked green!
Parry the green projectiles to deal substantial damage back to its source, possibly staggering them and leaving them open for more brutal attacks!
Use the Rail Spike Shredder for Single Target

When the slow kick of the combat shotgun is not enough for a tough enemy on the battlefield, take advantage of the Rail Spike Shredder to burst it down to the ground. This weapon is best used for fighting a single enemy as you could focus your shots on them.
Doom: The Dark Ages Related Guides

Full Walkthrough and List of Chapters
Comment
Author
Chapter 1: Village of Khalim Secrets and Walkthrough
improvement survey
03/2026
improving Game8's site?

Your answers will help us to improve our website.
Note: Please be sure not to enter any kind of personal information into your response.

We hope you continue to make use of Game8.
Rankings
- We could not find the message board you were looking for.
Gaming News
Popular Games

Genshin Impact Walkthrough & Guides Wiki

Honkai: Star Rail Walkthrough & Guides Wiki

Umamusume: Pretty Derby Walkthrough & Guides Wiki

Pokemon Pokopia Walkthrough & Guides Wiki

Resident Evil Requiem (RE9) Walkthrough & Guides Wiki

Monster Hunter Wilds Walkthrough & Guides Wiki

Wuthering Waves Walkthrough & Guides Wiki

Arknights: Endfield Walkthrough & Guides Wiki

Pokemon FireRed and LeafGreen (FRLG) Walkthrough & Guides Wiki

Pokemon TCG Pocket (PTCGP) Strategies & Guides Wiki
Recommended Games

Diablo 4: Vessel of Hatred Walkthrough & Guides Wiki

Fire Emblem Heroes (FEH) Walkthrough & Guides Wiki

Yu-Gi-Oh! Master Duel Walkthrough & Guides Wiki

Super Smash Bros. Ultimate Walkthrough & Guides Wiki

Pokemon Brilliant Diamond and Shining Pearl (BDSP) Walkthrough & Guides Wiki

Elden Ring Shadow of the Erdtree Walkthrough & Guides Wiki

Monster Hunter World Walkthrough & Guides Wiki

The Legend of Zelda: Tears of the Kingdom Walkthrough & Guides Wiki

Persona 3 Reload Walkthrough & Guides Wiki

Cyberpunk 2077: Ultimate Edition Walkthrough & Guides Wiki
All rights reserved
© 2025 ZeniMax Media Inc. All Rights Reserved.
The copyrights of videos of games used in our content and other intellectual property rights belong to the provider of the game.
The contents we provide on this site were created personally by members of the Game8 editorial department.
We refuse the right to reuse or repost content taken without our permission such as data or images to other sites.




![Monster Hunter Stories 3 Review [First Impressions] | Simply Rejuvenating](https://img.game8.co/4438641/2a31b7702bd70e78ec8efd24661dacda.jpeg/thumb)


