Chapter 4: Sentinel Barracks Secrets and Walkthrough
☆ Doom: The Dark Ages is live now!
★ Collectibles | Secrets | Walkthrough
┗ Resources | Codex | Toy
★ Trophies | Beginner's Guide | Enemies
☆ Skins: Twitch Drops | Prince St. Pizza
★ FAQs: Co-op | DLC | Specs | Glory Kills
Chapter 4: Sentinel Barracks in Doom: the Dark Ages contains 6 secrets and 3 collectibles. Learn how to get all the secrets, gold, and collectibles, as well as how to complete the Mission Challenges in this Chapter 4 walkthrough guide.
| ◄ Previous Chapter | Next Chapter ▶ |
|---|---|
| Barrier Core | The Holy City of Aratum |
Sentinel Barracks Secrets and Collectibles
Sentinel Barracks Interactive Map
| Jump to a Collectible! | |
|---|---|
| Toys | 1 |
| Skins | 1 |
| Codex | 1 |
| Life Sigils | 2 |
| Demonic Essence | 1 |
| Gold | 212 |
| Rubies | 2 |
| Secrets | 6 |
Sentinel Barracks Toys
| Item | How to Get |
|---|---|
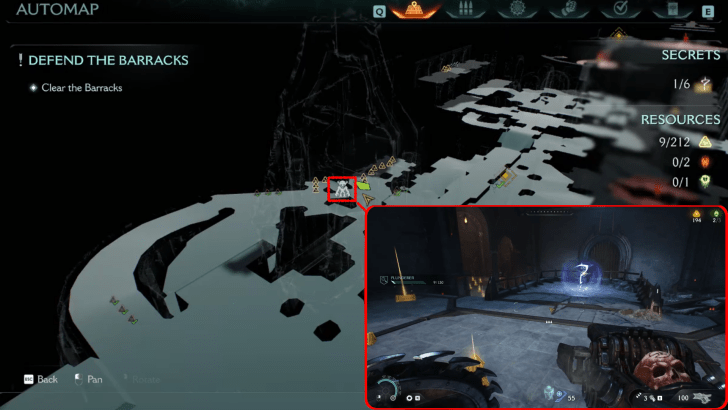 (Secret 1/6) |
The Hell Knight Toy is found at the right wing of the barracks. Access this secret area by going to the hall with a Mancubus and multiple Shield Soldiers in line. Once you see a wooden barrier wooden barrier 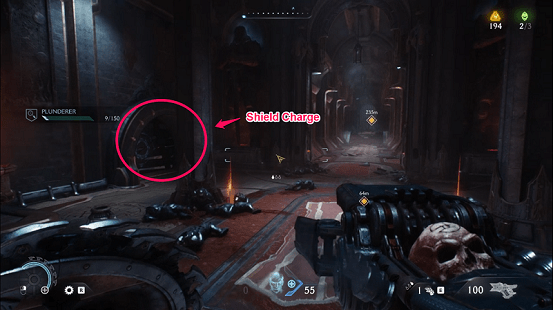 |
Sentinel Barracks Skins
| Item | How to Get |
|---|---|
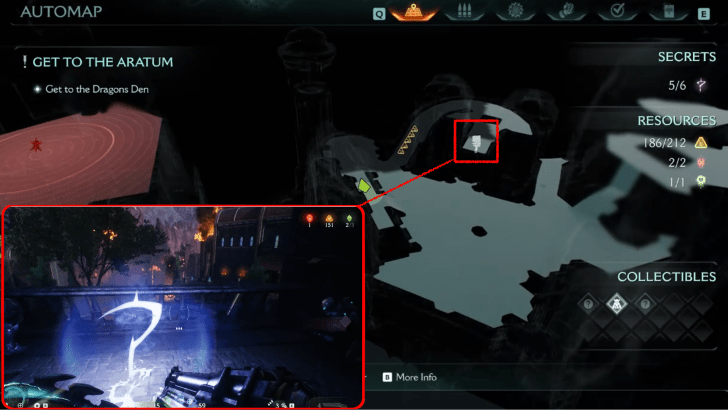 (Secret 2/6) |
Found after jumping down the area with Lost Souls near the end of the chapter. Go up the right stairs and get the Nightmare Accelerator Skin near multiple refugees to find the secret area. You can find this near the end of the second objective ▲. |
Sentinel Barracks Codex Entries
| Item | How to Get |
|---|---|
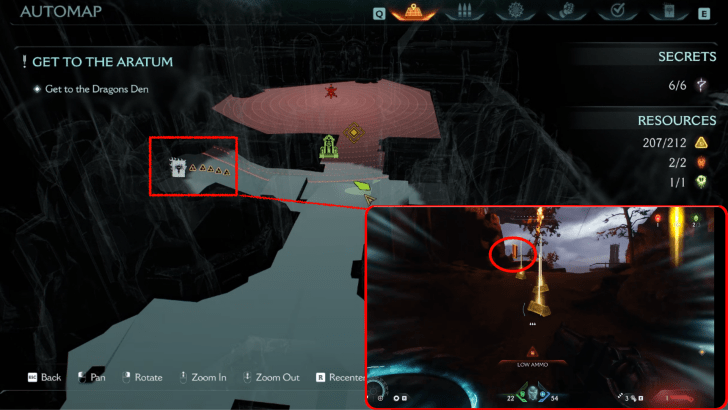 |
Found at the left side of the Sentinel Shrine beside the wooden barrier before the Vagary Champion. Remember to also pickup the gold trail near this codex entry. You can find this before the boss of the second objective ▲. |
Sentinel Barracks Life Sigils
| Item | How to Get |
|---|---|
 (Secret 3/6) |
Use the door switch door switch 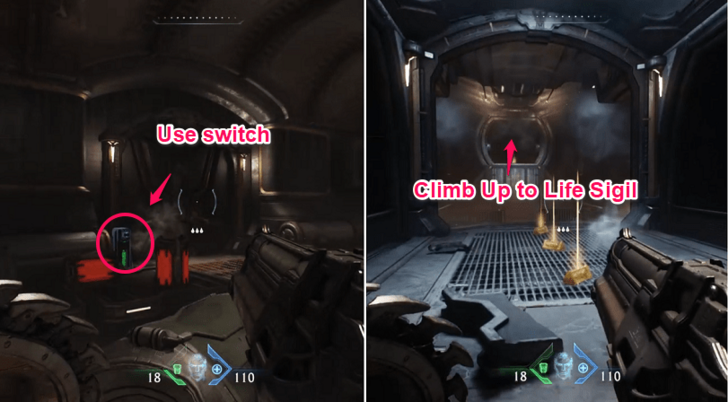 |
 (Secret 4/6) |
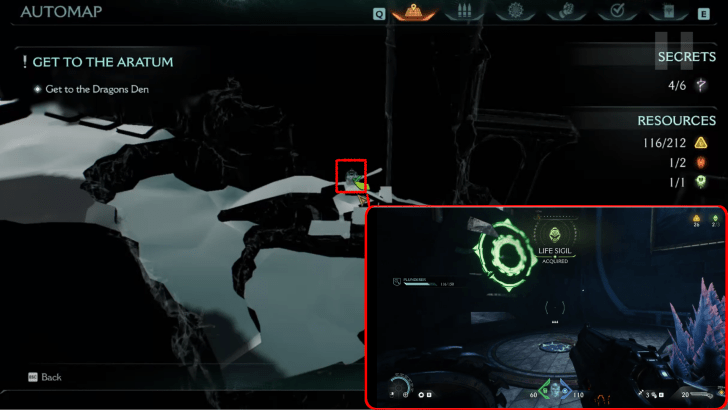
Access this secret area by going to the lower left part of the Mancubus Leader area. Reach the other side by jumping over the wide gap and climbing to the top to acquire the second Life Sigil. You can find this during the second objective ▼. |
Sentinel Barracks Demonic Essence
| Item | How to Get |
|---|---|
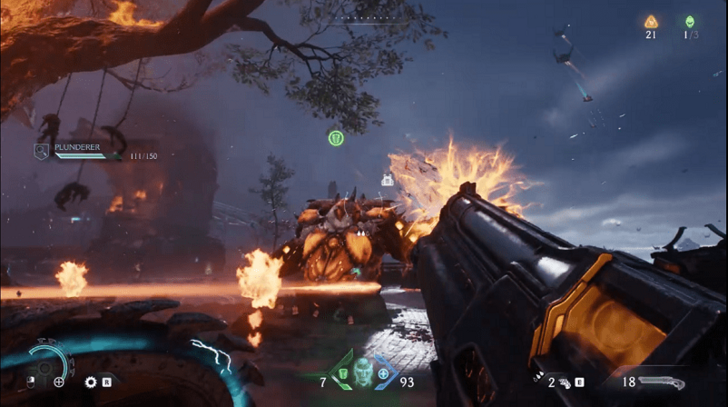 |
Obtained by defeating the Mancubus Leader found in the area after shield recall, jumping over a broken bridge. Increases maximum armor capacity. This is acquired in the middle of the second objective ▼. |
Sentinel Barracks Gold
| Item | How to Get |
|---|---|
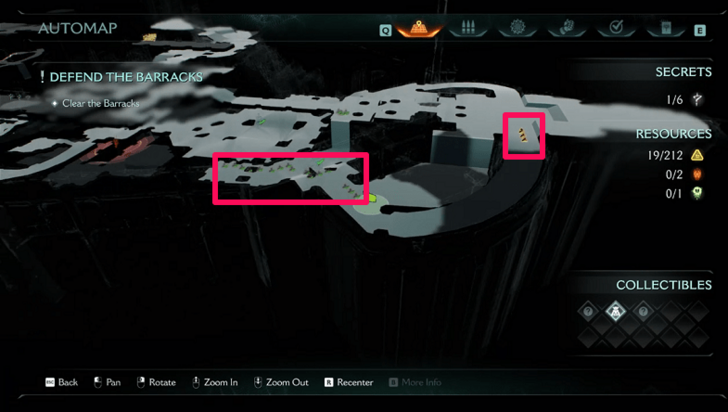 |
Found near the Hell Knight Toy at the right wing of the barracks. You can find this near the beginning of the first objective ▼. |
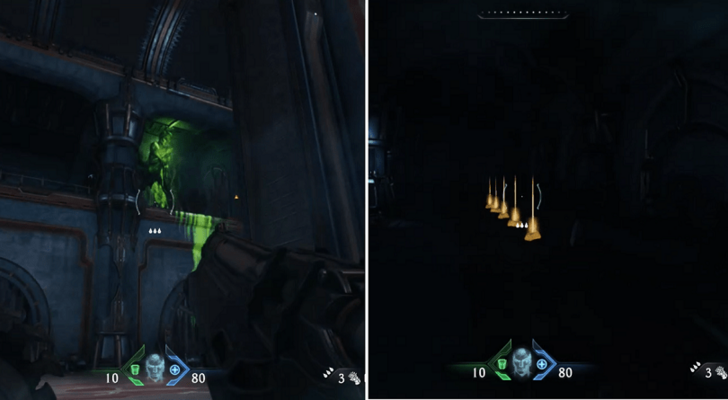 |
Go to the left side of the lift area and shield recall jump to the platform to find this gold trail. This can be found at the green platform section of the first objective ▼. |
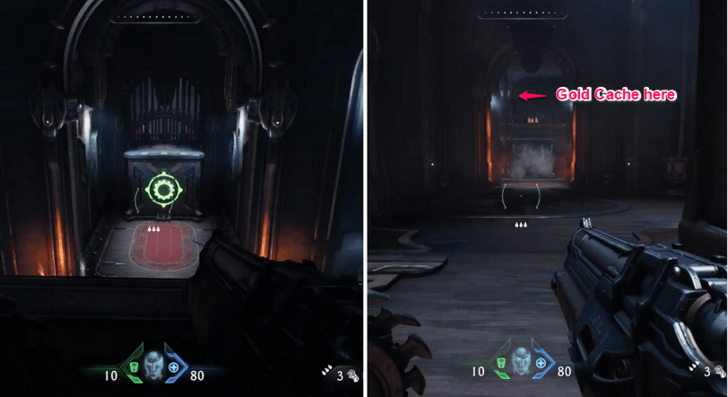 (Secret 5/6) |
Access this secret area by shield charging the metal crate and climbing the platform above. Melee the gold chest found on the left side of the mini gold trail. This can be found at the green platform section of the first objective ▼. |
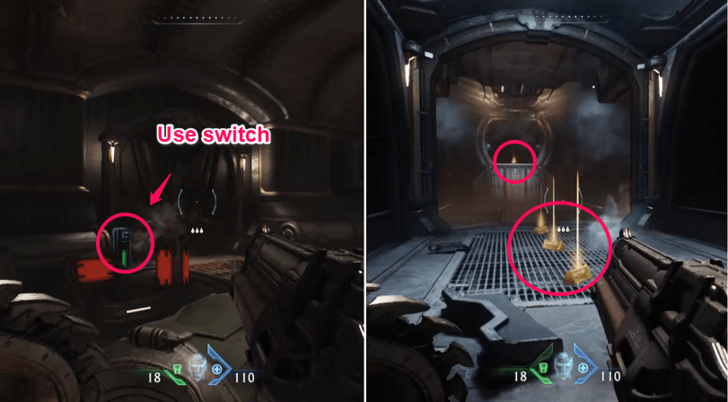 |
Found near the first Life Sigil. Access this area by using the door switch and following all the gold trail. You can find this during the first objective ▼. |
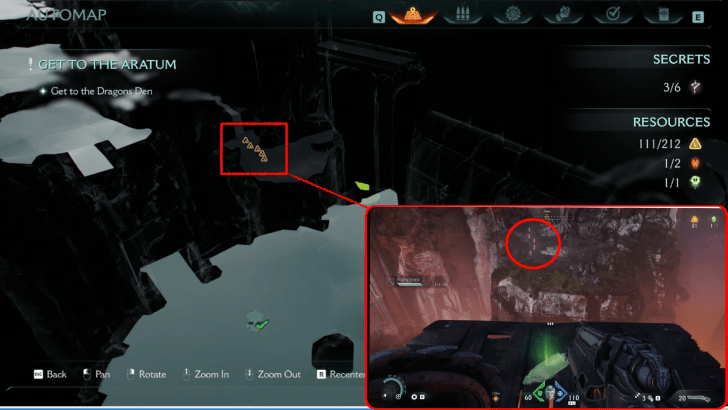 |
Found near the second Life Sigil. Access this area by jumping over the wide gap from the Mancubus Leader area and following the trail of gold. You can find this during the second objective ▼. |
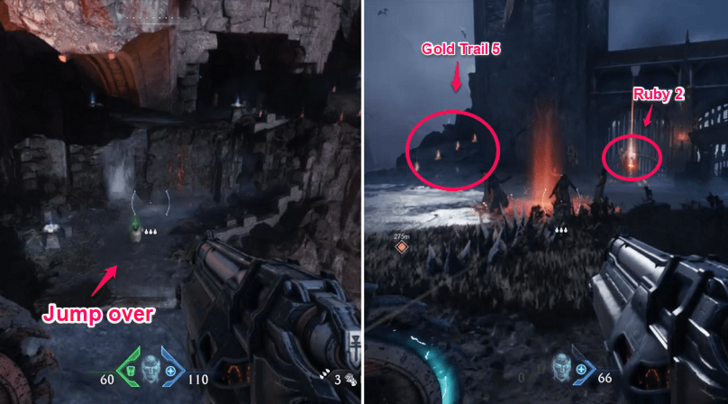 (Secret 6/6) |
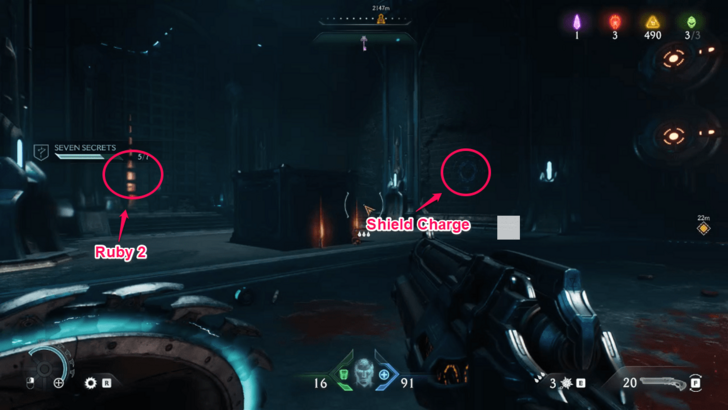
After jumping down the broken bridge, turn around and you will see an area far back. Access this secret area by jumping and go through enemies and fireballs, picking up gold trails and the second ruby found near Hell Cultists. These can be found after defeating the Mancubus Leader during the second objective ▼. |
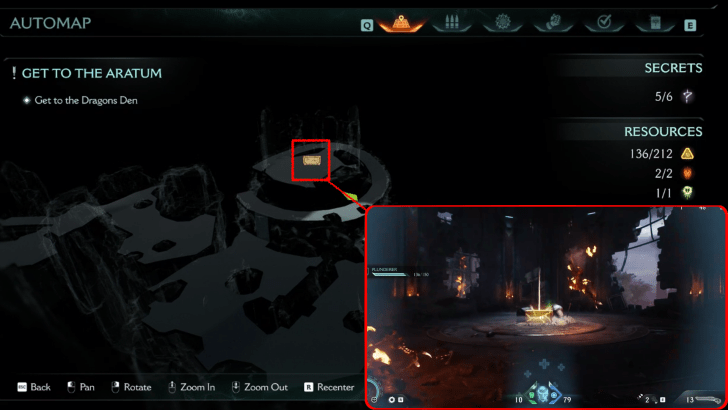 |
Found at the top of the broken tower by going to the right. This gold chest is guarded by 2 Nightmare Imp Stalkers.This can be found near the end of the second objective ▼. |
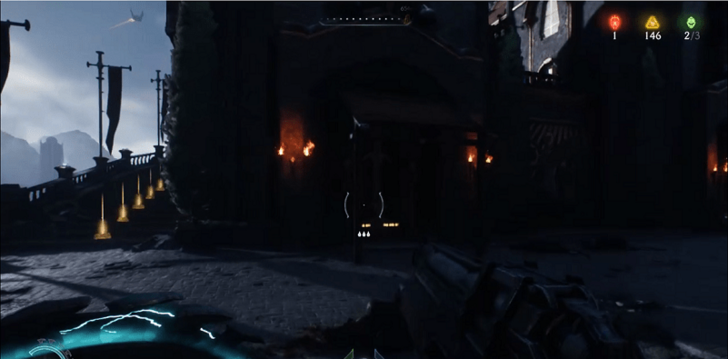 |
Found near the Nightmare Accelerator Skin. Follow the trail going up the stairs towards several refugees near the weapon skin. This can be found near the end of the second objective ▼. |
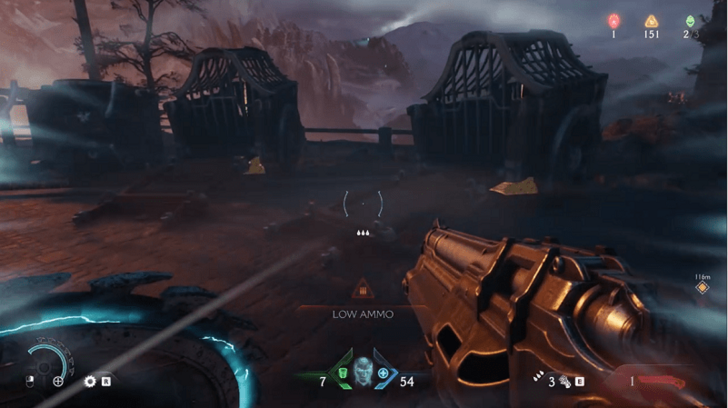 |
Hidden under wooden carriages at the last area before fighting the Vagary Champion. This can be found near the end of the second objective ▼. |
Sentinel Barracks Rubies
| Item | How to Get |
|---|---|
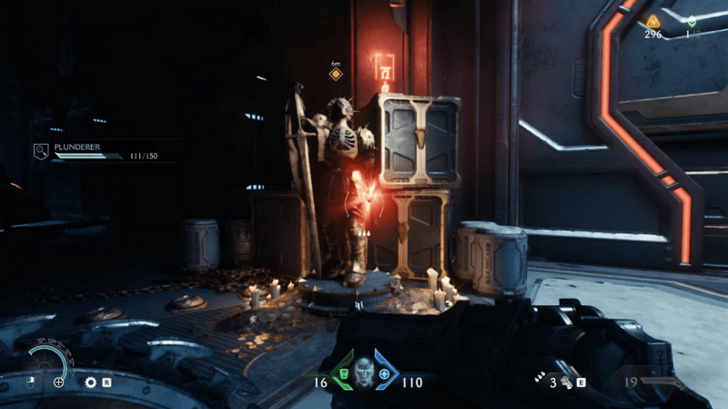 |
This one is is part of the main quest marker and cannot be missed. It is found near the Atlan hangar area before you acquire the Impaler weapon. This can be found near the end of the first objective ▼. |
 (Secret 6/6) |
After jumping down the broken bridge, turn around and you will see an area far back. Access this secret area by jumping and go through enemies and fireballs, picking up gold trail 5 and the secondy ruby found near Hell Cultists. These can be found after defeating the Mancubus Leader during the second objective ▼. |
Sentinel Barracks Walkthrough
| Main Objectives | |
|---|---|
| 1 | Clear the Barracks Secrets: Hell Knight Toy – Secret #1 Life Sigil 1 – Secret #3 Gold Chest 1 – Secret #5 |
| 2 | Get to the Dragon's Den Secrets: Nightmare Accelerator Skin – Secret #2 Life Sigil 2 – Secret #4 Gold Trail 5 – Secret #6 Ruby 2 – Secret #6 |
1. Clear the Barracks
| 1 | 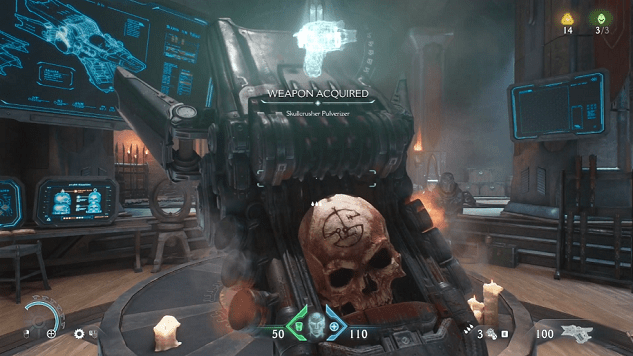 Enter the Sentinel Facility and clear the first wave of enemies after acquiring the Pulverizer. |
|---|---|
| 2 | 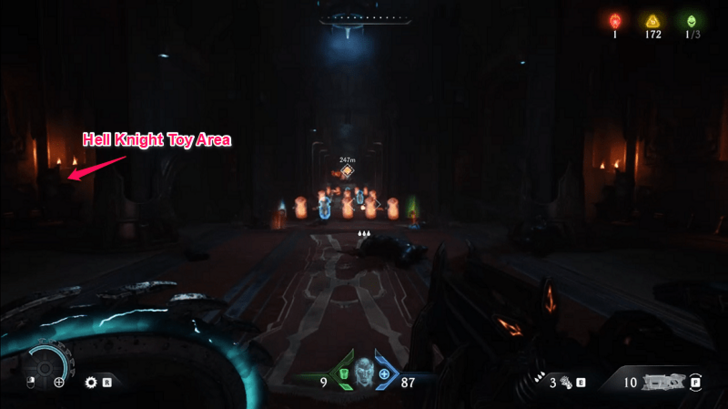 Go outside the barracks and run upstairs to defeat another horde of enemies outside and inside the barracks. The path to the Hell Knight Toy collectible is found at the left of the hallway with multiple Shield Soldiers. Collectible: Hell Knight Toy, Gold Trail 1 |
| 3 | 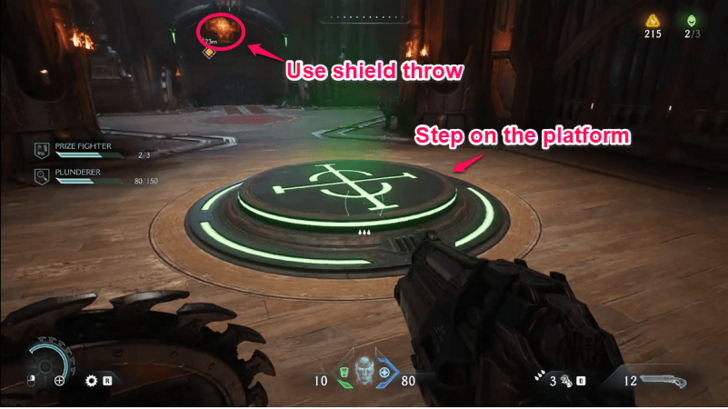 Find the green circular platform to lower down a metal piece and destroy it with the shield throw. Climb up towards the next area. Trails and chests of gold can also be found on the left and right sides of the area. Collectible: Gold Trail 2, Gold Chest 1 |
| 4 | 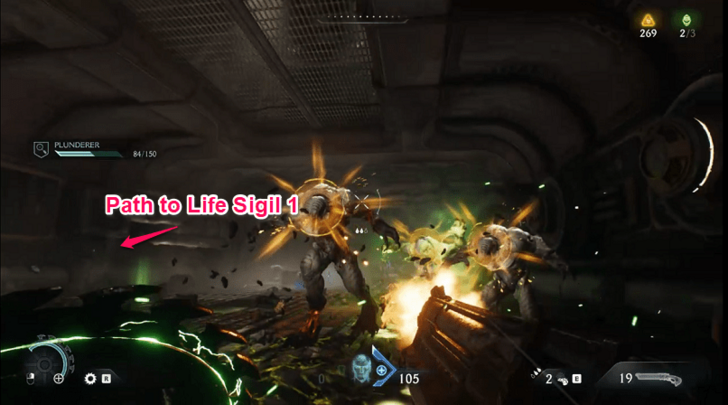 Fight multiple Hell Knights and Imps before jumping down to the Atlan hangar and fighting another round of demons once again. Collectible: Life Sigil 1, Gold Trail 3 |
| 5 | 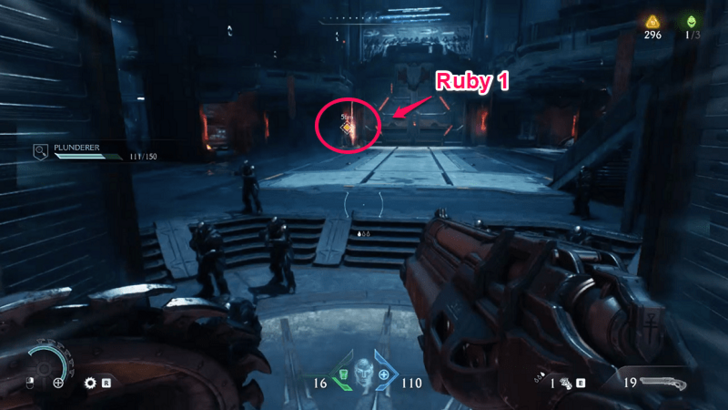 Once the wave of enemies has been cleared, a Ruby will be waiting at the end of the hangar. Collectible: Ruby 1 |
2. Get to the Dragon's Den
| 1 | 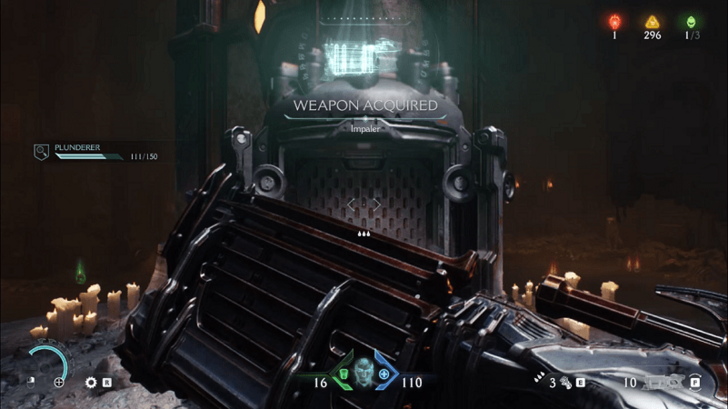 Power through another wave of demons and get acquainted with your newly acquired Impaler. |
|---|---|
| 2 | 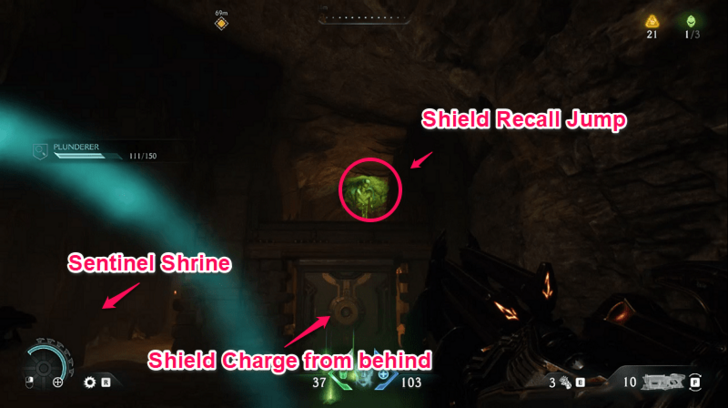 Upgrade as necessary witht the Sentinel Shrine. Towards the left side, use your shield recall jump to shield charge the metal crate from behind, creating a pathway upwards to the next area. |
| 3 | 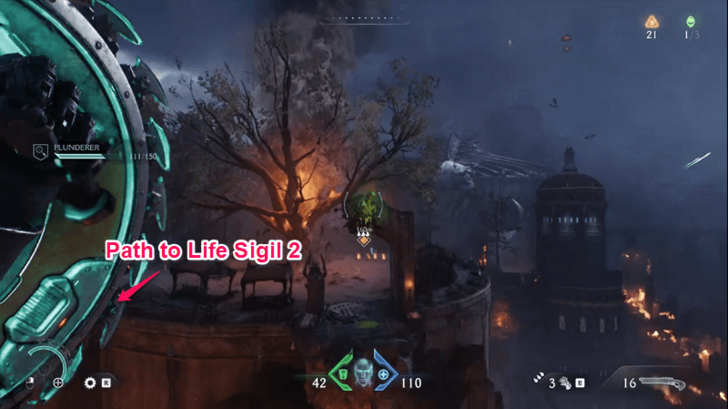 Shield recall jump over a wide gap towards the next area and defeat another wave of enemies including a Mancubus Leader that drops a Demonic Essence. Collectible: Demonic Essence - Armor, Life Sigil 2, Gold Trail 4 |
| 4 | 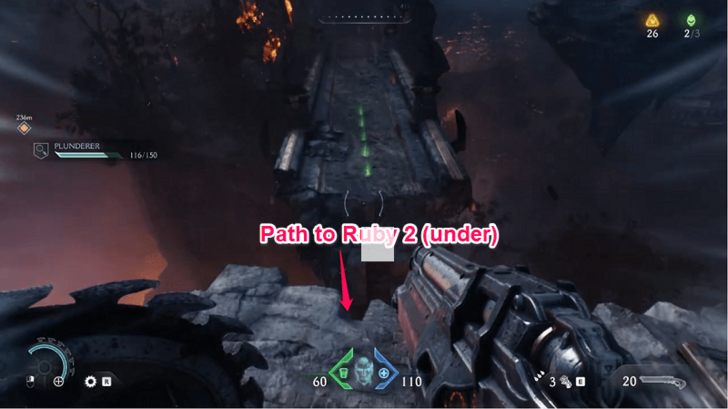 Jump below the broken bridge and turn around to find the path towards the second Ruby and Hell Cultists. Collectible: Ruby 2, Gold Trail 5 |
| 5 | 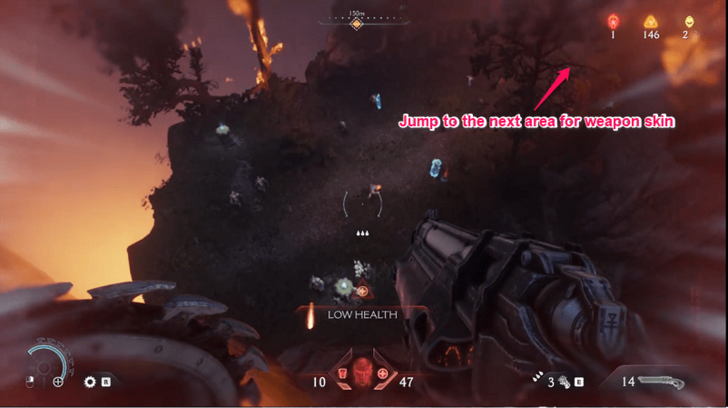 Get the Gold Chest above the tower and continue the path below while defeating enemies. The Nightmare Accelerator Skin can be found in the area with Lost Souls. Collectible: Nightmare Accelerator Skin, Gold Trail 6, Gold Chest 2, Gold Trail 7 |
| 6 | 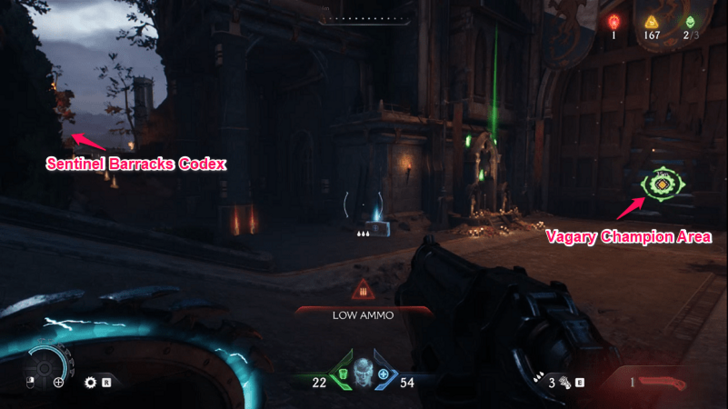 Before shield charging towards the Vagary Champion area, upgrade your equipment with the Sentinel Shrine. You can also pick up the Sentinel Barracks Codex by going to its left side. Collectible: Sentinel Barracks Codex |
| 7 | 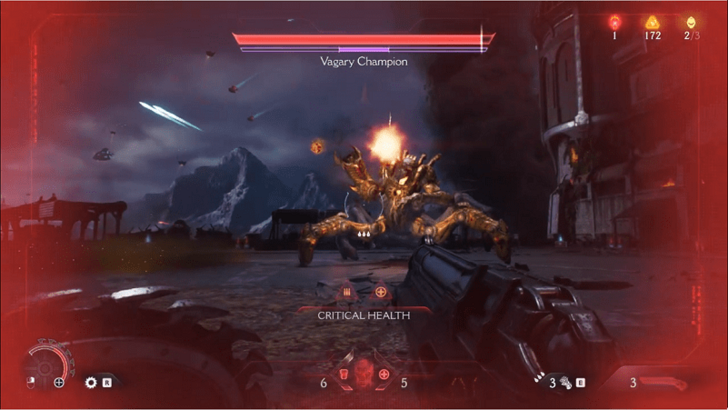 Defeat the Vagary Champion using a mix of parries, melee strikes, and your arsenal of weapons to clear the chapter. |
Sentinel Barracks Boss Guide
| Vagary Champion Combat Tips |
|---|
|
|
Keep Your Distance and Parry to Build Up Stun
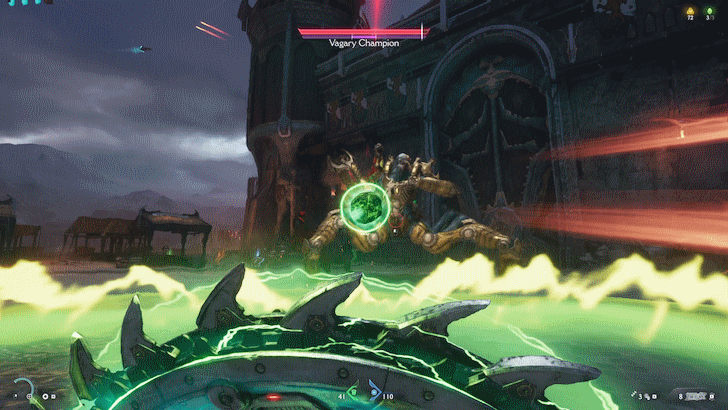
The Vagary Champion has quick melee attacks and a slowing projectile that can easily hit you on close and mid ranges. It's best to keep your distance and parry the green projectiles to build up the stun meter for an opening.
Attack the Exposed Legs and Abdomen When Stunned
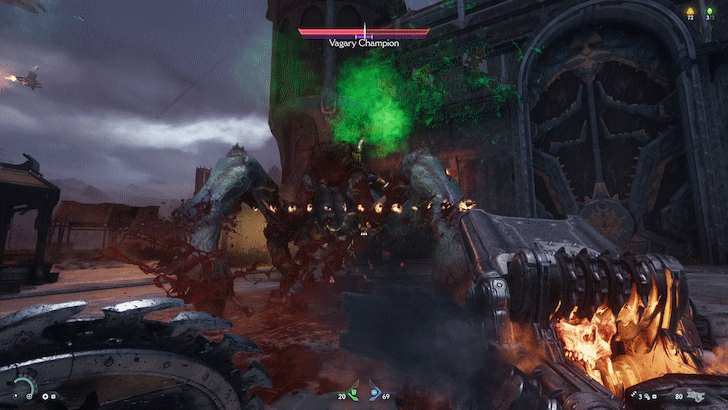
Upon filling the Stun Meter, go behind the Vagary Champion to attack its exposed abdomen and legs. The Pulverizer can be an effective weapon here as all of the bullets can hit simultaneously for massive damage.
Sentinel Barracks Mission Challenges
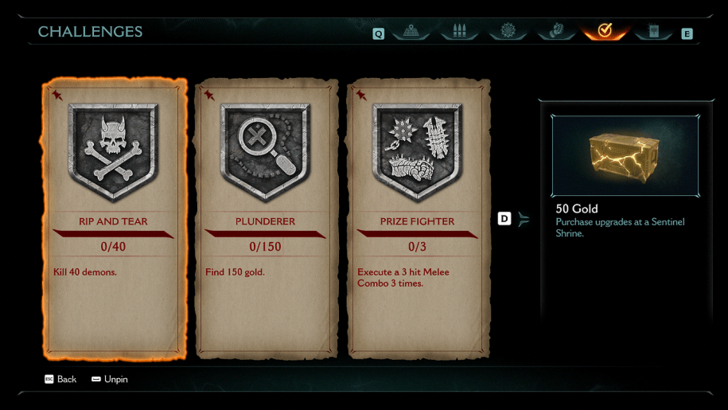 |
|
| Challenge | Details and Reward |
|---|---|
| Rip and Tear | Kill 40 demons Reward: 50 Gold |
| Plunderer | Find 150 Gold Reward: 50 Gold |
| Prize Fighter | Execute a 3 hit Melee Combo 3 times Reward: 50 Gold |
Rip and Tear
Simply proceed with the chapter as you fight through enemy hordes and you will eventually achieve this challenge. Use the Pulverizer, Shield Throw, or Shield Charge to quickly kill multiple enemies.
Plunderer
There is a total of 212 gold in Sentinel Barracks. Following this page's resources walkthrough will get you enough gold to achieve this challenge
Prize Fighter
Stack 3 Melee Strikes and unleash it all on heavy enemy units such as an Imp Stalker, Mancubus, or Hell Knight. You can quickly fill up these Melee Strike charges by parrying green projectiles or melee attacks from enemies.
Doom: The Dark Ages Related Guides

Full Walkthrough and List of Chapters
Comment
Author
Chapter 4: Sentinel Barracks Secrets and Walkthrough
improvement survey
03/2026
improving Game8's site?

Your answers will help us to improve our website.
Note: Please be sure not to enter any kind of personal information into your response.

We hope you continue to make use of Game8.
Rankings
- We could not find the message board you were looking for.
Gaming News
Popular Games

Genshin Impact Walkthrough & Guides Wiki

Honkai: Star Rail Walkthrough & Guides Wiki

Umamusume: Pretty Derby Walkthrough & Guides Wiki

Pokemon Pokopia Walkthrough & Guides Wiki

Resident Evil Requiem (RE9) Walkthrough & Guides Wiki

Monster Hunter Wilds Walkthrough & Guides Wiki

Wuthering Waves Walkthrough & Guides Wiki

Arknights: Endfield Walkthrough & Guides Wiki

Pokemon FireRed and LeafGreen (FRLG) Walkthrough & Guides Wiki

Pokemon TCG Pocket (PTCGP) Strategies & Guides Wiki
Recommended Games

Diablo 4: Vessel of Hatred Walkthrough & Guides Wiki

Fire Emblem Heroes (FEH) Walkthrough & Guides Wiki

Yu-Gi-Oh! Master Duel Walkthrough & Guides Wiki

Super Smash Bros. Ultimate Walkthrough & Guides Wiki

Pokemon Brilliant Diamond and Shining Pearl (BDSP) Walkthrough & Guides Wiki

Elden Ring Shadow of the Erdtree Walkthrough & Guides Wiki

Monster Hunter World Walkthrough & Guides Wiki

The Legend of Zelda: Tears of the Kingdom Walkthrough & Guides Wiki

Persona 3 Reload Walkthrough & Guides Wiki

Cyberpunk 2077: Ultimate Edition Walkthrough & Guides Wiki
All rights reserved
© 2025 ZeniMax Media Inc. All Rights Reserved.
The copyrights of videos of games used in our content and other intellectual property rights belong to the provider of the game.
The contents we provide on this site were created personally by members of the Game8 editorial department.
We refuse the right to reuse or repost content taken without our permission such as data or images to other sites.


![Monster Hunter Stories 3 Review [First Impressions] | Simply Rejuvenating](https://img.game8.co/4438641/2a31b7702bd70e78ec8efd24661dacda.jpeg/thumb)


