Chapter 7: Siege Part 2 Secrets and Walkthrough
☆ Doom: The Dark Ages is live now!
★ Collectibles | Secrets | Walkthrough
┗ Resources | Codex | Toy
★ Trophies | Beginner's Guide | Enemies
☆ Skins: Twitch Drops | Prince St. Pizza
★ FAQs: Co-op | DLC | Specs | Glory Kills
Chapter 7: Siege - Part 2 in Doom: the Dark Ages contains 9 secrets and 3 collectibles. Learn how to get all the secrets, gold, and collectibles, as well as how to complete the Mission Challenges in this Chapter 7 walkthrough guide.
| ◄ Previous Chapter | Next Chapter ▶ |
|---|---|
| Siege - Part 1 | Abyssal Forest |
Siege Part 2 Secrets and Collectibles
Siege Part 2 Interactive Map
| Jump to a Collectible! | |
|---|---|
| Toys | 1 |
| Skins | 1 |
| Codex | 1 |
| Life Sigils | 3 |
| Demonic Essence | 1 |
| Gold | 183 |
| Rubies | 2 |
| Secrets | 9 |
Siege Part 2 Toys
| Item | How to Get |
|---|---|
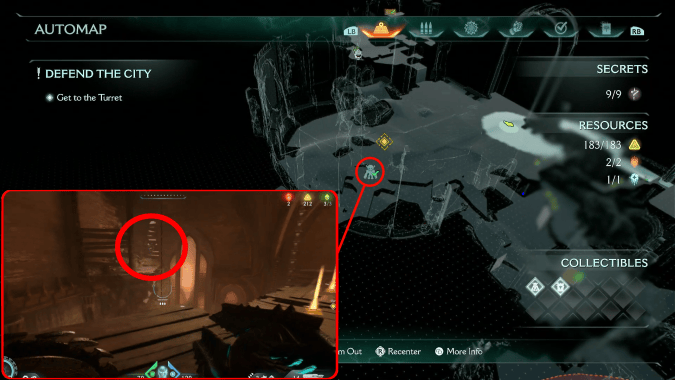 (Secret 3/9) |
On the second floor of the church area, there is a gap you can jump across which has a blue-marked door on the opposite end. Shield bash through and find a wall you can climb up. Inside is a Gold Trail and a Pinky Rider Toy. This is obtained during the second objective ▼. |
Siege Part 2 Skins
| Item | How to Get |
|---|---|
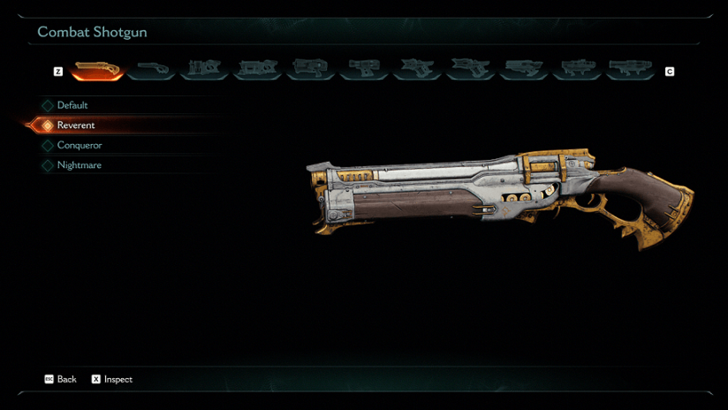 (Mission Challenge) |
This weapon skin can only be acquired after achieving the Exterminator mission challenge. |
Siege Part 2 Codex Entries
| Item | How to Get |
|---|---|
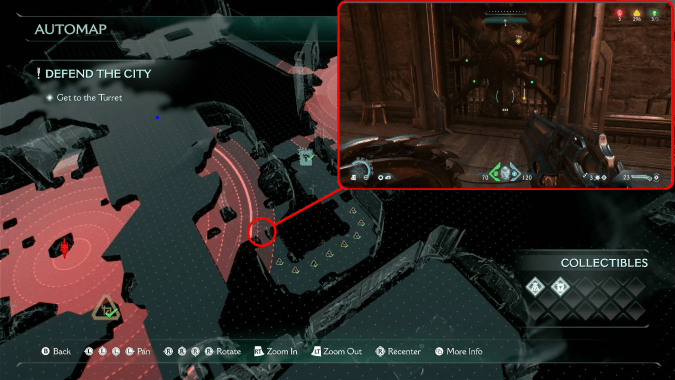 (Secret 7/9) |
After getting the Secret Key, drop down into the courtyard area to find a door with a purple lock on the left end of the wall. Go inside and defeat the monsters to obtain the Siege Part 2 Codex. This is obtained during the second objective ▼. |
Siege Part 2 Life Sigils
| Item | How to Get |
|---|---|
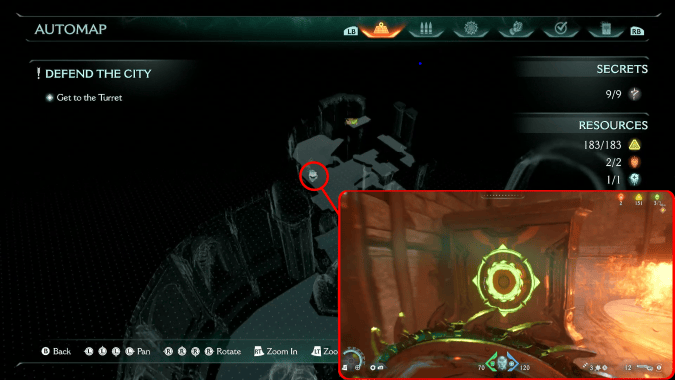 (Secret 1/9) |
In the room with the Mancubus, use your Shield Bash to push the box against the wall, revealing a blue-marked door containing a Life Sigil. This is obtained during the second objective ▼. |
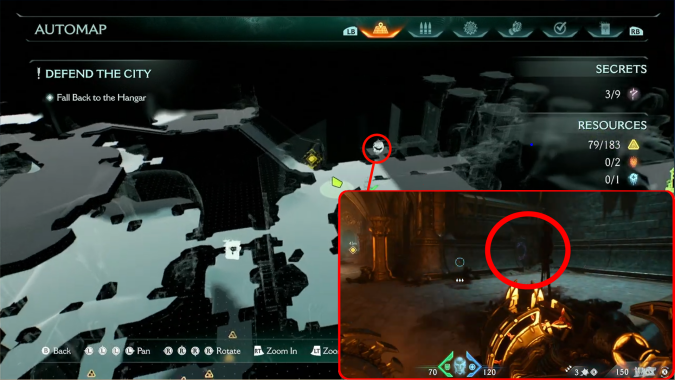 (Secret 4/9) |
In the long curved hallway with the Mancubus, turn left through a doorway to find a blue-marked door which you can break with your shield to find a hidden area containing a Life Sigil. This is obtained during the second objective ▼. |
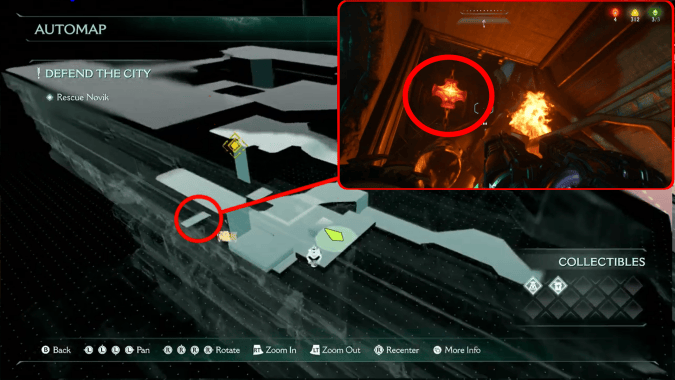 (Secret 9/9) |
After falling down from the ship, you'll find an area with a Fan with a grate blocking it Fan with a grate blocking it 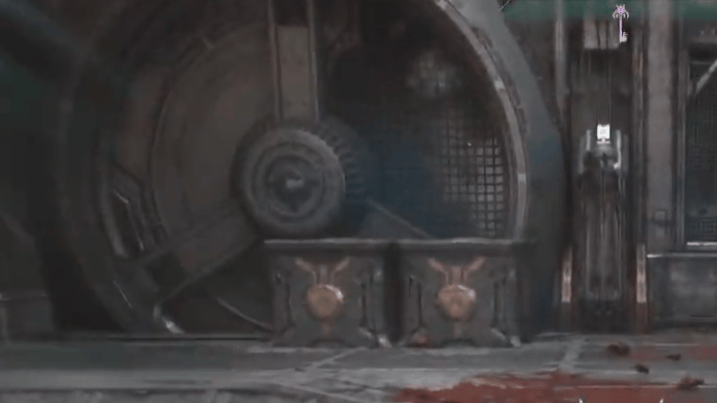 |
Siege Part 2 Demonic Essence
| Item | How to Get |
|---|---|
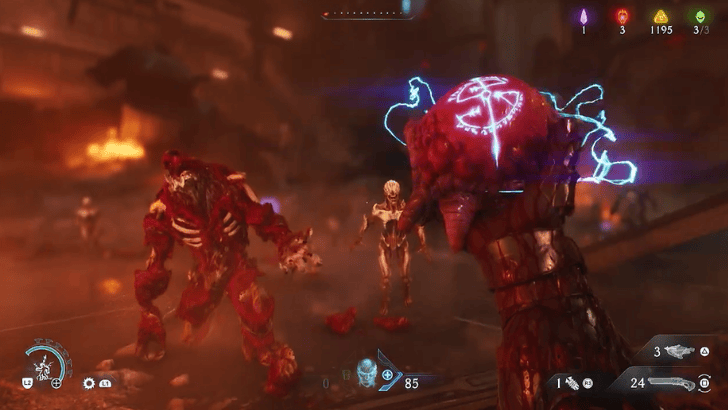 |
Obtained by defeating the Mancubus Leader found in the area after shield recall, jumping over a broken bridge. Increases maximum armor capacity. This is obtained during the third objective ▼. |
Siege Part 2 Gold
| Item | How to Get |
|---|---|
 (Secret 1/9) |
In the same secret room as Life Sigil 1. This is obtained during the second objective. |
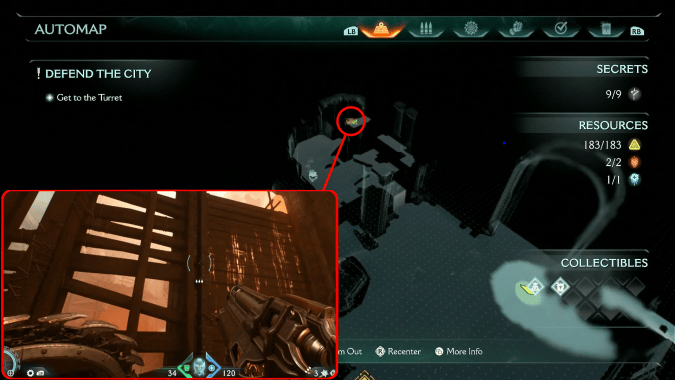 (Secret 2/9) |
In the same area as Life Sigil 1, find an opening leading to a box you can climb up. Continue climbing up two more walls to find the Gold Cache. This is obtained during the second objective ▼. |
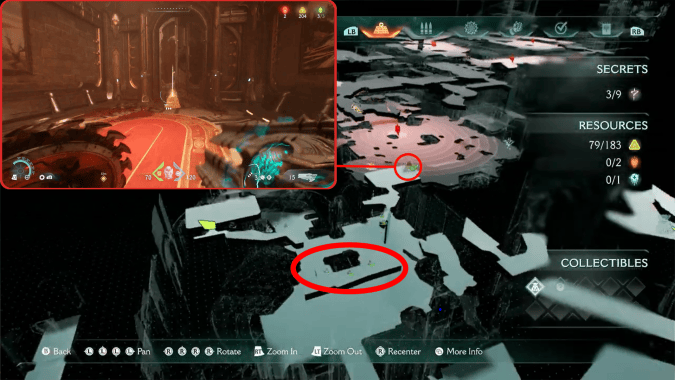 |
On the second floor of the church, find the cache ina a room with demons, then find the trail next door in the hallway with platforms containing the entrance to the secret area with the Pinky Rider Toy. This is obtained during the second objective ▼. |
 (Secret 3/9) |
Right before the Pinky Rider Toy; follow the same steps as described in that section to find it. This is obtained during the second objective. |
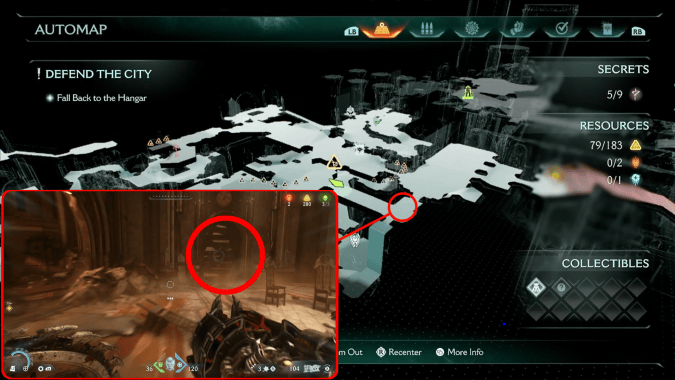 (Secret 5/9) |
In the hallway with chairs, you'll find a blue-marked door on one wall. Continue ahead and grab the Gold Cache (x8) on the right, then turn left to find the Gold Trail (x7) and a jump pad; you'll also find the Secret Key across the gap from the jump pad. This is obtained during the second objective ▼. |
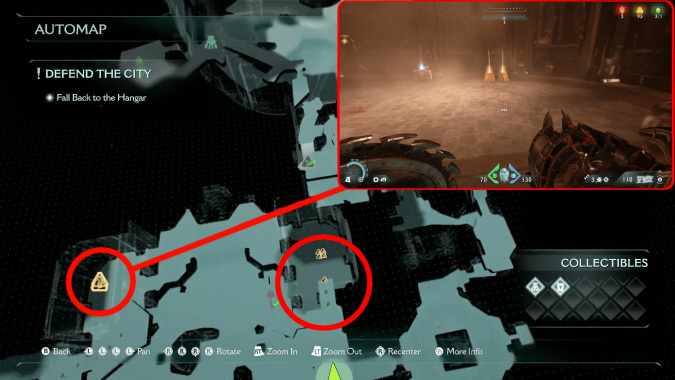 |
Right after obtaining the Secret Key, go into the door and to the left to get the 3 gold, then fall down to obtain 4 gold. Go across to the near corner of the courtyard to find 16 more gold. This is obtained during the second objective ▼. |
 |
In the room leading to the Siege Part 2 Codex; follow the same steps to get it. third objective ▼ |
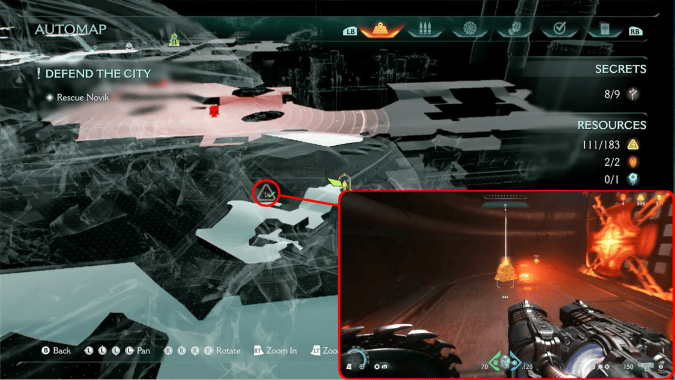 |
On the ship, right before you jump out the exit to the next area. This is obtained during the second objective ▼. |
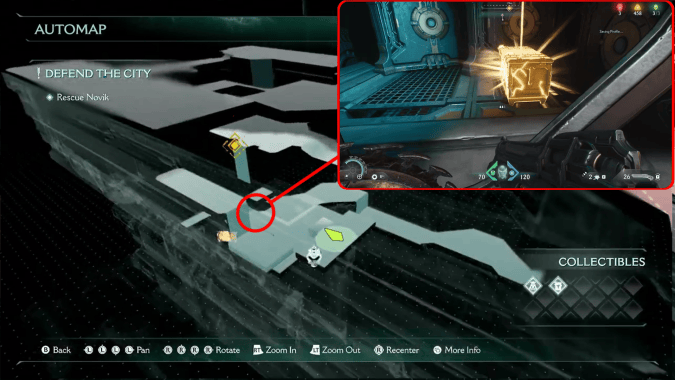 |
Follow the same steps as Life Sigil 3, and after the wall is lowered, it will reveal a new gap in the wall containing a Gold Chest. This is obtained during the third objective ▼ |
Siege Part 2 Rubies
| Item | How to Get |
|---|---|
 (Secret 6/9) |
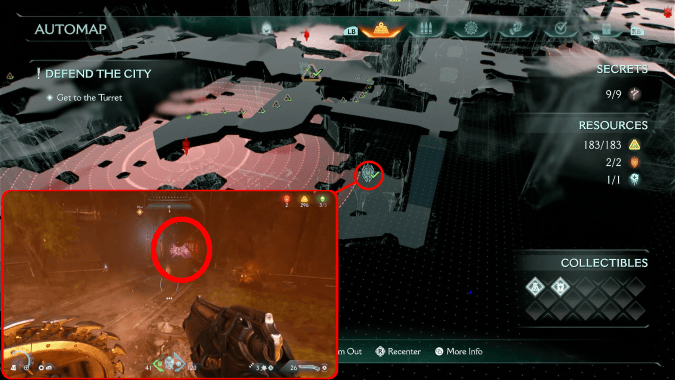
After getting the Secret Key, drop down into the courtyard area to find a door with a purple lock in the middle of the wall. Go inside to find the Ruby. This is obtained during the second objective ▼. |
 (Secret 8/9) |
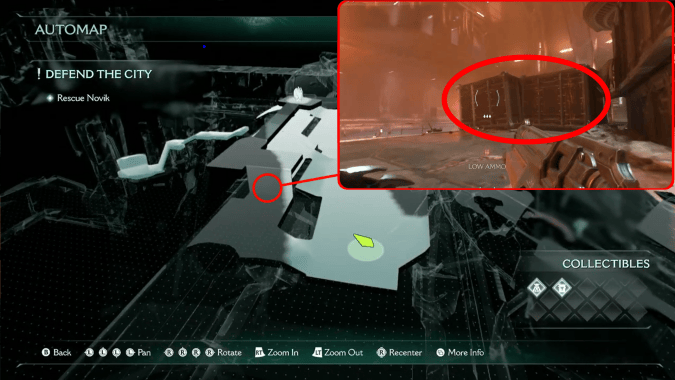
In the area with the crashed airship, find two crates which you can climb up. Go along the path to find the Ruby. This is obtained during the third objective ▼. |
Siege Part 2 Walkthrough
| Main Objectives | |
|---|---|
| 1 | Get to the Turret |
| 2 | Fall Back to the Hangar Secrets: Life Sigil 1 & Gold Trail 1 (x3) – Secret #1 Gold Chest 1 (x50) – Secret #2 Pinky Rider Toy & Gold Trail 3 (x8) – Secret #3 Life Sigil 2 – Secret #4 Gold Cache 2 (x8) & Gold Trail 4 (x7) – Secret #5 Ruby 1 – Secret #6 Siege Part 2 Codex – Secret #7 |
| 3 | Rescue Novik Secrets: Ruby 2 – Secret #8 Life Sigil 3 – Secret #9 |
1. Get to the Turret
| 1 | 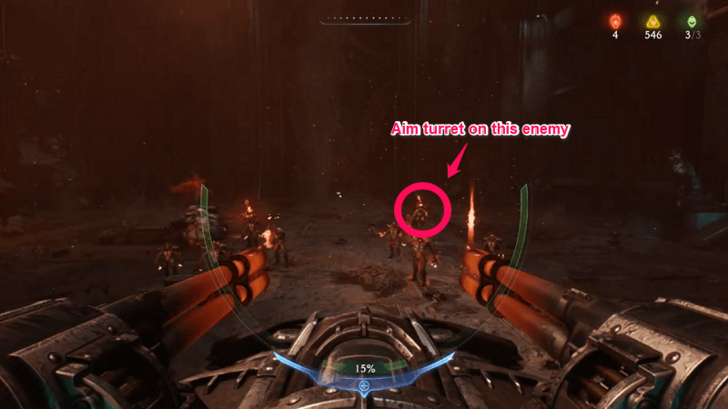 Run to the Turret in the main plaza and stand your ground against 5 waves of enemies. It is recommended to aim at fire barrel demons to make them explode and clear the wave fast. |
|---|---|
| 1 | 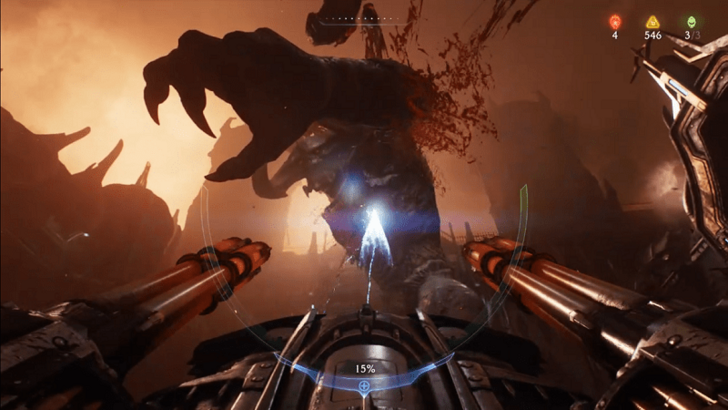 An Armored Titan will eventually crash in from the main gate after 5 waves. Keep firing the turret to reach 100% charge and fire a bolt. Shoot the bolt 4 times to defeat the Armored Titan. |
2. Fall Back to the Hangar
| 1 | 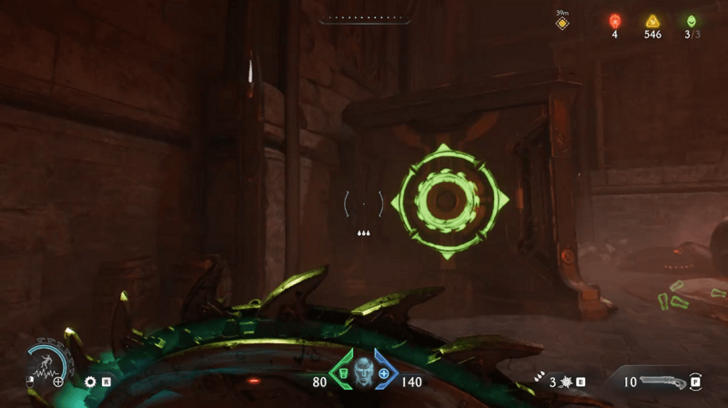 Follow the objective marker by climbing a wall to the left and eventually shield bashing a metal crate. Shield bash through a wooden barrier on the left for a secret area. Collectible: Life Sigil 1, Gold Trail 1 (x3) |
|---|---|
| 2 | 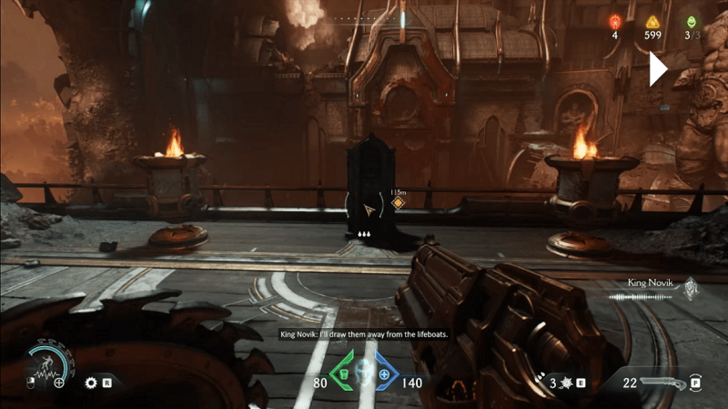 Climb another wall and then turn around to climb another one to find a secret area and fight off against Arachnotrons before interacting with the switch. Collectible: Gold Chest 1 (x50) |
| 3 | 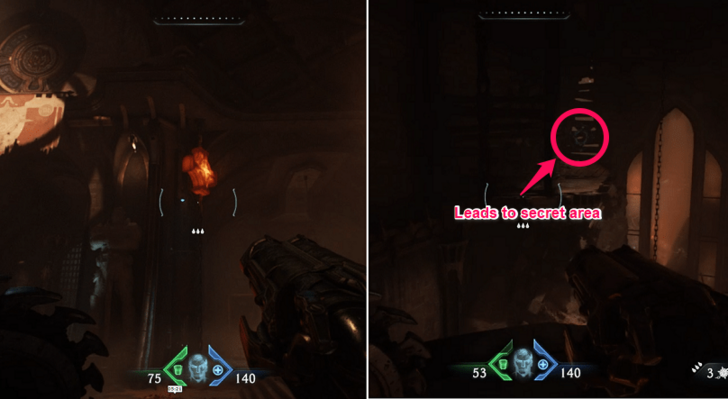 Enter the gate in front and defeat a wave of enemies before shield throwing and climbing a wall. At top, shield bash through a wooden barrier that leads to another secret area Collectible: Pinky Rider Toy, Gold Trail 3 (x8) |
| 4 | 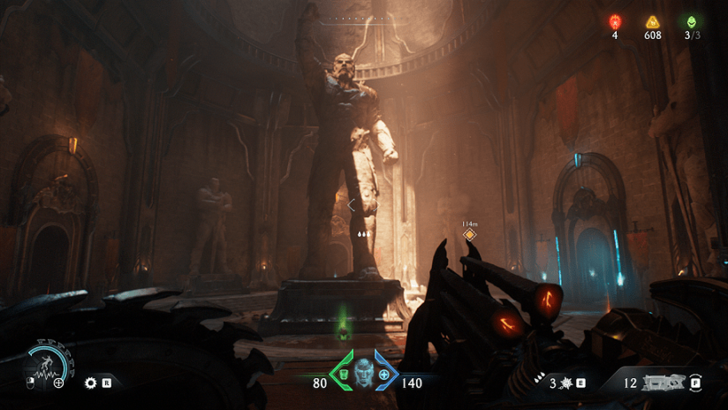 Continue following the objective marker and jump through platforms before landing on a point of no return in front of a large statue. Defeat the enemies here. Collectible: Gold Cache 1 (x8), Gold Trail 2 (x10) |
| 5 | 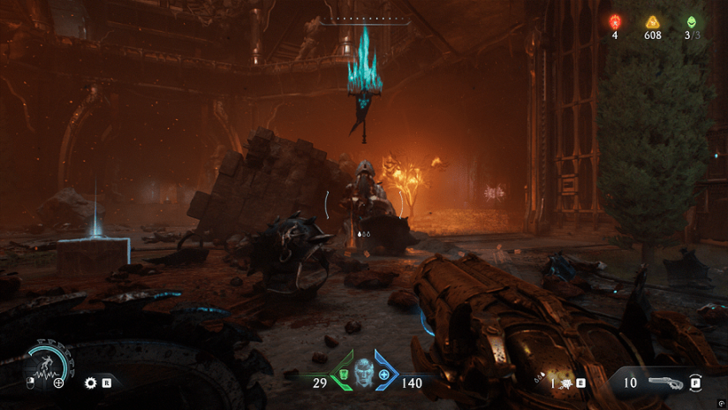 You will eventually reach an open area and fight a wave of enemies including a Plinky Rider Enforcer. The secret area in this zone is locked behind a gate that can be opened by a Secret Key. Collectible: Gold Trail 5 (x7), Gold Cache 3 (x16), Ruby 1, Siege Part 2 Codex |
| 6 | 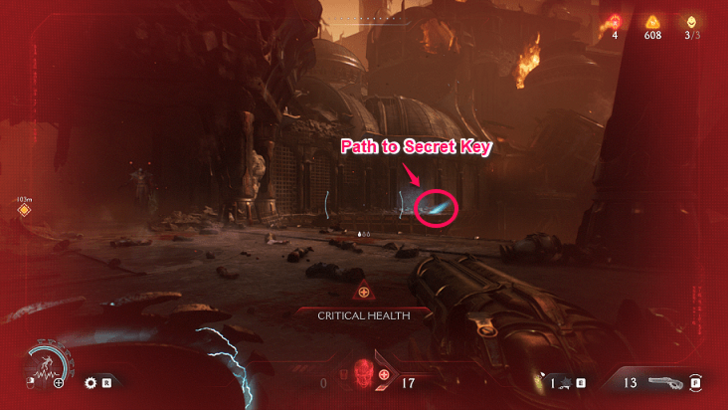 Continue following the objective markers and fight another wave before going upstairs to clear another horde of demons. You will find a launch pad to the right that leads to the Secret Key. Collectible: Life Sigil 2, Gold Cache 2 (x8), Gold Trail 4 (x7), Secret Key |
| 7 | 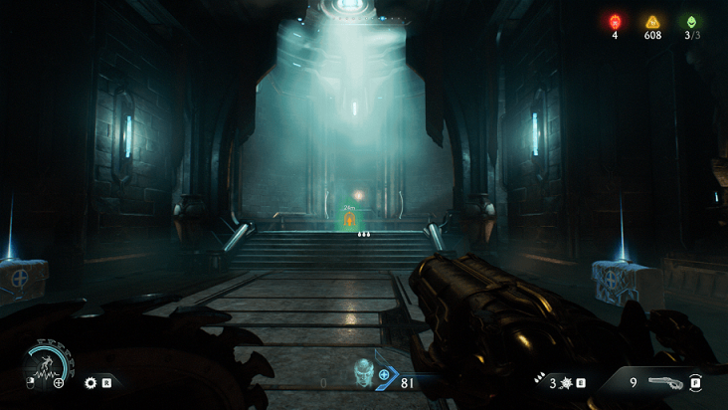 Continue going upstairs and defeat a last wave of enemies before going into a lift leading to a point of no return. |
3. Rescue Novik
| 1 | 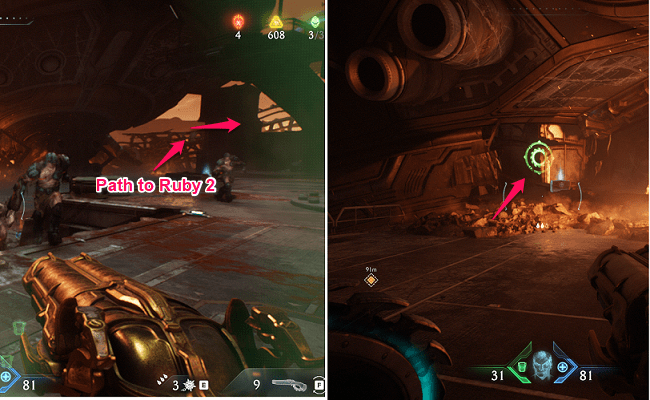 Reach the platform with a damaged airship and clear the enemies before shield charging through a green ring. There is also a secret area behind the airship. Collectible: Ruby 2, Gold Trail 6 (x8) |
|---|---|
| 2 | 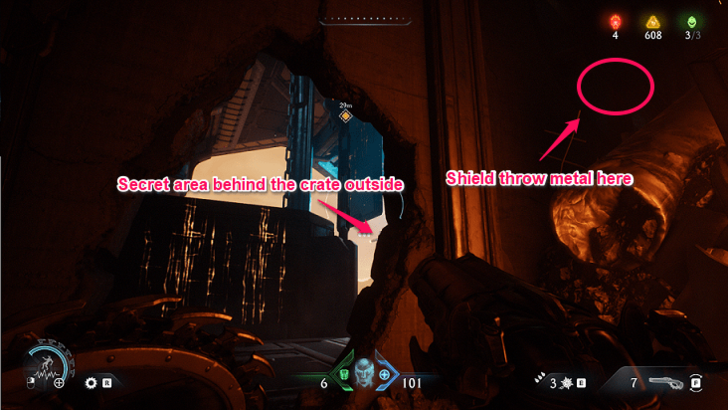 Follow the objective marker and you will reach another point of no return. In this area, fight off the demons and then enter a gap to the left before shield throwing a metal chain to bring down a lift and open a secret area to the right. Collectible: Life Sigil 3, Gold Chest 2 (x50) |
| 3 | 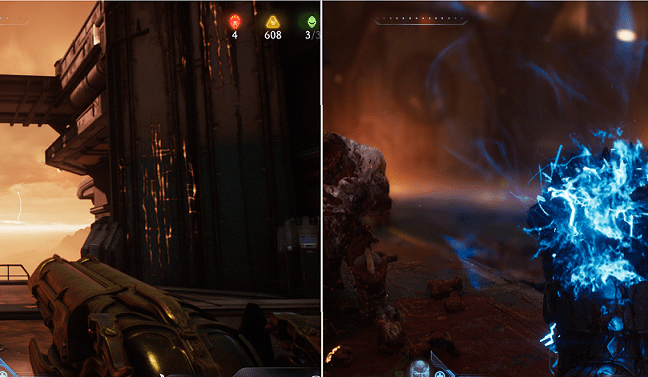 Continue climbing until you reach another zone where you fight another horde of enemies, including a Battle Knight Leader. Collectible: Demonic Essence - Health |
| 4 | 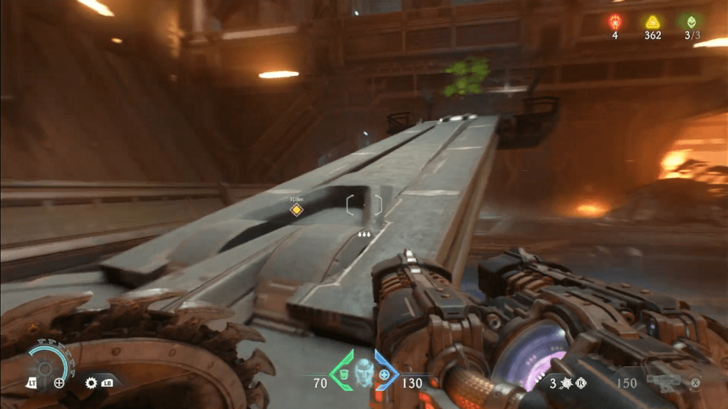 Get to the other side by climbing and then shield recall jumping near a Sentinel Shrine. Enter the lift to the left to complete the chapter. |
Secret Key Location

In the hallway with chairs, you'll find a blue-marked door on one wall. Continue ahead and grab the Gold Cache (x8) on the right, then turn left to find the Gold Trail (x7) and a jump pad; the Secret Key is across the gap from the jump pad.
Siege Part 2 Mission Challenges
 |
|
| Challenge | Details and Reward |
|---|---|
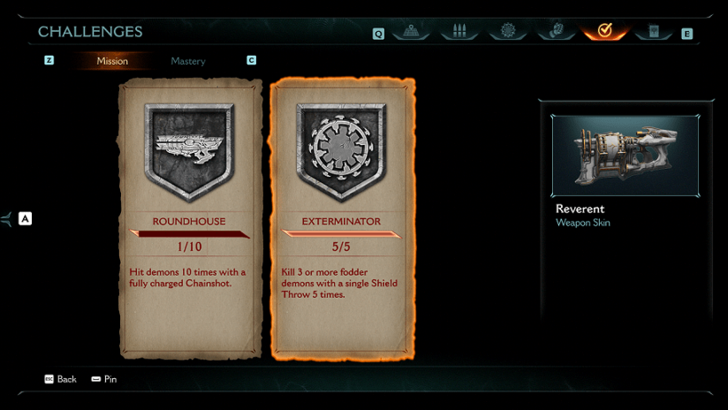
| Roundhouse | Hit demons 10 times with a fully charged Chainshot Reward: 50 Gold |
| Exterminator | Kill 3 or more fodder demons with a single Shield Throw 5 times. Reward: Reverent Shredder Skin |
Roundhouse
Fight through enemy hordes while using a fully charged Reaver Chainshot. This is made easier with the Cosmic Breach upgrade from the Sentinel Shrine.
Reaver Chainshot Upgrades and How to Get
Exterminator
Fodder enemies are demons that usually die in one shot such as Zombies, Soldiers, and Imps. Wait for 3 or more of them to line up before shield throwing. This is made easier with the Extended Surge upgrade from the Sentinel Shrine.
Doom: The Dark Ages Related Guides

Full Walkthrough and List of Chapters
Comment
Author
Chapter 7: Siege Part 2 Secrets and Walkthrough
improvement survey
03/2026
improving Game8's site?

Your answers will help us to improve our website.
Note: Please be sure not to enter any kind of personal information into your response.

We hope you continue to make use of Game8.
Rankings
- We could not find the message board you were looking for.
Gaming News
Popular Games

Genshin Impact Walkthrough & Guides Wiki

Honkai: Star Rail Walkthrough & Guides Wiki

Umamusume: Pretty Derby Walkthrough & Guides Wiki

Pokemon Pokopia Walkthrough & Guides Wiki

Resident Evil Requiem (RE9) Walkthrough & Guides Wiki

Monster Hunter Wilds Walkthrough & Guides Wiki

Wuthering Waves Walkthrough & Guides Wiki

Arknights: Endfield Walkthrough & Guides Wiki

Pokemon FireRed and LeafGreen (FRLG) Walkthrough & Guides Wiki

Pokemon TCG Pocket (PTCGP) Strategies & Guides Wiki
Recommended Games

Diablo 4: Vessel of Hatred Walkthrough & Guides Wiki

Fire Emblem Heroes (FEH) Walkthrough & Guides Wiki

Yu-Gi-Oh! Master Duel Walkthrough & Guides Wiki

Super Smash Bros. Ultimate Walkthrough & Guides Wiki

Pokemon Brilliant Diamond and Shining Pearl (BDSP) Walkthrough & Guides Wiki

Elden Ring Shadow of the Erdtree Walkthrough & Guides Wiki

Monster Hunter World Walkthrough & Guides Wiki

The Legend of Zelda: Tears of the Kingdom Walkthrough & Guides Wiki

Persona 3 Reload Walkthrough & Guides Wiki

Cyberpunk 2077: Ultimate Edition Walkthrough & Guides Wiki
All rights reserved
© 2025 ZeniMax Media Inc. All Rights Reserved.
The copyrights of videos of games used in our content and other intellectual property rights belong to the provider of the game.
The contents we provide on this site were created personally by members of the Game8 editorial department.
We refuse the right to reuse or repost content taken without our permission such as data or images to other sites.




![Monster Hunter Stories 3 Review [First Impressions] | Simply Rejuvenating](https://img.game8.co/4438641/2a31b7702bd70e78ec8efd24661dacda.jpeg/thumb)


