Chapter 14: Spire of Nerathul Secrets and Walkthrough
☆ Doom: The Dark Ages is live now!
★ Collectibles | Secrets | Walkthrough
┗ Resources | Codex | Toy
★ Trophies | Beginner's Guide | Enemies
☆ Skins: Twitch Drops | Prince St. Pizza
★ FAQs: Co-op | DLC | Specs | Glory Kills
Chapter 14: Spire of Nerathul in Doom: the Dark Ages contains 11 secrets and 5 collectibles. Learn how to get all the secrets, gold, and collectibles, as well as how to complete the Mission Challenges in this Chapter 14 walkthrough guide.
| ◄ Previous Chapter | Next Chapter ▶ |
|---|---|
| From Beyond | City of Ry'uul |
Spire of Nerathul Secrets and Collectibles
Spire of Nerathul Interactive Map
| Jump to a Collectible! | |
|---|---|
| Toys | 2 |
| Skins | 1 |
| Codex | 2 |
| Life Sigils | 3 |
| Gold | 359 |
| Rubies | 3 |
| Wraithstone | 2 |
| Demonic Essence | 2 |
| Secrets | 11 |
Spire of Nerathul Toys
| Item | How to Get |
|---|---|
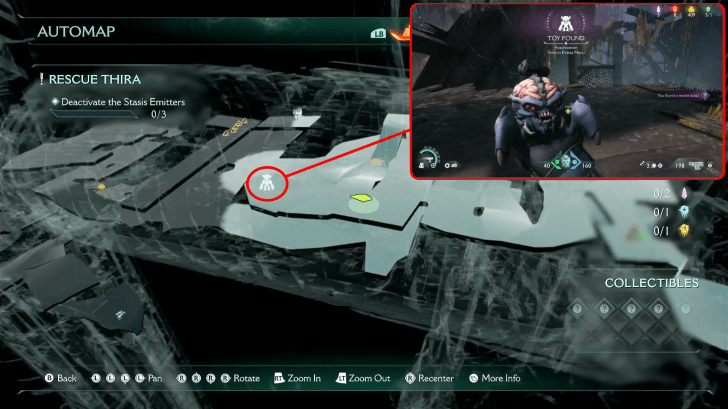 (Secret 2/11) |
Found on the second floor, which can be accessed by breaking the wall wall 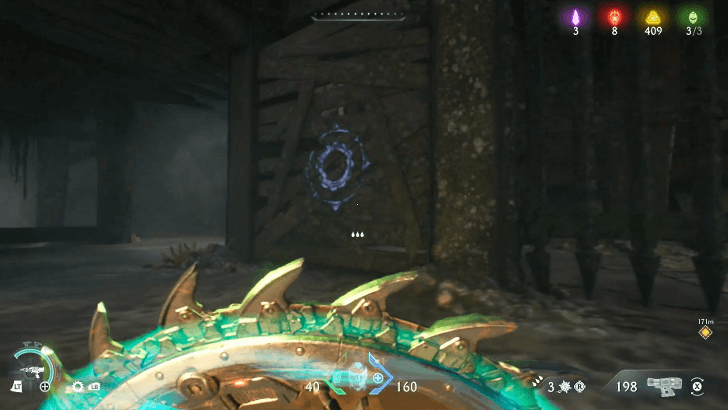 |
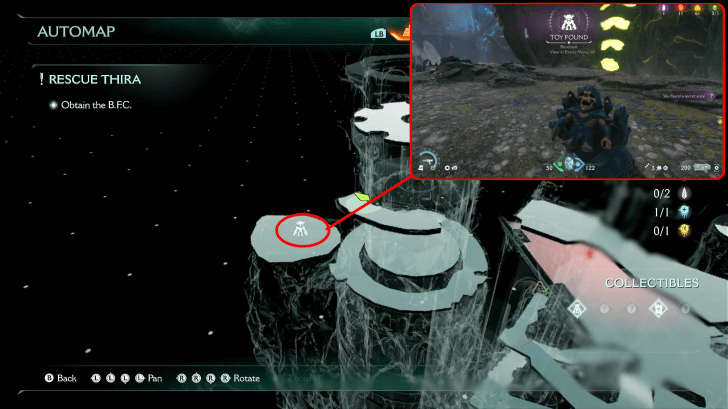 (Secret 9/11) |
It can be found by jumping off a ledge, which can be reached by using the jump boost jump boost 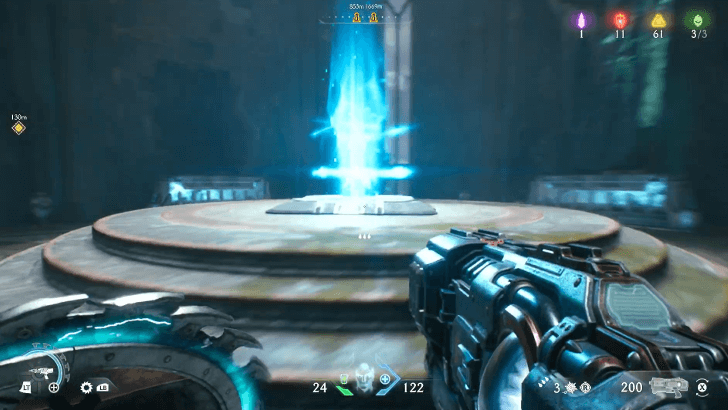 |
Spire of Nerathul Skins
| Item | How to Get |
|---|---|
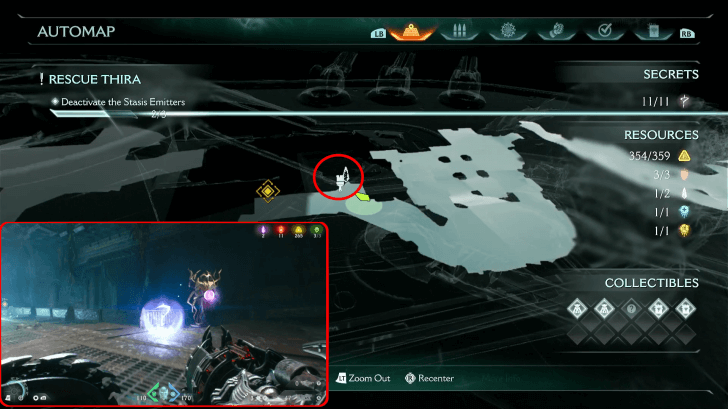 (Secret 11/11) |
Accessible through a blue portal, leading to an area littered with enemies. Defeat all the demons and head to the upper area, where you will find the Grenade Launcher weapon skin and a Wraithstone beside it. This can be obtained during the second objective ▼ in in the second Secret Landing Spot. |
Spire of Nerathul Codex Entries
| Item | How to Get |
|---|---|
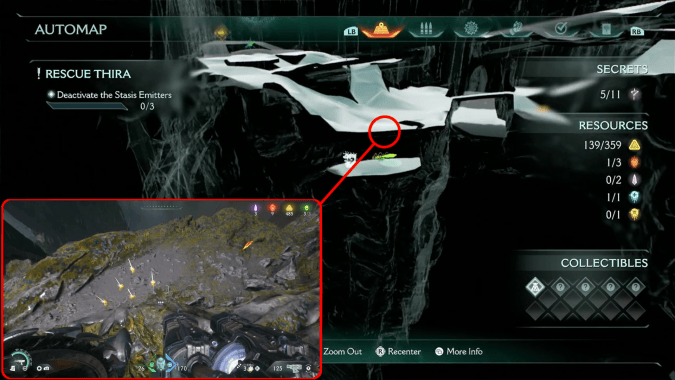 |
At the edge of the cliff where you can look up and see a Green Statue, look down off the side of the cliff to see an area you can fall to, containing the Spire of Nerathul Codex and Gold Trail 2 (x5). This can be obtained during the second objective ▼ in Area 3. |
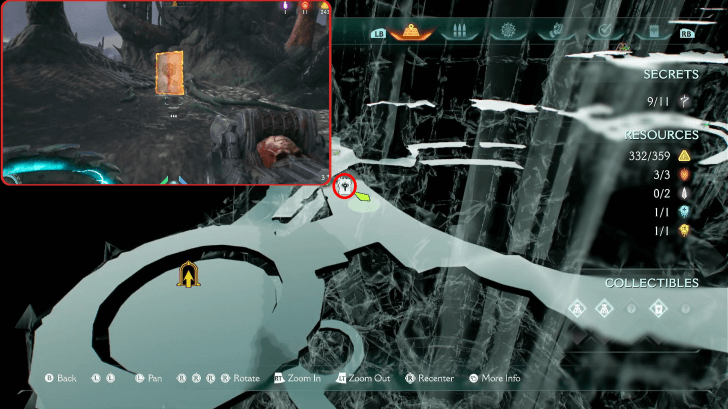 |
Located just before the elevator that leads to the Old One release mechanism area. This can be obtained during the fourth objective ▼. |
Spire of Nerathul Life Sigils
| Item | How to Get |
|---|---|
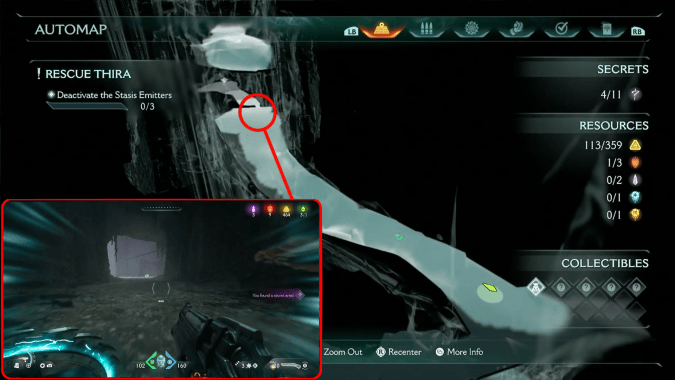 (Secret 5/11) |
Continue down a long stone bridge to find a Life Sigil and a Gold Cache (x16). When you reach it, you will be attacked by a Komodo Champion. This can be obtained during the first objective ▼. |
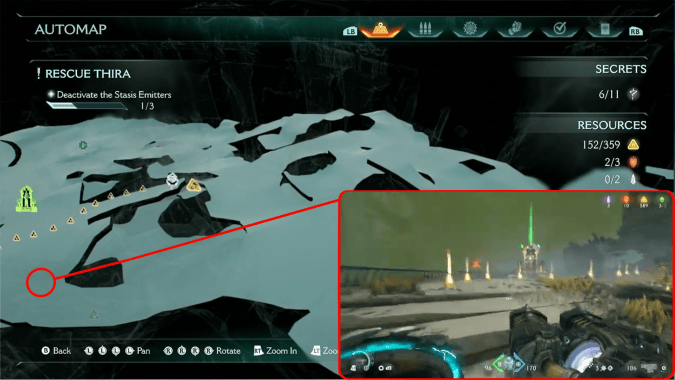 (Secret 7/11) |
Climb up the spiral pathway to the top to find an area with a Gold Trail and a Life Sigil, but watch out for enemies. This can be obtained during the second objective ▼ in Area 2. |
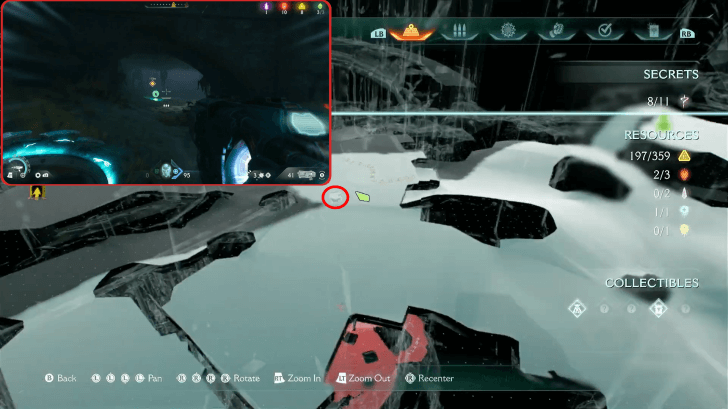 |
Found in the secret area underneath the arena, close to the sentinel shrine. Shares the same spot as Gold Trail 6.. This can be obtained during the second objective ▼. |
Spire of Nerathul Gold
| Item | How to Get |
|---|---|
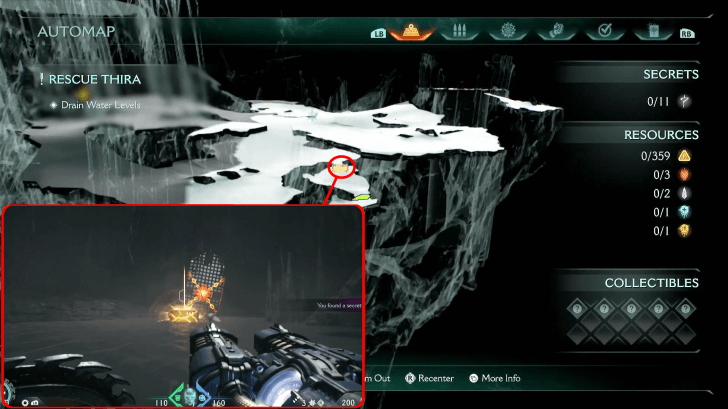 (Secret 1/11) |
Drop down the
ledge ledge 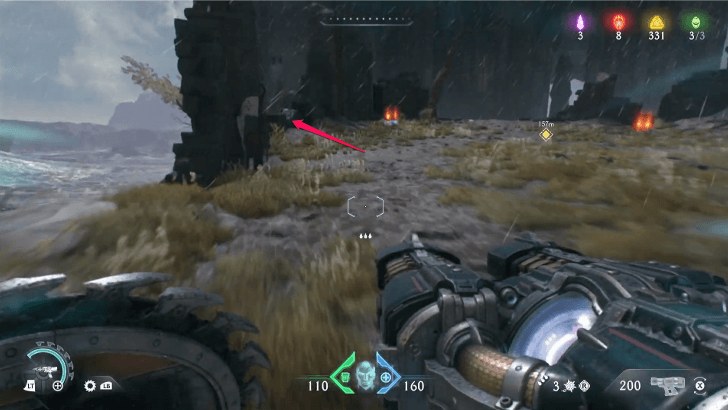 |
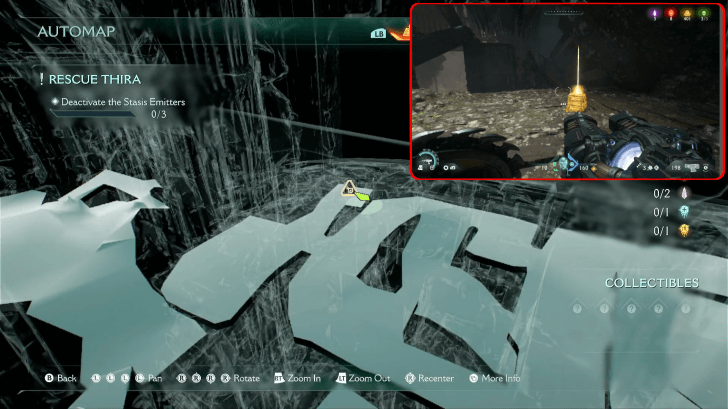 |
Use Shield Throw Shield Throw 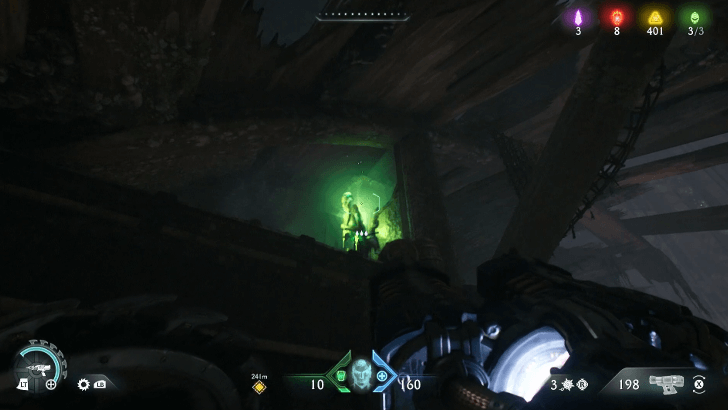 |
 (Secret 3/11) |
Shoot the glowing red orb Shoot the glowing red orb 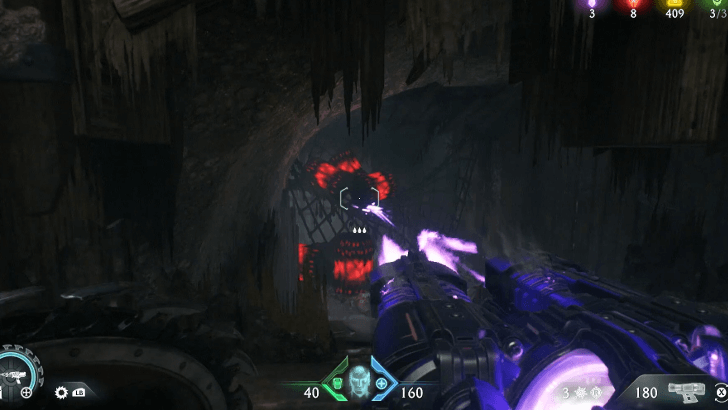 |
 |
Continue down a long stone bridge to find a Gold Cache (x16) and a Life Sigil. When you reach it, you will be attacked by a Komodo Champion. This can be obtained during the second objective ▼. |
 |
At the edge of the cliff where you can look up and see a Green Statue, look down off the side of the cliff to see an area you can fall to, containing the Spire of Nerathul Codex and Gold Trail 2 (x5). This can be obtained during the second objective ▼. |
 |
Across a river from the Spire of Nerathul Codex and Gold Trail 2; cross the bridge to find it. This can be obtained during the second objective ▼. |
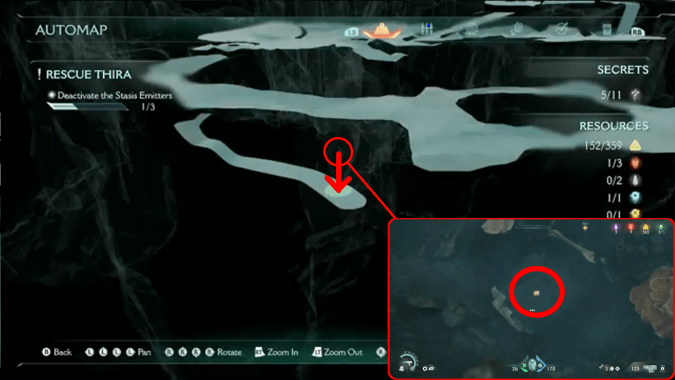 |
In the water, swim straight down to the bottom to find it. This can be obtained during the second objective ▼. |
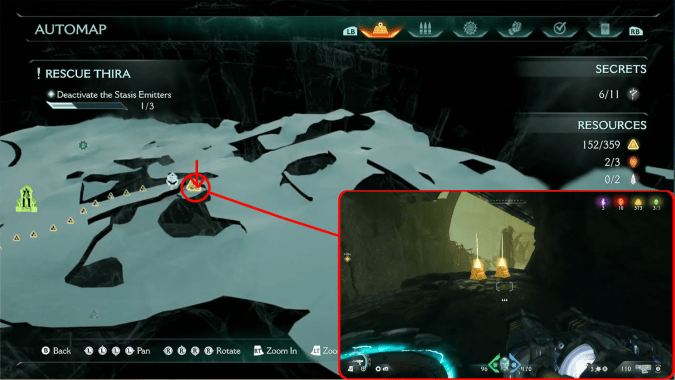 |
Drop off the cliff to find it on a ledge above the water. This can be obtained during the second objective ▼. |
 |
Climb up the spiral pathway to the top to find an area with a Gold Trail and a Life Sigil, but watch out for enemies. This can be obtained during the second objective ▼ in Area 2. |
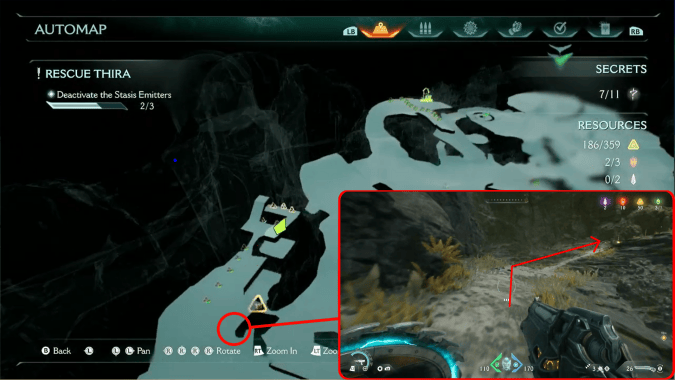 |
When you find a Gold Cache blocked behind a gate, go around and to the left up the slope collecting the Gold Trail, then drop in to find the Gold Cache. This can be obtained during the second objective ▼ in Area 2. |
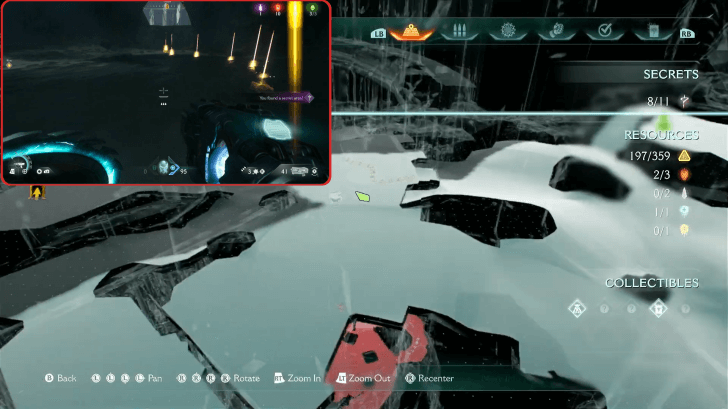 (Secret 8/11) |
Located underneath the structure close to the Cyberdemon, encountered shortly after reaching the Sentinel Shrine. This can be obtained during the second objective ▼ in Area 4. |
 |
The gold trail can be found after the fight with the Cyberdemon in the enclosed structure, located on the left stairs. This can be obtained during the second objective ▼ in Area 4. |
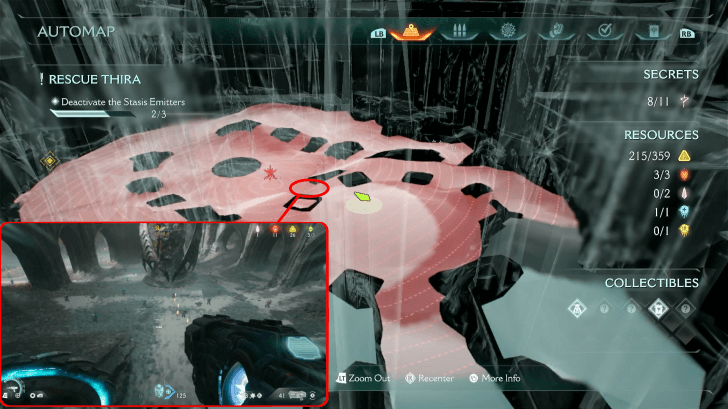 |
Located just in front of the big demonic statue. This can be obtained during the second objective ▼ in Area 4. |
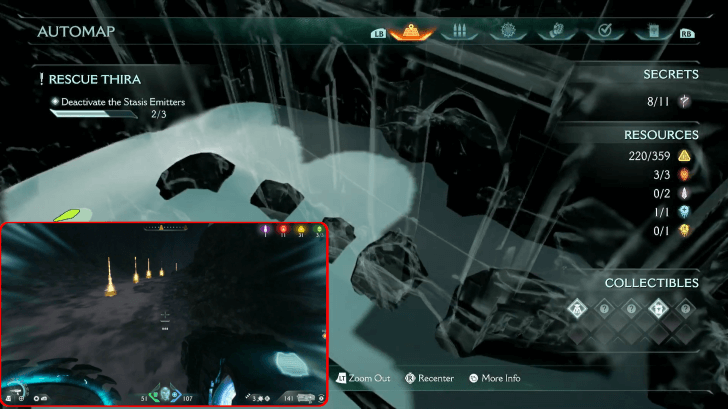 |
The gold trail can be found underneath the pillars near the demonic statue, but it's recommended to clear the area first of demons before heading to this area. This can be obtained during the second objective ▼ in Area 4. |
 |
Head up the left stairs after disembarking the Serrat. Keep following the path, and you should be able to grab all the gold trails. This can be obtained during the third objective ▼ in Area 5. |
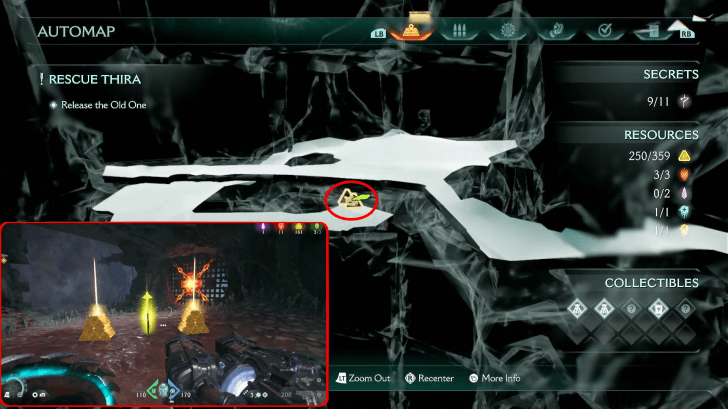 |
Drop off the tree branch to access the area. |
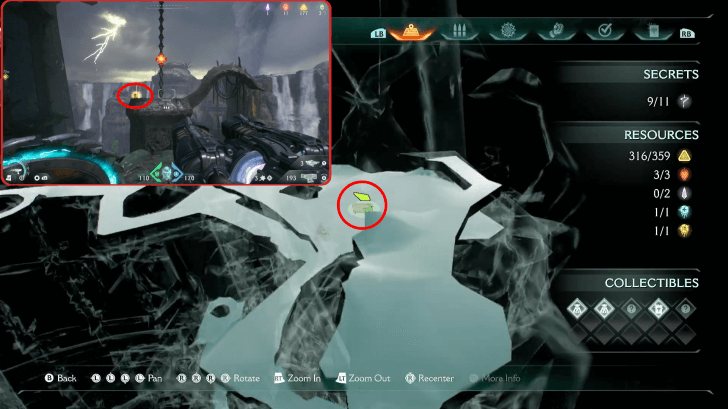 |
Use shield throw on the red mechanism to lower the platform, and you should be able to access it afterwards. This can be obtained during the third objective ▼. |
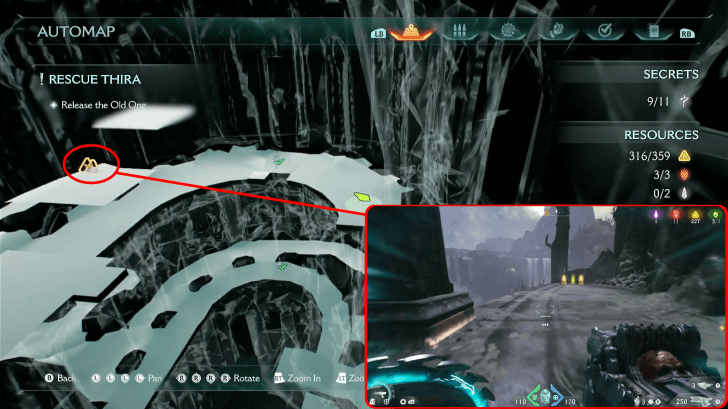 |
Head to the outer area in the room with multiple jump boosts after defeating the Revenant. This can be obtained during the third objective ▼. |
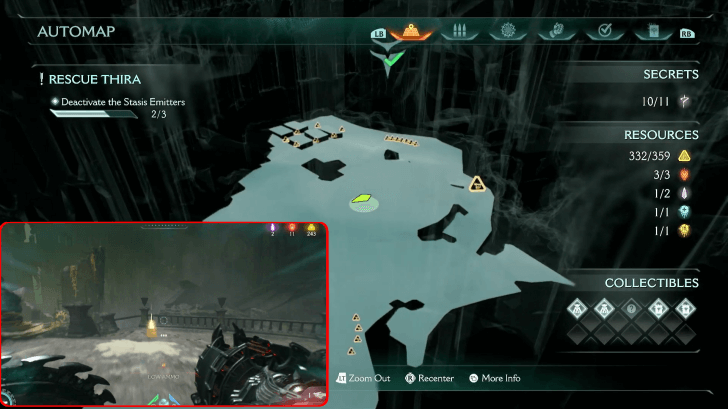 |
Accessible in an area that can be reached by riding to the area with Serrat. This can be obtained during the third objective ▼. |
Spire of Nerathul Rubies
| Item | How to Get |
|---|---|
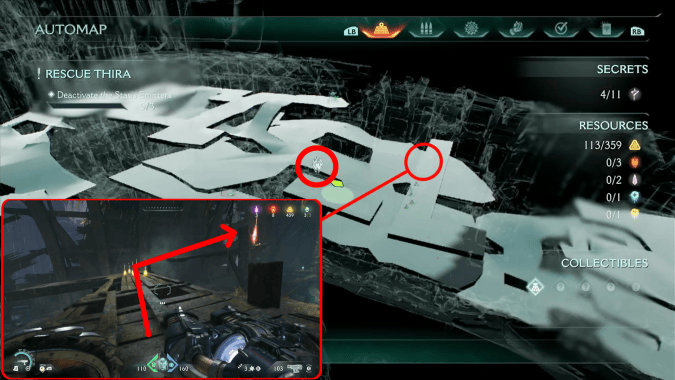 (Secret 4/11) |
On the ground below, there is a jump pad which will launch you directly upwards. Land on the wooden walkway with a Gold Trail on it, and follow the trail to the Ruby. This can be obtained during the second objective ▼. |
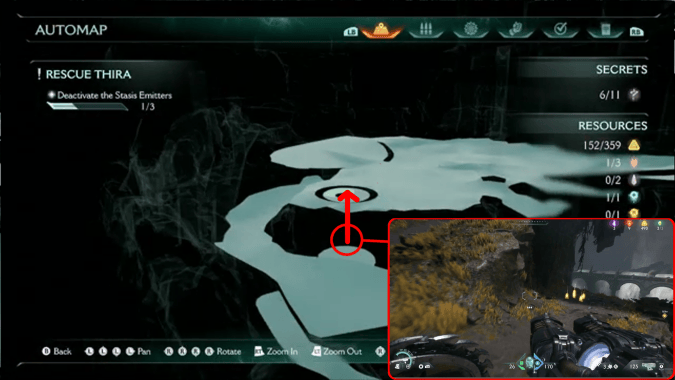 (Secret 6/11) |
From the location of Gold Cache 3, go into the nearby tunnel and avoid the fireballs to find an opening at the end; enter to reach a room with the Ruby. This can be obtained during the second objective ▼. |
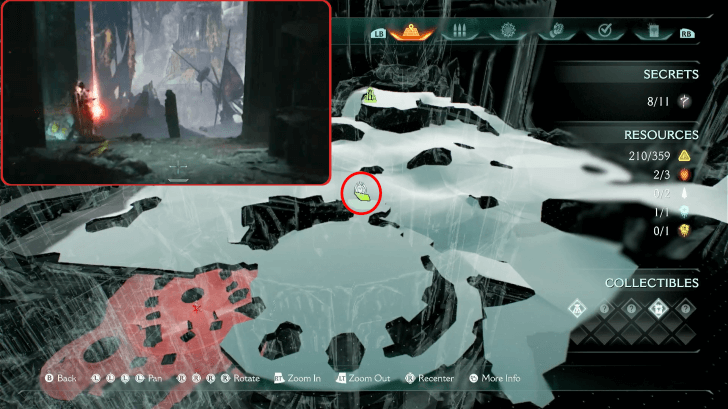 |
Found close to the arena, where you fight a cyberdemon in an enclosed location. This can be obtained during the second objective ▼. |
Spire of Nerathul Wraithstone
| Item | How to Get |
|---|---|
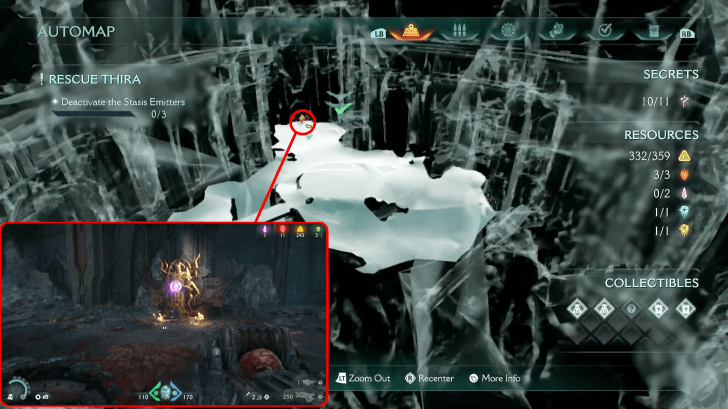 (Secret 10/11) |
Defeat the stationary demon stationary demon 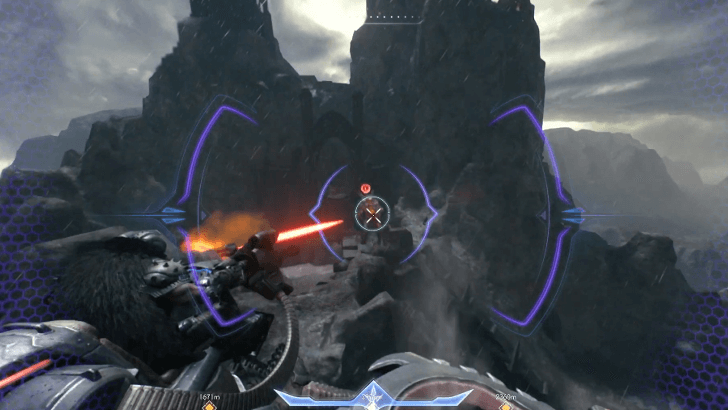 |
 |
Accessible through a blue portal, leading to an area littered with enemies. Defeat all the demons and head to the upper area, where you will find the Wraithstone and the Grenade Launcher weapon skin beside it. This can be obtained during the second objective ▼ in the first secret area. |
Spire of Nerathul Demonic Essence
| Item | How to Get |
|---|---|
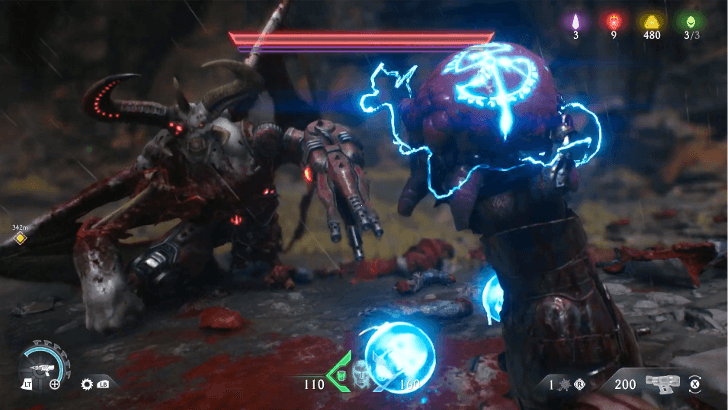 |
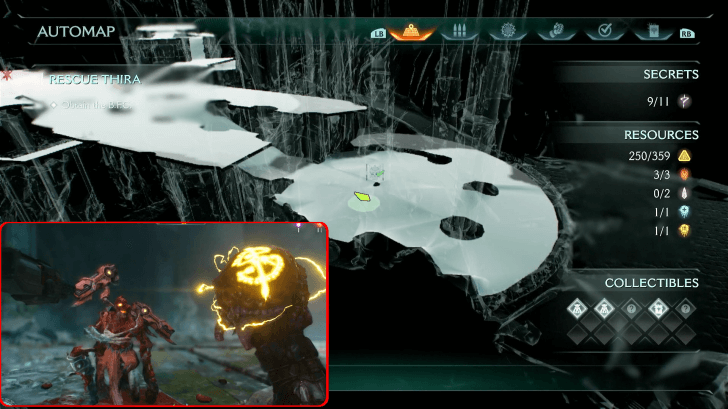
Near the cave with Life Sigil 1, find a tree with a portal on top; charge into the green wall at the bottom to summon the Leader. Defeat them to get the Demonic Essence: Health. This can be obtained during the second objective ▼ in area 3. |
 |
Obtainable by defeating the empowered Revenant, in the same room with the Vagary on it. This can be obtained during the third objective ▼ in Area 5. |
Spire of Nerathul Walkthrough
| Main Objectives | |
|---|---|
| 1 | Drain Water Levels Secrets: Gold Cache 1 (x50) - Secret #1 |
| 2 | Deactivate the Stasis Emitters Secrets: Arachnotron Toy - Secret #2 Gold Cache 2 (x50) - Secret #3 Ruby 1 - Secret #4 Life Sigil 1 & Gold Trail 2 (x16) - Secret #5 Ruby 2 - Secret #6 Life Sigil 2 & Gold Trail 5 (x11) - Secret #7 Life Sigil 3 & Gold Trail 7 (x13)- Secret #8 |
| 3 | Obtain the B.F.C Secrets: Revenant Toy - Secret #9 |
| 4 | Release the Old One ┗ Secret Landing Spots Secrets: Wraithstone - Secret #10 Weapon Skin & Wraithstone 2 - Secret #11 |
1. Drain Water Levels
| 1 |  There will be a wide open space with plenty of demons that you need to clear. As soon as they are all taken care of, a Komodo Champion will spawn. Defeat it to progress. Komodo Champion Boss Guide ▼
|
|---|---|
| 2 | 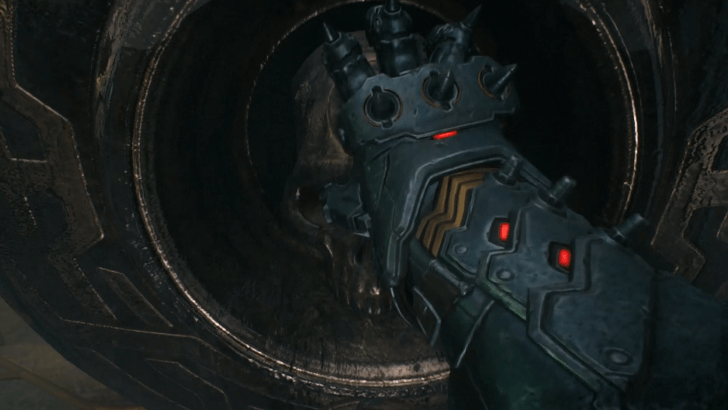 Take the time to explore the area, and grab the resource pickups if you need to. Once you're ready, follow the objective marker and push the button to lower the water levels. Collectible: Gold Cahe 1 |
| 3 | 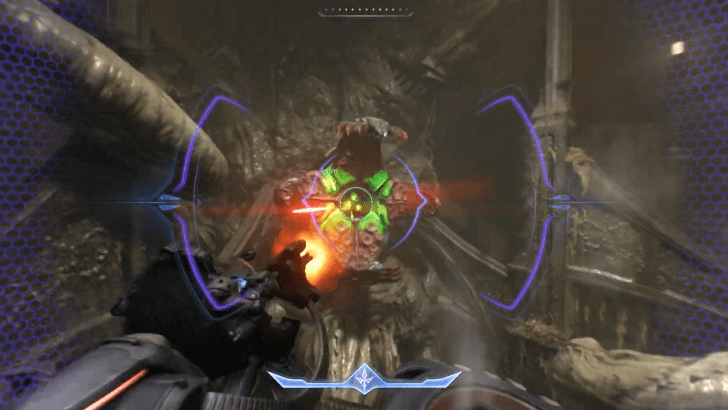 Ride Serrat and head to the next objective. Like other previous chapters that involve Serrat, you may head straight to the objective or go to the secret landing spots if you need the Wraithstones. ┗ Secret Landing Spots |
2. Deactivate the Stasis Emitters
| 1 | 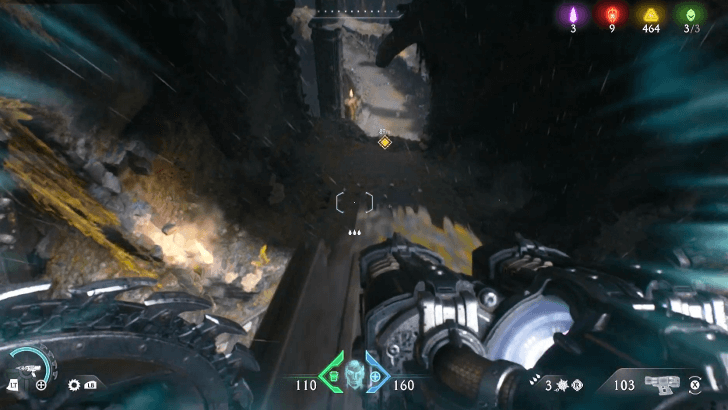 Grab all the collectibles that you wish to get before leaving the ship wreckage area, then jump down below to proceed. Collectible: Gold Trail 1, Arachnotron Toy, Gold Cache 2, Ruby 1 |
|---|---|
| 2 | 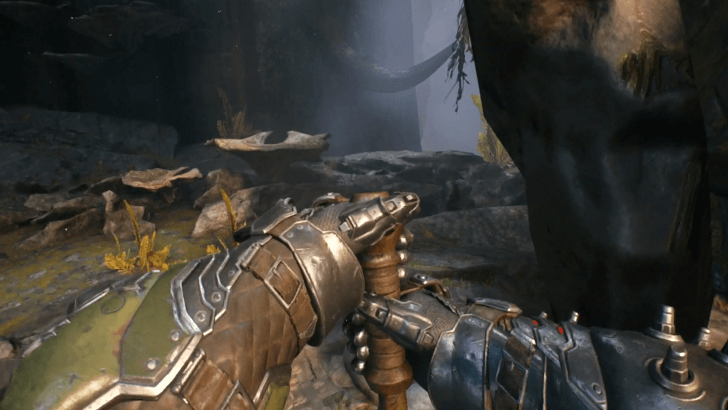 Continue going down the path, and defeat the demons you encounter along the way. After arriving at the lower levels, interact with the lever to unlock the barrier blocking the first stasis emitter. Destroy it, then ride Serrat to continue looking for the next one. Collectible: Gold Trail 2, Life Sigil 1, Demonic Essence - Health. Spire of Nerathul Codex, Gold Trail 3, Gold Trail 4 |
| 3 | 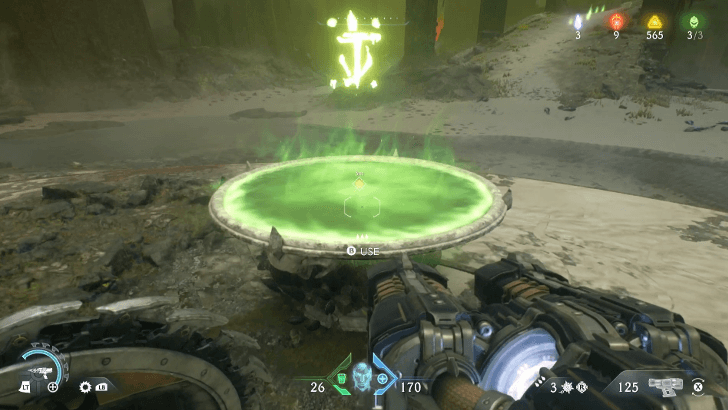 Upon disembarking Serrat, follow the objective makers to obtain the Heaven Splitter Shield Rune. |
| 4 | 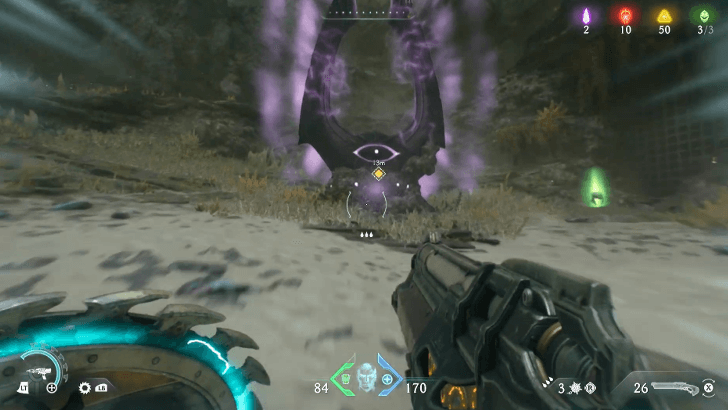 Keep following the objective markers to get to the next stasis emitter. Defeat the demons guarding it, and ride Serrat once you're done with the area to get to the final stasis emitter. Collectible: Gold Cache 3, Gold Cache 4, Gold Cache 5, Ruby 2, Gold Trail 5 & Life Sigil 2, Gold Trail 6 & Gold Cache 6 |
| 5 | 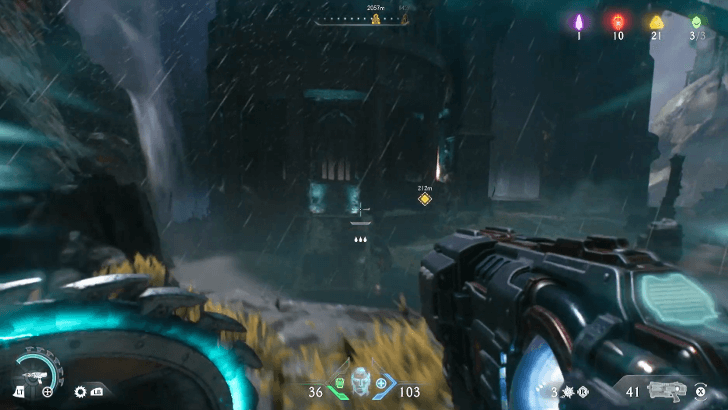 Upon your arrival at the final stasis emitter area, make your way to the coliseum-like structure. Grab everything you can, as there will be plenty of combat encounters leading up to the area. Collectible: Gold Trail 7 & Life Sigil 3, Ruby 3 |
| 6 | 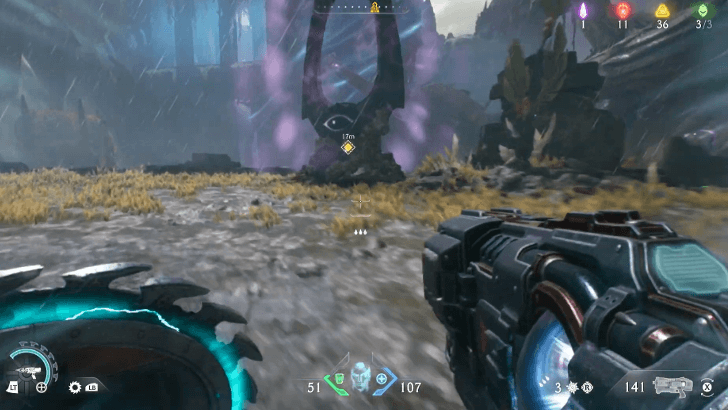 Fight your way to the lower levels. Use the elevator to go down further, and keep pushing until you arrive at the third stasis emitter. Defeat all the demons to access the last stasis emitter. Collectible: Gold Trail 8, Gold Trail 9, Gold Trail 10 |
3. Obtain the B.F.C
| 1 | 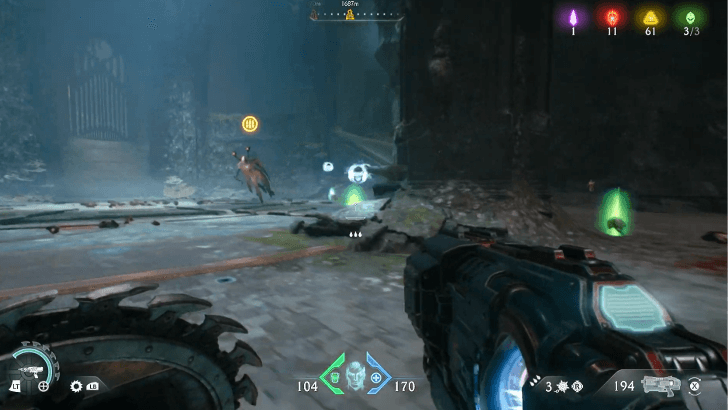 Ride Serrat and disembark in the next area. Fight your way towards the Spiral Staircase, and grab the resources that you can. Collectible: Gold Trail 11 - 14, Demonic Essence - Ammo, Revenant Toy, Gold Trail 15, Gold Trail 16 |
|---|---|
| 2 | 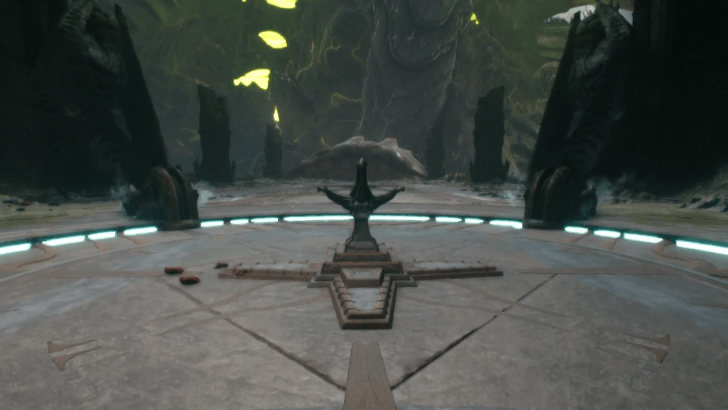 Open the gate and grab the Ballistic Force Crossbow (B.F.C). |
4. Release The Old One
| 1 | 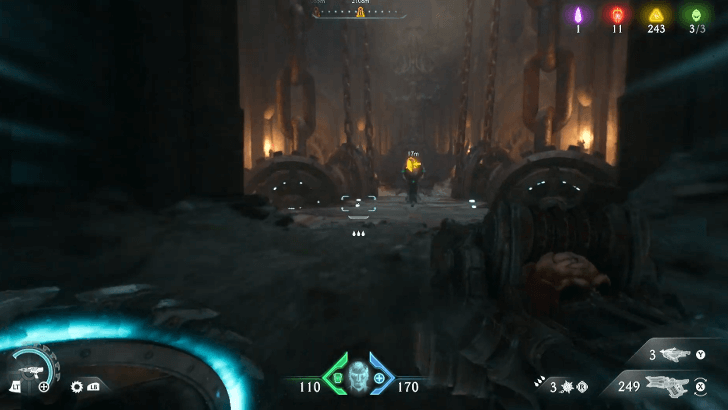 Head to the next area, swim across the water section, and go up using the elevator. Keep following the objective markers to get to the release mechanism holding the Old one, and interact with it to end the level. After seeing the results screen, you may explore the map to grab some collectibles at the secret landing spots before heading to the next objective. Collectible: Serrat Codex |
|---|
Spire of Nerathul Secret Landing Spots
| 1 | 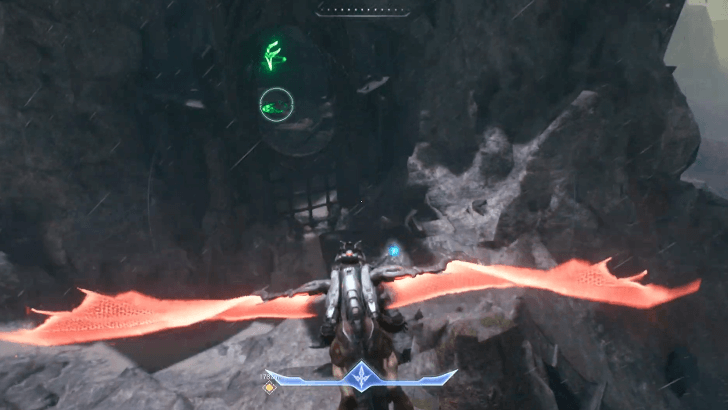 Travel to the northern edge of the map and head to the secluded island near the waterfall. Defeat the stationary demon so that Serrat can disembark. Defeat all the demons that spawn, and you will be rewarded with a Wraithstone. Collectible: Wrath Stone 1 |
|---|---|
| 2 | 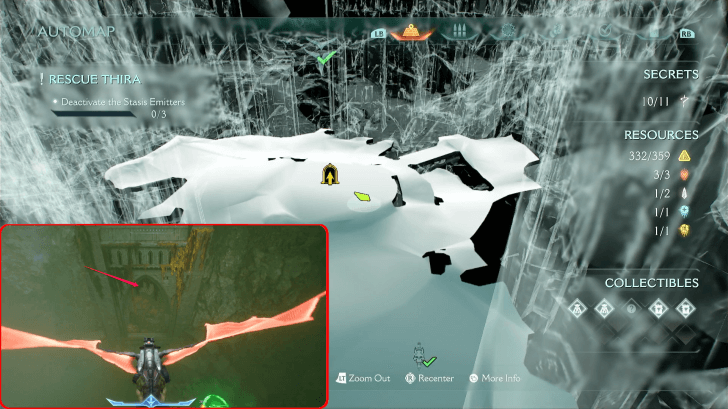 Starting from the central building in the middle of the map, head down to find the arch. This archway leads to the blue portal, which opens to the secret area. Defeat all the demons, and you will find the grenade launcher weapon skin and the wraithstone right next to each other at the end of the path. Collectible: Wrath Stone 2, Gold Trail 17 -20, Grenade Launcher Skin |
Spire of Nerathul Boss Guide
| Komodo Champion Combat Tips |
|---|
|
|
Keep Your Distance When It Disengages
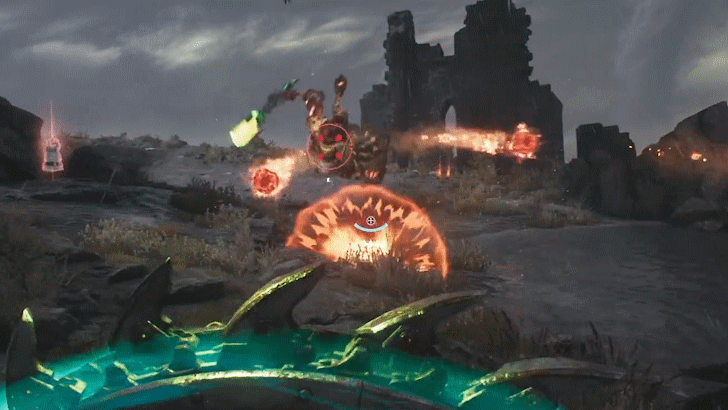
After a barrage of melee combos, the Komodo Champion will often disengage and fire quick projectiles at you. As it's harder to dodge these projectiles when close, it's best to keep your distance and attack with long-range weapons. The Impaler is a good choice of a weapon for this.
Watch Out for the Second Melee Hit
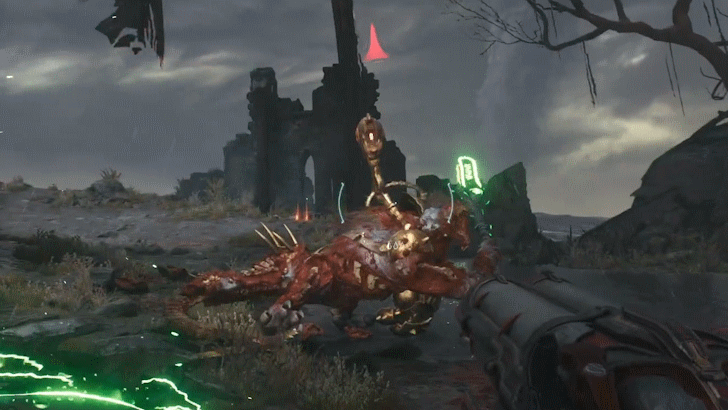
After the Komodo Champion charges forward to do the horizontal swing, watch out for the guaranteed follow-up slash as its weapon stays lit up, indicating a Hell Surge attack. Take this chance to anticipate and parry the second swing for a counterattack.
Komodo Champion Boss Guide and How to Beat
Spire of Nerathul Mission Challenges
| Challenge | Details and Reward |
|---|---|
| Heart Harvester | Kill all leader demons. Reward: 50 Gold |
| Master Blaster | Damage demons with 250 Auto Turret Rounds Reward: 50 Gold |
| Expert Stalker | Chase and Destroy 2 Hellfighter ships. Reward: 50 Gold |
Heart Harvester
Consider this mission a two-for-one deal, as each leader drops a demonic essence upon defeat. Complete this mission by hunting both leaders in this chapter.
Master Blaster
To complete this mission, the player must equip the Auto Turret Shield Rune, obtained in Chapter 12. Given the auto turret's fire rate, completing this mission shouldn't take too long, provided you use the auto turret whenever possible.
Expert Stalker
You can hunt down the Hellfighter ships as soon as you complete the first objective. These ships will have a distinct green trail, and you must chase and destroy two of them to complete the mission.
Doom: The Dark Ages Related Guides

Full Walkthrough and List of Chapters
Comment
Author
Chapter 14: Spire of Nerathul Secrets and Walkthrough
improvement survey
03/2026
improving Game8's site?

Your answers will help us to improve our website.
Note: Please be sure not to enter any kind of personal information into your response.

We hope you continue to make use of Game8.
Rankings
- We could not find the message board you were looking for.
Gaming News
Popular Games

Genshin Impact Walkthrough & Guides Wiki

Honkai: Star Rail Walkthrough & Guides Wiki

Umamusume: Pretty Derby Walkthrough & Guides Wiki

Pokemon Pokopia Walkthrough & Guides Wiki

Resident Evil Requiem (RE9) Walkthrough & Guides Wiki

Monster Hunter Wilds Walkthrough & Guides Wiki

Wuthering Waves Walkthrough & Guides Wiki

Arknights: Endfield Walkthrough & Guides Wiki

Pokemon FireRed and LeafGreen (FRLG) Walkthrough & Guides Wiki

Pokemon TCG Pocket (PTCGP) Strategies & Guides Wiki
Recommended Games

Diablo 4: Vessel of Hatred Walkthrough & Guides Wiki

Fire Emblem Heroes (FEH) Walkthrough & Guides Wiki

Yu-Gi-Oh! Master Duel Walkthrough & Guides Wiki

Super Smash Bros. Ultimate Walkthrough & Guides Wiki

Pokemon Brilliant Diamond and Shining Pearl (BDSP) Walkthrough & Guides Wiki

Elden Ring Shadow of the Erdtree Walkthrough & Guides Wiki

Monster Hunter World Walkthrough & Guides Wiki

The Legend of Zelda: Tears of the Kingdom Walkthrough & Guides Wiki

Persona 3 Reload Walkthrough & Guides Wiki

Cyberpunk 2077: Ultimate Edition Walkthrough & Guides Wiki
All rights reserved
© 2025 ZeniMax Media Inc. All Rights Reserved.
The copyrights of videos of games used in our content and other intellectual property rights belong to the provider of the game.
The contents we provide on this site were created personally by members of the Game8 editorial department.
We refuse the right to reuse or repost content taken without our permission such as data or images to other sites.





![Monster Hunter Stories 3 Review [First Impressions] | Simply Rejuvenating](https://img.game8.co/4438641/2a31b7702bd70e78ec8efd24661dacda.jpeg/thumb)


