Chapter 2: Hebeth Secrets and Walkthrough
☆ Doom: The Dark Ages is live now!
★ Collectibles | Secrets | Walkthrough
┗ Resources | Codex | Toy
★ Trophies | Beginner's Guide | Enemies
☆ Skins: Twitch Drops | Prince St. Pizza
★ FAQs: Co-op | DLC | Specs | Glory Kills
Chapter 2: Hebeth in Doom: the Dark Ages contains 9 secrets and 3 collectibles. Learn how to get all the secrets, gold, and collectibles, as well as how to complete the Mission Challenges in this Chapter 2 walkthrough guide.
List of Contents
| ◄ Previous Chapter | Next Chapter ▶ |
|---|---|
| Village of Khalim | Barrier Core |
Hebeth Secrets and Collectibles
Hebeth Interactive Map
| Jump to a Collectible! | |
|---|---|
| Toys | 1 |
| Skins | 1 |
| Codex | 1 |
| Life Sigils | 3 |
| Gold | 210 |
| Demonic Essence | 1 |
| Secrets | 9 |
Hebeth Toys
| Item | How to Get |
|---|---|
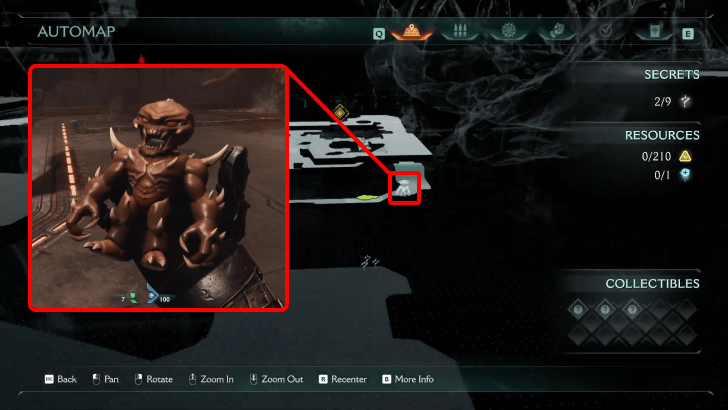 (Secret 1/9) |
The Imp Stalker Toy can be found jumping down the vent by the boxes stacked flat against the wall. Proceeding through the shaft leads you to where the demon had initially burst from. You can find this near the first objective ▼. |
Hebeth Skins
| Item | How to Get |
|---|---|
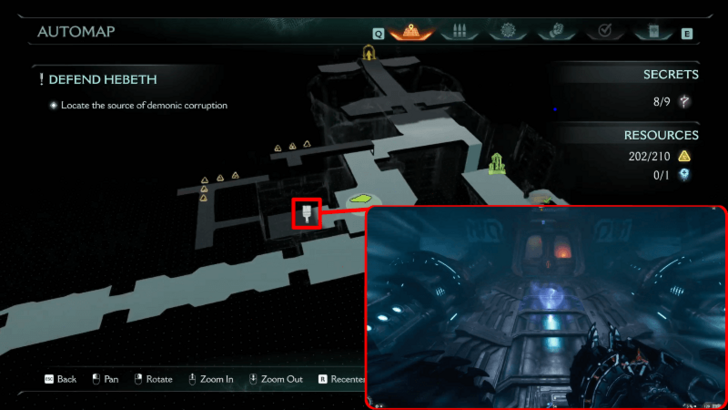 (Secret 9/9) |
At the fork in the road before the teleporter, look up and to the left to see a stack of metal boxes leading up to a climbable vent. Through the vent, you'll collect gold and obtain the Skin when you fall out the other side, but watch out as you'll be ambushed by a Mancubus and other enemies! This can be obtained during the fourth objective ▼. |
Hebeth Codex Entries
| Item | How to Get |
|---|---|
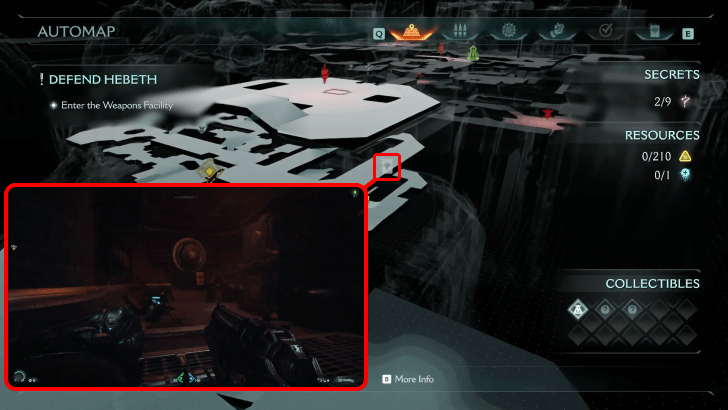 |
Jump over the
metal boxes metal boxes 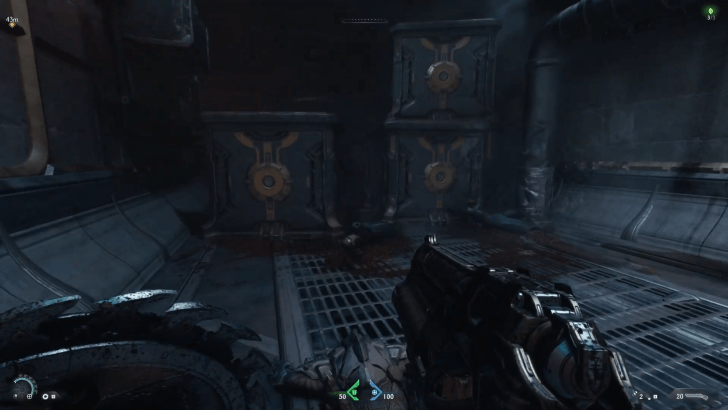 |
Hebeth Life Sigils
| Item | How to Get |
|---|---|
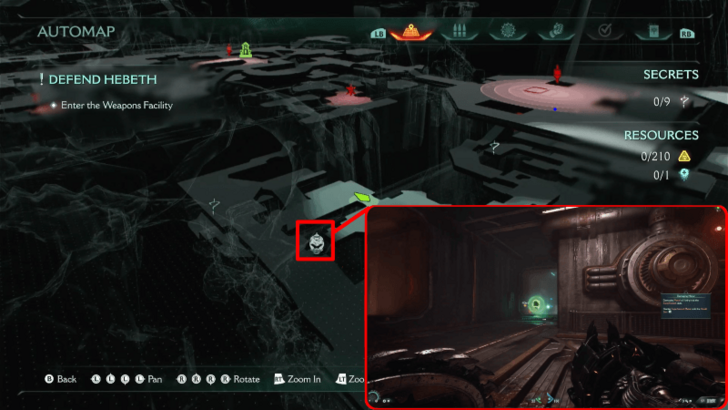 |
Found in the room after the Shield Saw tutorial, break the
metal lock metal lock 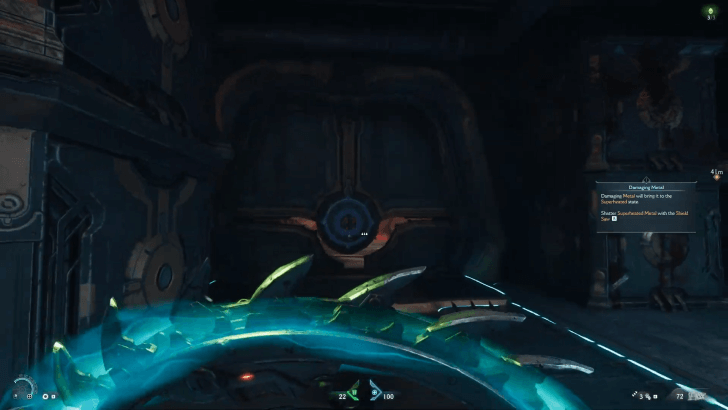 |
 (Secret 4/9) |
Before proceeding, there is a
metal vent metal vent 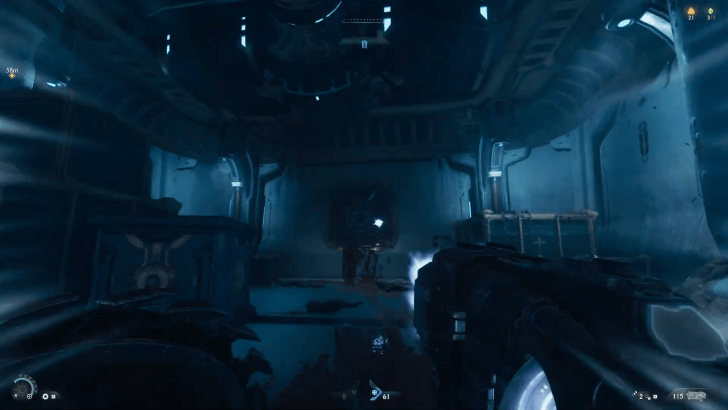 |
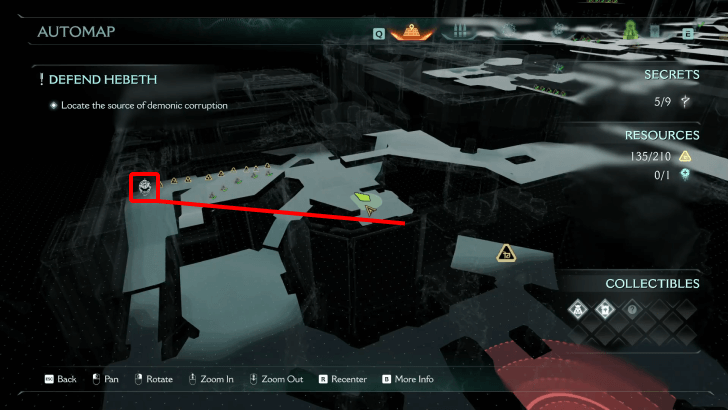 (Secret 7/9) |
Break the
metal lock metal lock 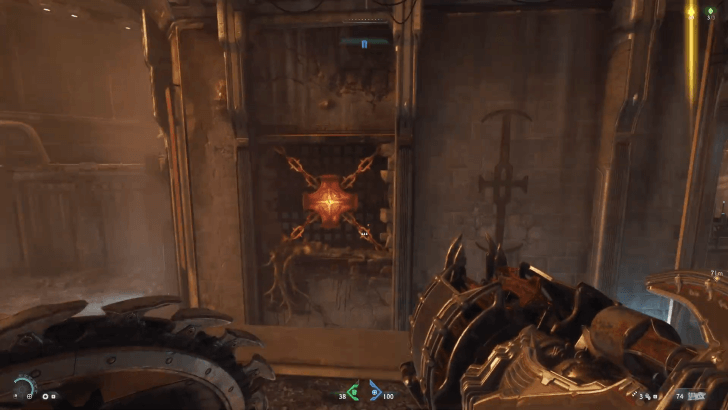 valve 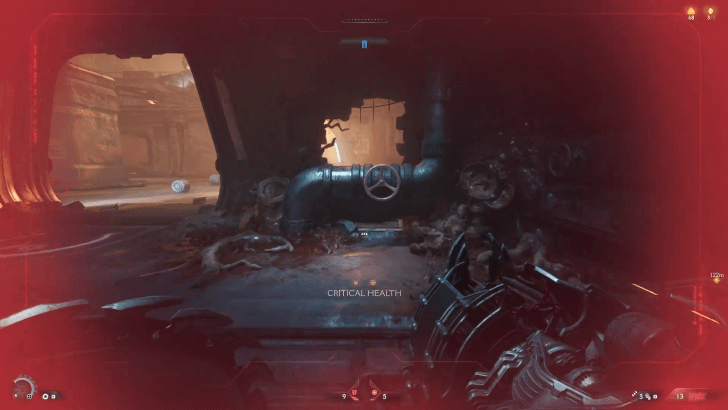 |
Hebeth Demonic Essence
| Item | How to Get |
|---|---|
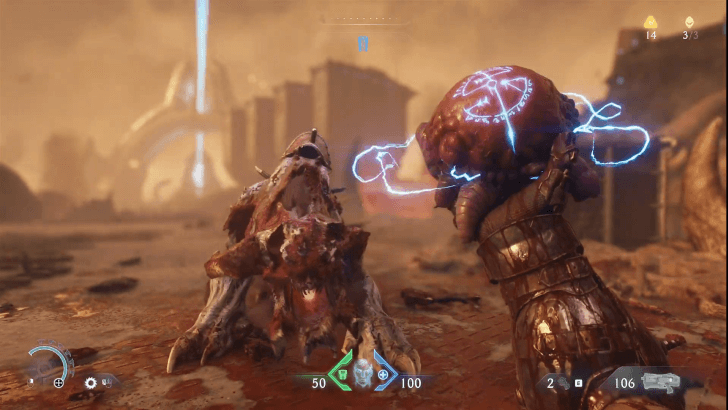 |
Defeating this leader grants you extra Health. It can be encountered during the fourth objective ▼. |
Hebeth Gold
| Item | How to Get |
|---|---|
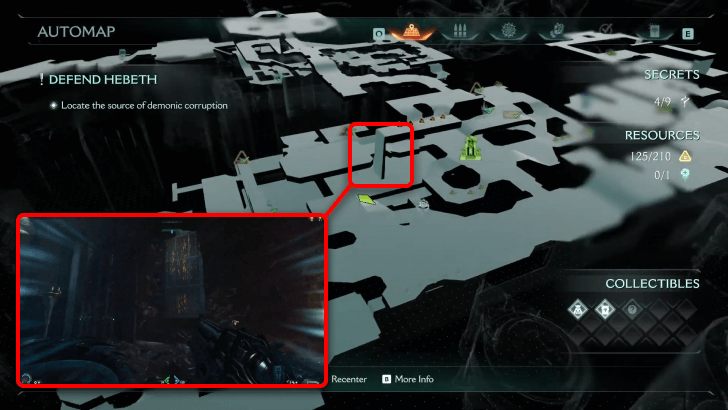 (Secret 2/9) |
Above the warded gate blocking the cultists, there is wall that can be climbed on that will lead to a gold trail. This can be found during the second objective ▼. |
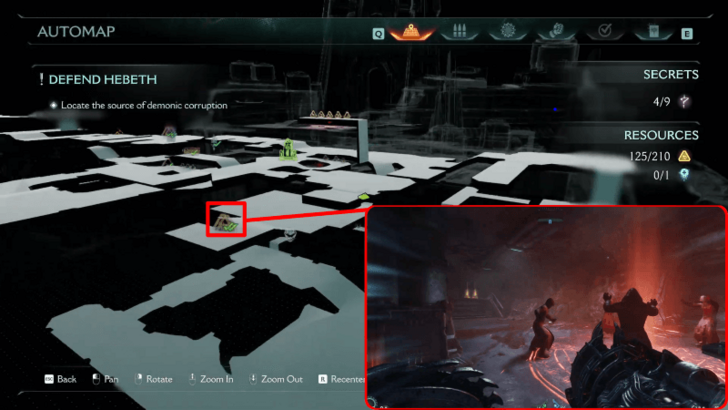 |
The ward blocking the cultists ward is now gone, so you'll be able to pick up gold as well as an armor refill in their area. This can be obtained during the third objective ▼. |
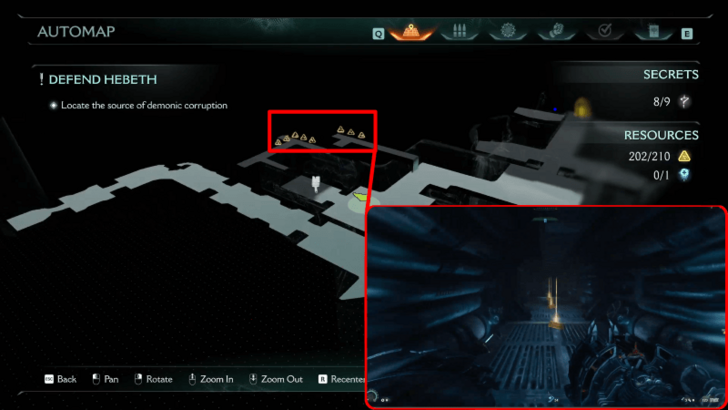 |
Jump up the boxes to get to the metal vent, and follow along the path until you reach the end. You'll encounter more gold as you proceed. This can be encountered during the fourth objective ▼. |
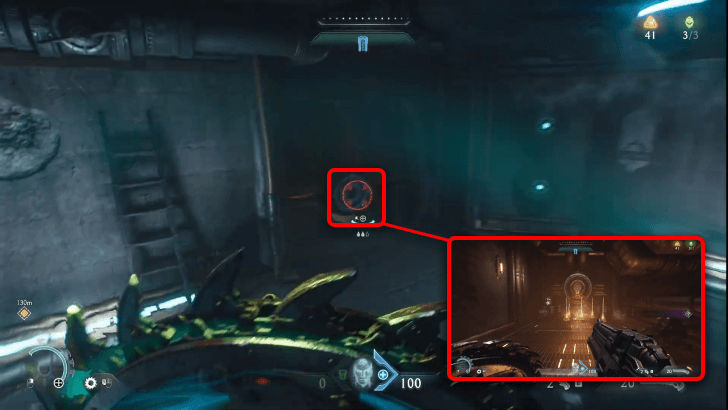 (Secret 3/9) |
This gold cache is accessed by breaking the metal doorway on the way to the Research Lab. This can be found during the second objective ▼. |
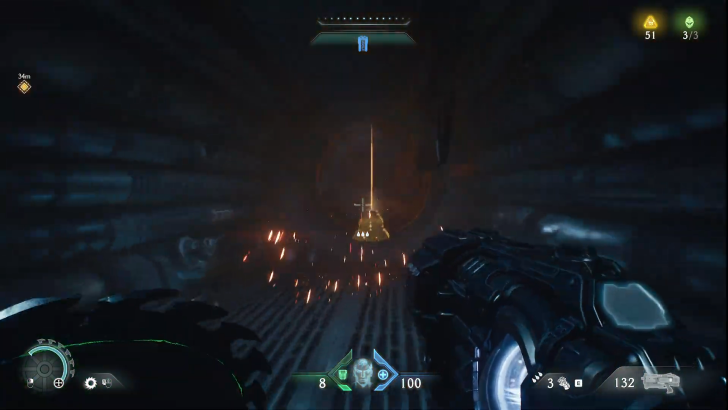 (Secret 5/9) |
Parry the green projectiles while inside the vent to access the gold cache hiding behind the blaster. This can be found at the third objective ▼. |
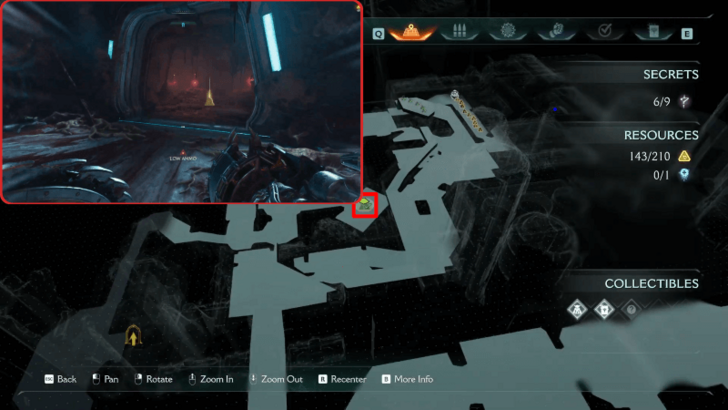 (Secret 6/9) |
Grab the gold cache in the blocked doorway after the fight. This can be obtained during the fourth objective ▼. |
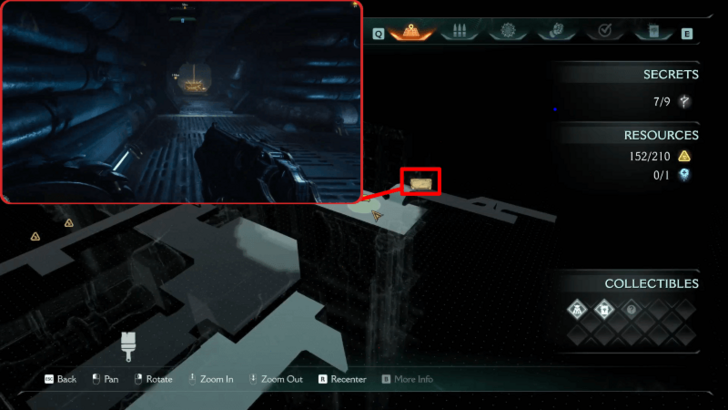 (Secret 8/9) |
The
path path 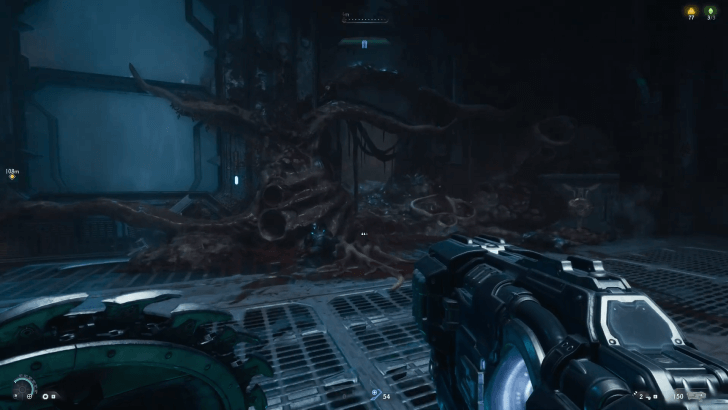 |
| Gold Cache 4 | This gold cache can be found in the first room with a Sentinel Shrine. When you enter the room, take a left and you will find the cache. |
| Gold Cache 5 | This smaller gold cache can be found directly across the first gold cache in the room when you go left. |
| Gold Chest 2 | This gold chest can be found in the central area with the Sentinel Shrine. It spawns after getting the blue keycard. |
| Gold Trail 4 | This gold trail can be found in a small hidden corner just behind the Sentinel Shrine. |
| Gold Trail 5 | This gold trail can be found past an encounter area on the lowest levels of the first area with the Sentinel Shrine. |
| Gold Trail 6 | This gold trail can be found on the lower area of the main area with the Sentinel Shrine. |
| Gold Trail 7 | This gold cache can be found near the last gold trail on the lower floor. |
| Gold Trail 8 | This gold cache can be found in the room with Cultists. |
| Gold Cache 6 | This gold trail can be found the platform that leads to the valve that closes the fire door. |
| Gold Cache 7 | This gold trail can be found behind the fire door. You can also get a Life Sigil at the end of this trail. |
Hebeth Walkthrough
| Main Objectives | |
|---|---|
| 1 | Enter the Weapons Facility Secrets: Imp Stalker Toy - Secret #1 Gold Trail 1 - Secret #2 Hebeth Codex - Secret #3 |
| 2 | Get to the Research Lab Secrets: Gold Trail 2 + Life Sigil 2 - Secret #4 Gold Cache 1 - Secret #5 |
| 3 | Retrieve the Accelerator and Clear the Demons |
| 4 | Locate the Source of Demonic Corruption Secrets: Gold Cache 3 - Secret #6 Life Sigil 3 - Secret #7 Gold Chest - Secret #8 Nightmare Shredder Skin - Secret #9 |
1. Enter the Weapons Facility
| 1 | 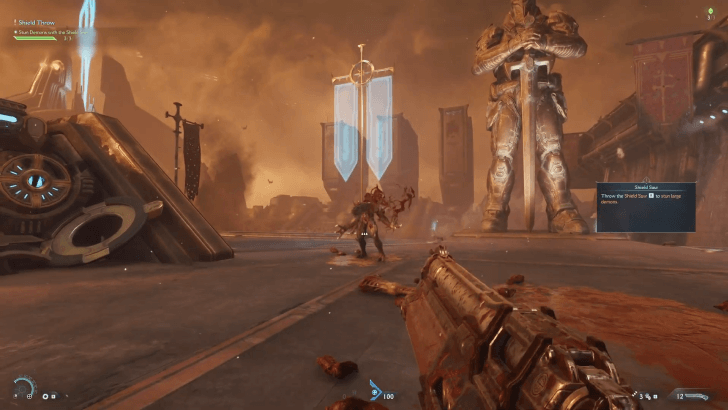 Pick up the weapon drop containing the Shield Saw. Stun 3 demons with the Shield Saw. |
|---|---|
| 2 | 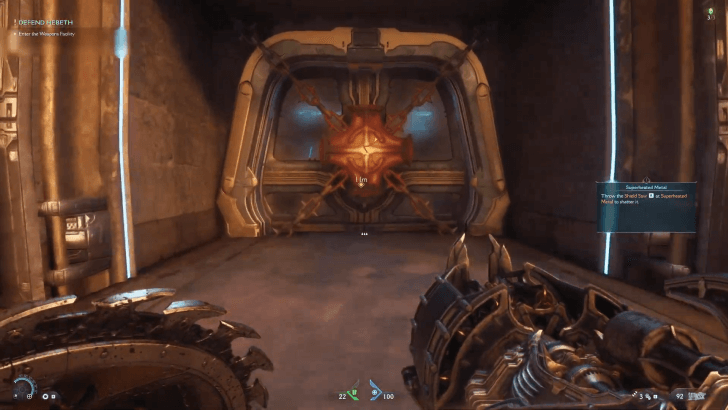 Head past the statue of the knight, and clear out the demons. Use the Shield Saw to break the defenses of the demons holding shields, then use it against the metal lock blocking the next area. Collectible: Life Sigil 1 |
| 3 | 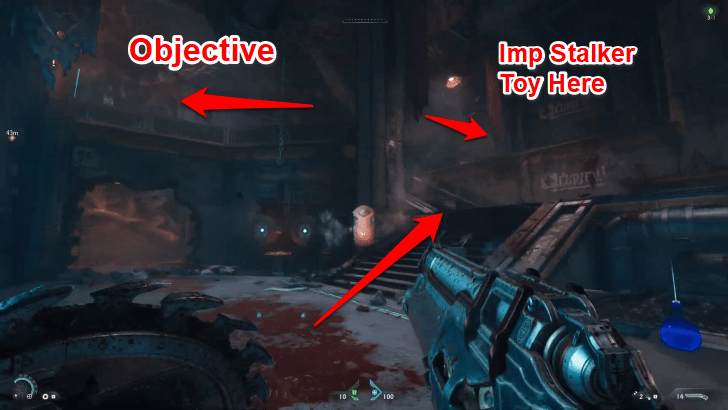 Head past the door with the green rune, and go up the stairs. Towards the right is a stack of boxes hiding a collectible, and towards the left is the path to the objective. Collectible: Imp Stalker Toy |
| 4 | 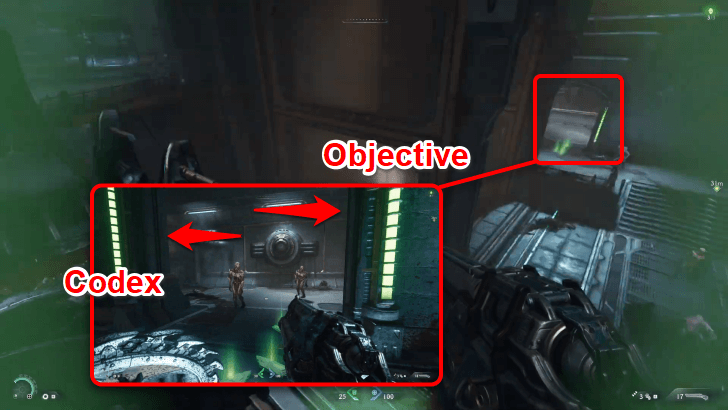 Jump down the platform, and head inside the entryway with glowing green lights. Over the left are boxes hiding a collectible, and towards the right is a metal lock that can be shattered with your Shield Saw. Collectible: Codex Entry |
| 5 | 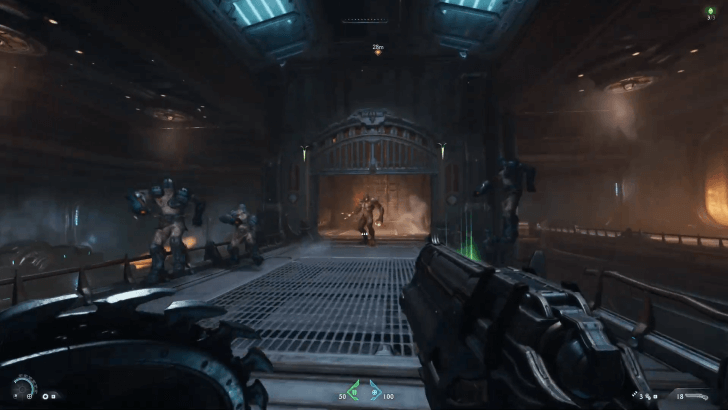 Climb up to the control deck and pull the lever to unlock the elevator. Get to the top, and when you slay the demons in the courtyard, you can finally proceed to the Weapons Facility. |
2. Get to the Research Lab
| 1 | 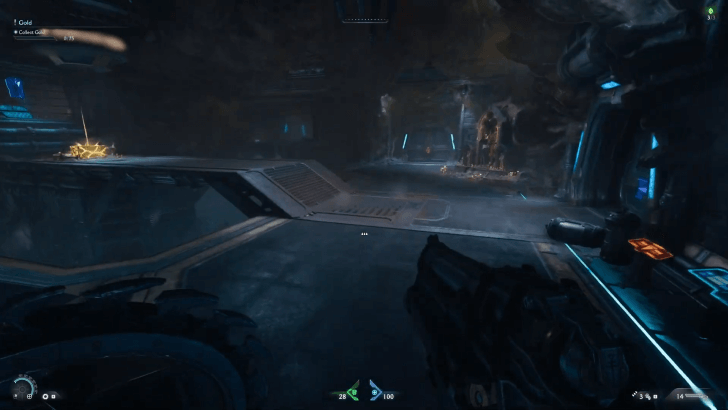 Collect the gold cache and gold around the area, then use the Sentinel Shrine nearby to upgrade your gear. |
|---|---|
| 2 | 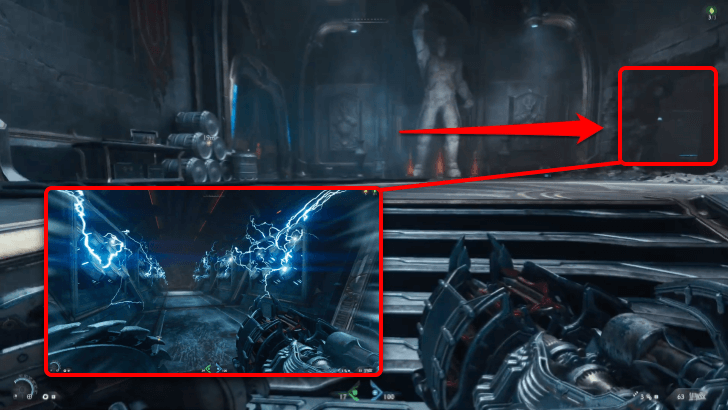 Head to the corridor behind the Sentinel Shrine. You won't be able to access the cultists behind the warded area just yet, so head to the other side. Go to the right of the statue, and you'll come across a metal gate hiding a gold cache towards the left, and the objective marker leading to the right. Collectibles: Gold Trail 2, Gold Cache 1 |
| 3 | 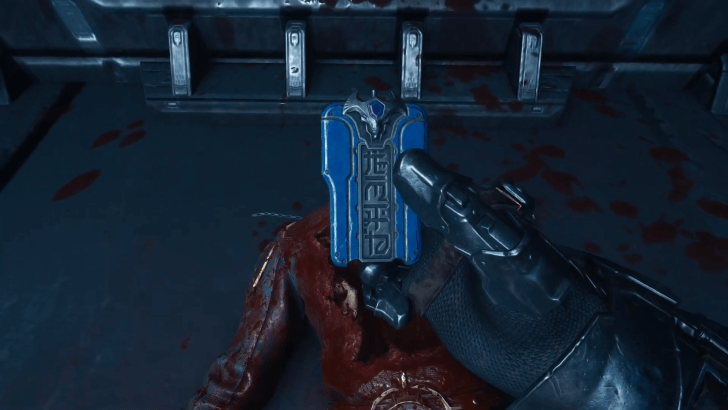 Jump down the shaft, and you can pick up the Blue Keycard here. |
| 4 | 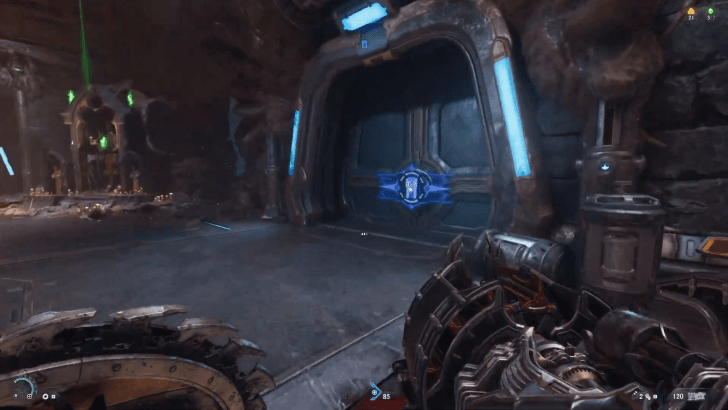 You'll be able to burst out of the control deck back to the initial starting area from there, though you'll have to defeat the newly spawned demons in the area. Unlock the gate with your Blue Keycard to reach the Research Lab. |
3. Retrieve the Accelerator and Clear the Demons
| 1 | 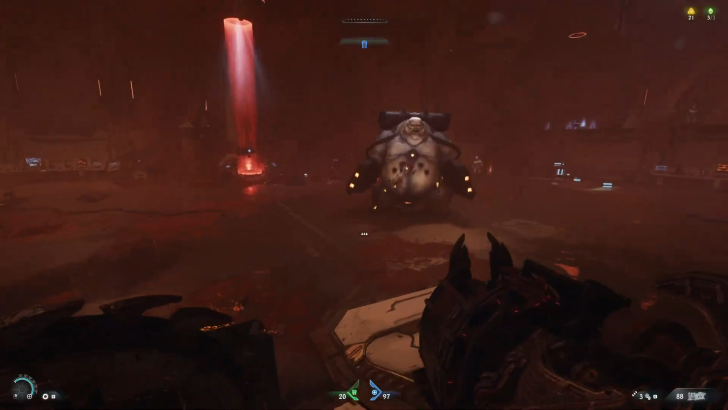 Proceeding through the path leads you down a hole and right into a demon fight. |
|---|---|
| 2 |  Interact with the console to pick up the Accelerator. You'll be prompted to cull all the demons in the area with your new rifle. Before proceeding towards the right doorway, there is a vent access on the left that will lead to a Life Sigil. Collectibles: Life Sigil 2 |
| 3 | 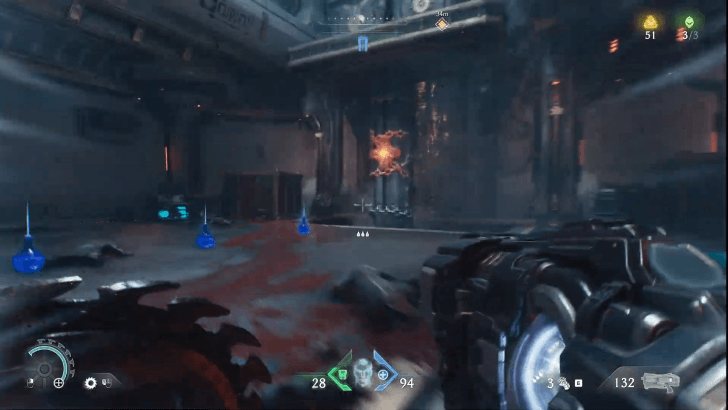 Use your Shield Saw to let the platform fall, opening a new path for you to proceed. Use the vent to get to the next area, and cull the demons to continue. Collectibles: Gold Cache 2 |
| 4 | 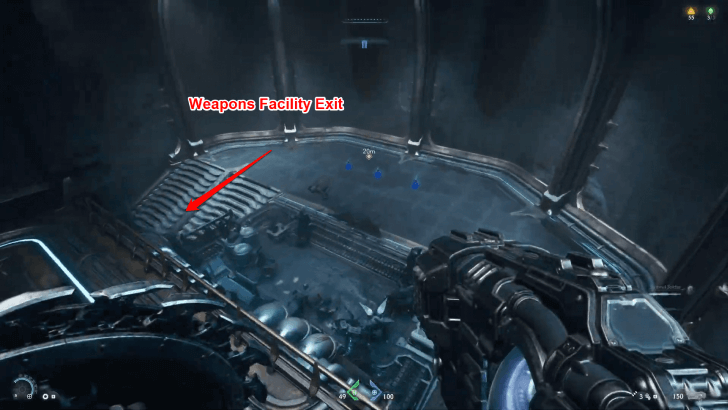 Continue and you'll notice you're back at the corridor where you found the cultists. Proceed through the hallway, and the locked gate leading outside the Weapon Facility is open. Collectibles: Gold Trail 2 |
4. Locate the Source of Demonic Corruption
| 1 | 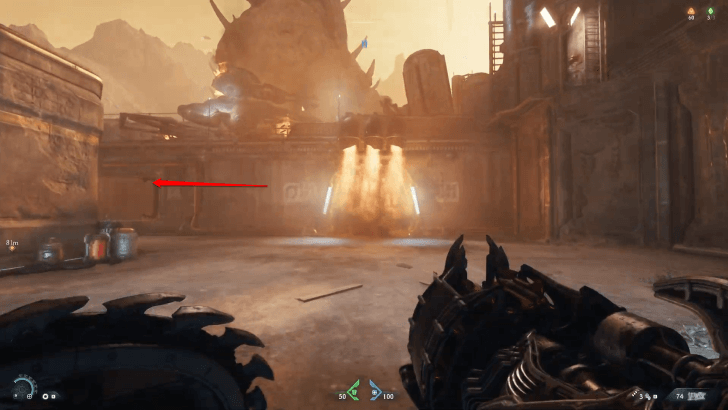 Ahead, defeat the demons down the stairs until you reach a door blocked by flames. Take the path straight left from the door, and climb up the building to find more gold. Across the gap is a metal lock you can break with your saw; hop into the building (it's a bit tricky). Turn the valve beside the door to disable the fire blocking the door to grab collectibles and supplies. Collectibles: Life Sigil 3 |
|---|---|
| 2 | 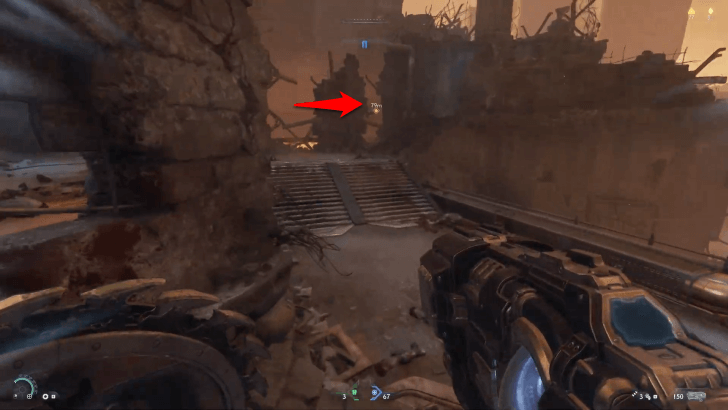 Head to the path towards the left after the bridge gets crushed. Clear the demons in this area, and a hidden resource will unlock behind a locked gate. Towards the end of the area, proceed along the pathway until you come across the building it leads to. Collectibles: Gold Cache 3 |
| 3 | 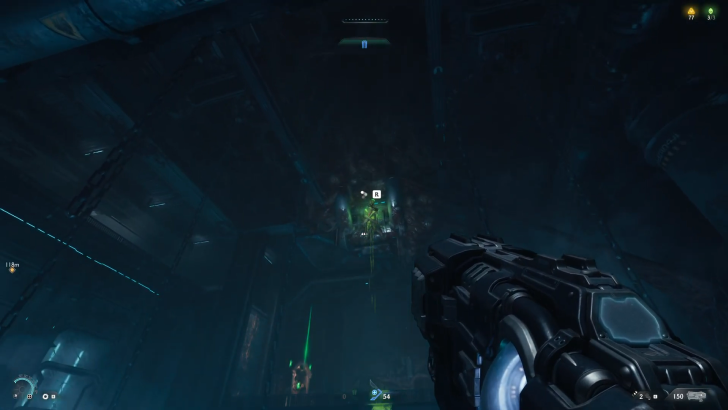 Fight through the hordes of demons until you come across the prompt for the Shield Recall Jump. Jump across and climb up the wall on the left, though there is also a secret path towards the right. Collectibles: Gold Chest |
| 4 | 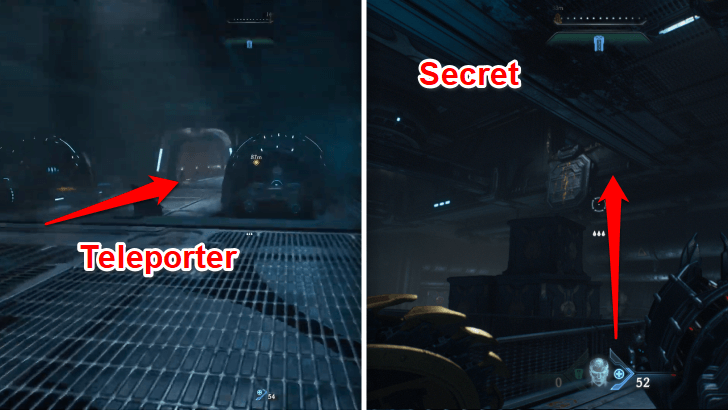
Up and to the left at the fork is a stack of boxes below a climbable metal vent leading to secret area; to the right is the teleporter. Jump through to proceed. Collectibles: Gold Cache 4, Weapon Skin |
| 5 | 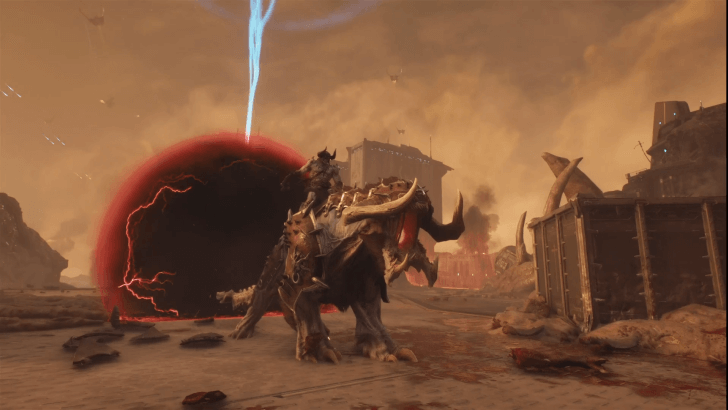 Cull the demons around you, and a Leader demon battle will enter the area. Defeating this demon will end the chapter. Collectibles: Demonic Essence - Health |
How to Open the Fire Door Guide - Hebeth
Doom: The Dark Ages Related Guides

Full Walkthrough and List of Chapters
Comment
Author
Chapter 2: Hebeth Secrets and Walkthrough
improvement survey
03/2026
improving Game8's site?

Your answers will help us to improve our website.
Note: Please be sure not to enter any kind of personal information into your response.

We hope you continue to make use of Game8.
Rankings
- We could not find the message board you were looking for.
Gaming News
Popular Games

Genshin Impact Walkthrough & Guides Wiki

Honkai: Star Rail Walkthrough & Guides Wiki

Umamusume: Pretty Derby Walkthrough & Guides Wiki

Pokemon Pokopia Walkthrough & Guides Wiki

Resident Evil Requiem (RE9) Walkthrough & Guides Wiki

Monster Hunter Wilds Walkthrough & Guides Wiki

Wuthering Waves Walkthrough & Guides Wiki

Arknights: Endfield Walkthrough & Guides Wiki

Pokemon FireRed and LeafGreen (FRLG) Walkthrough & Guides Wiki

Pokemon TCG Pocket (PTCGP) Strategies & Guides Wiki
Recommended Games

Diablo 4: Vessel of Hatred Walkthrough & Guides Wiki

Fire Emblem Heroes (FEH) Walkthrough & Guides Wiki

Yu-Gi-Oh! Master Duel Walkthrough & Guides Wiki

Super Smash Bros. Ultimate Walkthrough & Guides Wiki

Pokemon Brilliant Diamond and Shining Pearl (BDSP) Walkthrough & Guides Wiki

Elden Ring Shadow of the Erdtree Walkthrough & Guides Wiki

Monster Hunter World Walkthrough & Guides Wiki

The Legend of Zelda: Tears of the Kingdom Walkthrough & Guides Wiki

Persona 3 Reload Walkthrough & Guides Wiki

Cyberpunk 2077: Ultimate Edition Walkthrough & Guides Wiki
All rights reserved
© 2025 ZeniMax Media Inc. All Rights Reserved.
The copyrights of videos of games used in our content and other intellectual property rights belong to the provider of the game.
The contents we provide on this site were created personally by members of the Game8 editorial department.
We refuse the right to reuse or repost content taken without our permission such as data or images to other sites.


![Everwind Review [Early Access] | The Shaky First Step to A Very Long Journey](https://img.game8.co/4440226/ab079b1153298a042633dd1ef51e878e.png/thumb)

![Monster Hunter Stories 3 Review [First Impressions] | Simply Rejuvenating](https://img.game8.co/4438641/2a31b7702bd70e78ec8efd24661dacda.jpeg/thumb)


