Chapter 18: Belly of the Beast Secrets and Walkthrough
☆ Doom: The Dark Ages is live now!
★ Collectibles | Secrets | Walkthrough
┗ Resources | Codex | Toy
★ Trophies | Beginner's Guide | Enemies
☆ Skins: Twitch Drops | Prince St. Pizza
★ FAQs: Co-op | DLC | Specs | Glory Kills
Chapter 18: Belly of the Beast in Doom: the Dark Ages contains 6 secrets and 3 collectibles. Learn how to get all the secrets, gold, and collectibles, as well as how to complete the Mission Challenges in this Chapter 18 walkthrough guide.
| ◄ Previous Chapter | Next Chapter ▶ |
|---|---|
| Temple of Lomarith | Harbor of Souls |
Belly of the Beast Walkthrough
| Main Objectives | |
|---|---|
| 1 | Find a Way Out |
| 2 | Destroy the Organ Secrets: Gold Chest 1 (x50) – Secret #1 Life Sigil 1 and Gold Trail 1 (x6) – Secret #2 Ruby – Secret #3 Gold Chest 2 (x50) – Secret #4 Life Sigil 2 and Gold Trail 2 (x14) – Secret #5 Komodo Toy and Gold Trail 3 (x7) – Secret #6 |
| 3 | Enter the Temple |
| 4 | Rescue Thira |
1. Find a Way Out
| 1 |  Begin the chapter by following the objective marker until you reach consecutive opening mouths leading to a wooder barrier you can Shield Charge through. |
|---|
2. Destroy the Organ
| 1 | 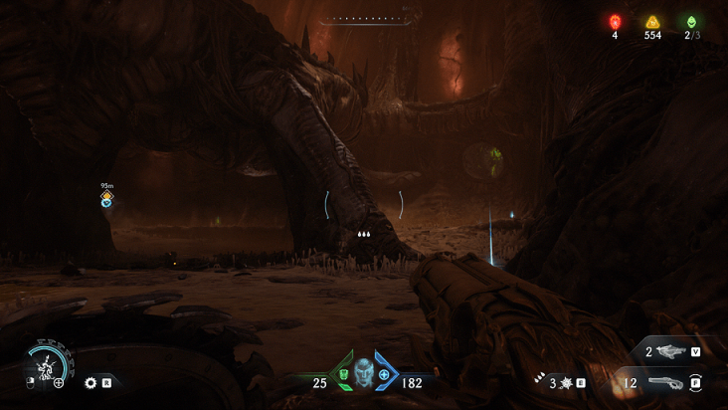 Defeat a large wave of enemies that includes 2 Enforcers and an Acolyte Leader before destroying the first organ. Shield Throw energy nodes and Shield Recall statues to get to the next organ area. Collectibles: Demonic Essence - Armor, Gold Chest 1 (x50), Life Sigil 1, Gold Trail 1 (x6), Ruby |
|---|---|
| 2 | 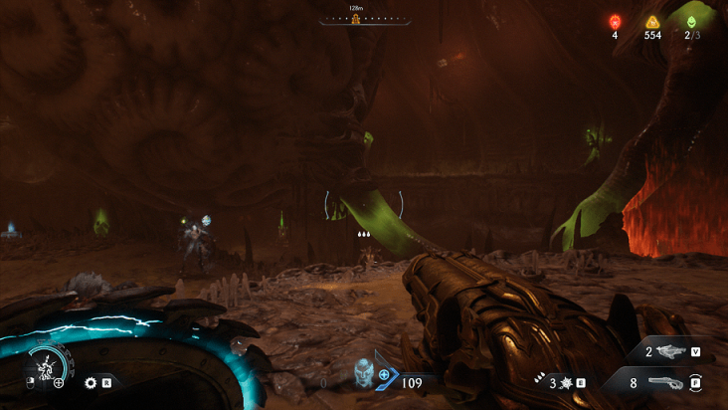 Defeat another wave of enemies to destroy the next organ. Be careful not to step on the acid pool as it drains down health fast. Collectibles: Gold Chest 2 (x50) |
| 3 | 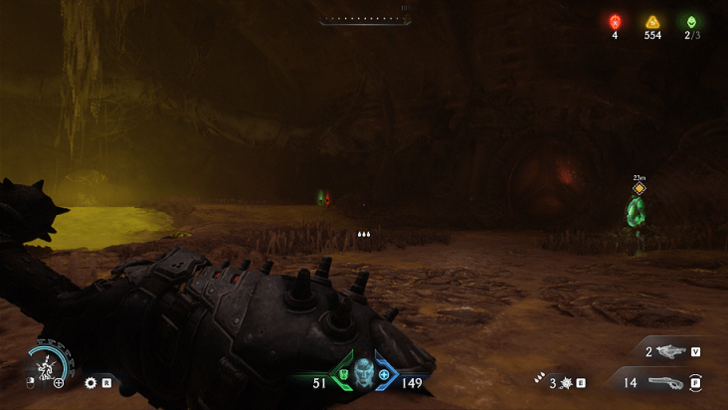 Push through multiple waves of enemies until you reach the area and destroy the third organ. This area has a large acid pool and is where you can find the optional area needed to complete the Swallowed Whole mission challenge. Collectibles: Commander Thira Codex, Life Sigil 2, Gold Trail 2 (x14), Komodo Toy, Gold Trail 3 (x7) |
| 4 | 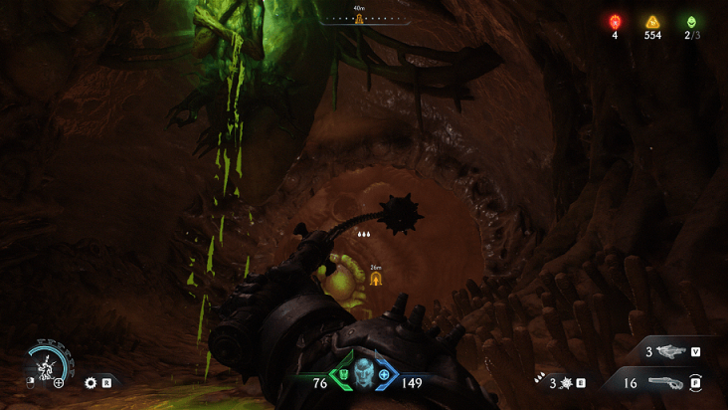 Shield Recall Jump using the statues to reach a point of no return and destroy the main organ. |
3. Enter the Temple
| 1 | 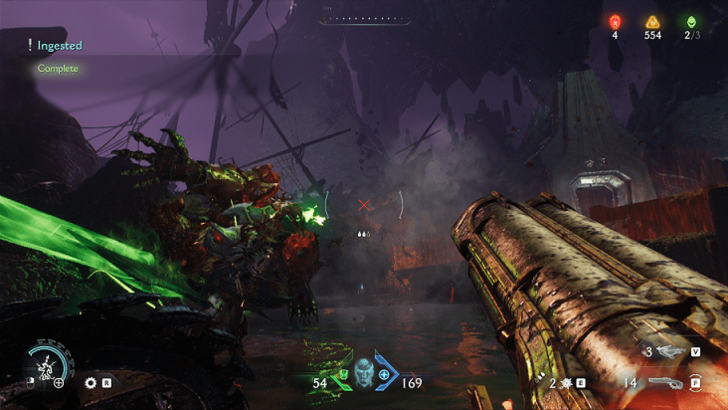 Shield Charge through a wooden barrier that will lead to the ending area of Chapter 17: Temple of Lomarith. Defeat all the heavy enemies while making your way to the main gate and on to the next area. |
|---|
4. Rescue Thira
| 1 | 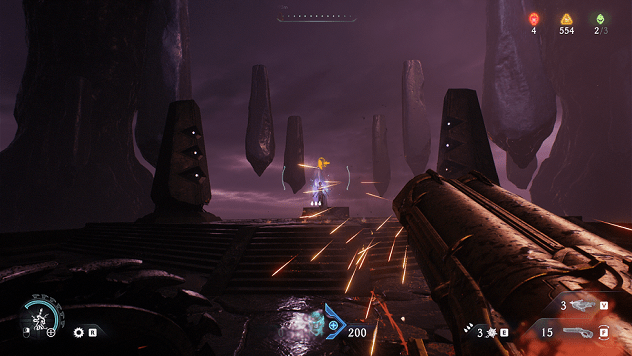 Make your way through a wall of enemies to the end of the platform to rescue Thira and complete the chapter. |
|---|
Belly of the Beast Secrets and Collectibles
Belly of the Beast Interactive Map
| Jump to a Collectible! | |
|---|---|
| Toys | 1 |
| Skins | 1 |
| Codex | 1 |
| Life Sigils | 2 |
| Demonic Essence | 1 |
| Gold | 153 |
| Rubies | 1 |
| Secrets | 6 |
Belly of the Beast Toys
| Item | How to Get |
|---|---|
 (Secret 6/6) |
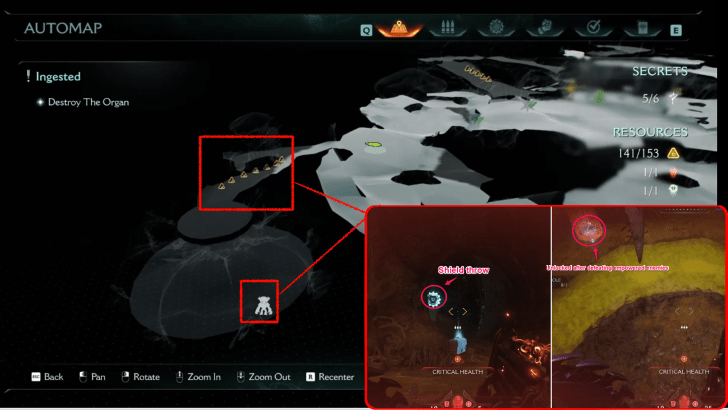
This secret area is found near the end of the chapter after destroying the third green organ. Throw your shield on an energy node and pick up a trail of gold before going down a pit to challenge a gauntlet of empowered enemies to unlock the Komodo Toy. This will also complete the Swallowed Whole mission challenge. This can be obtained during the second objective ▲. |
Belly of the Beast Skins
| Item | How to Get |
|---|---|
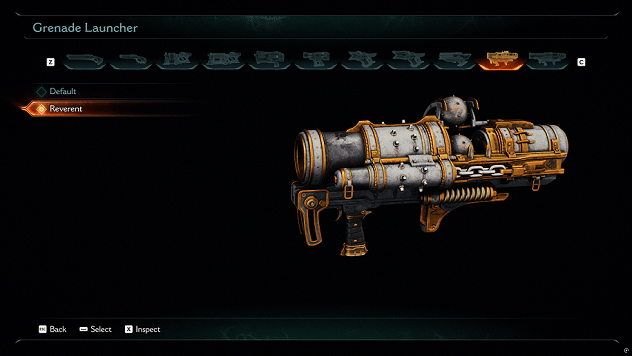 (Mission Challenge) |
This weapon skin can only be acquired after achieving the Toe-To-Toe mission challenge. |
Belly of the Beast Codex Entries
| Item | How to Get |
|---|---|
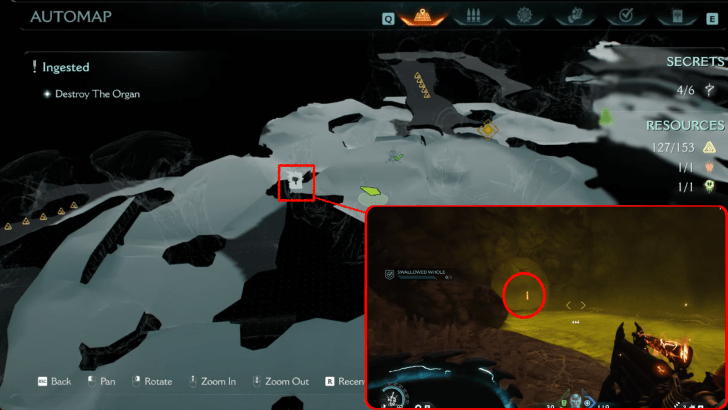 |
The Commander Thira codex entry can be found near an acid pile near the chapter's end after destroying the third green organ. This can be obtained during the second objective ▲. |
Belly of the Beast Life Sigils
| Item | How to Get |
|---|---|
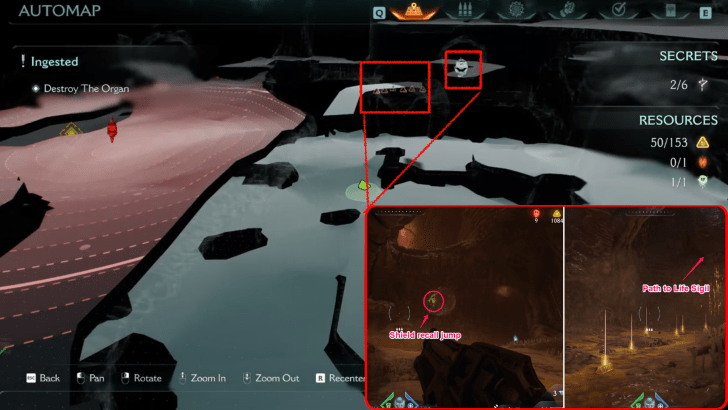 (Secret 2/6) |
This secret area can be accessed after destroying the first green organ. Shield recall jump to the statue in front and follow the trail of gold towards the first Life Sigil. This can be obtained during the second objective ▲. |
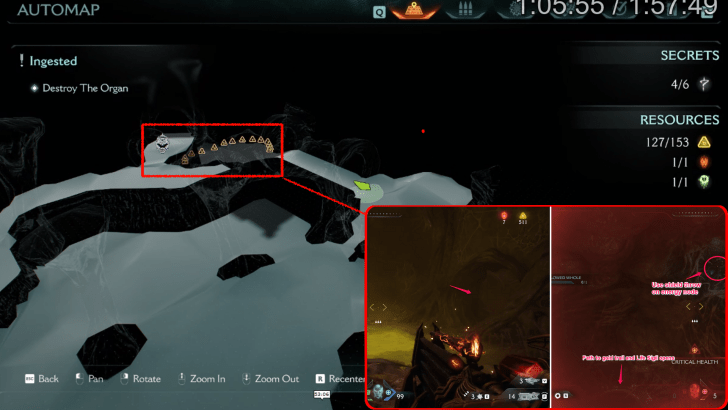 (Secret 5/6) |
This secret area is found after destroying the third green organ. Shield throw on the energy node above to stop the biting traps. Follow the trail of gold to reach the second Life Sigil. This can be obtained during the second objective ▲. |
Belly of the Beast Demonic Essence
| Item | How to Get |
|---|---|
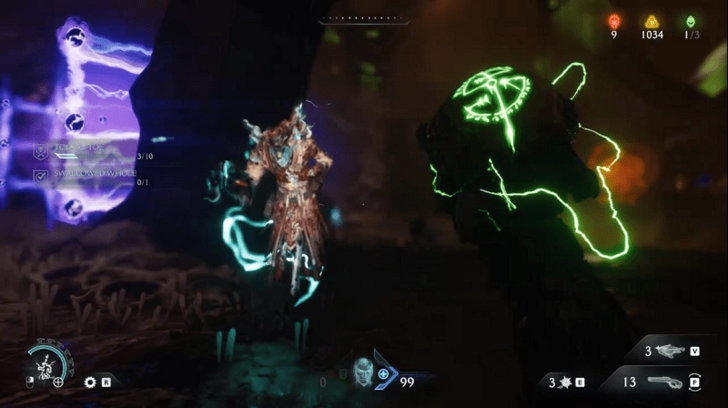 |
Obtained by defeating the Acolyte Leader at the beginning of the chapter. Increases maximum armor capacity. This can be obtained during the second objective ▲. |
Belly of the Beast Gold
| Item | How to Get |
|---|---|
 (Secret 1/6) |
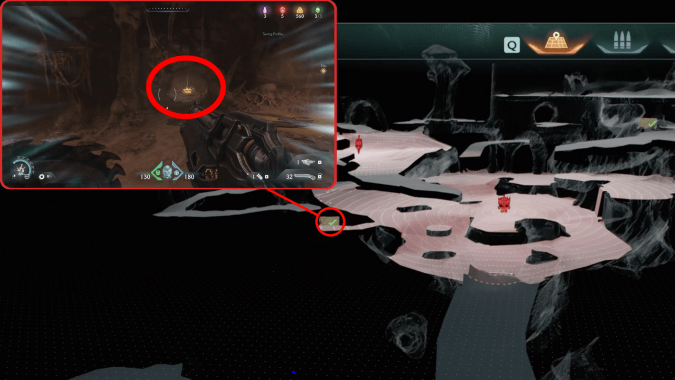
Access this secret area by destroying the first green organ after defeating the Acolyte Leader. Turn around and find a newly opened door containing the Gold Chest directly behind you. This can be obtained during the second objective ▲. |
 (Secret 2/6) |
This secret area can be accessed after destryong the first green organ. Shield recall jump to the statue in front and follow the trail of gold towards the first Life Sigil. This can be obtained during the second objective ▲. |
 (Secret 4/6) |
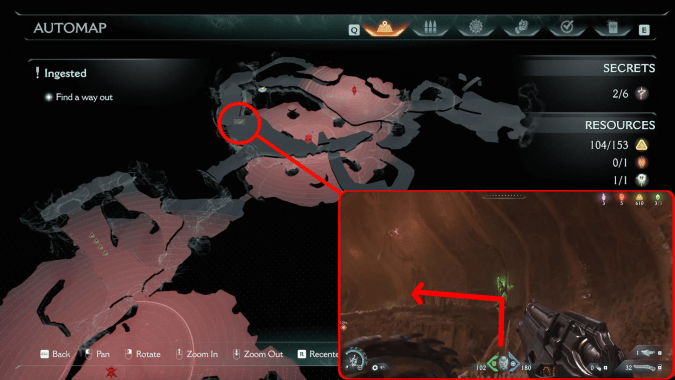
Access this secret area after destroying the second green organ. From there, turn left and look up to find a green statue. Use your shield to launch up and find the Gold Chest. This can be obtained during the second objective ▲. |
 (Secret 5/6) |
This secret area is found after the third green organ is destroyed. Shield throw on the energy node above to stop the biting traps. Follow thetrail of gold to reach the [second Life Sigil. This can be obtained during the second objective ▲. |
 (Secret 6/6) |
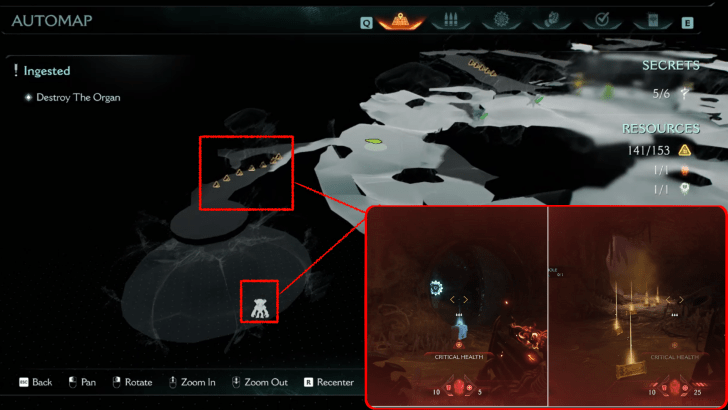
This secret area is found near the end of the chapter after destroying the third green organ. Throw your shield on an energy node and pick up a trail of gold before going down a pit to challenge a gauntlet of empowered enemies to unlock the Komodo Toy. This can be obtained during the second objective ▲. |
Belly of the Beast Rubies
| Item | How to Get |
|---|---|
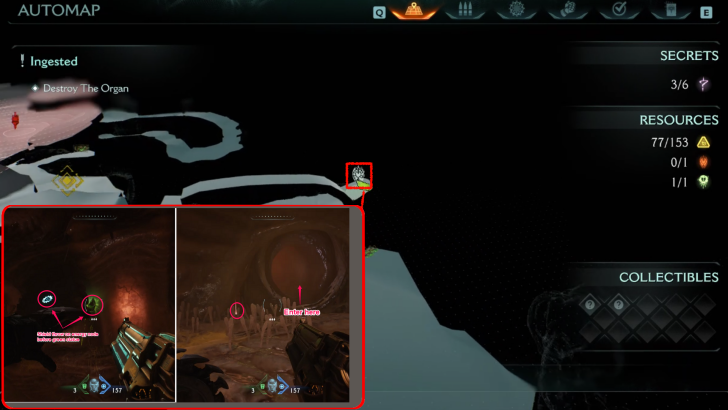 (Secret 3/6) |
Access this secret area by shield throwing on the energy node to move the body part, then quickly shield recall jump onto the higher platform. After jumping, turn around and enter the path towards the Ruby. This can be obtained during the second objective ▲. |
Belly of the Beast Mission Challenges
 |
|
| Challenge | Details and Reward |
|---|---|
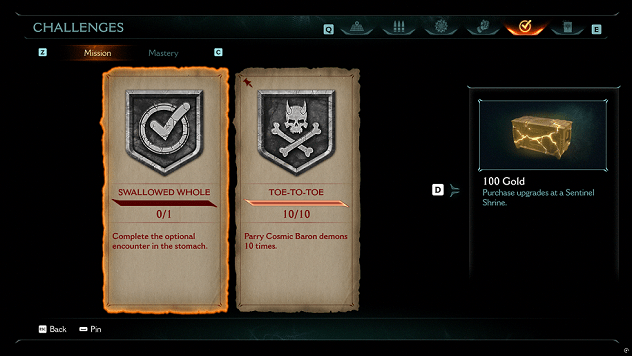
| Swallowed Whole | Complete the optional encounter in the stomach. Reward: 100 Gold |
| Toe-To-Toe | Parry Cosmic Baron demons 10 times. Reward: Reverent Grenade Launcher Skin |
Swallowed Whole
This challenge can be done in a secret area near the end of the chapter after destroying the third green organ. Completing this challenge will also unlock the Komodo Toy.
Defeat a gauntlet of empowered enemies to achieve this challenge: Armored Mancubus, Soldiers, Battle Knight, Whiplash, Revenants, and a Cyberdemon.
Toe-To-Toe
The best Cosmic Baron to do this against is the one behind one of the wooden barriers found after the first green organ is destroyed.
Defeat the fodder enemies around it to avoid any distractions while you parry the Cosmic Baron until this challenge is completed.
Doom: The Dark Ages Related Guides

Full Walkthrough and List of Chapters
Comment
Author
Chapter 18: Belly of the Beast Secrets and Walkthrough
improvement survey
03/2026
improving Game8's site?

Your answers will help us to improve our website.
Note: Please be sure not to enter any kind of personal information into your response.

We hope you continue to make use of Game8.
Rankings
- We could not find the message board you were looking for.
Gaming News
Popular Games

Genshin Impact Walkthrough & Guides Wiki

Honkai: Star Rail Walkthrough & Guides Wiki

Umamusume: Pretty Derby Walkthrough & Guides Wiki

Pokemon Pokopia Walkthrough & Guides Wiki

Resident Evil Requiem (RE9) Walkthrough & Guides Wiki

Monster Hunter Wilds Walkthrough & Guides Wiki

Wuthering Waves Walkthrough & Guides Wiki

Arknights: Endfield Walkthrough & Guides Wiki

Pokemon FireRed and LeafGreen (FRLG) Walkthrough & Guides Wiki

Pokemon TCG Pocket (PTCGP) Strategies & Guides Wiki
Recommended Games

Diablo 4: Vessel of Hatred Walkthrough & Guides Wiki

Fire Emblem Heroes (FEH) Walkthrough & Guides Wiki

Yu-Gi-Oh! Master Duel Walkthrough & Guides Wiki

Super Smash Bros. Ultimate Walkthrough & Guides Wiki

Pokemon Brilliant Diamond and Shining Pearl (BDSP) Walkthrough & Guides Wiki

Elden Ring Shadow of the Erdtree Walkthrough & Guides Wiki

Monster Hunter World Walkthrough & Guides Wiki

The Legend of Zelda: Tears of the Kingdom Walkthrough & Guides Wiki

Persona 3 Reload Walkthrough & Guides Wiki

Cyberpunk 2077: Ultimate Edition Walkthrough & Guides Wiki
All rights reserved
© 2025 ZeniMax Media Inc. All Rights Reserved.
The copyrights of videos of games used in our content and other intellectual property rights belong to the provider of the game.
The contents we provide on this site were created personally by members of the Game8 editorial department.
We refuse the right to reuse or repost content taken without our permission such as data or images to other sites.




![Everwind Review [Early Access] | The Shaky First Step to A Very Long Journey](https://img.game8.co/4440226/ab079b1153298a042633dd1ef51e878e.png/thumb)

![Monster Hunter Stories 3 Review [First Impressions] | Simply Rejuvenating](https://img.game8.co/4438641/2a31b7702bd70e78ec8efd24661dacda.jpeg/thumb)


