Chapter 17: Temple of Lomarith Secrets and Walkthrough
☆ Doom: The Dark Ages is live now!
★ Collectibles | Secrets | Walkthrough
┗ Resources | Codex | Toy
★ Trophies | Beginner's Guide | Enemies
☆ Skins: Twitch Drops | Prince St. Pizza
★ FAQs: Co-op | DLC | Specs | Glory Kills
Chapter 17: Temple of Lomarith in Doom: The Dark Ages contains 9 secrets and 3 collectibles. Learn how to get all the secrets, gold, and collectibles, as well as how to complete the Mission Challenges in this Chapter 17 walkthrough guide.
| ◄ Previous Chapter | Next Chapter ▶ |
|---|---|
| The Kar'Thul Marshes | Belly of the Beast |
Temple of Lomarith Secrets and Collectibles
Temple of Lomarith Interactive Map
| Jump to a Collectible! | |
|---|---|
| Toys | 1 |
| Skins | 1 |
| Codex | 1 |
| Life Sigils | 2 |
| Gold | 194 |
| Rubies | 2 |
| Wraithstone | 1 |
| Demonic Essence | 2 |
| Secrets | 9 |
Temple of Lomarith Toys
| Item | How to Get |
|---|---|
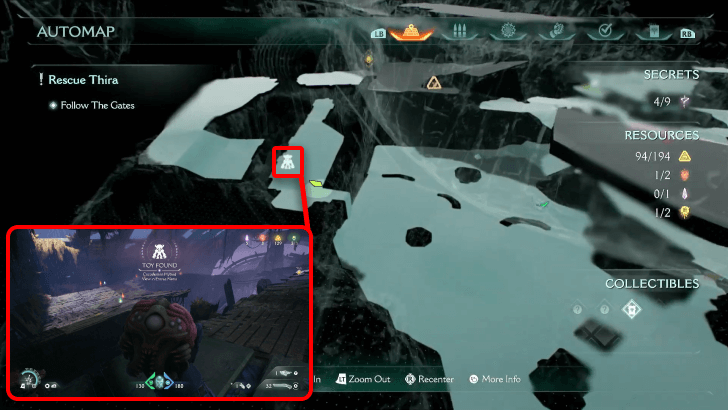 |
To obtain the toy, you'll need to push certain things in the correct place. Climb up the ship and make your way across the platforms, following the trail of ammo refills. Instead of breaking the green barricade, turn to your right and Shield Charge the
blue indicator blue indicator 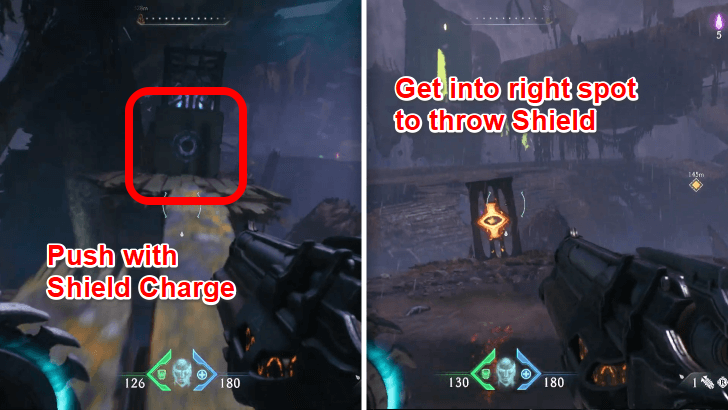 Cosmic Eye  |
Temple of Lomarith Skins
| Item | How to Get |
|---|---|
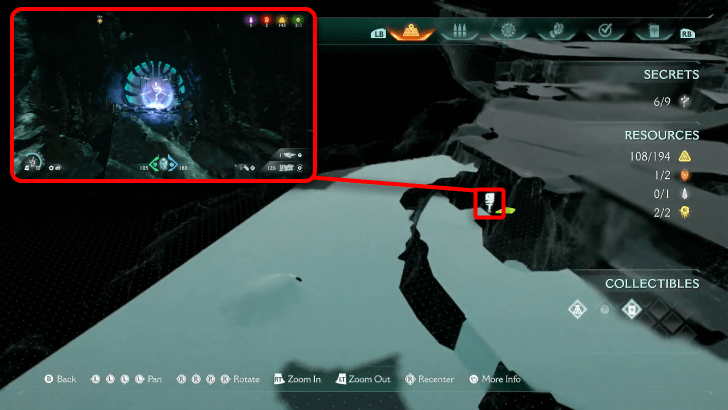 |
The weapon skin is nearby the Secret Area. At the base of the temple, head towards the far side to find a
portal portal 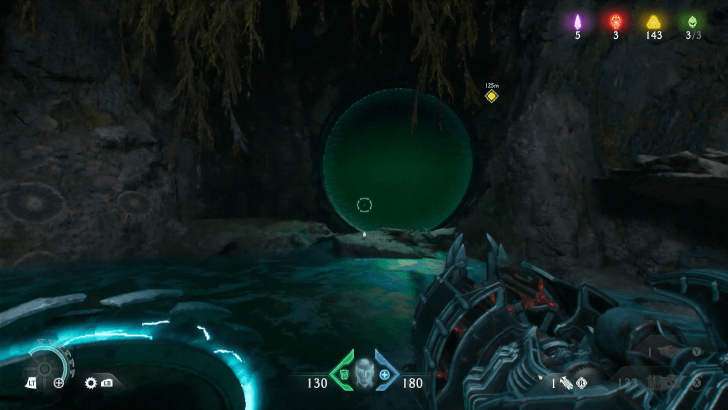 crevice 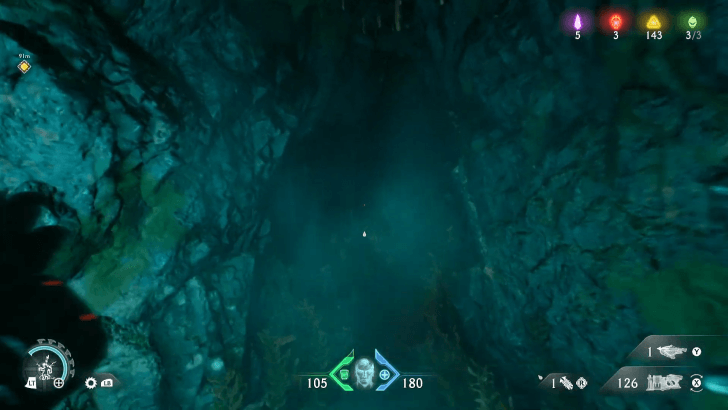 |
Temple of Lomarith Codex Entries
| Item | How to Get |
|---|---|
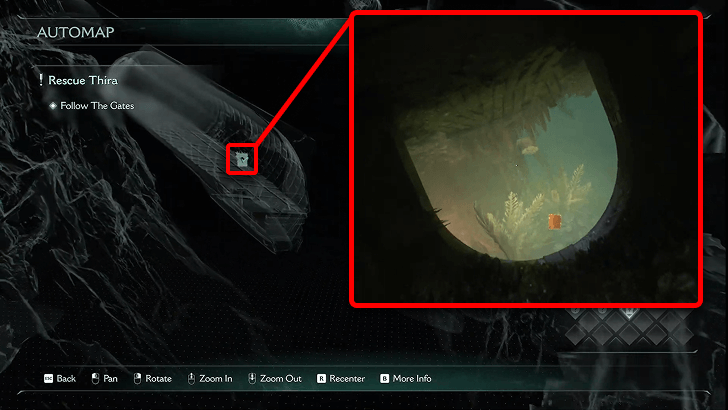 (Secret 2/9) |
As you swim through the waterlogged sunken ship, you'll come across the Codex entry floating in the middle of the pathway. This can be obtained during the first objective ▼ |
Temple of Lomarith Life Sigils
| Item | How to Get |
|---|---|
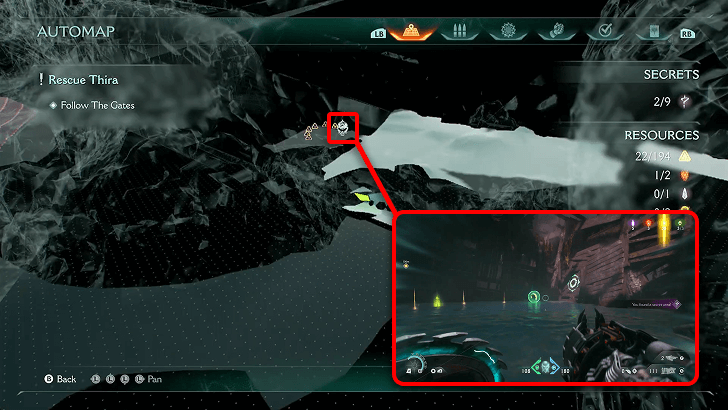 (Secret 3/9) |
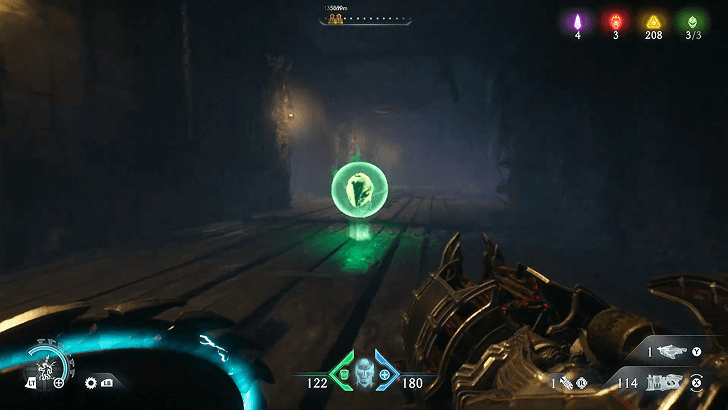
This Life Sigil is found in the second Secret Area you'll encounter. It can be accessed by submerging yourrself underwater, and swimming towards the far side of tha cavern, through a little pathway, where a Life Sigil as well as a Gold Trail will be waiting. This can be obtained during the first objective ▼ |
 |
You will come across this Life Sigil as you proceed through a maze. Enter the ship nearby the temple and Shield Charge two
blue barricades blue barricades 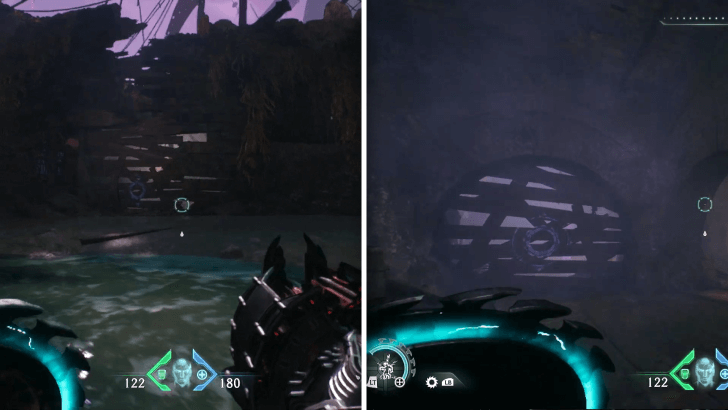 |
Temple of Lomarith Gold
| Item | How to Get |
|---|---|
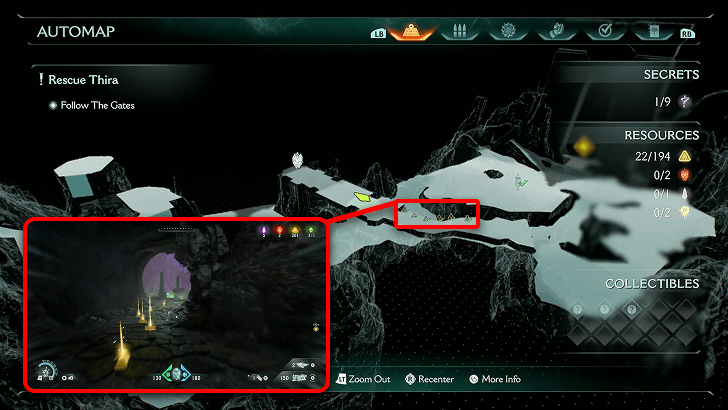
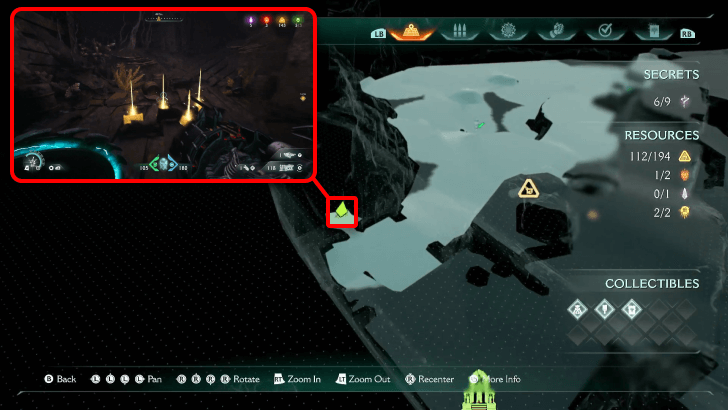 |
Nearby where the Weapon Skin can be found, head straight ahead where a ship is, and turn towards the right. There are four gold bars hiding behind some wooden barrels and chests there. This can be obtained during the fourth objective ▼ |
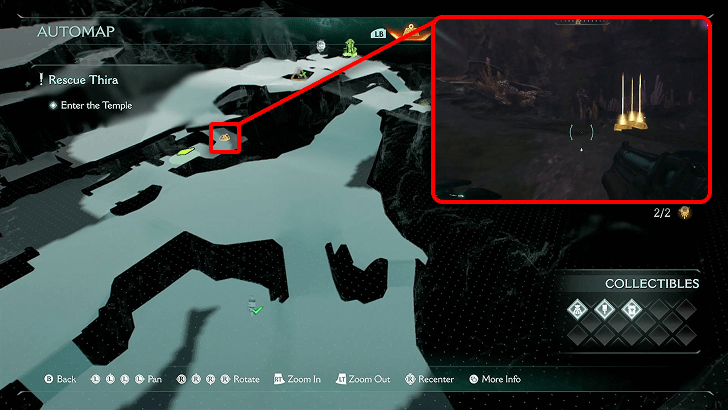 |
Below in the underbelly of the ship with a Sentinel Shrine and Ruby 2, there is a blue barricade that can be Shield Charged to reveal three gold bars. This can be obtained during the fourth objective ▼ |
 |
As you go through the beach in the starting area, there is a
Shield Recall Jump Shield Recall Jump 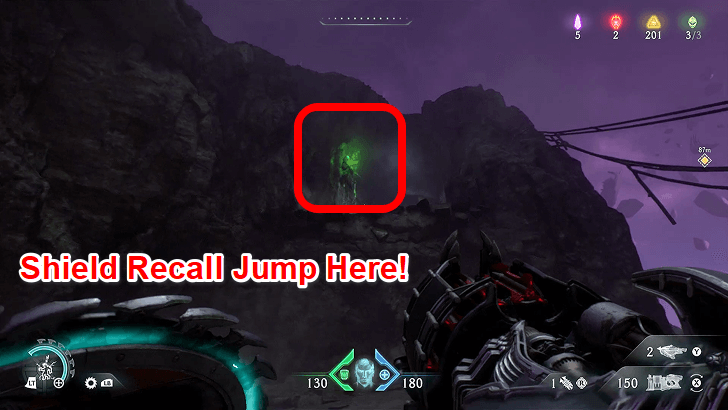 |
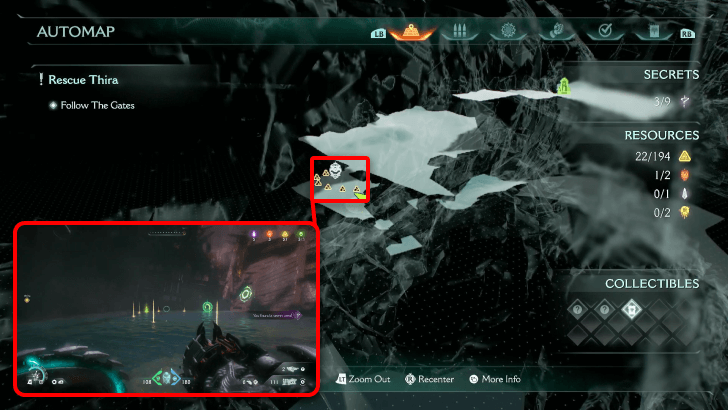 (Secret 5/9) |
Past the first Sentinel Shrine, there is a large area in a broken ship. Parts of the cave is submerged in water, so head towards the far end to find a submerged area to swim in. Towards the side is a short passageway that will exit out where Life Sigil 1 is, as well as Gold Trail 2. This can be obtained during the third objective ▼ |
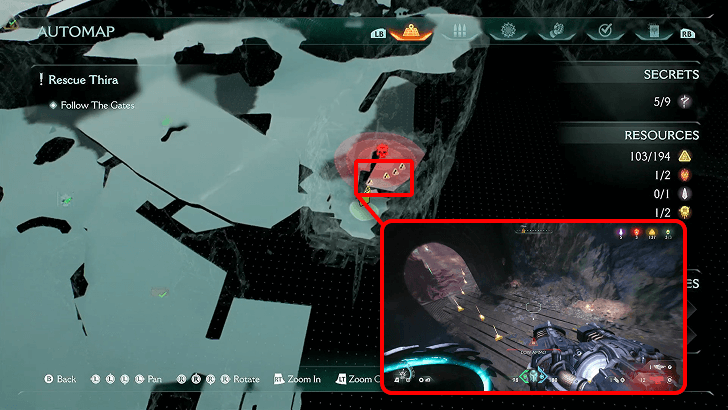 |
Proceed through the ship, and take the booster. Defeat the demons in the area, then break through the blue barricade at the far end of the ship. You'll land in a secret area and right on top of the gold trail here. This can be obtained during the fourth objective ▼ |
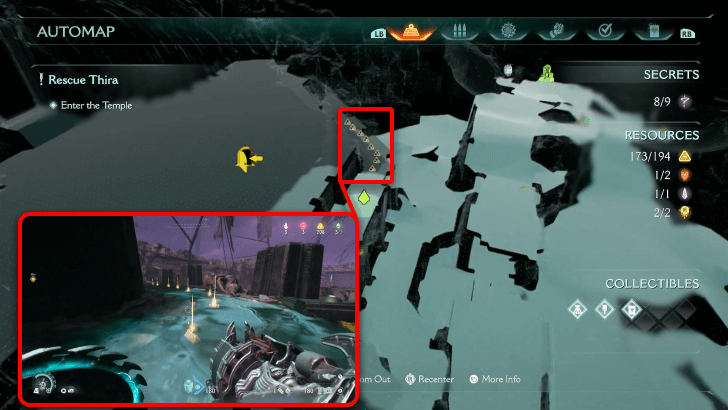 |
Before proceeding to the top of the temple, there is a gold trail towards the side. This can be obtained during the fourth objective ▼ |
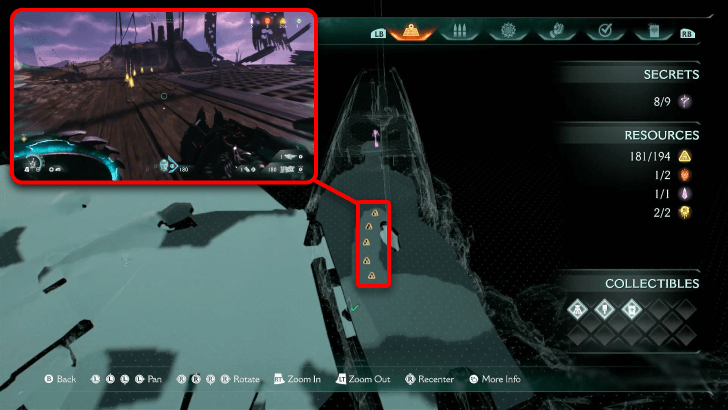 |
Near the entry of the temple, there is a ship holding some goodies towards the side. Pick up the gold trail on the deck and the Purple Key in a room at the end of the area. This can be obtained during the fourth objective ▼ |
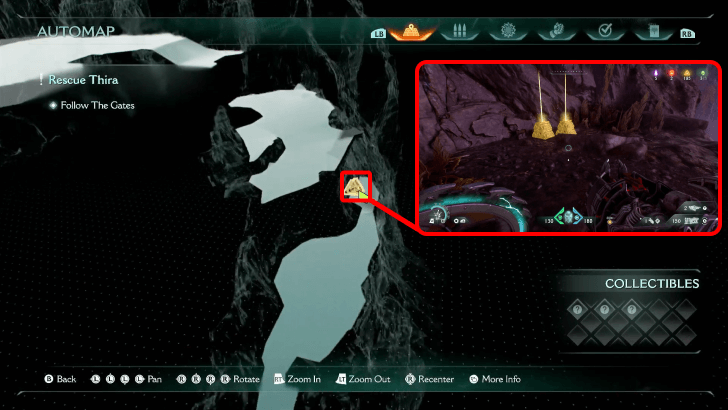 |
This is found next to the starting area. Drop down to the platform below, and grab the gold caches. This can be obtained during the first objective ▼ |
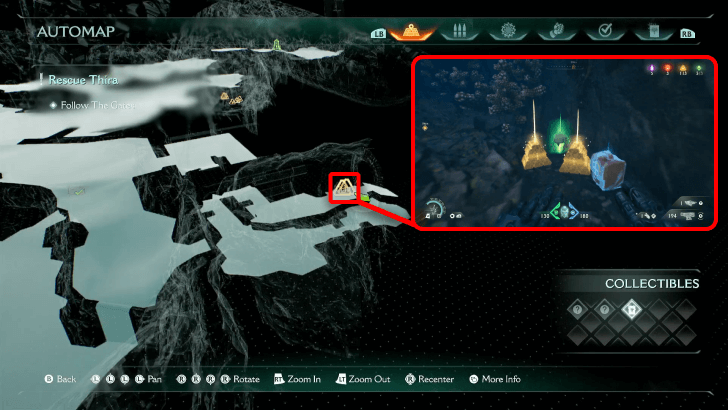 |
You'll find this around the decrepit ship with two portals. Take the
portal portal 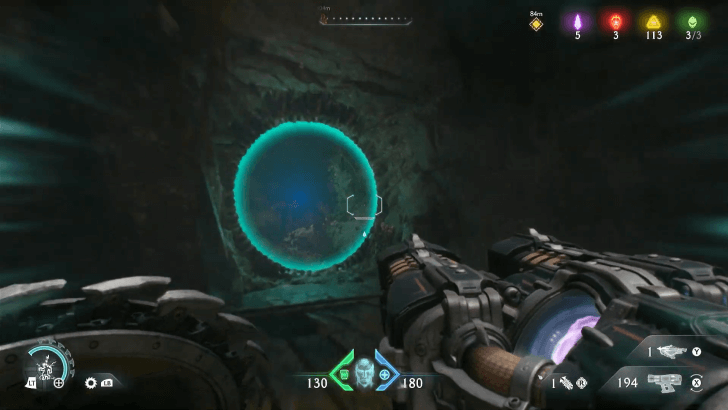 |
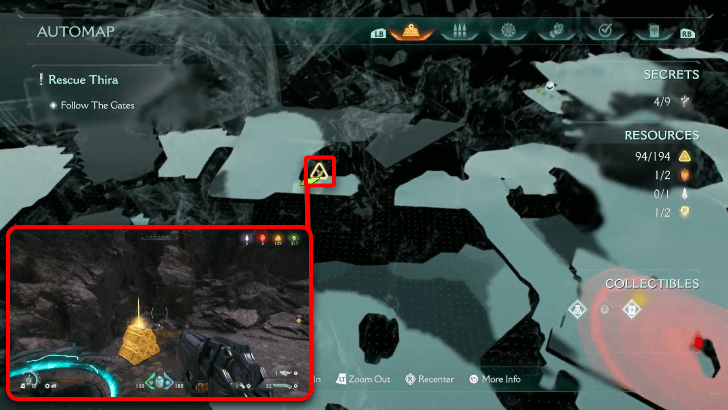 |
Around where the Cacodemon Hybrid Toy was found, Shield Charge the green barricade to proceed to the new area. Instead of continuing through the ship, bank towards the right, and the gold cache will be waiting there. This can be obtained during the third objective ▼ |
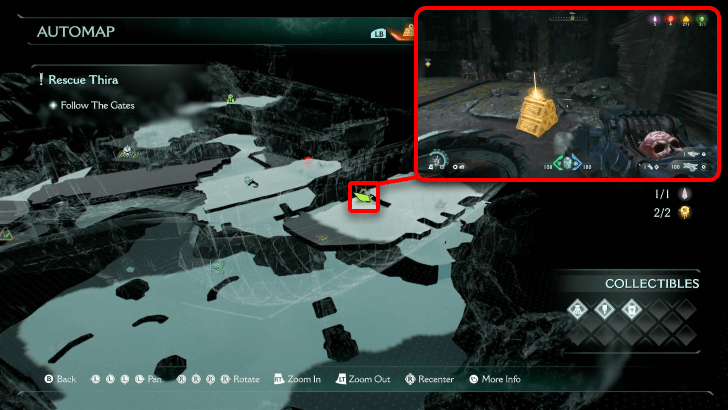 |
Take the jump booster to take you up to the ship. Your suit will tell you there are gravitic anomalies detected, and as you proceed through the ship, before taking the next booster, turn around the corner to pick up the gold cache. This can be obtained during the third objective ▼ |
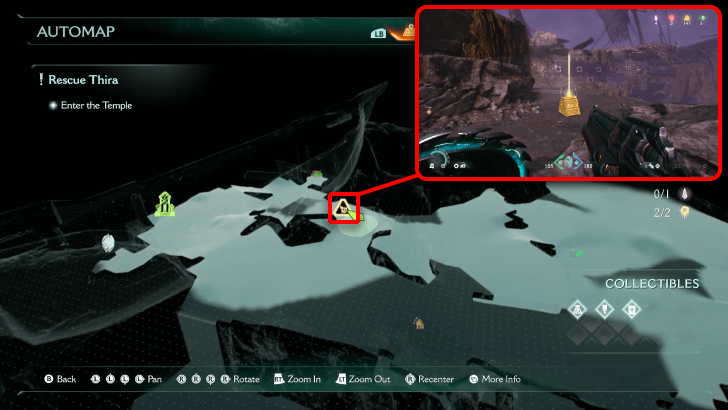 |
Nearby the Sentinel Shrine and Ruby 2, there is a gold cache outside the area in plain sight. This can be obtained during the fourth objective ▼ |
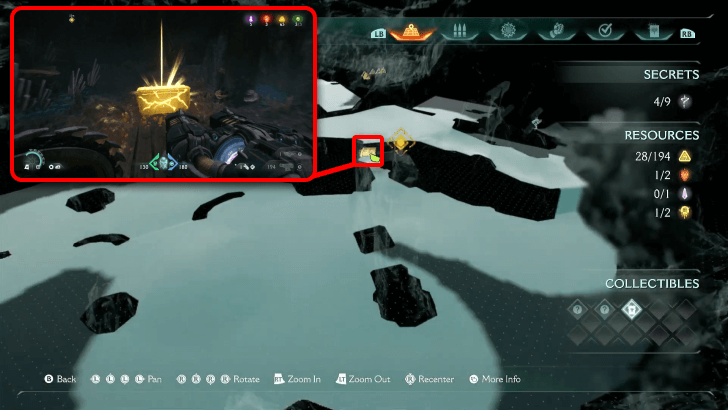 (Secret 4/9) |
Around the area of the first Leader fight, there is an alcove hidden behind a
blue barricade blue barricade 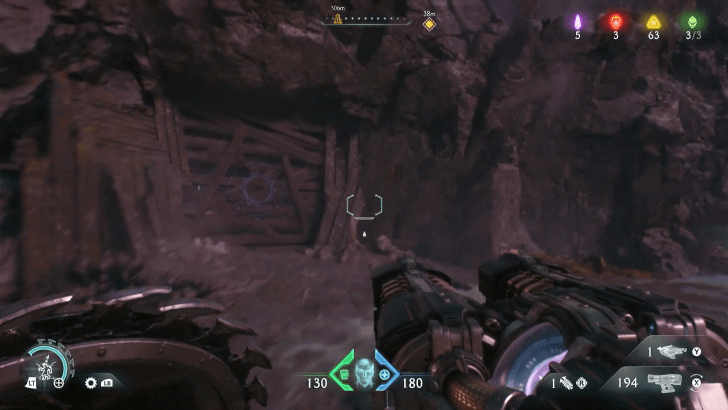 |
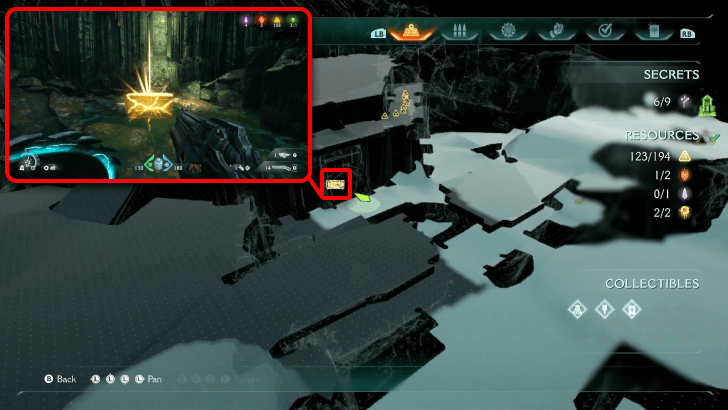 (Secret 7/9) |
Nearby underneath where the Sentinel Shrine and Ruby 2, there is a gold chest waiting in an alcove in the base of the temple. This can be obtained during the fourth objective ▼ |
Temple of Lomarith Rubies
| Item | How to Get |
|---|---|
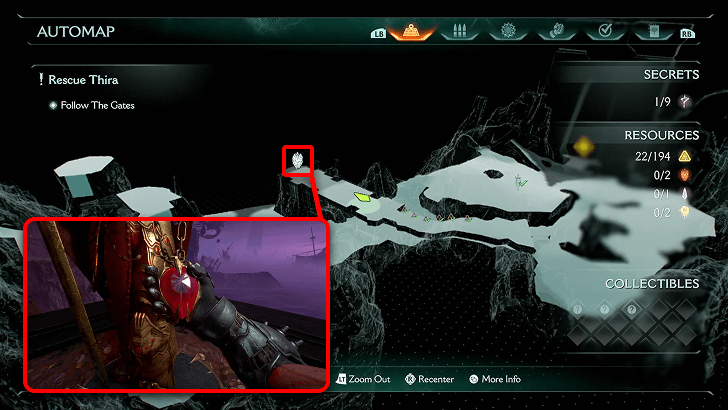 (Secret 1/9) |
As you go through the beach in the starting area, there is a
Shield Recall Jump Shield Recall Jump  |
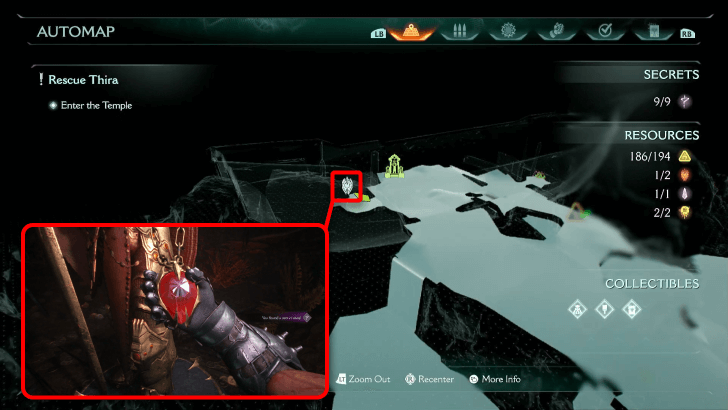 (Secret 9/9) |
Hop over to the ship acting as a bridge on the far side of the temple, and you'll find a Sentinel Shrine and a locked gate waiting for you at the end. Unlock the gate with the Purple Key to reveal the Ruby. This can be obtained during the fourth objective ▼ |
Temple of Lomarith Wraithstones
| Item | How to Get |
|---|---|
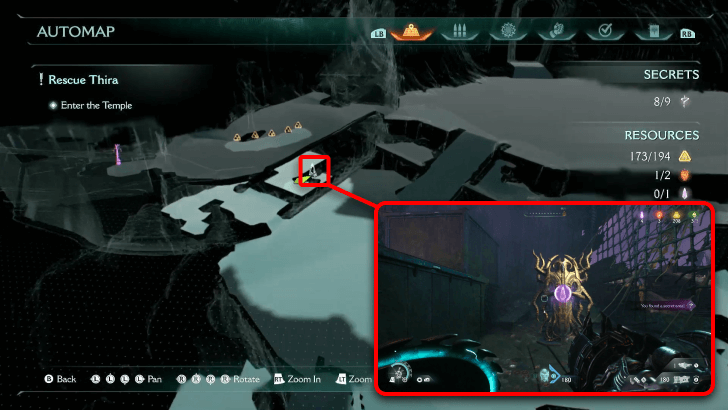 (Secret 8/9) |
You will come across the Wraithstone after you proceed through a maze. Enter the ship nearby the entrance of the temple and Shield Charge two
blue barricades blue barricades  |
Temple of Lomarith Demonic Essence
| Item | How to Get |
|---|---|
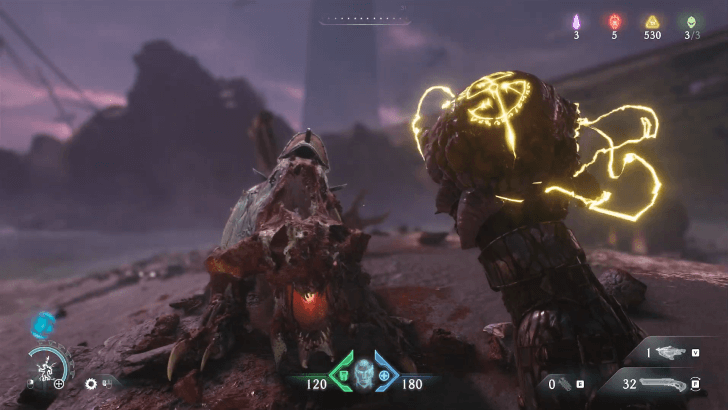 Demonic Essence - Spike Ammo Demonic Essence - Spike Ammo |
As you pick yourself up from the beach, a Pinky Rider Leader will be waiting for you past the first Sentinel Shrine. Defeat it to get a capacity upgrade for Spike Ammo. This can be obtained during the first objective ▼ |
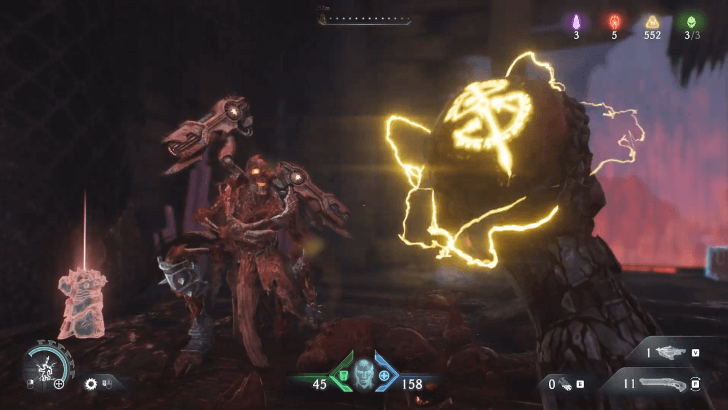 Demonic Essence - Cell Ammo Demonic Essence - Cell Ammo |
In one of the beached, dilapidated ships, a Revenant Leader is hiding in the area. Defeat it to get a capacity upgrade for Cell Ammo. This can be obtained during the third objective ▼ |
Temple of Lomarith Walkthrough
| Main Objectives | |
|---|---|
| 1 | Follow the Gates Secrets: Gold Trail 1 + Ruby 1 - Secret #1 Temple of Lomarith Codex - Secret #2 Life Sigil 1 + Gold Trail 2 Secret #3 |
| 2 | Activate the Gate |
| 3 | Follow the Gates Secrets: Gold Chest 1 - Secret #4 Gold Trail 2 - Secret #5 |
| 4 | Enter the Temple Secrets: Secret Area - Secret #6 Gold Chest 2 - Secret #7 Wraithstone - Secret #8 Ruby 2 - Secret #9 |
1. Follow the Gates
| 1 | 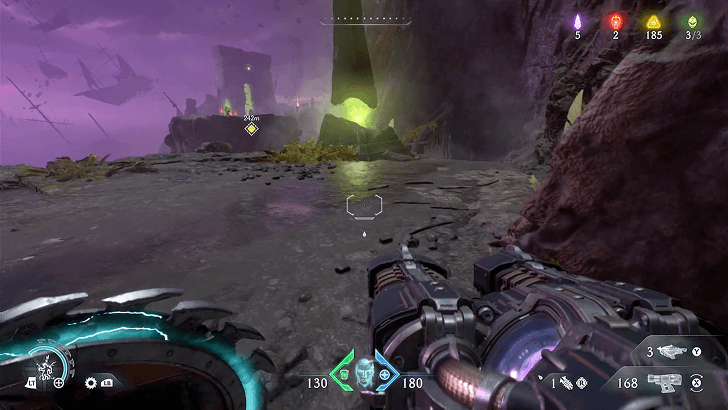 Upon spawning, follow the Objective Marker to the Green Portal looming in the distance. To the side of the portal is a Shield Recall Jump that will lead to more collectibles. Collectibles: Gold Cache 1 (x16), Gold Trail 1 (x6), Ruby 1 - Secret # 1 |
|---|---|
| 2 | 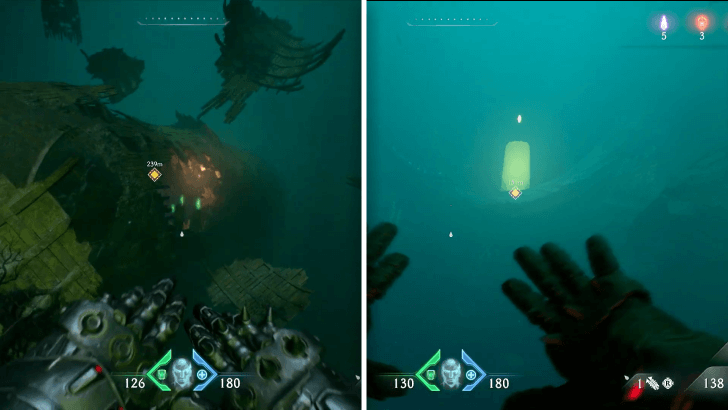 Swim through the sunken ship, and then to the portal up ahead. Collectibles: Temple of Lomarith Codex - Secret # 2 |
| 3 | 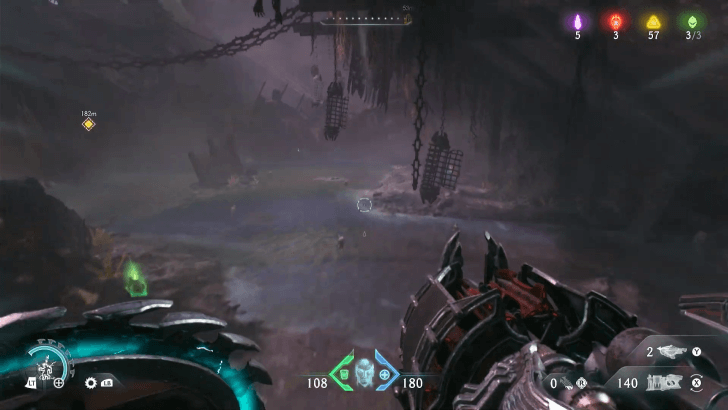 Get through the large cavern, and cull the demons in your way to clear the ward. Collectibles: Life Sigil 1, Gold Trail 2 (x6) - Secret # 3 |
| 4 | 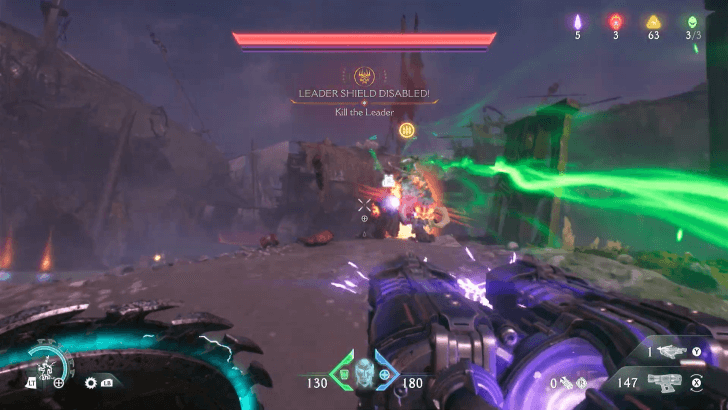 Defeat the Pinky Rider Leader to gain a Demonic Essence. Keep following the objective marker, and cut your way through the beach and the ships to get to the next area. |
2. Activate the Gate
| 1 | 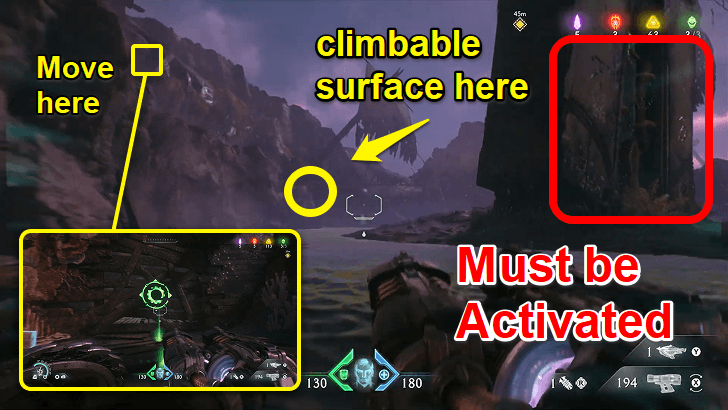 You'll end up at a beach clearing with a portal in the middle of the area waiting to get activated. Climb up the surface at the far end of the portal, and move into the nearby decrepit ship. Collectibles: Gold Chest 1 (x50) |
|---|---|
| 2 | 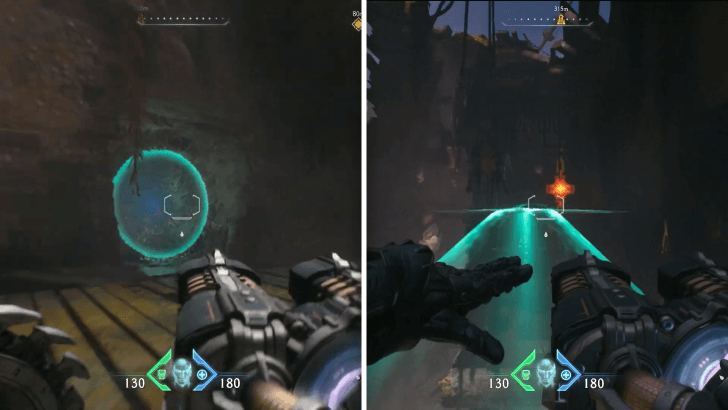 Enter from the ship from its side, and go through the portal on the lower floor. Exit from the portal above you then break the Metal Lock holding the gate of the green box. Collectibles: Gold Cache 2 (x16) |
| 3 | 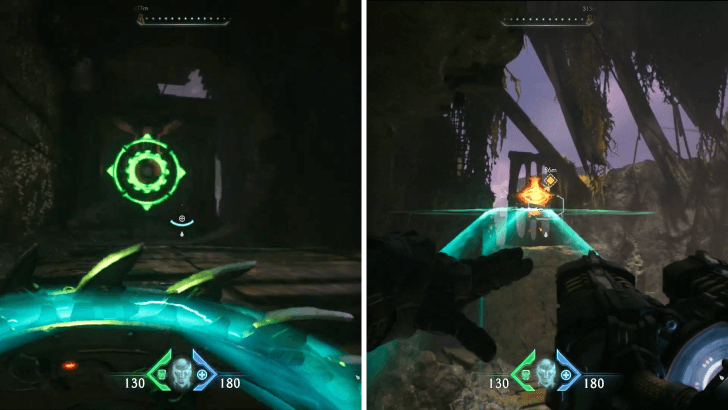 Jump down the platform and push the box. This will let you climb up to a new platform be able to hit the Cosmic Eye from here to activate the gate. |
3. Follow the Gates
| 1 | 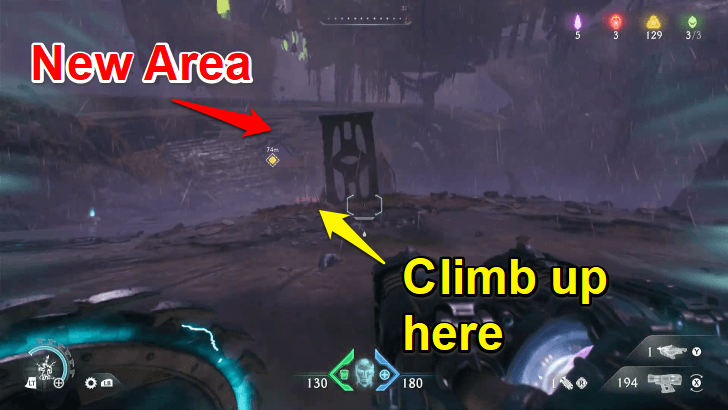 It might seem like the same area, but your objective marker will say otherwise. Climb up to the new area, and make your way to the far end of the area. Break the green barricade to proceed. Collectibles: Cacodemon Hybrid Toy, Gold Cache 3 (x16), Gold Trail 3 (x16) |
|---|---|
| 2 | 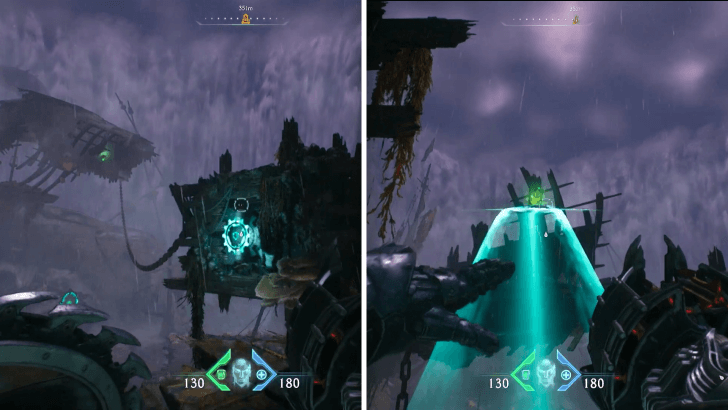 Throw your Shield to manuever the ship and chain closer to Shield Recall Jump at it next. |
| 3 | 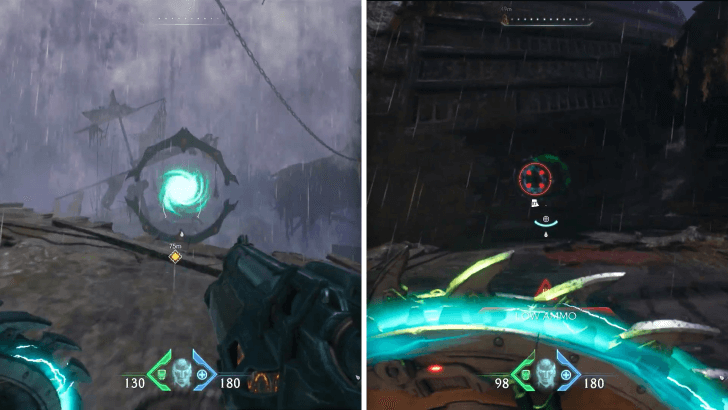 You'll have to take the Boosters to lead you to the final area of the map. Use the ships as a pathway to the Boosters, and cull the demons in your way. Collectibles: Gold Trail 2 (x8) |
| 4 | 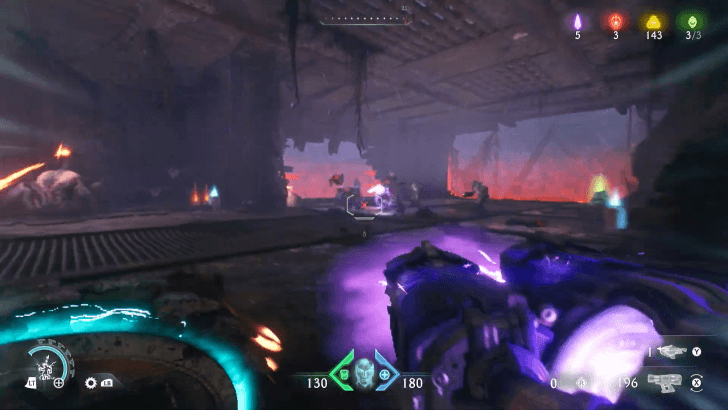 There will be a Revenant Leader battle in one of the ships, where you'll earn a Cell Ammo capacity upgrade after defeating it. Keep following the objective marker afterwards. Collectibles: Demonic Essence - Ammo, Gold Cache 4 (x8) |
| 5 | 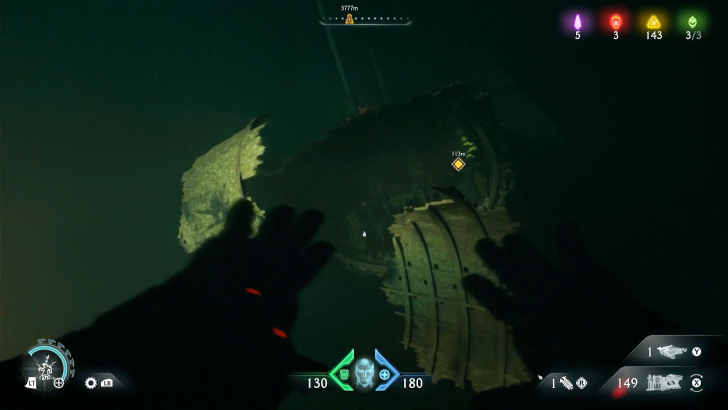 Swim through the broken ships to the final portal. |
4. Enter the Temple
| 1 | 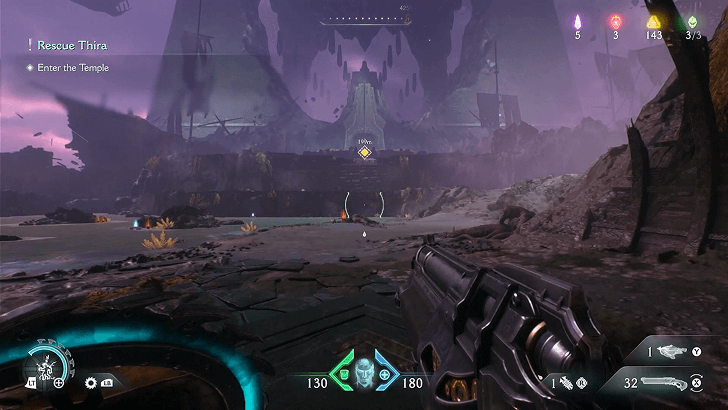 You'll be entering the final area of the map when you exit. Climb up the steps of the temple to clear the last objective. Collectibles: Nightmare Rocket Launcher Skin, Gold (x4), Gold Cache 5 (x8), Gold Chest 2 (x50) - Secret #7, Gold Trail 3-4 (x12), Wraithstone - Secret #8, Ruby 2 - Secret #9 |
|---|
Secret Key Location
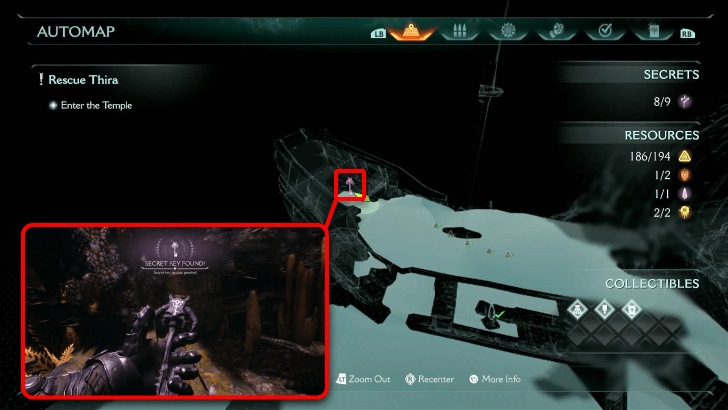
The secret key is located at a decrepit ship near the far side of the temple. Go up the steps, but don't head into the final area and instead head towards the side. Gold Trail 5 is on the deck, along with the room at the end of the ship containing the Purple key.
Temple of Lomarith Mission Challenges
 |
|
| Challenge | Details and Reward |
|---|---|
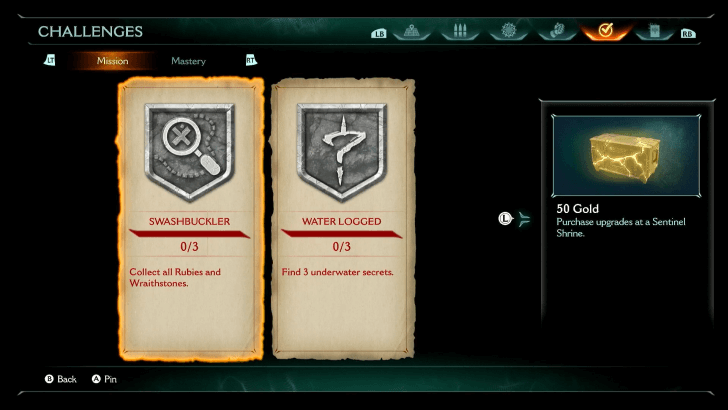
| Swashbuckler | Collect all Rubies and Wraithstones Reward: 50 Gold |
| Water Logged | Strike demons with the Flail 25 times Reward: 50 Gold |
Swashbuckler
Collect all the Rubies and Wraithstones in the map level.
Water Logged
Secret Area 1 Location (Secret 2/9)
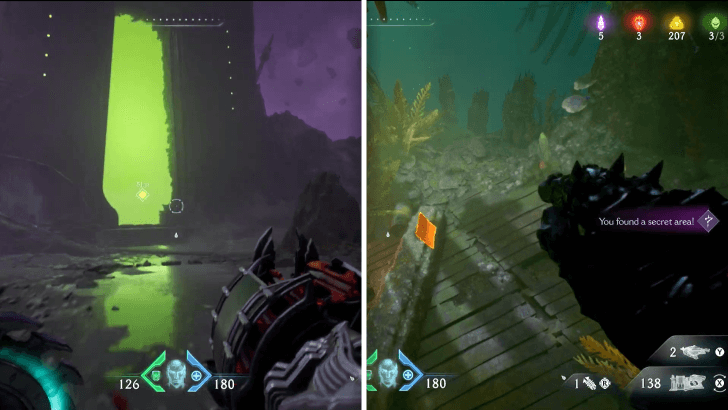
You'll come across this secret area when you pass for the Temple of Lomarith Codex. Hop into the Green portal after fighting off the demons in the beach, the swim towards the sunken ship.
Secret Area 2 Location (Secret 3/9)
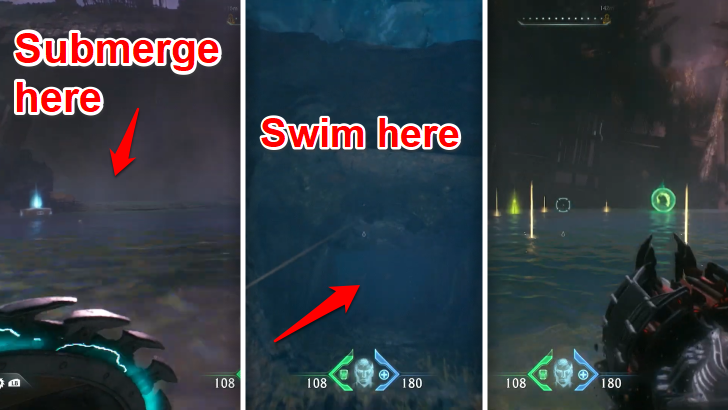
Past the first Sentinel Shrine, there is a large area in a broken ship. Parts of the cave is submerged in water, so head towards the far end to find a submerged area to swim in. Towards the side is a short passageway that will exit out where Life Sigil 1 is, as well as Gold Trail 2.
Secret Area 3 Location (Secret 6/9)
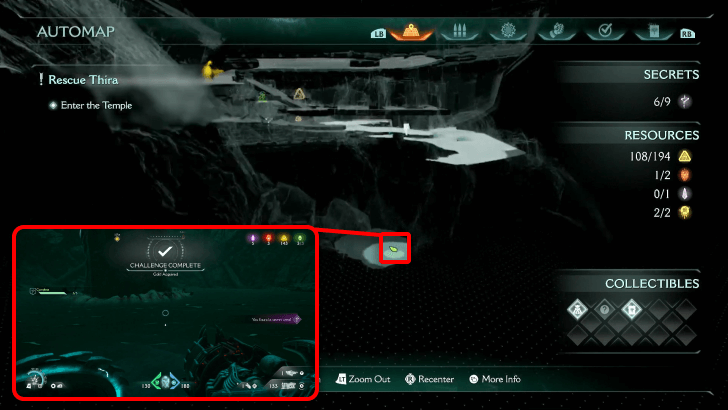
At the far side of the temple, below at the base, there is a portal

Doom: The Dark Ages Related Guides

Full Walkthrough and List of Chapters
Comment
Author
Chapter 17: Temple of Lomarith Secrets and Walkthrough
improvement survey
03/2026
improving Game8's site?

Your answers will help us to improve our website.
Note: Please be sure not to enter any kind of personal information into your response.

We hope you continue to make use of Game8.
Rankings
- We could not find the message board you were looking for.
Gaming News
Popular Games

Genshin Impact Walkthrough & Guides Wiki

Honkai: Star Rail Walkthrough & Guides Wiki

Umamusume: Pretty Derby Walkthrough & Guides Wiki

Pokemon Pokopia Walkthrough & Guides Wiki

Resident Evil Requiem (RE9) Walkthrough & Guides Wiki

Monster Hunter Wilds Walkthrough & Guides Wiki

Wuthering Waves Walkthrough & Guides Wiki

Arknights: Endfield Walkthrough & Guides Wiki

Pokemon FireRed and LeafGreen (FRLG) Walkthrough & Guides Wiki

Pokemon TCG Pocket (PTCGP) Strategies & Guides Wiki
Recommended Games

Diablo 4: Vessel of Hatred Walkthrough & Guides Wiki

Fire Emblem Heroes (FEH) Walkthrough & Guides Wiki

Yu-Gi-Oh! Master Duel Walkthrough & Guides Wiki

Super Smash Bros. Ultimate Walkthrough & Guides Wiki

Pokemon Brilliant Diamond and Shining Pearl (BDSP) Walkthrough & Guides Wiki

Elden Ring Shadow of the Erdtree Walkthrough & Guides Wiki

Monster Hunter World Walkthrough & Guides Wiki

The Legend of Zelda: Tears of the Kingdom Walkthrough & Guides Wiki

Persona 3 Reload Walkthrough & Guides Wiki

Cyberpunk 2077: Ultimate Edition Walkthrough & Guides Wiki
All rights reserved
© 2025 ZeniMax Media Inc. All Rights Reserved.
The copyrights of videos of games used in our content and other intellectual property rights belong to the provider of the game.
The contents we provide on this site were created personally by members of the Game8 editorial department.
We refuse the right to reuse or repost content taken without our permission such as data or images to other sites.





![Everwind Review [Early Access] | The Shaky First Step to A Very Long Journey](https://img.game8.co/4440226/ab079b1153298a042633dd1ef51e878e.png/thumb)

![Monster Hunter Stories 3 Review [First Impressions] | Simply Rejuvenating](https://img.game8.co/4438641/2a31b7702bd70e78ec8efd24661dacda.jpeg/thumb)


