Chapter 8: Abyssal Forest Secrets and Walkthrough
☆ Doom: The Dark Ages is live now!
★ Collectibles | Secrets | Walkthrough
┗ Resources | Codex | Toy
★ Trophies | Beginner's Guide | Enemies
☆ Skins: Twitch Drops | Prince St. Pizza
★ FAQs: Co-op | DLC | Specs | Glory Kills
Chapter 8: Abyssal Forest in Doom: the Dark Ages contains 11 secrets and 3 collectibles. Learn how to get all the secrets, gold, and collectibles, as well as how to complete the Mission Challenges in this Chapter 8 walkthrough guide.
| ◄ Previous Chapter | Next Chapter ▶ |
|---|---|
| Siege - Part 2 | Ancestral Forge |
Abyssal Forest Secrets and Collectibles
Abyssal Forest Interactive Map
| Jump to a Collectible! | |
|---|---|
| Toys | 1 |
| Codex | 1 |
| Life Sigils | 3 |
| Gold | 250 |
| Rubies | 3 |
| Demonic Essence | 1 |
| Secrets | 11 |
Abyssal Forest Toys
| Item | How to Get |
|---|---|
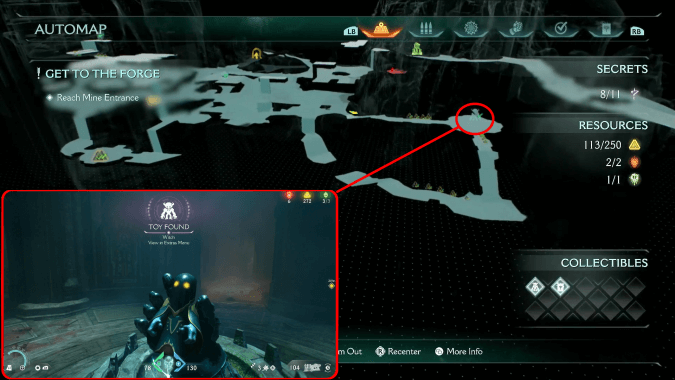 [Secret 8/11) |
Found in the secret area accessible after breaking the wall with a shield charge. In the room with fire traps, use shield throw on the mechanism mechanism 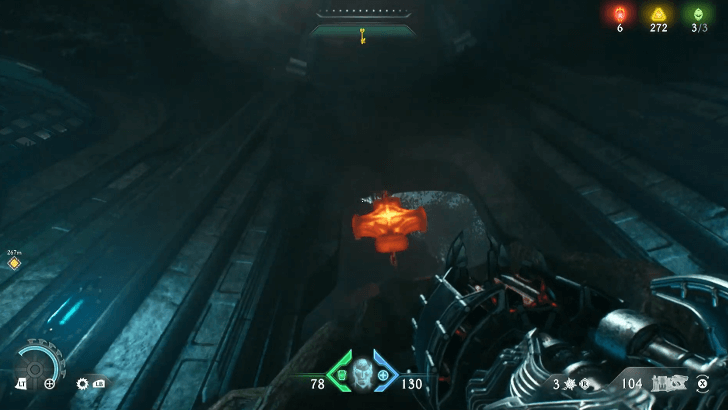 |
Abyssal Forest Codex Entries
| Item | How to Get |
|---|---|
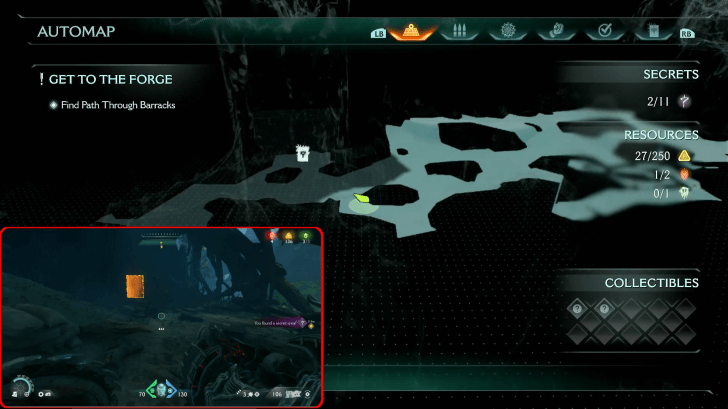 (Secret 3/11) |
Obtained by going to a secret area, accessible by using a shield charge on the wall with a blue seal. |
Abyssal Forest Life Sigils
| Item | How to Get |
|---|---|
 (Secret 1/11) |
Found in the area above the yellow key. |
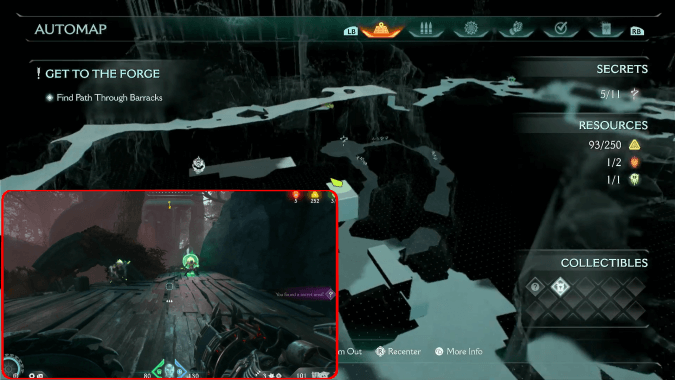 (Secret 5/11) |
Accessible via shield throw shield throw 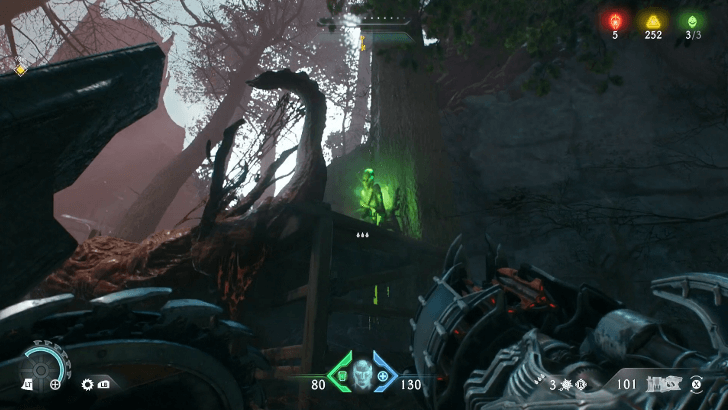 |
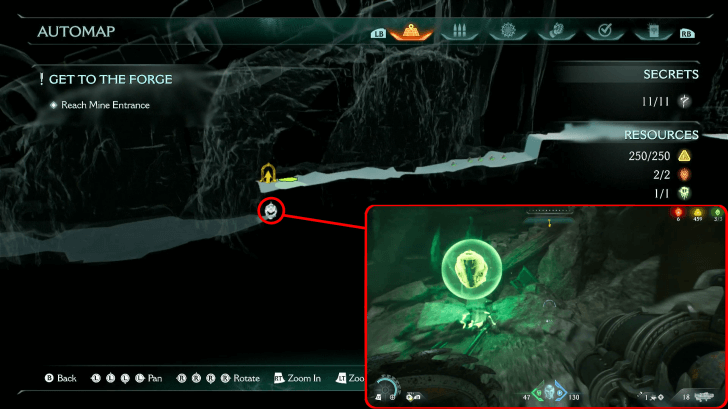 |
Found in the final area, just before the boss encounter. |
Abyssal Forest Gold
| Item | How to Get |
|---|---|
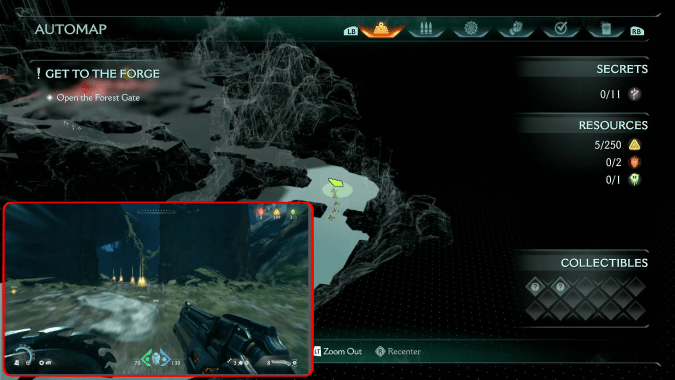 |
Stick to the right path at the beginning of the level, and you'll see the first gold trail. |
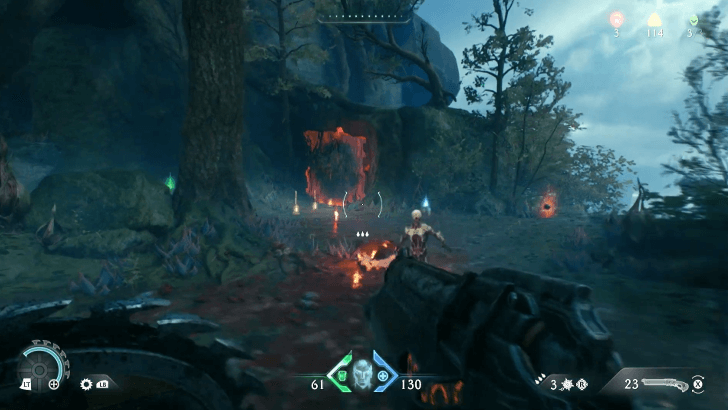 |
Found directly across the yellow gate, guarded by a serpent-like demon. |
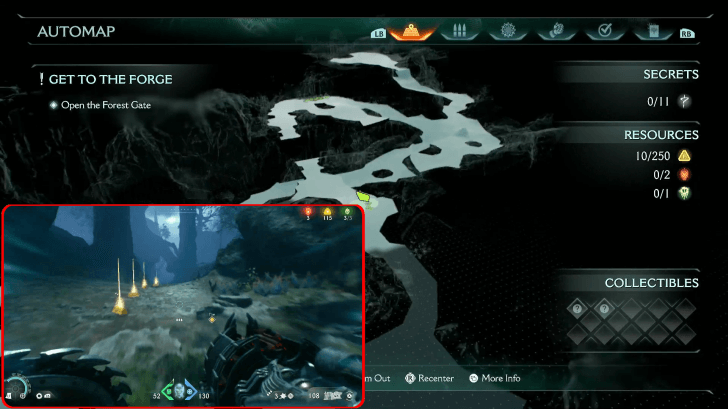 |
It can be found in the upper area just above the yellow key, opposite the direction of the first life sigil. |
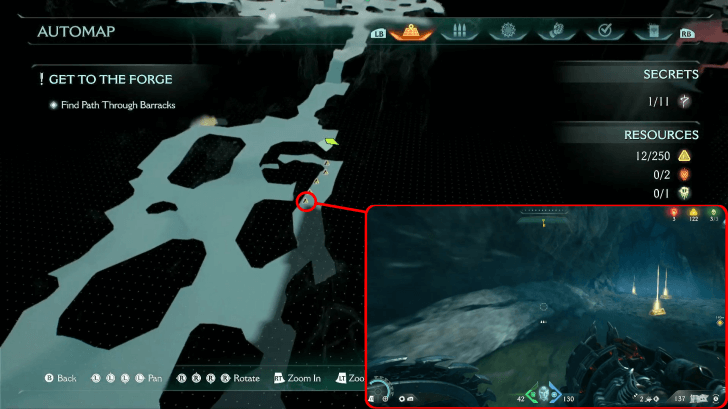 |
Accessible by jumping down from the ledge on the left, just past the first ruby. |
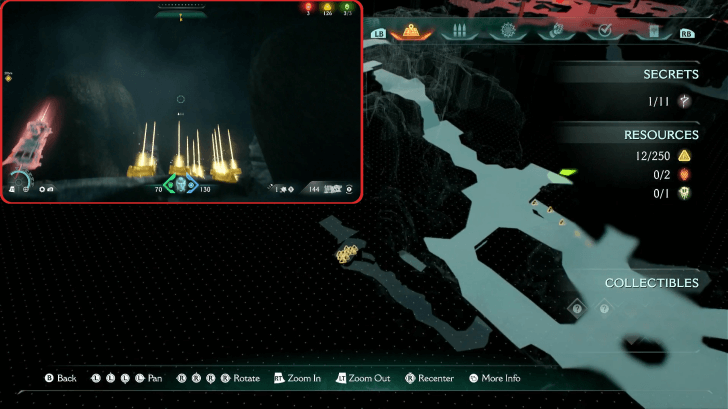 (Secret 2/11) |
Continue to descend the path from where you obtained the 4th Gold Trail. Head to the bottom and swim forward to the end of the path. Climb the wall, and you'll find the 5th Gold Trail Location. |
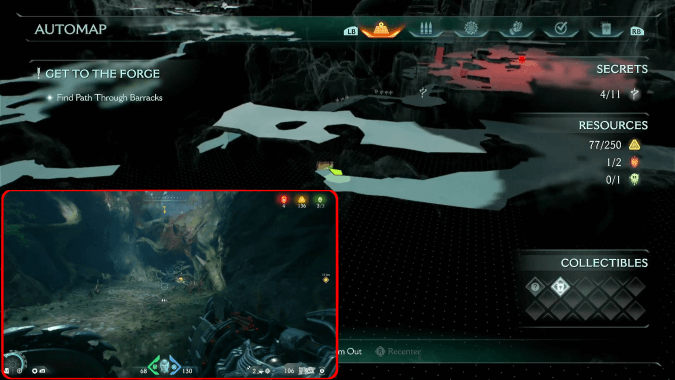 (Secret 4/11) |
It can be accessed through a secret area by breaking through a wall with a shield charge. |
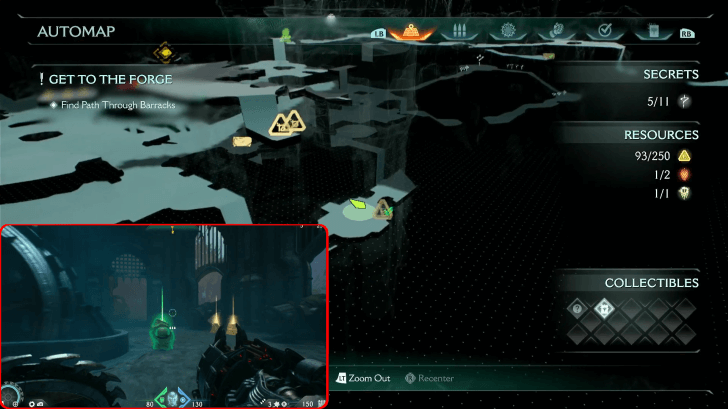 (Secret 6/11) |
Accessible through a hidden room, which can be accessed by using a shield throw on a broken wall, located just outside the room, near the wall on the upper left side. |
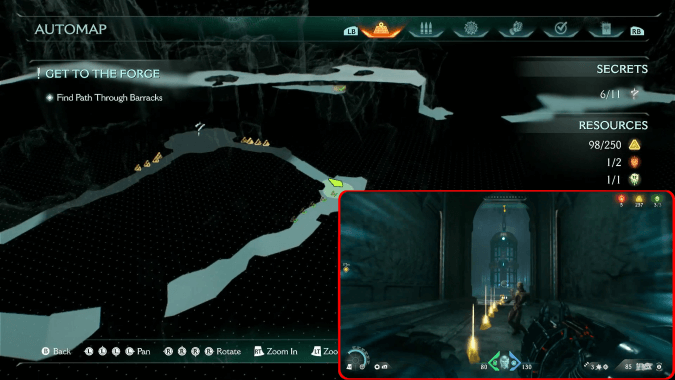 (Secret 7/11) |
You can access it using a shield charge on the wall in the open area where you first encounter the Pinky Rider. Then, jump across the chasm to reach the secret location. |
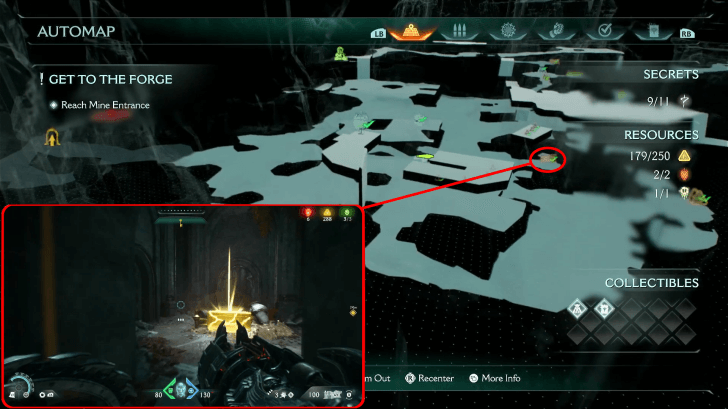 (Secret 9/11) |
In the open area with the Pinky Rider, drop down into this hole this hole 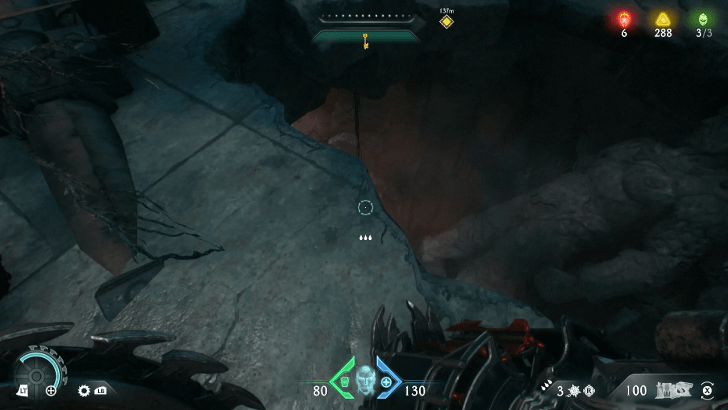 |
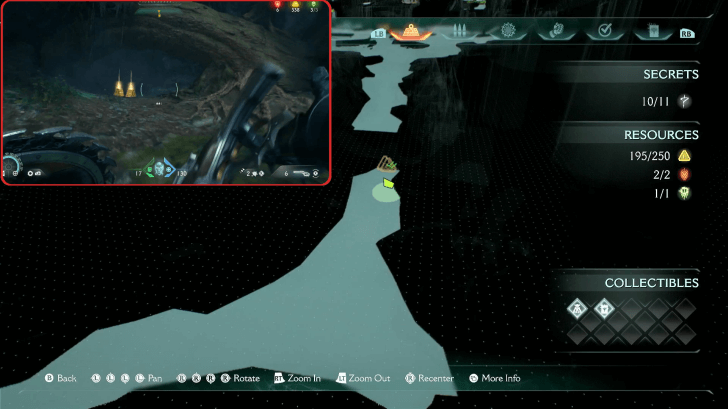 |
Found in a secret area just across the mine entrance elevator. |
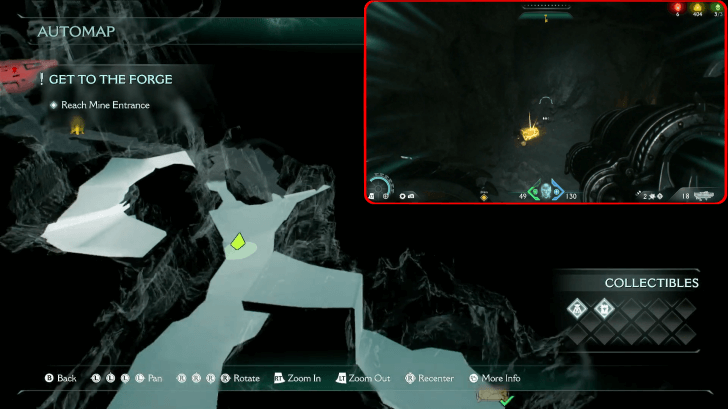 |
After obtaining the Grenade Launcher, there will be a secret area accessible by using the shield throw on the mechanism mechanism 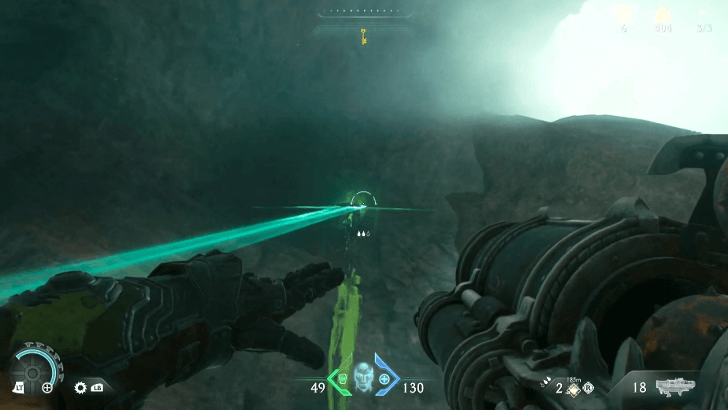 |
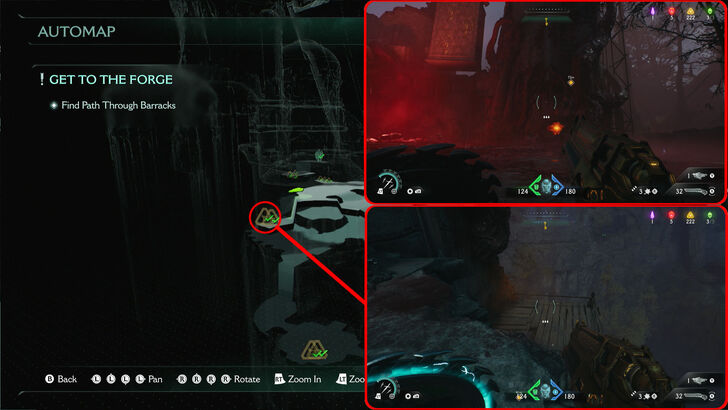 |
Hit the hot metal gear holding up the climbable stone behind where the red demon portal used to be. Climb up and you'll find the gold cache in a small area you can drop down to. |
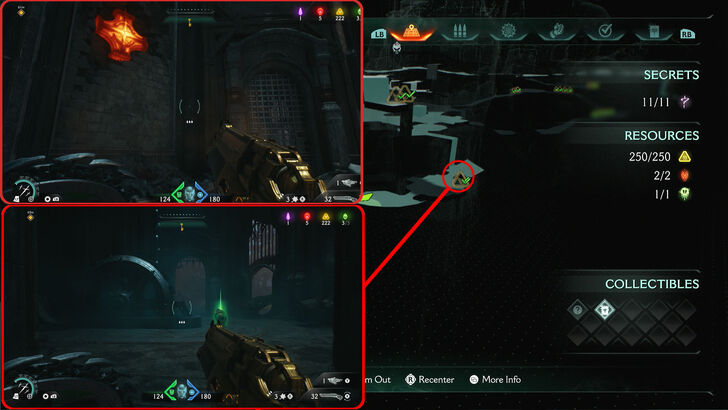 |
Drop down from the raised area where the ballista is located. Hit another molten gear to raise the gates and get another gold cache in the room. |
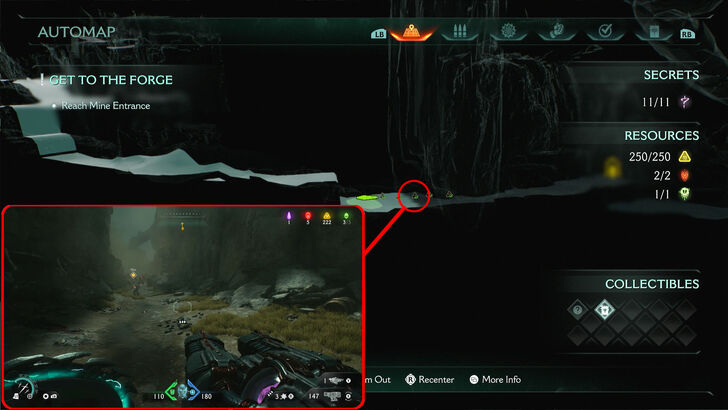 |
You will find this gold trail on the way to exit of the Abyssal Forest. |
Abyssal Forest Rubies
| Item | How to Get |
|---|---|
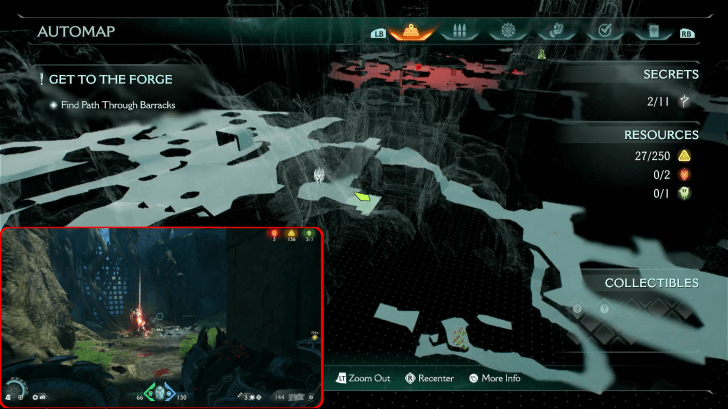 (Secret 2/11) |
After getting the 5th gold trail, go to the end of the path and climb up with the blue jump booster. Defeat the lone enemy in the area and you can reach the ruby. |
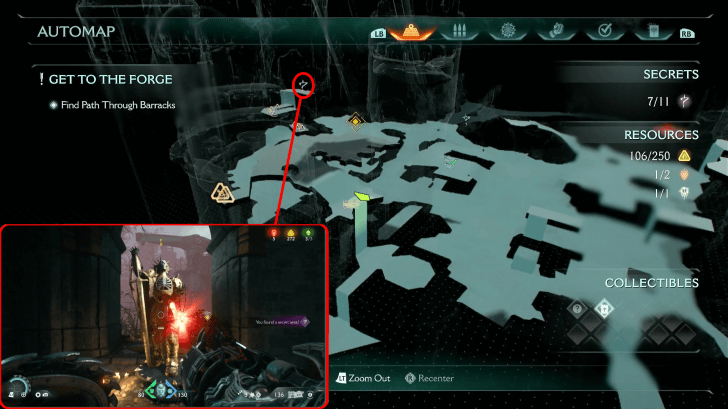 |
Head to the ledge directly left of the cannon. Follow the path until you reach a climbable wall, where you will find the second Ruby. |
| Ruby 3 | Obtainable by finishing the Ghostbuster Mission Challenge, which requires you to parry revenant projectiles. |
Abyssal Forest Demonic Essence
| Item | How to Get |
|---|---|
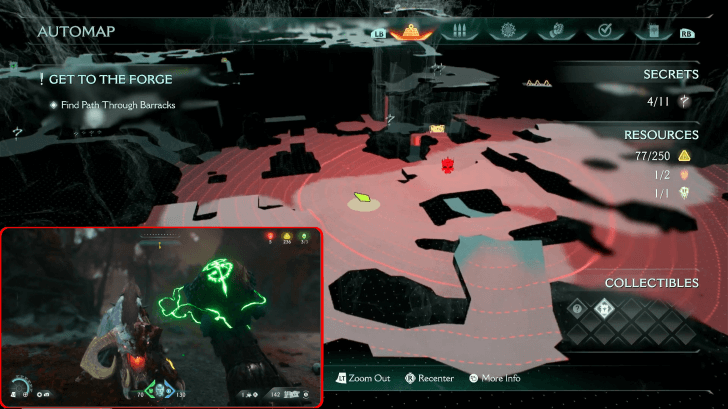 |
Obtained by defeating the Pinky Rider in the open area, just past the first sentinel shrine. |
Abyssal Forest Walkthrough
| Main Objectives | |
|---|---|
| 1 | Open the Forest Gate Secrets: Life Sigil 1 - Secret #1 |
| 2 | Find Path Through Barracks Secrets: Ruby 1 and Gold Trail 5 (x10) - Secret #2 Codex - Secret #3 Gold Cache 1 (x50) - Secret #4 Life Sigil 2 - Secret #5 Gold Cache 2 (x16) - Secret #6 Gold Trail 6 and 7 (x10)- Secret #7 Witch Toy - Secret #8 Gold Cache 3 - Secret #9 |
| 3 | Reach Mine Entrance Secrets: Gold Trail 8 (x16)- Secret #10 Gold Cache 4 (x50)- Secret #11 |
1. Open The Forest Gate
| 1 | 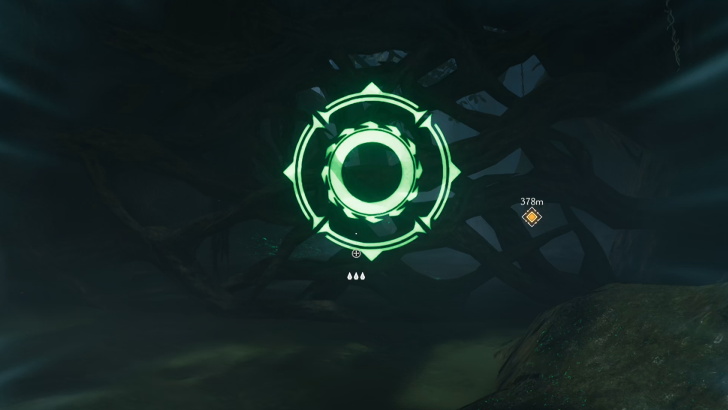 Keep moving forward to get to the main area, and destroy the barrier with the green sigil with your shield charge. |
|---|---|
| 2 | 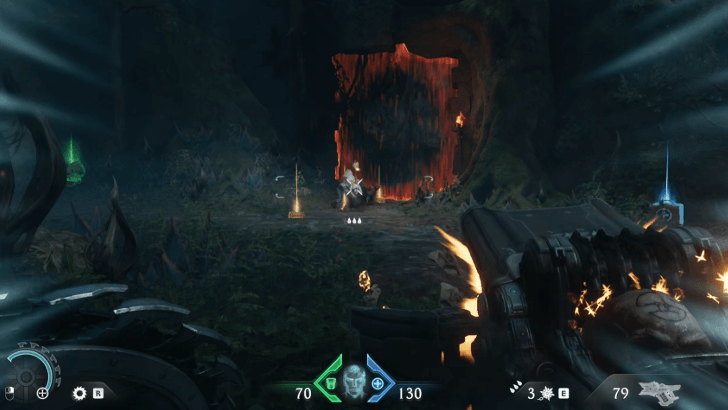 Dispatch the demons in the main area to remove the barriers blocking the way. Collectibles: Life Sigil 1, Gold Trail 1-3 |
| 3 | 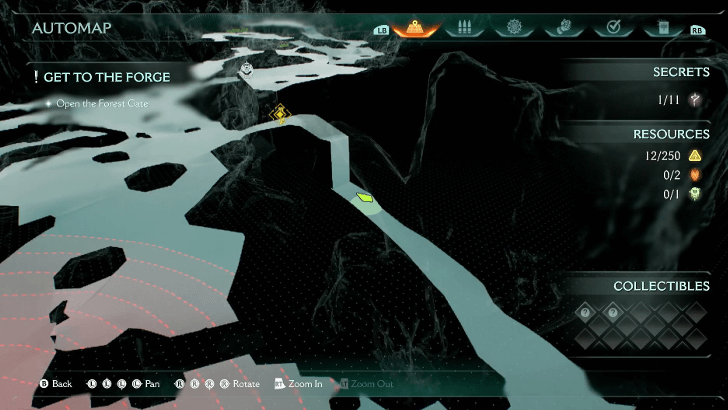 After defeating all the demons and lowering all the barriers in the area, drop down onto the ledge ledge 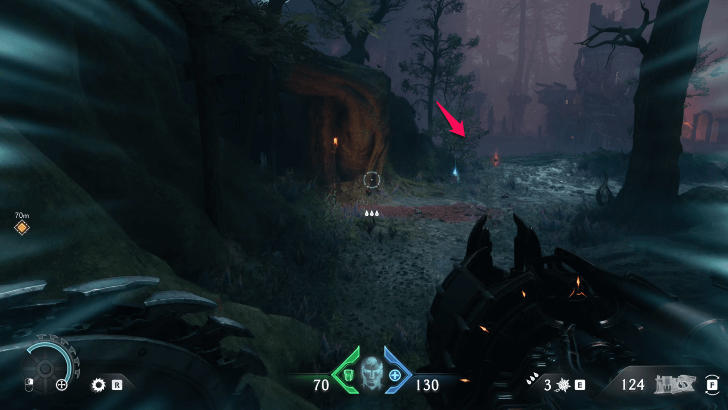 |
| 4 | 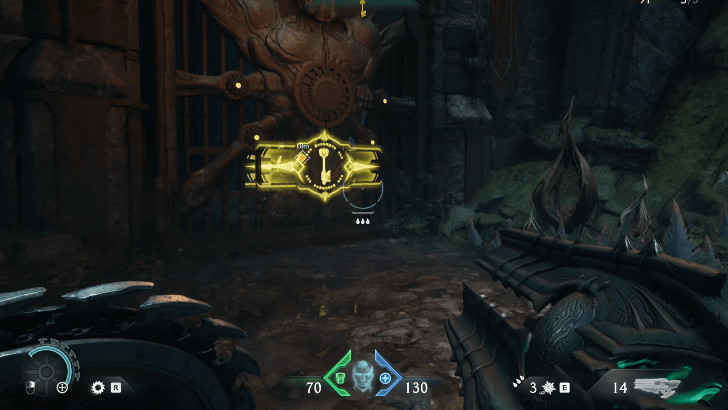 Once you get the yellow key, head to the yellow gate to get to the second area. |
2. Find Path Through Barracks
| 1 | 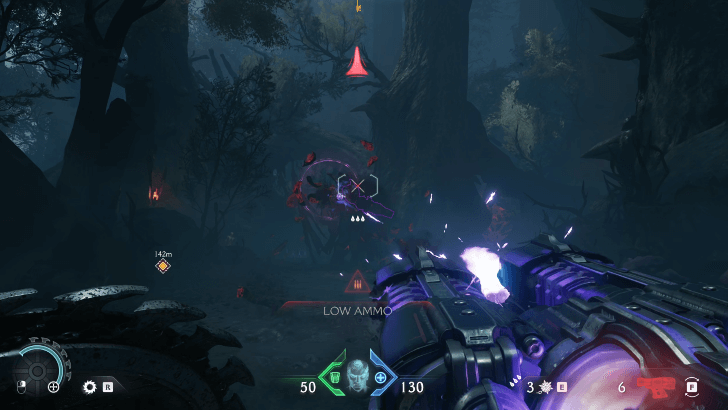 Just after entering the gate, you'll notice a Ruby to your right, which is currently inaccessible for now, but you can get to it later. Clear the next area littered with demons first, most notably the Cyberdemon, as it deals quite a lot of damage when it fires its gun. |
|---|---|
| 2 | 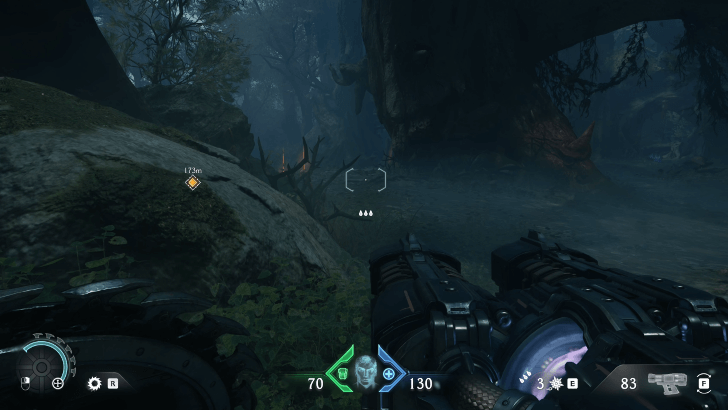 After clearing the area, you can spend time searching for the collectibles in this area, or you could go straight down the objective marker if you wish to progress. Collectibles: Gold Trail 4 - 6, Codex 1, Ruby 1 |
| 3 | 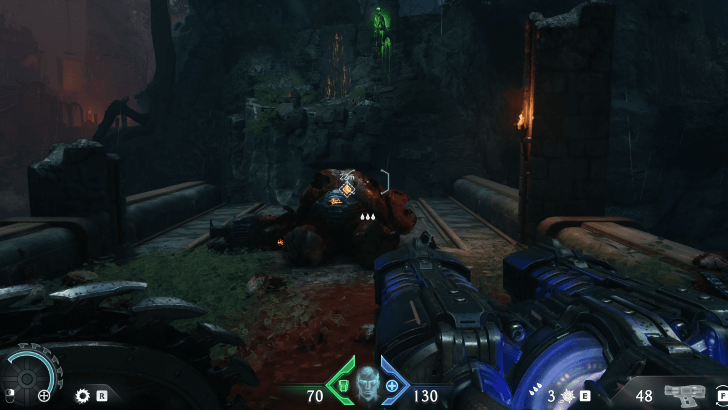 Once you're ready to proceed, keep following the objective markers until you come across a chasm guarded by the demons. Defeat them all, then jump across to get to the next area. |
| 4 | 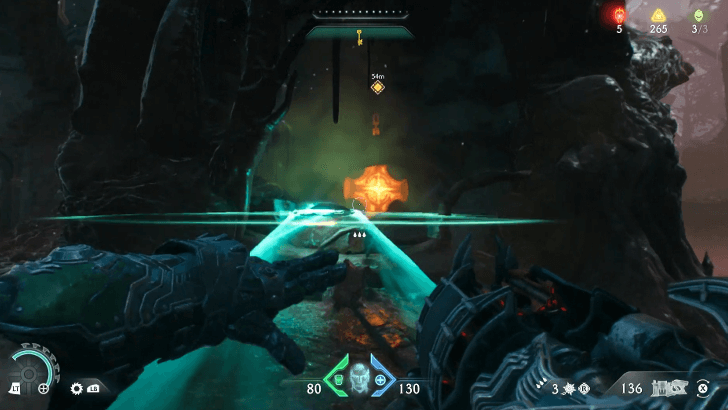 After defeating the demons in the main area, time your shield throw to hit the trigger behind the rotating mechanism. This will lower the wall wall 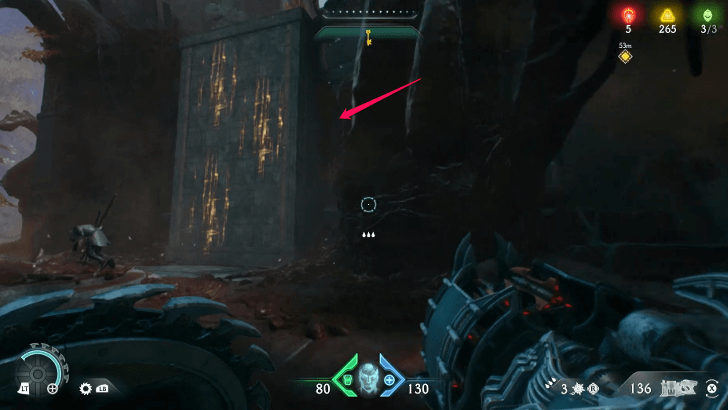 |
| 5 | 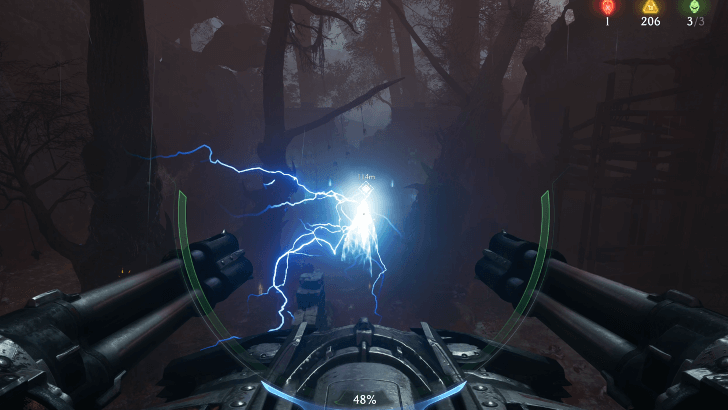 Use the cannon to clear a path, destroying the rocks blocking the way. There are plenty of secrets and collectibles in this area, so take the time to grab them all, as you cannot return to this area once you descend the elevator. Collectible: Gold Cache 1-3, Gold Trail 6-7, Life Sigil 2 |
3. Reach Mine Entrance
| 1 | 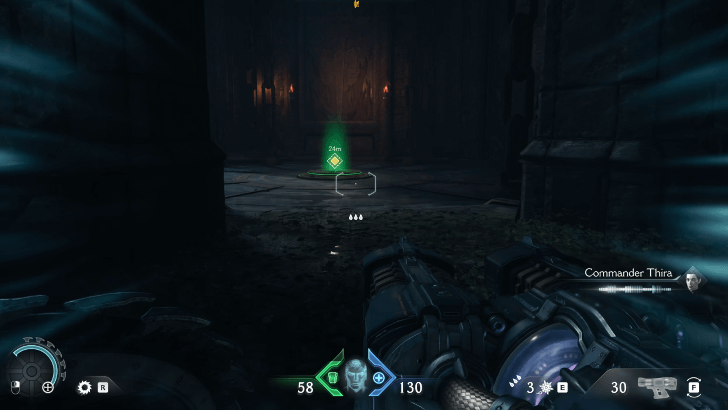 Go down the elevator to get to the mines. You cannot go back up once you go down, so make sure you get every collectible that you might need before heading down. Collectible: Gold Trail 8 |
|---|---|
| 2 | 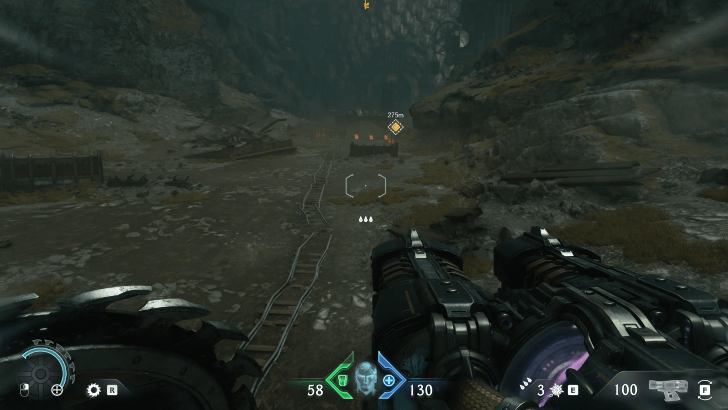 Grab the Grenade Launcher and make your way to the mines. This will be the last area where you'll fight against the Agaddon Champion boss. Defeating him will conclude the chapter. Collectible: Life Sigil 3, Gold Cache 4 |
Abyssal Forest Boss Guide
| Agaddon Champion Combat Tips |
|---|
|
|
Get Close to Cancel its Shield
The Agaddon Champion will occasionally disengage and activate its shield while firing projectiles at you. To end this defensive stance, get near it to provoke a melee attack and open up its defenses.
Prepare for Hell Surge Melee Combos When Getting Close
Upon getting close to the Agaddon Champion to cancel it's shield, you have to prepare to parry a flurry of Hell Surge melee attack combos. Be patient and focus on parrying these attacks and wait for an opening before unleashing your counterattack.
Agaddon Champion Boss Guide and How to Beat
Abyssal Forest Mission Challenges
| Challenge | Details and Reward |
|---|---|
| Ghostbuster | Parry 3 Revenant Projectiles Reward: 1 Ruby |
| Knockout | Execute 5 demons with shield charge. Reward: 50 Gold |
| Bone Collector | Collect 100 ammo loot drops from melee striking demons. Reward: 50 Gold |
Ghostbuster
Simply parry with your shield thrice to clear the challenge. Quite simple and easy to do, as you can finish this mission by just waiting for the revenant to launch projectiles again and again, and parrying as needed.
Knockout
Lower the enemy's health, then parry their attacks to get them in a dazed state. Finish them off with the shield charge to get this mission done.
Bone Collector
This mission can be achieved through normal gameplay, as you would be meleeing quite often to replenish ammo. If, for some reason, your difficulty is lowered to a degree where you never run out of ammo, you can dump your ammo elsewhere and use the melee mechanic to replenish it via enemy fodder.
Doom: The Dark Ages Related Guides

Full Walkthrough and List of Chapters
Comment
Author
Chapter 8: Abyssal Forest Secrets and Walkthrough
improvement survey
03/2026
improving Game8's site?

Your answers will help us to improve our website.
Note: Please be sure not to enter any kind of personal information into your response.

We hope you continue to make use of Game8.
Rankings
- We could not find the message board you were looking for.
Gaming News
Popular Games

Genshin Impact Walkthrough & Guides Wiki

Honkai: Star Rail Walkthrough & Guides Wiki

Umamusume: Pretty Derby Walkthrough & Guides Wiki

Pokemon Pokopia Walkthrough & Guides Wiki

Resident Evil Requiem (RE9) Walkthrough & Guides Wiki

Monster Hunter Wilds Walkthrough & Guides Wiki

Wuthering Waves Walkthrough & Guides Wiki

Arknights: Endfield Walkthrough & Guides Wiki

Pokemon FireRed and LeafGreen (FRLG) Walkthrough & Guides Wiki

Pokemon TCG Pocket (PTCGP) Strategies & Guides Wiki
Recommended Games

Diablo 4: Vessel of Hatred Walkthrough & Guides Wiki

Fire Emblem Heroes (FEH) Walkthrough & Guides Wiki

Yu-Gi-Oh! Master Duel Walkthrough & Guides Wiki

Super Smash Bros. Ultimate Walkthrough & Guides Wiki

Pokemon Brilliant Diamond and Shining Pearl (BDSP) Walkthrough & Guides Wiki

Elden Ring Shadow of the Erdtree Walkthrough & Guides Wiki

Monster Hunter World Walkthrough & Guides Wiki

The Legend of Zelda: Tears of the Kingdom Walkthrough & Guides Wiki

Persona 3 Reload Walkthrough & Guides Wiki

Cyberpunk 2077: Ultimate Edition Walkthrough & Guides Wiki
All rights reserved
© 2025 ZeniMax Media Inc. All Rights Reserved.
The copyrights of videos of games used in our content and other intellectual property rights belong to the provider of the game.
The contents we provide on this site were created personally by members of the Game8 editorial department.
We refuse the right to reuse or repost content taken without our permission such as data or images to other sites.




![Monster Hunter Stories 3 Review [First Impressions] | Simply Rejuvenating](https://img.game8.co/4438641/2a31b7702bd70e78ec8efd24661dacda.jpeg/thumb)


