Best Team Comp and Party Setup
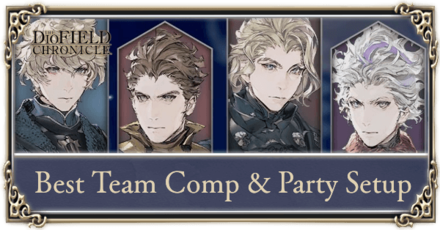
Having multiple characters in DioField Chronicle allow for a number of team and party compositions for players to come up with. Read on to learn about the best leader and adjutant setup, from best offensive team comps to defensive builds, status effect exploitation, and more!
List of Contents
Best Team Comp and Party Setup
Maximum Offense Team
| Leaders | Role and Explanation |
|---|---|
 Andrias Rhondarson Andrias Rhondarson
|
Finishing Blow Deals the finishing blow using Assassination to cancel out its cooldown, allowing Andrias to use it once more. |
Adjutant:
Additional AoE skills to ensure finishing blows. |
|
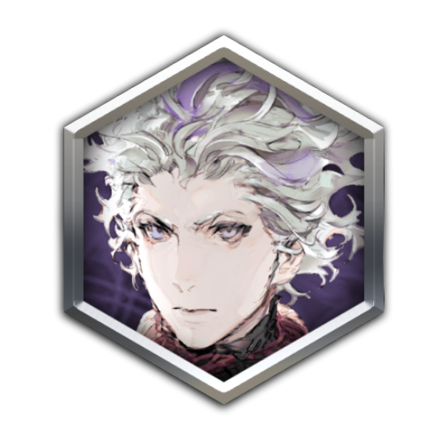
 Zoruaq Wigan Zoruaq Wigan
|
Main AoE Attacker Having multiple area-of-effect skills that packs a punch, Zoruaq can easily whittle down the health of enemy units. |
Adjutant:
Minor support and for selective stunning. |
|
 Chappleman Chappleman
|
Secondary AoE Attacker Having another Wyvern Rider allows for a double casting of Wings of the Storm and Cyclone, which can easily decimate foes. |
Adjutant:
Can cast Sanctuary within the melee team's range if needed. |
|
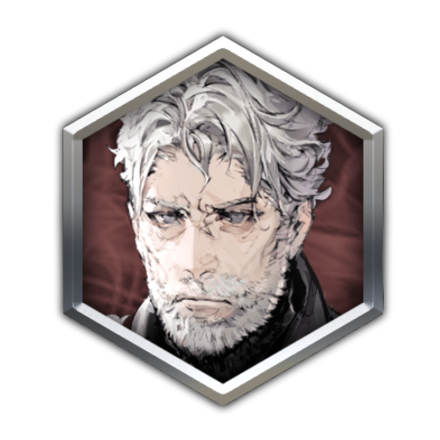
 Umarida Bareas Umarida Bareas
|
Critical Hit and Chain Attacker Pairing Umarida's AoE skills alongside her high critical rate passives makes her a reliable unit for landing massive damage. |
Adjutant:
Recommended for last-minute support. |
This team comp makes use of the best offensive late game units. Having DPS specialists Zoruaq and Chappleman, high critical rate unit Umarida, as well as the master of finishers Andrias makes for a team that can easily wipe out enemy mobs and then some.
Defensive Team for Wave Missions
| Leaders | Role and Explanation |
|---|---|
|
Andrias Rhondarson
|
High-Speed Attacker Having excellent attack speed and powerful skills like Assassinate and Shadow Step makes Andrias a good line of defense when you need it most. |
Adjutant:
Additional AoE skills to ensure finishing blows. |
|
|
Zoruaq Wigan
|
Wave Containment Zoruaq's skill Wings of the Storm makes him a good pick for being able to control the positioning of enemies. |
Adjutant:
Effective use of AoE skills after casting Wings of Storm. |
|
|
Chappleman
|
Secondary Wave Containment Doubling up on a Wyvern Rider allows complete control over enemy positioning, which lessens the chances of enemies going through the barriers you are trying to defend. |
Adjutant:
Support adjutant for emergencies. |
|
 Shivat Malzin Shivat Malzin
|
Main Support Having multiple healing skills and a handful of support buffs can help this team comp in top shape at all times. |
Adjutant:
Recommended for last-minute support. |
Having this team comp is ideal for missions wherein you will have to defend areas from waves of enemies.
Having two Wyvern Rider Cavaliers can ensure high mobility and crowd control while Andrias can finish off and hunt down enemy strays while having a support unit make sure both defenses and allies are in good condition.
Exploiting Status Effect Bonuses
| Leaders | Role and Explanation |
|---|---|
|
Andrias Rhondarson
|
High-Speed Attacker Having the ability Insult to Injury, Andrias can inflict 30% more damage to units with status effects. |
Adjutant:
Allows for crowd control and additional status effects. |
|
 Fredret Lester Fredret Lester
|
Main Tank and Attacker On top of having the same Insult to Injury ability as Andrias, Fredret's ability Relapse can prolong status effects of enemies by 3 seconds when using skills. |
Adjutant:
Recommended for his healing skills and support buffs. |
|
|
Umarida Bareas
|
Inflicts Status Effects Umarida can use Chaos Cluster to inflict status effects to enemies. From there, the main attacker and tank can deal 30% more damage to enemies thanks to their passive abilities. |
Adjutant:
Recommended for last-minute support. |
|
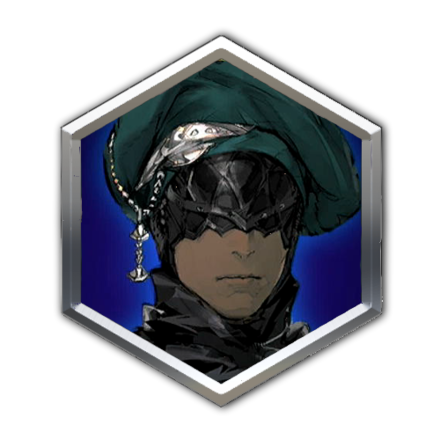
 Waltaquin Redditch Waltaquin Redditch
 Estalt Yewfare Estalt Yewfare
|
Pandemic Caster If any of the targets hit by the skill Pandemic have a status effect, that status effect will then be passed to all enemies within the target area. This then allows for more enemies to be susceptible to bonus damage. |
Adjutant:
Allows for crowd control when the going gets tough. |
This team comp focuses on taking advantage of damage bonuses dealt to enemies with status effects. The trick is to spread the status effect within a cluster of foes and prolong its duration until they are swiftly defeated.
How to Change Leader and Adjutant
Select Edit Unit
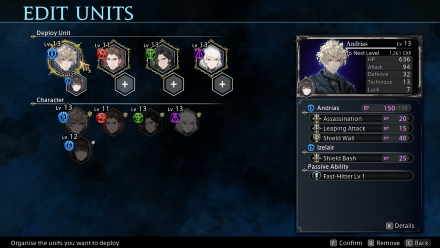
Players can change their unit's leader and adjutants by selecting Edit Unit either in the mission screen before beginning a battle or by opening up the menu when outside of missions.
Select a Leader by clicking on the bigger portrait icon and an Adjutant with the smaller icon. The Leader determines the unit's attributes while the Adjutant adds extra skills. While each unit can have a Leader and an Adjutant, players may opt not to deploy an adjutant. The character set as the Adjutant will receive less EXP compared to the Leader.
Switch Characters During Battle
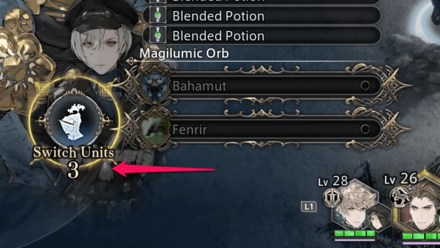
There may be times where battles get dragged out and players can find their characters' resources exhausted. Character Switching allows players to swap characters in battle with those that are currently benched. Players may do this for a maximum of 3 times per battle and will reset upon restarting or completing a mission.
DioField Chronicle Related Guides

All Tips and Tricks
Author
Best Team Comp and Party Setup
Rankings
- We could not find the message board you were looking for.
Gaming News


![Monster Hunter Stories 3 Review [First Impressions] | Simply Rejuvenating](https://img.game8.co/4438641/2a31b7702bd70e78ec8efd24661dacda.jpeg/thumb)
Popular Games

Genshin Impact Walkthrough & Guides Wiki
Honkai: Star Rail Walkthrough & Guides Wiki
Umamusume: Pretty Derby Walkthrough & Guides Wiki
Pokemon Pokopia Walkthrough & Guides Wiki
Resident Evil Requiem (RE9) Walkthrough & Guides Wiki
Monster Hunter Wilds Walkthrough & Guides Wiki
Wuthering Waves Walkthrough & Guides Wiki
Arknights: Endfield Walkthrough & Guides Wiki
Pokemon FireRed and LeafGreen (FRLG) Walkthrough & Guides Wiki
Pokemon TCG Pocket (PTCGP) Strategies & Guides Wiki


Recommended Games
Diablo 4: Vessel of Hatred Walkthrough & Guides Wiki
Cyberpunk 2077: Ultimate Edition Walkthrough & Guides Wiki
Fire Emblem Heroes (FEH) Walkthrough & Guides Wiki
Yu-Gi-Oh! Master Duel Walkthrough & Guides Wiki
Super Smash Bros. Ultimate Walkthrough & Guides Wiki
Pokemon Brilliant Diamond and Shining Pearl (BDSP) Walkthrough & Guides Wiki
Elden Ring Shadow of the Erdtree Walkthrough & Guides Wiki
Monster Hunter World Walkthrough & Guides Wiki
The Legend of Zelda: Tears of the Kingdom Walkthrough & Guides Wiki
Persona 3 Reload Walkthrough & Guides Wiki


All rights reserved
© 2022 SQUARE ENIX CO., LTD. All Rights Reserved.
The copyrights of videos of games used in our content and other intellectual property rights belong to the provider of the game.
The contents we provide on this site were created personally by members of the Game8 editorial department.
We refuse the right to reuse or repost content taken without our permission such as data or images to other sites.