 Andrias Rhondarson
 Fredret Lester
 Iscarion Colchester
 Waltaquin Redditch
 Izelair Wigan
 Rickenback Madea
 Donovar Sullion
 Shivat Malzin
 Estalt Yewfare
 Castevere Bunnow
 Umarida Bareas
 Tremina Umbert
 Catherine
 Zoruaq Wigan
 Hezeliah Shaytham
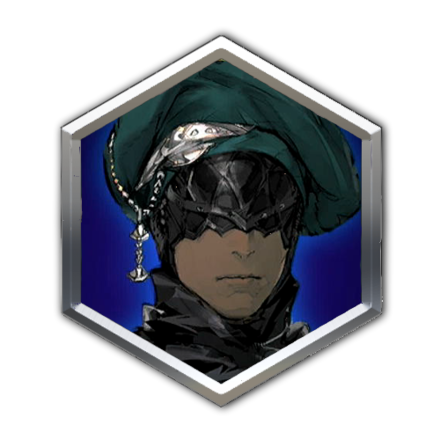 Chappleman
This survey will take about 1 minute.
Your answers will help us to improve our website.
DioField Chronicle
Best Abilities for Each Character

Some abilities are better than others at improving your characters' effectiveness in battle. Read on to see a list of the best abilities to level up, and which abilities are the best for each character to learn!
Best Overall Abilities
| Skill | Effect & Reason |
|---|---|
|
|
Effect: 30% damage to targets with status effects. |
| Reason for Ranking: Status effects will be much more common from mid-game onwards, since all classes will have skill and ability upgrades that passively and actively inflict different kinds of status effects. 30% is large and goes a long way to increase your damage output. Priority: ★ ★ ★ |
|
|
|
Effect: Recovers 1% EP every three seconds. |
| Reason for Ranking: EP is very hard to come by mid-battle, so having your EP recover automatically is a godsend. This makes it possible to use skills one after another without losing too much EP. Priority: ★ ★ ★ |
|
|
|
Effect: Recovers 1% HP every 3 seconds. |
| Reason for Ranking: A must-have for your tanks, if they wish to survive longer and take more hits. This also makes it so that your healer won't have to keep on healing them as much. Priority: ★ ★ ★ |
|
|
|
Effect: Reduces EP cost by 30%. |
| Reason for Ranking: Cuts down EP costs to save more EP that you can use to cast even more skills the longer the mission draws out. This will make it so that you won't immediately run out of EP. Priority: ★ ★ ★ |
|
|
|
Effect: Reduces cooldown time by 30% |
| Reason for Ranking: Waiting for a cooldown to end while your team is in danger is never a comfortable feeling. Always be ready to perform a skill at a moment's notice with shorter cooldowns. Priority: ★ ★ |
|
|
|
Effect: Lv. 1: Increases skill damage by 5%. Lv. 2: Increases skill damage by 10%. Lv. 3: Increases skill damage by 20%. Lv. 4: Increases skill damage by 30%. |
| Reason for Ranking: A great ability to have in general, as it greatly increases your damage-dealing potential. Priority: ★ ★ |
|
|
|
Effect: 100% chance that HP Healing Fragments are dropped when an enemy is defeated. |
| Reason for Ranking: This ability gives more longevity to your entire team, as your healer will need to heal less often. Priority: ★ |
|
|
|
Effect: 100% chance that EP Healing Fragments are dropped when an enemy is defeated. |
| Reason for Ranking: This ability allows you to be less conservative with your skill usage, as more EP fragment drops means more chances to use powerful skills and defeat enemies before they can do considerable damage to you. Priority: ★ |
Best Abilities for Each Character
Select a character to see their best abilities
Andrias
| Skill | Effect & Reason |
|---|---|
|
|
Effect: 30% damage to targets with status effects. |
| Reason for Ranking: Status effects will be more common from mid-game onwards, and 30% is a huge amount of damage increase for someone like Andrias, who already does a large amount of DPS. Priority: ★ ★ ★ |
|
|
|
Effect: Reduces cooldown time by 30% |
| Reason for Ranking: Cooldowns can sometimes spell the difference between life and death. The sooner you're able to use your skills, the better. Priority: ★ ★ |
|
|
|
Effect: Lv. 1: Increases evasion by 5%. Lv. 2: Increases evasion by 10%. Lv. 3: Increases evasion by 30%. |
| Reason for Ranking: Andrias doesn't have as great a defense as other Soldiers, so he needs to rely on good evasion to avoid taking large amounts of damage from enemy auto-attacks. Priority: ★ |
Fredret
| Skill | Effect & Reason |
|---|---|
|
|
Effect: 30% damage to targets with status effects. |
| Reason for Ranking: Status effects will be more common from mid-game onwards, and 30% is a huge amount of damage increase for a frontliner DPS like Fredret. Priority: ★ ★ ★ |
|
|
|
Effect: 100% chance that HP Healing Fragments are dropped when an enemy is defeated. |
| Reason for Ranking: This ability won't leave you wanting for healing, as healing fragments will always be available, so long as Fredret is the one who defeats them. Priority: ★ ★ |
|
|
|
Effect: Increases damage by 50% when a target area skill only hits 1 target(s). |
| Reason for Ranking: Only effective when fighting against a boss or single-targets, but this ability is sure to bring the boss' HP down much faster, and is a great single-target DPS ability. Priority: ★ |
Iscarion
| Skill | Effect & Reason |
|---|---|
|
|
Effect: Increases damage dealt to enemies in combat with another unit by 30%. |
| Reason for Ranking: This ability is superb, as you will always be dealing 30% more damage, due to your Soldiers and Cavaliers being on the frontline. Priority: ★ ★ ★ |
|
|
|
Effect: Recovers 3 EP after dealing damage. |
| Reason for Ranking: Iscarion will be able to provide sub-DPS AoE damage a lot more often if he is able to recover EP. This is especially helpful, since bow-wielding Sharpshooters have very low EP cost skills. Priority: ★ ★ |
|
|
|
Effect: Lv. 1: Increases auto-attack damage by 3%. Lv. 2: Increases auto-attack damage by 5%. Lv. 3: Increases auto-attack damage by 10%. |
| Reason for Ranking: Permanently boosting Iscarion's auto-attack damage will make him deal a bit more damage, which contributes to your team's total DPS. Priority: ★ |
Waltaquin
| Skill | Effect & Reason |
|---|---|
|
|
Effect: Reduces EP cost by 30%. |
| Reason for Ranking: This ability allows Waltaquin to save large amounts of EP, making her able to cast more spells before she runs out. Priority: ★ ★ ★ |
|
|
|
Effect: Recovers 3 EP after dealing damage. |
| Reason for Ranking: EP is a very important resource, so being able to recover EP mid-battle is very necessary. This will ensure Waltaquin is able to provide more occasion healing and have some spare EP for offensive skills. Priority: ★ ★ |
|
|
|
Effect: 100% chance that EP Healing Fragments are dropped when an enemy is defeated. |
| Reason for Ranking: This is helpful if your entire team is in desperate need of EP. Simply let Waltaquin defeat enemies herself to acquire free EP. Priority: ★ |
Izelair
| Skill | Effect & Reason |
|---|---|
|
|
Effect: Lv. 1: Reduces auto-attack damage from enemies by 3%. Lv. 2: Reduces auto-attack damage from enemies by 5%. Lv. 3: Reduces auto-attack damage from enemies by 10%. |
| Reason for Ranking: Allows Izelair to fulfill her tanking duties more effectively by reducing the amount of damage she takes and extending her survivability. Priority: ★ ★ ★ |
|
|
|
Effect: Reduces damage received by 5% for every 1 enemy/enemies attacking you. |
| Reason for Ranking: Izelair can further increase her defense by tanking a large number of enemies. Priority: ★ ★ |
|
|
|
Effect: Recovers 1% HP every 3 seconds. |
| Reason for Ranking: As if damage negation wasn't enough, Izelair can also recover HP gradually, making her an incredibly tough tank to bring down. Priority: ★ |
Rickenback
| Skill | Effect & Reason |
|---|---|
|
|
Effect: Reduces cooldown time by 30% |
| Reason for Ranking: Cooldowns can sometimes spell the difference between life and death. The sooner you're able to use your skills, the better, especially for Stun Shots to interrupt enemy skills, the better. Priority: ★ ★ ★ |
|
|
|
Effect: Deals additional damage equal to 30% of Luck. |
| Reason for Ranking: This ability will increase Rickenback's DPS, so it's worth having for that extra damage. Priority: ★ ★ |
|
|
|
Effect: 100% chance that TP Healing Fragments are dropped when an enemy is defeated. |
| Reason for Ranking: This ability allows Rickenback to collect a lot of TP to use powerful summons more often, which can help obliterate tons of enemies quickly. Priority: ★ |
Donovar
| Skill | Effect & Reason |
|---|---|
|
|
Effect: Recovers 5% of damage dealt as HP. |
| Reason for Ranking: This ability greatly adds to Donovar's survivability and makes him tougher to bring down. You healer will also need to heal him less often. Priority: ★ ★ ★ |
|
|
|
Effect: 100% chance of preventing knockback. |
| Reason for Ranking: Getting knocked back by enemy roars is annoying, especially as it can take the enemy's aggro off your tank and onto another party member. This ability avoids that completely. Priority: ★ ★ |
|
|
|
Effect: Lv. 1: Attributes: Increases attack by 3. Lv. 2: Attributes: Increases attack by 5. Lv. 3: Attributes: Increases attack by 10. Lv. 4: Attributes: Increases attack by 15. |
| Reason for Ranking: Increases Donovar's combat effectiveness by making him a decent damage dealer, as well as a tank. Priority: ★ |
Shivat
| Skill | Effect & Reason |
|---|---|
|
|
Effect: Recovers 1% EP every three seconds. |
| Reason for Ranking: This ability is superb, as EP is hard to come by mid-battle. Being able to recover EP automatically means that Shivat can use low-EP skills like Frostbind indefinitely. Priority: ★ ★ ★ |
|
|
|
Effect: Reduces cooldown time by 30% |
| Reason for Ranking: Cooldowns can sometimes spell the difference between life and death. The sooner you're able to use your skills, the better, especially Shivat's healing spells, which can save your whole party. Priority: ★ ★ |
|
|
|
Effect: Lv. 1: Increases recovery amount by an extra 3%. Lv. 2: Increases recovery amount by an extra 5%. Lv. 3: Increases recovery amount by an extra 10%. Lv. 4: Increases recovery amount by an extra 15%. Lv. 5: Increases recovery amount by an extra 30%. |
| Reason for Ranking: This eliminates the need to heal over and over again, as one Heal will recover even more than before, giving more efficiency and EP-savings for the spell. Priority: ★ |
Estalt
| Skill | Effect & Reason |
|---|---|
|
|
Effect: Reduces EP cost by 30%. |
| Reason for Ranking: Save EP with this ability, so you can have more EP to cast more healing and offensive spells. Priority: ★ ★ ★ |
|
|
|
Effect: Lv. 1: Increases skill damage by 5%. Lv. 2: Increases skill damage by 10%. Lv. 3: Increases skill damage by 20%. Lv. 4: Increases skill damage by 30%. |
| Reason for Ranking: This ability turns Estalt into an effective DPS with powerful AoE skills. Priority: ★ ★ |
|
|
|
Effect: Increases damage by 10% per 1 enemy/enemies within the skill's target area. |
| Reason for Ranking: Greatly increases his AoE skills' damage potential. Having at least 3 enemies in your target will already greatly improve the damage. Priority: ★ |
Castevere
| Skill | Effect & Reason |
|---|---|
|
|
Effect: Increases all attributes by 20 when in a unit with a female character. |
| Reason for Ranking: This is very situational and can affect your team comp, but when you find the right character to be in his unit, he becomes much more powerful. Priority: ★ ★ ★ |
|
|
|
Effect: Recovers 5% of damage dealt as HP. |
| Reason for Ranking: This ability works well with Calm and Collected, as Castevere can stay at full health, even if he gets damaged a little. Priority: ★ ★ |
|
|
|
Effect: Lv. 1: Attributes: Increases attack by 3. Lv. 2: Attributes: Increases attack by 5. Lv. 3: Attributes: Increases attack by 10. Lv. 4: Attributes: Increases attack by 15. |
| Reason for Ranking: Improves Castevere's damage output and makes him a compelling frontliner DPS. Priority: ★ |
Umarida
| Skill | Effect & Reason |
|---|---|
|
|
Effect: Increases damage by 50% when a target area skill only hits 1 target(s). |
| Reason for Ranking: Only effective when fighting against a boss or single-targets, but this ability is sure to bring the boss' HP down much faster, and is a great single-target DPS ability. Priority: ★ ★ ★ |
|
|
|
Effect: Lv. 1: Increases skill damage by 5%. Lv. 2: Increases skill damage by 10%. Lv. 3: Increases skill damage by 20%. Lv. 4: Increases skill damage by 30%. |
| Reason for Ranking: Greatly increases the damage output of her skills, given they are already very powerful. This would make her a DPS monster. Priority: ★ ★ |
|
|
|
Effect: Lv. 1: Increases critical hit rate by 5%. Lv. 2: Increases critical hit rate by 10%. |
| Reason for Ranking: Umarida shines as a DPS when she's performing Ambush crits on her enemies to take them down extremely quickly. Priority: ★ |
Tremina
| Skill | Effect & Reason |
|---|---|
|
|
Effect: 30% damage to targets with status effects. |
| Reason for Ranking: Status effects will be more common from mid-game onwards, and 30% is a huge amount of damage increase for someone like Tremina, who is capable of inflicting large amounts of damage. Priority: ★ ★ ★ |
|
|
|
Effect: Increases damage by 10% per 1 enemy/enemies within the skill's target area. |
| Reason for Ranking: Greatly increases her AoE skills' damage potential. Having at least 3 enemies in your target will already greatly improve the damage. Priority: ★ ★ |
|
|
|
Effect: Deals additional damage equal to 30% of Technique. |
| Reason for Ranking: Greatly adds to her DPS, provided she is equipped with Technique-enhancing accessories. Priority: ★ |
Catherine
| Skill | Effect & Reason |
|---|---|
|
|
Effect: Recovers 1% HP every 3 seconds. |
| Reason for Ranking: Catherine can also recover HP gradually, making her an incredibly tough tank to bring down. Priority: ★ ★ ★ |
|
|
|
Effect: Reduces EP cost by 30%. |
| Reason for Ranking: This ability allows Catherine to save large amounts of EP, making her able to cast more skills before she runs out. Priority: ★ ★ |
|
|
|
Effect: 100% chance that HP Healing Fragments are dropped when an enemy is defeated. |
| Reason for Ranking: This is great, if you want to conserve your healer's healing spells for harder fights later on in the mission. Priority: ★ |
Zoruaq
| Skill | Effect & Reason |
|---|---|
|
|
Effect: Recovers 5% of damage dealt as HP. |
| Reason for Ranking: Makes it easier for Zoruaq to be more bold on the front lines, taking damage, but also dealing great damage and recovering HP again. Priority: ★ ★ ★ |
|
|
|
Effect: Lv. 1: Attributes: Increases HP by 50. Lv. 2: Attributes: Increases HP by 100. Lv. 3: Attributes: Increases HP by 200. Lv. 4: Attributes: Increases HP by 300. Lv. 5: Attributes: Increases HP by 500. |
| Reason for Ranking: Zoruaq's playstyle is aggressive, so make him go wild in the frontlines while giving him a bit of survivability with HP Boost. Priority: ★ ★ |
|
|
|
Effect: Lv. 1: Attributes: Increases defence by 3. Lv. 2: Attributes: Increases defence by 5. Lv. 3: Attributes: Increases defence by 10. Lv. 4: Attributes: Increases defence by 15. |
| Reason for Ranking: Adds to Zoruaq's combat prowess, making him a tough hybrid tank/DPS on the field. Priority: ★ |
Hezeliah
| Skill | Effect & Reason |
|---|---|
|
|
Effect: Reduces EP cost by 30%. |
| Reason for Ranking: Allows Hezeliah to save more EP, thus being able to use more skills in the long run. Priority: ★ ★ ★ |
|
|
|
Effect: Lv. 1: Increases skill damage by 5%. Lv. 2: Increases skill damage by 10%. Lv. 3: Increases skill damage by 20%. Lv. 4: Increases skill damage by 30%. |
| Reason for Ranking: Greatly adds to her damage output, increasing her DPS. Priority: ★ ★ |
|
|
|
Effect: Increases Magilumic Orb damage by 50%. |
| Reason for Ranking: Greatly increases damage of magilumic orbs, allowing you to obliterate an entire battalion of enemies in one go. Priority: ★ |
Chappleman
| Skill | Effect & Reason |
|---|---|
|
|
Effect: Increases damage by 50% when a target area skill only hits 1 target(s). |
| Reason for Ranking: Only effective when fighting against a boss or single-targets, but this ability is sure to bring the boss' HP down much faster, and is a great single-target DPS ability. Priority: ★ ★ ★ |
|
|
|
Effect: Recovers 3 EP after dealing damage. |
| Reason for Ranking: Chappleman will be able to use his skills and do AoE crowd control a lot more often if he is able to recover EP. Priority: ★ ★ |
|
|
|
Effect: Lv. 1: Attributes: Increases attack by 3. Lv. 2: Attributes: Increases attack by 5. Lv. 3: Attributes: Increases attack by 10. Lv. 4: Attributes: Increases attack by 15. |
| Reason for Ranking: The last of Chappleman's abilities that makes him an auto-attack monster. Increase his attack to deal even greater, faster, and more powerful auto-attack damage. Priority: ★ |
DioField Chronicles Related Guides

All Tips and Tricks
Author

Best Abilities for Each Character
Please participate in our site
improvement survey
02/2026
improvement survey
02/2026
Would you assist in
improving Game8's site?
improving Game8's site?

×
We are listening to our users' valuable opinions and discussing how to act on them.
The information collected through this survey will be used for the purpose of improving our services. In addition, the information will only be disclosed a part of a statistic in a format that will not allow identification of personal information.
Begin Survey
Not Now
×
Please rate each item regarding Game8.co's Advertisements.
Amount of Ads
Very Dissatisfied
Somewhat Dissatisfied
Fine
Somewhat Satisfied
Highly Satisfied
Placement of Ads
Timing of Ad Display
Ad Loading Speed
Safeness of Ads
Content of Ads
×
Please rate each item regarding Game8.co's Quality of Articles.
Amount of information
Very Dissatisfied
Somewhat Dissatisfied
Fine
Somewhat Satisfied
Highly Satisfied
Frequency of updates
Speed of new information
Accuracy of articles
Understandibility of articles
Readability of sentences
×
Please rate each item regarding Game8.co's Usability of the Site.
Ease of finding information
Very Dissatisfied
Somewhat Dissatisfied
Fine
Somewhat Satisfied
Highly Satisfied
Loading Speed
Use of Color
Font Size
Visibility of Images
Easy to Understand Layout
×
Please rate each item regarding Game8.co's Message Boards, Comments.
Ease of Writing
Very Dissatisfied
Somewhat Dissatisfied
Fine
Somewhat Satisfied
Highly Satisfied
Readability
Ease in Finding Information
Comment Quality
Comment Quantity
Admin Response
×
Please rate each item regarding Game8.co's Site's new design.
Please rate our site's new design
Very Dissatisfied
Somewhat Dissatisfied
Fine
Somewhat Satisfied
Highly Satisfied
Do you think that the website's design change makes the site easier to use?
Has the new design made it easier for you to find information on the site?
Has the new design improved the overall visual appeal of the site?
How would you rate your overall satisfaction with the new design of the site?
×
How likely are you to recommend Game8 to someone you know?
Very Unlikely
0
1
2
3
4
5
6
7
8
9
10
Very Likely
If you have other opinions regarding potential improvement to the website, please share them with us. We would appreciate your honest opinion.
Note: This is a free response section, so you can proceed without entering anything.
Note: Please be sure not to enter any kind of personal information into your response.
Note: Please be sure not to enter any kind of personal information into your response.
×
Thank You
×
Thank you for participating in our survey! Your answers will help us to improve the quality of our website and services.
We hope you continue to make use of Game8.
We hope you continue to make use of Game8.
Close
Rankings
- We could not find the message board you were looking for.
Gaming News
![Animal Crossing: New Horizons Review [Switch 2] | Needlessly Crossing Over to a New Generation](https://img.game8.co/4391759/47d0408b0b8a892e453a0b90f54beb8a.png/show)


Popular Games

Genshin Impact Walkthrough & Guides Wiki
Arknights: Endfield Walkthrough & Guides Wiki
Honkai: Star Rail Walkthrough & Guides Wiki
Wuthering Waves Walkthrough & Guides Wiki
Umamusume: Pretty Derby Walkthrough & Guides Wiki
Zenless Zone Zero Walkthrough & Guides Wiki
Pokemon TCG Pocket (PTCGP) Strategies & Guides Wiki
Clair Obscur: Expedition 33 Walkthrough & Guides Wiki
Digimon Story: Time Stranger Walkthrough & Guides Wiki
Where Winds Meet Walkthrough & Guides Wiki


Recommended Games
Fire Emblem Heroes (FEH) Walkthrough & Guides Wiki
Diablo 4: Vessel of Hatred Walkthrough & Guides Wiki
Super Smash Bros. Ultimate Walkthrough & Guides Wiki
Yu-Gi-Oh! Master Duel Walkthrough & Guides Wiki
Pokemon Brilliant Diamond and Shining Pearl (BDSP) Walkthrough & Guides Wiki
Elden Ring Shadow of the Erdtree Walkthrough & Guides Wiki
Monster Hunter World Walkthrough & Guides Wiki
The Legend of Zelda: Tears of the Kingdom Walkthrough & Guides Wiki
Persona 3 Reload Walkthrough & Guides Wiki
Cyberpunk 2077: Ultimate Edition Walkthrough & Guides Wiki


All rights reserved
© 2022 SQUARE ENIX CO., LTD. All Rights Reserved.
The copyrights of videos of games used in our content and other intellectual property rights belong to the provider of the game.
The contents we provide on this site were created personally by members of the Game8 editorial department.
We refuse the right to reuse or repost content taken without our permission such as data or images to other sites.