Lost in Alivel Mall Starry Locations and Missions Walkthrough
This is a walkthrough for the Lost in Alivel Mall stage in Kirby and the Forgotten Land Star-Crossed World DLC. See the location of all the Starries, how to complete all missions, and discover all the hidden locations!
| Previous Stage | Next Stage |
|---|---|
| Meteor Shower's Arrival | Fallen-Star Beach |
List of Contents
Lost in Alivel Mall Missions and Abilities
Missions List
| Mission | Starries |
|---|---|
| 3 | |
| 4 | |
| 1 | |
| 1 | |
| 1 |
Copy Abilities
 Needle Needle
|
 Bomb Bomb
|
 Sword Sword
|
 Cutter Cutter
|
 Fire Fire
|
Lost in Alivel Mall Mission Completion Order
Area 1
| Area 1 Missions | ||
|---|---|---|
| 1 | 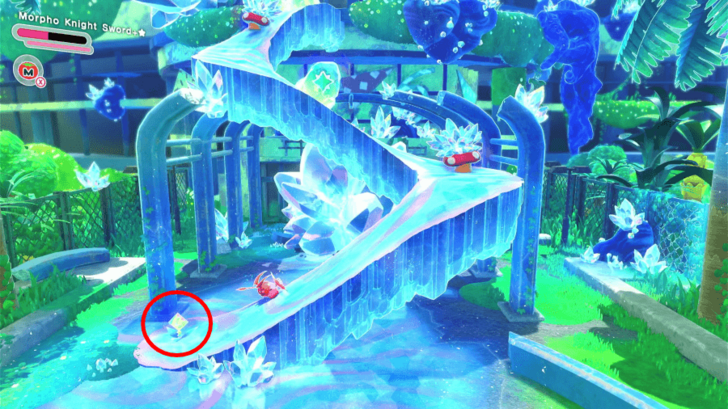 |
Make the 1st Small Starryflowers Bloom |
Area 2
Area 3
| Area 3 Missions | ||
|---|---|---|
| 1 | 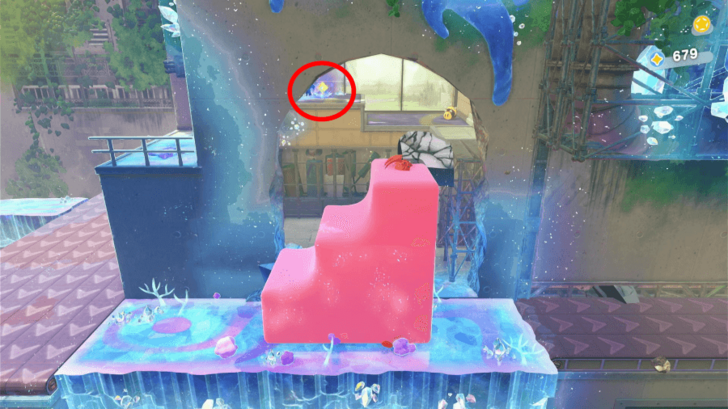 |
Make the 4th Small Starryflowers Bloom |
| 2 | 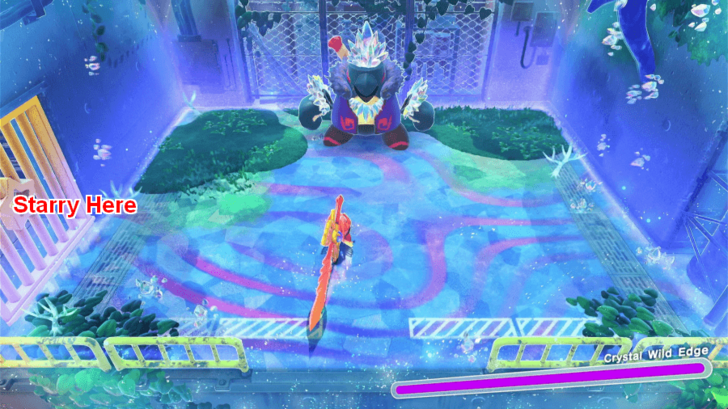 |
Save the 3rd Hidden Starry |
| 3 | 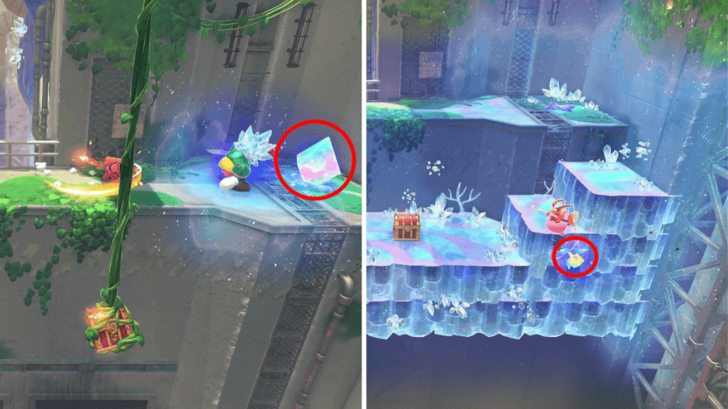 |
Make the 5th Small Starryflowers Bloom |
| 4 | 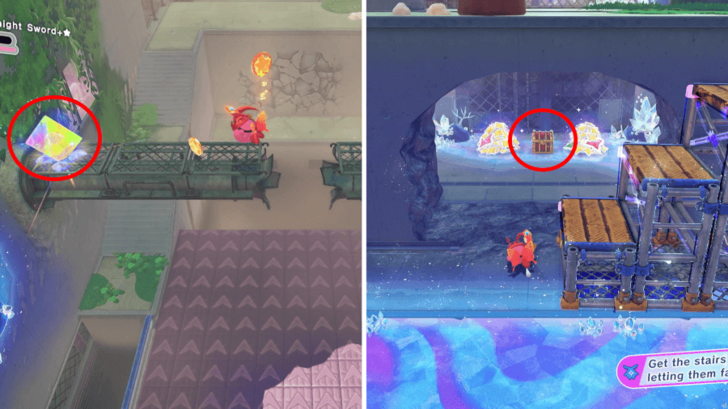 |
Save the 4th Hidden Starry |
Lost in Alivel Mall Hidden Starry Locations
1. Defeat the Crystal Monster that Shoots Meteor

You can get the first hidden Starry by defeating the Crystal Monster that shoots meteor in the second area. Once defeated, head over to the right using the crystal path to rescue the Starry.
2. Inside the Locked Ice Cream Sign Area
After defeating the Crystal Monster, head towards the locked area with the mint chocolate chip ice cream cone logo. Go behind the counter in the middle of the area to find a hidden button that you can push to open the locked gate.
Enter the newly opened area and hit the large crystal near the two dog enemies to spawn the second hidden Starry.
3. Defeat Crystal Wild Edge

You can get the third hidden Starry after beating the Crystal Wild Edge in the middle of the third area. You will find it in the room on the right after defeating the mini-boss.
4. Behind the Cracked Wall Near the End

The final Starry is hidden behind a cracked wall at the end of the stage. You must first destroy the crystal on the pipe to create a platform leading to the cracked wall.
You can destroy the wall and unlock the hidden area using the Stairs. You can then open the Treasure Chest inside to save the last Starry!
Lost in Alivel Mall Small Starryflowers Locations
1. Base of the Crystal Platform in the 1st Area

You can find the first Starryflower on the base of the crystal platform in the first area. You can summon the platform by destroying the crystal on the right of the large crystal.
2. Climb the Ladder on the 2nd Area
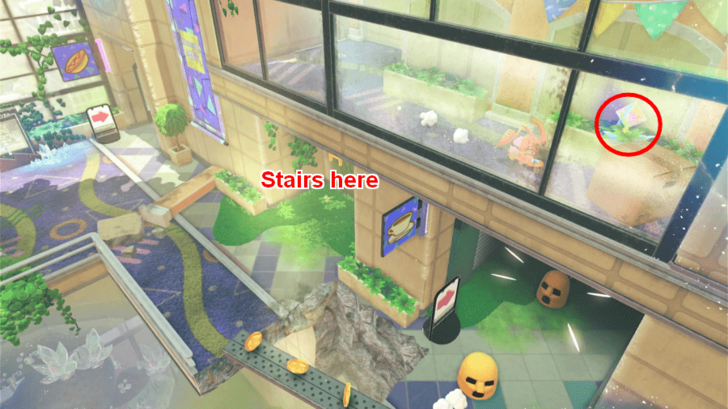
The third Starryflower is located in the second area. You must climb the ladder on the right before the Hotdog Sandwich sign and after the Coffee Sign to get to the Starryflower.
3. Inside the Locked Ice Cream Sign Area
After defeating the Crystal Monster, head towards the locked area with the mint chocolate chip ice cream cone logo. Go behind the counter in the middle of the area to find a hidden button that you can push to open the locked gate.
Enter the newly opened area and activate the Small Starryflower at the entrance.
4. Behind the Cracked Wall After the Hot Head Enemy in the 3rd Area

The fourth Starryflower is behind a wall located near the Hot Head enemy in the third area. Destroy the cracked wall using the Stairs to open up a room where the flower is residing.
5. Near the Hot Head in the 3rd Area

You can get the fifth Starryflower on the rightmost side of the third area, near the end. Climb the Stairs and destroy the crystal to summon the flower on the new platform that appeared.
Lost in Alivel Mall Crystal Monster Location
In the Central Part of the 2nd Area
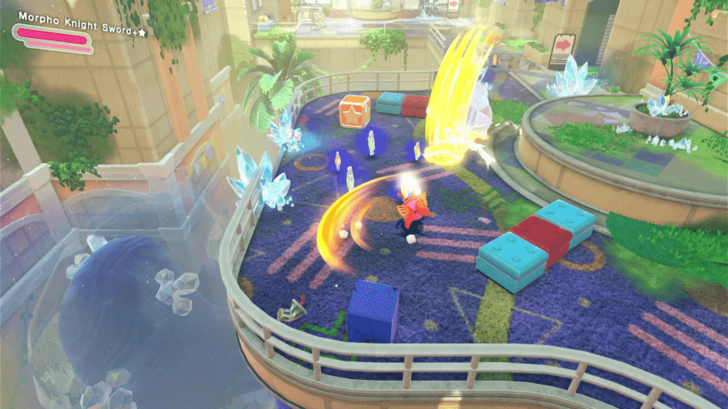
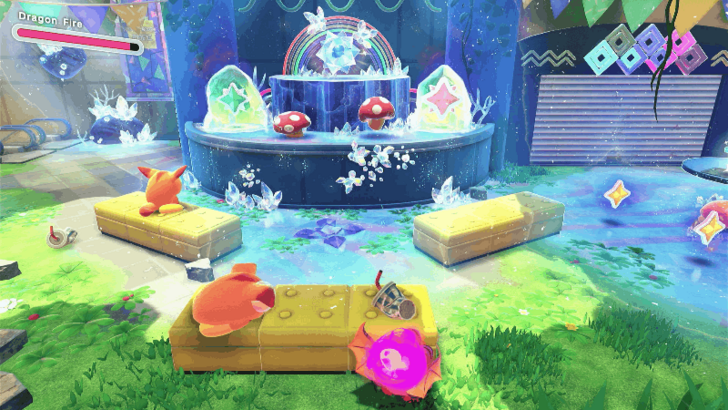
You can find the Crystal Monster that shoots meteors in the middle part of the 2nd area. Its attacks are easy to evade as long as you move to the side once you see the attack animation.
You will have to knock it down three times to defeat it and unlock a new area on the left.
Lost in Alivel Mall Figure Locations
1. Pop the Small Starryflower on the Second Floor
You can get a Figure after activating the Small Starryflower on the second floor. You can get to the second floor by climbing the ladder on the right side after the Coffee Sign.
2. Chest Hanging from a Vine
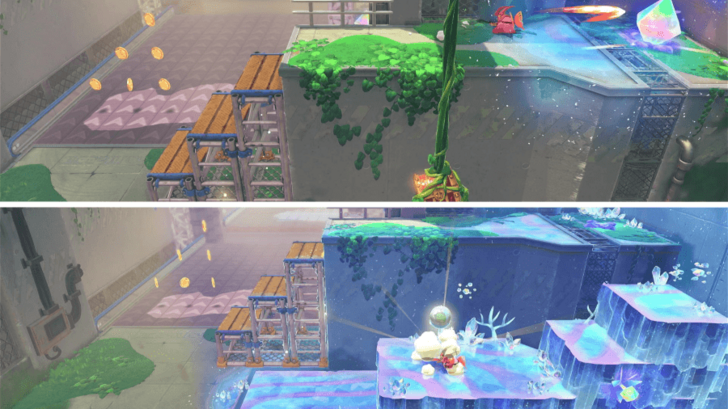
You can get the last figure of this stage from the chest hanging from a vine. You will find it close to the end of the stage, near a Blade Knight.
To reach the chest, copy the Blade Knight and destroy the crystal behind it. You can then slash the vine using the Sword and get the chest.
Kirby and the Forgotten Land Related Guides

Comment
It’d make more sense if the 2nd and 3rd flowers were swapped. I was watching my friend play and thought the walkthrough followed the game’s progression, and we ended up missing the 3rd flower🐡
Author
Lost in Alivel Mall Starry Locations and Missions Walkthrough
improvement survey
04/2026
improving Game8's site?

Your answers will help us to improve our website.
Note: Please be sure not to enter any kind of personal information into your response.

We hope you continue to make use of Game8.
Rankings
- We could not find the message board you were looking for.
Gaming News
Popular Games

Genshin Impact Walkthrough & Guides Wiki

Crimson Desert Walkthrough & Guides Wiki

Umamusume: Pretty Derby Walkthrough & Guides Wiki

Honkai: Star Rail Walkthrough & Guides Wiki

Monster Hunter Stories 3: Twisted Reflection Walkthrough & Guides Wiki

Wuthering Waves Walkthrough & Guides Wiki

The Seven Deadly Sins: Origin Walkthrough & Guides Wiki

Pokemon TCG Pocket (PTCGP) Strategies & Guides Wiki

Pokemon Pokopia Walkthrough & Guides Wiki

Zenless Zone Zero Walkthrough & Guides Wiki
Recommended Games

Monster Hunter World Walkthrough & Guides Wiki

Fire Emblem Heroes (FEH) Walkthrough & Guides Wiki

Pokemon Brilliant Diamond and Shining Pearl (BDSP) Walkthrough & Guides Wiki

Super Smash Bros. Ultimate Walkthrough & Guides Wiki

Diablo 4: Vessel of Hatred Walkthrough & Guides Wiki

Cyberpunk 2077: Ultimate Edition Walkthrough & Guides Wiki

Yu-Gi-Oh! Master Duel Walkthrough & Guides Wiki

Elden Ring Shadow of the Erdtree Walkthrough & Guides Wiki

The Legend of Zelda: Tears of the Kingdom Walkthrough & Guides Wiki

Persona 3 Reload Walkthrough & Guides Wiki
All rights reserved
© HAL Laboratory, Inc. / Nintendo
The copyrights of videos of games used in our content and other intellectual property rights belong to the provider of the game.
The contents we provide on this site were created personally by members of the Game8 editorial department.
We refuse the right to reuse or repost content taken without our permission such as data or images to other sites.
 Meteor Shower's Arrival
 Lost in Alivel Mall
 Fallen-Star Beach
 Washed Away at the Cement Summit
 Crossing Wondaria
 Spinning Dream Parade
 Frost Street Snow Park
 Freezing Wind and Some Snowmen
 Wastes That Count Time
 Moonlight Canyon Labyrinth
 Crumbling Fiery Forbidden Lands
 Crystal Beast Pack Volcano Battle
 Fallen-Star Volcano




![Forza Horizon 6 Review [Preview] | Beautiful Roads With a Whole Lot of Oversteer](https://img.game8.co/4460981/a7254c24945c43fbdf6ad9bea52b5ce9.png/thumb)


This has been fixed in the article. Thank you for the feedback!