Post Game Boss Rematch Guide
♕ Princess Peach: Showtime! Wiki ▶︎ Game8 Review
★ All Level Walkthroughs | All Bosses | All Rehearsals
┗ Peach Transformations ▶︎ Radiant Peach
☆ 100% Completion Guide | Post Game Content
★ Sparkle Gems | Ribbons | Outfits | Hidden Theets
☆ Hidden Spotlights | Sparkle Decors |
You can rematch all Darkle bosses and take on boss challenges in the post game of Princess Peach: Showtime! Read on for a list of all post game boss challenges, how to complete them, and more!
List of Contents
Disco Wing Post Game Boss Rematch
Boss Challenges
| 1. | Defeat all of the purple chicks before they escape |
|---|---|
| 2. | Hit Disco Wing with Sparkle chicks without missing |
| 3. | Win the fight without taking damage |
Defeating Purple Chicks
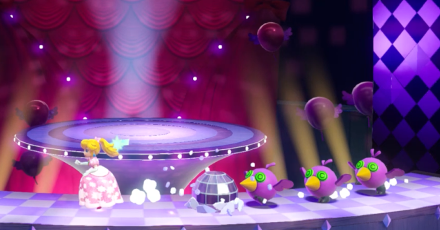
The purple chicks in the Disco Wing rematch are those birds whose bodies are jotting out of their disco egg. Upon landing on the ground, they will walk towards the edge of the stage in an attempt to escape.
Use Stella's ribbon and attack sideways to defeat the chicks. These can be easily done as they will be walking in line, and one side attack will not only reach all three chicks, but also knock them out in one hit.
Launching Sparkle Chicks Without Missing
Sparkle chicks are the blue birds that get launch upwards or downwards once you hit an unhatched disco egg.
For the challenge, you need to make sure that all of the Sparkle chicks that you will launch towards the boss will hit. This is a matter of timing your attacks properly.
A good timing of when to attack is to hit the disco eggs as soon as it lines up with Disco Wing's head. The time it takes for the chick to fly upwards or downwards is fairly short, and it will hit Disco Wing's disco ball armor and damage it.
If you miss this timing, it is much better to wait for the next set of disco balls instead of still launching an attack that can potentially miss Disco Wing.
Avoiding Damage
Use the Platforms During Roll Attack
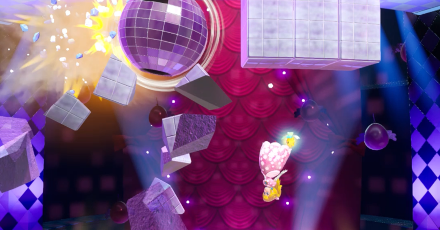
During Disco Wing's ball phase, utilize the platforms that spawn on the ground and climb on top of it to avoid Disco Wing's rolling attack. The boss will also destroy the platform that you are standing on, so jump over it as soon as it's close to you.
Look at the Shadows During Bounce Attack

When Disco Wing prepares for its bounce attack, watch the shadows on the ground to see where it will land and stay away from to avoid getting damaged.
Defeat Purple Chicks
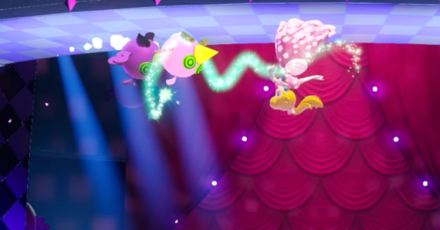
The purple chicks can also damage Peach, so prioritize defeating them immediately as soon as they hatch from their eggs.
Light Fang Post Game Boss Rematch
Boss Challenges
| 1. | Don't cause time to rewind |
|---|---|
| 2. | Obtain eight Sparkle pieces |
| 3. | Win the fight without taking damage |
Avoiding Rewinds
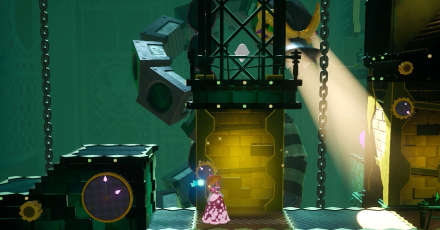
Light Fang will only rewind time if you are caught by its gaze. Hide behind walls to avoid getting caught by Light Fang, but watch out for exposed walls that Light Fang can break!
You can take your time when moving from one part of the stage to the next. The level isn't timed, so you can plan your routes as long as you want.
If Light Gaze does catch you, you have about a second to quickly move behind cover before the rewind actually activates, which you'll know as the screen will turn gray.
Getting All Sparkle Gem Pieces
The second challenge for the Light Fang boss rematch is to collect Sparkle Gem pieces spread across the level. You can break the small light bulbs spread across the level to momentarily stun Light Fang and get the Sparkle Gem Piece safely.
| # | Light Fang Boss Rematch Sparkle Gem Pieces |
|---|---|
| 1 | 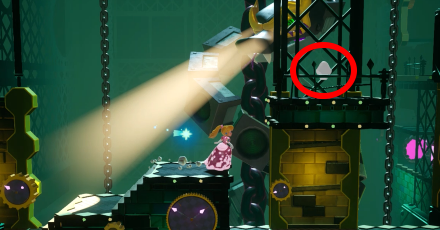 On a platform on the top of the wall at the beginning of the first section. |
| 2 | 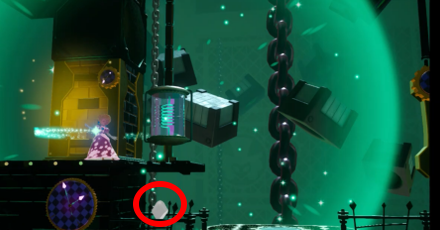 Below the big light bulb in the first section. |
| 3 | 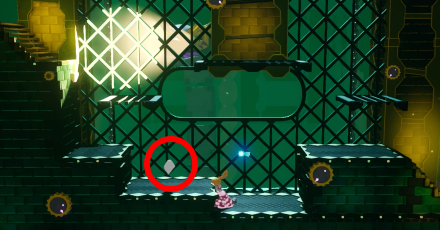 At the bottom path in the middle of the second section. |
| 4 |  Below the big light bulb at the end of the second section. |
| 5 | 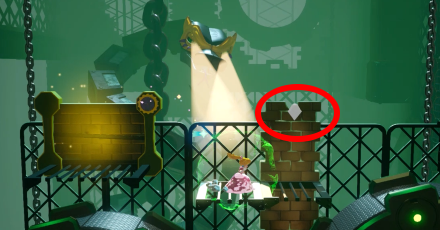 In front of the exposed wall at the beginning of the third section. |
| 6 | 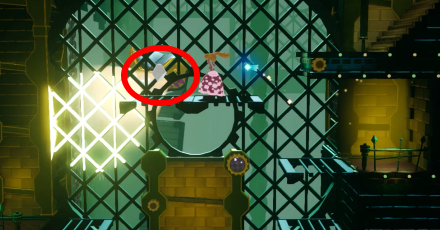 On a platform in the middle of the third section. |
| 7 | 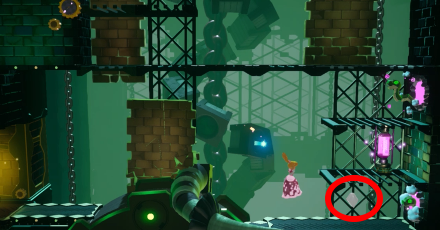 Below the small light bulb next to a snake portal in the middle of the third section. |
| 8 |  Near the big light bulb at the end of the third section. |
Avoiding Damage
Moving Away from Tail Attacks

Light Fang will swipe its tail when Peach moves close next to exposed walls. Quickly move away from these walls to avoid getting hit.
Defeat Small Snakes

You will also encounter small snakes that come our from portals throughout the level. They can easily overwhelm you while jumping from platform to platform, so deal with them with your ribbon attacks.
Purrjector Cat Post Game Boss Rematch
Boss Challenges
| 1. | Avoid being hit by the cat's paw or tail |
|---|---|
| 2. | Defeat Purrjector Cat using only three mice |
| 3. | Win the fight without taking damage |
Avoid Purrjector Cat's Paw and Tail Attacks
Paw Swipe Attack
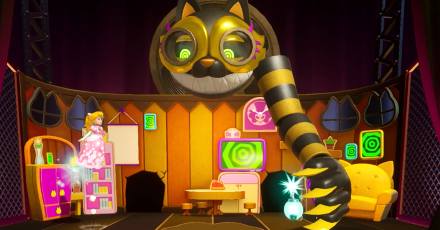
Purrjector Cat will bring out one of its paws and place it either on the left or right side of the stage. After a few moments, it will reveal its claws and swipe its paw towards the middle of the stage.
You can attack the paw with Peach's ribbon attack to cancel this attack, or if you want to play it safe, you can run to the other side of the stage.
Paw Slam Attack
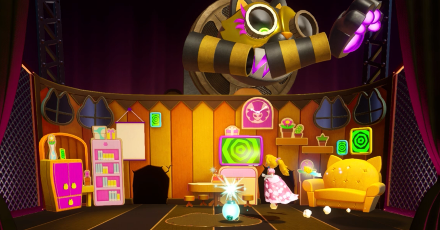
Purrjector Cat will sometime hover its paw above the stage, following Peach. It then slams its paw to the ground to attack.
You can also attack the paw with an upward ribbon attack to cancel the slam attack, or you can move to another location to dodge it.
Tail Swipe

Purrjector Cat can also whip its tail out of the mouse holes in the stage and swipe it across the stage.
You will not be able to cancel this attack, so move away from the tail or jump over it.
Ghost Paw Slam

When Purrjector Cat activates its powers, it will summon two ghostly paws and slam them towards the ground, launching the mouse bomb to the air.
You can simply jump and pass through the ghost paws to avoid the slam attack.
This is also the moment where you can damage the boss with an activated mouse bomb, so move it in the middle of the stage.
Defeat Purrjector Cat with Three Mice
This challenge requires you to launch the activated mouse bomb during the boss' double paw slam attack for three consecutive times.
To ensure that the bomb won't miss Purrjector Cat's face, make sure to always keep the bomb in the middle of the stage. The boss will use its paws and tail to fling the bomb away from the center of the level, so reposition it whenever it goes too far.
You also have a few seconds to move the bomb in the middle as soon as Purrjector Cat activates its powers and brings out its ghostly paws, so take this time to line up the bomb below its face.
Avoiding Damage
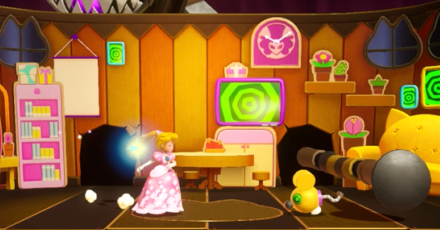
Getting hit by Purrjector Cat's paw and tail attacks will cross out two challenges at once, so if you can manage to avoid those attacks, you're well on your way to complete these challenge as well.
You also need to avoid getting hit by the mouse bomb before you activate it, which you can easily do so simply by attacking it.
Spotlion Post Game Boss Rematch
Boss Challenges
| 1. | Defeat Spotlion with only striped orbs |
|---|---|
| 2. | Defeat Spotlion with nine or fewer returned orbs |
| 3. | Win the fight without taking damage |
Defeat with Striped Orbs
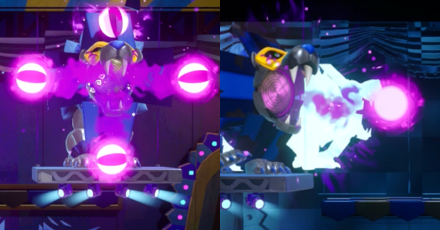
Spotlion's main attacks are its purple orb projectiles. During the boss rematch, Spotlion can spew out striped and non-striped orbs. The boss will only launch striped orbs when the level is still normal and Spotlion hasn't made the entire stage have mirror surfaces. When the level is transformed to appear shiny and relfective, Spotlion will mix up both types of orbs, with the non-striped projectiles being able to bounce off surfaces.
For the first challenge, you need to defeat Spotlion by only reflecting back striped orbs. Take advantage of the stage before it is transformed and reflect the striped orbs back to Spotlion.
When Spotlion changes the stage, you can try to reflect back any striped orbs if the boss uses any but make sure to not deflect the non-striped ones. You can also just wait for the stage to go back to normal.
Defeat With Nine or Fewer Orbs

For the second challenge, you can reflect back either striped or non-striped orbs, so you'll have an easier time completing this challenge.
Make sure that you'll be able to attack the purple blob that appears out of Spotlion's body when it breaks down to progress through the boss fight. If you miss this chance, Spotlion will regenerate without taking any damage, which means that you'll need more reflected orbs to fully defeat it.
Avoiding Damage
Purple Orbs
Peach will take damage when she gets hit by a purple orb without reflecting it. Make sure to move around when Spotlion spews out these orbs or try reflecting it back to the boss.
Lasers
Spotlion will start using its laser attack whenever it transforms the stage with mirrors halfway through the boss fight. Run away from the laser's path as it will bounce around the level due to the reflective surfaces.
| Laser Patterns |
|---|
 Hide near the ledge |
 Climb at the top of the platform. |
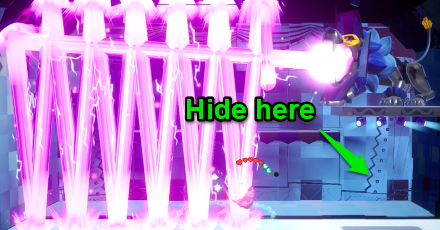 Hide underneath Spotlion |
Madame Grape Post Game Boss Rematch
Boss Challenges
| 1. | Avoid defeating any dancers |
|---|---|
| 2. | Win the battle against Grape without taking damage |
| 3. | Win the battle against Grape the Great without taking damage |
How to Beat Madame Grape Final Boss
Avoid Defeating Dancers
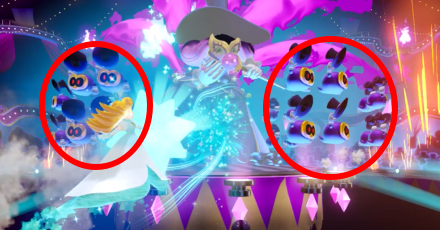
Dancers are the Sour Bunch that are circling around Madame Grape during the first phase of the boss fight. They can take a few hits without getting knocked out if you misfire while attacking as Radiant Peach, but they will fall down if they get hit 4 times.
Try to aim your attacks in between spaces where there aren't any dancers to avoid accidentally defeating one.
Dodging Madame Grape Attacks
Avoiding Sparklers
The sparklers below the stage will spew out smoke before being ignited, which tells you when to fly upwards or move aside to avoid getting hit.
Make sure that there aren't any sparklers to the area where you'll move to avoid getting damaged.
Avoiding Falling Presents
Madame Grape can summon giant presents from the sky which you can see at the top of the stage before they come crashing down. Use this chance to fly sideways to avoid getting damaged.
Avoiding the Train and Planes
You'll be able to see the train and planes from the back of the stage before they circle around to where Peach is. When you see these vehicles approaching, fly upwards or downwards to not get hit.
Dodging Grape the Great Attacks
Avoiding Projectiles
Grape the Great can summon plenty of projectiles from far away before hurtling it towards Peach. Move to an area where there are no incoming projectiles to avoid getting damaged.
Do note that you won't be able to cancel out these projectiles with Radiant Peach's attacks, so don't try to blast them away with your own attacks.
Avoiding the Laser Attack
Grape the Great can also spew out lasers later on in Phase 2. The attack will be directed to the ground before it rises, so you can easily telegraph where the safe spots are to avoid getting hit.
Post Game Boss Rematch Tips
Clear One Challenge at a Time
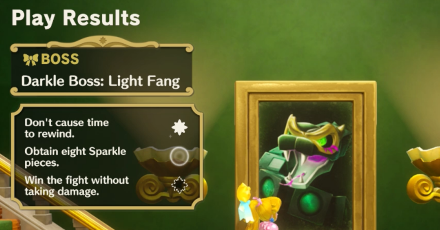
Completing every single challenge in one boss fight can be difficult and overwhelming, so aim to complete only a single challenge per run. There are no limits on how many times you can challenge a boss, so feel free to keep trying!
Avoid All Enemy Attacks
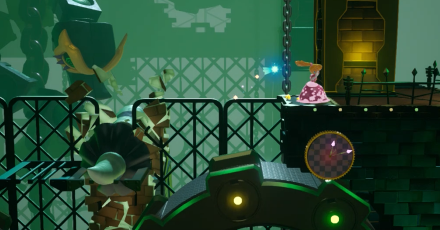
All five bosses share one similar challenge, which is to not get hit during the entire boss fight. If you follow the suggestion to only attempt clearing one challenger at a time, you'll be able to learn the boss' attacks and behavior during the battle, so you'll know how to dodge their attacks as you play on.
Pause the Game to Check Challenges
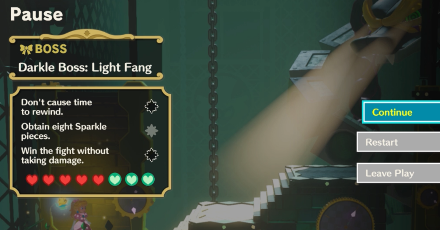
You may easily forget what challenge you're aiming to clear as the boss fight intensifies. You can always pause the game to remind yourself of what challenge to do, as these will be listed in the pause screen.
Pausing will also allow you to restart the boss fight, but do note that this will take you back to the beginning of the level.
How to Unlock Princess Peach Showtime Boss Rematches
Complete the Game
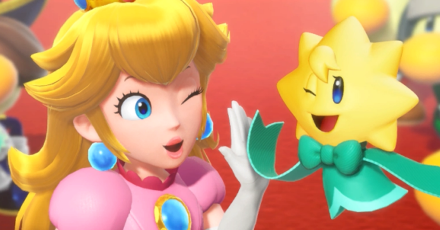
To unlock boss rematches, you need to complete the story of Princess Peach: Showtime!
This means that you need to complete all 30 levels and defeat each boss once before you can unlock the feature of rebattling them.
Princess Peach Showtime All Level Walkthroughs
Where to Find Post Game Bosses
Interact with Boss Portraits to Start
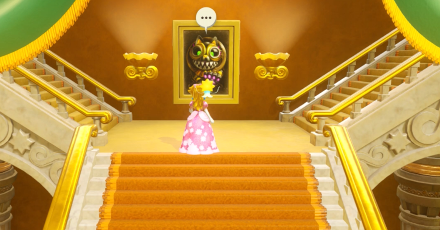
After the game's credits, you'll be sent back to the Sparkle Theater, which will now have boss portraits displayed on each level of the building. Interact with these portraits to start a boss rematch!
Needed for 100% Game Completion

You need to clear every boss challenge available to get all Sparkle Gems in the game and reach 100% game completion.
The extra obtainable Sparkle Gems here will also help you purchase all Sparkle Decorations available in the Lobby Shop during post game. You will also obtain special photos with the Darkle bosses in your Album.
Princess Peach: Showtime! Related Guides

All Tips and Tricks
Comment
Author
Post Game Boss Rematch Guide
improvement survey
03/2026
improving Game8's site?

Your answers will help us to improve our website.
Note: Please be sure not to enter any kind of personal information into your response.

We hope you continue to make use of Game8.
Rankings
- We could not find the message board you were looking for.
Gaming News
Popular Games

Genshin Impact Walkthrough & Guides Wiki

Honkai: Star Rail Walkthrough & Guides Wiki

Umamusume: Pretty Derby Walkthrough & Guides Wiki

Pokemon Pokopia Walkthrough & Guides Wiki

Resident Evil Requiem (RE9) Walkthrough & Guides Wiki

Monster Hunter Wilds Walkthrough & Guides Wiki

Wuthering Waves Walkthrough & Guides Wiki

Arknights: Endfield Walkthrough & Guides Wiki

Pokemon FireRed and LeafGreen (FRLG) Walkthrough & Guides Wiki

Pokemon TCG Pocket (PTCGP) Strategies & Guides Wiki
Recommended Games

Diablo 4: Vessel of Hatred Walkthrough & Guides Wiki

Cyberpunk 2077: Ultimate Edition Walkthrough & Guides Wiki

Fire Emblem Heroes (FEH) Walkthrough & Guides Wiki

Yu-Gi-Oh! Master Duel Walkthrough & Guides Wiki

Super Smash Bros. Ultimate Walkthrough & Guides Wiki

Pokemon Brilliant Diamond and Shining Pearl (BDSP) Walkthrough & Guides Wiki

Elden Ring Shadow of the Erdtree Walkthrough & Guides Wiki

Monster Hunter World Walkthrough & Guides Wiki

The Legend of Zelda: Tears of the Kingdom Walkthrough & Guides Wiki

Persona 3 Reload Walkthrough & Guides Wiki
All rights reserved
© Nintendo. Games are property of their respective owners. Nintendo of America Inc. Headquarters are in Redmond, Washington, USA
The copyrights of videos of games used in our content and other intellectual property rights belong to the provider of the game.
The contents we provide on this site were created personally by members of the Game8 editorial department.
We refuse the right to reuse or repost content taken without our permission such as data or images to other sites.


![Monster Hunter Stories 3 Review [First Impressions] | Simply Rejuvenating](https://img.game8.co/4438641/2a31b7702bd70e78ec8efd24661dacda.jpeg/thumb)


