How to Kill Chargers
★ Check out our Beginner's Guide!
☆ How to Beat All Enemies: Automatons | Terminids
★ Equip the Best Builds and Loadouts!
┗Best Weapons | Best Armor | Best Stratagems
☆ Upgrades: Ship Modules | Boosters
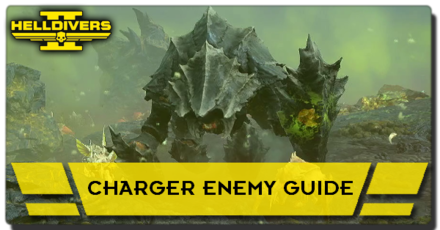
The Charger is a Terminid enemy in Helldivers 2 that has a lot of weaknesses. See how to kill a Charger, its locations, the best difficulty to find it, its variants, and an overview here!
List of Contents
How to Kill a Charger
| How to Kill a Charger |
|---|
|
|
Charger Weak Spot
| Weak Spot | Using an anti-armor weapon, shoot the Charger's Head to kill it instantly. You can also shoot the armor of either of the Charger's front two legs until it comes off. Then, shoot the exposed flesh. |
|---|
The Charger is a heavily armored enemy that will be very hard to kill without an anti-armor weapon. Regular bullets will bounce off its heavy armor, and it has a charge attack that deals a lot of damage.
Shoot the Charger's Head
The Helldivers 2 developers lowered the health of the Charger’s head as mentioned in Patch 1.000.102. With this, the Charger's actual weak spot is its head.
Now, you can instantly kill Charger using a Support Weapon such as the Recoilless Rifle and the EAT-17 Expendable Anti-Tank by just landing a well-placed shot at its head!
Shoot the Charger's Front Legs
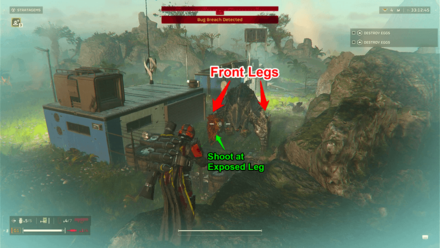
Shooting the Charger front legs is also a way to kill it. It will initially be armored like the rest of its body, but you can shoot the armor off with a few anti-armor weapon shots, depending on the weapon.
Shoot the Exposed Flesh
After you shoot off the armor, switch to a Support Weapon like the Machine Gun and then shoot the exposed leg until the Charger dies. We recommend just shooting the Charger's head since this method is more time-consuming and will eat up a lot of your resources.
Shoot the Charger's Posterior
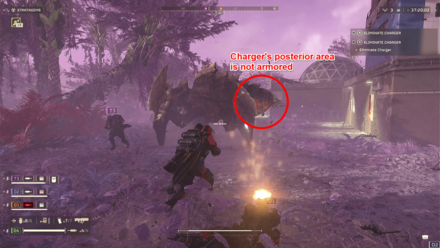
Another spot you can shoot Chargers at with regular weapons is at their posterior area, which does not have armor. It is much less vulnerable as their exposed legs, but you can deal damage to the Charger instead of your attacks simply bouncing off the armor.
Avoid the Charger's Attack
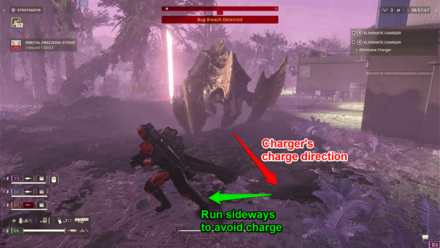
The Charger has a charge attack where it runs towards one direction. If the attack hits you, you will receive heavy damage and will fall down, making it deadly if you are surrounded by other enemies.
Run Away or Hide From the Charger
The simplest way to avoid a Charger's attack is to run in the direction perpendicular to its charge direction. You can also dive and jump out of the way, but this leaves you in a worse position than running.
The charge attack can also be avoided by hiding behind terrain. Just make sure that you are not on destructible terrain, like buildings since a Charger can easily destroy those!
Use Offensive Stratagems
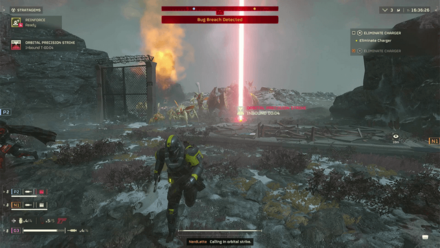
If you want to make quick work of a Charger, you could use an Offensive Stratagem like an Orbital Precision Strike on it. If it does not kill the Charger, it will likely be heavily damaged and can be picked off with a few shots to its posterior.
Hit the Charger with Stratagem Pods
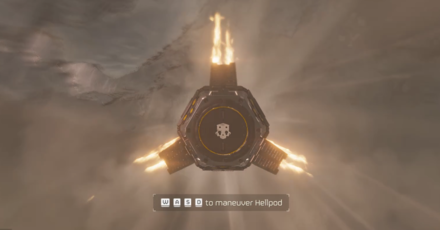
All type of pods can deal heavy damage to anything, including Chargers. It will take a few of them to kill a Charger, and it can be hard to make them hit, but it is an option you have at your disposal.
Reinforce pods that revive the player are great at this since the one who got revived can steer the pod. You can obtain the Caught them by Supplies! trophy if a Charger is killed with this method.
Trophy Guide and List of Achievements
Charger Locations
Where to Find Chargers
| Sectors | L'estrade, Sten, Draco, Mirin, Umlaut, Orion |
|---|---|
| Difficulties | Medium, Challenging, Hard, Extreme, Suicide Mission, Impossible, Helldive |
You can find Chargers in any of the sectors and difficulties mentioned above!
Eliminate Charger Missions
You are guaranteed to encounter Chargers in Eliminate Charger missions regardless of the difficulty you choose.
Best Difficulty to Farm Chargers
Clearing Eliminate Charger missions in Medium difficulty is the fastest way to complete Personal Orders related to it while also gaining some XP whenever you extract!
All Charger Variations
Charger Behemoth
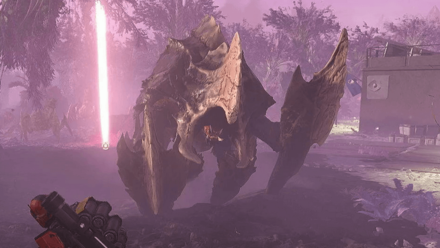
The Charger Behemoth looks similar to a regular Charger, but its armor has more bladed edges. You'll encounter this Charger in the lower difficulty Eliminate Charger missions, but also in some higher difficulty missions.
Charger Overview
Charger Basic Information
 Charger
 |
|
| Faction | Terminid |
|---|---|
Helldivers 2 Related Guides

Enemies by Faction
| All Enemy Factions | |
|---|---|
| Automatons | Terminids |
All Terminids
 Bile Spewer Bile Spewer
|
 Hunter Hunter
|
 Bile Titan Bile Titan
|
 Charger Charger
|
 Stalker Stalker
|
 Scavenger Scavenger
|
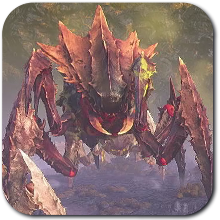 Brood Commander Brood Commander
|
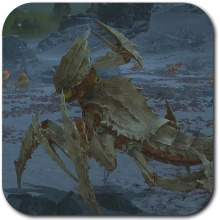 Warrior Warrior
|
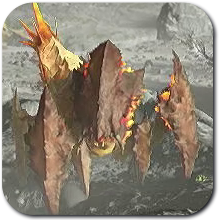 Hive Guard Hive Guard
|
Comment
Author
How to Kill Chargers
improvement survey
03/2026
improving Game8's site?

Your answers will help us to improve our website.
Note: Please be sure not to enter any kind of personal information into your response.

We hope you continue to make use of Game8.
Rankings
- We could not find the message board you were looking for.
Gaming News
Popular Games

Genshin Impact Walkthrough & Guides Wiki

Honkai: Star Rail Walkthrough & Guides Wiki

Umamusume: Pretty Derby Walkthrough & Guides Wiki

Pokemon Pokopia Walkthrough & Guides Wiki

Resident Evil Requiem (RE9) Walkthrough & Guides Wiki

Monster Hunter Wilds Walkthrough & Guides Wiki

Wuthering Waves Walkthrough & Guides Wiki

Arknights: Endfield Walkthrough & Guides Wiki

Pokemon FireRed and LeafGreen (FRLG) Walkthrough & Guides Wiki

Pokemon TCG Pocket (PTCGP) Strategies & Guides Wiki
Recommended Games

Fire Emblem Heroes (FEH) Walkthrough & Guides Wiki

Diablo 4: Vessel of Hatred Walkthrough & Guides Wiki

Yu-Gi-Oh! Master Duel Walkthrough & Guides Wiki

Super Smash Bros. Ultimate Walkthrough & Guides Wiki

Pokemon Brilliant Diamond and Shining Pearl (BDSP) Walkthrough & Guides Wiki

Elden Ring Shadow of the Erdtree Walkthrough & Guides Wiki

Monster Hunter World Walkthrough & Guides Wiki

The Legend of Zelda: Tears of the Kingdom Walkthrough & Guides Wiki

Persona 3 Reload Walkthrough & Guides Wiki

Cyberpunk 2077: Ultimate Edition Walkthrough & Guides Wiki
All rights reserved
© 2024 Arrowhead Game Studios AB
The copyrights of videos of games used in our content and other intellectual property rights belong to the provider of the game.
The contents we provide on this site were created personally by members of the Game8 editorial department.
We refuse the right to reuse or repost content taken without our permission such as data or images to other sites.





![Slay the Spire 2 Review [Early Access] | Still the Deckbuilder to Beat](https://img.game8.co/4433115/44e19e1fb0b4755466b9e516ec7ffb1e.png/thumb)

![Resident Evil Village Review [Switch 2] | Almost Flawless Port](https://img.game8.co/4432790/e1859f64830960ce4248d898f8cd38d9.jpeg/thumb)


