This survey will take about 1 minute.
Your answers will help us to improve our website.
Helldivers 2
Tips and Tricks: A Beginner's Guide to Helldivers 2
★ Check out our Beginner's Guide!
☆ How to Beat All Enemies: Automatons | Terminids
★ Equip the Best Builds and Loadouts!
┗Best Weapons | Best Armor | Best Stratagems
☆ Upgrades: Ship Modules | Boosters
Welcome to Game8's beginner's guide for Helldivers 2. Here you'll learn the basics of the game, how to get started, and various tips and tricks to survive the intergalactic warfare!
List of Contents
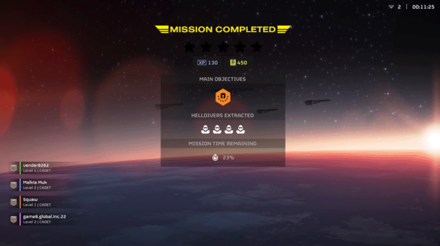
Beginner's Guide
| Beginner's Getting Started Guide |
|---|
|
|
Learn the Shooting Mechanics
Shooting is a bit complex in Helldivers 2 as moving around while firing will result in weapon inaccuracy. Be sure to stand still, crouch, or go prone when shooting to be more accurate.
You don't want your bullets flying all over the place as you might accidentally hit and damage your teammates since friendly fire is always on in this game.
Conserve Ammo, Avoid Reloading Unnecessarily
Reloading throws the whole clip away along with the remaining bullets inside of it. In order to conserve and maximize ammunition, you'll want to reload your weapon only when you've emptied a whole magazine or when you're down to a few bullets left.
There's No Need to Kill Everything
It might be tempting to dish out democracy to everything you encounter, however, your kill count has no effect on XP or give any bonuses after you end a match. The only things that matter for XP are completing objectives and missions, so kill only those that are related to your mission objectives to save ammo!
While moving from mission to mission, try to avoid the patrols roaming around. No need to snipe and trigger them, as you'll just waste ammunition if you do so.
Stealth is a Viable Playstyle
Stealth is a playstyle that you should consider for certain objectives that don't involve killing.
There are armor that improve your stealth, and there are certain stratagems that you should avoid, like the Guard Dog Rover.
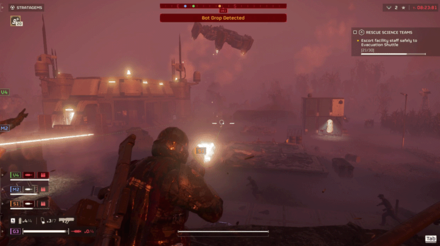
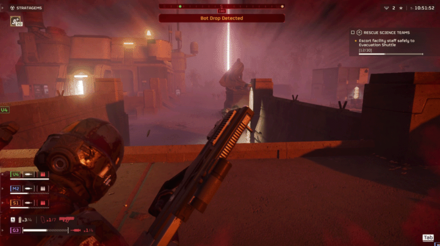
Utilize Stratagems
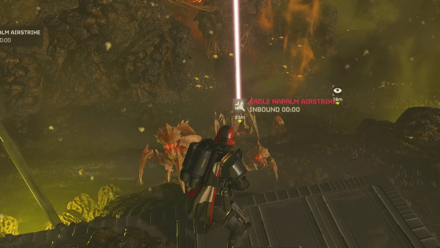
Stratagems are vital in combat as these can restock your ammo, call in an orbital laser airstrike that decimates all those caught within it, summon a high-powered machine gun for you to use, and even recall your dead teammates back to action.
Stratagem Pods Deal Heavy Damage
The pods that you call with stratagems deal heavy damage to the area that they drop on. You can use these pods to damage and kill enemies, even heavily armored ones like Chargers. There is an achievement to killing a Charger with a resupply pod.
Likewise, stay away from the marked areas, as the pods can also kill you if they land directly on you!
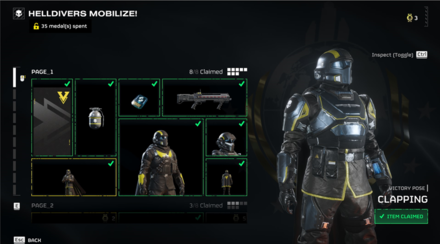
Unlock New Stratagems Via Ship Management
You can unlock new Stratagems by purchasing them using Requisition Slips via the Ship Management terminal aboard your ship. Initially, you'll only be able to unlock a few, but as you level up, more Stratagems will become available for purchase.
Best Stratagems and How to Unlock
Upgrade Ship Modules

Upgrading Ship Modules will enhance and improve the overall effectiveness of Stratagems. These can also be upgraded at the Ship Management terminal using Samples.
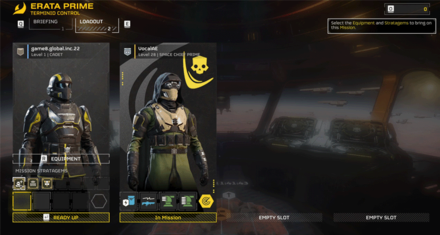
Plan Your Loadout
Before you jump straight into the heat of battle, it's important you pick the right weapons, armor, boosters, and most importantly stratagems for the mission.
For stratagems, you need careful consideration to the combination of stratagems that you'll bring.
You Can Only Carry One Support Weapon and One Backpack
Always remember that you can only carry one support weapon and one backpack at a time, so it's a terrible idea to carry more than one stratagem of each. The ideal loadout is one support weapon, one backpack, and two damaging stratagems.
Orbitals Have Limited Charges Unlike Eagle Stratagems
Orbital stratagems have limited uses, while Eagle stratagems don't. Consider Eagle stratagems over Orbital stratagems if you're planning a long mission, and use Orbitals for shorter ones.
Eagle stratagems do have to deal with the long cooldown of rearming the charges when they run out. You can manually rearm the charge using Eagle Rearm to trigger the cooldown early.
Eagle Rearm Guide
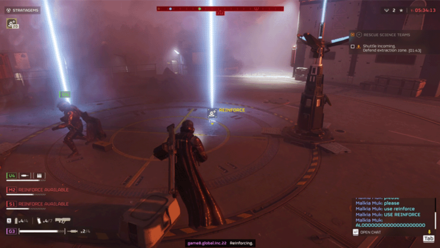
Turrets Draw Enemy Aggro
Turrets like the Gatling Sentry and Machine Sentry are a great Stratagem to bring along with you, as enemies will usually target them first. A neat strategy to do is to place these turrets on hard to reach places such as on top of hills and obstacles, so that your enemies will take a longer time reaching them.
Since Turrets draw aggro, you can plop one down and then retreat to safety to heal up if you're badly injured.
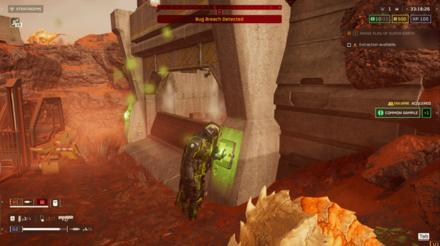
Use Environmental Objects in Combat
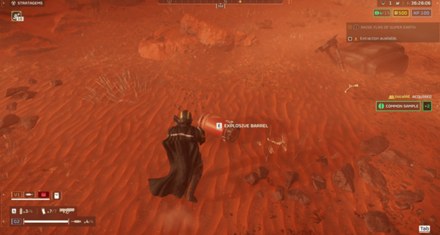
While on the battlefield, you will find objects like red barrels scattered around that you can shoot at to cause an explosion. Pick one of these up and throw it at a horde, then fire at it to watch them blow up in flames.
Gather Loot in Points of Interest
Various points of interest can be found throughout the map area. These areas contain loot like Samples, currency, and other resources.
You can easily identify these POIs as they are marked on your mini-map with a large diamond icon. Some are hidden behind metal gates that can be opened using an explosive.
Group Up With Friends or Random Players
Completing missions will always go smoothly with a full squad of 4 players instead of going in solo. Taking on enemies in Helldivers 2 as a lone wolf is extremely difficult and we highly recommend finding some friends to play with.
Some Locked Doors Require Two People to Open
You will also encounter locked doors that require at least two people to open them. Behind these sealed doors contain some useful items such as heavy weaponry like the Arc Thrower and the Flamethrower.
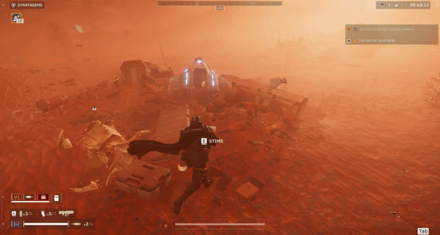
Use a Stim on an Ally if Their Health is Low
Stims can actually be used on an ally, with the condition that the ally should be low on health. When you approach them, you'll see a prompt to heal them; press the interact button to do so.
This is a useful tip to know if you have an ally that has low health and no more stims; you can prolong their life until your squad gets more supplies.
Samples and Currency are Shared with the Whole Squad
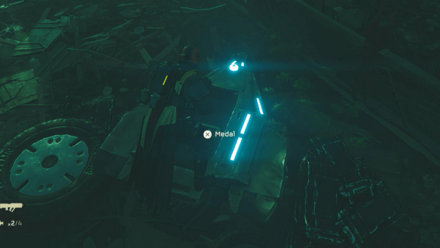
The combined amount of Samples, Medals, and Super Credits that your whole squad has collected is what every single member will get at the end of the mission. There's no need to fight over who takes which, if it involves samples or currency.
Samples Can Be Dropped, Including Weapons
Dropping Samples is a valid strategy. You can drop them at the extraction point and come back for them later on before leaving so you don't risk losing it elsewhere. You can also give it to a skilled teammate who rarely dies.
In addition, weapons can also be dropped, so if you're not comfortable with a weapon you're using, you can trade it in with another player.
Take Note of Environmental Conditions
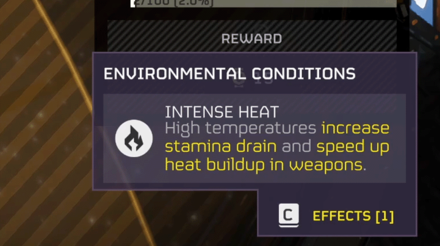
Planets will have Planetary Hazards and Environmental Conditions which will affect some gameplay elements such as disabling the use of Stratagems and increasing your stamina drain!
Before hopping into a mission, be sure to take note of what negative effects that planet has. You can see this on the bottom right corner of the screen when hovering between planets.
Avoid Quitting Midgame
Returning to your ship and abandoning a mission will disqualify you from earning EXP and currency rewards. Refrain from quitting midgame especially if you have teammates to carry you so as not to waste earning a bit of Requisition Slips and a few experience points.
What Happens if You Abandon an Operation?
Diving Has a Lot of Uses
| Diving Uses |
|---|
|
|
Diving and going prone in general is a skill that will often save your life. Remembering that you have this ability is key to surviving, especially in higher difficulties.
Dodge Dangerous Enemy Attacks
Many enemies have dangerous but predictable attacks. Diving to the side will allow you to dodge the Charger's charge attack, the Bile Spewer's spit attack, and more! Once you have memorized the enemy patterns, you should know the right time to dive.
Avoid Ally Bullets
Diving or going prone will allow you to avoid ally bullets (as long as they're not targeting you). When you're in front of the squad leading the charge, you might encounter the issue of allies behind you accidentally shooting you; by going prone, you can reduce the likelihood of that happening.
It can be a worse issue if there's a lot of allied turrets nearby, since they don't care if they accidentally shoot you or not. Just go prone to avoid their bullets as well (if they're the turret types that shoot straight).
Reduce Weapon Recoil
When you are in a prone position, you'll have reduced weapon recoil. This is especially useful for certain weapons such as the Machine Gun, drastically improving your accuracy.
Reduce Damage from Explosives
Being prone or not is usually the difference of dying or living from an explosive. If a situation happens where you can't avoid getting hit by an explosive, quickly dive to survive.
Removes Burning
Diving will remove the Burning status. If you find yourself on fire (for example, from an ally Flamethrower) dive to avoid any further damage.
Repeatedly Dive to Escape Being Surrounded
If you find yourself being surrounded by a lot of enemies, you can try escaping by repeatedly diving: dive, get up, dive, get up, until you can run and escape.
Simply running away from being surrounded often doesn't work, since enemies can catch up with you. This repeated dive trick will give you better chances.
All Tips and Tricks Guides
All Tips and Tricks
Helldivers 2 Related Guides
Helldivers 2 Walkthrough Wiki
| Game8 Helldivers 2 Guides | |
|---|---|
 Tips and Tricks Tips and Tricks |
 Weapons Weapons |
 Stratagems Stratagems |
 Armor Armor |
 Ship Modules Ship Modules |
 Loadouts Loadouts |
 Enemies Enemies |
 News News |
 Galactic War Galactic War |
|
Comment
Author

Tips and Tricks: A Beginner's Guide to Helldivers 2
Please participate in our site
improvement survey
03/2026
improvement survey
03/2026
Would you assist in
improving Game8's site?
improving Game8's site?

×
We are listening to our users' valuable opinions and discussing how to act on them.
The information collected through this survey will be used for the purpose of improving our services. In addition, the information will only be disclosed a part of a statistic in a format that will not allow identification of personal information.
Begin Survey
Not Now
×
Please rate each item regarding Game8.co's Advertisements.
Amount of Ads
Very Dissatisfied
Somewhat Dissatisfied
Fine
Somewhat Satisfied
Highly Satisfied
Placement of Ads
Timing of Ad Display
Ad Loading Speed
Safeness of Ads
Content of Ads
×
Please rate each item regarding Game8.co's Quality of Articles.
Amount of information
Very Dissatisfied
Somewhat Dissatisfied
Fine
Somewhat Satisfied
Highly Satisfied
Frequency of updates
Speed of new information
Accuracy of articles
Understandibility of articles
Readability of sentences
×
Please rate each item regarding Game8.co's Usability of the Site.
Ease of finding information
Very Dissatisfied
Somewhat Dissatisfied
Fine
Somewhat Satisfied
Highly Satisfied
Loading Speed
Use of Color
Font Size
Visibility of Images
Easy to Understand Layout
×
Please rate each item regarding Game8.co's Message Boards, Comments.
Ease of Writing
Very Dissatisfied
Somewhat Dissatisfied
Fine
Somewhat Satisfied
Highly Satisfied
Readability
Ease in Finding Information
Comment Quality
Comment Quantity
Admin Response
×
Please rate each item regarding Game8.co's Site's new design.
Please rate our site's new design
Very Dissatisfied
Somewhat Dissatisfied
Fine
Somewhat Satisfied
Highly Satisfied
Do you think that the website's design change makes the site easier to use?
Has the new design made it easier for you to find information on the site?
Has the new design improved the overall visual appeal of the site?
How would you rate your overall satisfaction with the new design of the site?
×
How likely are you to recommend Game8 to someone you know?
Very Unlikely
0
1
2
3
4
5
6
7
8
9
10
Very Likely
If you have other opinions regarding potential improvement to the website, please share them with us. We would appreciate your honest opinion.
Note: This is a free response section, so you can proceed without entering anything.
Note: Please be sure not to enter any kind of personal information into your response.
Note: Please be sure not to enter any kind of personal information into your response.
×
Thank You
×
Thank you for participating in our survey! Your answers will help us to improve the quality of our website and services.
We hope you continue to make use of Game8.
We hope you continue to make use of Game8.
Close
Rankings
- We could not find the message board you were looking for.
Gaming News


![Monster Hunter Stories 3 Review [First Impressions] | Simply Rejuvenating](https://img.game8.co/4438641/2a31b7702bd70e78ec8efd24661dacda.jpeg/thumb)


Popular Games

Genshin Impact Walkthrough & Guides Wiki
Honkai: Star Rail Walkthrough & Guides Wiki
Umamusume: Pretty Derby Walkthrough & Guides Wiki
Pokemon Pokopia Walkthrough & Guides Wiki
Resident Evil Requiem (RE9) Walkthrough & Guides Wiki
Monster Hunter Wilds Walkthrough & Guides Wiki
Wuthering Waves Walkthrough & Guides Wiki
Arknights: Endfield Walkthrough & Guides Wiki
Pokemon FireRed and LeafGreen (FRLG) Walkthrough & Guides Wiki
Pokemon TCG Pocket (PTCGP) Strategies & Guides Wiki


Recommended Games
Diablo 4: Vessel of Hatred Walkthrough & Guides Wiki
Fire Emblem Heroes (FEH) Walkthrough & Guides Wiki
Yu-Gi-Oh! Master Duel Walkthrough & Guides Wiki
Super Smash Bros. Ultimate Walkthrough & Guides Wiki
Pokemon Brilliant Diamond and Shining Pearl (BDSP) Walkthrough & Guides Wiki
Elden Ring Shadow of the Erdtree Walkthrough & Guides Wiki
Monster Hunter World Walkthrough & Guides Wiki
The Legend of Zelda: Tears of the Kingdom Walkthrough & Guides Wiki
Persona 3 Reload Walkthrough & Guides Wiki
Cyberpunk 2077: Ultimate Edition Walkthrough & Guides Wiki


All rights reserved
© 2024 Arrowhead Game Studios AB
The copyrights of videos of games used in our content and other intellectual property rights belong to the provider of the game.
The contents we provide on this site were created personally by members of the Game8 editorial department.
We refuse the right to reuse or repost content taken without our permission such as data or images to other sites.