This survey will take about 1 minute.
Your answers will help us to improve our website.
The Witcher 3
Pyres of Novigrad Walkthrough
☆ Story Guides: Main Quests | Choices
☆ Gwent Guides: All Cards | Gwent Quests | Player-Vendor Locations
┗ Best Decks: Nilfgaardian Empire | Monsters | Northern Realms | Scoia'tael
Pyres of Novigrad is a Main Quest in The Witcher 3: Wild Hunt's Act 1. Find out how to complete the quest, as well as the best choices and rewards here!
| Previous Quest | Current Quest | Next Quest |
|---|---|---|
| Family Matters | Pyres of Novigrad | Novigrad Dreaming |
List of Contents
Pyres of Novigrad Walkthrough
Visit Triss in Her House
| Step-by-step Walkthrough | |
|---|---|
| 1 | Make your way to Novigrad. Upon reaching Hierarch Square, a cutscene will trigger. Afterward, head to the marked house. |
| 2 |
Once you're inside the courtyard of the house, you will encounter two looters. They will divulge information to Geralt if you choose to talk to them. However, if you tell them to get lost you'll have to beat them in a fist fight first instead before you can get intel from them. ・Get Lost - Leads into a fist fight. When the HP of one of the thugs is low enough, they will surrender and tell you what they know. ・Let's Talk - Immediately gives you the intel. |
Ways to Find the King of Beggars
| 3 Options to Find the King of Beggars | ||
|---|---|---|
| Follow a Thief | Ask a Beggar | Find the Sewer |
There are three methods to find out Putrid Grove's location. Whichever you choose will not affect any quest or the story.
Look for Thieves on the Main Square and Follow Them (Obj 2-3)
| Step-by-step Walkthrough | |
|---|---|
| 1 |
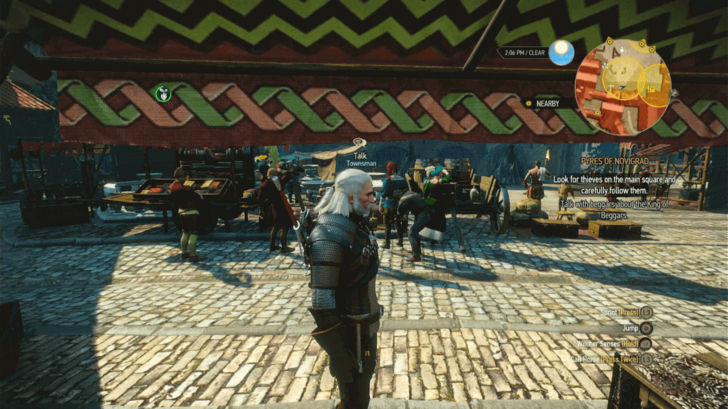 Return to Hierarch Square and stand near the marked search areas. Wait until a "Townsman" pickpockets one of the onlookers. Don't approach the thief yet, let him walk past towards the alley. |
| 2 | Follow the pickpocket through the wooden gate into the back alley. When stopped by a beggar, choose any of the options to continue. Athough it's highly recommended to not give him any money as it will only be a waste. |
| 3 |
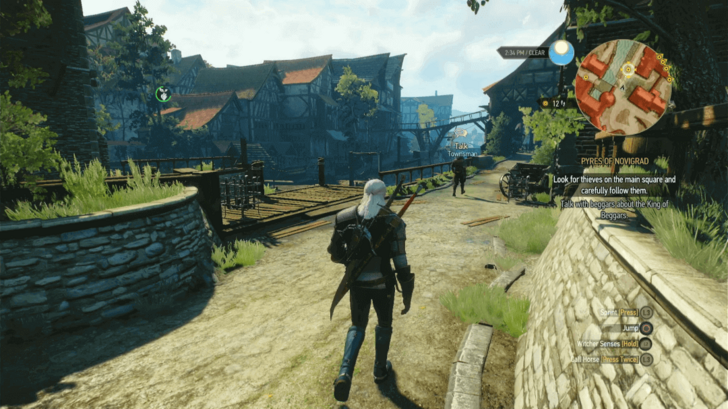 Continue following the pickpocket. He will pass the purse to another thief. Follow the thief courier. |
| 4 |
Defeat the Bandits (Optional) If you get too close to any of the two thieves, they will confront you. No matter what reply you choose, they will go to a backyard to lead you into an ambush. You will need to beat all the 4 thugs to make them tell you the location of the hideout and the password. |
| 5 |
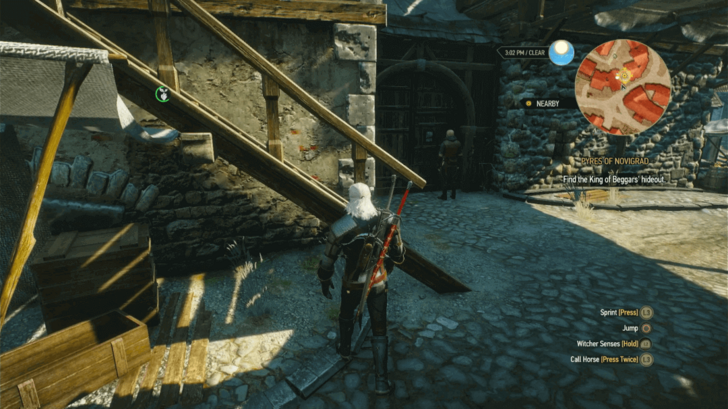 Find the King of Beggars' Hideout Knock on the door the where the thief stopped. If you do not know the password yet, you have two choices. ・Pay 50 Crowns: You can get in and earn 5 XP, but you are stripped of your weapons. ・Use Axii: If you have Delusion level 2, you can choose the Axii dialogue option, which will give you 40 XP and let you keep your weapons. |
Talk with Beggars About the King of Beggars (Obj 2-3)
| Step-by-step Walkthrough | |
|---|---|
| 1 |
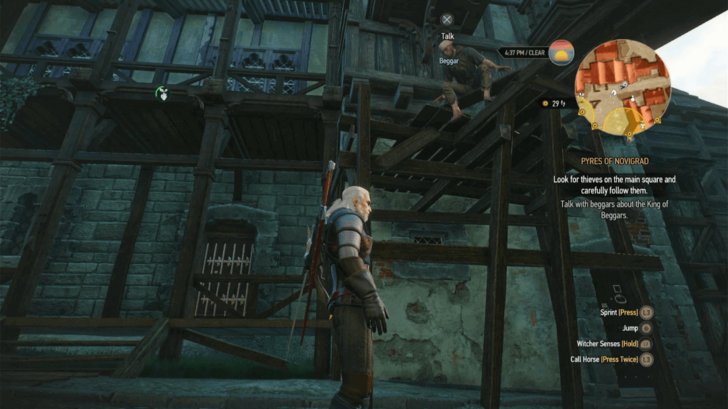 Return to Hierarch Square and talk to the beggar sitting on top of the scaffold next to Vivaldi Bank. When talking to him, always choose the first dialogue option to answer. Otherwise, you'll have to speak to him twice to get the information. |
| 2 |
Find the King of Beggars' Hideout Follow the marker to the entrance of the hideout of the King of Beggars, located south of Hirarch Square in the Lacehalls district. |
| 3 | Knock on the door. Give the password "Old sow's farrowed piglets". |
| 4 |
If you do not give the right password, you have two choices. ・Pay 50 Crowns: You can get in and earn 5 XP, but you are stripped of your weapons. ・Use Axii: If you have Delusion level 2, you can choose the Axii dialogue option, which will give you 40 XP and let you keep your weapons. |
Find the Sewer
| Step-by-step Walkthrough | |
|---|---|
| 1 |
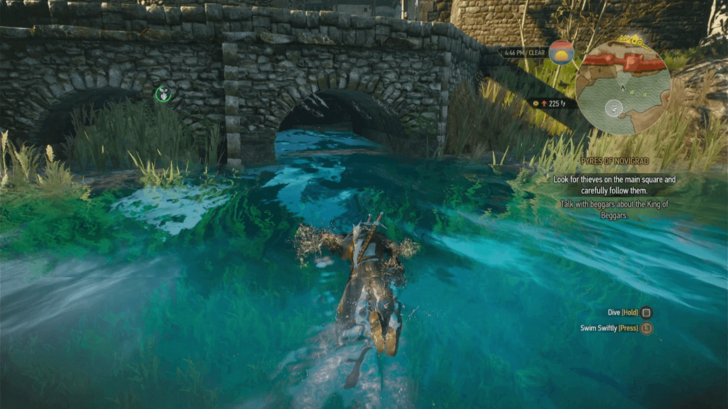 Go to Glory Gate. Dive in the water and swim towards the archway; then enter the tunnel right under it. |
| 2 | Follow the passage until you reach a spacious chamber. Kill the 3 Drowners lurking there. |
| 3 |
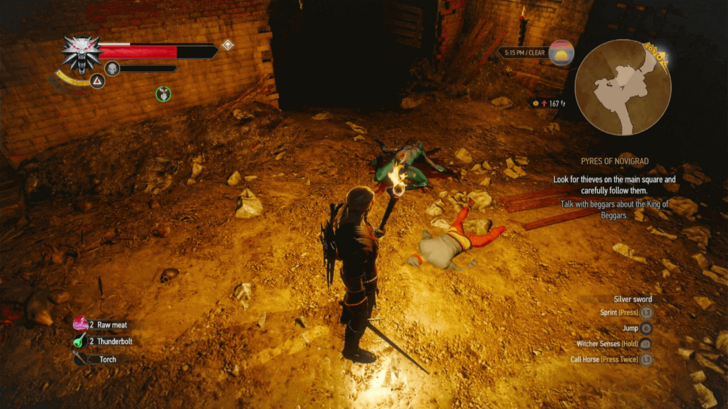 Loot the human corpse in the room with the drowners to find a key. Use the key on the locked gate. |
| 4 |
 Continue through the sewers until you reach the last room. Then climb up the ladder. |
| 5 |
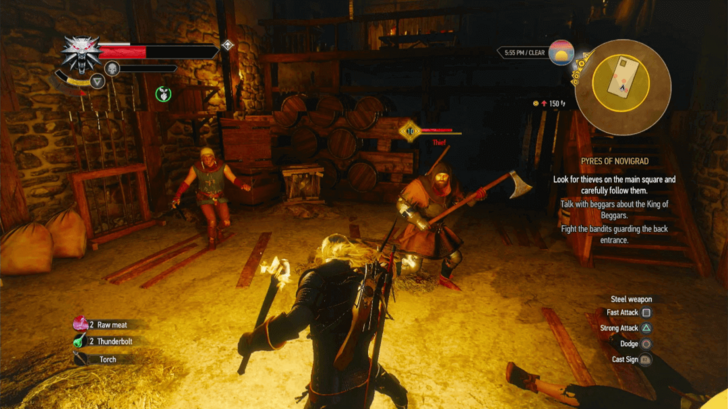 Fight the Bandits Guarding the Back Entrance Walk to the center of the room where you will encounter 4 thieves. Weaken the leader (the axe-wielding thief) to end the fight. |
Objectives 4-11
| Step-by-step Walkthrough | |
|---|---|
| 1 |
Meet with the King of Beggars Once you're inside Putrid Grove you will gain 100 XP. Follow the marker to meet the King of Beggars. |
| 2 |
Follow Triss Follow where Triss leads you. |
| 3 |
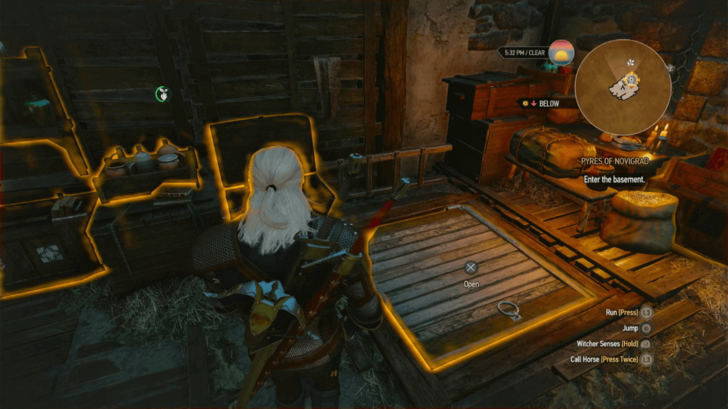 Enter the Basement Find the trapdoor using your Witcher Senses, then open it. Go down the basement where a single drowner will be waiting for you. |
| 4 |
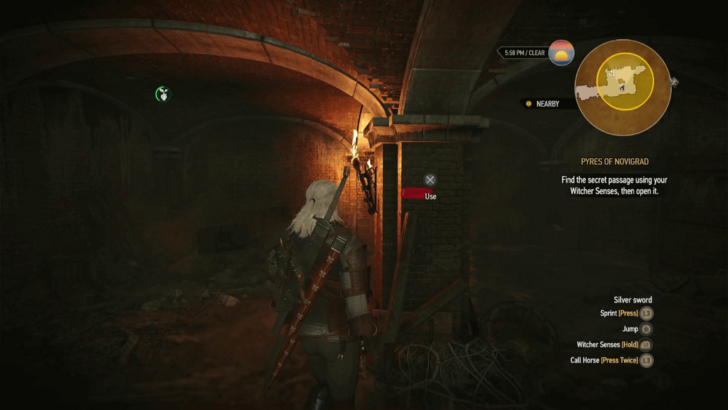 Find the Secret Passage Using Your Witcher Senses, Then Open it Use your Witcher Senses and interact with the lone brick that is jutting out of the pillar in the middle of the room. |
| 5 |
Follow Triss Follow Triss again. |
| 6 |
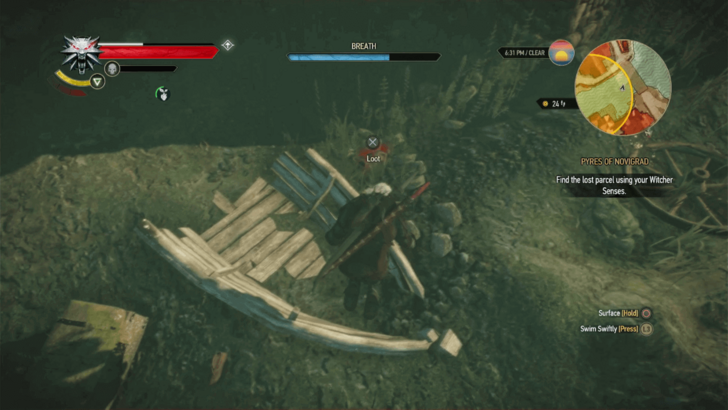 Find the Lost Parcel Using Your Witcher Senses Swim towards the bridge. Then, dive underwater and use your Witcher Sense to find the parcel. The parcel is next to a wrecked boat. |
| 7 |
Give Triss the Parcel Return to Triss and give her the parcel. |
| 8 |
Follow Triss Continue following Triss. When talking to the merchant Brandon, demand the full price in advance. |
Place Rat Traps Around the Warehouse
Use your Witcher Senses to find rat activity and place rat traps. You will find the locations of rat activity at the northern wall, eastern wall, and northeastern corner. It is best to start from the right then work your way counterclockwise, as this direction will allow you to come across each location.
| Locations to Place Rat Traps | |
|---|---|
| 1 |  First location to place trap, starting from the right. |
| 2 | 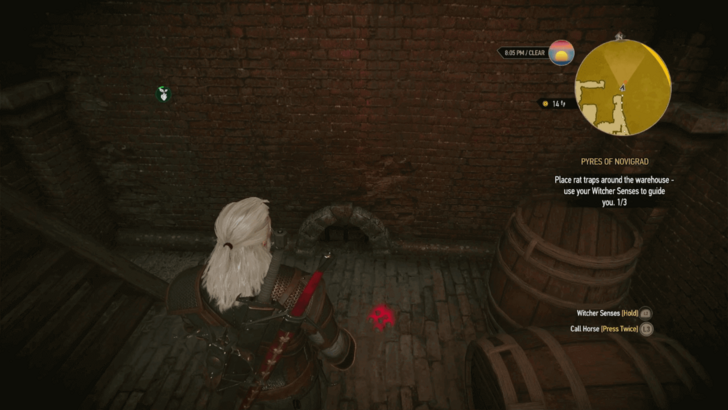 Second location to place trap, going counterclockwise. |
| 3 | 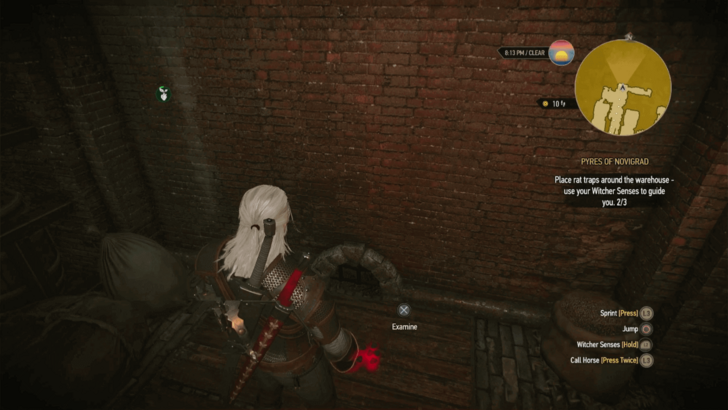 Third location to place trap. |
Objectives 13-15
| Step-by-step Walkthrough | |
|---|---|
| 1 |
Tell Triss You've Completed Your Task After placing all the three traps, talk to Triss. |
| 2 |
Fight the Thugs Kill the 3 Witch Hunters. |
| 3 |
Leave the Warehouse After the fight, exit the warehouse to complete the Pyres of Novigrad quest. |
Pyres of Novigrad Choices
| Choice | Results |
|---|---|
| Follow a Thief |
・Will require you to have either 50 Crowns or Delusion level 2. ・Possible fighting in this route. ・Must beat bandits to get the password if caught tailing thief. |
| Ask a Beggar |
・You obtain the location of the hideout and password immediately. ・Easiest and fastest method to get to Putrid Grove. ・No fighting in this route. |
| Find the Sewer | ・Fighting necessary. Must beat the thugs to continue. |
Choices and Decisions that Affect the Story
Pyres of Novigrad Rewards
| Gold Reward | None |
|---|---|
| Exp Reward | 200 |
| Item Reward | None |
Pyres of Novigrad Quest Info
| Quest Number | 17 |
|---|---|
| Region | Novigrad |
| Quest Location | Novigrad |
| Previous Quest | Family Matters |
| Next Quest | Novigrad Dreaming |
| Missable? | No |
| Failable? | No |
The Witcher 3 Related Guides

Witcher 3 Questlines
| Prologue | |||||
| Act 1 | Act 2 | Act 3 | |||
| DLC | |||||
|---|---|---|---|---|---|
| Hearts of Stone | Blood and Wine | ||||
All Act 1 Quests
Comment
Author

Pyres of Novigrad Walkthrough
Please participate in our site
improvement survey
03/2026
improvement survey
03/2026
Would you assist in
improving Game8's site?
improving Game8's site?

×
We are listening to our users' valuable opinions and discussing how to act on them.
The information collected through this survey will be used for the purpose of improving our services. In addition, the information will only be disclosed a part of a statistic in a format that will not allow identification of personal information.
Begin Survey
Not Now
×
Please rate each item regarding Game8.co's Advertisements.
Amount of Ads
Very Dissatisfied
Somewhat Dissatisfied
Fine
Somewhat Satisfied
Highly Satisfied
Placement of Ads
Timing of Ad Display
Ad Loading Speed
Safeness of Ads
Content of Ads
×
Please rate each item regarding Game8.co's Quality of Articles.
Amount of information
Very Dissatisfied
Somewhat Dissatisfied
Fine
Somewhat Satisfied
Highly Satisfied
Frequency of updates
Speed of new information
Accuracy of articles
Understandibility of articles
Readability of sentences
×
Please rate each item regarding Game8.co's Usability of the Site.
Ease of finding information
Very Dissatisfied
Somewhat Dissatisfied
Fine
Somewhat Satisfied
Highly Satisfied
Loading Speed
Use of Color
Font Size
Visibility of Images
Easy to Understand Layout
×
Please rate each item regarding Game8.co's Message Boards, Comments.
Ease of Writing
Very Dissatisfied
Somewhat Dissatisfied
Fine
Somewhat Satisfied
Highly Satisfied
Readability
Ease in Finding Information
Comment Quality
Comment Quantity
Admin Response
×
Please rate each item regarding Game8.co's Site's new design.
Please rate our site's new design
Very Dissatisfied
Somewhat Dissatisfied
Fine
Somewhat Satisfied
Highly Satisfied
Do you think that the website's design change makes the site easier to use?
Has the new design made it easier for you to find information on the site?
Has the new design improved the overall visual appeal of the site?
How would you rate your overall satisfaction with the new design of the site?
×
How likely are you to recommend Game8 to someone you know?
Very Unlikely
0
1
2
3
4
5
6
7
8
9
10
Very Likely
If you have other opinions regarding potential improvement to the website, please share them with us. We would appreciate your honest opinion.
Note: This is a free response section, so you can proceed without entering anything.
Note: Please be sure not to enter any kind of personal information into your response.
Note: Please be sure not to enter any kind of personal information into your response.
×
Thank You
×
Thank you for participating in our survey! Your answers will help us to improve the quality of our website and services.
We hope you continue to make use of Game8.
We hope you continue to make use of Game8.
Close
Rankings
- We could not find the message board you were looking for.
Gaming News


![Slay the Spire 2 Review [Early Access] | Still the Deckbuilder to Beat](https://img.game8.co/4433115/44e19e1fb0b4755466b9e516ec7ffb1e.png/thumb)

![Resident Evil Village Review [Switch 2] | Almost Flawless Port](https://img.game8.co/4432790/e1859f64830960ce4248d898f8cd38d9.jpeg/thumb)
Popular Games

Genshin Impact Walkthrough & Guides Wiki
Honkai: Star Rail Walkthrough & Guides Wiki
Umamusume: Pretty Derby Walkthrough & Guides Wiki
Pokemon Pokopia Walkthrough & Guides Wiki
Resident Evil Requiem (RE9) Walkthrough & Guides Wiki
Monster Hunter Wilds Walkthrough & Guides Wiki
Wuthering Waves Walkthrough & Guides Wiki
Arknights: Endfield Walkthrough & Guides Wiki
Pokemon FireRed and LeafGreen (FRLG) Walkthrough & Guides Wiki
Pokemon TCG Pocket (PTCGP) Strategies & Guides Wiki


Recommended Games
Fire Emblem Heroes (FEH) Walkthrough & Guides Wiki
Diablo 4: Vessel of Hatred Walkthrough & Guides Wiki
Yu-Gi-Oh! Master Duel Walkthrough & Guides Wiki
Super Smash Bros. Ultimate Walkthrough & Guides Wiki
Pokemon Brilliant Diamond and Shining Pearl (BDSP) Walkthrough & Guides Wiki
Elden Ring Shadow of the Erdtree Walkthrough & Guides Wiki
Monster Hunter World Walkthrough & Guides Wiki
The Legend of Zelda: Tears of the Kingdom Walkthrough & Guides Wiki
Persona 3 Reload Walkthrough & Guides Wiki
Cyberpunk 2077: Ultimate Edition Walkthrough & Guides Wiki


All rights reserved
The Witcher® is a trademark of CD PROJEKT S. A. The Witcher game © CD PROJEKT S. A. All rights reserved. The Witcher game is based on the prose of Andrzej Sapkowski. All other copyrights and trademarks are the property of their respective owners.
The copyrights of videos of games used in our content and other intellectual property rights belong to the provider of the game.
The contents we provide on this site were created personally by members of the Game8 editorial department.
We refuse the right to reuse or repost content taken without our permission such as data or images to other sites.