Crumbling Fiery Forbidden Lands Starry Locations and Missions Walkthrough
This is a walkthrough for the Crumbling Fiery Forbidden Lands stage in Kirby and the Forgotten Land Star-Crossed World DLC. See the location of all the Starries, how to complete the missions, and discover all the hidden locations!
| Previous Stage | Next Stage |
|---|---|
| Moonlight Canyon Labyrinth | Crystal Beast Pack Volcano Battle |
List of Contents
Crumbling Fiery Forbidden Lands Missions and Abilities
Missions List
| Mission | Starries |
|---|---|
| 3 | |
| 5 | |
| 1 | |
| 1 | |
| 1 |
Copy Abilities
 Hammer Hammer
|
 Cutter Cutter
|
 Ranger Ranger
|
Crumbling Fiery Forbidden Lands Mission Completion Order
Area 1
| Area 1 Missions | ||
|---|---|---|
| 1 | 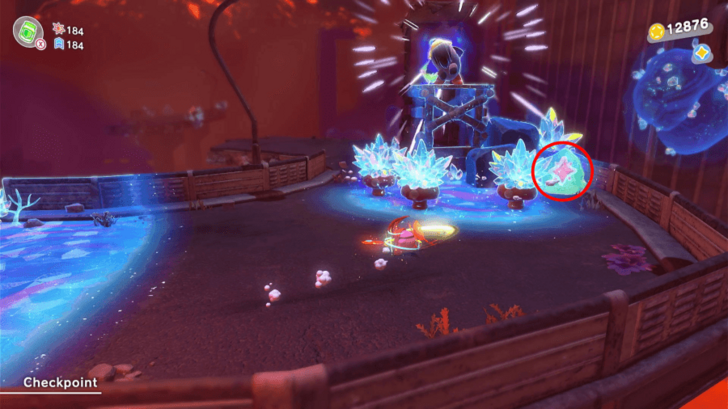 |
Break the Crystal to get the 1st Red Starry Coin |
| 2 | 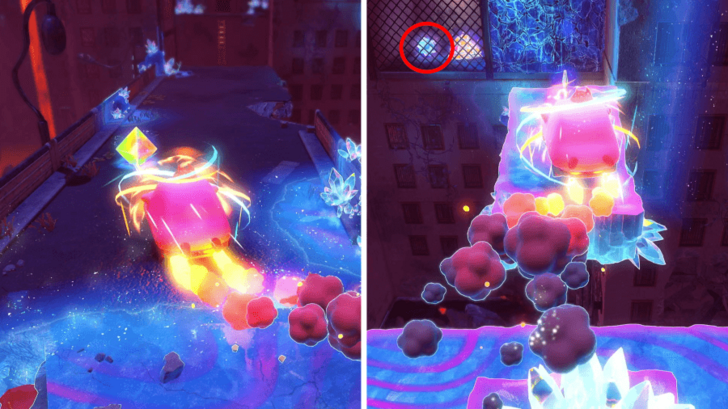 |
Save the 1st Hidden Starry |
Area 2
| Area 1 Missions | ||
|---|---|---|
| 1 | 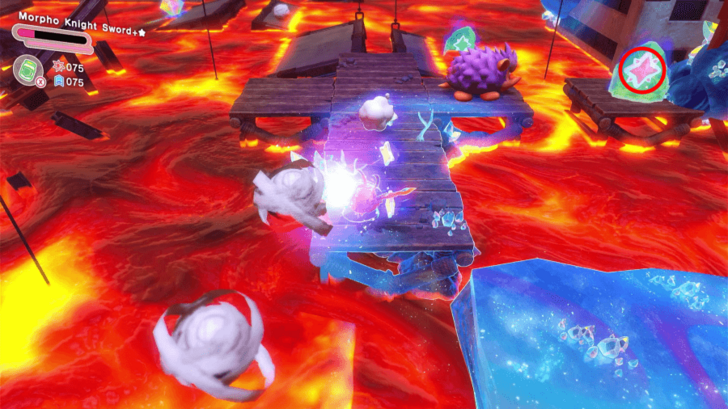 |
Break the Crystal to get the 2nd Red Starry Coin |
| 2 |  |
Save the 2nd Hidden Starry |
| 3 | 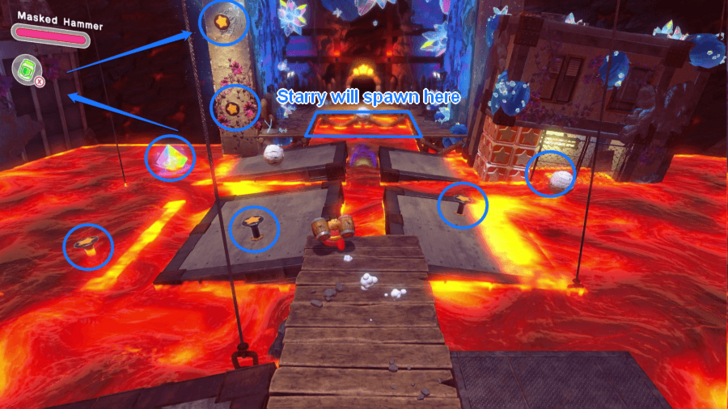 |
Save the 3rd Hidden Starry |
Area 3
| Area 1 Missions | ||
|---|---|---|
| 1 | 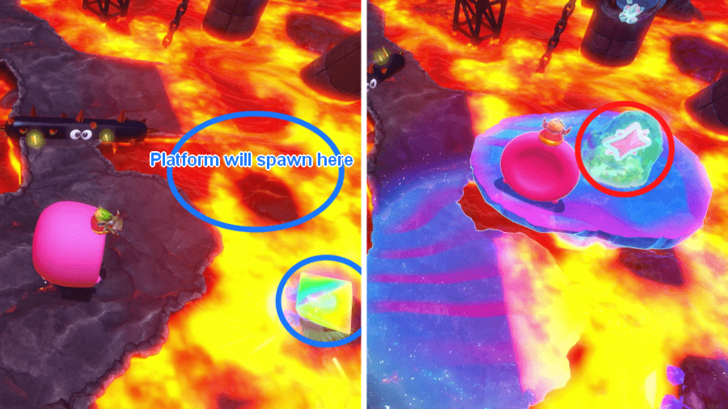 |
Break the Crystal to get the 3rd Red Starry Coin |
| 2 |  |
Save the 4th Hidden Starry |
| 3 | 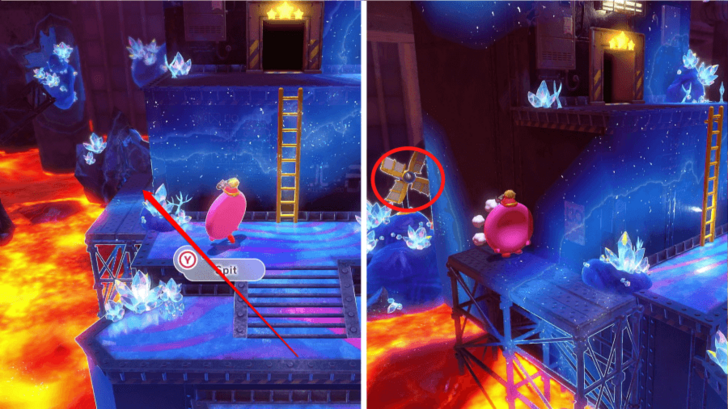 |
Spin the Hidden Windmill on the crystals |
Area 4
Crumbling Fiery Forbidden Lands Hidden Starry Locations
1. Behind a Cracked Wall Near the 1st Area's Exit

The first hidden Starry is located on the right, before the first area's exit. Destroy the crystal nearby and follow the new path on the right until you hit the wall with the Car Mouth.
2. On Top of a Building in the 2nd Area

You can get the second Starry on top of a building in the second area. You can get to the top if you destroy the crystal on the right.
3. Smash All Nails at the 2nd Area's Exit

You can find the third hidden Starry by smashing the Nails using the Hammer from the Crystal Wild Bonkers near the second area's exit.
4. Right Side of the 3rd's Area's Exit

You can get the fourth Starry on the right side before the third area's exit. Destroy the crystal and hop on the building to the right to get the Starry.
5. Collect 5 Green Fragments
The last Starry is found at the last car course of the stage. You will need to collect 5 Green Fragments to summon the Starry and get it.
Crumbling Fiery Forbidden Lands Red Starry Coin Locations
1. Right Turn in the 1st Area

You can get the first Red Starry Coin when you take the first right turn at the start of the stage. You can find it near the tower and enemies.
2. To the Right of the Jabhog in the 2nd Area

You can find the next Red Starry Coin on the right side of the Jabhog in the second area. Simply jump on the right after defeating the Jabhog to get it.
3. In the 4th Windmill of the 3rd Area

You can find the third Red Starry Coin in the 4th Windmill of the 3rd area (not including the one on the north before this). Destroy the crystal on the lower right to summon the Red Starry Coin.
4. Start of the the Last Car Course
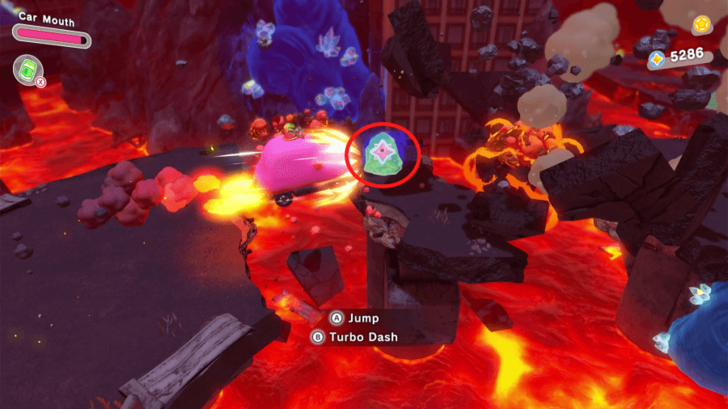
You can get the fourth Red Starry Coin on a bridge at the start of the last car course. You can hit the coin if you jump on the middle. You can slow down a little to ensure that you will hit it!
5. At the End of the Stage
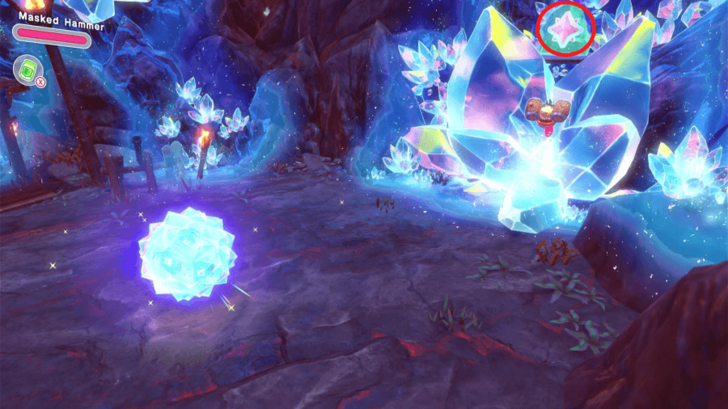
Head to the upper right to see the crystal when you reach the end of the stage. Fly towards the coin and hit it to complete the mission.
Crumbling Fiery Forbidden Lands Hidden Windmill Locations
Left Side of the 3rd Area's Exit

You will find the Hidden Windmill on the left side of the third area's exit. Walk towards the small platform on the left to change the camera view and see the windmill.
Crumbling Fiery Forbidden Lands Last Car Course Walkthrough
Video Playthrough
The last car course is in the fourth area of the stage. Some roads and platforms will disappear due to the meteors, so make sure to anticipate them.
It's also best not to use any Speed Boost here, as the Car will be harder to control, increasing the chance to fall into the magma. You can always try again at the end by riding the Blue Star on the right.
Crumbling Fiery Forbidden Lands Figure Locations
1. In the Moving Platform Area
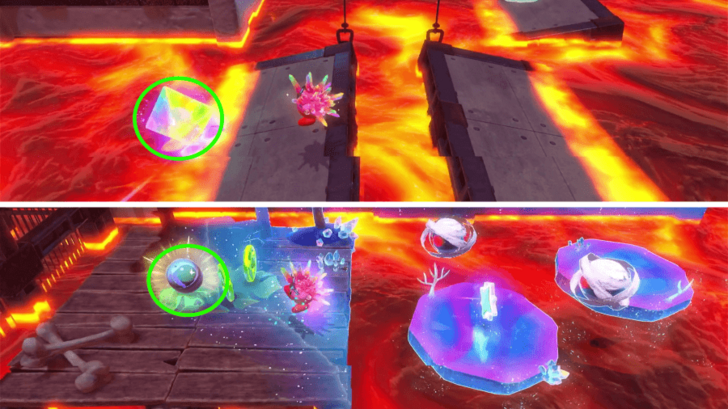
You can get the first Figure when you destroy the crystal on the left side in the moving platform area, near the second Red Starry Coin. Continue going to the left after destroying the crystal to get the figure.
2. Under the Magma Blocks in the Windmill Area
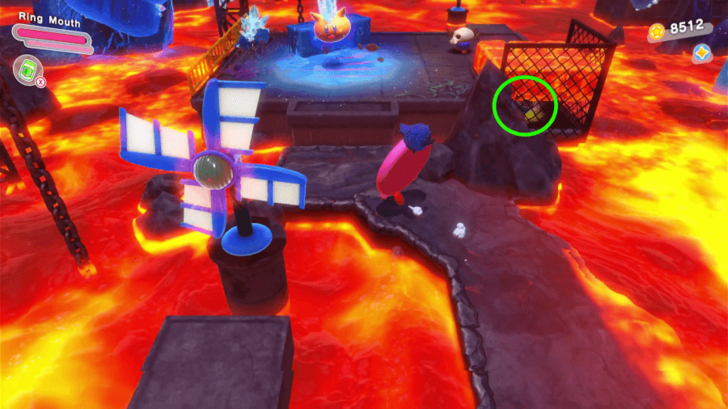
You can get the next Figure under the Magma Blocks in the windmill area. You can blow the blocks with the Ring Mouth to reach the Figure.
3. Collect the Coins in the North Windmill
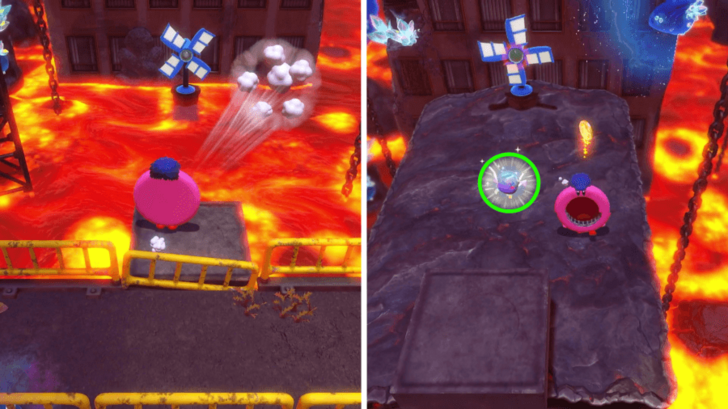
You can get the last Figure on the northside windmill after the second one. Keep blowing the windmill and collect the coins to get the Figure.
Kirby and the Forgotten Land Related Guides

Comment
Author
Crumbling Fiery Forbidden Lands Starry Locations and Missions Walkthrough
improvement survey
04/2026
improving Game8's site?

Your answers will help us to improve our website.
Note: Please be sure not to enter any kind of personal information into your response.

We hope you continue to make use of Game8.
Rankings
- We could not find the message board you were looking for.
Gaming News
Popular Games

Genshin Impact Walkthrough & Guides Wiki

Crimson Desert Walkthrough & Guides Wiki

Umamusume: Pretty Derby Walkthrough & Guides Wiki

Honkai: Star Rail Walkthrough & Guides Wiki

Monster Hunter Stories 3: Twisted Reflection Walkthrough & Guides Wiki

Wuthering Waves Walkthrough & Guides Wiki

The Seven Deadly Sins: Origin Walkthrough & Guides Wiki

Pokemon TCG Pocket (PTCGP) Strategies & Guides Wiki

Pokemon Pokopia Walkthrough & Guides Wiki

Zenless Zone Zero Walkthrough & Guides Wiki
Recommended Games

Monster Hunter World Walkthrough & Guides Wiki

Fire Emblem Heroes (FEH) Walkthrough & Guides Wiki

Pokemon Brilliant Diamond and Shining Pearl (BDSP) Walkthrough & Guides Wiki

Super Smash Bros. Ultimate Walkthrough & Guides Wiki

Diablo 4: Vessel of Hatred Walkthrough & Guides Wiki

Cyberpunk 2077: Ultimate Edition Walkthrough & Guides Wiki

Yu-Gi-Oh! Master Duel Walkthrough & Guides Wiki

Elden Ring Shadow of the Erdtree Walkthrough & Guides Wiki

The Legend of Zelda: Tears of the Kingdom Walkthrough & Guides Wiki

Persona 3 Reload Walkthrough & Guides Wiki
All rights reserved
© HAL Laboratory, Inc. / Nintendo
The copyrights of videos of games used in our content and other intellectual property rights belong to the provider of the game.
The contents we provide on this site were created personally by members of the Game8 editorial department.
We refuse the right to reuse or repost content taken without our permission such as data or images to other sites.
 Meteor Shower's Arrival
 Lost in Alivel Mall
 Fallen-Star Beach
 Washed Away at the Cement Summit
 Crossing Wondaria
 Spinning Dream Parade
 Frost Street Snow Park
 Freezing Wind and Some Snowmen
 Wastes That Count Time
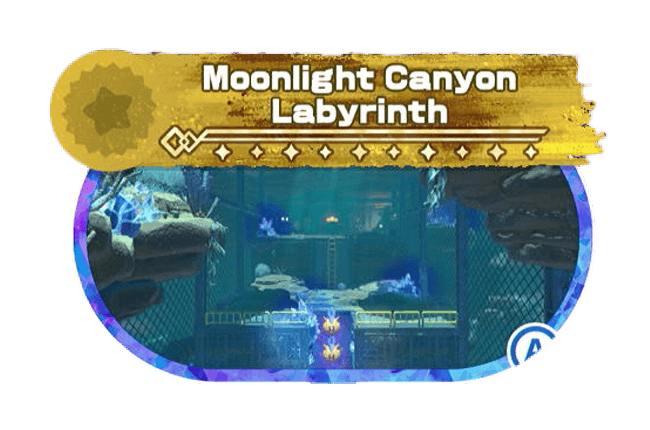 Moonlight Canyon Labyrinth
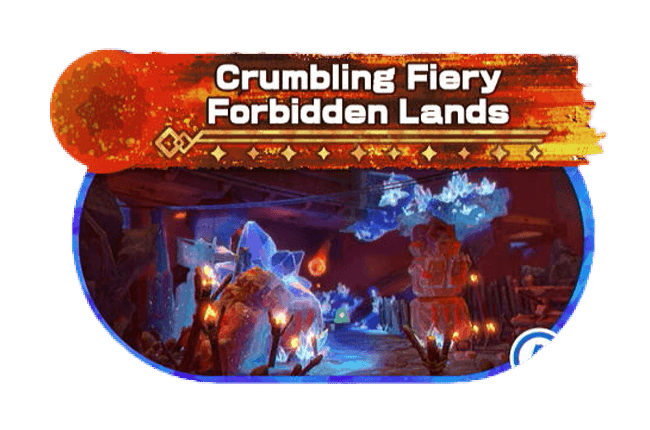 Crumbling Fiery Forbidden Lands
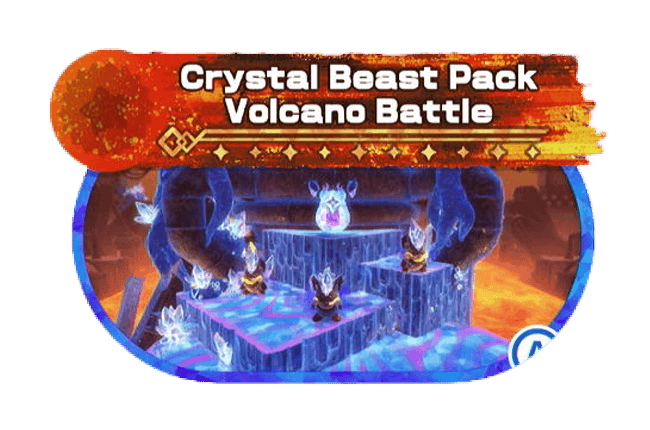 Crystal Beast Pack Volcano Battle
 Fallen-Star Volcano




![Forza Horizon 6 Review [Preview] | Beautiful Roads With a Whole Lot of Oversteer](https://img.game8.co/4460981/a7254c24945c43fbdf6ad9bea52b5ce9.png/show)


![Forza Horizon 6 Review [Preview] | Beautiful Roads With a Whole Lot of Oversteer](https://img.game8.co/4460981/a7254c24945c43fbdf6ad9bea52b5ce9.png/thumb)


