Best Armor Tier List
★ Roadmap and Future Updates
☆ Best Weapons | Best Armor
★ Best Trinkets | Best Class
☆ List of All Bosses
This is a guide to the best armor in Grounded 2. Learn which armor pieces are the best to craft and equip for each stage of the game!
| Armor Guides | |
|---|---|
| Armor List | Best Armor |
| Armor Sets | Tier 3 Armor |
List of Contents
Best Armor Tier List
|
Eyepatch
Bee Face Mask
Bee Shoulder Pads
Bee Shin Guards
Grub Goggles
Grub Leggings
Grub Vest
Ladybug Chestplate
Ladybug Faceplate
Ladybug Shin Guards
Marksman's Cap
Weaver Hood
Weaver Leggings
Weaver Spaulders
Wolf Hood
Wolf Leggings
Wolf Spaulders
|
|
|
Snail Shell Casque
Snail Shell Greaves
Snail Shell Plastron
Sizzling Boots
Sizzling Robes
Roach Chestplate
Roach Greaves
Roach Helmet
Acorn Face Mask
Acorn Greaves
Acorn Plate
Butterfly Boots
Butterfly Circlet
Butterfly Robes
Northern Breeches
Northern Mask
Northern Spaulders
Red Ant Arm Guards
Red Ant Helmet
Red Ant Knee Guards
|
|
|
Sizzling Circlet
Fuzzy Hat
Fuzzy Mukluks
Fuzzy Parka
Aphid Slippers
Clover Hood
Clover Poncho
Clover Shin Guards
Gas Mask
Mitey Muffs
|
| Generally considered the best armor pieces you can find in the current version of the game, while also providing extremely beneficial mods or armor sets when completed. | |
| Armor pieces that are generally good and can be used to transition to the later armor sets you can make. They have less optimal mod options and/or weaker set bonuses when completed. | |
| Armor pieces that lack defensive capabilities, mods, and set bonuses that make them subpar choices compared to other options. These pieces are best equipped only out of necessity or when specific situations arise where their effects are valuable. |
Best Armor Pieces for Early Game
| Best Early Game Armor | |
|---|---|
| Melee Builds | Ranged Builds |
Best Early Game Melee Fighter Armor
| Armor | Mods |
|---|---|
|
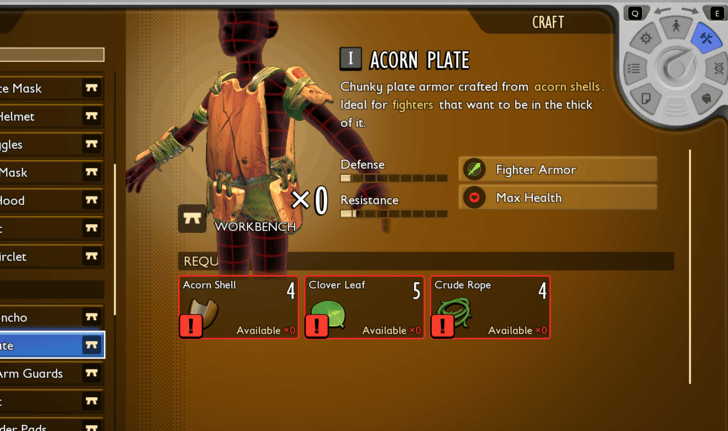
Acorn Set |
・ Fighter Armor x3 ・ Max Health x3 |
The best general starting armor for fighters. It provides a decent amount of defensive stats and additional max HP. This is excellent to have to make the earlier sections of the game a lot more survivable for melee fighters, helping you take on Red Soldier Ants and Orb Weavers.
Couple this with the Milk Molars to get extra health and stamina stats, and it'll make early game exploration a breeze. It's also easy to craft using Acorns that can be found in abundance around the starting area.
Best Early Game Ranger Armor
| Armor | Mods |
|---|---|
|
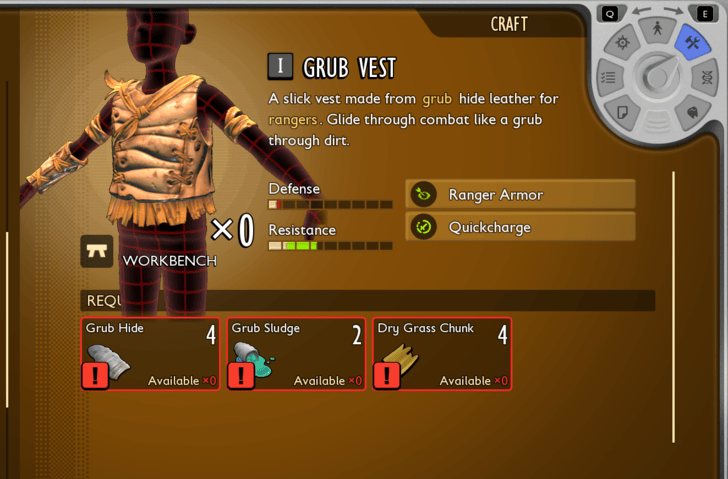
Grub Set |
・ Ranger Armor x3 ・ Quickcharge x3 |
For early range damage-oriented gear, grab the Grub set. This set focuses on the Ranger Armor mod that allows you to deal extra damage from hitting weak spots, and Quickcharge that charges charged attacks faster. This is an amazing set for making bows much stronger in the early stages.
It can be crafted easily using materials from Grubs and Gnats, which are found in the starting area and are easy to kill.
Best Armor Sets for Mid Game
| Jump to an Armor Class! | ||
|---|---|---|
| Fighter | Ranger | Mage |
Best Fighter Mid-Game Armor - Roach Set
| Armor | Mods |
|---|---|
|
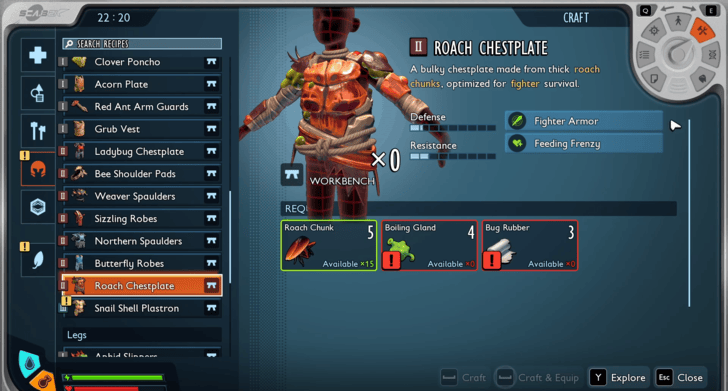
Roach Set |
・ Fighter Armor x3 ・ Feeding Frenzy x3 ・ Adaptive Resistance |
The Roach Set is an excellent choice for transitioning from early to mid-game. Along with its strong defensive stats, it grants the Feeding Frenzy mod, allowing you to regain HP when looting corpses. This greatly improves survivability during combat and raids, letting you use much fewer healing items.
With all three pieces equipped, you gain the Roach Armor Set Bonus: Adaptive Resistance, which provides extra damage resistance to Venom, Chill, or Sizzle effects, making you even tankier.
Quickly take down foes and leech off the HP you gain from slain foes!
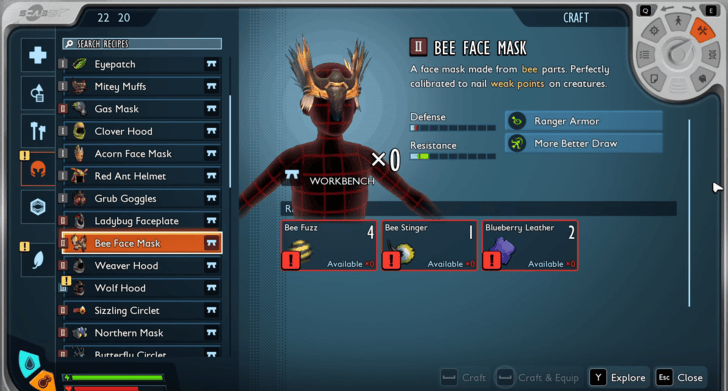
Best Ranger Mid Game Armor - Bee Set
| Armor Set | Mods |
|---|---|
|
Bee Set |
・ Ranger Armor x3 ・ More Better Draw x3 ・ Apex Pollinator |
For ranged-specific armor, the Bee set is a solid Tier 2 upgrade. It provides the Ranger Armor weak spot damage boost and the More Better Draw Mod, which extends the perfect draw timing for bow attacks. This helps trigger the Apex Pollinator set bonus more often, releasing a gas cloud that slows enemies when you land perfect draw shots.
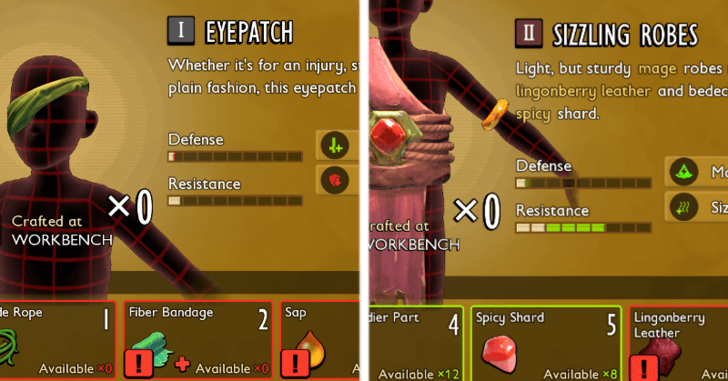
Best Mage Mid Game Armor - Sizzling + Eyepatch
| Armor | Mods |
|---|---|
|
Sizzling + Eyepatch ・ Eyepatch
|
・ Mage Armor x2 ・ Sizzle Reduction x2 ・ Attack Damage x1 ・ Damage Resist Down x1 |
Two pieces of the Sizzling set together with the Eyepatch let you consume less stamina and deal more damage. The full Sizzling Armor Set bonus that increases attack speed isn't the most optimal for its high stamina consumption. Instead of focusing on more hits that you can't use, it's better to utilize the stronger individual hits.
The Sizzling Armor pieces also help counter most mid-game bosses with Sizzle Reduction, as most bosses in these stages up until the end use a lot of Sizzle attacks.
Best Armor for Late Game
| Jump to an Armor Class! | |
|---|---|
| Rogue | Mage |
| Fighter | Ranger |
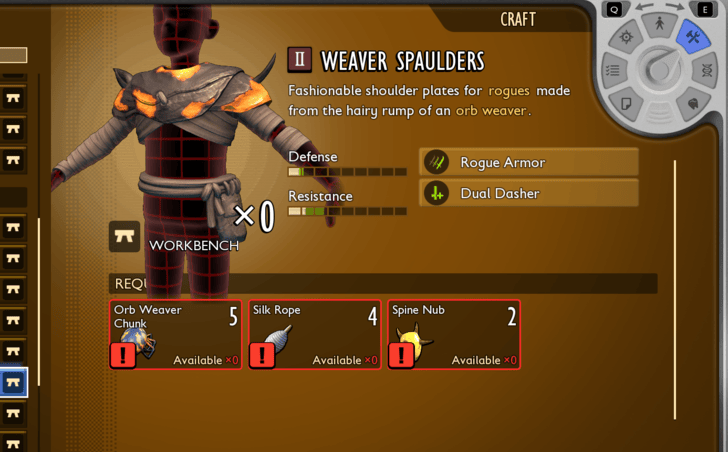
Best Rogue Late Game Armor - Weaver Set
| Armor | Mods |
|---|---|
|
Weaver Armor Set |
・ Rogue Armor x3 ・ Dual Dasher x3 ・ Web Crawler ・ Critical Momentum |
The full Weaver Set is the best choice for maximizing the critical hit potential of Rogue Armor, especially when paired with high-crit dash strike weapons like daggers. Combine this with stealthy Ambush Mutation attacks to unleash massive damage against any enemy.
Its set bonus, Critical Momentum, increases your critical hit chance with every successful hit, allowing you to chain even more crits as you combo enemies with your daggers.
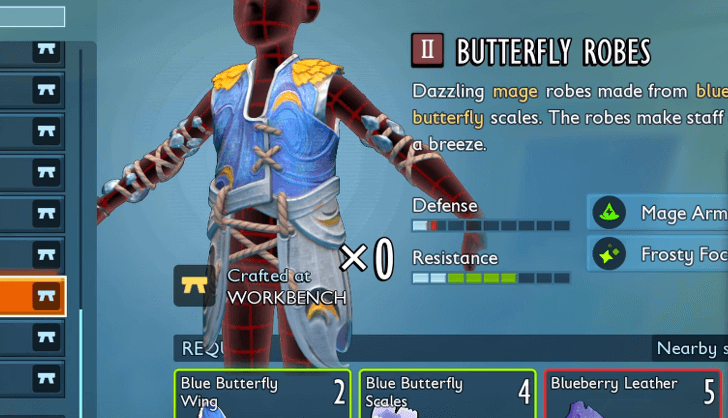
Best Mage Late Game Armor - Butterfly Set
| Armor | Mods |
|---|---|
|
Butterfly Armor Set |
・ Mage Armor x3 ・ Frosty Focus x3 ・ Chilly Dodge |
The Butterfly Set takes advantage of the Fresh magic type to make chilling and freezing magic stronger. Ideally paired with the Glacial Sting, you can output a lot of good Fresh status effects to enemies with the Frost Focus mod. Additionally, the Chilly Dodge armor set bonus turns dodging into an offensive maneuver.
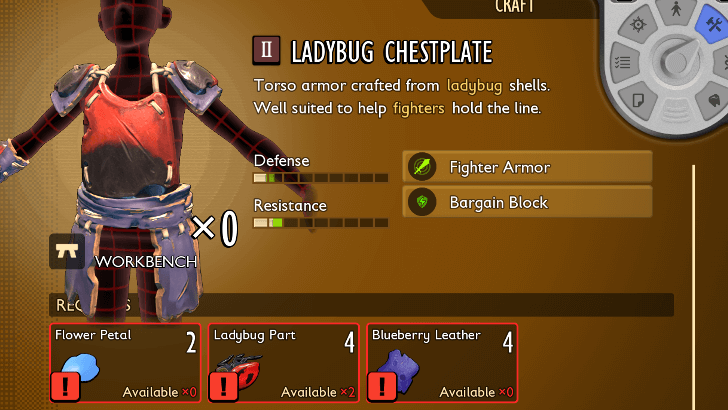
Best Fighter Late Game Armor - Ladybug Set
| Armor | Mods |
|---|---|
|
Ladybug Set |
・ Fighter Armor x3 ・ Bargain Block x3 ・ Scarlet Embrace |
The Ladybug Set is incredibly durable and perfect for players who want to absorb damage through blocking. The 3 stacks of Bargain Block greatly reduce stamina costs for blocking, and the Scarlet Embrace set bonus heals you with every block. This combination makes it ideal for a tank that wants to be nearly unkillable.
Best Ranger Late Game Armor - Marksman's Cap + Ranger Pieces
| Armor | Overview |
|---|---|
 Marksman's Cap Marksman's Cap
|
Base Tier: Tier II
Armor Slot: Head Mods: Ranger Armor Ranger Armor Effect: Increase damage dealt to enemy weakpoints.
, Bow Attack Bow Attack Effect: Attacks with bows do more damage. |
The best Ranger setup is to equip the Marksman’s Cap as your headpiece and pair it with two other Ranger armor pieces, either from the Bee Set for its perfect draw buff or the Grub Set if you prefer faster charge speed.
With this setup, you have 3 Ranger Armor bonuses for increased weak point damage, and the cap's Bow Attack mod boosts bow damage, making it perfect for bow-focused rangers.
Grounded 2 Related Guides

Recommended Guides
Grounded 2 Wiki
 Story Quests
 Interactive Map
 Resources
 Creatures
 Tips and Tricks
 Builds
 Weapons
 Armor
Armor Trinkets
 Buggies
 Keys
Keys Optical Disks
 Bosses
 Omni-Tool Upgrades
 Mutations
 Ranger Challenges
 Building Recipes
 News
NewsAuthor
Best Armor Tier List
Rankings
- We could not find the message board you were looking for.
Gaming News

![Death Stranding 2: On The Beach [PC] Review | A Port That Delivers](https://img.game8.co/4447392/15310a0c9aa1b6843bb713b2ea216930.jpeg/show)


Popular Games

Genshin Impact Walkthrough & Guides Wiki
Umamusume: Pretty Derby Walkthrough & Guides Wiki
Crimson Desert Walkthrough & Guides Wiki
Monster Hunter Stories 3: Twisted Reflection Walkthrough & Guides Wiki
Honkai: Star Rail Walkthrough & Guides Wiki
Pokemon Pokopia Walkthrough & Guides Wiki
The Seven Deadly Sins: Origin Walkthrough & Guides Wiki
Wuthering Waves Walkthrough & Guides Wiki
Zenless Zone Zero Walkthrough & Guides Wiki
Arknights: Endfield Walkthrough & Guides Wiki


Recommended Games
Fire Emblem Heroes (FEH) Walkthrough & Guides Wiki
Diablo 4: Vessel of Hatred Walkthrough & Guides Wiki
Cyberpunk 2077: Ultimate Edition Walkthrough & Guides Wiki
Yu-Gi-Oh! Master Duel Walkthrough & Guides Wiki
Super Smash Bros. Ultimate Walkthrough & Guides Wiki
Pokemon Brilliant Diamond and Shining Pearl (BDSP) Walkthrough & Guides Wiki
Elden Ring Shadow of the Erdtree Walkthrough & Guides Wiki
Monster Hunter World Walkthrough & Guides Wiki
The Legend of Zelda: Tears of the Kingdom Walkthrough & Guides Wiki
Persona 3 Reload Walkthrough & Guides Wiki


All rights reserved
© 2025 Obsidian Entertainment, Inc. Obsidian Entertainment, the Obsidian Entertainment logo, Grounded 2, and Grounded 2 logos are trademarks or registered trademarks of Obsidian Entertainment, Inc. All rights reserved.
The copyrights of videos of games used in our content and other intellectual property rights belong to the provider of the game.
The contents we provide on this site were created personally by members of the Game8 editorial department.
We refuse the right to reuse or repost content taken without our permission such as data or images to other sites.
Dont mix and match armor. You loose the set bonus that is exactly why certain armor is as strong as they are.