Worqor Lar Dor (Normal) Trial Guide
★ Patch 7.05 is Now Live! | All 7.05 Guides
┗ Buffs and Nerfs | Tomestones of Heliometry
┗ Master Crafting Recipes | Cenote Ja Ja Gural
┗ Quetzali Gear | Dark Horse Champion Gear
☆ Latest News | Tips and Tricks | Job Guide | Quests
★ Dungeons | Trials | Raids | Savage Raids
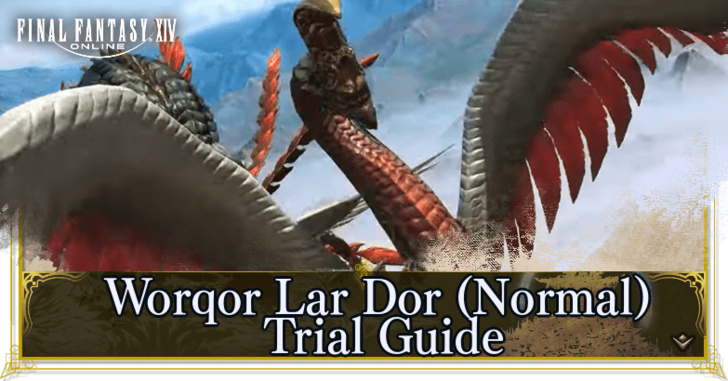
Worqor Lar Dor (Normal) is a Trial in FFXIV Dawntrail (FF14). Learn how to beat Valigarmanda, its mechanics, and strategies to use to win the fight here.
List of Contents
Worqor Lar Dor (Normal) Details
| Worqor Lar Dor (Normal) Details | |
|---|---|
| Level Sync | Level 93 - 94 Item Level: 635 |
| Time Limit | 60 minutes |
| Party Size | 8 Players 2 Tanks / 2 Healers / 4 DPS |
| How to Unlock | Accept the main scenario quest The Skyruin. |
Make sure to have a total of Item Level 635 before attempting this trial!
Worqor Lar Dor (Normal) Mechanics
Trauma and Concussion Debuffs
If the Boss Tell mentions A tempestuous wind surrounds Valigarmanda, move to the center of the platform to avoid a donut-shaped AoE attack!
Getting hit once inflicts Trauma which is a stacking debuff that deals DoT. Getting hit twice stacks the debuff and Trauma turns into Concussion then inflicts stun and damage down to those who get hit twice.
Stack at the Center when Strong Winds Surround the Arena
If the Boss Tell mentions A tempestuous wind surrounds Valigarmanda, move to the center of the platform to avoid a donut-shaped AoE attack!
Get Out of Melee Range When the Boss Gathers Strength
If the Boss Tell mentions Valigarmanda gathers its strength, move away from Melee Range before its claws slam on the ground to avoid getting damaged.
Move to the Front Corners if Its Beak Starts Glowing
If the Boss Tell mentions Blinding energies build within Valigarmanda's wide-open beak, run to the nearest corner at the front of the platform to avoid its massive cone-shaped attack!
Pay Attention to the Boss Tell
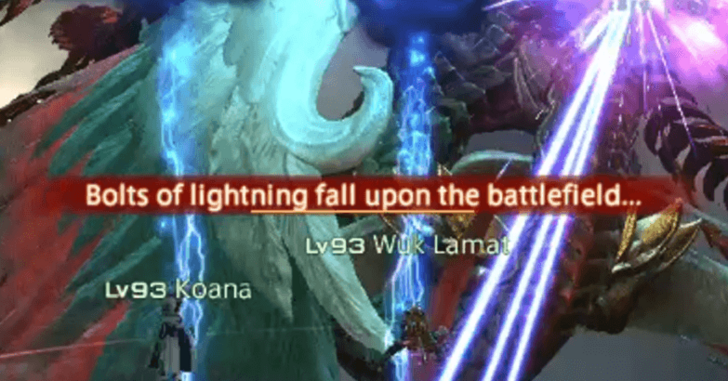
Valigarmanda's attacks do not have a cast bar so pay close attention to its tells and movements and reposition accordingly.
While there are boss tells popping up to give hints to players, it's much better to react and reposition to avoid getting unnecessary damage!
Mitigate Skyruin's Raid Wide Damage

At some point of the fight, Valigarmanda will cast Skyruin, change the platform to Snow, and deal raid-wide damage.
This damage is easily recoverable by healers, and a mini-phase will begin shortly.
Go to the Opposite Side of the Arrows During Avalanche
During Avalanche, a Boss Tell mentions A rumbling avalanche approaches from the southeast, followed by large blue arrows pointing and sliding towards a direction to indicate where the attack will happen.
Simply move to the opposite side to avoid it!
Keep Moving During Freezing Dust
Immediately after Avalanche goes out, Valigarmanda casts Freezing Dust.
A huge indicator can be seen on everyone's heads, so make sure to keep moving and jumping until the timer finishes to avoid getting damaged and debuffed.
Dodge Line Attacks During Arcane Sphere - Ice
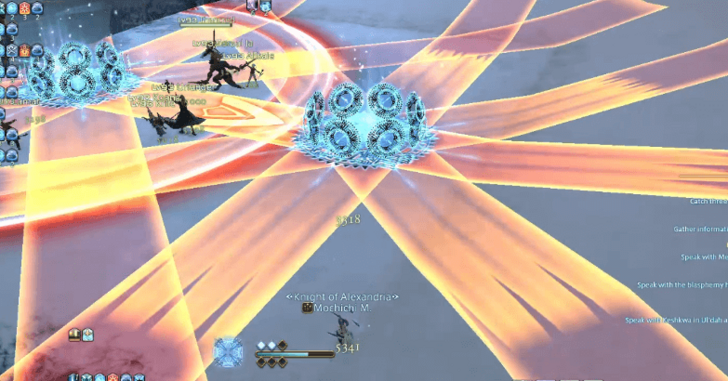
During Arcane Sphere - Ice, two huge ice spheres will form and burst in a line formation.
To avoid getting hit and frozen, know that the spheres explode in a starburst pattern and the lines are thick.
The trick is to position yourself in-between the circles and move a bit further from the spheres!
Prioritize Freeing Frozen Players
If there are party members that get hit, prioritize freeing them before going back to hitting the boss!
Mitigate Raid-Wide Damage During Disaster Zone
The platform will change from Ice to normal during Disaster Zone, so simply heal and mitigate incoming raid-wide damage.
Glowing Tiles and Phase Change During Skyruin - Storm

During this phase, the platform will change again and glowing tiles will appear.
Standing on the glowing tiles levitates players, and going to a non-glowing area puts players back on the ground.
Levitate to Avoid Thunderous Breath
Thunderous Breath is an arena-wide attack that will hit anyone who's not levitating.
Stand on the glowing tiles to levitate and avoid damage.
Stay on the Ground During Hail of Feathers
During Hail of Feathers, four feathers with lightning clouds hovering over them will drop on the ground and act as Thunder Rods that will hit players who are levitating.
Players need to stay on the ground and stay away from the plumes before they explode in a wide AoE circle.
Stand On an Empty Lane During Arcane Sphere (Purple)
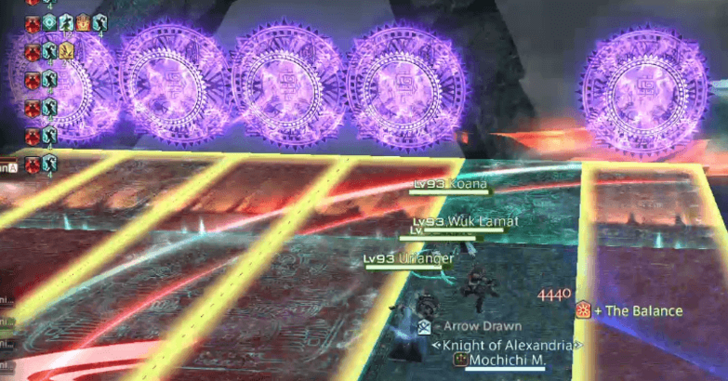
This time, purple Arcane Spheres will spawn at the edge of the arena.
Reposition and move to an empty lane to avoid getting hit! Afterwards, another Disaster Zone cast happens and the platform goes back to normal once again.
Shared Tankbuster Pillar During Ruinfall
When playing as a Tank, make sure to position yourselves at a safe spot to avoid getting hit by the Tornado at the edge of the platform, pop mitigations, and stand on the shared tankbuster pillar.
Healers and DPS can already move into a safe position to avoid getting hit by the shared tankbuster, while also avoiding getting knocked into the Tornado puddles.
If you're not feeling too confident about repositioning, stand on your chosen spot and hit Arms Length or Surecast to avoid getting knocked back.
Heal and Mitigate Raid-Wide Damage During Ruin Foretold
Just another quick heal and mitigating raid-wide damage section.
Destroy the Beacons During Ruinous Power and Calamitous Cry

During Ruinous Power, three beacons that need to be destroyed as soon as possible will appear along with Calamitous Cry that places a lined stack marker on one of the players.
While chaotic due to the both mechanics going off at the same time, make sure to always stack with the player that has the stack marker, and destroy the beacons to stop the gauge from filling up and causing a wipe!
Heal and Mitigate Raid-Wide Damage During Tulidisaster
Make sure to use party regen, shields, Addle, Feint, and other damage mitigations here.
Damage Over Time During Perpetual Conflagration
Once Valigarmanda casts Perpetual Conflagration, players now enter the final phase of the fight and gain a Damage Over Time debuff until the boss is defeated.
Healers need to keep watch on their party member's health bars and cast heals more often than earlier phases.
Avoid Red AoE Circles During Eruption
During Eruption, three red AoE circles will form where three random players are standing. These AoE circles explode quickly, so watch them and reposition immediately the moment they show up!
Remember to watch the boss and its movements as it mixes in its three movements at the start of the fight!
Final Round of Skyruin (Ice Phase)
During this phase of Skyruin - Ice, Arcane Spheres, Avalanche, and Freezing Dust mechanics will be mixed together.
Move to the opposite spot once the Avalanche Arrows appear and reposition to avoid getting hit and frozen by the Arcane Spheres.
Big Shields on Tanks During Ice Talon Tankbusters
Healers can choose to deploy big shields and regen on both tanks to mitigate the tankbusters during Ice Talon!
Final Round of Skyruin Thunder Phase
During this phase of Skyruin - Thunder, the purple arcane spheres and levitation mechanics are now mixed.
Avoid getting damaged by levitating on the empty lane!
Mechanics Now Repeat Until Boss is Defeated
After both final rounds of Skyruin - Thunder and Skyruin - Ice have been shown and the fight is not over yet, mechanics will now continue to repeat until Valigarmanda is defeated.
FFXIV Dawntrail Related Guides
List of Dawntrail Trials
| All Dawntrail Trials | |
|---|---|
| Worqor Lar Dor (Normal) | Everkeep (Normal) |
| The Interphos | Worqor Lar Dor (Extreme) |
| Everkeep (Extreme) | |
Comment
Author
Worqor Lar Dor (Normal) Trial Guide
improvement survey
03/2026
improving Game8's site?

Your answers will help us to improve our website.
Note: Please be sure not to enter any kind of personal information into your response.

We hope you continue to make use of Game8.
Rankings
- We could not find the message board you were looking for.
Gaming News
Popular Games

Genshin Impact Walkthrough & Guides Wiki

Honkai: Star Rail Walkthrough & Guides Wiki

Umamusume: Pretty Derby Walkthrough & Guides Wiki

Pokemon Pokopia Walkthrough & Guides Wiki

Resident Evil Requiem (RE9) Walkthrough & Guides Wiki

Monster Hunter Wilds Walkthrough & Guides Wiki

Wuthering Waves Walkthrough & Guides Wiki

Arknights: Endfield Walkthrough & Guides Wiki

Pokemon FireRed and LeafGreen (FRLG) Walkthrough & Guides Wiki

Pokemon TCG Pocket (PTCGP) Strategies & Guides Wiki
Recommended Games

Diablo 4: Vessel of Hatred Walkthrough & Guides Wiki

Cyberpunk 2077: Ultimate Edition Walkthrough & Guides Wiki

Fire Emblem Heroes (FEH) Walkthrough & Guides Wiki

Yu-Gi-Oh! Master Duel Walkthrough & Guides Wiki

Super Smash Bros. Ultimate Walkthrough & Guides Wiki

Pokemon Brilliant Diamond and Shining Pearl (BDSP) Walkthrough & Guides Wiki

Elden Ring Shadow of the Erdtree Walkthrough & Guides Wiki

Monster Hunter World Walkthrough & Guides Wiki

The Legend of Zelda: Tears of the Kingdom Walkthrough & Guides Wiki

Persona 3 Reload Walkthrough & Guides Wiki
All rights reserved
© SQUARE ENIX
Square Enix, Inc., 999 N. Pacific Coast Highway, El Segundo, California 90245
LOGO ILLUSTRATION:© YOSHITAKA AMANO
The copyrights of videos of games used in our content and other intellectual property rights belong to the provider of the game.
The contents we provide on this site were created personally by members of the Game8 editorial department.
We refuse the right to reuse or repost content taken without our permission such as data or images to other sites.





![Monster Hunter Stories 3 Review [First Impressions] | Simply Rejuvenating](https://img.game8.co/4438641/2a31b7702bd70e78ec8efd24661dacda.jpeg/thumb)


