This survey will take about 1 minute.
Your answers will help us to improve our website.
FFXIV Dawntrail 7.05 (FF14)
M4S Raid Guide
★ Patch 7.05 is Now Live! | All 7.05 Guides
┗ Buffs and Nerfs | Tomestones of Heliometry
┗ Master Crafting Recipes | Cenote Ja Ja Gural
┗ Quetzali Gear | Dark Horse Champion Gear
☆ Latest News | Tips and Tricks | Job Guide | Quests
★ Dungeons | Trials | Raids | Savage Raids
AAC Light-heavyweight M4 (Savage) is the fourth savage raid in the first tier of the Arcadion in Final Fantasy XIV Dawntrail (FF14). Read on to learn more about the boss, Wicked Thunder, and a guide to the raid mechanics and attack patterns during the boss fight!
List of Contents
AAC Light-heavyweight M4 (Savage) Information
| AAC Light-heavyweight M4 (Savage) | |
|---|---|
 |
|
| Level | 100 |
| Item Level | 710 |
| Party Size | 8 |
| Time Limit | 120 min |
| Requisite Quest | The Neoteric Witch |
How to Unlock AAC Light-heavyweight M4 (Savage)
Complete The Neoteric Witch
AAC Light-heavyweight M4 (Savage) will be unlocked after completing the quest “The Neoteric Witch” from the questline received from the Stylish Stranger in Solution Nine (X:19.1, Y:18.8)
Savage Raid Preparations
Most Recommended Raid Food
These are all of the most recommended raid food for all roles in patch 7.05 of FFXIV Dawntrail (FF14)!
Tank Raid Food
| Food | Effect |
|---|---|
| HQ Roast Chicken |
Direct Hit Rate +8% (Max 105) Vitality +8% (Max 162) Determination +8% (Max 63) |
| HQ Churrasco |
Critical Hit +8% (Max 105) Vitality +8% (Max 162) Skill Speed +8% (Max 63) |
| HQ Moqueca |
Determination +8% (Max 105) Vitality +8% (Max 162) Critical Hit +8% (Max 63) |
All DPS Raid Food
| Food | Effect |
|---|---|
| HQ Moqueca |
Determination +8% (Max 105) Vitality +8% (Max 162) Critical Hit +8% (Max 63) |
| HQ Roast Chicken |
Direct Hit Rate +8% (Max 105) Vitality +8% (Max 162) Determination +8% (Max 63) |
| HQ Churrasco |
Critical Hit +8% (Max 105) Vitality +8% (Max 162) Skill Speed +8% (Max 63) |
| HQ Pine Orange Jelly |
Critical Hit +8% (Max 105) Vitality +8% (Max 162) Spell Speed +8% (Max 63) |
All Healer Raid Food
| Food | Effect |
|---|---|
| HQ Pine Orange Jelly |
Critical Hit +8% (Max 105) Vitality +8% (Max 162) Spell Speed +8% (Max 63) |
| HQ Moqueca |
Determination +8% (Max 105) Vitality +8% (Max 162) Critical Hit +8% (Max 63) |
| HQ Roast Chicken |
Direct Hit Rate +8% (Max 105) Vitality +8% (Max 162) Determination +8% (Max 63) |
Waymarks, Formations, and Light Party Setups
Make sure to assign partners, put waymarks, and light party stack setups before starting the fight.
Tanks are usually partnered with Melee DPS and Healers are paired with all Ranged DPS.
Discuss the pairings with the group and take notes to avoid confusion later on.
AAC Light-heavyweight M4 (Savage) Raid Guide
Wrath of Zeus
Wrath of Zeus is a raid-wide AoE that can be shielded and healed easily by healers.
Bewitching Flight
Wicked Thunder will grow wings during Bewitching Flight and electrope orbs will line up at the west side of the arena.
Both the cubes and lasers from her wings will glow and intersect each other, so stand on the gaps of the intersecting lasers to avoid getting hit.
Electrifying Witch Hunt
The boss will start casting Electrifying Witch Hunt while the leftover laser marks from Bewitching Flight start to glow.
Observe if it's the two outermost lines or three innermost lines that starts glowing, and watch the elctrope cubes forming at the eastern side of the map before spreading in or spreading out accordingly.
Afterwards, either Tanks and Healers all get hit or all DPS gets hit with a Physical Vuln and Forked Lightning debuffs before casting her next mechanic.
Witch Hunt
During Witch Hunt, Wicked Thunder will get telegraphed diamond markers on her for a very short moment. These can either be purple diamonds spaced far apart or pink diamonds that are very close to each other.
If it's purple diamonds, the farthest players in the arena will get hit by Witch Hunt and pink diamonds mean that the closest players will get hit.
To avoid dying, players that have no physical vulns must be the one to get hit by Witch Hunt, while the ones with the Forked Lightning debuffs soak damage and get healed!
Narrowing or Widening Witch Hunt
Immediately after, Wicked Thunder will cast Narrowing Witch Hunt or Widening Witch Hunt which lasts for four turns.
While casting, purple or pink diamond telegraphs will appear to indicate where the attacks will land again.
Narrowing Witch Hunt
If the boss casts Narrowing Witch Hunt make sure to stand at your designated waymark near her. Once the outer ring AoE goes out, reposition to avoid the upcoming inner circle AoE and bait the first set of Witch Hunt mechanics according to your roles.
Widening Witch Hunt
If the boss casts Widening Witch Hunt, reposition to your designated waymarkers away from her. After the inner AoE circle goes out, reposition to bait the first set of Witch Hunt mechanics according to your roles.
There will be four baits during this mechanic and depending on the type of Witch Hunt casted, it will always interchange between In and Out phases.
Wrath of Zeus
Immediately afterwards, Wicked Thunder will cast Wrath of Zeus, which is a raidwide AoE. Heal and mitigate as needed.
Electrope Edge and Witchgleam
The boss will now cast Electrope Edge, where she summons four cubes at the corners of the arena. Reposition to cardinal waymarks to avoid outgoing AoEs for later.
She will also cast Witchgleam which hits the cubes with three sets of two column AoEs and charge them.
Watch which cubes are hit only once, reposition and get shields up quickly while the boss casts Symphony Fantastique.
Symphony Fantastique and Sidewise Spark
Symphony Fantastique is a quick cast that activates the cubes to detonate at the same time as Sidewise Spark.
During Sidewise Spark, either four large orbs or eight small orbs will spawn on the boss. Reposition with your designated partner to the opposite side of the spark to avoid getting cleaved.
Heal the party and get ready for the next mechanic.
Wicked Jolt (Tankbuster)
Wicked Jolt is a tankbuster that deals Magic Invuln to the main tank. Using an invuln to withstand the two consecutive attacks is viable, but make sure to Tank Swap once the debuff is applied to avoid dying to auto-attacks.
Electrope Edge II and Witchgleam
Electrope Edge will be casted again, so reposition to your designated clock spots as the arena changes. Once it goes out, all players get an Electrical Condenser debuff, leaving each role with either a 22-second timer or a 42-second timer.
During Witchgleam, the boss targets four players with AoE columns four times, so take not of how many times you got hit during this mechanic. Also, if you have a Slow Debuff, reposition to get hit twice to resolve an upcoming mechanic later.
Lightning Cage
Afterwards, the boss casts Lightning Cage and specific tiles will start to glow. To avoid hitting each other, Tanks and Healers can reposition to the western side while DPS takes the eastern side.
Those with slow debuffs need to reposition at the southern tile to safely dodge the mechanic.
Immediately after, the boss casts Sidewise Spark while facing north with either four pair orbs or eight spread orbs.
Wicked Bolt
Immediately after, the boss casts Wicked Bolt which is a 5-hit party stack. Quickly put up shields and mitigate incoming raidwide damage.
Ion Cluster and Stampeding Thunder
During Ion Cluster, all players get 3 stacks of yellow Positron and blue Negatron. Afterwards, she executes Stampeding Thunder which consists of 5 AoE attacks on 3/4 squares on the tilted side, destroying the field where the attacks land.
Reposition to the safe column to avoid falling down the arena.
Electron Stream
After positioning herself on the remaining column, she will start casting Electron Stream.
Her cannon emits yellow beams at the front and blue beams at the back. Stand on the side that's opposite of your debuffs, with Tanks receiving it on the front of the party to mitigate damage.
Each light party will now have a new set of debuffs with either a blue or green curent that targets the farthest or nearest player with a conal AoE.
Make sure that you're standing on the correct side and is cleansing the correct debuffs to survive each hit!
Electrope Transplant (Transition)
Electrope Transplant is an AoE attack that goes out on 8 directions from the boss 7 times.
Lightning Point is generated for 4 players on the 5th time, while Lightning Current is generated for the point target on the 6th time. Take note of your waymarks and alternate dodging to the right and dodging to the left in pairs to avoid the fan-shaped AoE.
Conduction Point and Forked Fissures
After the fifth attack lands, either all DPS or all Tanks and Healers get hit by Conduction Point and get Magic Invuln debuffs.
For the sixth hit, Forked Fissures is a massive line AoE that must be intercepted by those that do not have the debuff to survive.
Soul Shock, Impact, and Cannonbolt
Wicked Thunder starts to transform and become huge while hitting the party with raidwide damage four times, so reposition to Waymark C and start mitigating there.
For the last hit, the party will be sent flying toa southward platform, so make sure you're positioned properly to land safely.
Cross Tail Switch
Cross Tail Switch is a continuous AoE attack where the party gets hit nine times. It's recommended to Tank LB at the end of the cast bar to survive the mechanic.
Wicked Blaze
Hexaflare markers now appear on the arena and and stack markers will appear on both healers. To dodge this, have one light party reposition to the eastern edge and the other party to reposition at the western edge.
Wicked Special
When the boss casts Wicked Special, if she lands an orange attack at the sides, those are the safe spots. Purple telegraphs mean that the center area is the safe spot so reposition as needed!
Mustard Bomb
Move into spread positions when the boss casts Mustard Bomb.
Tanks should be ready to grab the tethers and head north, while everyone stays in their positions as the AoEs go out.
Only two players will not be affected with Fire Vulns so make sure to grab the tethers from the tanks to survive the mechanic.
Aetherial Conversion and Tail Thrust
The boss will now store either blue knockbacks into her tails or orange circle AoEs during Aetherial Conversion.
Tail Thrust is when the boss releases the mechanics she stored in her tail. Just remember that Blue is knockback and orange is a circle AoE, so dodge accordingly.
Azure Thunder
Wicked Thunder will deal raidwide damage then place a huge electrical field outside of the arena during Azure Thunder.
Stack at the center of the arena and get ready for the next mechanic.
Twilight Sabbath
Twilight Sabbath lets the boss produce four clones of herself that will cast Sidewise Spark cleaves, twice at a time.
Wicked Fire
While chaotic, there are still safe spots during Wicked Fire. Once the AoE goes out and the first spark lands, quickly reposition to the opposite side.
Scattered or Concentrated Burst
The boss will either cast Scattered Burst, or Concentrated Burst. Split into pairs first before spreading.
Cannon clones will fire a column AoE across the arena, while wing clones create a donut AoE around themselves.
Make sure to look at the boss again to know which side to reposition to as she casts another Wicked Special.
Wicked Thunder
A hard-hitting raidwide. Be ready to shield and heal big to survive the mechanic!
Flame Slash and Raining Swords
When Wicked Thunder starts casting Flame Slash, spread into two light parties and stay away from the middle since she will destroy it with the cast.
Raining Swords creates four towers on either side, so make sure to saok damage from north south in the proper order of Tank, Melee, Healer, and Ranged.
Ion Cluster II
Ion Cluster will be casted again and deal raidwide damage. This gives the party both yellow Positron and blue Negatron with both slow and fast timers.
Separate Tanks and Healers to the west and set DPS to the east as Sunrise Sabbath goes out and summons clones of cannons.
Reposition to bait the cannons and cleanse debuffs of the opposite color.
Sword Quiver - Enrage Mode
During Sword Quiver, Wicked Thunder places an asterisk pattern on the arena that grows into wide line AoEs. Reposition to the corners and prepare to heal incoming damage.
Wicked Thunder will also start lacerating the stage with multiple hits to leave marks. Since this is a multi-hit mechanic, players need to pair up, reposition, and dodge to their designated spots.
After the laceration line AoEs go out, quickly return to center and get ready for a repeat of the mechanic until Enrage Mode happens.
AAC Light-heavyweight M4 (Savage) Rewards
Monowheel S1 Mount Preview
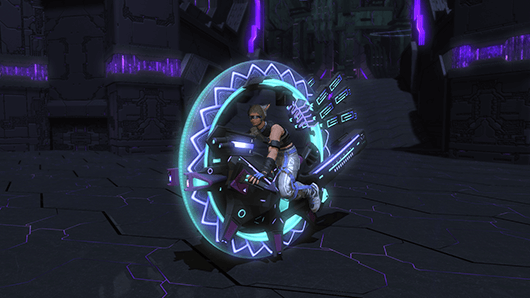
The Monowheel S1 mount is a rare drop from AAC Light-heavyweight M4 (Savage)! While it does not have any added speed boost, it is currently the latest mount in this expansion.
How to Get the Monowheel S1 Mount
FFXIV Dawntrail Related Guides
List of Dawntrail Raids
Comment
Author

Please participate in our site
improvement survey
03/2026
improvement survey
03/2026
Would you assist in
improving Game8's site?
improving Game8's site?

×
We are listening to our users' valuable opinions and discussing how to act on them.
The information collected through this survey will be used for the purpose of improving our services. In addition, the information will only be disclosed a part of a statistic in a format that will not allow identification of personal information.
Begin Survey
Not Now
×
Please rate each item regarding Game8.co's Advertisements.
Amount of Ads
Very Dissatisfied
Somewhat Dissatisfied
Fine
Somewhat Satisfied
Highly Satisfied
Placement of Ads
Timing of Ad Display
Ad Loading Speed
Safeness of Ads
Content of Ads
×
Please rate each item regarding Game8.co's Quality of Articles.
Amount of information
Very Dissatisfied
Somewhat Dissatisfied
Fine
Somewhat Satisfied
Highly Satisfied
Frequency of updates
Speed of new information
Accuracy of articles
Understandibility of articles
Readability of sentences
×
Please rate each item regarding Game8.co's Usability of the Site.
Ease of finding information
Very Dissatisfied
Somewhat Dissatisfied
Fine
Somewhat Satisfied
Highly Satisfied
Loading Speed
Use of Color
Font Size
Visibility of Images
Easy to Understand Layout
×
Please rate each item regarding Game8.co's Message Boards, Comments.
Ease of Writing
Very Dissatisfied
Somewhat Dissatisfied
Fine
Somewhat Satisfied
Highly Satisfied
Readability
Ease in Finding Information
Comment Quality
Comment Quantity
Admin Response
×
Please rate each item regarding Game8.co's Site's new design.
Please rate our site's new design
Very Dissatisfied
Somewhat Dissatisfied
Fine
Somewhat Satisfied
Highly Satisfied
Do you think that the website's design change makes the site easier to use?
Has the new design made it easier for you to find information on the site?
Has the new design improved the overall visual appeal of the site?
How would you rate your overall satisfaction with the new design of the site?
×
How likely are you to recommend Game8 to someone you know?
Very Unlikely
0
1
2
3
4
5
6
7
8
9
10
Very Likely
If you have other opinions regarding potential improvement to the website, please share them with us. We would appreciate your honest opinion.
Note: This is a free response section, so you can proceed without entering anything.
Note: Please be sure not to enter any kind of personal information into your response.
Note: Please be sure not to enter any kind of personal information into your response.
×
Thank You
×
Thank you for participating in our survey! Your answers will help us to improve the quality of our website and services.
We hope you continue to make use of Game8.
We hope you continue to make use of Game8.
Close
Rankings
- We could not find the message board you were looking for.
Gaming News


![Monster Hunter Stories 3 Review [First Impressions] | Simply Rejuvenating](https://img.game8.co/4438641/2a31b7702bd70e78ec8efd24661dacda.jpeg/thumb)
Popular Games

Genshin Impact Walkthrough & Guides Wiki
Honkai: Star Rail Walkthrough & Guides Wiki
Umamusume: Pretty Derby Walkthrough & Guides Wiki
Pokemon Pokopia Walkthrough & Guides Wiki
Resident Evil Requiem (RE9) Walkthrough & Guides Wiki
Monster Hunter Wilds Walkthrough & Guides Wiki
Wuthering Waves Walkthrough & Guides Wiki
Arknights: Endfield Walkthrough & Guides Wiki
Pokemon FireRed and LeafGreen (FRLG) Walkthrough & Guides Wiki
Pokemon TCG Pocket (PTCGP) Strategies & Guides Wiki


Recommended Games
Diablo 4: Vessel of Hatred Walkthrough & Guides Wiki
Cyberpunk 2077: Ultimate Edition Walkthrough & Guides Wiki
Fire Emblem Heroes (FEH) Walkthrough & Guides Wiki
Yu-Gi-Oh! Master Duel Walkthrough & Guides Wiki
Super Smash Bros. Ultimate Walkthrough & Guides Wiki
Pokemon Brilliant Diamond and Shining Pearl (BDSP) Walkthrough & Guides Wiki
Elden Ring Shadow of the Erdtree Walkthrough & Guides Wiki
Monster Hunter World Walkthrough & Guides Wiki
The Legend of Zelda: Tears of the Kingdom Walkthrough & Guides Wiki
Persona 3 Reload Walkthrough & Guides Wiki


All rights reserved
© SQUARE ENIX
Square Enix, Inc., 999 N. Pacific Coast Highway, El Segundo, California 90245
LOGO ILLUSTRATION:© YOSHITAKA AMANO
The copyrights of videos of games used in our content and other intellectual property rights belong to the provider of the game.
The contents we provide on this site were created personally by members of the Game8 editorial department.
We refuse the right to reuse or repost content taken without our permission such as data or images to other sites.