M4 Raid Guide (Normal)
★ Patch 7.05 is Now Live! | All 7.05 Guides
┗ Buffs and Nerfs | Tomestones of Heliometry
┗ Master Crafting Recipes | Cenote Ja Ja Gural
┗ Quetzali Gear | Dark Horse Champion Gear
☆ Latest News | Tips and Tricks | Job Guide | Quests
★ Dungeons | Trials | Raids | Savage Raids

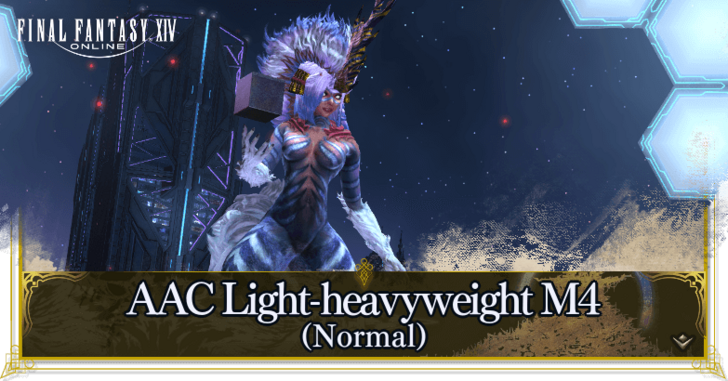
AAC Light-heavyweight M4 (Normal) is the fourth raid in the first tier of the Arcadion in Final Fantasy XIV Dawntrail (FF14). Read on to learn more about the boss, Wicked Thunder, and a guide to the raid mechanics and attack patterns during the boss fight!
List of Contents
AAC Light-Heavyweight M4 (Normal) Raid Guide
Wrath of Zeus
The raid starts with a Raid-wide magical attack that deals a lot of damage, so use a damage reduction barrier to mitigate the incoming damage.
Sidewise Spark

The boss will raise a spinning electrope with lightning on it. Avoid the attack by running to the opposite side of the electrope.
Shadows' Sabbath
Wicked Thunder creates clones on the fields that shoot side sparks. Avoid the clones' hands by moving away from them.
Wicked Jolt
A strong AOE Magical tankbuster attack. Use defensive buffs and barriers to reduce damage.
Stampeding Thunder
Armed with a giant cannon, Wicked Thunder will fire five consecutive AOE magic attacks. After firing five times, it will destroy two-thirds of the arena floor. If you are standing on a destroyed floor, you will fall and become unable to fight.
While Wicked Thunder is firing its attacks, you can see which floors will be destroyed, so after dodging the five attacks, immediately run to a part of the arena that was not marked (either on the far right or left).
If you are using a ranged unit, or have a strong ranged attack, you can immediately run to a safe location at the start to minimize risks of falling.
Threefold Blast ~ Fourfold Blast
Wicked Thunder will fire three consecutive shots. Before firing, a warning will appear indicating the direction and order of the shots, either in front, or behind the boss. Dodge the attack by memorizing the pattern, and moving either in front or behind the boss depending on the sequence of attacks.
The Fourfold blast will fire four shots instead of three, and ends with a circular AOE under each player. After dodging the blasts and the circular marker appears, move and avoid it quickly to dodge the attack.
Colors Indicate Direction
Keep in mind that the attack indicators differ in color, depending on where the attack will come from. Orange marks indicate the attack coming from the front, while Blue marks mean that they will come from behind Wicked Thunder.
Wicked Bolt
A 5-hit magick attack that will split the party into groups. Group up with all party members to tank the damage.
Bewitching Flight
Wicked Thunder spreads its wings and sweeps in a straight line with lightning lasers.You can dodge the lasers by heading to the gaps between each laser.
Two rows will also be marked and detonate after the flight, so move away from the attack indicator immediately. Additionally, a circular AOE attack will also appear beneath the players' feet after the area attack, so move quickly to dodge this as well.
After the fifth and final area attack, the boss will immediately start using Sidewise Sparks, which can be avoided by avoiding the non-glowing hand of Wicked Thunder.
Shadows' Sabbath (Second Time)
During the second Shadows' Sabbath, Wicked Thunder summons clones that descend quickly, and you must avoid the Sidewise Sparks of the clones four times in a short interval. The clones will attack in the order of which they descend, so be sure to memorize which ones to avoid first.
After the clones, Wicked Thunder will also attack with its own Sidewise Sparks, which can be avoided by running to the opposite side of the marked area.
Fivefold Blast + Thunderstorm
The boss will shoot five consecutive shots aimed in front or behind its position. Remember the order similar to the Threefold and Fourfold Blast, and dodge accordingly. After the five shots, a circular AOE marker will appear for all players.
Since the floor during this stage is only one row, spread out Melee players near the boss and Ranged players away from the boss to create more room to dodge.
Shadows' Sabbath + Bewitching Flight
Wicked Thunder summons a clone and both of them performs Bewitching Flight, resulting in a checkerboard pattern on the floor. Stand on the squares to avoid the lightning lasers.
Additionally, the lines will detonate and explode for a total of five attacks, which can either appear in an L-Shape, Cross-Shape, or T-Shape on the floor.
Witch Hunt
Wicked Thunder attacks with circular AOE range indicators appearing quickly, rotating from the center to the outside of the arena. Since each attack lands quickly, you can run to the outermost part of the arena, then run inwards after the row is done being attacked.
Keep in mind that dodging the attacks beforehand is the best approach due to the speed of this attack, and moving slowly can render you unable to fight.
Soaring Soulpress
An attack that affects all players. Use Barriers to reduce incoming damage during this attack.
Wicked Hyper Cannon + Thunderstorm
Wicked Thunder will launch 10 consecutive Split Damage attacks. The boss will continously repeat this attack until the raid ends, or until the party is wiped out. Due to this, prioritize Barriers and Healing instead of attacking, to ensure that you can survive the onslaught of attacks.
Once the Wicked Hyper Cannon attack ends, circular AOE marks will also appear beneath the players twice.
How to Unlock AAC Light-heavyweight M4
Complete The Neoteric Witch
AAC Light-heavyweight M4 will be unlocked after completing the quest “The Neoteric Witch” from the questline received from the Stylish Stranger in Solution Nine (X:19.1, Y:18.8)
AAC Light-heavyweight M4 (Normal) Information
| AAC Light-heavyweight M4 | |
|---|---|
 |
|
| Level | 100 |
| Item Level | 685 |
| Party Size | 1~8 |
| Time Limit | 90 min |
| Requisite Quest | The Neoteric Witch |
FFXIV Related Guides
List of Dawntrail Raids
Comment
Author
M4 Raid Guide (Normal)
improvement survey
03/2026
improving Game8's site?

Your answers will help us to improve our website.
Note: Please be sure not to enter any kind of personal information into your response.

We hope you continue to make use of Game8.
Rankings
- We could not find the message board you were looking for.
Gaming News
Popular Games

Genshin Impact Walkthrough & Guides Wiki

Honkai: Star Rail Walkthrough & Guides Wiki

Umamusume: Pretty Derby Walkthrough & Guides Wiki

Pokemon Pokopia Walkthrough & Guides Wiki

Resident Evil Requiem (RE9) Walkthrough & Guides Wiki

Monster Hunter Wilds Walkthrough & Guides Wiki

Wuthering Waves Walkthrough & Guides Wiki

Arknights: Endfield Walkthrough & Guides Wiki

Pokemon FireRed and LeafGreen (FRLG) Walkthrough & Guides Wiki

Pokemon TCG Pocket (PTCGP) Strategies & Guides Wiki
Recommended Games

Diablo 4: Vessel of Hatred Walkthrough & Guides Wiki

Cyberpunk 2077: Ultimate Edition Walkthrough & Guides Wiki

Fire Emblem Heroes (FEH) Walkthrough & Guides Wiki

Yu-Gi-Oh! Master Duel Walkthrough & Guides Wiki

Super Smash Bros. Ultimate Walkthrough & Guides Wiki

Pokemon Brilliant Diamond and Shining Pearl (BDSP) Walkthrough & Guides Wiki

Elden Ring Shadow of the Erdtree Walkthrough & Guides Wiki

Monster Hunter World Walkthrough & Guides Wiki

The Legend of Zelda: Tears of the Kingdom Walkthrough & Guides Wiki

Persona 3 Reload Walkthrough & Guides Wiki
All rights reserved
© SQUARE ENIX
Square Enix, Inc., 999 N. Pacific Coast Highway, El Segundo, California 90245
LOGO ILLUSTRATION:© YOSHITAKA AMANO
The copyrights of videos of games used in our content and other intellectual property rights belong to the provider of the game.
The contents we provide on this site were created personally by members of the Game8 editorial department.
We refuse the right to reuse or repost content taken without our permission such as data or images to other sites.


![Monster Hunter Stories 3 Review [First Impressions] | Simply Rejuvenating](https://img.game8.co/4438641/2a31b7702bd70e78ec8efd24661dacda.jpeg/thumb)


