Worqor Lar Dor (Extreme) Trial Guide
★ Patch 7.05 is Now Live! | All 7.05 Guides
┗ Buffs and Nerfs | Tomestones of Heliometry
┗ Master Crafting Recipes | Cenote Ja Ja Gural
┗ Quetzali Gear | Dark Horse Champion Gear
☆ Latest News | Tips and Tricks | Job Guide | Quests
★ Dungeons | Trials | Raids | Savage Raids
Worqor Lar Dor (Extreme) is a High-End Trial in FFXIV Dawntrail (FF14). Learn how to beat Valigarmanda (Extreme), its mechanics, and strategies to use to win the fight here.
List of Contents
Worqor Lar Dor (Extreme) Details
| Worqor Lar Dor (Extreme) Details | |
|---|---|
| Level Sync | Level 100 Item Level: 690 |
| Time Limit | 60 minutes |
| Party Size | 8 Players 2 Tanks / 2 Healers / 4 DPS |
| How to Unlock | Complete the required quest How the West Was Sung. |
Make sure to have a total of Item Level 690, fully-meld gearsets, lvl 100 raid food and pots before attempting this trial!
Worqor Lar Dor (Extreme) Trial Preparations
Most Recommended Raid Food
These are all of the most recommended raid food for all roles in patch 7.05 of FFXIV Dawntrail (FF14)!
Tank Raid Food
| Food | Effect |
|---|---|
| HQ Roast Chicken |
Direct Hit Rate +8% (Max 105) Vitality +8% (Max 162) Determination +8% (Max 63) |
| HQ Churrasco |
Critical Hit +8% (Max 105) Vitality +8% (Max 162) Skill Speed +8% (Max 63) |
| HQ Moqueca |
Determination +8% (Max 105) Vitality +8% (Max 162) Critical Hit +8% (Max 63) |
All DPS Raid Food
| Food | Effect |
|---|---|
| HQ Moqueca |
Determination +8% (Max 105) Vitality +8% (Max 162) Critical Hit +8% (Max 63) |
| HQ Roast Chicken |
Direct Hit Rate +8% (Max 105) Vitality +8% (Max 162) Determination +8% (Max 63) |
| HQ Churrasco |
Critical Hit +8% (Max 105) Vitality +8% (Max 162) Skill Speed +8% (Max 63) |
| HQ Pine Orange Jelly |
Critical Hit +8% (Max 105) Vitality +8% (Max 162) Spell Speed +8% (Max 63) |
All Healer Raid Food
| Food | Effect |
|---|---|
| HQ Pine Orange Jelly |
Critical Hit +8% (Max 105) Vitality +8% (Max 162) Spell Speed +8% (Max 63) |
| HQ Moqueca |
Determination +8% (Max 105) Vitality +8% (Max 162) Critical Hit +8% (Max 63) |
| HQ Roast Chicken |
Direct Hit Rate +8% (Max 105) Vitality +8% (Max 162) Determination +8% (Max 63) |
Partners, Waymarks, and Light Parties Stack Setup
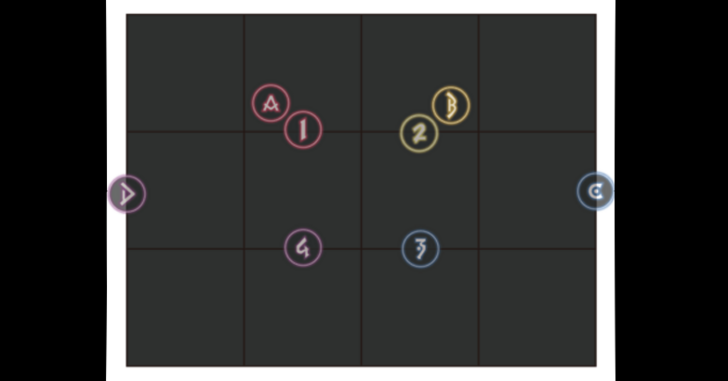
Make sure to assign partners, put waymarks, and light party stack setups before starting the fight.
Tanks are usually partnered with Melee DPS and Healers are paired with all Ranged DPS.
Discuss the pairings with the group and take notes to avoid confusion later on.
Worqor Lar Dor (Extreme) First Phase Mechanics
Avoid Shooting Ice and Exploding Boulders During Spikesicle
Valigarmanda will start the fight with Spikesicle, which shoots out ice that leaves thin blue lines as a tell.
Players must watch the direction of the blue lines, then reposition to avoid it and move across after dodging thw fully formed icicles.
Make sure to move away from the front edge to avoid getting hit by the lined up boulders' AoEs .
Mitigate Raid-Wide Damage and Heal Fire Debuffs During Skyruin
Skyruin is the starting indicator of a short fire phase, so mitigate and shield the incoming raid-wide damge.
Make sure to heal the party as necessary while waiting for the Fire debuffs to disappear.
Mind the Timed Debuffs During Triscourge
| Triscourge Debuffs | ||
|---|---|---|
 |
 |
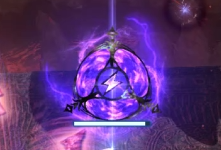 |
During Triscourge, players will get either a fire, lightning, or ice debuff depending on each player's varying timers.
Avoid AoE Circles During Eruption
During Eruption, players must look at which side the volcano appears then quickly move to the opposite side to avoid getting hit by a massive AoE circle.
Afterwards, be aware of the mini AoE circles that spawn and move away to dodge them.
Watch Boss Movements and Reposition Accordingly
Valigarmanda will now execute one of its three attacks that was previously done in the Normal version of the fight.
Reposition accordingly to avoid getting damaged.
Stack at the Center when Strong Winds Surround the Arena
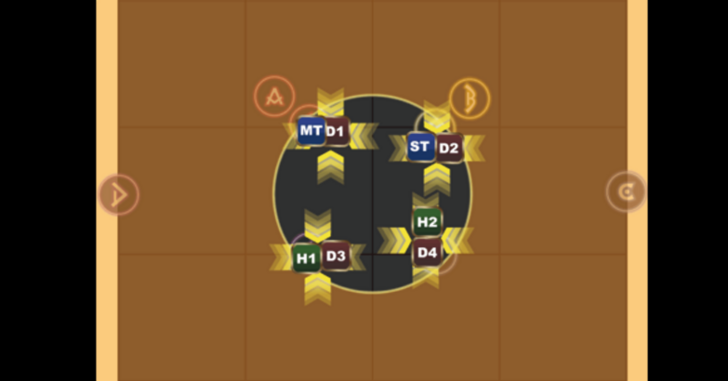
This position is referring to Valigarmanda circling the arena. Stack at the center to avoid getting hit!
Get Out of Melee Range When the Boss Gathers Strength
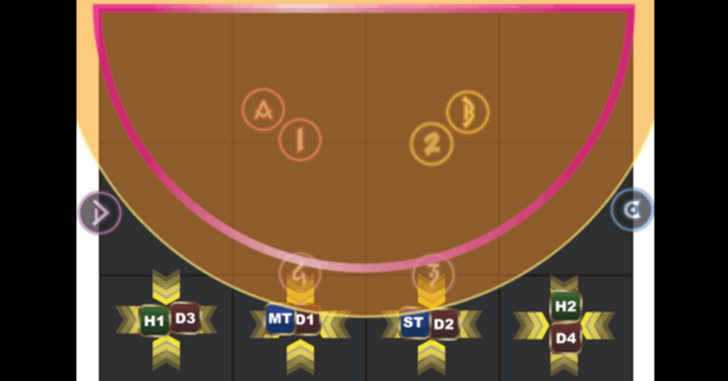
If the boss starts gathering its strength, move to the edge of the arena to avoid getting hit by this mechanic!
Move to the Front Corners if Its Beak Starts Glowing
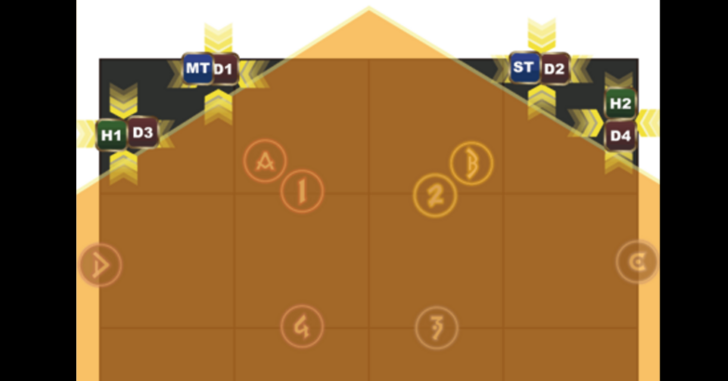
When Valigarmanda's beak starts glowing, run to the corners of the platform with your partner to avoid its massive cone-shaped attack!
Keep Moving During Triscourge - Ice 1
Ice Debuffs will be placed on all players during Triscourge - Ice 1.
Keep moving until the timer goes out!
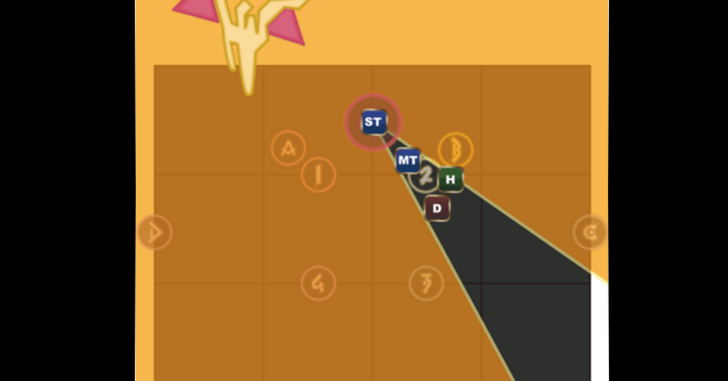
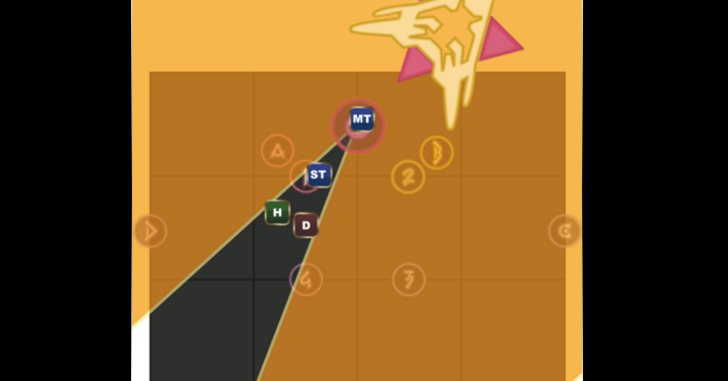
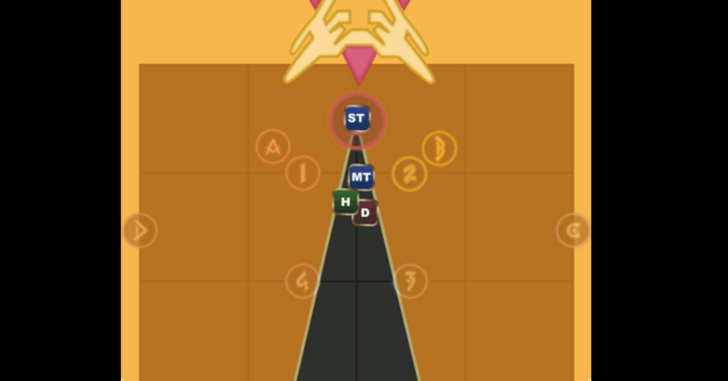
Soak Damage and Keep Tank Swapping During Mountain Fire
| Mountain Fire Positions | 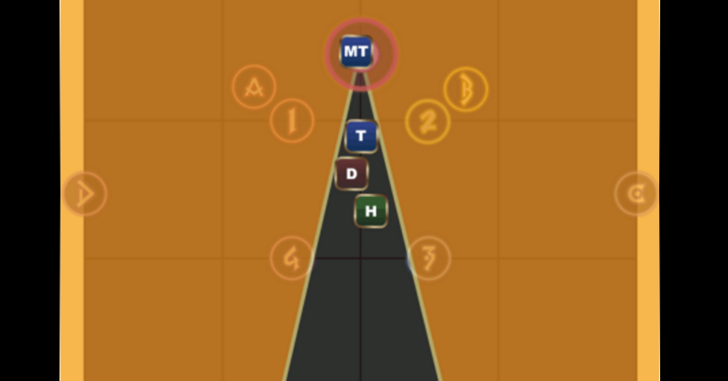 |
 |
 |
|---|---|---|
 |
 |
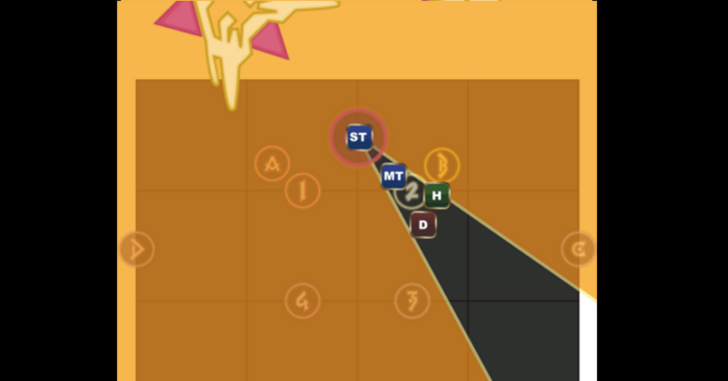 |
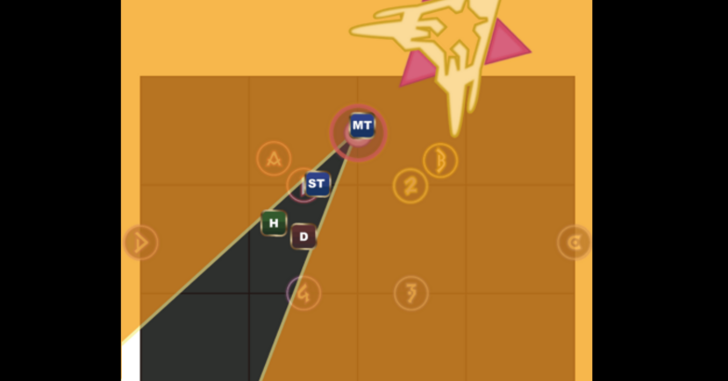
A tower with a Tankbuster marker appears during Mountain Fire. Tanks must soak the damage, cooldown, and keep swapping until all six rounds have passed.
Everyone else must reposition themselves opposite of where Valigarmanda is positioned to avoid getting cleaved!
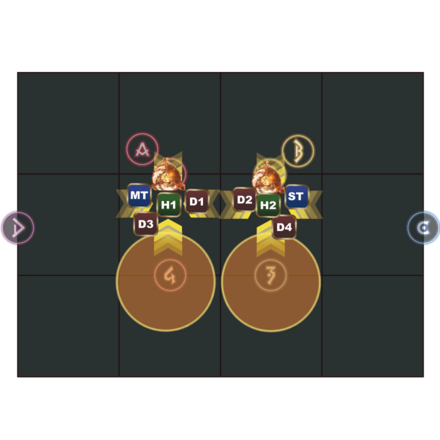
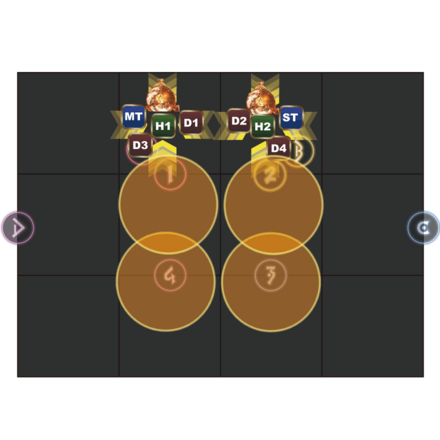
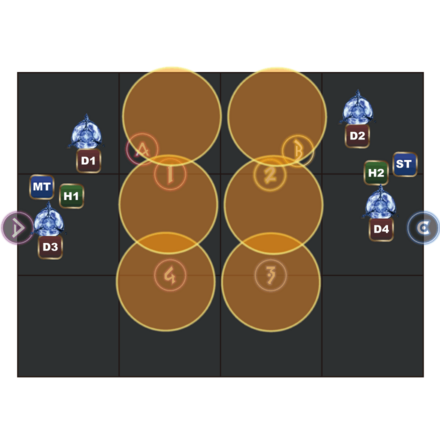
Stack With Both Healers During Triscourge - Fire
| Triscourge Fire Patterns | ||
|---|---|---|
 |
 |
|
 |
 |
|
 |
- | |
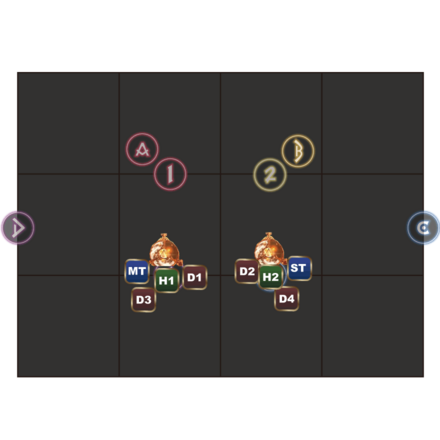
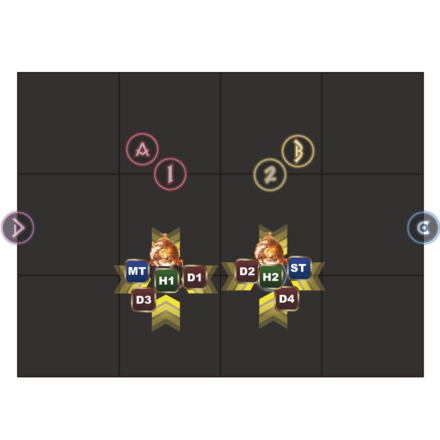
Right after Mountain Fire goes out, healers will be marked and light parties need to reposition and stack with their respective healers during this mechanic.
Shared Explosions on each healer will leave huge AoE puddles, so both parties will need to move and stack with their respective healers until the end of the phase.
Triscourge - Ice 2

Immediately after Triscourge - Fire, the movement debuff will appear on four players during Triscourge - Ice.
Just keep moving until the timer runs out to avoid getting frozen.
Move to the Opposite Side of the Volcano During Eruption
During Eruption, players must rotate their cameras to the left or right side of the screen to see where the volcano spawns.
After spotting the volcano, move to the opposite side and position yourself close to the edge to avoid getting hit by a large AoE puddle.
Avoid the mini AoE puddles spawning, but try not to stray too far away from your current position.
Watch Boss Movements and Reposition Accordingly
| Valigarmanda (Normal) Attack Patterns | ||
|---|---|---|
 |
 |
 |
Valigarmanda will now execute familiar moves from the Normal version of the fight, so watch the boss's movements and reposition with your designated partner accordingly.
Spread Out During Triscourge - Lightning
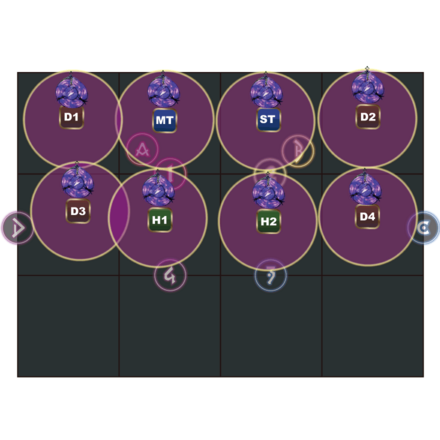
Make sure to spread out during Triscourge - Lightning and heal the incoming raid-wide damage.
Heal and Mitigate Damage During Disaster Zone
Make sure to heal big and mitigate during Disaster Zone. The platforms will change and another phase will begin afterwards.
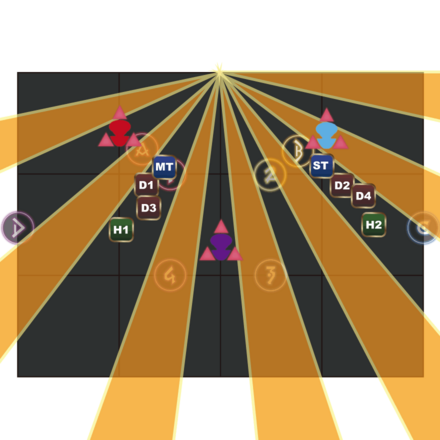
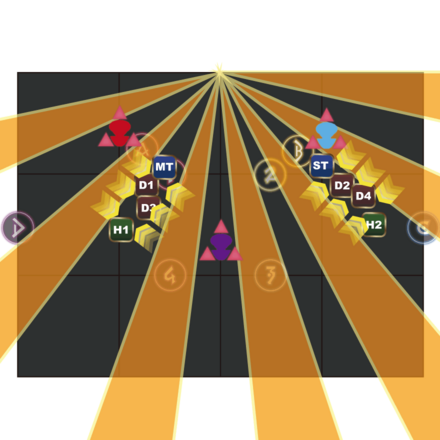
Destroy the Beacons During Ruin Foretold
| Ruin Foretold Positions | ||
|---|---|---|
 |
 |
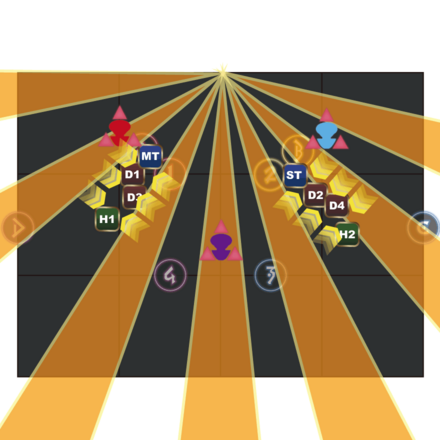 |
Focus on destroying the three beacons that spawn during Ruin Foretold, and avoid the cone AoEs while stacking with light parties.
Tanks must always be in front of the light party stack to minimize damage.
First Phase Ends With Tulidisaster
The first phase will now end with Tulidisaster.
Throw big heals, shields, and mitigate incoming raid-wide damage as Valigarmanda prepares for the next phase with another Skyruin mechanic.
Worqor Lar Dor (Extreme) Second Phase Mechanics
The Boss Will Cast Either Skyruin - Ice or Skyruin - Lightning
The second phase starts with Valigarmanda throwing in Skyruin - Ice or Skyruin - Lightning.
Mitigate the incoming raid-wide damage and observe as the platform changes.
Glowing Tiles Appear During Skyruin - Lightning
Similarly to the normal version of the fight, glowing tiles will appear during Skyruin - Lightning.
Players Get Hit with Fire, Ice, and Lightning Debuffs During Triscourge
| Triscourge Debuffs | ||
|---|---|---|
 |
 |
 |
During Triscourge, everyone will get hit by fire, ice, and lightning debuffs with specific timers, so reposition as needed!
Healers need to heal as necessary until the debuff timers run out.
Triscourge - Fire
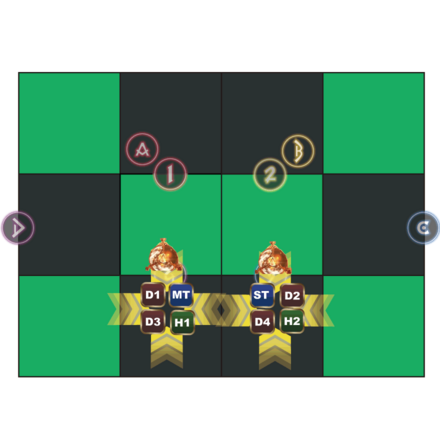
Almost immediately after getting the debuffs, healers will be marked with the fire debuff during Triscourge - Fire.
Spread into Light Parties and stack with your designated healer to split the incoming damage.
Move out of the AoE puddle, heal the party to full, and get ready for the next mechanic.
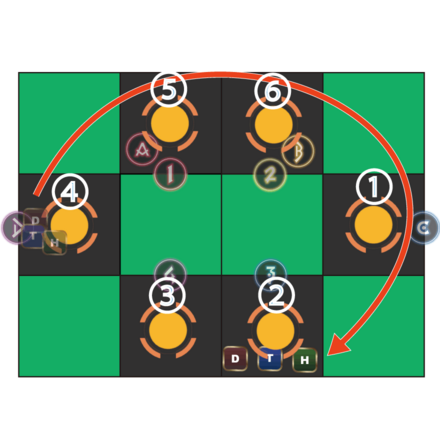
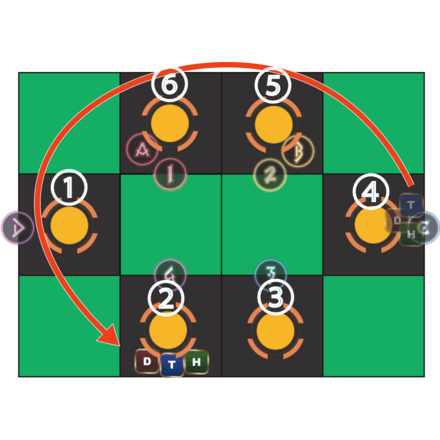
Hail of Feathers
During Hail of Feathers, make sure to stay away from the proximity markers, and levitate before each proximity goes out.
Blighted Bolt
| Blighted Bolt Starting Positions | |
|---|---|
 East East |
 West West |
Six feathers will start falling on normal tiles, while the proximity markers are still ongoing, so focus on destroying one feather to have a permanent safe spot.
Once the safe spot is secured, proceed to destroy other feathers and get ready for the next mechanic.
Reposition According to Your Debuff During Triscourge - Lightning and Ice
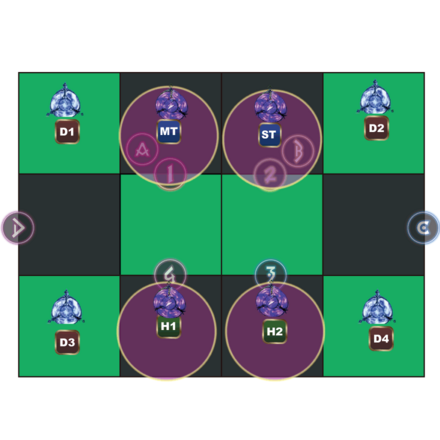
During Triscourge - Lightning and Ice, four players will be marked with a thunder debuff, and four others will be marked with an ice debuff.
Players with the thunder debuff need to spread out on a normal tile, while players with the ice debuff need to stand on different glowing tiles and levitate to avoid getting damaged.
Heal the party to full and watch the boss for the next mechanic.
Watch Boss Movements and Reposition Accordingly
| Valigarmanda (Normal) Attack Patterns | ||
|---|---|---|
 |
 |
 |
Valigarmanda will execute its normal version movements, so reposition accordingly to avoid getting damaged.
Watch out for the thunder puddles that form under the party, and reposition quickly to dodge.
Find a Safe Spot Between Arcane Spheres During Lightningous Breath
During Lightningous Breath, observe the spheres and reposition to a glowing tile.
Squeeze into the middle of two arcane spheres, or move to an empty lane while levitating to dodge the mechanic.
Boss Repeats Triscourge - Lightning and Ice 2 Mechanics

Valigarmanda will repeat its Triscourge - Lightning and Ice 2 mechanic, so make sure that players with the ice debuff are levitating on glowing tiles, while players with the thunder debuff are spread out on normal tiles.
Heal the party to full, avoid thunder puddles, and watch the boss's movements to reposition quickly.
Disaster Zone Changes Platforms Back to Normal
Valigarmanda will start casting Disaster Zone to change the platform back to normal, so heal and mitigate the raid-wide damage.
Use Knockback Immunity During Ruinfall
A double tankbuster tower will appear in the middle of the screen during Ruinfall, along with an arena-wide knockback marker.
Tanks need to stack together and cooldown the tower while both DPS and Healers need to use knockback immunity to avoid getting blown off the edge of the arena.
The next cast will be Skyruin again, with the element depending on which was casted first.
Platforms Change to Snowy Area During Skyruin - Ice
Mitigate incoming raid-wide damage as the platform changes to a snowy area during Skyruin - Ice.
Triscourge - Ice And Fire
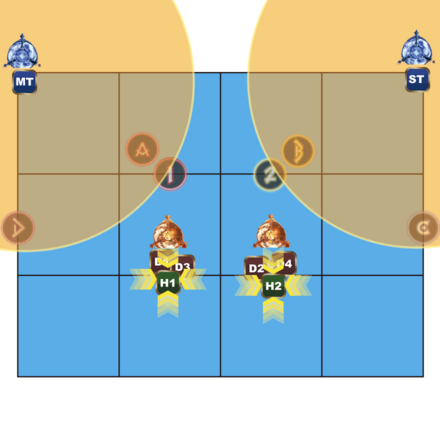
All players will get three types of debuffs with varying timers during Triscourge - Ice and Fire.
Tanks need to reposition to the front edges of the arena when the ice debuff markers appear, while DPS forms light parties to stack with their designated healers.
Dodge to the Opposite Side During Avalanche
Quickly reposition to the opposite side of the arrows during Avalanche, and watch Valigarmanda's movements to know where to stand.
Find a Safe Spot During Arcane Spheres
After Avalanche, the boss will summon five Arcane Spheres that deals line attacks.
To find a safe spot quickly, refer to your waymarkers! With enough practice, the safe spot during this mechanic can always be located at the A waymarker, so keep practicing until the party gets the position right.
Spread Out and Heal as Necessary During Triscourge - Lightning

As usual, four players will get a thunder debuff during Triscourge - Lightning and needs to spread out to avoid stacking damage.
Heal and shield as necessary and get ready for the next mechanic.
Dodge Ice Particles and Exploding Boulders During Spikesicle
Similarly to the first Spikesicle mechanic, move to the opposite side of the first blue line that shoots out and stay at the edge.
Slowly move back to position as the ice starts shooting out.
For this part, it's much safer to stand on an AoE of an exploding boulder temporarily while waiting for the Avalanche AoEs to go out, then get out of the boulder AoE before it explodes.
Watch Boss Movements and Dodge Accordingly
| Valigarmanda (Normal) Attack Patterns | ||
|---|---|---|
 |
 |
 |
The boss will throw its telegraphed movements from normal mode, so dodge accordingly.
Move to Safe Spots During Arcane Spheres and Avalanche
| Arcane Sphere + Avalanche Safe Spots | |
|---|---|
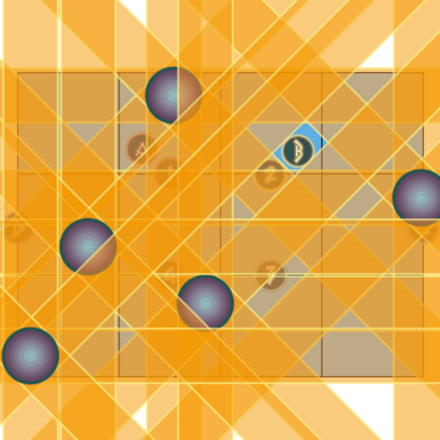
 Near the A Marker Near the A Marker |
 Near the B Marker Near the B Marker |
Another set of Arcane Spheres will appear along with an Avalanche on one side. Refer to the waymarkers and reposition to the safe spot as soon as possible while avoiding Avalanche's AoE damage.
Keep Moving During Freezing Dust
When Freezing Dust is cast, make sure to keep moving to avoid getting frozen until the mechanic is over.
Spread Again During Triscourge - Lightning 2
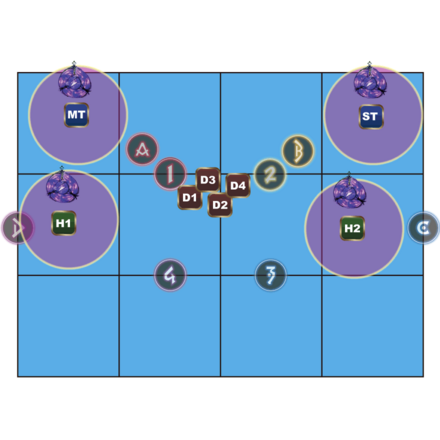
Triscourge - Lightning 2 mechanics repeat and four random players will get a lightning debuff. Spread and heal unavoidable damage as necessary.
Heal and Mitigate Raid-Wide Damage During Disaster Zone
The phase ends and platforms return to normal after Valigarmanda casts Disaster Zone.
Heal the party to full and get ready for the upcoming mechanic.
Cooldown and Mitigate Tankbusters During Ice Talon
Tanks need to move away from the party and cooldown each tankbuster during Ice Talon.
Simply regen and heal both tanks then proceed with the fight.
Boss Gets Increased Damage During Wrath Unfurled
At this point of the fight, Valigarmanda buffs itself and increases its damage for the rest of the fight.
Focus on taking it down as fast as possible!
Tank Swap to Mitigate Mountain Fire
| Mountain Fire Positions |  |
 |
 |
|---|---|---|
 |
 |
 |
A tank tower will appear in the middle of the arena and Tanks need to Soak Damage and Tank Swap until the boss casts Tulidisaster.
Tulidisaster - Enrage Mode
Tulidisaster is the final attack and enrage mode phase of the fight.
Cast regen or shields once to mitigate the first raid wide, then focus on dealing as much damage as possible to the boss.
Go for the clear and claim your hard-earned rewards!
Worqor Lar Dor (Extreme) Rewards
These are all of the rewards that can be obtained from Worqor Lar Dor (Extreme) trial in FFXIV Dawntrail (FF14)!
Take note that there are [no Armor rewards] for clearing this fight.
All Worqor Lar Dor (Extreme) Weapons
| Weapon | IL/Level |
|---|---|
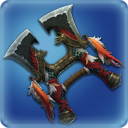 Skyruin Baghnakhs |
【Item Level】710 【Equippable Level】100 |
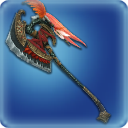 Skyruin Bardiche |
【Item Level】710 【Equippable Level】100 |
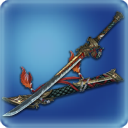 Skyruin Blade |
【Item Level】710 【Equippable Level】100 |
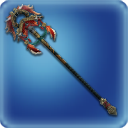 Skyruin Cane |
【Item Level】710 【Equippable Level】100 |
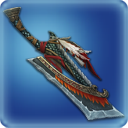 Skyruin Cleavers |
【Item Level】710 【Equippable Level】100 |
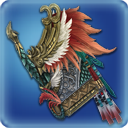 Skyruin Codex |
【Item Level】710 【Equippable Level】100 |
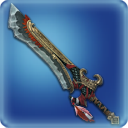 Skyruin Falchion |
【Item Level】710 【Equippable Level】100 |
 Skyruin Faussar |
【Item Level】710 【Equippable Level】100 |
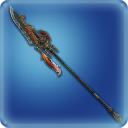 Skyruin Glaive |
【Item Level】710 【Equippable Level】100 |
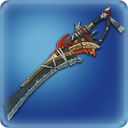 Skyruin Gunblade |
【Item Level】710 【Equippable Level】100 |
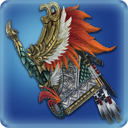 Skyruin Index |
【Item Level】710 【Equippable Level】100 |
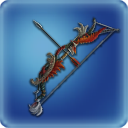 Skyruin Longbow |
【Item Level】710 【Equippable Level】100 |
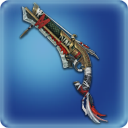 Skyruin Musketoon |
【Item Level】710 【Equippable Level】100 |
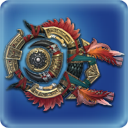 Skyruin Orrery |
【Item Level】710 【Equippable Level】100 |
 Skyruin Rapier |
【Item Level】710 【Equippable Level】100 |
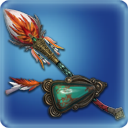 Skyruin Round Brush |
【Item Level】710 【Equippable Level】100 |
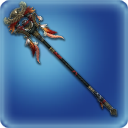 Skyruin Staff |
【Item Level】710 【Equippable Level】100 |
 Skyruin Twinfangs |
【Item Level】710 【Equippable Level】100 |
 Skyruin War Quoits |
【Item Level】710 【Equippable Level】100 |
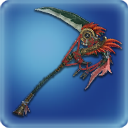 Skyruin War Scythe |
【Item Level】710 【Equippable Level】100 |
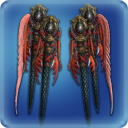 Skyruin Wings |
【Item Level】710 【Equippable Level】100 |
Wings of Ruin Preview
Wings of Ruin is a rare mount drop from Worqor Lar Dor (Extreme) and can only be obtained by rolling high on the reward.
Other Worqor Lar Dor (Extreme) Rewards
Players obtain 15 Allagan Tomestones of Aesthetics, and one Skyruin Totem per successful run. These totems can be exchanged at Solution Nine by talking to Uah'shepya who is found at (X:8.7 Y:13.5).
Other drops like Valigarmanda Card, Skyruin Weapon Coffer (IL 710), Faded Copy of The Skyruin, and Ruinous Prime all depend on RNG when dropping.
FFXIV Dawntrail Related Guides
List of Dawntrail Trials
| All Dawntrail Trials | |
|---|---|
| Worqor Lar Dor (Normal) | Everkeep (Normal) |
| The Interphos | Worqor Lar Dor (Extreme) |
| Everkeep (Extreme) | |
Comment
Author
Worqor Lar Dor (Extreme) Trial Guide
improvement survey
03/2026
improving Game8's site?

Your answers will help us to improve our website.
Note: Please be sure not to enter any kind of personal information into your response.

We hope you continue to make use of Game8.
Rankings
- We could not find the message board you were looking for.
Gaming News
Popular Games

Genshin Impact Walkthrough & Guides Wiki

Honkai: Star Rail Walkthrough & Guides Wiki

Umamusume: Pretty Derby Walkthrough & Guides Wiki

Pokemon Pokopia Walkthrough & Guides Wiki

Resident Evil Requiem (RE9) Walkthrough & Guides Wiki

Monster Hunter Wilds Walkthrough & Guides Wiki

Wuthering Waves Walkthrough & Guides Wiki

Arknights: Endfield Walkthrough & Guides Wiki

Pokemon FireRed and LeafGreen (FRLG) Walkthrough & Guides Wiki

Pokemon TCG Pocket (PTCGP) Strategies & Guides Wiki
Recommended Games

Diablo 4: Vessel of Hatred Walkthrough & Guides Wiki

Cyberpunk 2077: Ultimate Edition Walkthrough & Guides Wiki

Fire Emblem Heroes (FEH) Walkthrough & Guides Wiki

Yu-Gi-Oh! Master Duel Walkthrough & Guides Wiki

Super Smash Bros. Ultimate Walkthrough & Guides Wiki

Pokemon Brilliant Diamond and Shining Pearl (BDSP) Walkthrough & Guides Wiki

Elden Ring Shadow of the Erdtree Walkthrough & Guides Wiki

Monster Hunter World Walkthrough & Guides Wiki

The Legend of Zelda: Tears of the Kingdom Walkthrough & Guides Wiki

Persona 3 Reload Walkthrough & Guides Wiki
All rights reserved
© SQUARE ENIX
Square Enix, Inc., 999 N. Pacific Coast Highway, El Segundo, California 90245
LOGO ILLUSTRATION:© YOSHITAKA AMANO
The copyrights of videos of games used in our content and other intellectual property rights belong to the provider of the game.
The contents we provide on this site were created personally by members of the Game8 editorial department.
We refuse the right to reuse or repost content taken without our permission such as data or images to other sites.





![Monster Hunter Stories 3 Review [First Impressions] | Simply Rejuvenating](https://img.game8.co/4438641/2a31b7702bd70e78ec8efd24661dacda.jpeg/thumb)


