This survey will take about 1 minute.
Your answers will help us to improve our website.
The Legend of Zelda: The Wind Waker
Forbidden Woods Walkthrough
▲ 100% Completion Checklist
▲ All Heart Pieces & Empty Bottle Locations
▲ Treasure Charts | Triforce Charts
▲ GameCube and Wii U Version Differences
▲ Upgrades ▶︎ Wallet | Magic Meter | Picto Box
The Forbidden Woods is a dungeon in The Legend of Zelda: The Wind Waker located in Forest Haven. Read on for a complete walkthrough of the Forbidden Woods, as well as a list of the important items that you can get in this section of the game!
| ◀︎ Previous Area | Next Area ▶︎︎ |
|---|---|
| Forest Haven | The Third Pearl |
List of Contents
Forbidden Woods Walkthrough
First Floor
| 1 | 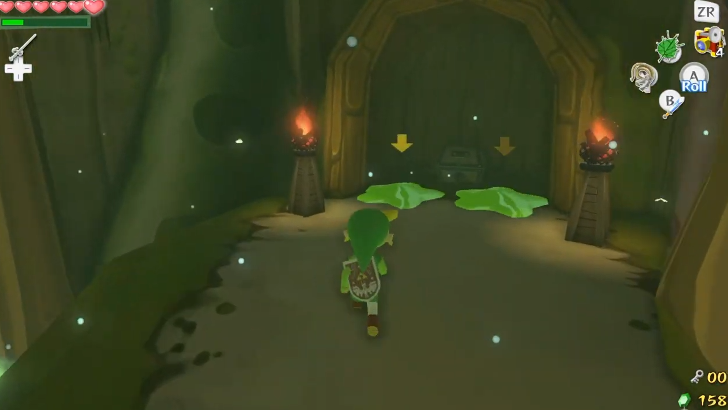 Walk up the slope on your right and open the chest containing the Dungeon Map. |
|---|---|
| 2 | 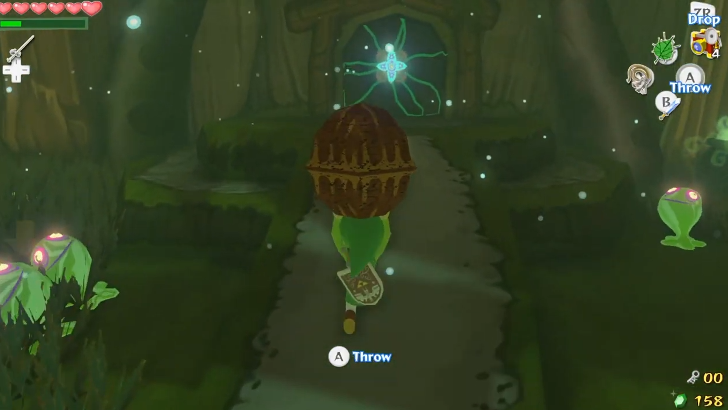 Check the left side of the room and pick up a Deku Nut. This is the only way to unlock the door to the next room, so carry it over to the door in the middle and throw it at the door to proceed. |
| 3 | 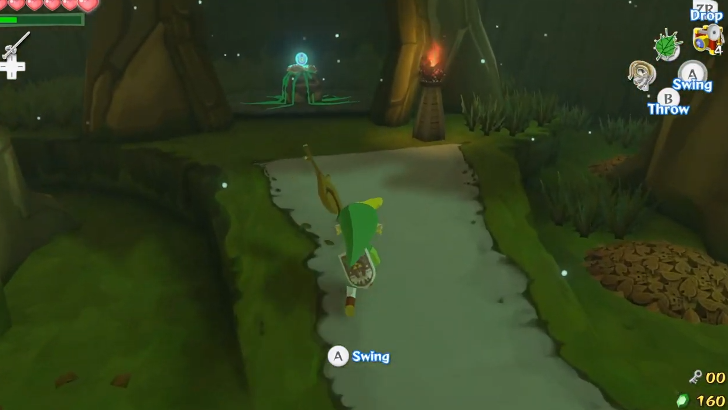 Jump below and defeat one of the Boko Baba to get a stick. Ignite the stick with the torch in front of the hollow tree and burn the bud inside. Open the chest for a Knight's Crest. |
| * | There are piles of leaves in this area hiding items such as Rupees, hearts, and even a fairy. Use your Deku Leaf to blow the leaves and uncover the hidden items. |
| 4 | 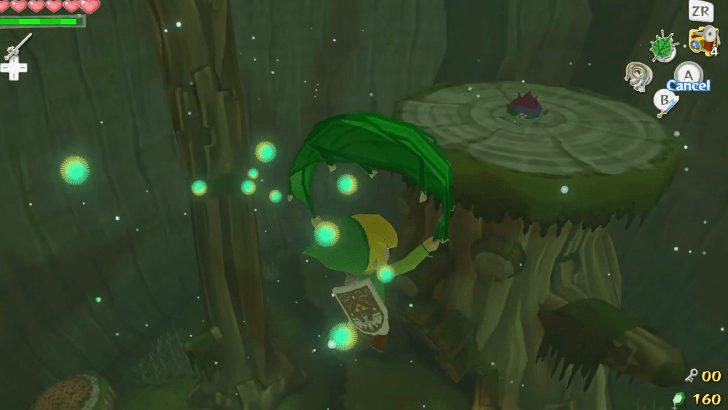 Go to the other side of the room and hop into the Baba Bud. Aim the launch to the east side where the next Baba Bud is. As you enter the second bud, face north and prepare to glide to the top of the stump where the Knight's Crest was. |
| 5 | 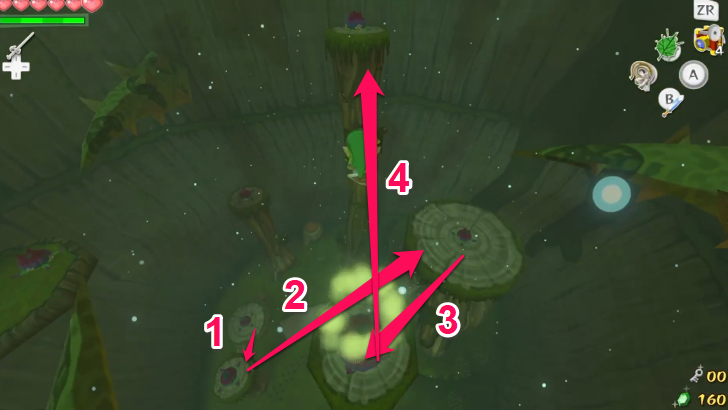 The next Baba Bud is southeast of your current position, on the tall, narrow platform. Launch yourself up and glide to this bud. From there, glide to the Baba Bud on the other tall, narrow platform on the west side. Finally, launch and glide to the north platform with a plant-covered door. |
| 6 | 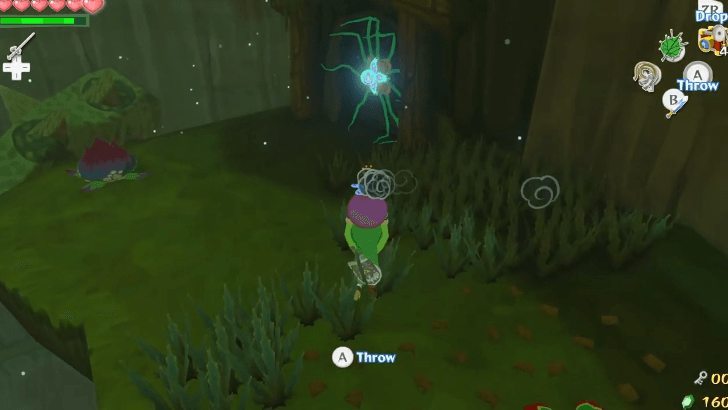 Pick up a Bomb Flower and throw it at the door. Make sure that the flower bud on the door is within the explosion range to remove it. Proceed to the next room once the door is unlocked. |
Second Floor
| 1 | 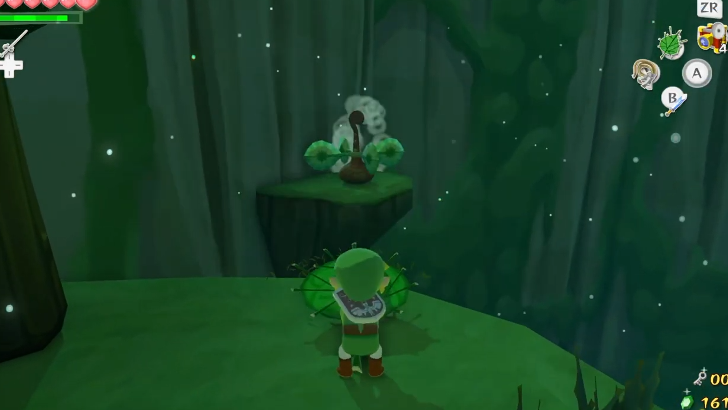 Look to your left and use the Deku Leaf to blow a gust into the wind mechanism to move the platform towards you. |
|---|---|
| 2 | 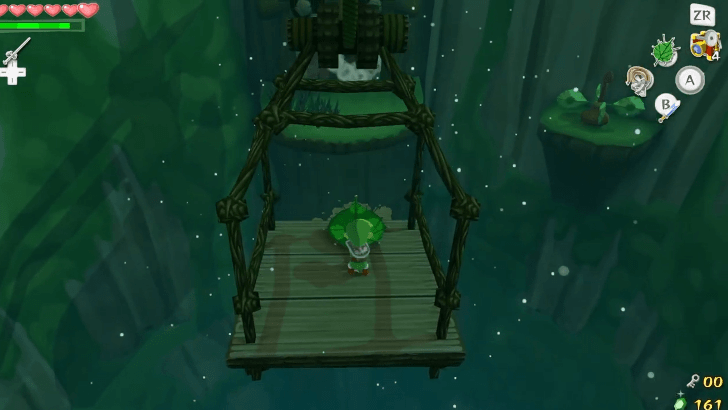 Hop on the platform and turn around. Using the Deku Leaf while on the platform will cause it to move to the opposite direction. Do this until you reach the other side then enter the next room. |
| 3 | 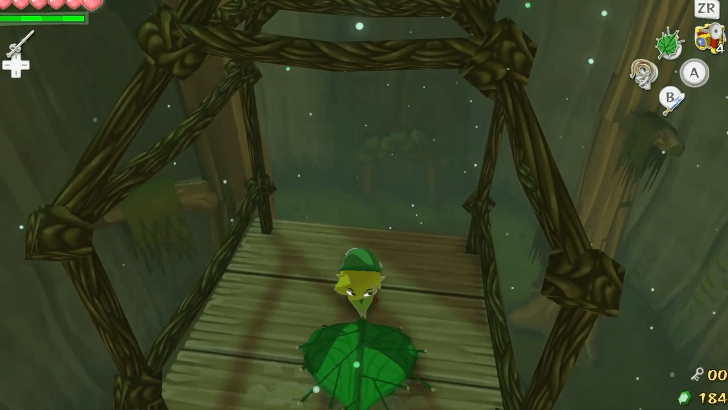 This next room is full of enemies, but your main target is the Boko Baba on the northeast corner. Defeating this particular Boko Baba will turn it into a non-hostile Baba Bud. Use it to reach the top of the stump then hop on the moving platform. Use the Deku Leaf to propel it to the other side. |
| 4 | 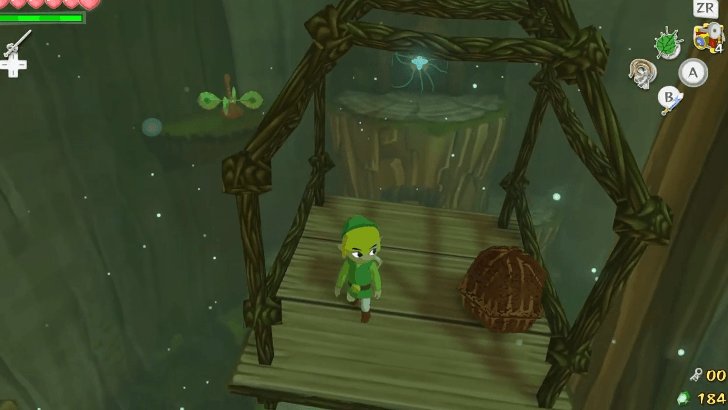 Break down the wooden planks and take the Deku Nut inside back to the platform. Transport the Deku Nut back to the stump (don't let it roll off the platform!), then throw it at the flower bud on the door to access the next room. Try to be quick, since the Deku Nut may burst after a period of time. |
Third Floor
| 1 | 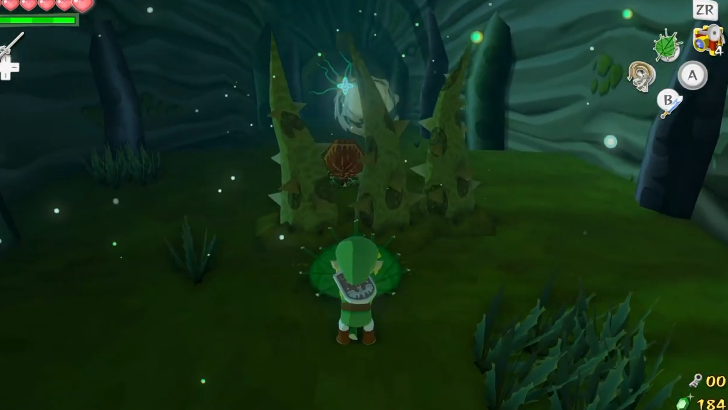 Slowly walk towards the Deku Nut in the middle until the hidden vines sprout from the ground. From behind the vines, blow the Deku Nut towards the other side of the room so you can safely pick it up and throw it at the door. |
|---|---|
| 2 | 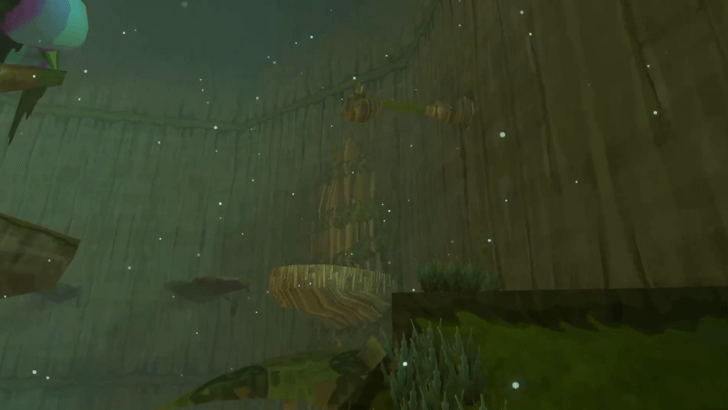 Turn right and grapple to the next section. Keep moving along using the moving branches until you reach the Deku Nut. Grab the nut, and hop over to the hanging tree in the center of the room. |
| 3 | 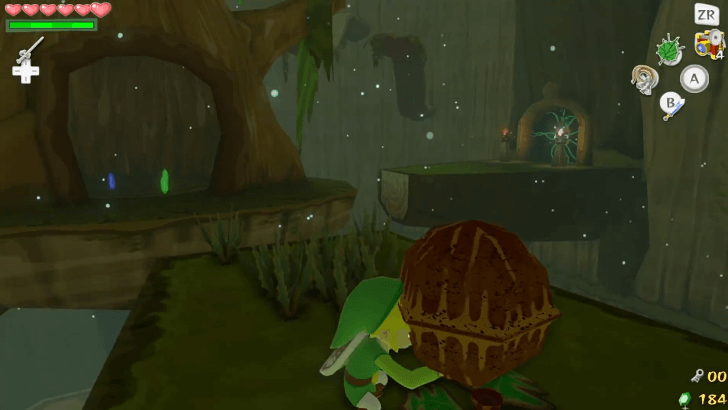 Go to the platform on the west side by going around the hollowed tree. Throw the nut at the the door with the flower to open it. You can also collect the Rupees inside the tree hollow if you need them. Before heading through, use the moving branches to the left to climb to the top of the room. Blow the leaves off of the Warp Pot hidden in the ground, and then head back down the branches and through the door. |
| 4 | 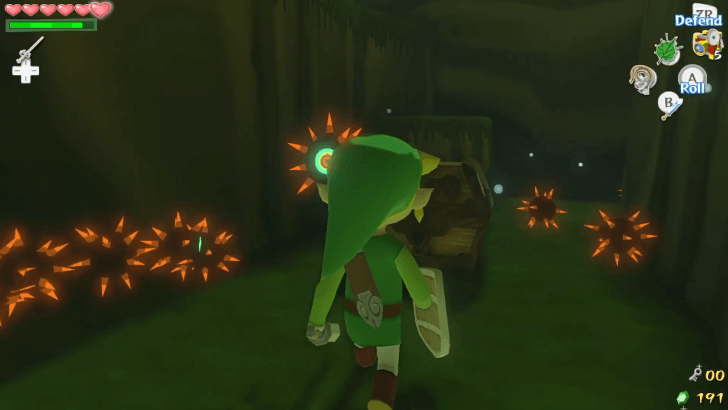 There are Morths at the center of this room. Use your spin attack when they attach to you to defeat them. You can then open the chest in the middle for a yellow rupee. Make your way through the door on the western side of the room. |
| 5 | 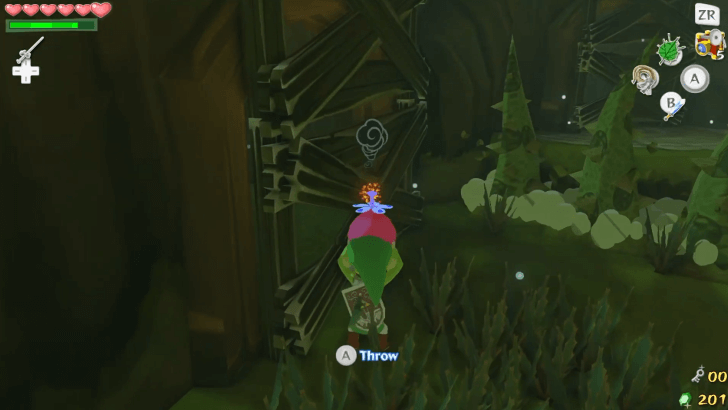 Inside the room, there are spiked vines that form a maze. There are two hidden paths here—one to your left, which leads to a Bomb Flower, and another to your right, which leads to a Baba Bud. Take the left path first. Walk slowly to avoid hitting the vines that pop out of the ground. Once you reach the Bomb Flower, use it to blow up the wooden boards nearby. Open the chest for the Compass. |
| * | If you end up on the Baba Bud path first, you can launch yourself up using the Baba Buds, then land beside the Bomb Flower. |
| 6 | 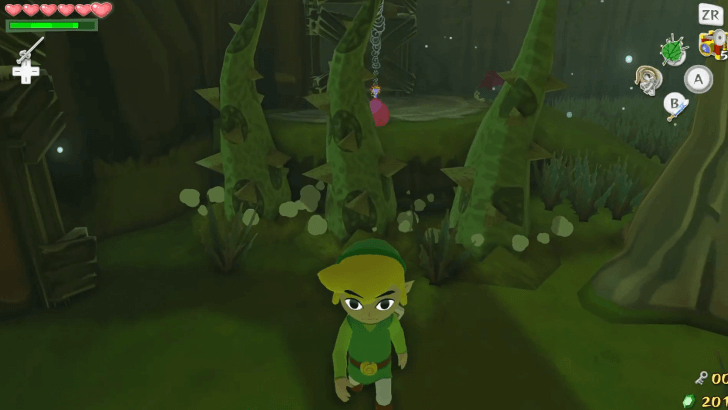 After getting the the Compass, grab another bomb and run towards the ledge to the north, and throw it at the next set of planks past the vines. Head back through the maze and return from where we entered from. |
| 7 | 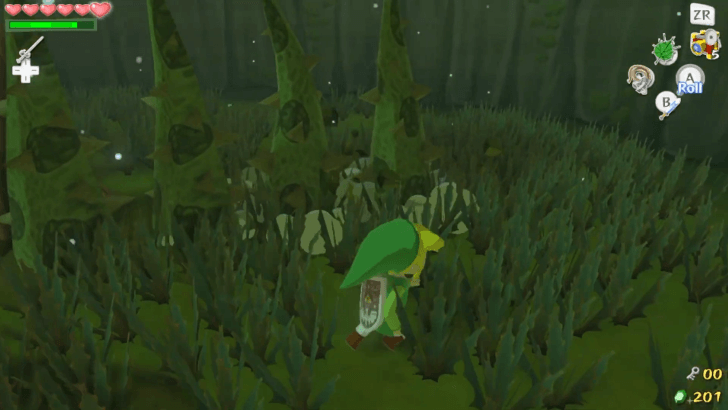 This time, we'll take the path to the right. Again, walk slowly. Face east, then turn left and continue straight. Go to the left side of tree and once you pass it, turn right and keep walking until you reach a wall. Turn left and then left again so you’re opposite the vines. Turn right at the tree, and go straight until the wall. Turn left at the wall, and then left again on the side of the vines. Finally, turn right at the tree. |
| 8 | 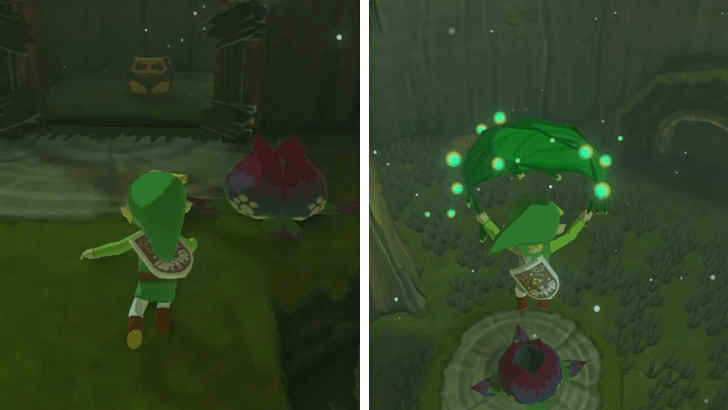 Head up to the platform, and grab the small key in the chest. Use the Baba Bud to fly over to the door we came from. Optionally, you can glide to the platforms in this room to nab some Rupees, health, and a Joy Pendant. |
| 9 | 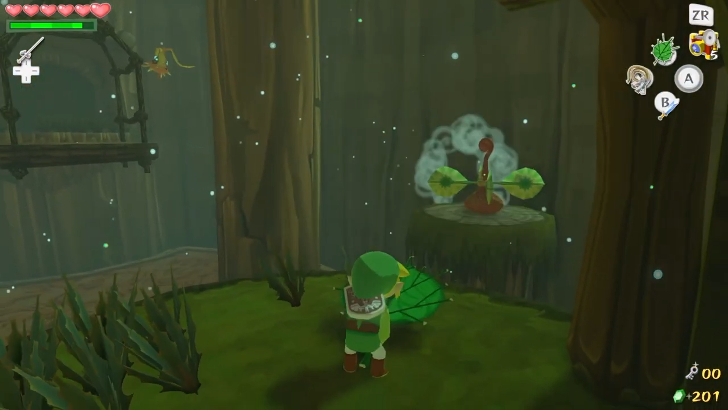 Back in the central room, hop onto the tree platform and head over to the locked door at the north. Heading through the room, defeat the Peahat then blow the switch with the Deku Leaf and make your way across the room, then head to the next door. |
| 10 | 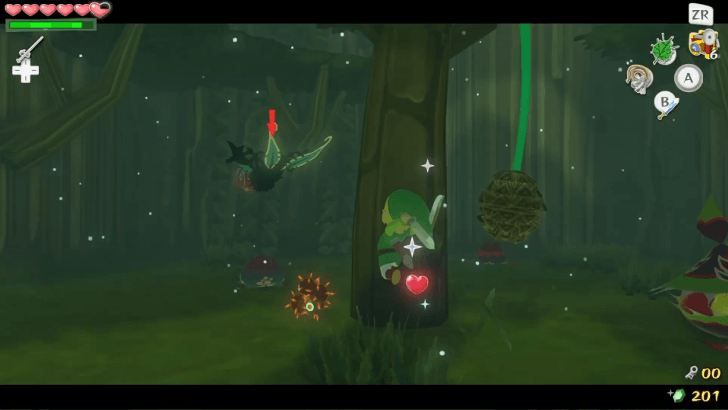 The next room will have a couple of Boko Babas, a Peahat, and a Mothula without wings. Defeat them and then use a Boko Bulb to get yourself onto the top of the trees. Jump into the Boko Bulb on this level to get up to the next floor. |
Fourth Floor
| 1 | 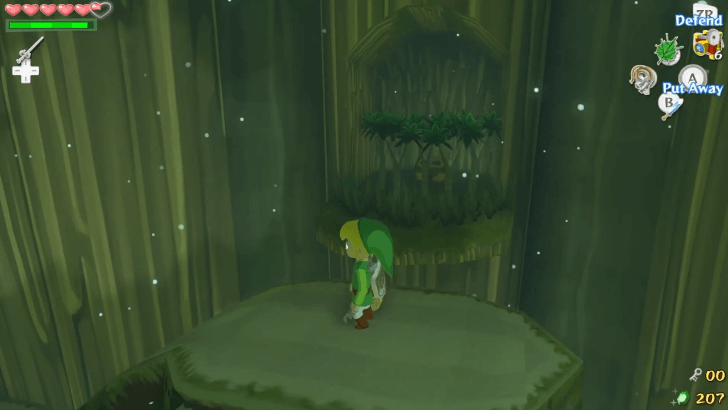 Heading up, you will find a door to the Winged Mothula. You can find a pole up the door so use your Grappling Hook on it to climb up so that you’re standing on it. Grapple to the next hook and drop down on to the platform below. Use the moving branches to move through the room. Cut down the trees for a chest that has another Joy Pendant. |
|---|---|
| 2 | 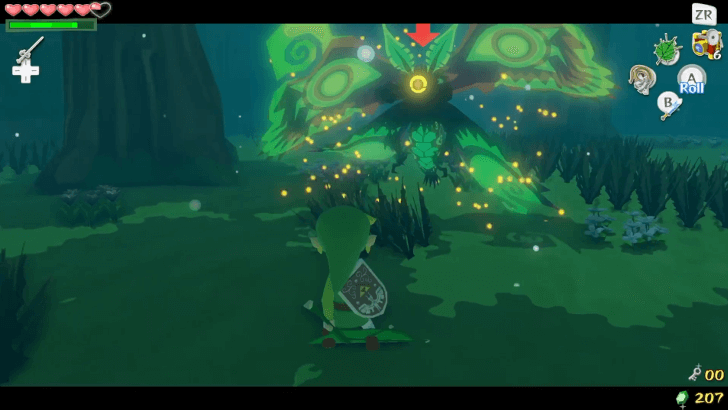 Make your way back through the door at the north side of the room to face the dungeon miniboss, the Winged Mothula. The best method to defeat it is to use the Deku Leaf to blow air to it. This will stun it, allowing you to attack it with your sword while it falls down. After you hit it four times it will turn to a regular Mothula. You can now attack it like any other Mothula. |
| 3 | 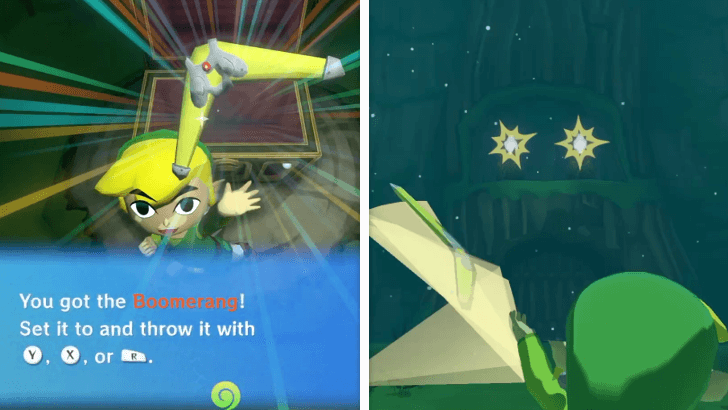 After you’ve defeated it, you will unlock the chest containing the Boomerang. Look back above the door and there are two switches. Use the Boomerang to target and hit them consecutively to open the door back out. |
| 4 | 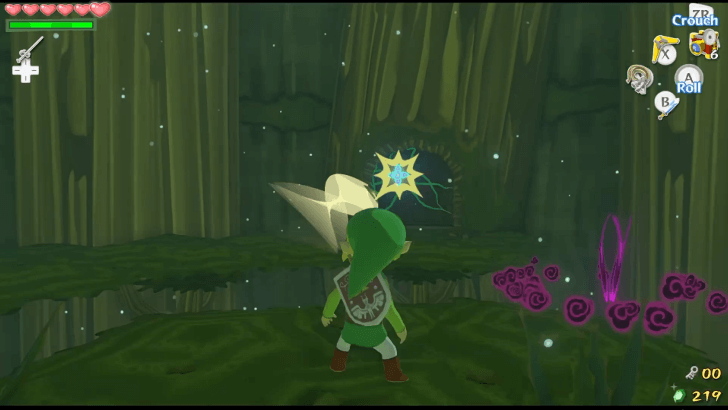 After you exit, walk over to the opposite side of the room and beat the Peahats while grappling their Feathers, then finish them off with the Boomerang. Use the Boomerang again to target and defeat the two flowers on this door, and then head through it. |
| 5 | 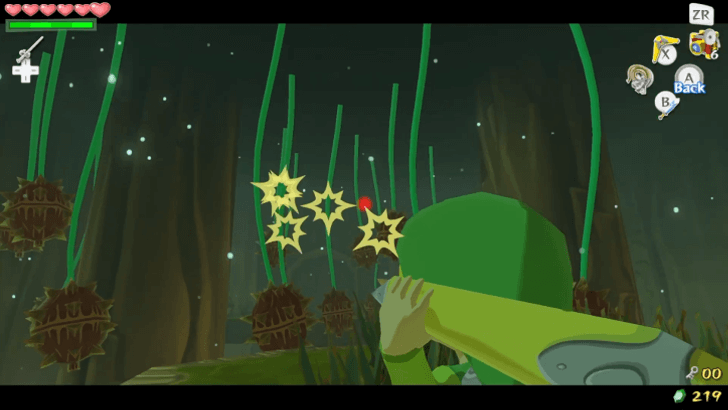 Inside the next room you will find various spiked plants hanging from the ceiling. Use your Boomerang to target them and knock them out of your way. Then, use the Deku Leaf to fly across to the other side and the chest opposite will have a Joy Pendant. |
| 6 | 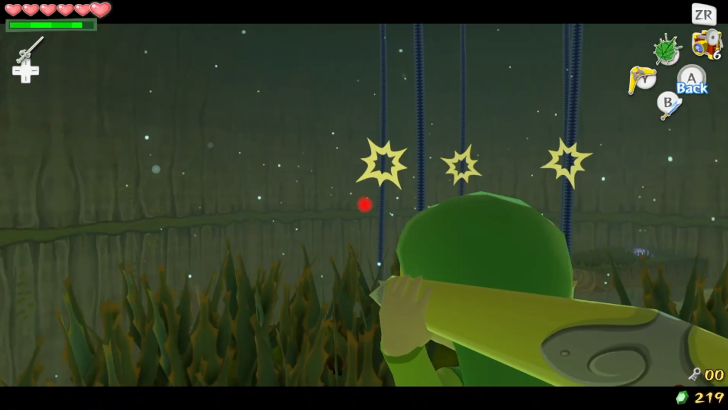 Head out the door and use the Boomerang to target the five blue vines to cut them down. This will cause the tree to break the floor barrier below to open up a new area. Jump down through the hole where it fell and enter the door here. |
Basement 1 Floor
| 1 | 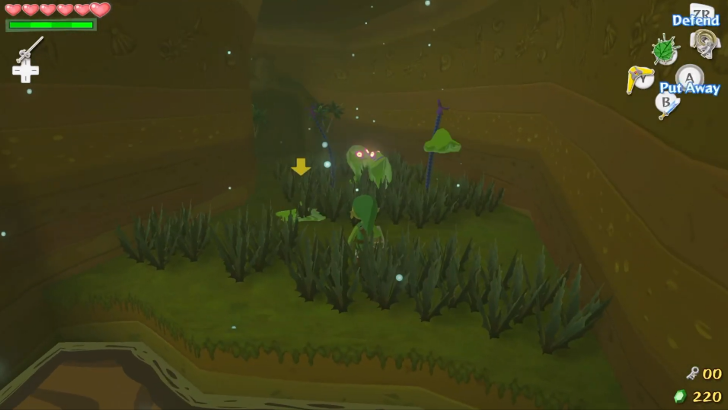 Use the Boomerang to take out all the enemies you see. Jump from the platform to platform and you will encounter two Dexivines. These enemies will not hurt you, but they will drain your magic once they grab onto you. Defeat them and the Chuchus, then through the next door. |
|---|---|
| 2 | 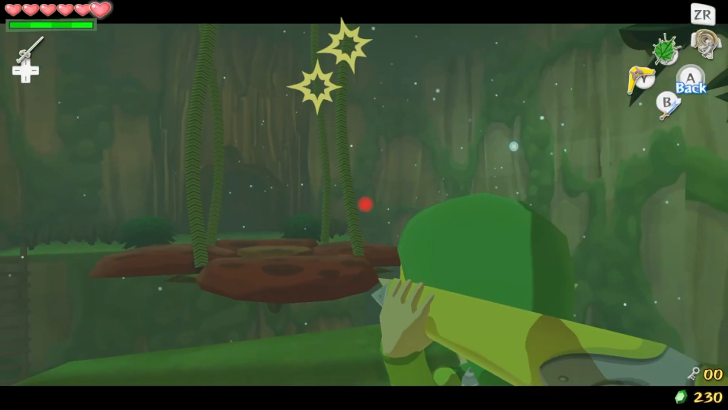 Jump onto the flower in the middle and then jump across to get to chest with a yellow rupee. Use the Boomerang to cut down the vines holding up the flower so it falls down. Head down and use the bomb to get to the next room. |
| 3 | 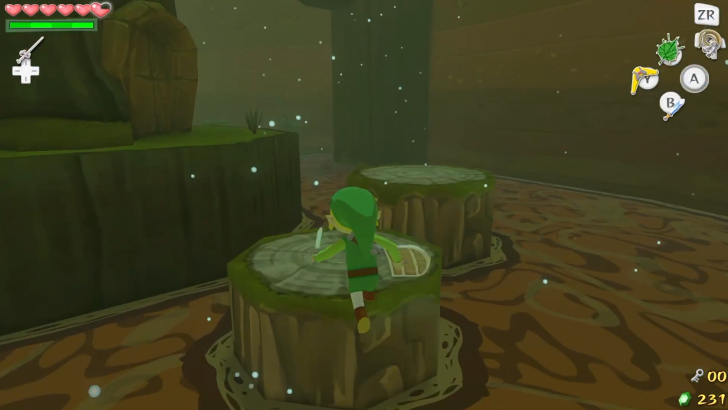 From the room's entrance, use the Deku Leaf to blow the leaves from the platform. Defeat the enemies, then jump over to the central platform and walk around the tree. Kill the Morths on the platform above and then jump onto it. Head up the next platform and jump into the Boko Bulb that appears after beating the Boko Baba to float over to the platform nearby. |
| 4 | 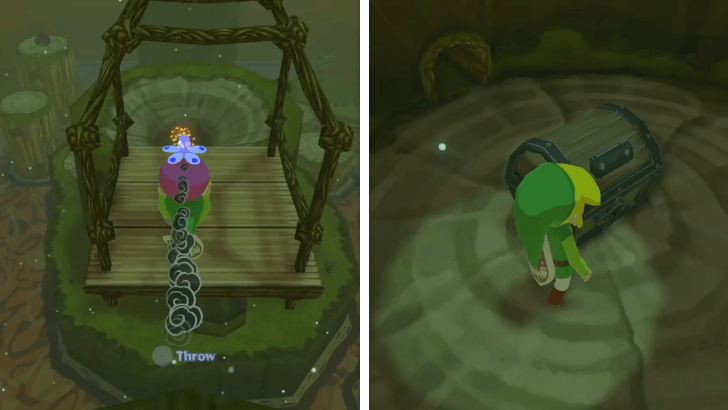 Use your Deku Leaf to spin the Switch and use the platform to get to the area with the Bomb and then hop onto the cart and throw the bomb into the hole on top of tree stump below. The bomb will fall and kill the plant inside. Jump down into the hole and open the chest for Treasure Chart #15. |
| * |  Head back to the platform with the bomb and look for an islet with the the three trees and throw the nearby bomb in the middle. This will spawn a chest with the Forbidden Tingle Statue in the HD version. |
| 5 | 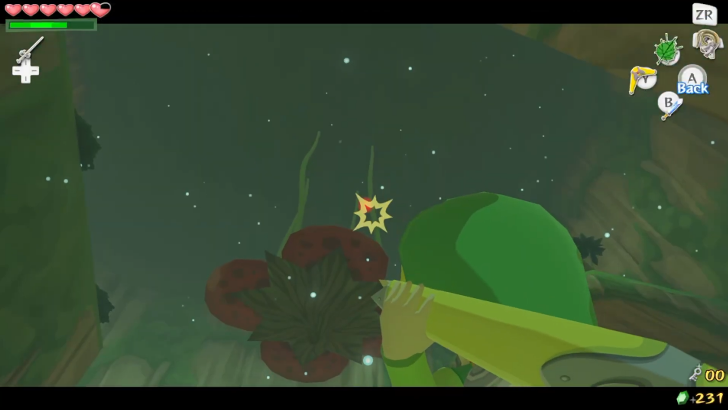 After leaving this room, cut down the platform once again using the boomerang. Jump onto the large flower platform and use the Deku Leaf and blow air at the eastern wall to move the flower along the top of the murky water. |
| 6 | 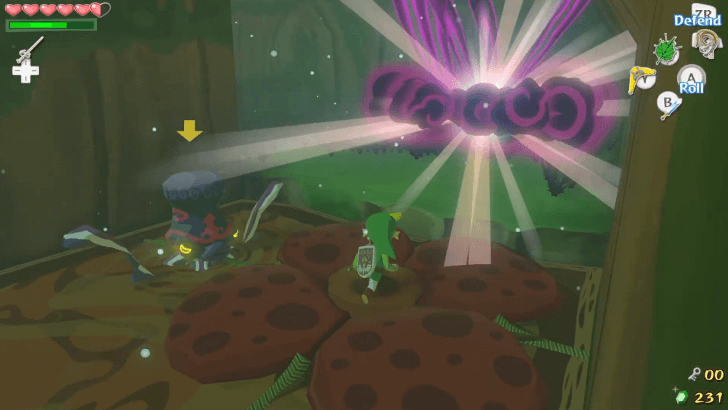 Continue doing this until you reach a wall and two more Octoroks. Defeat them and then use the Deku Leaf to reach the platform at the end of the path. Take care of the enemies here and head through the door. |
| 7 | 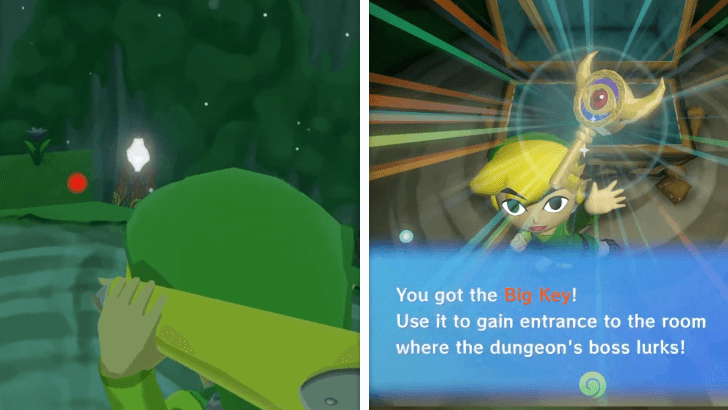 Vines will appear, blocking the door. Climb up the slope along the tree in the center and there will be five switches. Use your Boomerang to hit all of them and the switches will open the door below revealing a chest with the Big Key. |
| 8 | 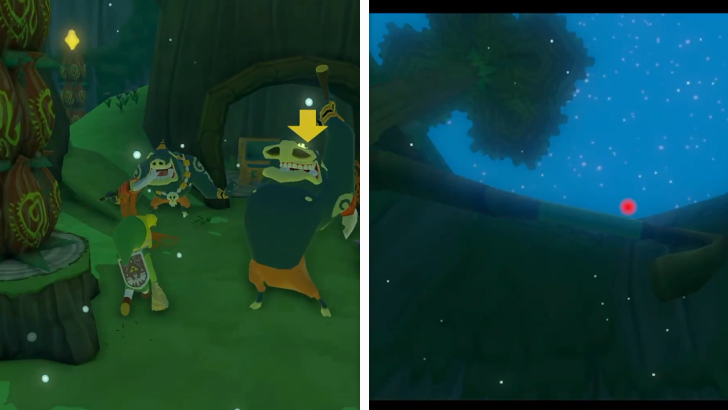 Grab the key and beat the enemies that drop then head back up the slope and use the Grappling Hook on the branch on the tree. Swing across to another platform and enter the door here. Slash the shrubs and use the Deku Leaf to float to the door on the other side of the room. |
| 9 |  After getting to the room with the giant flower use the Deku Leaf to spin the switch and activate a whirlwind. Jump into the Boko Bulb and use the whirlwind to shoot yourself upwards. Feel free to drop down when you see a platform and head through the door to the east. |
To the Boss Room
| 1 | 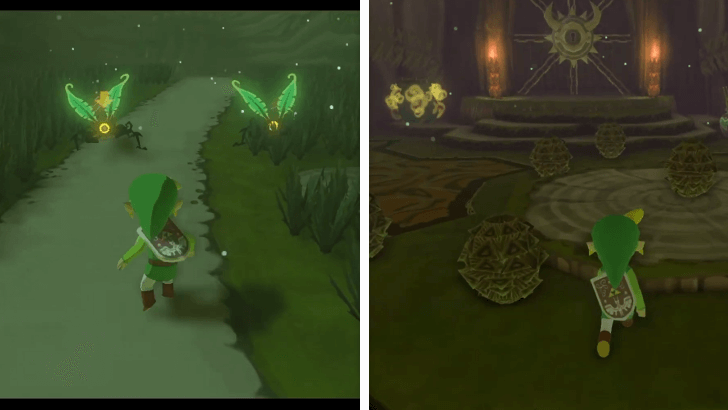 Defeat the Mothulas and a chest will appear containing a Joy Pendant. The next door will have various nuts with supplies like fairies, health, rupees and Morths inside. |
|---|---|
| 2 | 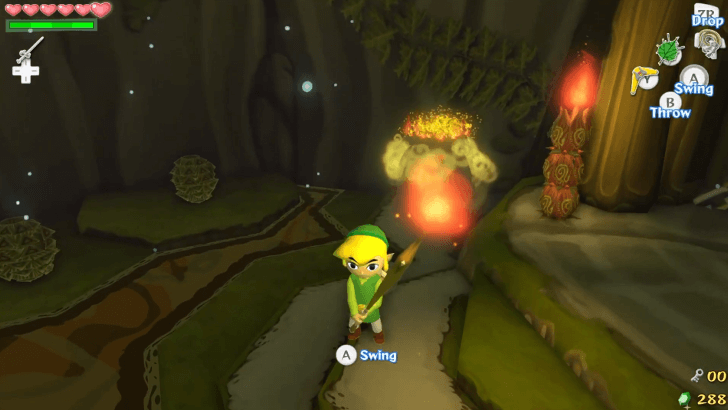 Grab a stick and burn the wood above the yellow pot, creating a warp portal. You can go to the boss now, but we recommend going back to the Dungeon Entrance to grab a treasure chart. |
| 3 | 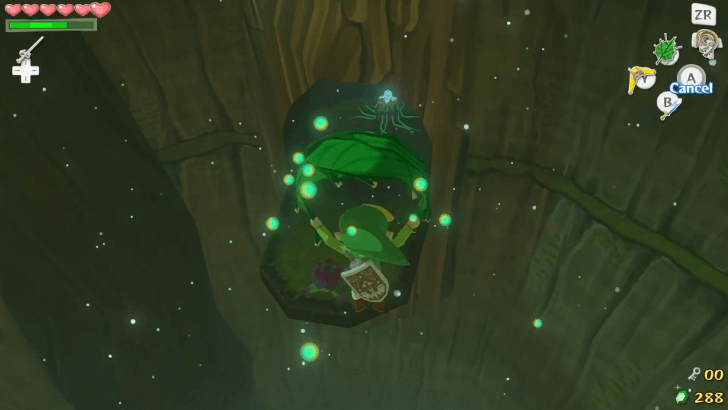 Jump into the Warp Pot and head through the door nearby. Make use of the Boko Bulbs to climb to the very top of the room. Find the the Boko Baba and use its Bulb to float across the room to the treasure chest containing Treasure Chart #1. |
| 4 | 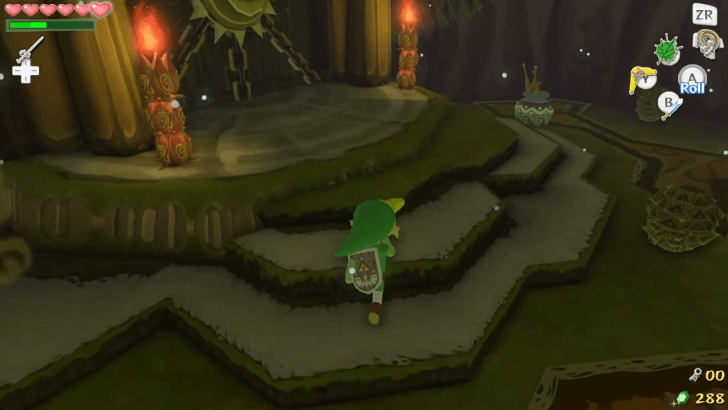 Head back to the Warp Pots, which you can use to go back to the room before the Boss. But before you face the boss, it's recommended to go back to the Forest Haven and grab some Forest Water to make the boss fight easier. |
| 5 | 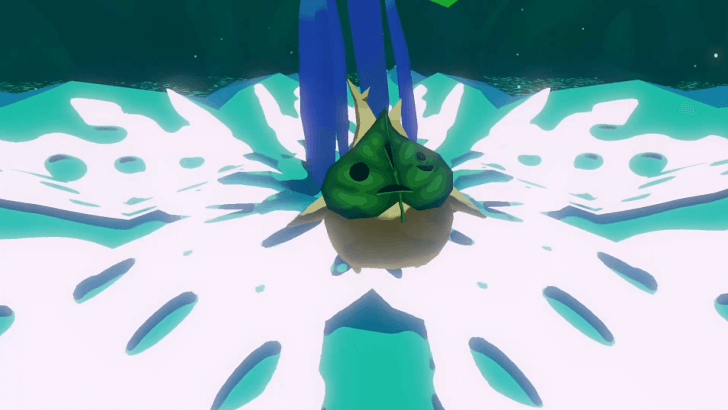 Head through the Boos Door once you're ready. When you walk forward you will see Makar standing on a flower. Approach Makar. After he gets eaten, the boss fight will start. ▶ How to Beat Kalle Demos |
| 6 | 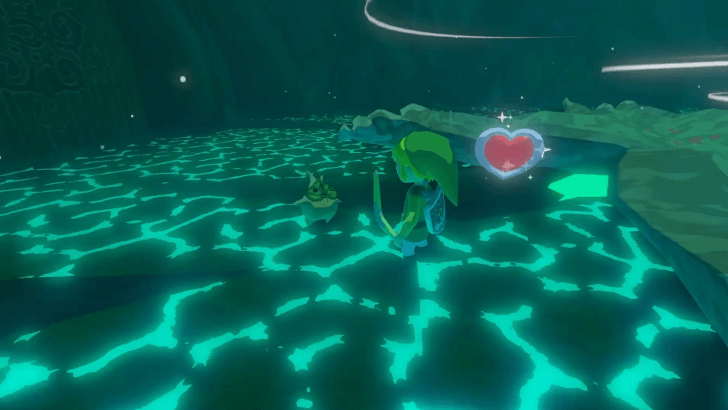 Once defeated, the boss with spit out Makar and a heart container will be left in the room. Makar will thank you, and you can then grab the Heart Container. Step into the whirlwind to be teleport back to the Great Deku Tree. |
Back to Forest Haven
| 1 | 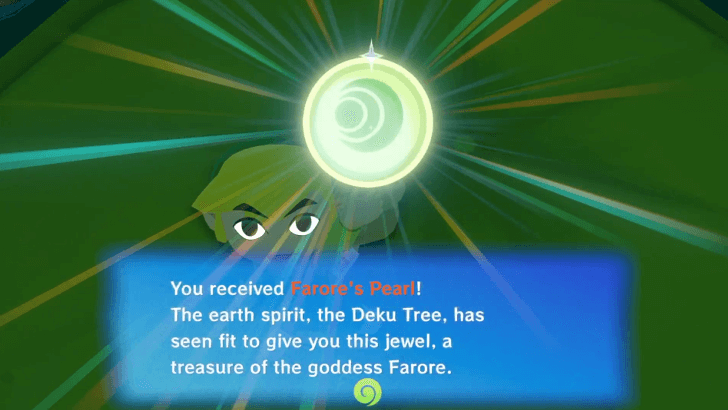 The Great Deku Tree will also thank you and chastise Makar. You are given Farore’s Pearl as a reward for saving Makar. |
|---|---|
| * | 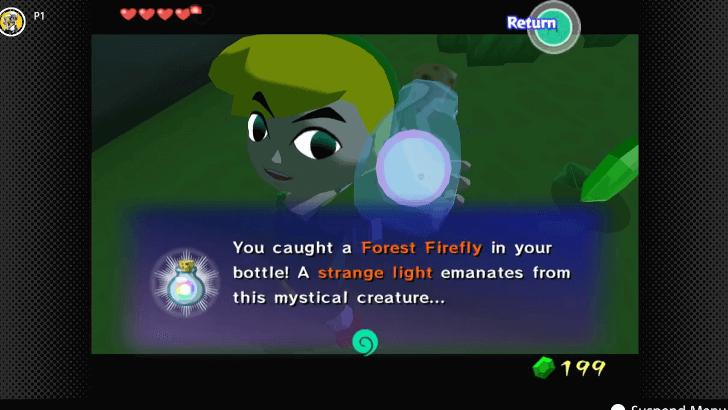 There are a few more things you can do before leaving Forest Haven. First, pick up a Forest Firefly with an Empty Bottle. If you're playing the GameCube version, you'll need it to get the Deluxe Picto Box. If you're playing the HD version, you can get a Joy Pendant from Lenzo instead. |
| * |  With the Deku Leaf equipped, you can now visit the Nintendo Gallery! Use the Baba Buds around the Deku Tree to reach the highest platform. Exit the tree hollow from there, direct the winds north, and glide down to the platform with a metal hatch. Use a Hyoi Pear to control a seagull and activate the switch on the opposite side. |
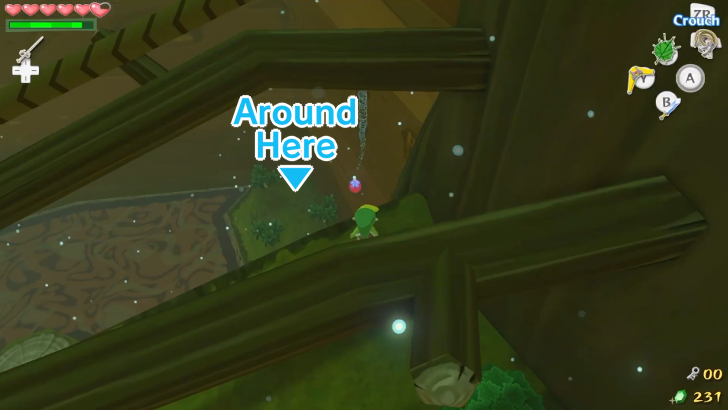
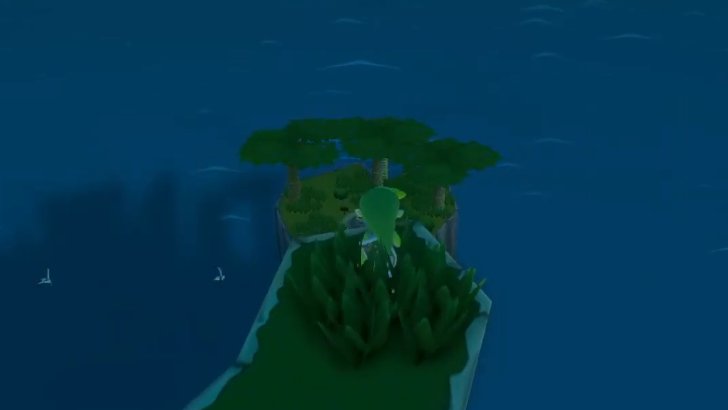
| * | 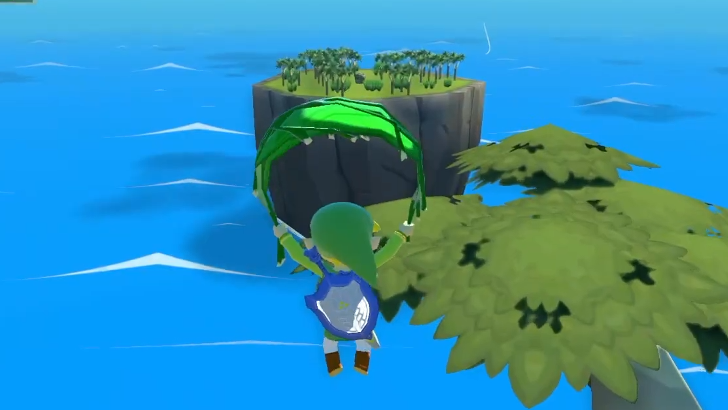 You can also get Treasure Chart #3 here in Forest Haven. From the entrance, glide south to the island platform with a lone chest. Open the chest for the Treasure Chart. |
| 2 | 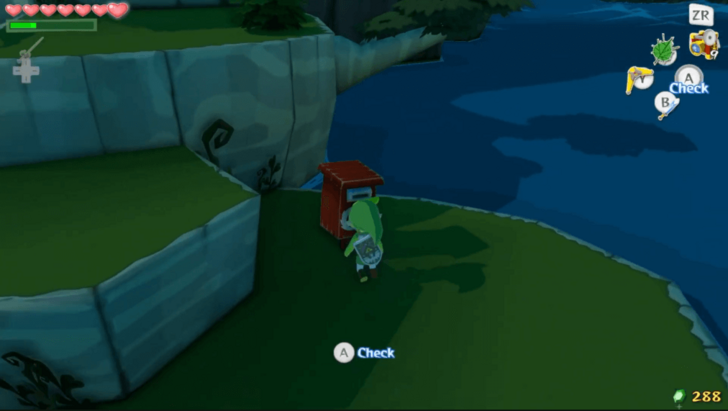 On your way out, check the postbox. You will notice that you have mail. You will get a letter from Prince Komali’s father thanking Link. He explains how the postbox works and will reward link with a Heart Piece. |
| 3 |  After that, you can now head back out to sea to pick up a few new unlocked items, or head straight to Greatfish Isle for Nayru’s Pearl. ▶︎ Third Goddess Pearl Walkthrough |
Forbidden Woods Boss
Kalle Demos
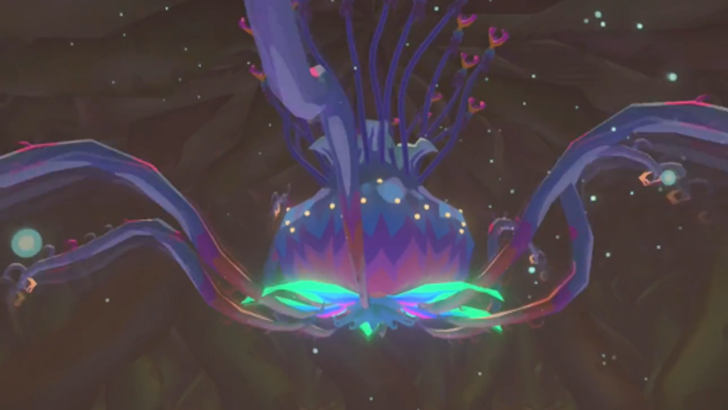
You will encounter Kalle Demos near the end of the Forbidden Woods. During this boss fight, you need to use your Boomerang to damage it.
How to Beat Kalle Demos
| How to Beat Kalle Demos |
|---|
|
|
Use Your Boomerang to Cut Down the Vines
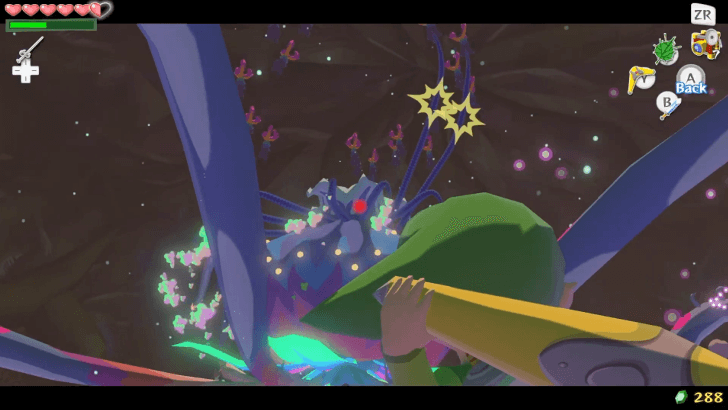
The boss is attached to the ceiling with its many vines. Use your Boomerang to target them and cut it off from the ceiling.
Note that Kalle Demos will try and use its other vines to attack you or create thorns from underground to pop up and hurt you. Don't get greedy with getting all the vines in one go or else you'll get hurt.
Use the Forest Water to Intantly Kill It
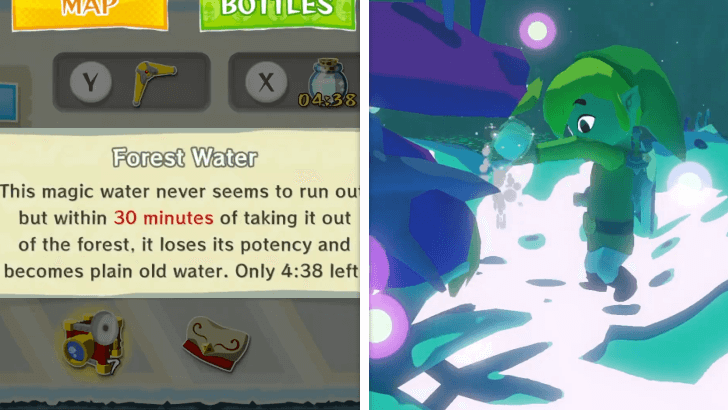
If you grabbed it back in Forest Haven you used the pots to teleport, or you just have Forest Water in a bottle, you can simply pour some onto Kalle Demos after cutting the vines down and it will be instantly defeated.
Once Down, Slash its Corolla With Your Sword
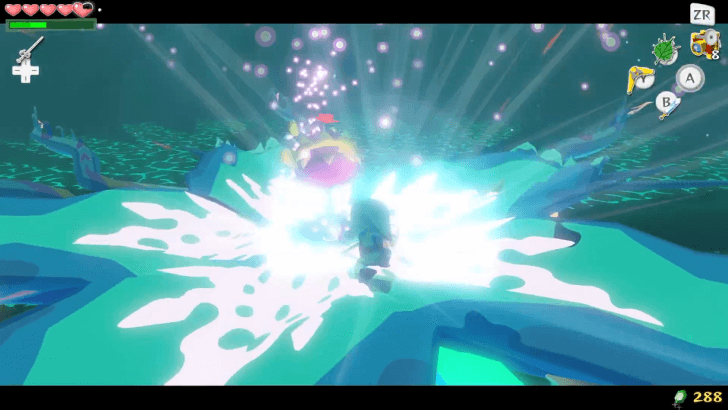
After being cut down, you can attack the plant at the center. Hit it a few times and make sure to watch the plant, since if you overstay your welcome, the petals will fold in and cause damage. Keep repeating and it will go down eventually.
Forbidden Woods Items to Get
Forbidden Woods Items
| Item | How to Get |
|---|---|
| Joy Pendant | Break one of the vases in the room with the thorny maze. |
| Joy Pendant | Found in a chest on the fourth floor. |
| Boomerang | Obtained after defeating the dungeon's miniboss, the Winged Mothula. |
| Forbidden Tingle Statue | Obtained in the inside the room with the hollow stump. Use the Bomb to blow up an area in the middle of three trees. |
| Treasure Chart #15 | Obtained inside the room with the hollow stump. Use the bomb to beat the plant inside. |
| Treasure Chart #1 | Obtained in the central tall room. Use the Boko Bulbs to head to the very top and glide onto the platform with the chest. |
| Heart Container | Obtained after defeating the dungeon's boss, Kalle Demos. |
Forest Haven Items
| Item | How to Get |
|---|---|
| Farore’s Pearl | Automatically given by the Great Deku Tree after warping out of the boss room. |
| Treasure Chart #3 | Glide to a chest located on a platform south of the Forest Haven entrance. |
The Legend of Zelda: The Wind Waker Related Guides

Walkthrough Guides
| 1 | Outset Island | 2 | Forsaken Fortress |
|---|---|---|---|
| 3 | Windfall Island | 4 | Dragon Roost Island |
| 5 | Dragon Roost Cavern | 6 | Forest Haven |
| 7 | Forbidden Woods | 8 | The Third Pearl |
| 9 | Tower of the Gods | 10 | Hyrule Castle |
| 11 | Return to the Forsaken Fortress | 12 | Earth Temple |
| 13 | Wind Temple | 14 | Triforce |
| 15 | Ganon's Tower | ||
Comment
Author
The Legend of Zelda: The Wind Waker Walkthrough & Guides Wiki
Forbidden Woods Walkthrough
Please participate in our site
improvement survey
04/2026
improvement survey
04/2026
Would you assist in
improving Game8's site?
improving Game8's site?

×
We are listening to our users' valuable opinions and discussing how to act on them.
The information collected through this survey will be used for the purpose of improving our services. In addition, the information will only be disclosed a part of a statistic in a format that will not allow identification of personal information.
Begin Survey
Not Now
×
Please rate each item regarding Game8.co's Advertisements.
Amount of Ads
Very Dissatisfied
Somewhat Dissatisfied
Fine
Somewhat Satisfied
Highly Satisfied
Placement of Ads
Timing of Ad Display
Ad Loading Speed
Safeness of Ads
Content of Ads
×
Please rate each item regarding Game8.co's Quality of Articles.
Amount of information
Very Dissatisfied
Somewhat Dissatisfied
Fine
Somewhat Satisfied
Highly Satisfied
Frequency of updates
Speed of new information
Accuracy of articles
Understandibility of articles
Readability of sentences
×
Please rate each item regarding Game8.co's Usability of the Site.
Ease of finding information
Very Dissatisfied
Somewhat Dissatisfied
Fine
Somewhat Satisfied
Highly Satisfied
Loading Speed
Use of Color
Font Size
Visibility of Images
Easy to Understand Layout
×
Please rate each item regarding Game8.co's Message Boards, Comments.
Ease of Writing
Very Dissatisfied
Somewhat Dissatisfied
Fine
Somewhat Satisfied
Highly Satisfied
Readability
Ease in Finding Information
Comment Quality
Comment Quantity
Admin Response
×
Please rate each item regarding Game8.co's Site's new design.
Please rate our site's new design
Very Dissatisfied
Somewhat Dissatisfied
Fine
Somewhat Satisfied
Highly Satisfied
Do you think that the website's design change makes the site easier to use?
Has the new design made it easier for you to find information on the site?
Has the new design improved the overall visual appeal of the site?
How would you rate your overall satisfaction with the new design of the site?
×
How likely are you to recommend Game8 to someone you know?
Very Unlikely
0
1
2
3
4
5
6
7
8
9
10
Very Likely
If you have other opinions regarding potential improvement to the website, please share them with us. We would appreciate your honest opinion.
Note: This is a free response section, so you can proceed without entering anything.
Note: Please be sure not to enter any kind of personal information into your response.
Note: Please be sure not to enter any kind of personal information into your response.
×
Thank You
×
Thank you for participating in our survey! Your answers will help us to improve the quality of our website and services.
We hope you continue to make use of Game8.
We hope you continue to make use of Game8.
Close
Rankings
- We could not find the message board you were looking for.
Gaming News

![Forza Horizon 6 Review [Preview] | Beautiful Roads With a Whole Lot of Oversteer](https://img.game8.co/4460981/a7254c24945c43fbdf6ad9bea52b5ce9.png/show)

![Forza Horizon 6 Review [Preview] | Beautiful Roads With a Whole Lot of Oversteer](https://img.game8.co/4460981/a7254c24945c43fbdf6ad9bea52b5ce9.png/thumb)
![Borderlands Mobile Review [Playtest] | The Same Borderlands Made Easy](https://img.game8.co/4465500/aac0c880a39ec5cd46073e49d18f3ed5.png/thumb)
Popular Games

Genshin Impact Walkthrough & Guides Wiki
Crimson Desert Walkthrough & Guides Wiki
Umamusume: Pretty Derby Walkthrough & Guides Wiki
Honkai: Star Rail Walkthrough & Guides Wiki
Monster Hunter Stories 3: Twisted Reflection Walkthrough & Guides Wiki
Wuthering Waves Walkthrough & Guides Wiki
The Seven Deadly Sins: Origin Walkthrough & Guides Wiki
Pokemon TCG Pocket (PTCGP) Strategies & Guides Wiki
Pokemon Pokopia Walkthrough & Guides Wiki
Zenless Zone Zero Walkthrough & Guides Wiki


Recommended Games
Monster Hunter World Walkthrough & Guides Wiki
Fire Emblem Heroes (FEH) Walkthrough & Guides Wiki
Pokemon Brilliant Diamond and Shining Pearl (BDSP) Walkthrough & Guides Wiki
Super Smash Bros. Ultimate Walkthrough & Guides Wiki
Diablo 4: Vessel of Hatred Walkthrough & Guides Wiki
Cyberpunk 2077: Ultimate Edition Walkthrough & Guides Wiki
Yu-Gi-Oh! Master Duel Walkthrough & Guides Wiki
Elden Ring Shadow of the Erdtree Walkthrough & Guides Wiki
The Legend of Zelda: Tears of the Kingdom Walkthrough & Guides Wiki
Persona 3 Reload Walkthrough & Guides Wiki


All rights reserved
© Nintendo. The Legend of Zelda and Nintendo Switch are trademarks of Nintendo.
The copyrights of videos of games used in our content and other intellectual property rights belong to the provider of the game.
The contents we provide on this site were created personally by members of the Game8 editorial department.
We refuse the right to reuse or repost content taken without our permission such as data or images to other sites.