This survey will take about 1 minute.
Your answers will help us to improve our website.
Kirby and the Forgotten Land
The Battle of Blizzard Bridge Waddle Dee Locations and Missions Walkthrough

This is a walkthrough for The Battle of Blizzard Bridge stage in Kirby and the Forgotten Land. Read on to learn how to clear all stage missions, see Waddle Dee and Figure locations, Enemy Information, Maxim Tomato location, the secret alternate route, and more!
| Previous Stage | Next Stage |
|---|---|
| Windy, Freezing Seas | An Unexpected Beast King |
List of Contents
The Battle of Blizzard Bridge Walkthrough Video
The Battle of Blizzard Bridge Missions and Abilities
Missions List
| Mission | Waddle Dees |
|---|---|
| 3 | |
| 5 | |
| 1 | |
| 1 | |
| 1 |
Waddle Dee Locations for All Missions
Copy Abilities
 Tornado Tornado
|
 Hammer Hammer
|
 Sword Sword
|
 Ice Ice
|
 Fire Fire
|
 Drill Drill
|
 Ranger Ranger
|
The Battle of Blizzard Bridge Mission Completion Order
This stage has a total of two areas. Follow the table below to clear each mission in order.
Area 1
| Area 1 Missions | ||
|---|---|---|
| 1 | 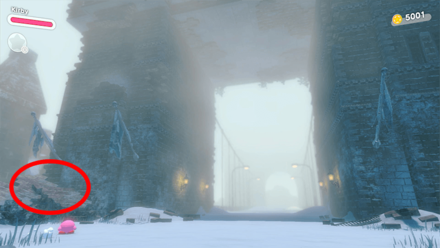 |
Take a detour and find a Maxim Tomato |
Area 2
The Battle of Blizzard Bridge Hidden Waddle Dee Locations
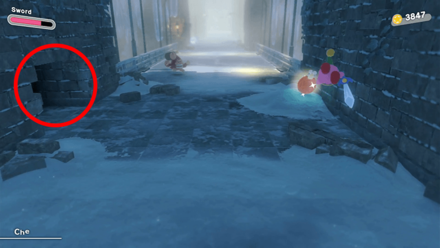
1: In the Hidden Room After Defeating Wild Edge
| Outside Room | Inside Room |
|---|---|
 |
 |
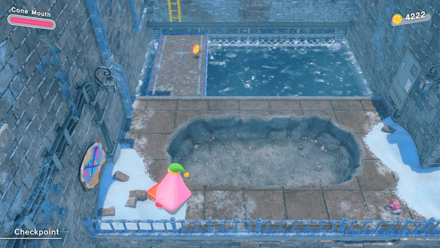
The first Waddle Dee can be found in the hidden room on the left side of the bridge after defeating Wild Edge. Enter the room and use the Sword copy ability to cut the vines on the traffic cone.
Inhale the cone and drop down to the lower platform. Break open the cracked floor to reveal the treasure chest that contains the first Waddle Dee.
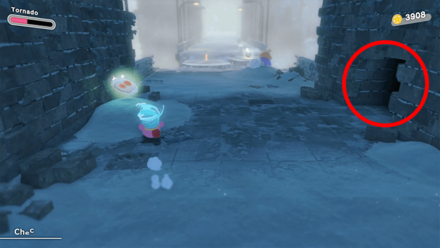
2: In the Hidden Room After Defeating Fleurina
| Outside Room | Inside Room |
|---|---|
 |
 |
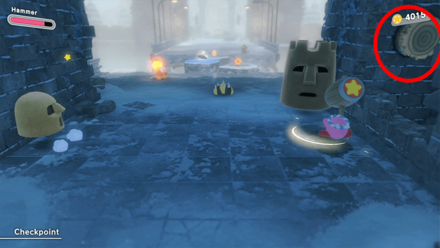
The second Waddle Dee can be found in the hidden room on the right side of the bridge after defeating Fleurina.
Use the Tornado copy ability to pass through the yellow fan and reach the red switch. Inhale the vending machine and head west to break the broken blue shutter and rescue the Waddle Dee inside.
3: In the Hidden Room After Defeating Wild Bonkers
| Outside Room | Inside Room |
|---|---|
 |
 |
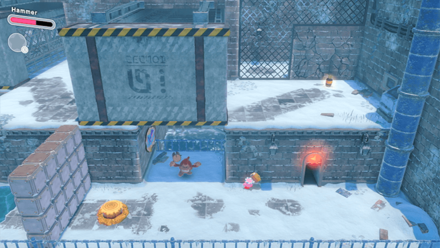
You can find the third Waddle Dee in the hidden room on the left side of the bridge after defeating Wild Bonkers. Defeat the giant brown Kabu on the right side and use the Hammer to activate the switch to open the entrance.
Use the Hammer copy ability to hit the nails on the floor as you move to the left side of the area. Climb up the ladder and inhale the car.
Use Turbo Dash to move to the right side of the area as fast as possible to rescue the Waddle Dee on time.
4: Under the Broken Bridge

The fourth Waddle Dee can be found underneath the bridge after defeating Wild Bonkers. You may need to use the recovery item nearby as you will take damage after rescuing this particular Waddle Dee.
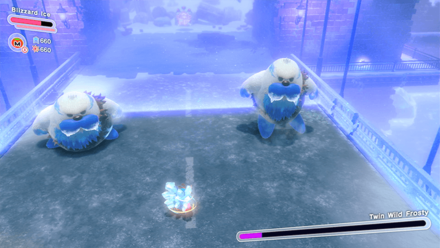
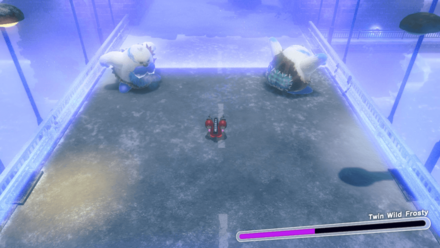
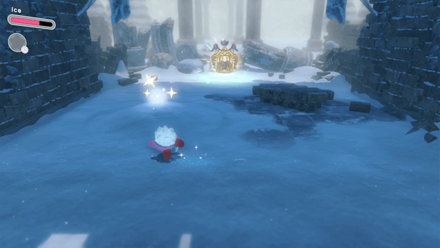
5: In the Hidden Room After Defeating Twin Wild Frosty
| Outside Room | Inside Room |
|---|---|
 |
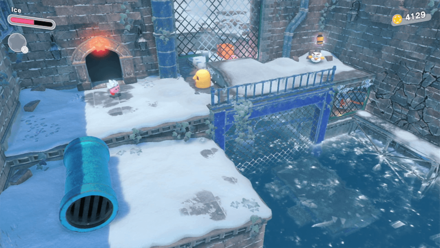 |
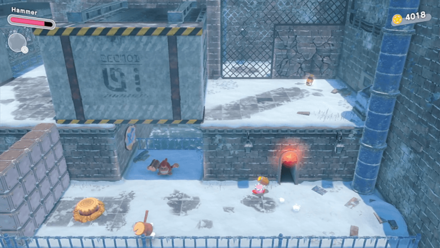
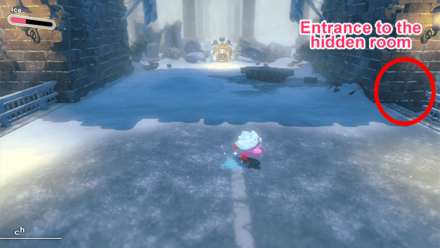
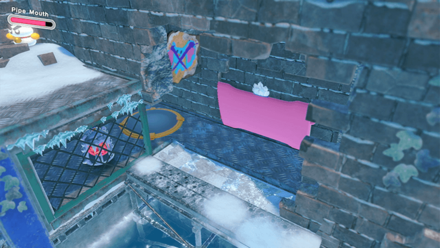
You can find the fifth Waddle Dee in the hidden room on the right side of the bridge after defeating Twin Wild Frosty. Use the Ice copy ability to burn down the flaming logs to enter the room.
Freeze the Kabu and push it towards the gap. Head to the bottom-left corner of the screen and inhale the pipe. Jump towards the cracked wall to destroy it and rescue the Waddle Dee nearby.
The Battle of Blizzard Bridge Wanted Posters Locations
1: First Hidden Room
The first Wanted Poster can be found in the bottom-left corner of the first hidden room.
2: Second Hidden Room
You can find the second Wanted Poster inside the second hidden room after defeating Fleurina.
Use the Tornado copy ability to activate the fan and open the red switch. Inhale the vending machine and use it to destroy the broken blue shutter on the left side.
Climb on the brown blocks that appear to reach the Wanted Poster at the top.
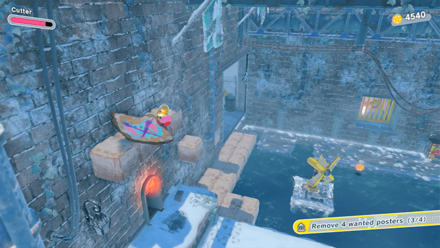
3: Third Hidden Room
After defeating Wild Bonkers, hit the giant Kabu and activate the nail on the wall on the right side of the bridge. This opens the entrance to the hidden room on the left.
Enter the hidden room and find the third Wanted Poster inside the small area with the monkey enemy.
4: Fourth Hidden Room
The fourth Wanted Poster can be found inside the hidden room on the right side of the bridge after defeating Twin Wild Frosty. Use the Ice copy ability to remove the flaming logs that are blocking the entrance.
Freeze the Kabu and push it towards the gap. Head to the bottom-left corner of the screen and inhale the pipe. Jump towards the cracked wall to destroy it and remove the Wanted Poster.
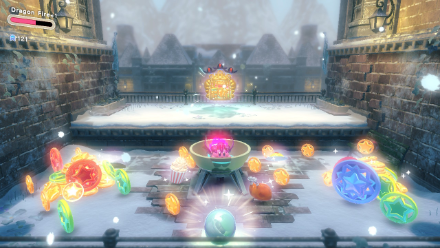
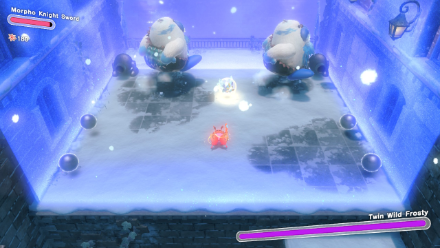
The Battle of Blizzard Bridge Beat Twin Wild Frosty Without Getting Hit
Use Volcano Fire Copy Ability
It is recommended to use the Volcano Fire copy ability to complete this mission as the two bosses take more damage when inflicted with fire. You can use the copy ability's jump attack to quickly maneuver around the arena and evade their attacks.
In addition, you can inflict a passive burn effect that allows you to deplete their health over time.
Volcano Fire Ability Attacks, Evolutions, and Available Stages
Use the Drill Copy Ability
You can also use the Drill copy ability to defeat the Twin Wild Frosty. Digging underground allows you to avoid all of their attacks.
Drill Ability Attacks, Evolutions, and Available Stages
The Battle of Blizzard Bridge Take a Detour and Find a Maxim Tomato
Maxim Tomato Location

You can find the Maxim Tomato hidden on the wall to the left side of the bridge. At the start of the stage, jump on the rubble to the left and follow the path until you reach the Maxim Tomato.
The Battle of Blizzard Bridge Blueprint Location
Defeat Twin Wild Frosty
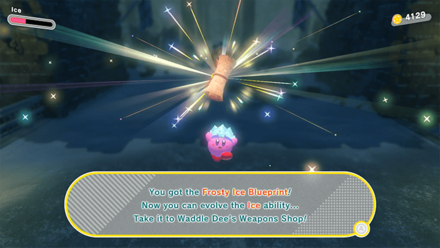
You receive the Frosty Ice Blueprint as a reward for defeating the Twin Wild Frosty. The blueprint allows you to upgrade the Ice copy ability.
Blueprint Locations: How to Obtain All Blueprints
The Battle of Blizzard Bridge Figure Locations
1: On the Collapsed Bridge after Defeating Fleurina

You can find the first figure on the collapsed part of the bridge after defeating Fleurina.
2: Sparkling Spot at the End of the Stage
As you reach the end of the stage, touch the sparkling spot on the left side to reveal and collect the second figure.
3: Inside the Chest through the Secret Alternate Route

As you go through the secret alternate route of the stage, you will encounter a chest near the open window you need to enter. Inside the chest is a figure capsule.
4: After Completing the Secret Alternate Route
At the end of the secret alternate route mentioned in the previous figure, you will encounter a Water Tank. Open it up with Dome Mouth to unlock the final figure capsule.
The Battle of Blizzard Bridge Secret Alternate Route Location
There is a secret path in this stage that will take you through an entirely different alternate route from the regular stage. In this route, you will travel on top of the bridge structure and battle the mid-bosses on the rooftops.
Though the bosses you battle are the same, these fights are much tougher than those below, so it is not recommended to try this route on your first run. Taking this route is not required for 100% completion.
How to Take the Secret Alternate Route
| 1 | Jump on the rubble at the start of the stage. The first section of the route is in the same location as the hidden Maxim Tomato. |
|---|---|
| 2 |  After obtaining the Maxim Tomato, float upwards while using the stone bricks as steps. The camera may lag behind at first, but it will eventually follow Kirby after a bit of delay. |
| 3 |  Continue heading up until you see a Green Star Coin. To the right of the green coin is a ladder. |
| 4 | 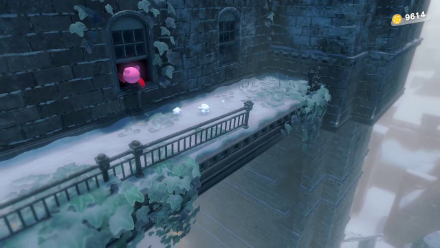 Climb up ladder and continue through the path until you reach a chest. Enter the open window to the left of the chest. |
| 5 | 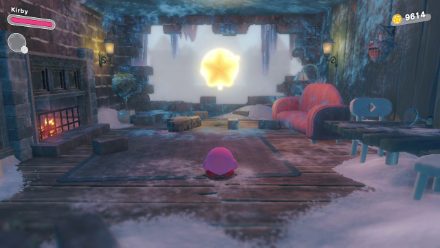 This takes you to a room with a warp star. Use the warp star to head to the first mid-boss battle. |
| 6 | 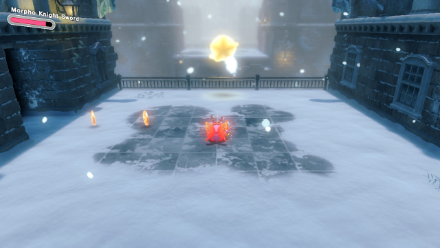 You battle each mid-boss in the same order as you do below. Defeating each one spawns a new warp star which takes you to the next boss. It also unlocks a path that will take you to the same secret rooms as below. |
| 7 | After defeating all the bosses, you will also end up in an alternate ending to the stage, where you can collect additional coins, rewards, and a figure capsule. |
Kirby and the Forgotten Land Related Guides
Winter Horns Walkthrough and Stage List
| List of Stages | |
|---|---|
 Northeast Frost Street Northeast Frost Street
|
 Metro on Ice Metro on Ice
|
 Windy, Freezing Seas Windy, Freezing Seas
|
 The Battle of Blizzard Bridge The Battle of Blizzard Bridge
|
 An Unexpected Beast King An Unexpected Beast King
|
|
Comment
Author
The Battle of Blizzard Bridge Waddle Dee Locations and Missions Walkthrough
Please participate in our site
improvement survey
03/2026
improvement survey
03/2026
Would you assist in
improving Game8's site?
improving Game8's site?

×
We are listening to our users' valuable opinions and discussing how to act on them.
The information collected through this survey will be used for the purpose of improving our services. In addition, the information will only be disclosed a part of a statistic in a format that will not allow identification of personal information.
Begin Survey
Not Now
×
Please rate each item regarding Game8.co's Advertisements.
Amount of Ads
Very Dissatisfied
Somewhat Dissatisfied
Fine
Somewhat Satisfied
Highly Satisfied
Placement of Ads
Timing of Ad Display
Ad Loading Speed
Safeness of Ads
Content of Ads
×
Please rate each item regarding Game8.co's Quality of Articles.
Amount of information
Very Dissatisfied
Somewhat Dissatisfied
Fine
Somewhat Satisfied
Highly Satisfied
Frequency of updates
Speed of new information
Accuracy of articles
Understandibility of articles
Readability of sentences
×
Please rate each item regarding Game8.co's Usability of the Site.
Ease of finding information
Very Dissatisfied
Somewhat Dissatisfied
Fine
Somewhat Satisfied
Highly Satisfied
Loading Speed
Use of Color
Font Size
Visibility of Images
Easy to Understand Layout
×
Please rate each item regarding Game8.co's Message Boards, Comments.
Ease of Writing
Very Dissatisfied
Somewhat Dissatisfied
Fine
Somewhat Satisfied
Highly Satisfied
Readability
Ease in Finding Information
Comment Quality
Comment Quantity
Admin Response
×
Please rate each item regarding Game8.co's Site's new design.
Please rate our site's new design
Very Dissatisfied
Somewhat Dissatisfied
Fine
Somewhat Satisfied
Highly Satisfied
Do you think that the website's design change makes the site easier to use?
Has the new design made it easier for you to find information on the site?
Has the new design improved the overall visual appeal of the site?
How would you rate your overall satisfaction with the new design of the site?
×
How likely are you to recommend Game8 to someone you know?
Very Unlikely
0
1
2
3
4
5
6
7
8
9
10
Very Likely
If you have other opinions regarding potential improvement to the website, please share them with us. We would appreciate your honest opinion.
Note: This is a free response section, so you can proceed without entering anything.
Note: Please be sure not to enter any kind of personal information into your response.
Note: Please be sure not to enter any kind of personal information into your response.
×
Thank You
×
Thank you for participating in our survey! Your answers will help us to improve the quality of our website and services.
We hope you continue to make use of Game8.
We hope you continue to make use of Game8.
Close
Rankings
- We could not find the message board you were looking for.
Gaming News


![Slay the Spire 2 Review [Early Access] | Still the Deckbuilder to Beat](https://img.game8.co/4433115/44e19e1fb0b4755466b9e516ec7ffb1e.png/thumb)

![Resident Evil Village Review [Switch 2] | Almost Flawless Port](https://img.game8.co/4432790/e1859f64830960ce4248d898f8cd38d9.jpeg/thumb)
Popular Games

Genshin Impact Walkthrough & Guides Wiki
Honkai: Star Rail Walkthrough & Guides Wiki
Umamusume: Pretty Derby Walkthrough & Guides Wiki
Pokemon Pokopia Walkthrough & Guides Wiki
Resident Evil Requiem (RE9) Walkthrough & Guides Wiki
Monster Hunter Wilds Walkthrough & Guides Wiki
Wuthering Waves Walkthrough & Guides Wiki
Arknights: Endfield Walkthrough & Guides Wiki
Pokemon FireRed and LeafGreen (FRLG) Walkthrough & Guides Wiki
Pokemon TCG Pocket (PTCGP) Strategies & Guides Wiki


Recommended Games
Fire Emblem Heroes (FEH) Walkthrough & Guides Wiki
Diablo 4: Vessel of Hatred Walkthrough & Guides Wiki
Yu-Gi-Oh! Master Duel Walkthrough & Guides Wiki
Super Smash Bros. Ultimate Walkthrough & Guides Wiki
Pokemon Brilliant Diamond and Shining Pearl (BDSP) Walkthrough & Guides Wiki
Elden Ring Shadow of the Erdtree Walkthrough & Guides Wiki
Monster Hunter World Walkthrough & Guides Wiki
The Legend of Zelda: Tears of the Kingdom Walkthrough & Guides Wiki
Persona 3 Reload Walkthrough & Guides Wiki
Cyberpunk 2077: Ultimate Edition Walkthrough & Guides Wiki


All rights reserved
© HAL Laboratory, Inc. / Nintendo
The copyrights of videos of games used in our content and other intellectual property rights belong to the provider of the game.
The contents we provide on this site were created personally by members of the Game8 editorial department.
We refuse the right to reuse or repost content taken without our permission such as data or images to other sites.