Searching for the Keystone of Ecstasy Walkthrough
★ Trending: Puzzles | Codes | Jeljin | NG+
☆ Starting out? Check our Beginner's Guide
┗ Combat | Builds | Weapons | Tier List
★ Walkthrough | Good Deeds | Mysteries
┗ Timeloops | Vaults | NPCs | Enemies
☆ Missables | Game Length | Trophies
This is a walkthrough for Searching for the Keystone of Ecstasy, an investigation in Hell is Us. Learn more about how to complete Searching for the Keystone of Ecstasy, and its points of interest here!
| ◄ Previous Mission | Next Mission ▶ |
|---|---|
| Searching for the Keystone of Rage | Into the Unknown |
List of Contents
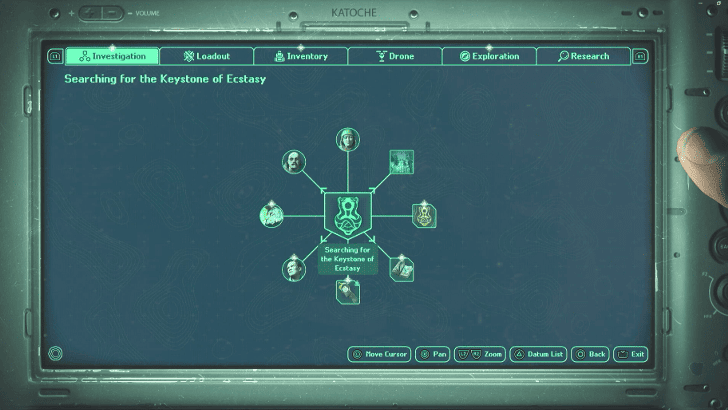
Searching for the Keystone of Ecstasy Walkthrough
| Searching for the Keystone of Ecstasy Objectives |
|---|
|
1. Get Information on the Symbol of the Two-Headed Snake 2. Get the Gospel of Teaar 3. Investigate the Serpent's Ascension in Vyssa Hills 4. Investigate the Temple of the Fallen in the Plains of Mist |
1. Get Information on the Symbol of the Two-Headed Snake
| Step | Objective |
|---|---|
| 1.1 | 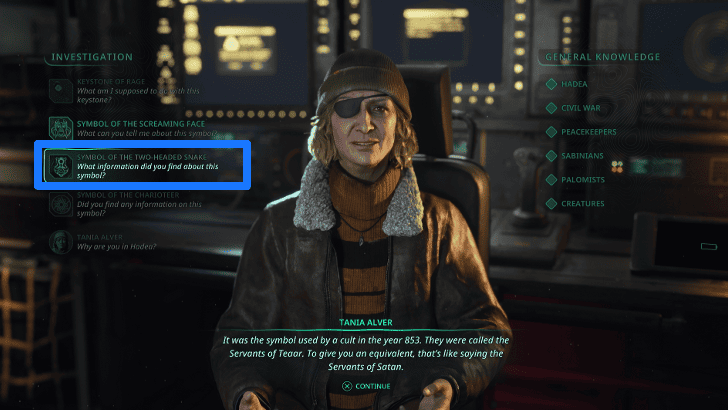 Speak with Tania in the APC and ask about the Symbol of the Two-Headed Snake. Get information on the Gospel of Teaar from Pathem Abbey in Acasa Marshes. |
| 1.2 | 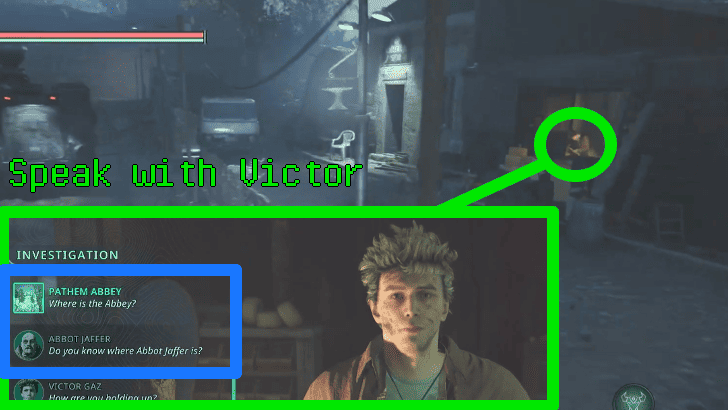 Travel to Acasa Marshes, a cut scene will play on the way. If you've spoken to Abbot Jaffer before, you can go to the Blacksmith Shop in Jova and speak with Victor. Ask him about Abbot Jaffer's location and where the Pathem Abbey is. Otherwise, you can use the map of the Acasa Marshes you got from Family Reunion to navigate to the Pathem Abbey. |
| 1.3 | 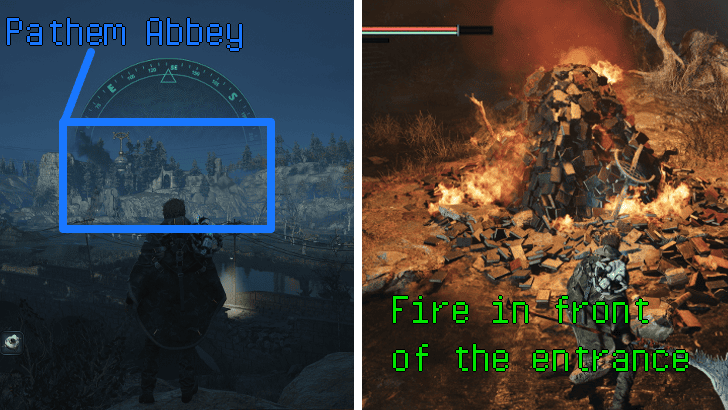 From the Village of Jova, head southeast to reach the Abbey. You won't be able to enter the Abbey from the fron,t so go to the left side of the wall when you're facing it, and walk along the path until you find the side entrance. There will be a bonfire of books and artillery boxes beside it. |
| 1.4 |  Enter the gate into a tunnel and keep walking until you reach a large pit. Defeat the Timeloop Guardian below and climb up the other ladder. |
| 1.4 | 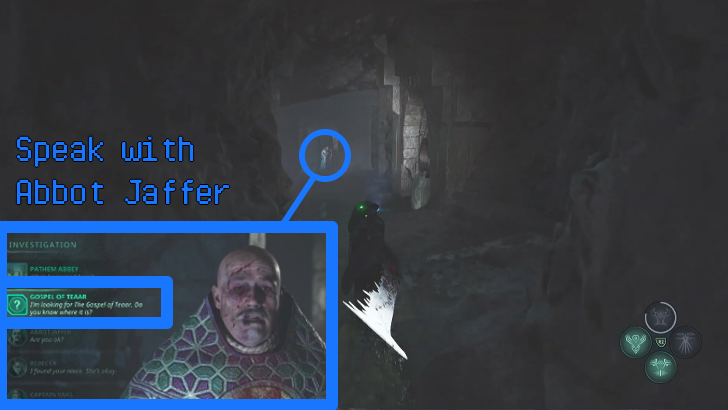 Follow the path into a cave-like area until you reach Abbot Jaffer, and ask him about the Gospel of Teaar to unlock travel to Lethe - National Library. Pull the lever to unlock the door. Return to the APC and travel to Lethe - National Library. You can rotate the torches on both sides of the gate to the right. If you manage to find all of them, you can complete the Mystery Enlightenment. |
| ▲Return To Objectives List▲ | |
2. Get the Gospel of Teaar
| Step | Objective |
|---|---|
| 2.1 | 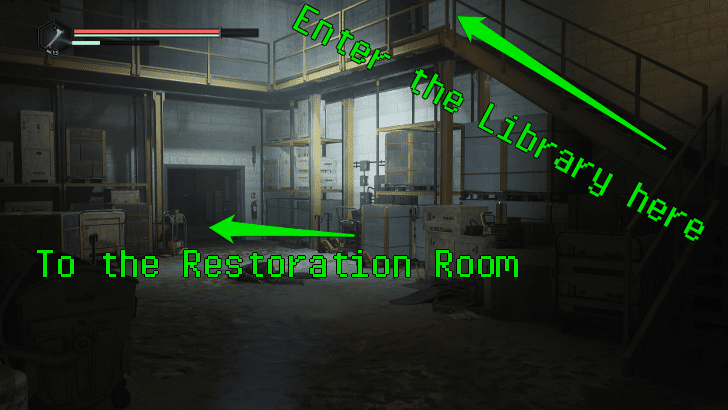 Enter the building and go up the stairs. Go through the door that says Second Floor and follow the path to the left. |
| 2.2 | 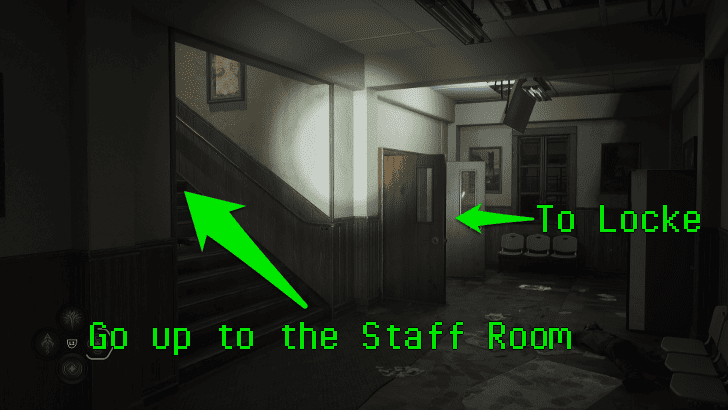 Take the stairs down. Then find the stairs in front of a vending machine and go back up. There will be a save point there and the entrance to the Staff Room. |
| 2.3 | 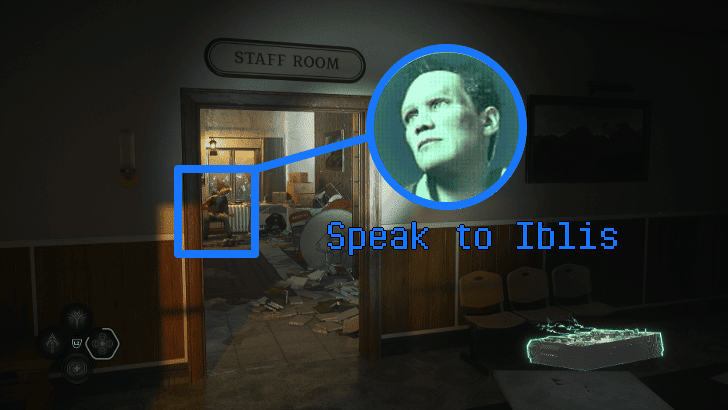 Enter the Staff Room and speak with the Stoned Man, Iblis, exhaust his dialogue options to get the clue on how to access the Restoration Room and the Keys - Lethe National Library. |
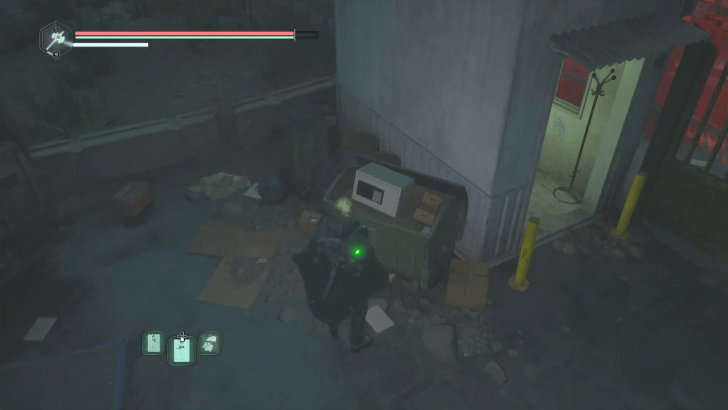
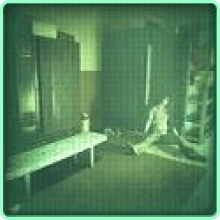
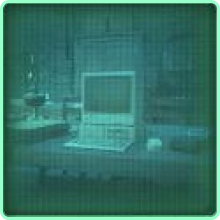
| 2.4 | 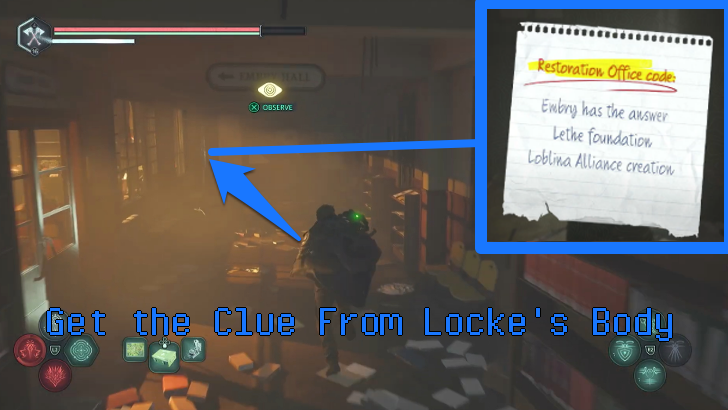 Go back down the stairs and go into the door beside it. At the end of the hall will be a set of locked glass doors. You can see Locke's body through the glass with a Feral Walker standing over it. Open the door and defeat the walker. Grab the clue from Locke's body. You can find the code by dropping down from the hole in the room where the helicopter is and collecting the scattered books. It is 537 from Historical Lethe - City of Wonder and 734 from The Loblina Alliance. |
| 2.5 | 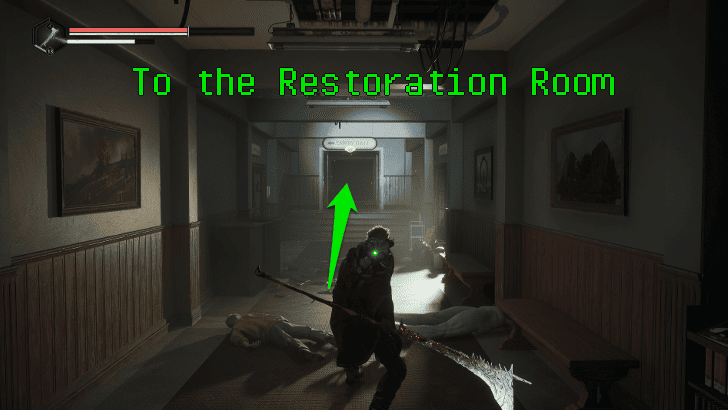 After getting the books, you can pass through the locked door where Locke's body is and cross to the next room. Enter the doorway with the Book Restoration sign and go downstairs to find the Book Restoration Office |
| 2.6 | 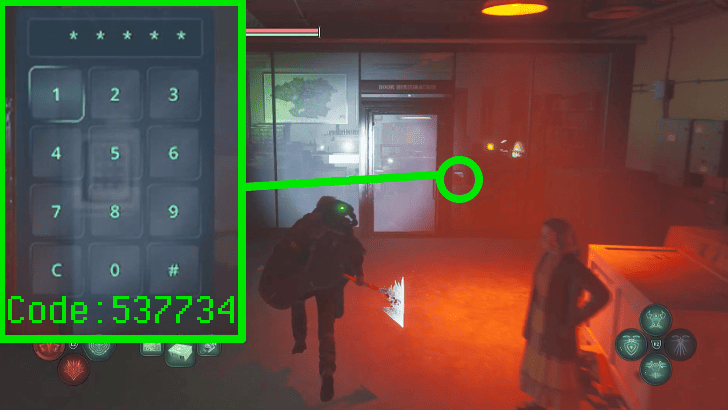 Unlock the door using the code 537 734 and collect the Gospel of Teaar and the Twin-Headed Serpent. Return to the APC and speak with Tania about the Gospel of Teaar. Travel to Vyssa Hills after that. You can also grab the Note - Favors Owed in the Restoration Room. This is related to the Good Deed A Way Out. |
| ▲Return To Objectives List▲ | |
3. Investigate the Serpent's Ascension in Vyssa Hills
| Step | Objective |
|---|---|
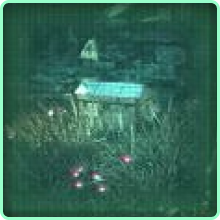
| 3.1 | 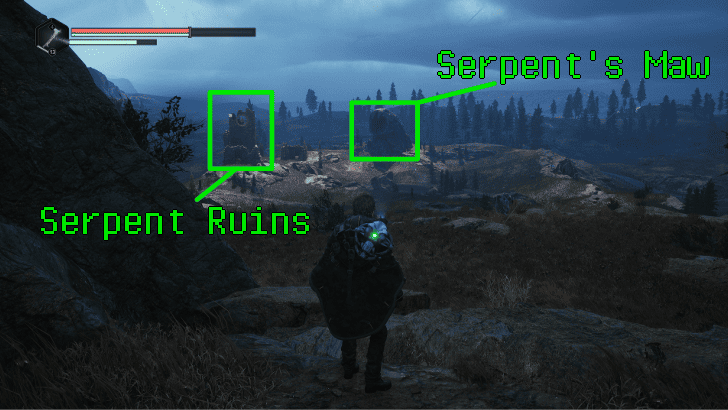 When you get to Vyssa Hills, go to the area where Serpent's Maw is east of the map, close to where you first met Tania. On the tablet, it will tell you to follow the serpent across the Vyssa Hills. |
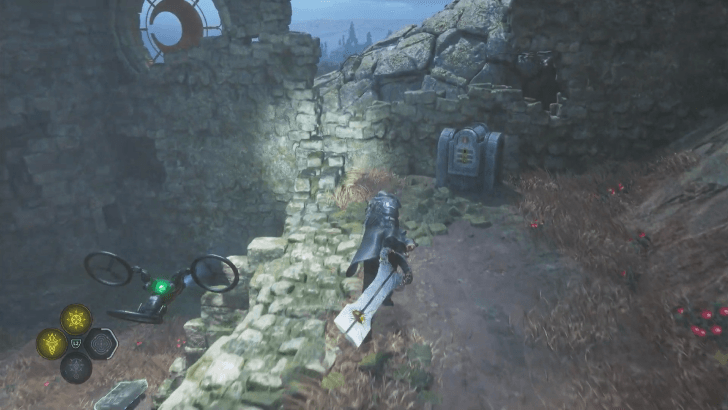
| 3.2 | 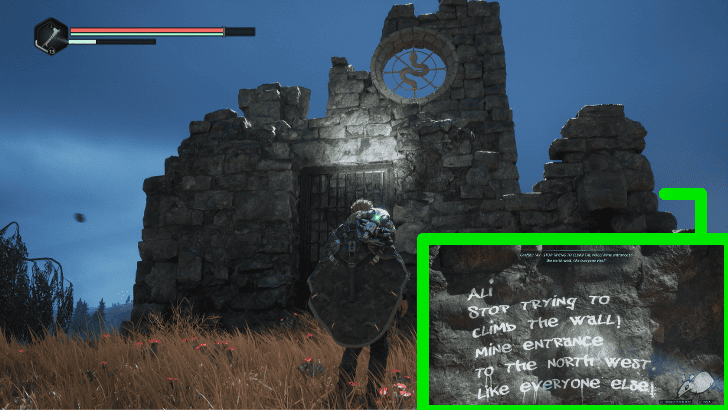 Beside the Maw, there is a ruin with a serpent symbol, you will need inside the item here. Since the gate is locked, you will need to make your way into the mines northwest to access it from inside.There will be a clue spray-painted on the side of the wall. Take note of the mice painting since it will guide you to where you need to go. |
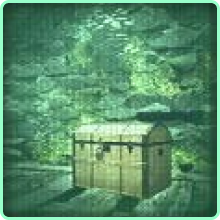
| 3.3 | 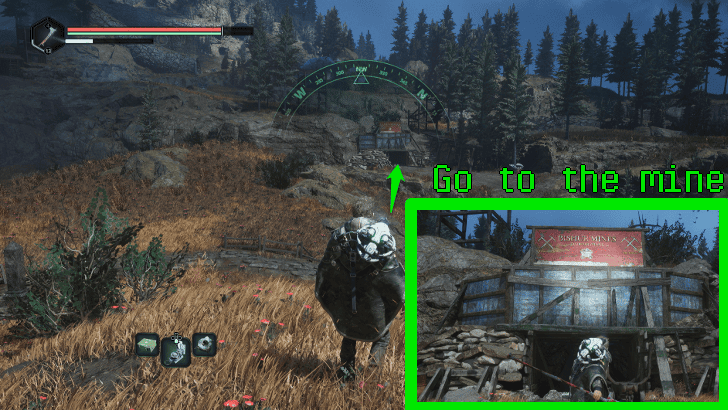 Head into the mines, and follow the mice paintings along the way. You will reach a passage with a save point and a ladder. |
| 3.4 | 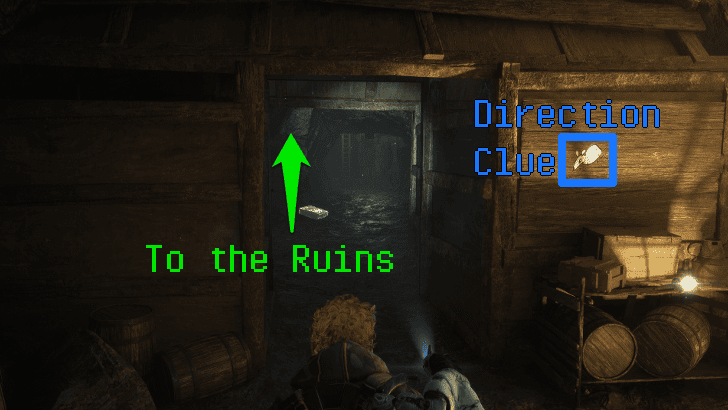 Go up the ladder and open the chest with the Twin-Headed Serpent to get the Token of the Serpent. |
| 3.5 | 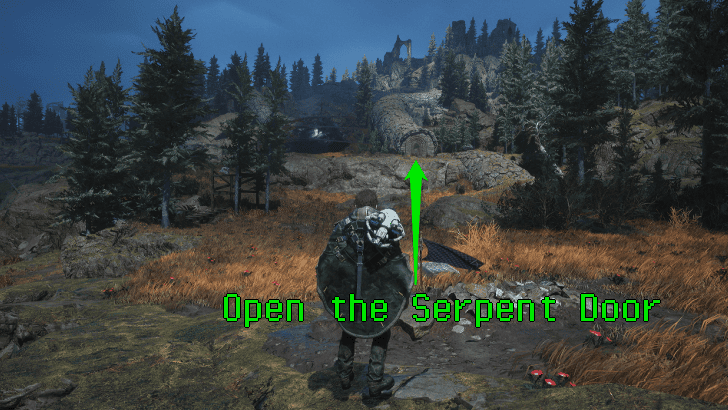 From the Mine's entrance go up the hill and follow the serpents body. The door will be beside the Timeloop. |
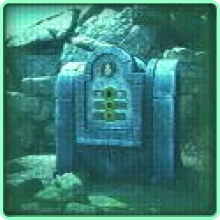
| 3.6 | 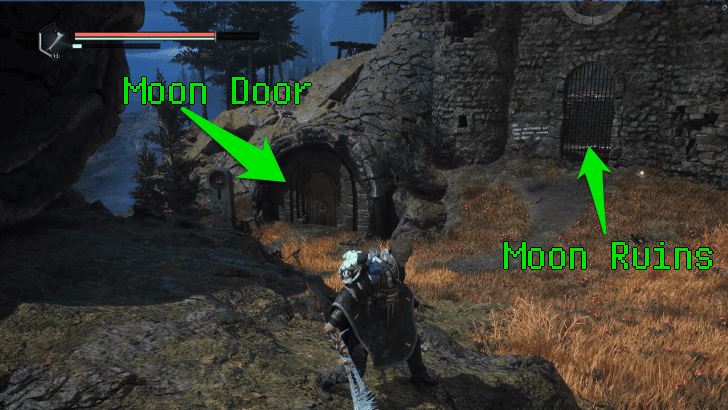 Open the door and pass through the tunnel. South of the tunnel will be another door and ruins with a moon symbol. You will need the Token of the Moon to pass through. |
| 3.7 | 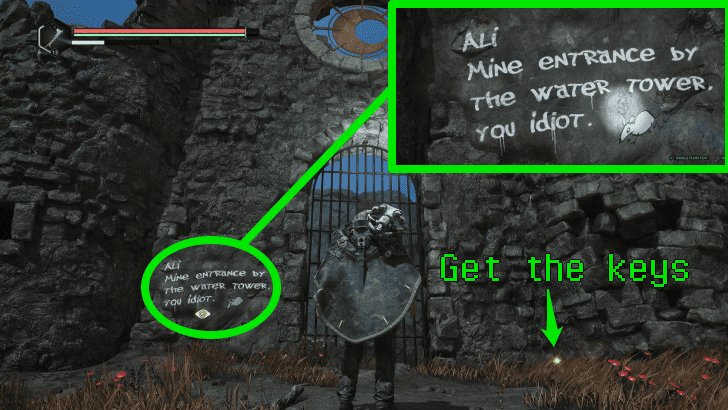 Approach the gate of the Moon Ruins, the door will be locked. Scan the clue on the side of the gate and grab the Key - Mine from the corpse beside it. |
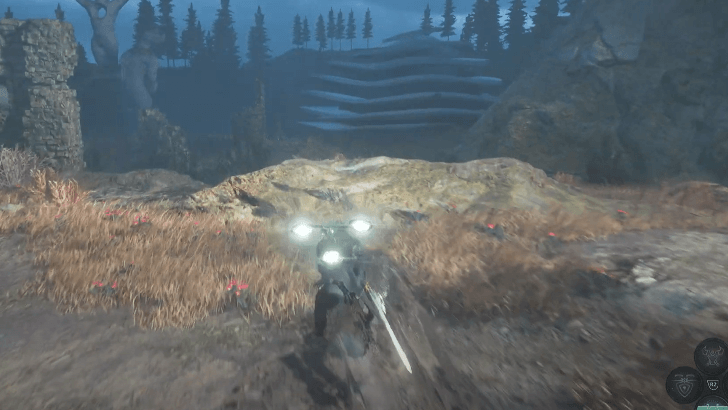
| 3.8 | 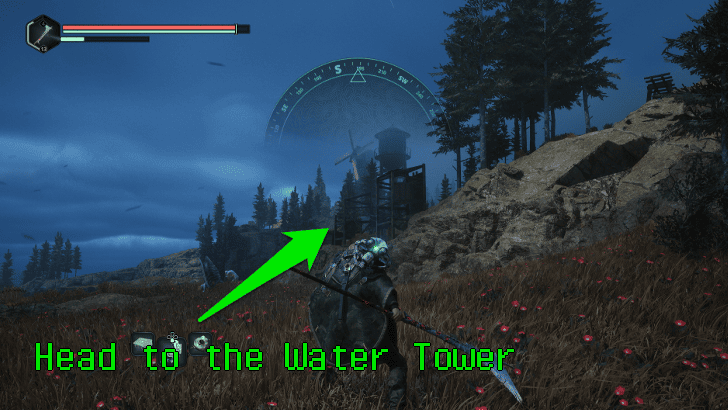 Go to the Water Tower. Jump down the hill towards the Timeloop, and it should be south from there. Once you enter the mountain pass, climb up the scaffolding to reach the mine entrance beside the water tower. |
| 3.9 | 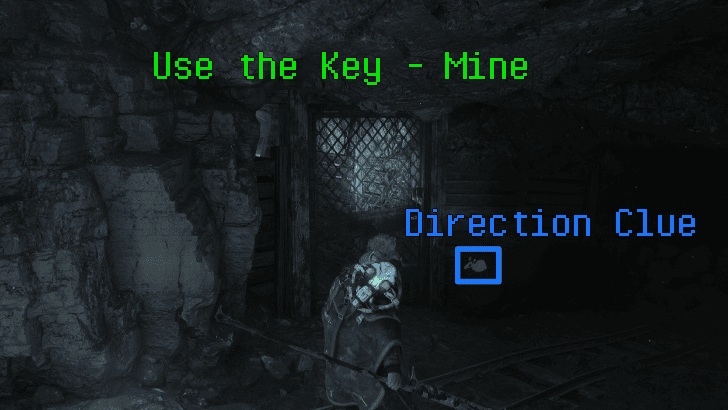 Use the Keys - Mine on the door beside the mouse painting. Like before, follow the mice paintings until you reach the ladder to climb up. |
| 3.10 | 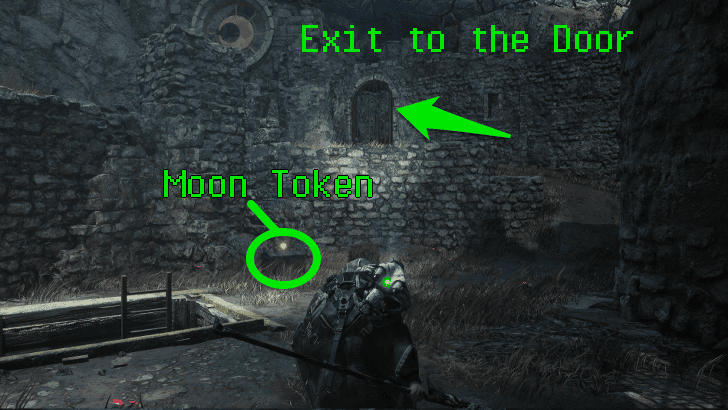 Inside the Moon Ruins, get the item inside the chest and exit back out to the area where the locked door is. |
| 3.11 | 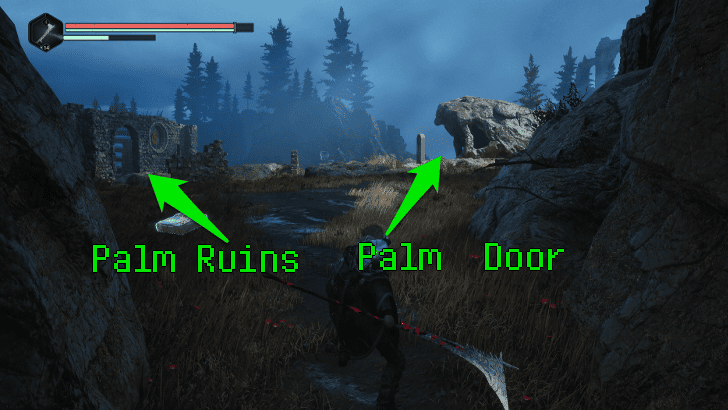 Open the door using the Moon Token and go through the tunnel and drop down into the path to continue heading northwest. In the clearing, there will be Ruins with a Palm Symbol and a rock formation that looks like a serpent's head. |
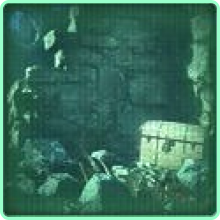
| 3.12 | 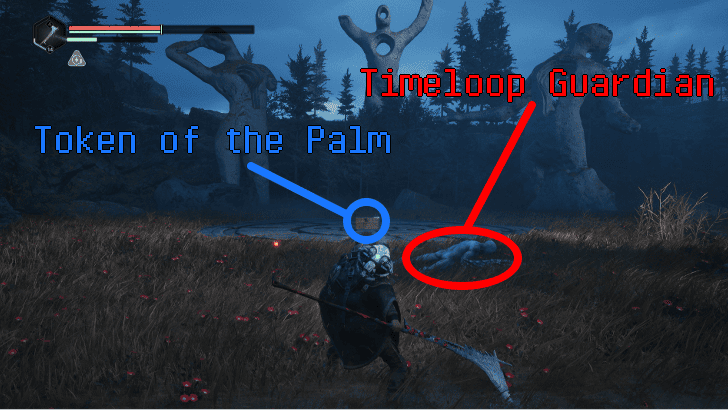 Go to the ruins and defeat the Timeloop Guardian. Get the Token of the Palm from the chest and head towards the serpent head. |
| 3.13 | 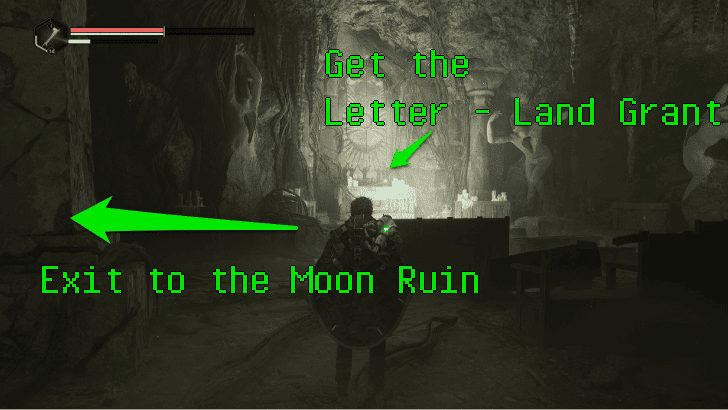 Use the Token of the Palm to open the door and enter the church. From the pedestal, take the Letter - Land Grant to unlock the location Plains of Mist. You can open the gate on the left side of the room to exit back out near the Moon Ruins and fast travel to the APC from the save point there. |
| ▲Return To Objectives List▲ | |
4. Investigate the Temple of the Fallen in the Plains of Mist
| Step | Objective |
|---|---|
| 4.1 | 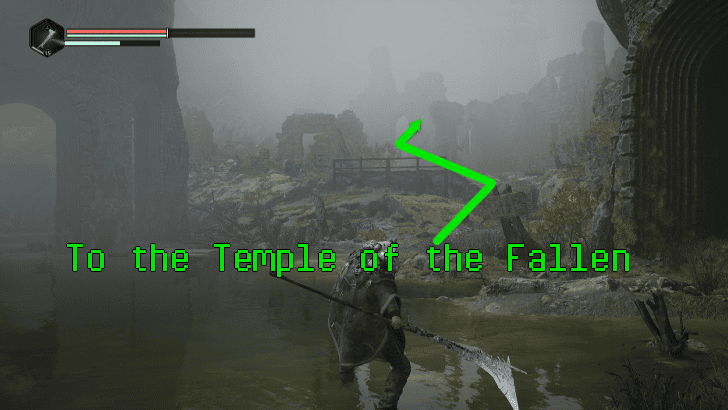 Travel to the Plains of Mist. Climb up the hill near the entrance and make your way through the ruins. While exploring the ruins, you will see symbols on the walls. Take note of the symbols and the shape of its plate. You will need this later. |
| 4.2 | 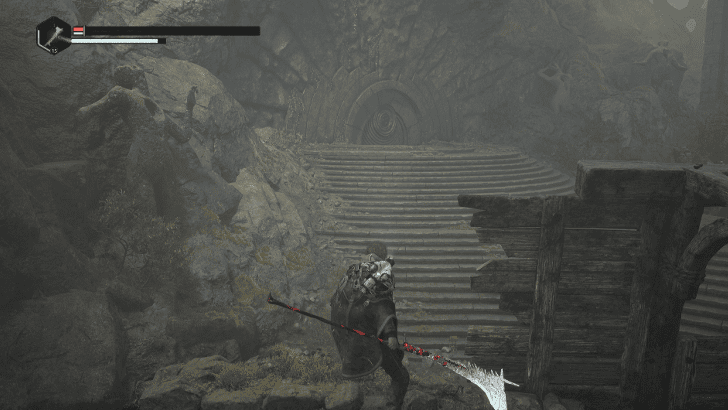 Walk north until you reach the grand staircase that leads up to a giant door; this is the Temple of the Fallen. Use the Twin-Headed Serpent to reveal a dial puzzle. |
| 4.3 | 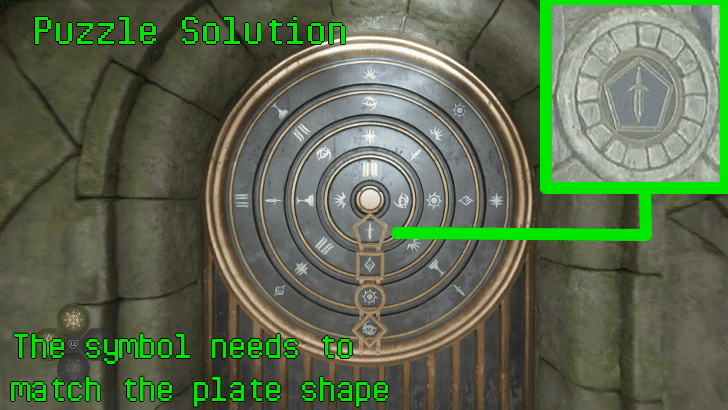 If you've managed to collect the symbols around the ruins, this is where you'll use them. Input this from top to bottom, Sword, Diamond, Sun, and Eye. ▶︎Plains of the Mist Entrance Puzzle Guide |
| 4.5 | 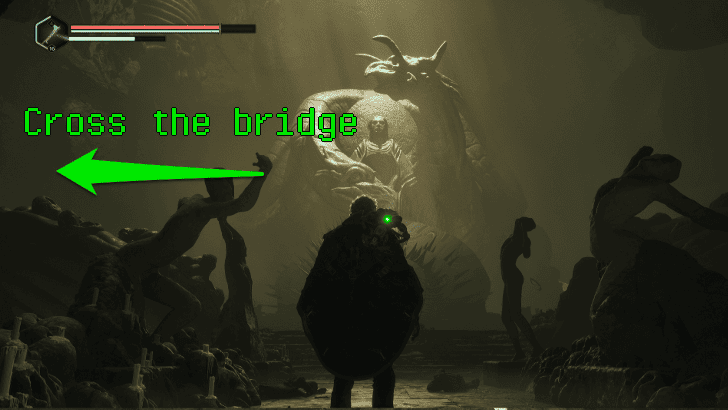 Enter the temple, climb down the stairs until you reach the Sanctum where the Timeloop is. Go to the bridge left of the timeloop |
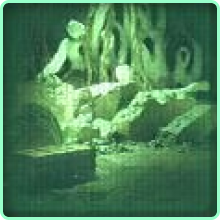
| 4.6 | 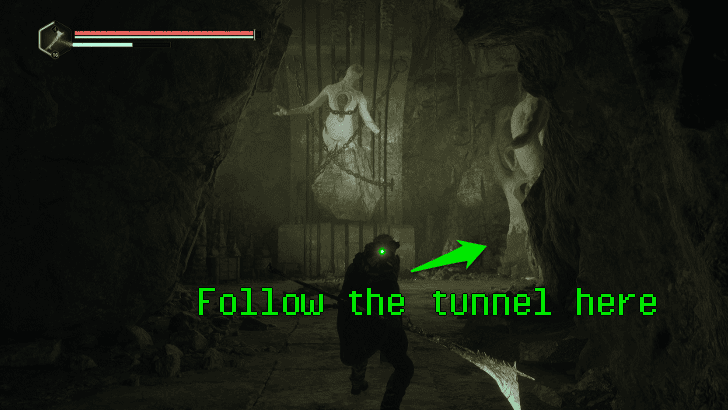 You will reach a room with a statue of a chained hollow walker. Quickly run to the right to avoid getting hit by the Artillery Walker on the ledge. Follow the tunnel until you reach the door with a lever. Pull the lever and enter the next area. |
| 4.7 | 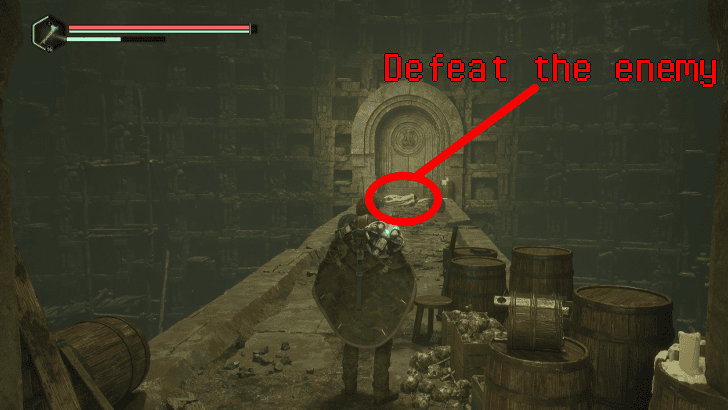 Defeat the enemy across the bridge, then pull the lever to open the next door. Travel down the path until you reach the next save point |
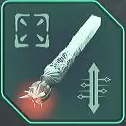
| 4.8 |  In the area where the save point is, take the path to the left. Taking the path to the right will take you below the bridge, where you can grab the Lymbic Rod. |
| 4.9 |  On the intersection, continue straight ahead if you want to defeat the Timeloop Guardian. If not, take the passage to the right and cross the bridge |
| 4.10 |  This path will exit into a large hall with a large staircase. Be careful since this hall will be filled with enemies. Make your way up the staircase and pull the lever to access the next area. |
| 4.11 | 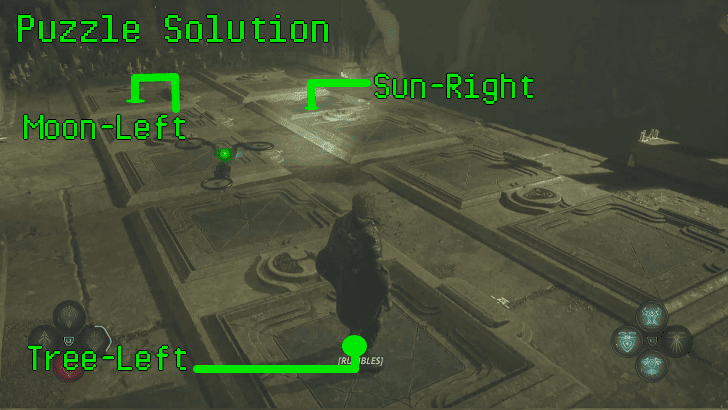 Scan the tablet to understand the mechanics for the Trial of Lies and Truths. Approach the door and step on the correct answer for the tiles on the tablet. Use the pattern right of the Sun, left of the Moon, and left of the Tree. Making a mistake will lead to your death. ▶︎Pressure Plate Puzzle 1 Guide |
| 4.12 | 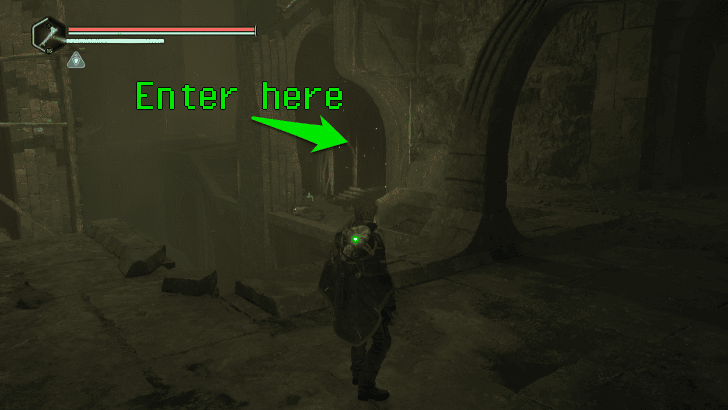 Enter the next area, and cross the bridge. Follow the path forward and take note of all the monoliths you pass by. This cavern will have the first 2 monoliths. The gate will be locked when you reach the top, so go back down and cross back to the other side of the bridge. Enter the passageway right of the bridge and climb up the scaffolding inside. Pull the lever to open the gate; this will also open the gate on the other side. |
| 4.13 | 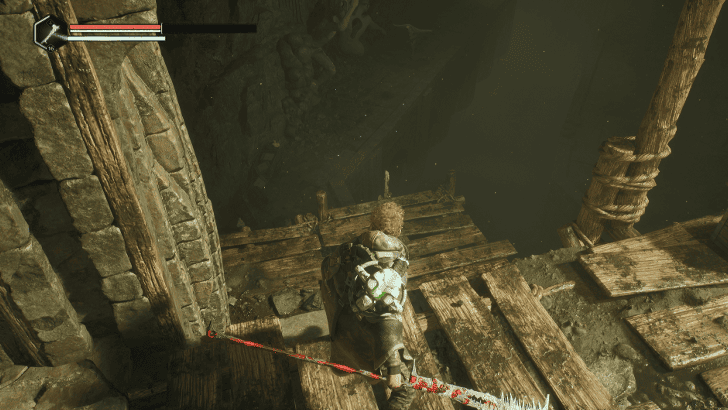 Go back to the area where the 2nd monolith is and go out the now open gate. Carefully make your way down the scaffolding and enter the passageway at the end of the corridor. |
| 4.14 | 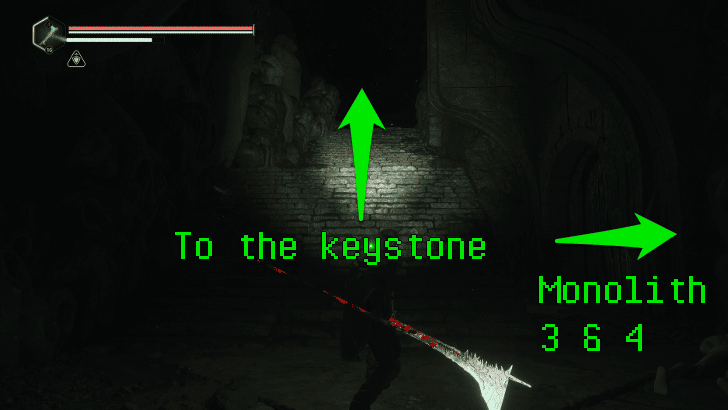 Enter the doorway beside the stairs and cross the bridge. Explore the tunnels to find the 3rd and 4th monoliths. When you're done, go back to where the staircase is. |
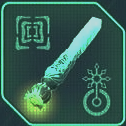
| 4.15 | 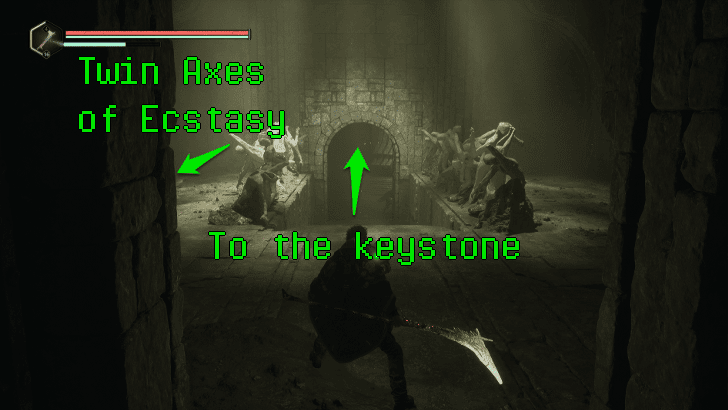 Climb up the stairs and defeat the Timeloop Guardian on the bridge to cross to the other side. When you reach the stairs surrounded by statues, there will be a chest with the Twin Axes of Ecstasy . |
| 4.16 | Enter the sealed door that will lead into a room with a tile puzzle. Step on the tiles according to the order of the monoliths you found. It is Hands with Hourglass, Dagger Eye, Backstab, and Twin-Headed Snake. ▶︎Pressure Plate Puzzle 2 Guide |
| 4.17 | 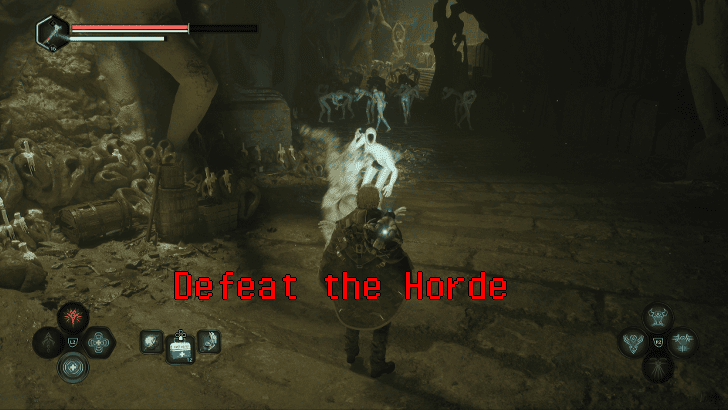 Enter the passage and defeat the horde of Hallow Walkers inside to reach the next door. |
| 4.18 | 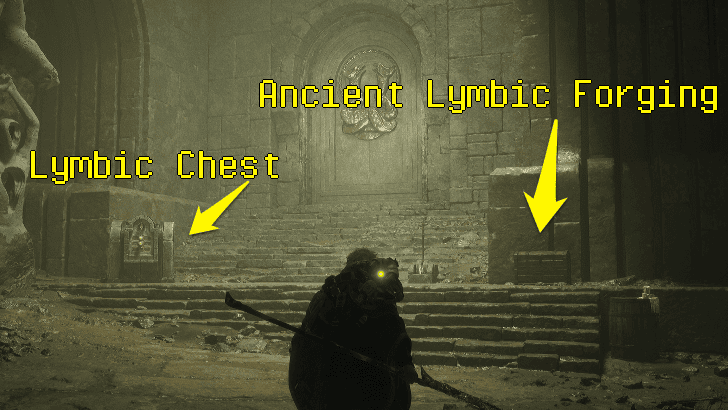 This door will lead into the last area of the temple. If you managed to find the Lymbic Rods needed, you can open the Lymbic Chest - Temple of the Fallen beside. Make sure to grab the Ancient Lymbic Forging book from the chest as well. |
| 4.19 | 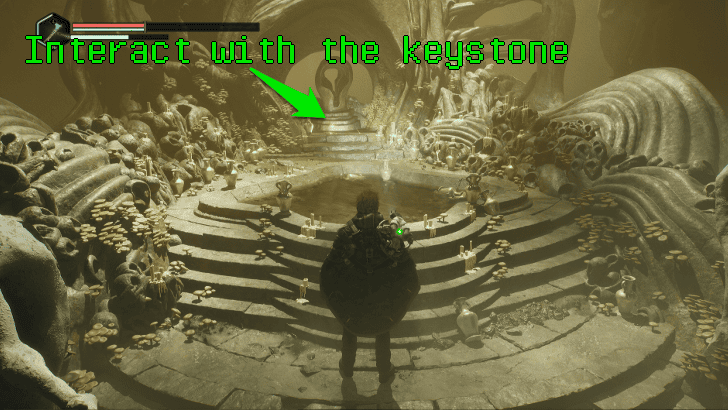 When you're ready, pull the lever and enter the Boss Room. Approach the altar and interact with the keystone to activate the boss fight. |
| 4.20 | In this fight, you'll mostly be fighting multiple Hazes of Ecstasy. Defeating one increases the yellow gauge at the top of your screen. Once the yellow gauge is full, the boss will spawn. At times the haze will be attached to the cones, break the cones they are tethered to, to damage the haze. Later in the game, these cones will turn into turrets. Take these down quickly to avoid excess damage. ▶︎How to Beat the Haze of Ecstasy Boss |
| 4.21 | 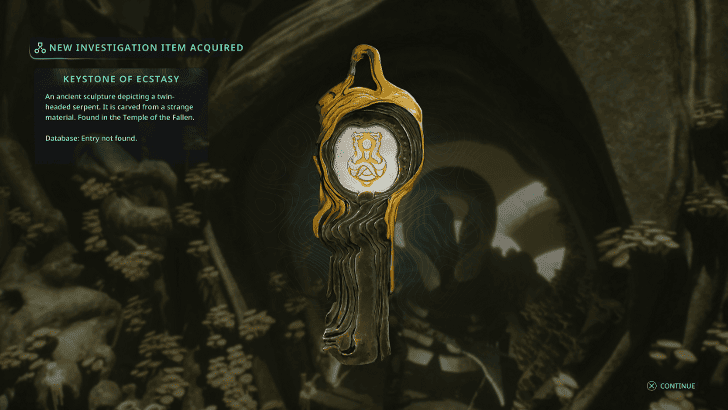 After defeating the boss, you will receive the Keystone of Ecstasy. Return to the APC and go to your next destination. |
| ▲Return To Objectives List▲ | |
Searching for the Keystone of Ecstasy Full Exploration List
| Jump to a Section! | |
|---|---|
| List of All Items | Timeloops |
| Amine Prisms | Mysteries and Good Deeds |
List of All Items
Lethe - National Library
| ✔️ | Item | How to Get |
|---|---|---|
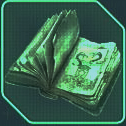 Gospel of Teaar Gospel of Teaar
|
Found in the book restorer's office at the Lethe National Library. |
|
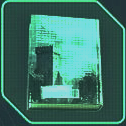
 Historical Lethe - City of Wonder Historical Lethe - City of Wonder
|
Found in the National Library. |
|
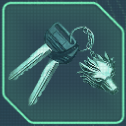 Keys - Car (Lethe) Keys - Car (Lethe)
|
Found in a locket at the National Library, Lethe. Used to Unlock a Parked Car. |
|
 Lady Marguerith: Scandal and Steel Lady Marguerith: Scandal and Steel
|
Found in the National Library. Used to solve the passcode in the Book Restoration Office |
|
 Note - Blackmailed Note - Blackmailed
|
Found in a locker at the National Library, Lethe. |
|
 Note - Cryptic Clue (National Library) Note - Cryptic Clue (National Library)
|
Found in the shipping docks at the National Library, Lethe. Part of the access code to be used in Computer Room D at Lethe National Library. |
|
 OMSIF Deployment Order - National Library OMSIF Deployment Order - National Library
|
Found in the National Library, Lethe. Used as a hint to |
|
 Pottery Fragment Pottery Fragment
|
Found inside the trunk of a blue car at Lethe National Library. |
|
 The Loblina Alliance The Loblina Alliance
|
Found in the National Library. |
|
| Wooden Mask |
Found in a safe at Lethe - National Library. |
Vyssa Hills
| ✔️ | Item | How to Get |
|---|---|---|
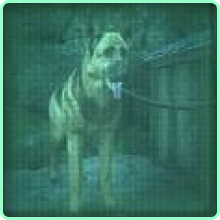
 Dog Collar Dog Collar
|
Obtained when freeing a dog in Jova, Acasa Marshes. Trade with Alban Vosh in Vyssa Hills. |
|
 Flower Medallion Flower Medallion
|
Found at Vyssa Hills. |
|
 Key - Mine Key - Mine
|
Found on a corpse in Vyssa Hills. |
|
 Letter - Land Grant Letter - Land Grant
|
Found in the church ruins high in the Vyssa Hills Used to unlock Plains of Mist |
|
 Lymbic Rod - Ecstasy, Z Lymbic Rod - Ecstasy, Z
|
Found in Vyssa Hills. Used to open Lymbic Chests and Lymbic Doors. |
|
 Note - Cryptic Maxim Note - Cryptic Maxim
|
Found on a corpse in the mines of Vyssa Hills. Used as hint to open a computer in Vyssa Hills. |
Plains of the Mist
| ✔️ | Item | How to Get |
|---|---|---|
 Lymbic Rod - Ecstasy, V Lymbic Rod - Ecstasy, V
|
Found inside the Temple of the Fallen. Used to open Lymbic Chests and Lymbic Doors. |
|
 Lymbic Rod - Ecstasy, W Lymbic Rod - Ecstasy, W
|
Found inside the Temple of the Fallen. Used to open Lymbic Chests and Lymbic Doors. |
Timeloops
Vyssa Hills
| ✔️ | Timeloop | How to Solve |
|---|---|---|
 Vyssa Hills |
This Timeloop is near the second Serpent's Head following the Serpent's body across Vyssa Hills. It is beside the Palm Ruin with the gigantic Primeval Statues. |
Temple of the Fallen
| ✔️ | Timeloop | How to Solve |
|---|---|---|
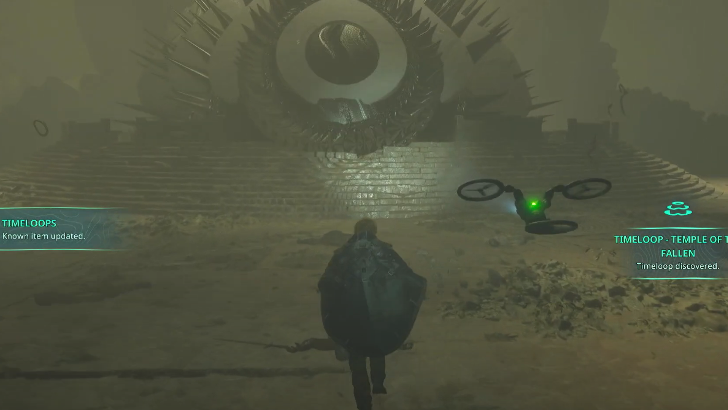 Temple of the Fallen |
The Temple of the Fallen Timeloop is located at the entrance of the temple. Once you enter the temple, you'll immediately see it in the middle. |
All Timeloop and Guardian Locations
Amine Prisms
Lethe - National Library
| ✔️ | Amine Prism | How to Get |
|---|---|---|
 Amine Prism - Rho |
You can obtain this prism by unlocking the safe by referring to Lukhan's serial ID number.
►History Lesson Walkthrough and Rewards |
Vyssa Hills
| ✔️ | Amine Prism | How to Get |
|---|---|---|
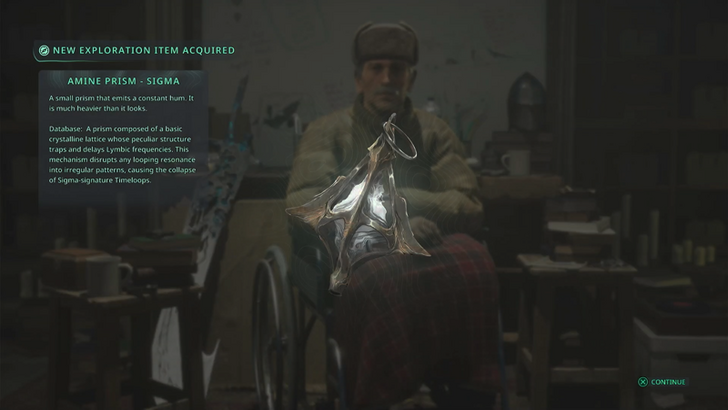 Amine Prism - Sigma |
Gildas Brom will give a Sigma Prism when you first encounter him in the Watcher's Nest. | |
 Amine Prism - Theta |
Unlock the Lymbic Chest at Vyssa Hills, Fort
►Lymbic Chest - Vyssa Hills Fort |
|
 Amine Prism - Rho |
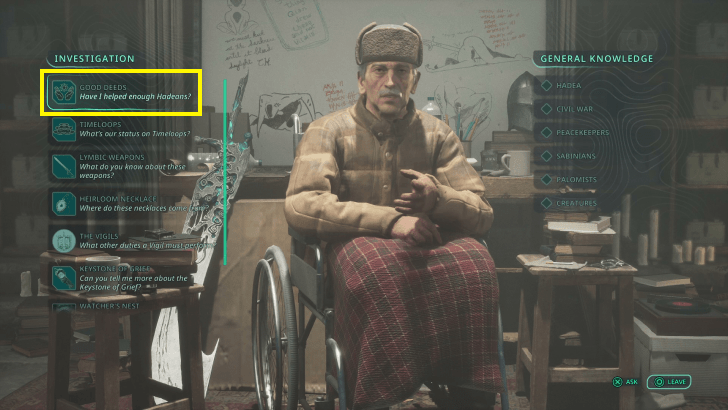
Gildas Brom will give a Rho Prism after completing a certain amount of good deeds.
►All Good Deeds Guide |
|
| Amine Prism - Rho |
Gildas Brom will give a Rho Prism after completing a certain amount of good deeds.
►All Good Deeds Guide |
Mysteries and Good Deeds
Lethe - National Library
| ✔️ | Items | How to Get |
|---|---|---|
 A Way Out A Way Out
|
Type:
Good Deed
Location: Lethe - National Library |
|
 Suspicious Activity Suspicious Activity
|
Type:
Mysteries
Location: Lethe - National Library |
|
 The Conspiracy The Conspiracy
|
Type:
Mysteries
Location: Lethe - National Library |
Vyssa Hills
| ✔️ | Items | How to Get |
|---|---|---|
 Death's Door Death's Door
|
Type:
Good Deed
Location: Vyssa Hills Deadline: Before the end of Act 1 and before completing Heart of Gold. |
|
 Eternity Eternity
|
Type:
Mysteries
Location: Vyssa Hills |
|
 Heart of Gold Heart of Gold
|
Type:
Good Deed
Location: Vyssa Hills |
|
 Lucky Break Lucky Break
|
Type:
Mysteries
Location: Vyssa Hills |
|
 Lymbic Chest - Vyssa Hills Fort Lymbic Chest - Vyssa Hills Fort
|
Type:
Mysteries
Location: Vyssa Hills |
|
 Man's Best Friend Man's Best Friend
|
Type:
Good Deed
Location: Vyssa Hills |
|
 Pilgrimage Pilgrimage
|
Type:
Mysteries
Location: Vyssa Hills |
Plains of Mist
 Overgrown
Temple of the Fallen
| ✔️ | Items | How to Get |
|---|---|---|
 Ascetic Vows Ascetic Vows
|
Type:
Mysteries
Location: Temple of the Fallen |
|
 Lymbic Chest - Temple of the Fallen Lymbic Chest - Temple of the Fallen
|
Type:
Mysteries
Location: Temple of the Fallen |
Searching for the Keystone of Ecstasy Points of Interest
| Required Investigations Points | |
|---|---|
 Investigate the clues about the Symbol of the Two-Headed Snake |
|
| Points of Interest | Locations |
|
NPC: |
Main Location: ・Pathem Abbey Key Items: |
Hell is Us Related Guides
Story Walkthrough and List of All Acts
Complete Walkthrough
| Act | Investigation |
|---|---|
| Act 1 | • Family Reunion
• Family Legacy |
| Act 2 | • Searching for the Keystone of Terror
• Searching for the Keystone of Rage • Searching for the Keystone of Ecstasy |
| Act 3 | • Into the Unknown |
100% Location Completion Guide
| List of All Locations | ||
|---|---|---|
| Senedra Forest | Acasa Marshes | Vyssa Hills |
| Lake Cynon | Lethe - National Library | Plains of Mist |
| Marastan | Talju | Lethe - Ministry of Cultural Primacy |
| Jeljin | Auriga Museum | - |
| Sub-Areas | ||
| Watcher's Nest | ||
Comment
Author

Searching for the Keystone of Ecstasy Walkthrough
Rankings
- We could not find the message board you were looking for.
Gaming News


Popular Games

Genshin Impact Walkthrough & Guides Wiki
Umamusume: Pretty Derby Walkthrough & Guides Wiki
Pokemon Pokopia Walkthrough & Guides Wiki
Honkai: Star Rail Walkthrough & Guides Wiki
Monster Hunter Stories 3: Twisted Reflection Walkthrough & Guides Wiki
Arknights: Endfield Walkthrough & Guides Wiki
Wuthering Waves Walkthrough & Guides Wiki
Zenless Zone Zero Walkthrough & Guides Wiki
Pokemon TCG Pocket (PTCGP) Strategies & Guides Wiki
Monster Hunter Wilds Walkthrough & Guides Wiki


Recommended Games
Fire Emblem Heroes (FEH) Walkthrough & Guides Wiki
Diablo 4: Vessel of Hatred Walkthrough & Guides Wiki
Cyberpunk 2077: Ultimate Edition Walkthrough & Guides Wiki
Yu-Gi-Oh! Master Duel Walkthrough & Guides Wiki
Super Smash Bros. Ultimate Walkthrough & Guides Wiki
Pokemon Brilliant Diamond and Shining Pearl (BDSP) Walkthrough & Guides Wiki
Elden Ring Shadow of the Erdtree Walkthrough & Guides Wiki
Monster Hunter World Walkthrough & Guides Wiki
The Legend of Zelda: Tears of the Kingdom Walkthrough & Guides Wiki
Persona 3 Reload Walkthrough & Guides Wiki


All rights reserved
©2025 – Nacon
The copyrights of videos of games used in our content and other intellectual property rights belong to the provider of the game.
The contents we provide on this site were created personally by members of the Game8 editorial department.
We refuse the right to reuse or repost content taken without our permission such as data or images to other sites.