Lake Cynon 100% Completion Guide
★ Trending: Puzzles | Codes | Jeljin | NG+
☆ Starting out? Check our Beginner's Guide
┗ Combat | Builds | Weapons | Tier List
★ Walkthrough | Good Deeds | Mysteries
┗ Timeloops | Vaults | NPCs | Enemies
☆ Missables | Game Length | Trophies
Lake Cynon is a main location in Hell Is Us. Find out more about Lake Cynon's Good Deeds, Mysteries, puzzles, Vault of Forbidden Knowledge, important loots, Timeloops, NPCs, and a Walkthrough for Laky Cynon here!
List of Contents
Lake Cynon Walkthrough
| Lake Cynon Objectives |
|---|
|
1. Access Lymbic Forge During Family Legacy 2. Return All Keystones During Into the Unknown |
1. Access Lymbic Forge During Family Legacy
| Step | Objective |
|---|---|
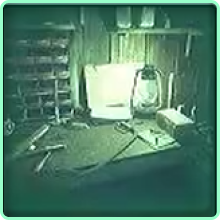
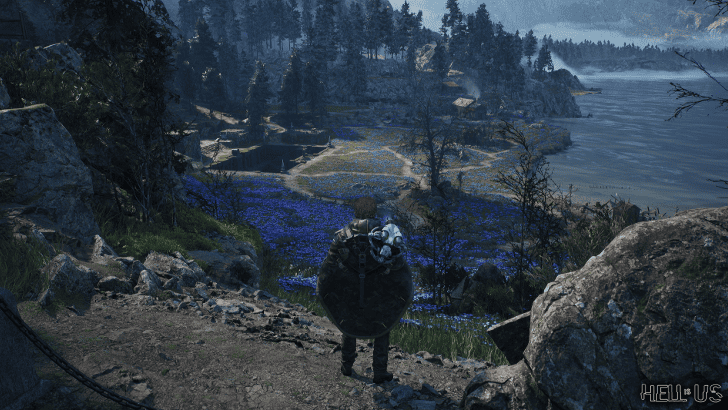
| 1.1 | 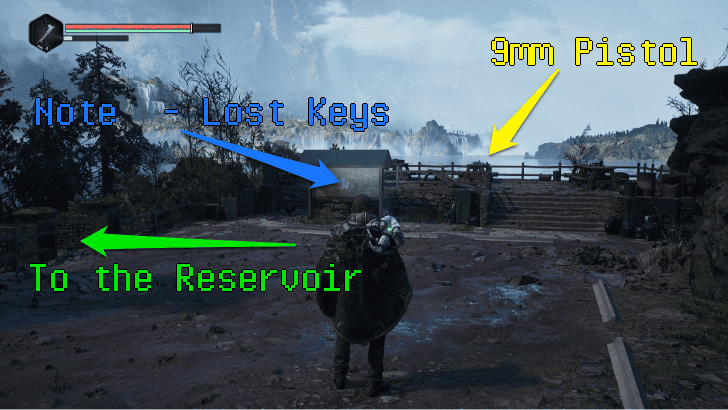 After receiving info about the Blue Flowers, go back to your APC and travel to Lake Cynon. There will be a cut scene on the way. Follow the path until you reach a bulletin board and some tables. From there, you can pick up a note for the Lost Keys mystery and the 9mm Pistol Research Item. There is also a note by the tables related to the Conspiracy mystery. |
| 1.2 | 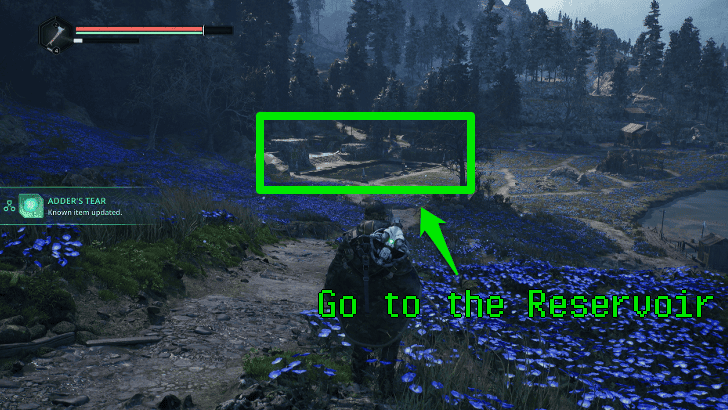 Continue following the path into the field of Blue Flowers. In the distance, you will be able to see what looks like a pond; this is the reservoir. Head towards it. Just past this is a mead factory with a note and key inside related to the Safekeeping mystery. |
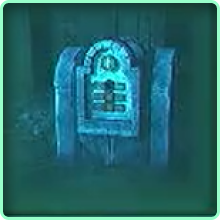
| 1.3 | 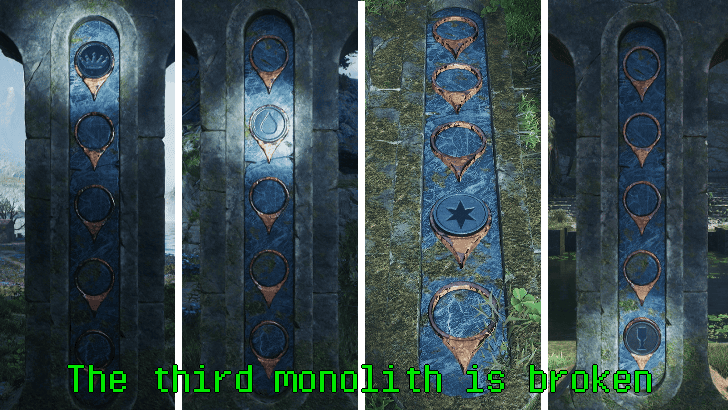 Around the reservoir are blue monoliths with symbols. Look at each one and take note of the position of each symbol. Hit the pillars in this order: Crown, Water, Key, Star, then Cup,. The third symbol can be found in the Blue Flower Scroll since the actual monolith on site is broken. ▶︎Lake Cynon Pillar Puzzle Guide |
| 1.4 | 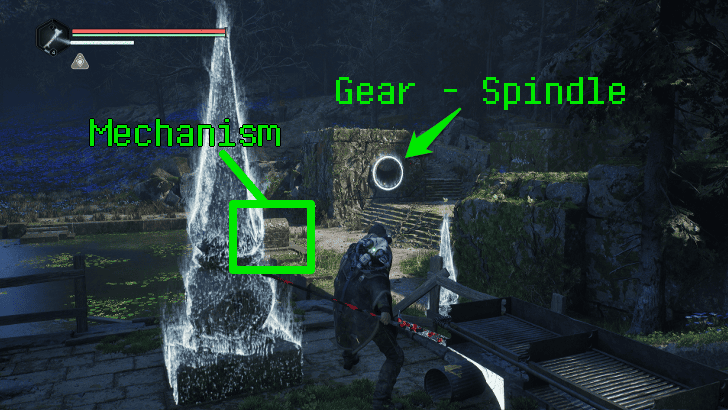 Grab the Gear - Spindle from the hole that opened near the mechanism. After that, interact with the mechanism and use the gear to drain the water. |
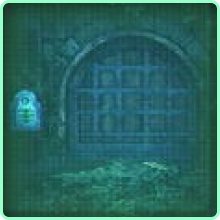
| 1.5 | 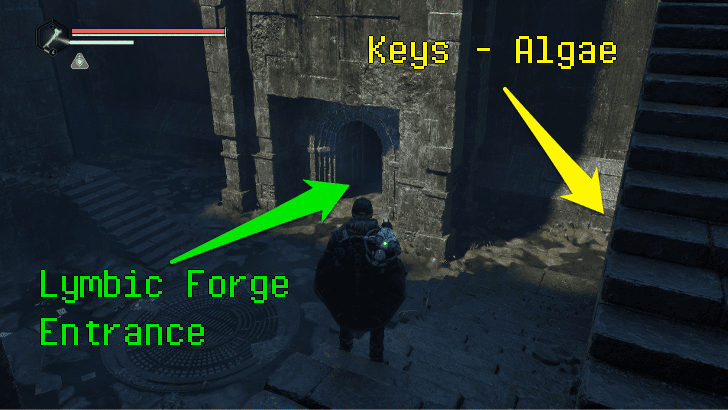 With the reservoir empty you can now grab the Keys - Algae for the Mystery Lost Keys and enter the Lymbic Forge. There is also a Lymbic Chest here. |
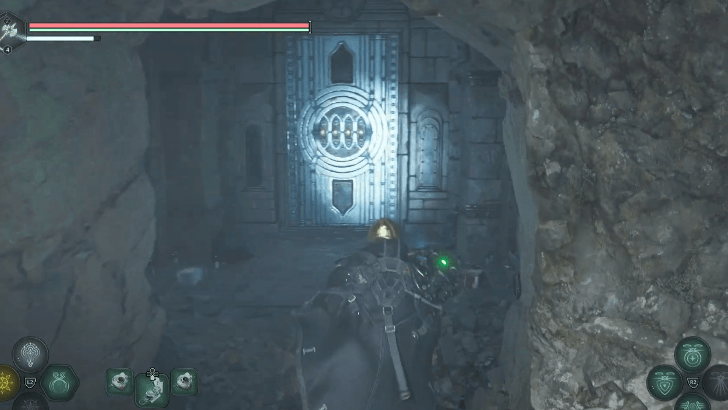
| 1.6 | 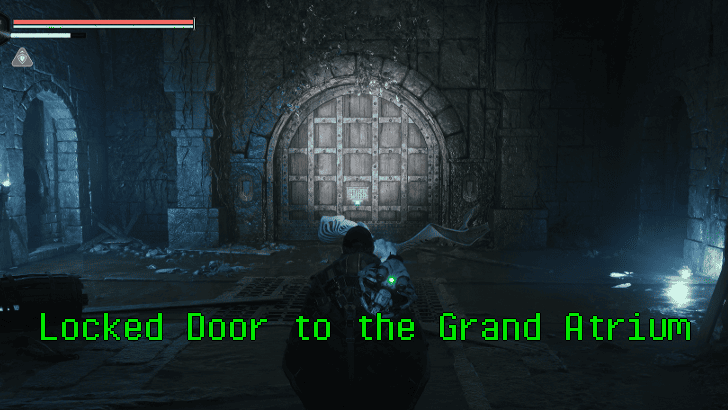 Head down into the Lymbic Forge until you reach the first save point in a room with the door and the lever. There will be an enemy that will lunge at you the moment you open the door. Continue going down this path, and you will arrive in the room leading into the Great Atrium. |
| 1.7 | 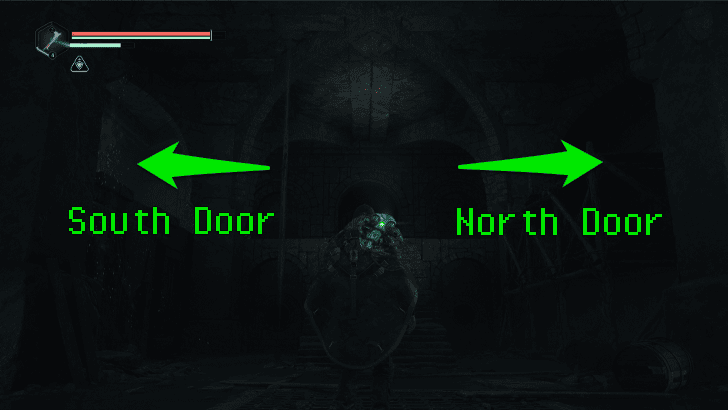 You will need to look for two items to access the Atrium. From the top of the stairs, if you turn south, there will be a door and a chest at the end of the corridor. The North Corridor will also have the same layout, but the door will be locked. |
| 1.8 | 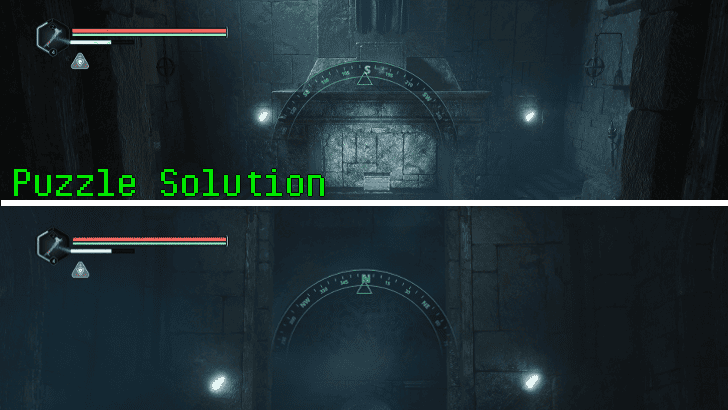 In the upper south door, follow the path until you reach the door with a lever. On the right side of the room is a torch puzzle, activate all the torches to the north and south to get the Sigil - Order of the Eye. ▶︎Lymbic Forge Torch Puzzle Guide |
| 1.9 | 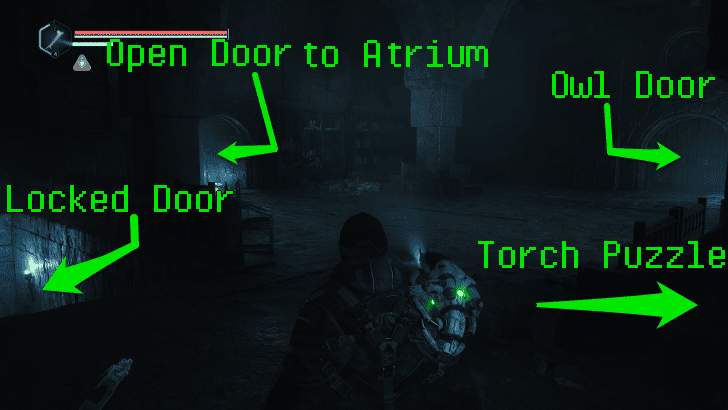 The door down the stairs next to the entrance will be locked from the other side. The door across the entrance will require the Key - Owl, and the door across the torch puzzle will be the only one open at this point. Go down the corridor and unlock the door at the end. This will lead you back to the room with the Grand Atrium Door. |
| 1.10 | 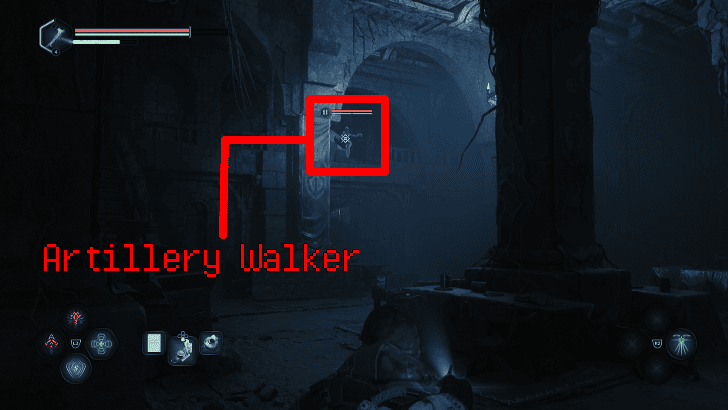 Go inside the lower north door into what looks like a dining hall, be careful of the Artillery Walker that will shoot you as soon as you enter the room. |
| 1.11 | 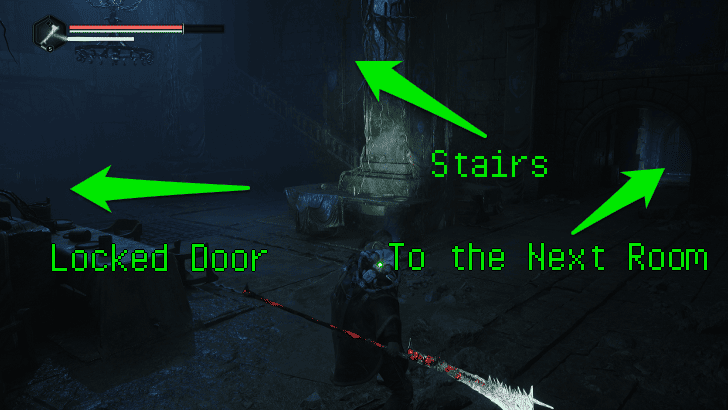 There are two doors on the ground floor. The door on the left will be locked on the other side, and the door directly in front of you will be open. Go to that door. This corridor will have two doors, one directly across and one to the left midway through the corridor. Go to the door across first. |
| 1.12 | 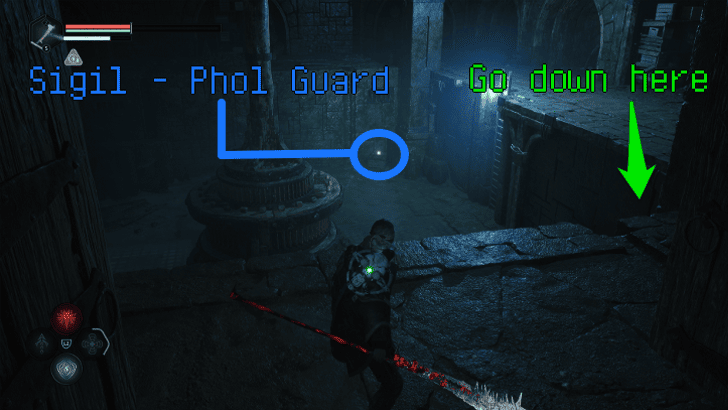 There will be another Artillery Walker waiting for you as soon as you open the door, you need to go down to the pit to filled with hollow walkers to get the Sigil - Phol Guard from the chest. There is no ladder going down, so hug the wall to the right and try to slide down onto the column ledge to avoid fall damage. |
| 1.13 | 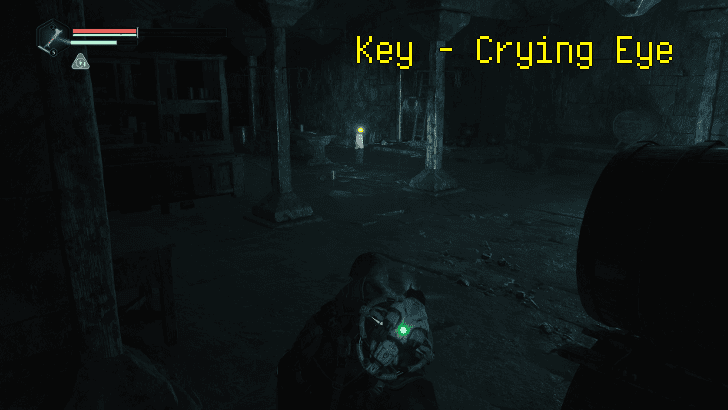 Go back into the short corridor and enter the other door there and grab the Key - Crying Eye. There will be another door on the other side of the room. Unlock this and exit back into the dining hall. |
| 1.14 | 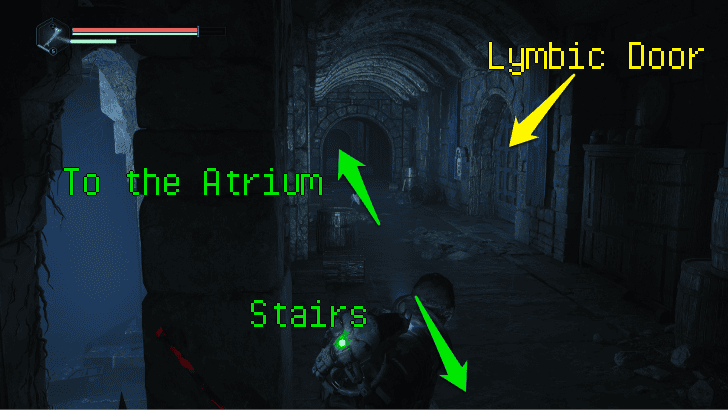 Climb up the stairs, unlock the door at the end of the corridor, and this will lead you back to the room where the Atrium door is. On the other end of the hall, beside the stairs, there is another flight going up. Take the stairs. You can also unlock Lymbic Door - Lymbic Forge if you have the Find the Lymbic Rod - Terror W, X, and Y. |
| 1.15 | 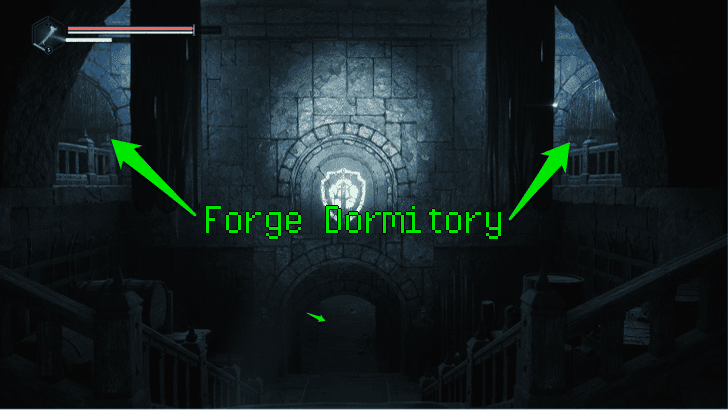 Continue climbing up the stairs until you reach a staircase that splits into two ways to the east and west, both doors lead into the same hall that has two rooms. There will be a Timeloop Guardian in one room and the Lymbic Chest in the other. if you have the Lymbic Rod - Neutral, V you can open the Lymbic Chest - Lymbic Forge Dormitory. |
| 1.16 |  Backtrack until you're in the room with the Atrium door and unlock it with the two sigils. You now have access to the atrium. There will be a mechanism at the center of the room with a missing part. Grab the Key- Owl from the rubble beside the mechanism. |
| 1.17 | 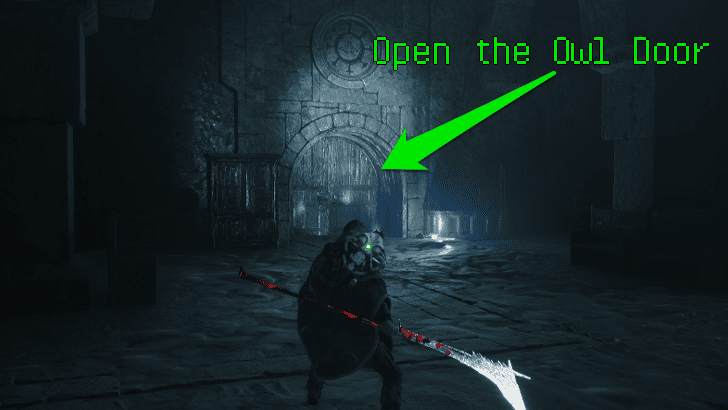 Go back south to the room where you got the Sigil - Order of the Eye, and open the Owl Door with your key. There will be an enemy as soon as you open the door, defeat it. There is a corridor to the north with a door and stairs going up in the south. This room will also have another Lymbic Chest. |
| 1.18 | 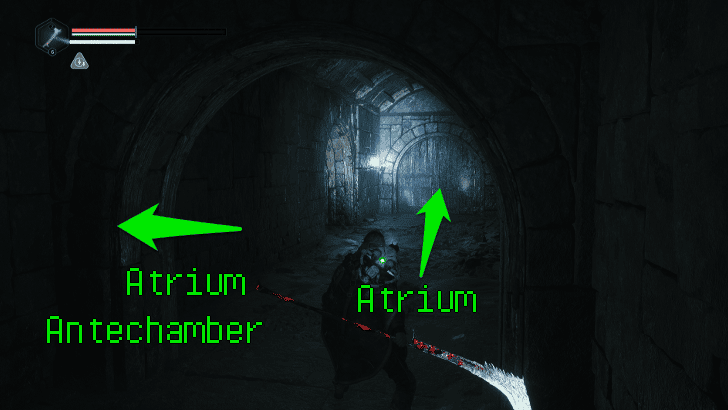 Go through the north first, along this corridor will be a door to the left. Unlock this to gain access to the path that leads back to the room before the atrium. |
| 1.19 | 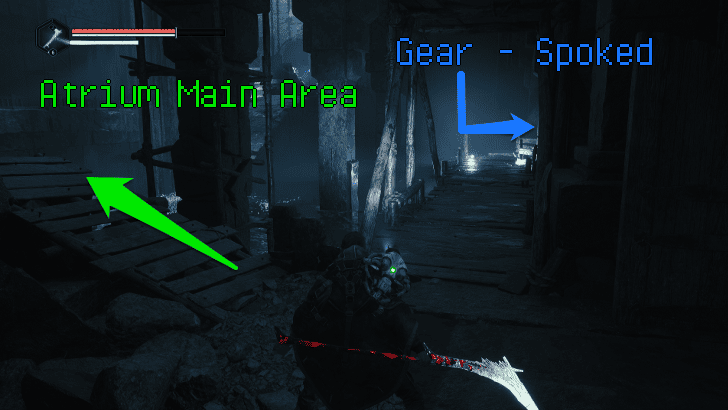 Continue forward, and the door at the end of the hall will open into the area of the Atrium that you couldn't access because of the rubble. Grab the Gear -Spoked from the chest and make your way back to the mechanism by climbing over the rotten wood bridge in front of the door. |
| 1.20 | 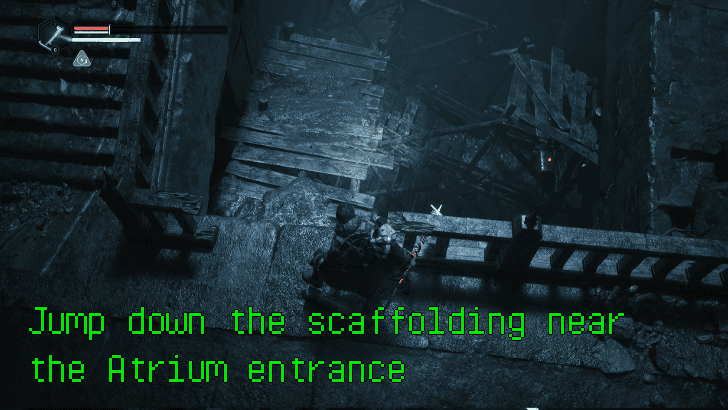 Go back to the mechanism and activate it to drain the first level of water in the Atrium. Carefully climb your way down the scaffolding. To the area to the north with two passages. |
| 1.21 | 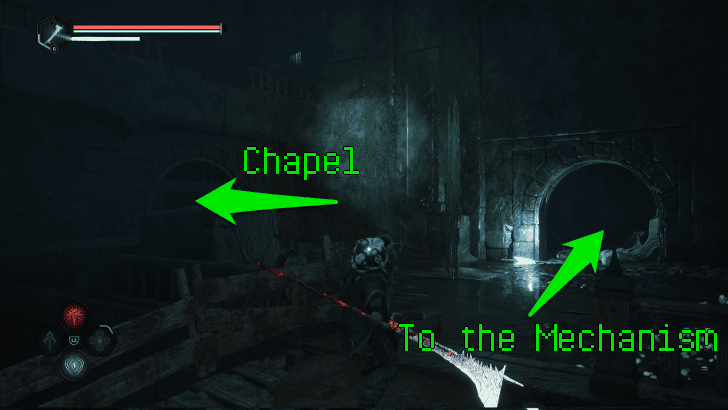 Enter the passage on the left that leads into the chapel. Once you enter the corridor, the gate will close. Defeat the Timeloop Guardian on the ground floor. |
| 1.22 | 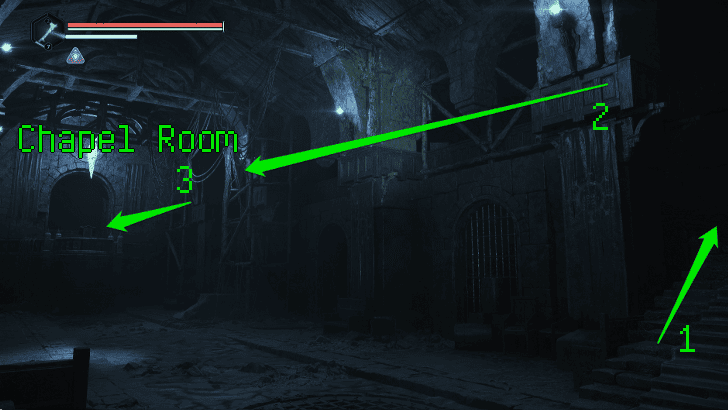 Climb up the other side and jump to the balcony to access the room. behind the podium. |
| 1.23 | 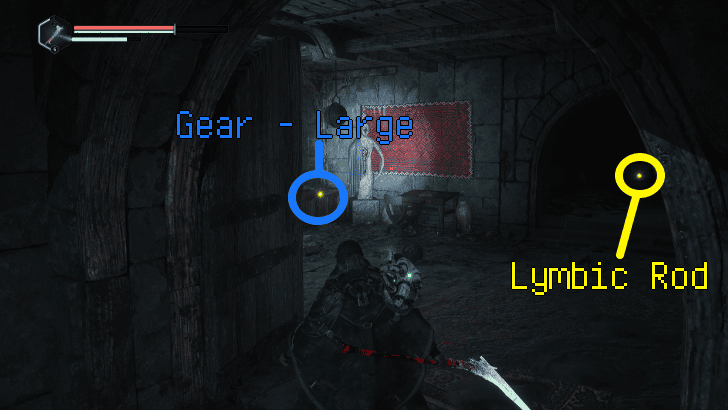 Pick up the Gear - Large from the cabinet, and the Lymbic Rod - Rage, W from the shelf. Climb down the stairs and unlock the door in the next room. This will lead you back down to the chapel. |
| 1.24 |  From the doorway of the stairs on the lower floor, cross to the other side and go down more stairs. Follow that path until it leads you back to the Atrium. |
| 1.25 | 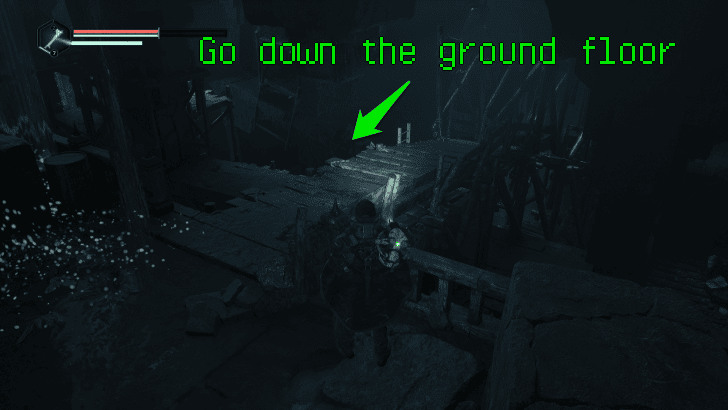 Attach the gear to the mechanism and drain the remaining water. Make your way down the deepest part of the Lymbic Forge. |
| 1.26 | 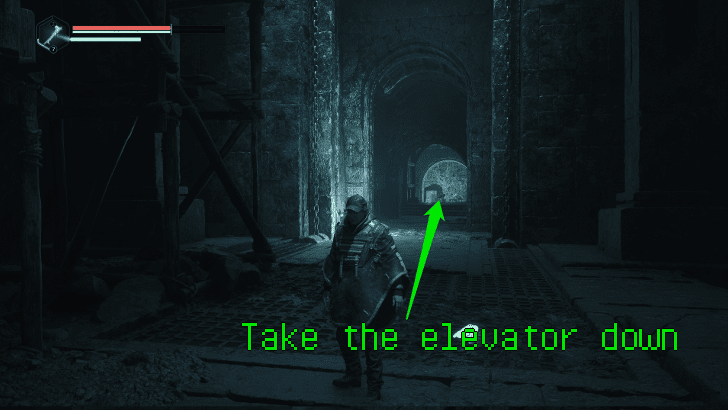 When you reach the ground floor, there will be enemies waiting, so be careful. Go to the Hall of Martyrs and take the elevator down. |
| 1.27 | 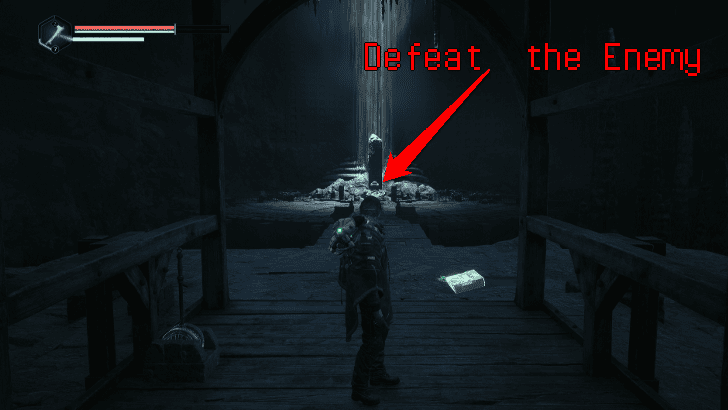 There will be a timeloop and a Guardian on this level. Defeat the Timeloop Guardian. Make sure that you are prepared since this is a challenging enemy. |
| 1.28 | 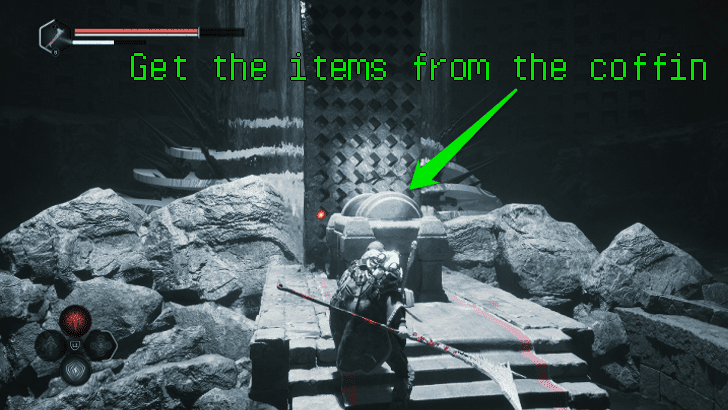 After defating the guardian open the coffin to get the Aster’s Band of Domination, the Hammer of Modus, and the Fundamentals of Lymbic Forging. You can also grab the Amine Prism - Sigma beside the coffin. |
| 1.29 | 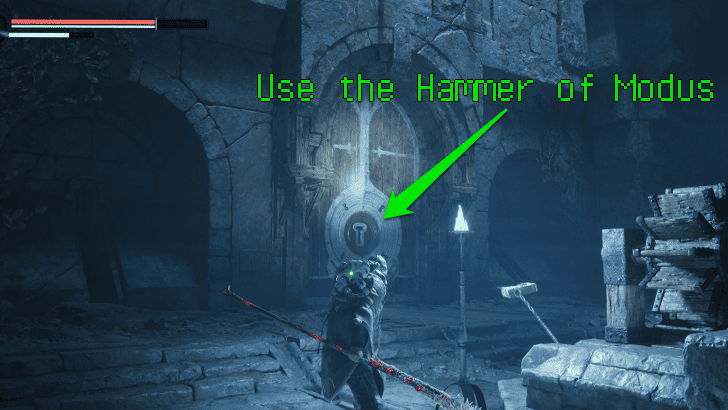 Go back to the mechanism in the Atrium. Approach the Large Door beside the save point and unlock it with the Hammer of Modus. |
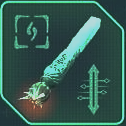
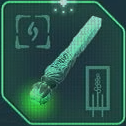
| 1.30 | 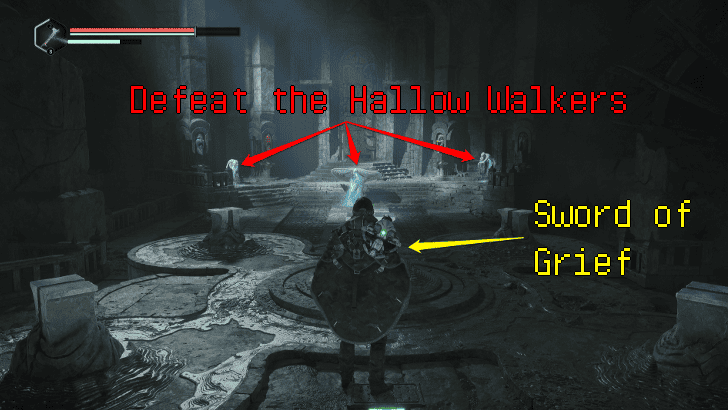 Enter the Main Hall and grab the Sword of Grief from the anvil. Further down the hall are four altars guarded by three Hallow Walkers. At the end of the hall is a large sealed door. |
| 1.31 | 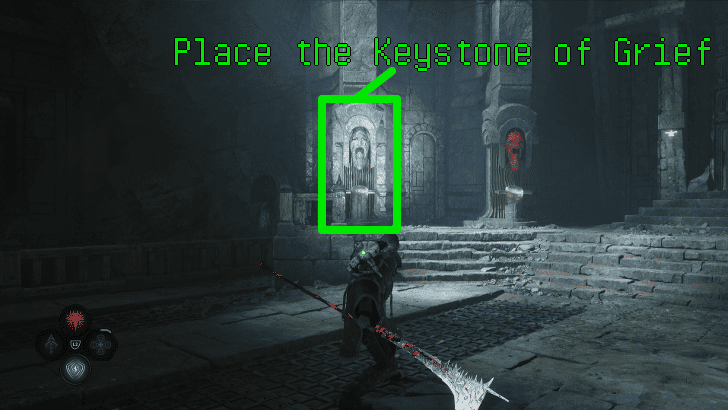 After defeating the hallows, approach the altar with the crying face on the left-most side. Place the Keystone of Grief into the Altar. A cutscene will play after this; this is the end of Act 1. |
2. Return All Keystones During Into the Unknown
| Step | Objective |
|---|---|
| 2.1 | 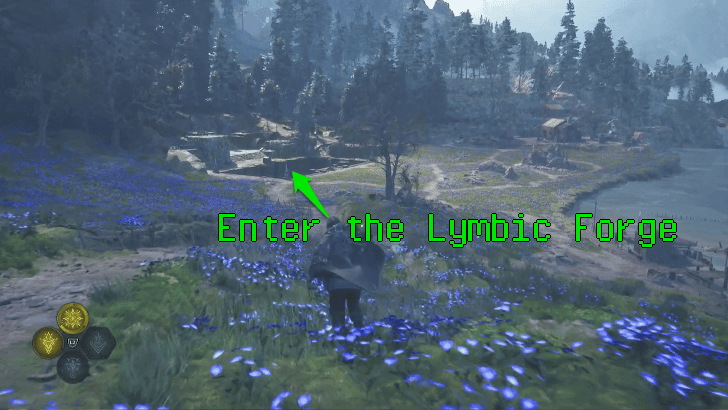 Travel to Lake Cynon, there will be cutscenes on the way. Go back to the bottom of the Lymbic Forge where the keystone altars are. |
| 2.2 |  With all keystones in hand, place each one in their respective altars to open the Sealed Door. Make sure that you are fully prepared before you proceed. From this point on you wont be able to fast travel back to the APC. |
| 2.3 | 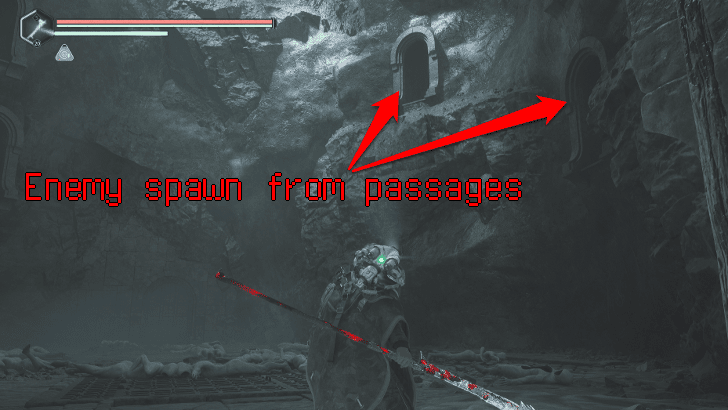 When you enter the room, there will be a horde of Primeval Walkers inside. After you defeat some more will spawn from the passages along the walls. Defeat all the enemies until they stop spawning to proceed to the next area. |
| 2.4 | 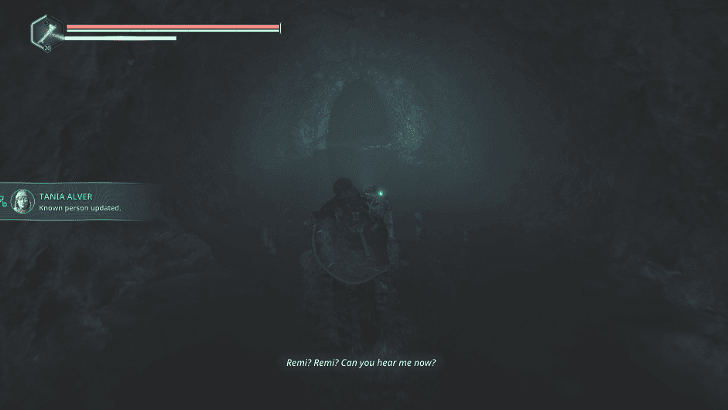 Midway through your descent into Mount Obek, you will start losing contact with Tania. |
| 2.5 | 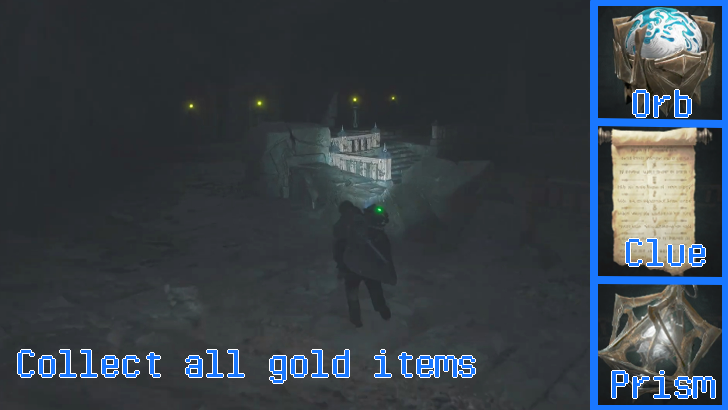 Once you reach the next save point, you will arrive in the Eye of God Antechamber. Collect the four orbs from the pedestal along the wall. Each colored orb will represent a keystone that you collected, Crimson for Rage, Gold for Ecstasy, Emerald for Terror, and Cobalt for Grief. |
| 2.6 | 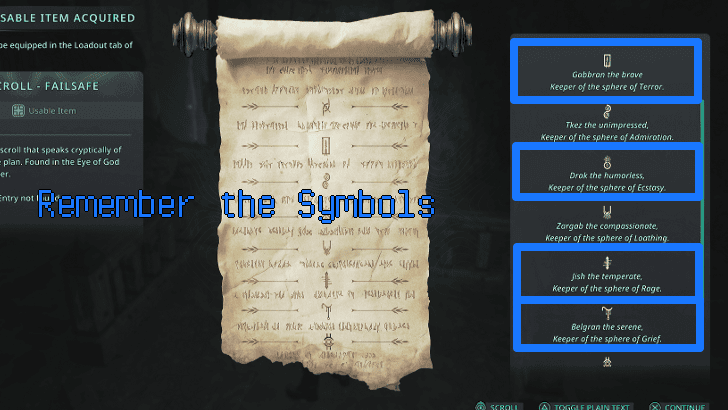 Approach the pedestal get the Amine Prism - Rho and the Scroll - Failsafe. The scroll will contain the symbols that represent the Keepers, keep in mind the symbol for Rage, Ecstasy, Terror, and Grief. |
| 2.7 | 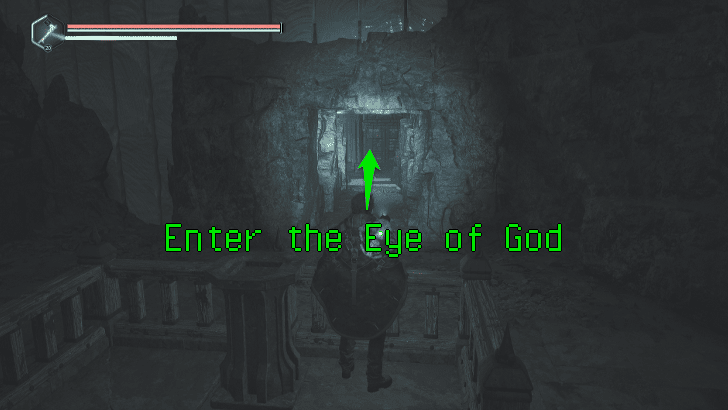 After claiming the items on the pedestal, the wall will open into a doorway. Enter the Eye of God when you are ready. |
| 2.8 | 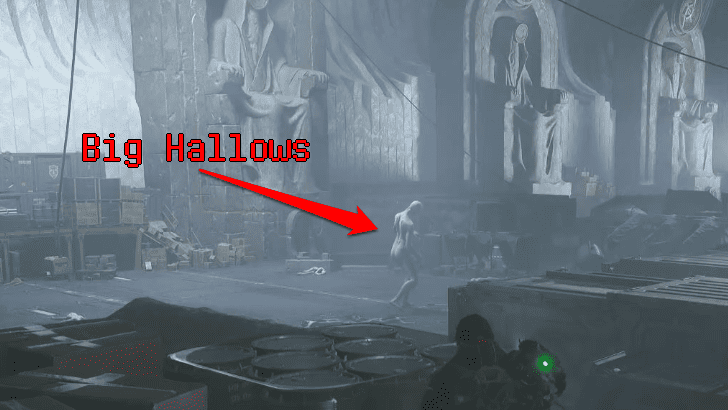 Enter the Eye of God, this area will have a new type of Lymbic Entity, the Big Hallows. Big Hallows are large entities that produce three Hazes from class I to III. These entities are also the Guardian Timeloop for the Eye of God Timeloop. |
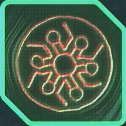
| 2.9 | 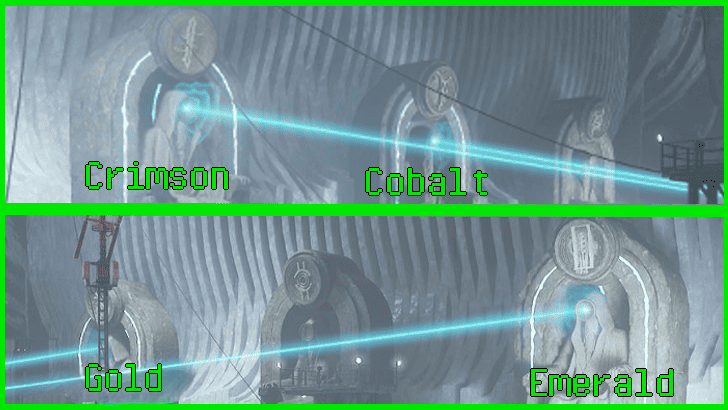 There will be two sets of statues on either side of the room. Look at the symbol on their throne, you will need to return the corresponding colored orb into the correct statue. If placed correctly, rays of light should converge at the center of the Timeloop. The code is: ★ Crimson for Rage - Sword Symbol ★ Gold for Ecstasy - Torch Symbol ★ Emerald for Terror - Rectangle Symbol ★ Cobalt for Grief - Dripping Symbol ▶︎Lake Cynon Golden Eye Orbs Puzzle Guide |
| 2.10 | 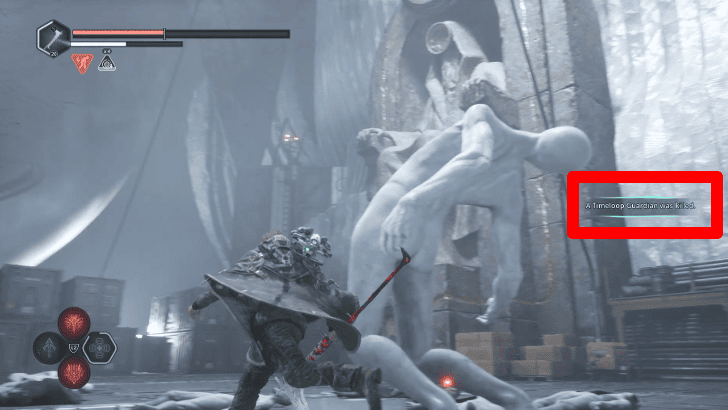 Defeat the Big Hallows you encounter on the way to the statues, you will need to defeat all four Guardians to close the timeloop. |
| 2.11 | 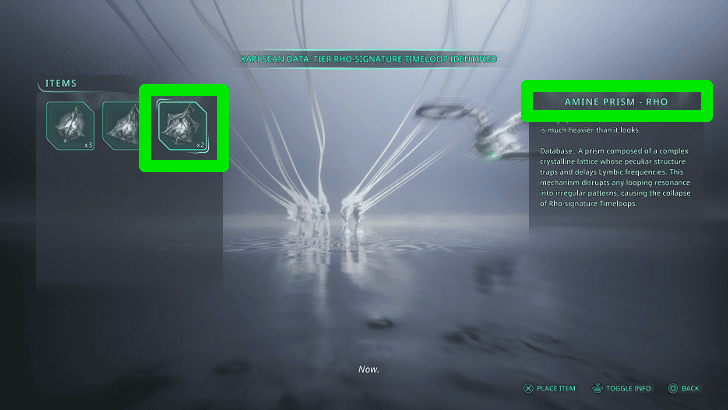 Once the orbs are in place and all guardians are defeated, approach the timeloop and close it with the Amine Prism - Rho. |
| 2.12 | 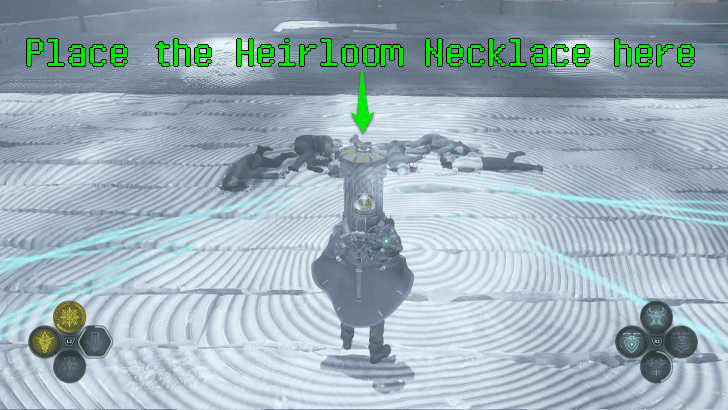 There will be a device in the middle of the area where the loop was, interact with this device and insert the Heirloom Necklace here to stop the calamity. |
| 2.13 | 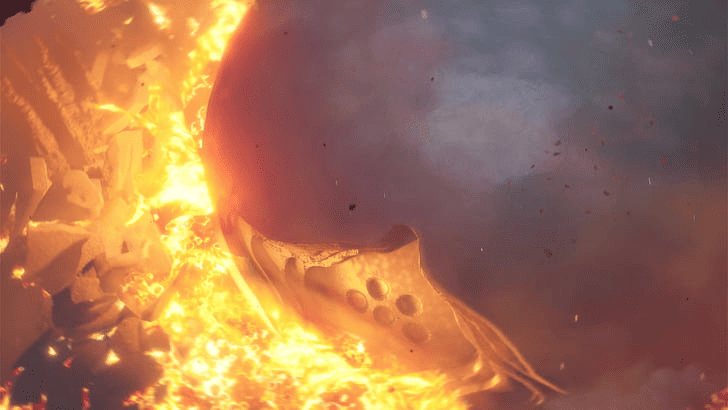 Placing the Necklace in the device will trigger the final cutscene and ending of the game. Users can continue the game as normal to complete Good Deeds, Mysteries, and collapse Timeloops after the ending. |
Lake Cynon Quests
Lake Cynon Good Deeds
| There are no Good Deeds in Lake Cynon |
Lake Cynon Mysteries
| ✔️ | Items | Details |
|---|---|---|
 Lost Keys Lost Keys
|
Rewards: |
|
 Lymbic Chest - Lake Cynon Reservoir Lymbic Chest - Lake Cynon Reservoir
|
Rewards: |
|
 Lymbic Chest - Lymbic Forge Dormitory Lymbic Chest - Lymbic Forge Dormitory
|
Rewards: |
|
 Lymbic Chest - Lymbic Forge Hall Lymbic Chest - Lymbic Forge Hall
|
Rewards: |
|
 Lymbic Door - Lymbic Forge Lymbic Door - Lymbic Forge
|
Rewards: |
|
 Safekeeping Safekeeping
|
Rewards: |
All Mystery Solutions and Locations
Lake Cynon Puzzles and Codes
Lake Cynon Puzzle Solutions
| ✔️ | Puzzle | How to Solve |
|---|---|---|
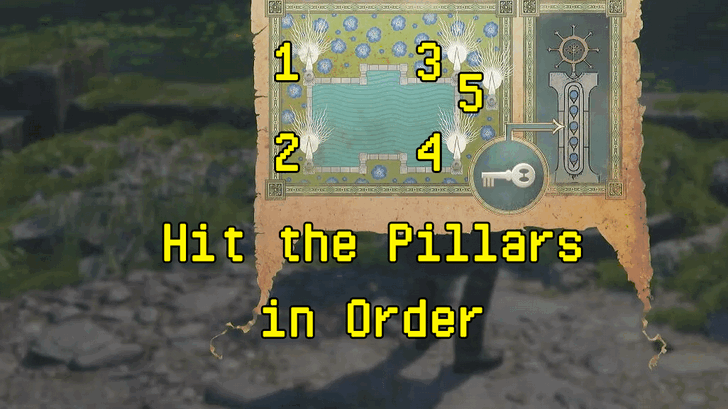 Lake Cynon Pillar Puzzle |
Location: Lake Cynon Investigation: Family Legacy Solution: Hit the stone pillars in this order: Crown-Water-Key-Star-Cup. |
|
|
Lake Cynon Golden Eye Orbs Puzzle |
Location: Lake Cynon Investigation: Into the Unknown Solution: Place the orbs in this order: Sword Symbol - Crimson, Dripping Symbol - Cobalt, Torch Symbol - Gold, and Rectangle Symbol - Emerald. |
All Puzzle Solutions
Lake Cynon Codes
| There are no Codes in Lake Cynon |
Lake Cynon Important Loot
Lake Cynon Exploration Items
| ✔️ | Item | How to Get |
|---|---|---|
 Gear - Spindle Gear - Spindle
|
Found in a hidden alcove in Lake Cynon. |
|
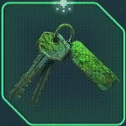 Keys - Algae Keys - Algae
|
Found in the reservoir at Lake Cynon. Use the keys to unlock the box in Samo's General Store. |
|
 Lymbic Rod - Neutral, V Lymbic Rod - Neutral, V
|
Found in Lake Cynon. Used to open Lymbic Chests and Lymbic Doors. |
|
 Lymbic Rod - Rage, W Lymbic Rod - Rage, W
|
Found in the Lymbic Forge. Used to open Lymbic Chests and Lymbic Doors. |
|
 Lymbic Rod - Terror, W Lymbic Rod - Terror, W
|
Found inside the Lymbic Forge. Used to open Lymbic Chests and Lymbic Doors. |
|
 Lymbic Rod - Terror, X Lymbic Rod - Terror, X
|
Found inside the Lymbic Forge. Used to open Lymbic Chests and Lymbic Doors. |
|
 Lymbic Rod - Terror, Y Lymbic Rod - Terror, Y
|
Found inside the Lymbic Forge. Used to open Lymbic Chests and Lymbic Doors. |
|
 Note - Conspiracy Note - Conspiracy
|
Found at the picnic area of Lake Cynon. |
|
 Note - Lost Keys Note - Lost Keys
|
Found on the message board at Lake Cynon. |
List of All Exploration Items
Lake Cynon Research Items
| ✔️ | Item | How to Get |
|---|---|---|
 9mm Pistol 9mm Pistol
|
Found on a table in Lake Cynon. |
|
 Old Sketchbook Old Sketchbook
|
Found inside the Lymbic Forge. |
Lake Cynon Investigation Items
| ✔️ | Item | How to Get |
|---|---|---|
 Fundamentals of Lymbic Forging Fundamentals of Lymbic Forging
|
Found in the Lymbic Forge. Give to Victor Gaz. |
|
 Gear - Large Gear - Large
|
Found inside the Lymbic Forge. Used to complete draining mechanism in the Lymbic Forge. |
|
 Gear - Spoked Gear - Spoked
|
Found in the Lymbic Forge. Used to complete draining mechanism in the Lymbic Forge. |
|
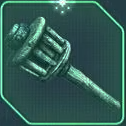
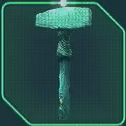 Hammer of Modus Hammer of Modus
|
Found in the Lymbic Forge. Used to open a door in the Lymbic Forge. |
|
 Key - Crying Eye Key - Crying Eye
|
Found on a wooden stool in the Lymbic Forge. Used to open a locked door inside the Lymbic Forge. |
|
 Key - Owl Key - Owl
|
Found on a skeleton in the Lymbic Forge. Used to open a locked door inside the Lymbic Forge. |
|
 Sigil - Order of the Eye Sigil - Order of the Eye
|
Found in the Lymbic Forge. Used to open a large locked door in the Lymbic Forge. |
|
 Sigil - Phol Guard Sigil - Phol Guard
|
Found in the Lymbic Forge. Used to open a large locked door in the Lymbic Forge. |
|
 Symbol of the Charioteer Symbol of the Charioteer
|
Found after finishing Act 1. |
|
 Symbol of the Screaming Face Symbol of the Screaming Face
|
Found after finishing Act 1. |
List of All Investigation Items
Lake Cynon Points of Interests
Lake Cynon Vaults
| Vault and Rune Code | Location |
|---|---|
| Lake Cynon Vault |
 Located inside a hidden cave next to the lake. |
Lake Cynon Timeloops
| ✔️ | Timeloop | How to Solve |
|---|---|---|
 Lymbic Forge |
The timeloop is in the lowest part of the Lymbic Forge, this is the same area where you get the Hammer of Modus. |
All Timeloop and Guardian Locations
Lake Cynon NPCs
| There are no NPCs in Lake Cynon |
Lake Cynon Summary
Location Overview
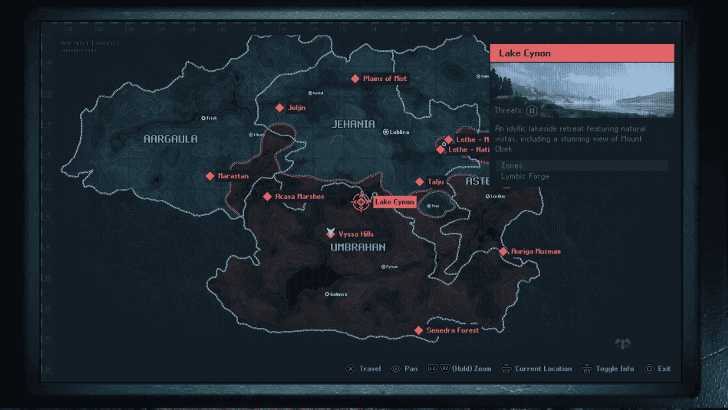
| World Map | In-Game Map | ||||||||
|---|---|---|---|---|---|---|---|---|---|
 |
 |
||||||||
| Related Investigations | Zones | ||||||||
|
Act 1 ・Family Legacy Act 3 ・Into the Unknown |
・Lymbic Forge | ||||||||
| Threat Level | |||||||||
| III | |||||||||
| Description | |||||||||
| An idyllic lakeside retreat featuring natural vistas, including a stunning view of Mount Obek. | |||||||||
Hell is Us Related Guides
Story Walkthrough and List of All Acts
Complete Walkthrough
100% Location Completion Guide
| List of All Locations | ||
|---|---|---|
| Senedra Forest | Acasa Marshes | Vyssa Hills |
| Lake Cynon | Lethe - National Library | Plains of Mist |
| Marastan | Talju | Lethe - Ministry of Cultural Primacy |
| Jeljin | Auriga Museum | - |
| Sub-Areas | ||
| Watcher's Nest | ||
Comment
Author

Lake Cynon 100% Completion Guide
Rankings
- We could not find the message board you were looking for.
Gaming News

![Monster Hunter Stories 3 Review [First Impressions] | Simply Rejuvenating](https://img.game8.co/4438641/2a31b7702bd70e78ec8efd24661dacda.jpeg/show)
![Monster Hunter Stories 3 Review [First Impressions] | Simply Rejuvenating](https://img.game8.co/4438641/2a31b7702bd70e78ec8efd24661dacda.jpeg/thumb)
![The Seven Deadly Sins: Origin [First Impressions] | A Promising Start](https://img.game8.co/4440581/584e0bfb87908f12c4eab6e846eb1afd.png/thumb)

Popular Games

Genshin Impact Walkthrough & Guides Wiki
Umamusume: Pretty Derby Walkthrough & Guides Wiki
Pokemon Pokopia Walkthrough & Guides Wiki
Honkai: Star Rail Walkthrough & Guides Wiki
Monster Hunter Stories 3: Twisted Reflection Walkthrough & Guides Wiki
Arknights: Endfield Walkthrough & Guides Wiki
Wuthering Waves Walkthrough & Guides Wiki
Zenless Zone Zero Walkthrough & Guides Wiki
Pokemon TCG Pocket (PTCGP) Strategies & Guides Wiki
Monster Hunter Wilds Walkthrough & Guides Wiki


Recommended Games
Diablo 4: Vessel of Hatred Walkthrough & Guides Wiki
Cyberpunk 2077: Ultimate Edition Walkthrough & Guides Wiki
Fire Emblem Heroes (FEH) Walkthrough & Guides Wiki
Yu-Gi-Oh! Master Duel Walkthrough & Guides Wiki
Super Smash Bros. Ultimate Walkthrough & Guides Wiki
Pokemon Brilliant Diamond and Shining Pearl (BDSP) Walkthrough & Guides Wiki
Elden Ring Shadow of the Erdtree Walkthrough & Guides Wiki
Monster Hunter World Walkthrough & Guides Wiki
The Legend of Zelda: Tears of the Kingdom Walkthrough & Guides Wiki
Persona 3 Reload Walkthrough & Guides Wiki


All rights reserved
©2025 – Nacon
The copyrights of videos of games used in our content and other intellectual property rights belong to the provider of the game.
The contents we provide on this site were created personally by members of the Game8 editorial department.
We refuse the right to reuse or repost content taken without our permission such as data or images to other sites.