The Rot Walkthrough, Bosses, and Resources
★ Woolhaven DLC available now!
★ New Features: Ranch | Winter
★ Learn how to get all Legendary Weapons!
★ All Marchosias Choices
★ How to Start the Woolhaven DLC
★ How to Get the Fleece of the Knight
The Rot is a dungeon in the Woolhaven DLC of Cult of the Lamb. See a walkthrough of The Rot here, along with its resources, bosses, Follower Forms, and decorations in this guide.
The Rot Resources
All Resources in The Rot
| Resources | How to Get |
|---|---|
 Cursed Yewbark Cursed Yewbark
|
Hit the tree in the Cursed Yewbark room |
 Rotburn Rotburn
|
Hit Red Boulders in the Rotburn room |
 Chilli Chilli
|
Harvest the Chillies in the Crops room |
 Chilli Seed Chilli Seed
|
Harvest the Chillies in the Crops room |
 Forget-Me-Not Forget-Me-Not
|
Hit the flowers |
 Grass Grass
|
Hit grass patches |
 Bone Bone
|
Hit Skulls and Carcasses |
 Stone Stone
|
Hit boulders and the ground |
 Lumber Lumber
|
Hit the pillars |
The Rot contains a mix of standard resources and unique ones, such as Cursed Yewbark. This resource is needed to in order to rebuild Woolhaven.
The Rot Bosses
All Minibosses and Bosses
| Boss | Type | Recruitable? |
|---|---|---|
 Poyel Poyel
|
Miniboss | Yes |
 Asbeel Asbeel
|
Miniboss | Yes |
 Ophans Ophans
|
Miniboss | Yes |
 The Executioner The Executioner
|
Boss | Yes |
 Eleleth Eleleth
|
Miniboss | Yes |
 Witness Mammon Witness Mammon
|
Miniboss | Yes |
 Yngya Yngya
|
Boss | Yes |
The Rot Follower Forms

|

|

|

|

|

|

|

|

|

|

|

|

|

|

|

|

|

|

|

|

|

|
The Rot Follower forms can be obtained in The Rot. These can be from bosses, from Valac, from the plants of The Gardener, or from random drops. Many of them can also be purchased from the Follower Forms statue at Woolhaven.
All Woolhaven DLC Follower Forms
The Rot Decorations
 Bottled Rot
 Bucket o'Guts
 Tall Cage
 Small Cage
 Flaming Cauldron
 Rot Fountain
 Strange Machine
 Iron Maiden of Ram Horn
 Wailing Bush
 Potted Eyeball
 Groaning Pillar
 Gawking Post
 Rotburn Altar
 Rotburn Candle
 Reaching Tentacle
 Rotburn Wall
The Rot decorations can be obtained as random rewards in The Rot.
The Rot Walkthrough
- The Rot Peak
- The Rot Caverns 1
- The Rot Caverns 2
- The Rot Caverns 3
- The Executioner
- The Rot Mouth 1
- The Rot Mouth 2
- Witness Mammon
- Meeting Yngya at The Rot
The Rot Peak
| # | Step-by-Step Guide |
|---|---|
| 1 | 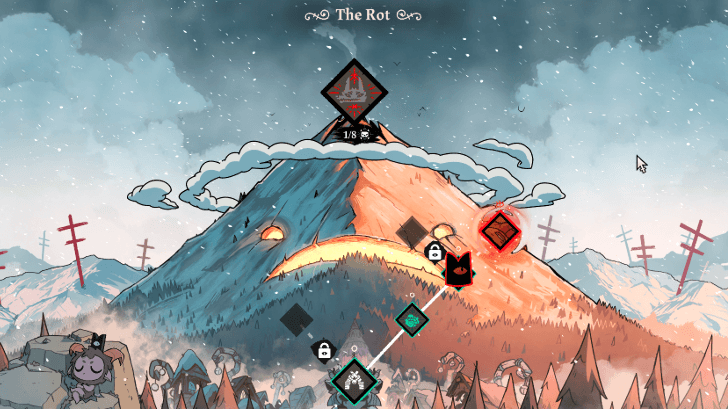 Upon delivering the souls back to Woolhaven, Yngya will hear of your encounters with Abas. She tells you of a great power that can be found deep in the mountain that you can claim to use against Marchosias. This unlocks the path to The Rot, the entrance to the heart of the mountain. |
| 2 | 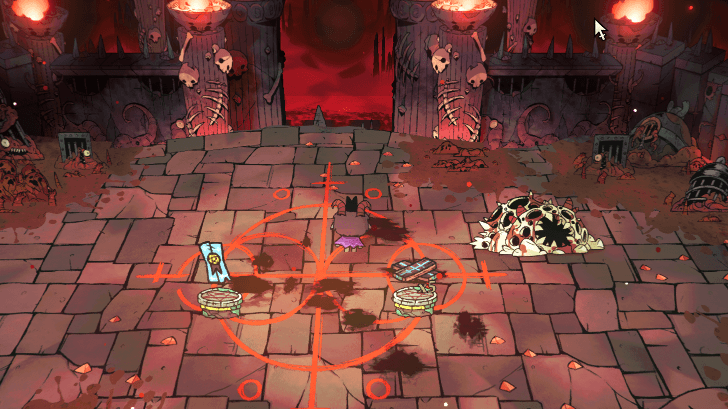 Do a run in The Rot, starting at The Rot Peak. Progress through rooms and descend into the caves. You will likely meet a moth-like creature, Stelle, during these runs. |
| 3 | 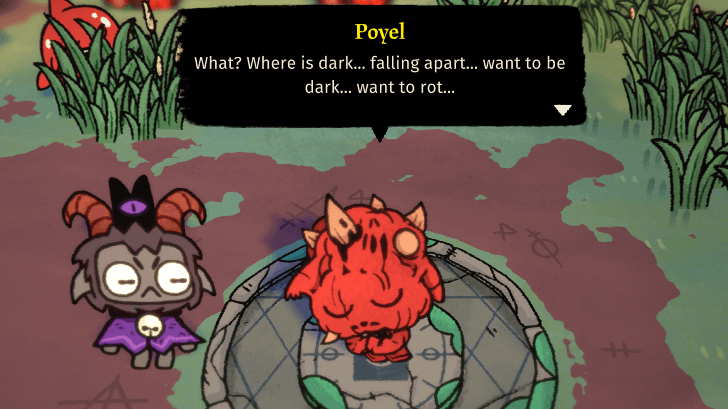 At the deepest point of your run, you'll face Poyel, the second miniboss of the Woolhaven DLC. Defeat him to recruit him as a follower after. ▶︎ How to Get Rotten Followers |
| 4 |
 When you complete your run, you'll find more lost souls to bring home. Return to your cult and escort these new souls to Woolhaven. This should be enough to trigger Winter I, and also lets you unlock the Bonfire Ritual II. This ritual will keep your Cult Warm for a full day. |
The Rot Caverns 1
| # | Step-by-Step Guide |
|---|---|
| 1 | 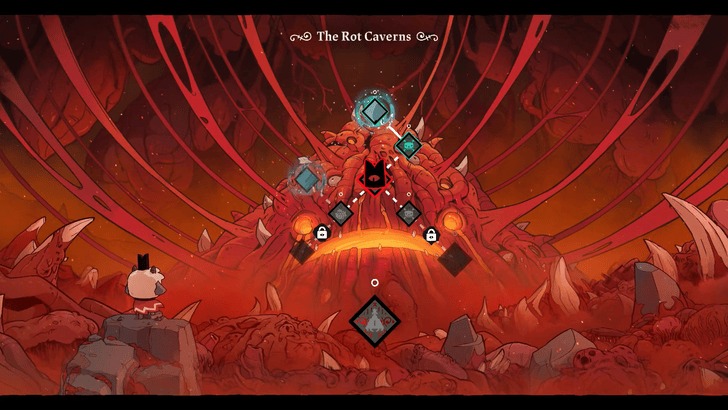 Enter the Rot Cavern. You can access this area by choosing the middle skull icon as a starting point. |
| 2 |  Continue exploring, and you'll have your first encounter with the Executioner. She'll leave the room, and enemies will attack you as she goes. ▶︎ The Executioner Boss Guide |
| 3 |  Head further up and defeat Asbeel. Asbeel will mostly bury itself underground before attacking, usually to your last location, so only attack when it emerges from the ground. Like most Woolhaven bosses, you can make Asbeel your follower after the combat. ▶︎ How to Get Rotten Followers |
| 4 | 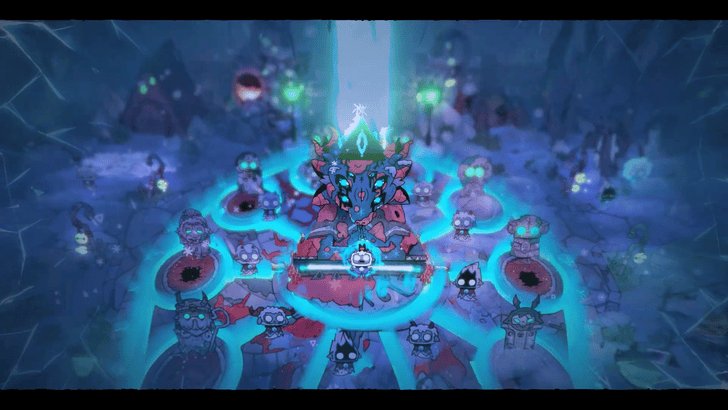 Gather the lost souls afterward and return to Woolhaven. Return them to Yngya to proceed to Winter II. |
| * |  Only return the souls when you're ready, since Winter II is much more difficult. Blizzards will be introduced, which you can only dispel if you have Rotburn Furnace II. ▶︎ How to Survive Winter |
The Rot Caverns 2: New Wool
| # | Step-by-Step Guide |
|---|---|
| 1 | 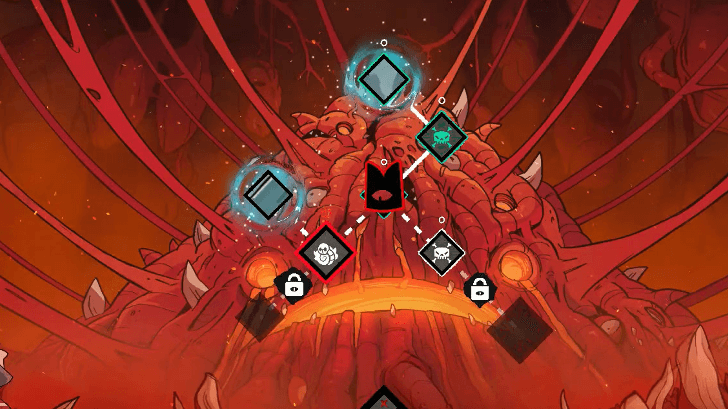 Head to the second area of The Rot Caverns. Pick the wool icon on the left as a starting point. |
| * | 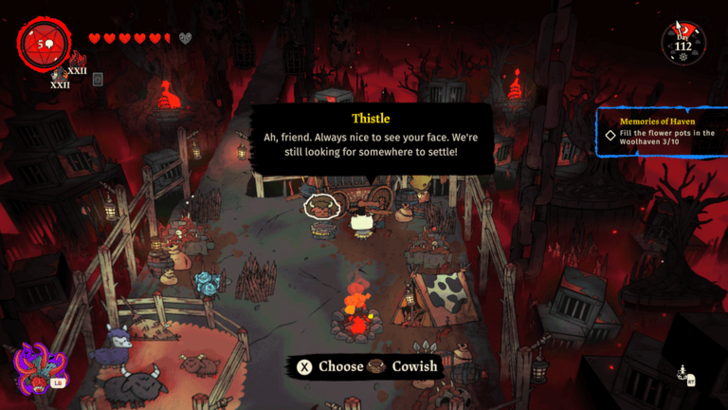 Along the way, you may encounter Thistle. This NPC can give you animals for your Ranch, and later on, you can meet him again by picking animal tiles. Keep this in mind during your run if you're also aiming to gather more animals. ▶︎ How to Unlock Ranch Animals |
| 2 | 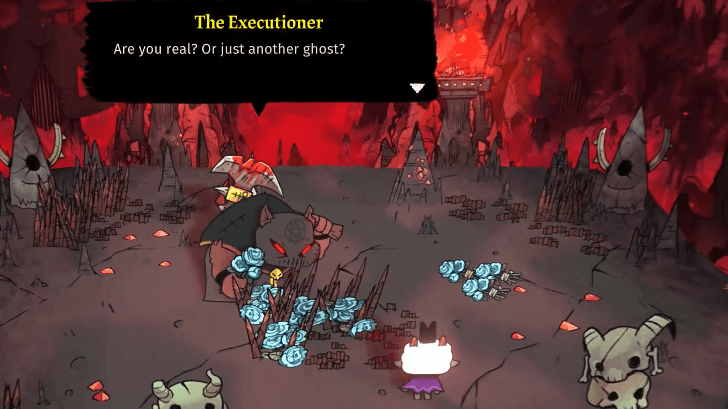 Continue onward and you'll meet the Executioner again. Like in your first encounter before Winter II, she'll leave again for other enemies to attack you. |
| 3 |  At the end of the dungeon, you must complete the room puzzle. This is a simple timing challenge, requiring you to guide the grieving statue toward the endpoint. You can toggle the obstacles by interacting with the effigy in the middle. |
| 4 | 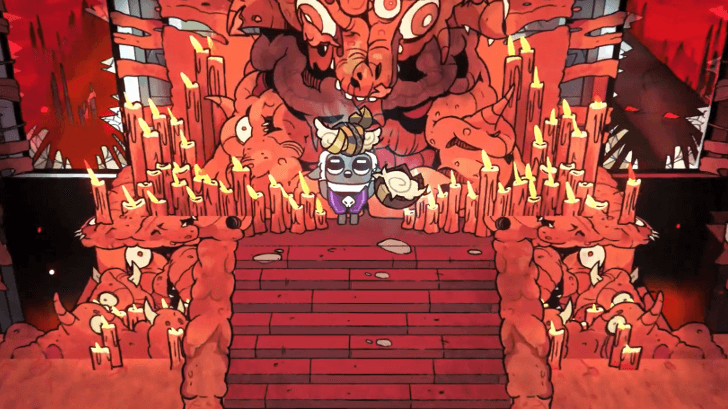 Take the Wool of the Charred and the Wool of the Shrewd from the altar in the middle, then make your way back to your cult. |
| 5 | 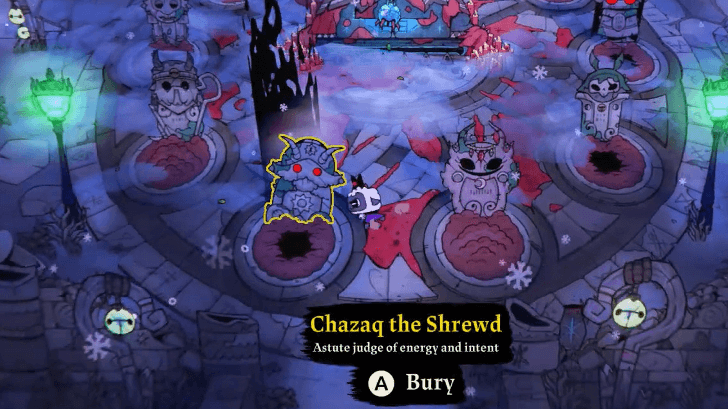 Bury the Wool of the Shrewd at his grave in Woolhaven to unlock Chazaq. Follow him to his shop afterward, then repair his building to unlock his decoration blueprints shop. This requires 6 Pure Yewbark. |
| 6 | 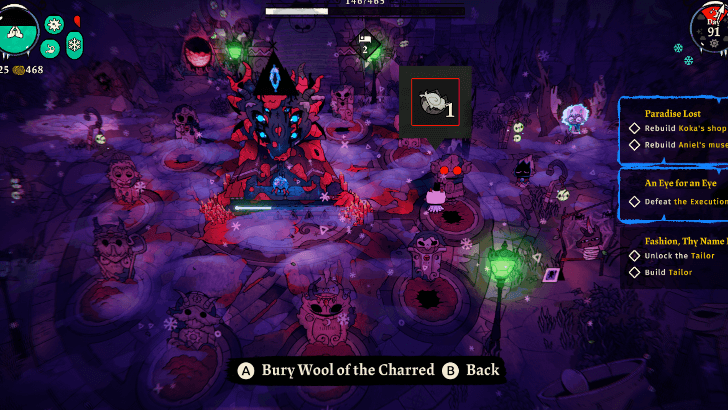 Bury the Wool of the Charred in Woolhaven to unlock Rami. Fix their building for 5 Pure Yewbark to unlock the forge and start obtaining Legendary Weapons. ▶︎ All Legendary Weapons and How to Get Them |
The Rot Caverns 3: Escorting Ratoo
| # | Step-by-Step Guide |
|---|---|
| 1 | 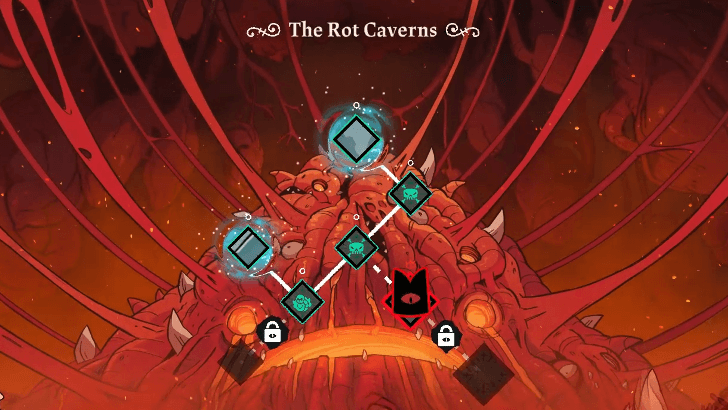 Before heading back to Ewefall, let's finish the available tiles here in The Rot. Head to The Rot Caverns on the east side with the skull icon. You can use this as an opportunity to gather more resources as well. |
| 2 | 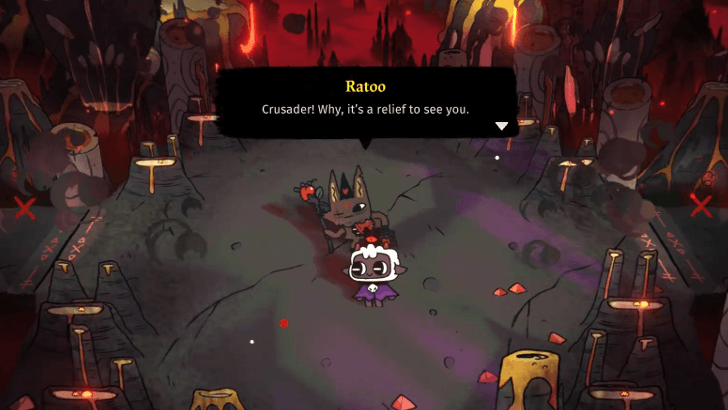 Along the way, you will encounter Ratoo, who has accidentally fallen into The Rot and needs your help to get out. All you need to do is make your way to the very end of the dungeon as you normally would. Ratoo won't require any special attention. When entering a room with enemies, Ratoo will hide safely underground until you defeat them all. ▶︎ List of All Characters |
| 3 | 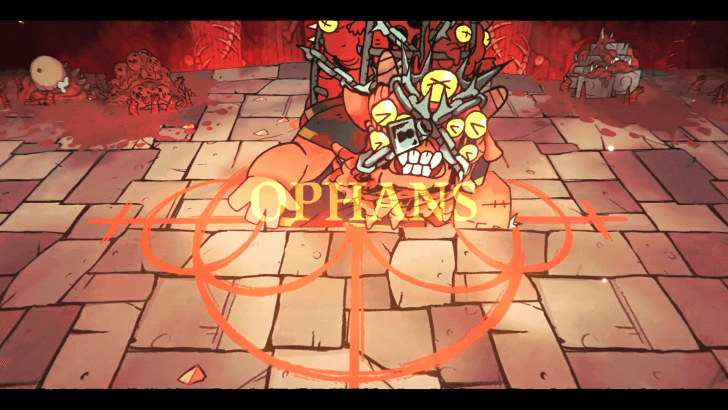 At the boss room at the end of your run, you'll be faced with Ophans. This boss uses a flail as his weapon, so his attack range is wide. Dodge out of the way of his attacks, then hit him back until this boss is defeated. Ophans will turn into a Rotten Follower that you can indoctrinate into your cult. |
| 4 |  In the final room, Ratoo will thank you and reward you with the Acolyte Sweater, which can be crafted at the Tailor. Call the lost Lamb souls home, then make your way back to your cult. Gofernon will appear to let you know that he's opened up a new path for you at Ewefall. |
| 5 | 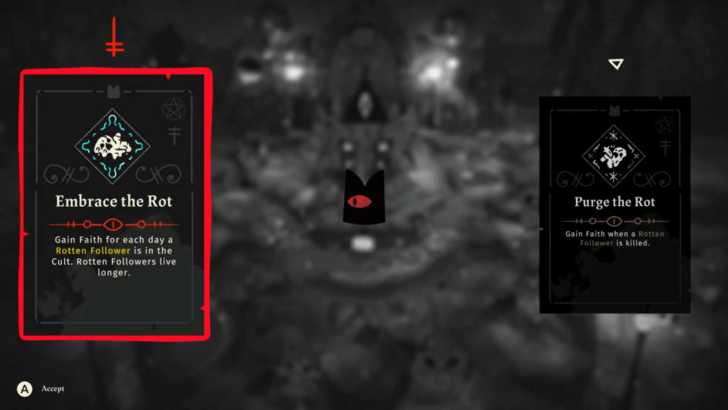 Return the lost souls to Yngya. This should be enough to fill the gauge to unlock a new doctrine—either Embrace the Rot or Purge the Rot—as well as enable Winter III, which allows Wolves to appear on occasion to attack your ranch animals. ▶︎ How to Fend Off Wolves |
| * | Choose the doctrine that suits your playstyle best. Embrace the Rot is probably the better doctrine for most people, especially for those who enjoy having Rotten Followers in their cult. However, if you usually end up sacrificing every one of your Rotten Followers or only get Rotten Followers to kill them off in the end, Purge the Rot might be beneficial for you. |
The Executioner
| # | Step-by-Step Guide |
|---|---|
| 1 | 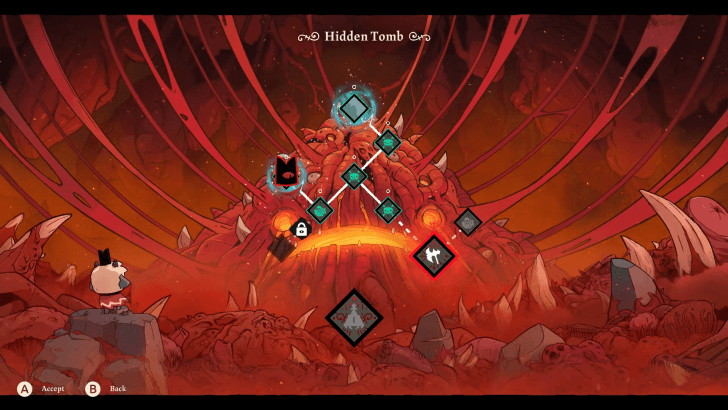 Once your cult is in good shape and you're ready to proceed, head to The Rot. Head to the axe icon on the right side of the inner mountain to start a crusade in Hidden Tomb. |
| 2 | Make your way through the dungeon. Try to get a good build with a weapon and curse you're comfortable with, a good number of Tarot Cards, and a reliable Relic. There is a big boss fight at the end, so it's best to be prepared. |
| 3 | 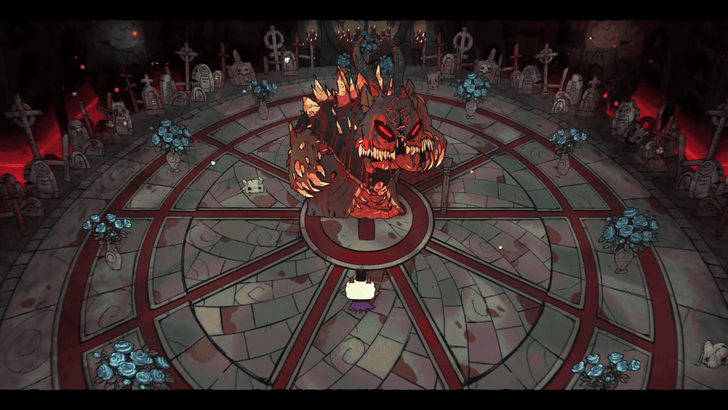 In the final section of the dungeon, you'll encounter the Executioner for the last time in the Rot. Consumed with guilt, the Executioner will transform and fight you in a boss battle. Defeat the Executioner, and you will be rewarded with the Swing of the Axe achievement. ▶︎ The Executioner Boss Guide |
| 4 | 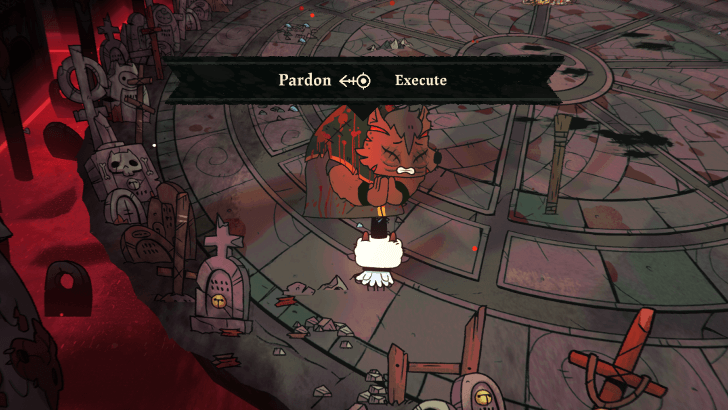 After defeating the Executioner, you will be given the option to either pardon or execute her. Pardoning the Executioner is the first step to recruiting her as a Follower. If you do not wish to have her as a follower, you can execute her to immediately get the Executioner Trophy decoration. |
| * | If you pardon the Executioner Hagar, she will leave The Rot and will reappear in Woolhaven after a few in-game days. You will only be able to recruit her after you finish rebuilding Woolhaven. |
| 5 | 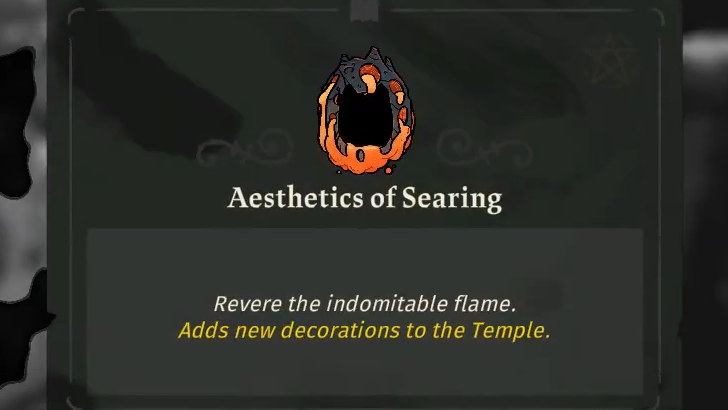 Upon returning to your cult, you will be rewarded with the Aesthetics of Searing. You can enable this Temple Aesthetic by selecting Temple from your Temple Altar, which will transform your Temple interior into a fiery-looking structure. |
The Rot Mouth 1
| # | Step-by-Step Guide |
|---|---|
| 1 | 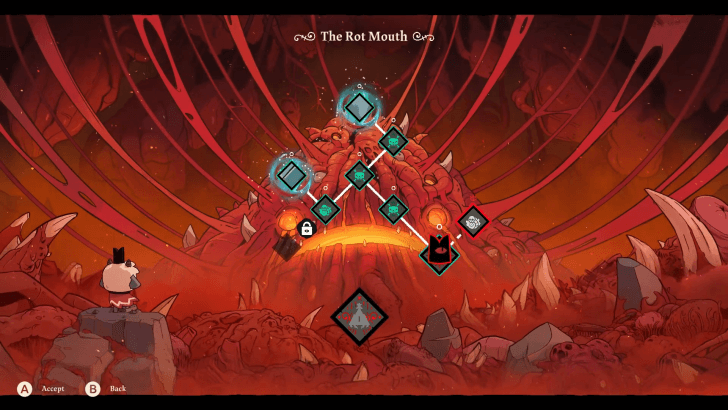 Let's finish off the right side of The Rot by getting the next set of disciple Wool. Enter The Rot Mouth to the right of the Executioner tile. |
| 2 | 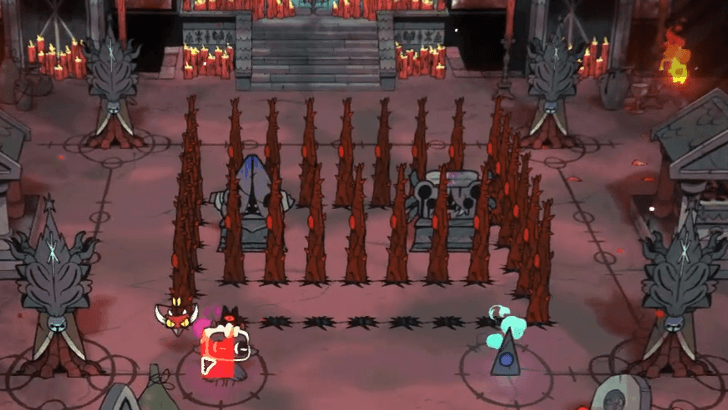 Progress through the dungeon until you reach the puzzle room at the very end. You will find four Yngya effigies here forming a square. Note that depending on the order you selected the tiles at Ewefall and The Rot, the puzzle and Wools available in this area may differ. |
| 3 | 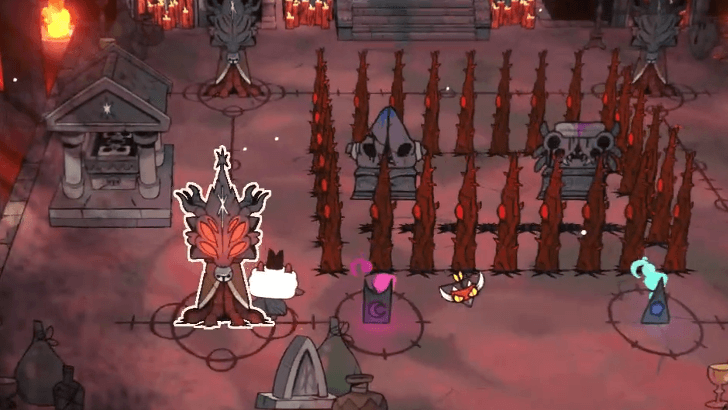 Interact with the bottom left Yngya effigy. This will make the back barrier go down and the front barrier go up. |
| 4 |  Then, interact with the top right Yngya effigy to open up the way to the two effigies in the middle. |
| 5 | 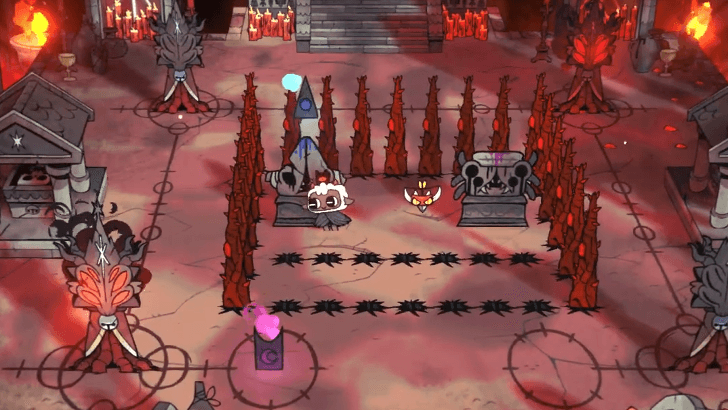 Place the blue crown on the Kallamar effigy on the left, and place the purple crown on the Shamura effigy on the right. This solves the puzzle and reveals the Wool of the Harbinger and Wool of the Warrior. Pick up the disciple Wools as well as your dungeon reward, and return to your cult. |
| 6 | 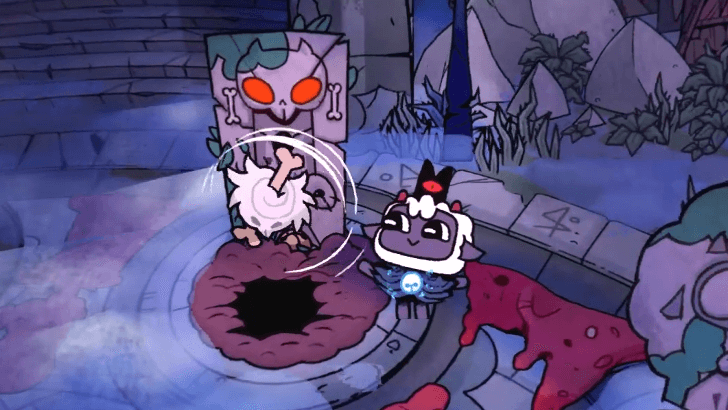 Bury the Wool of the Harbinger at Woolhaven to free the spirit of Erlim the Harbinger. He will not have a building but will float around the eastern side of Woolhaven, near Sariel. |
| 7 | 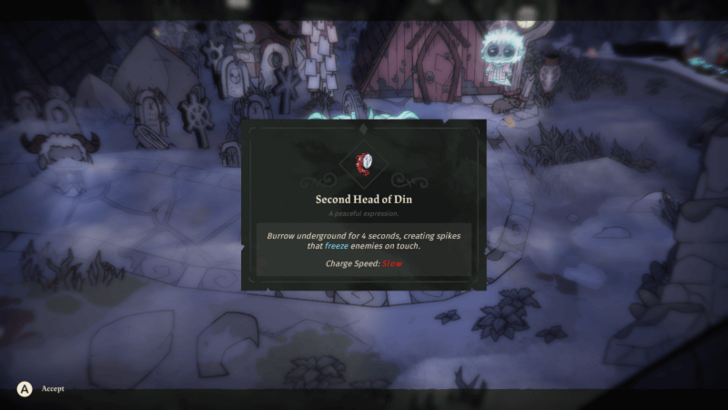 Although Erlim doesn't have a building, you can give him 100 Wool in order to get the Second Head of Din Relic. You can also offer 60 Wool on his grave in order to get the Fleece of the Harbinger. ▶︎ How to Farm Wool |
| 8 |  Bury the Wool of the Warrior at the grave of Yorabba the Warrior. He will appear and float over to the left side of Woolhaven. |
| 9 | 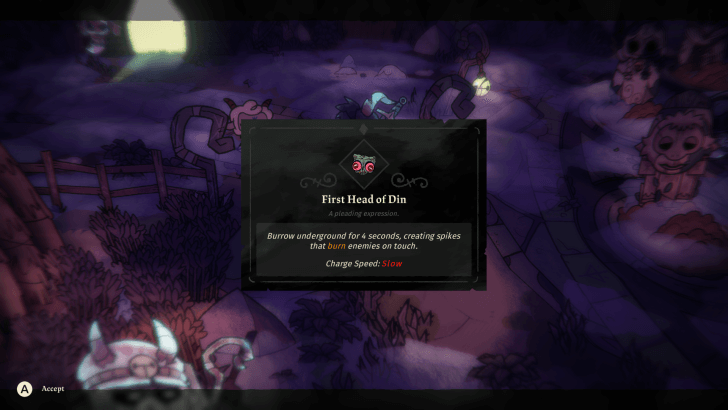 Like Erlim, Yorabba also does not have a building. However, you can offer him 100 Wool in exchange for the First Head of Din Relic. If you leave 50 Wool on his grave, you will be granted the Fleece of the Warrior. |
| 10 | 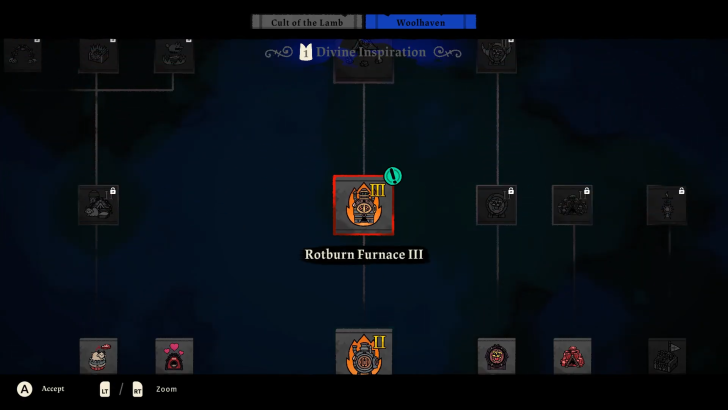 Winter IV should be active at this point. This unlocks the Rotburn Furnace III and the final tier of the Woolhaven Divine Inspiration upgrades. |
The Rot Mouth 2
| # | Step-by-Step Guide |
|---|---|
| 1 | 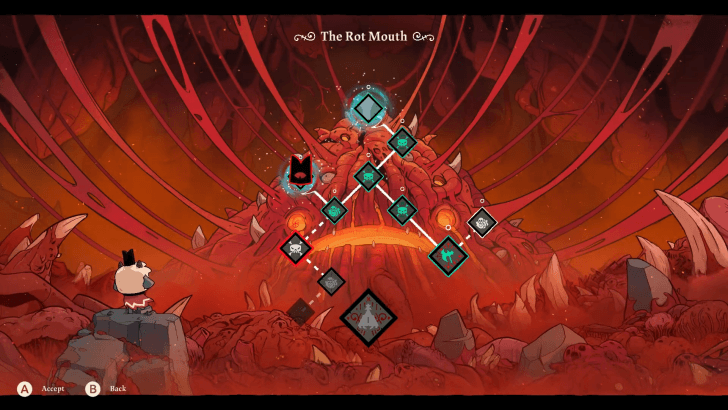 After going through Ewefall, let's check out the new path Gofernon unlocked. Head to The Rot and select the skull icon for The Rot Mouth. |
| 2 |  Make your way through the dungeon. At the end, you will have to fight the boss Eleleth. Eleleth shoots out a lot of projectiles, so it's best to use a deflecting curse against him. Luckily, he's easy to hit, so keep hitting him after dodging his attacks until Eleleth has been defeated. |
| 3 | 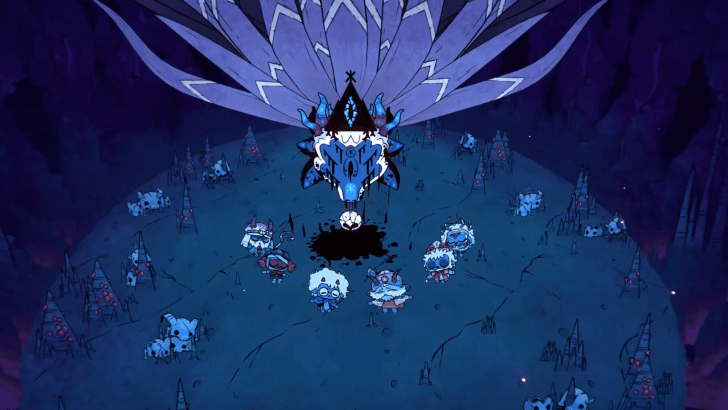 Defeating Eleleth gives you a new Rotten Follower. In the next room, call the Lost Souls home, then make your way back to your cult. A cutscene will then play showing what happened to Yngya and her disciples. |
| 4 | 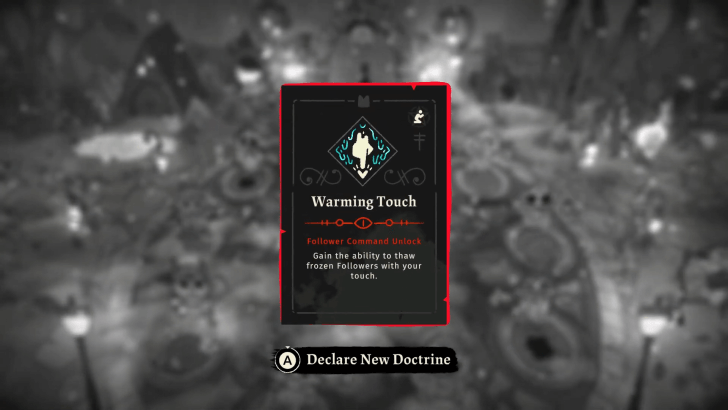 Return the Lost Souls to Yngya. This should fill Yngya's gauge and unlock the Warming Touch doctrine. This should also unlock Winter V, which can now cause lightning to strike during winter storms. Lightning strikes allow you to obtain Charged Shards at your base, but they can also endanger your Followers. |
| 5 |  Once you're up for another crusade, head back up the mountain and into The Rot. Select the Wool icon for The Rot Depths. This will have the last set of Wool we need to obtain in the game. |
| 6 | 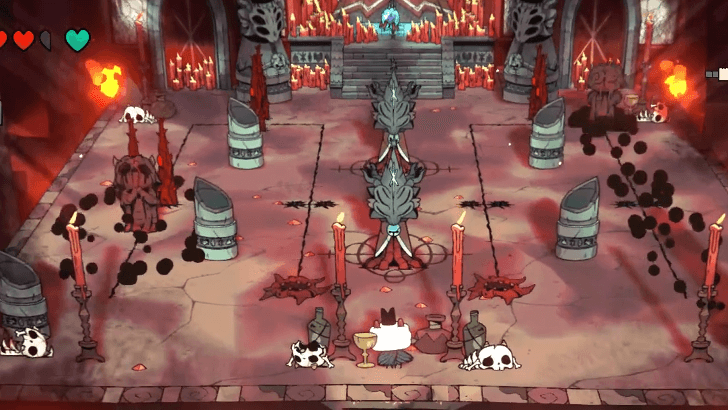 Proceed through the dungeon until you reach the final room. This puzzle requires you to guide the two moving statues to the end of their lines. |
| 7 | 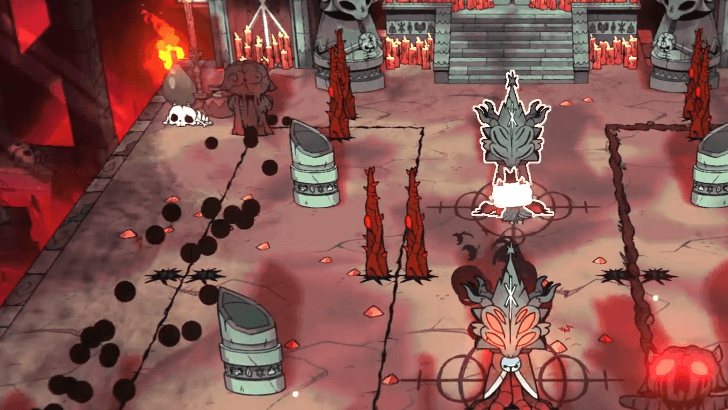 The statues don't need to reach the end at the same time, so choose one statue to guide first. To guide the statue on the left, interact with the Yngya effigy in front. Wait for the statue to go all the way up, then interact with the Yngya effigy at the back. Interact with the front Yngya effigy again to remove the final obstacle for the statue. |
| 8 | Interact with the effigies again to remove the obstacles for the statue on the right. |
| 9 | 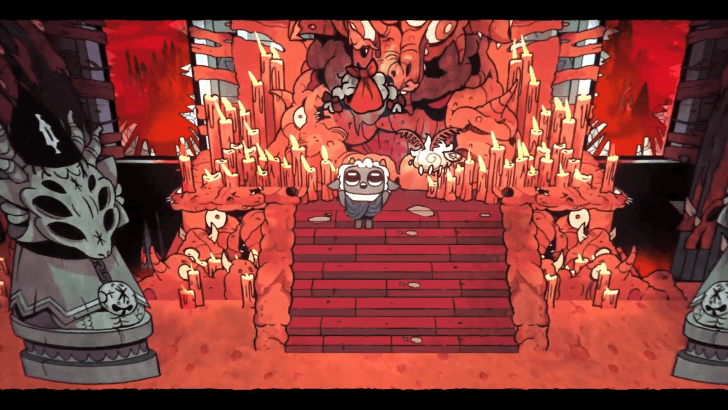 Once you complete the puzzle, pick up the Wool of the Innocent and Wool of the Pretender, then make your way back to your cult. Gofernon will appear to inform you that the final locked path on Ewefall is now accessible. |
| 10 | 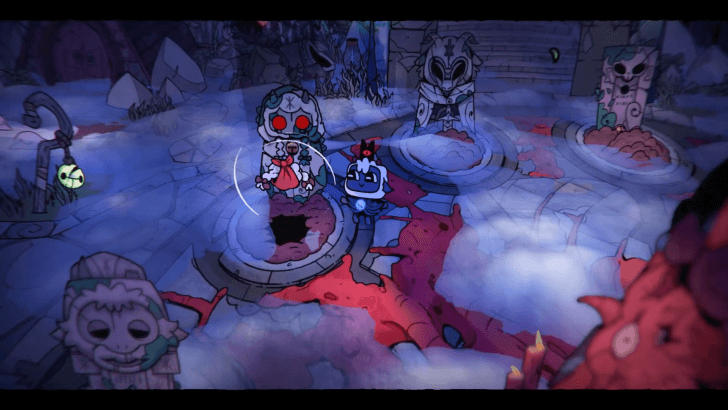 At Woolhaven, bury the Wool of the Innocent at the grave of Temi the Innocent. She will appear and float to the west side of Woolhaven, near Rami. |
| 11 | 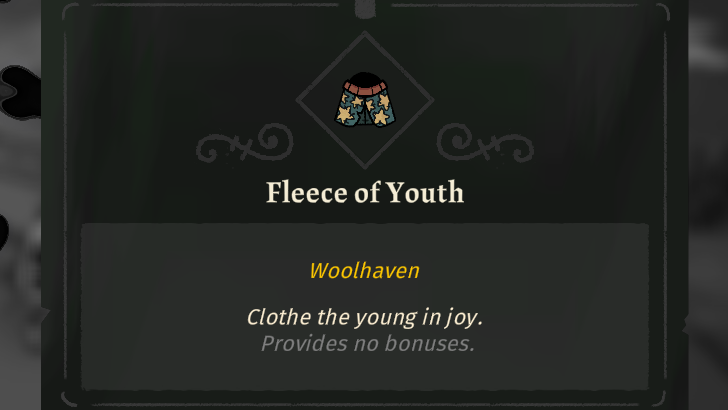 Temi doesn't have her own building, but you can give her 100 Wool to obtain the Fleece of Youth. You can also leave an additional 100 Wool on her grave in order to get the Fleece of the Innocent. |
| 12 | 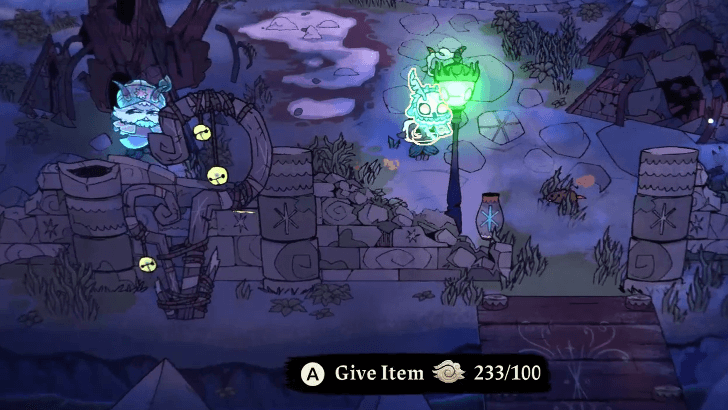 Bury the Wool of the Pretender at the grave of Zawa the Pretender, who will then appear and float towards the east side of Woolhaven. |
| 13 | 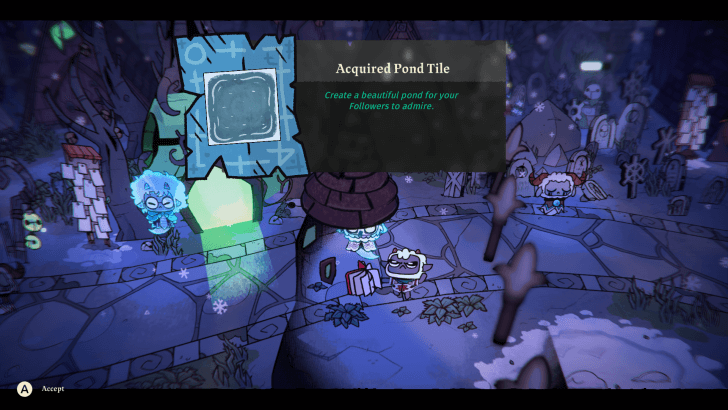 Giving Zawa 100 Wool will allow you to obtain the Pond Tile decoration. If you leave 75 Wool on Zawa's grave, you'll be given the Fleece of the Pretender. |
Witness Mammon
| # | Step-by-Step Guide |
|---|---|
| 1 | 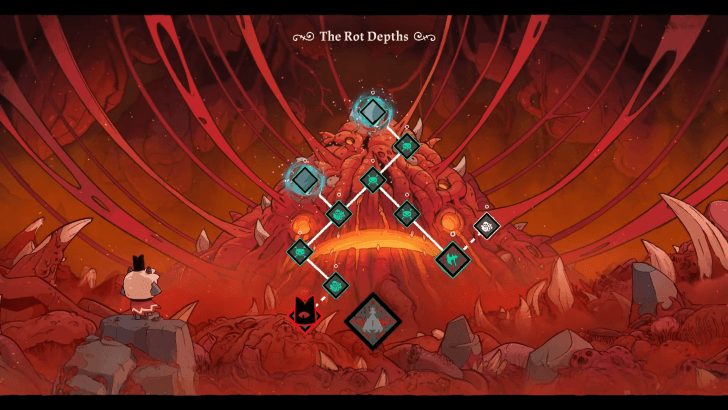 Although the path to Marchosias is now open in Ewefall, let's finish the remaining tile at The Rot first. Head to the ? tile at The Rot Depths. |
| 2 | 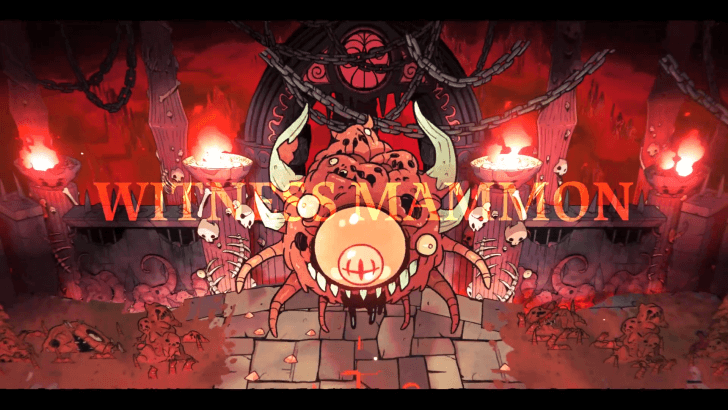 Similar to the ? tile at Ewefall, this area has a Witness boss at the end. Make your way through the dungeon until you encounter Witness Mammon in the boss room. |
| 3 | 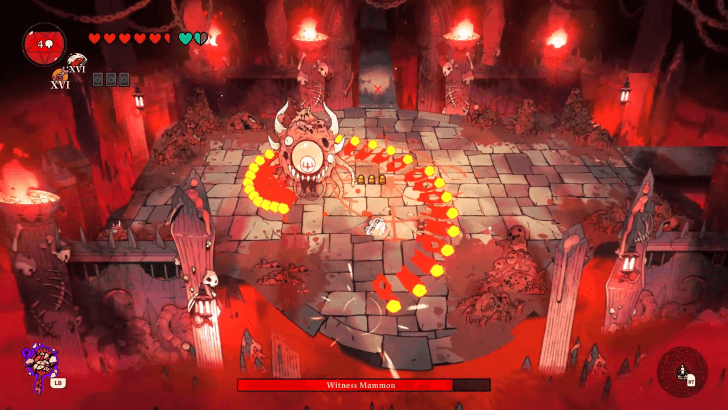 Witness Mammon will attack you with projectiles, but they're easy enough to dodge. Attack Witness Mammon in between his attacks, and get rid of the other enemies that spawn in until Witness Mammon has been defeated. |
| 4 | 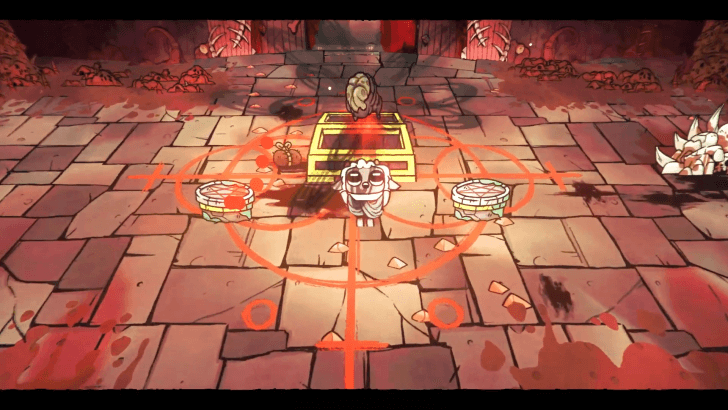 Convert the Witness Mammon Follower, and get your rewards. You should obtain another Rotten Eye of the Witness. Exit the dungeon and return to your cult. |
| 5 | 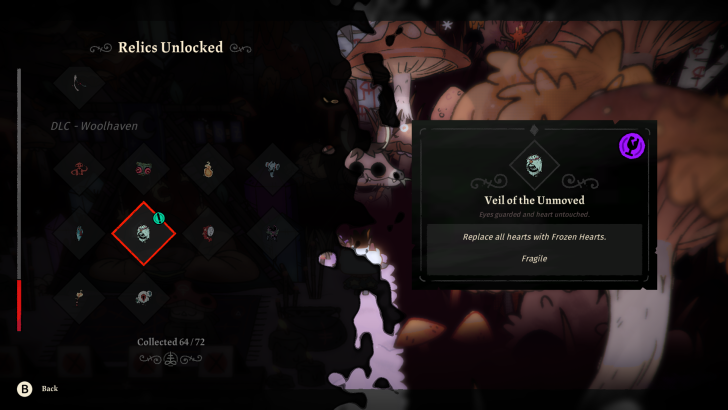 Head to Spore Grotto, and talk to Stranger? to exchange the Rotten Eye of the Witness. You will be given the Veil of the Unmoved Relic, which can now start appearing in crusades. |
| * | If you haven't unlocked the other Woolhaven Relics yet, you can do so by unlocking the Relics of the Burning and Relics of the Freezing from the Sermon tree. |
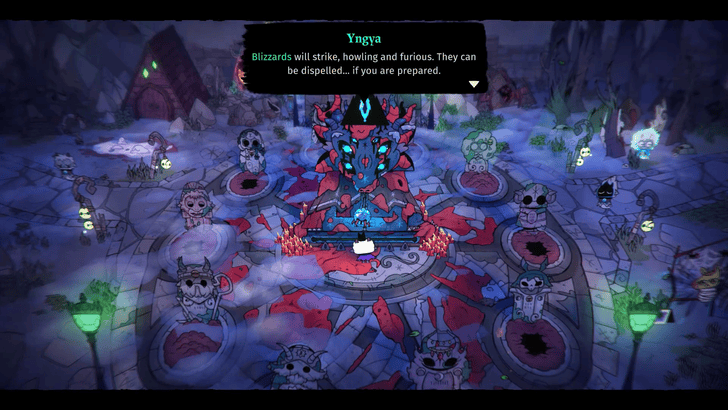
Meeting Yngya at The Rot
| # | Step-by-Step Guide |
|---|---|
| 1 |  Make your way to the Heart of the Moutain in The Rot. |
| * | If you're planning on defeating Yngya without attacking her for the Respect Thy Mother achievement, it is recommended to equip either Ratau's Cloak or the Fleece of the Fragile Fortitude beforehand. ▶︎ List of All Fleeces |
| 2 | 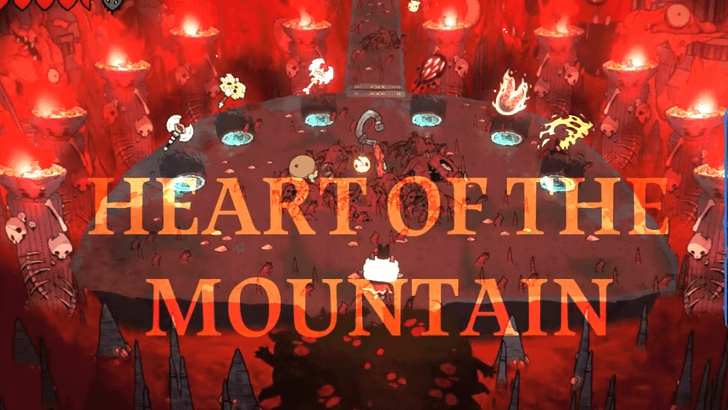 Three weapons and three curses will be made available for you. Choose the weapon and curse suited to your playstyle before proceeding onward. It is recommended to choose a teleportation curse if you plan on beating Yngya without attacking her. |
| 3 | 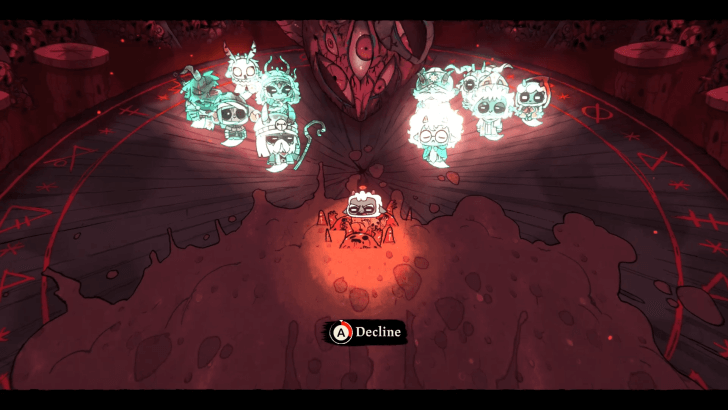 Yngya's disciples will appear and try to convince you to sacrifice yourself. You must Decline multiple times until the disciples merge with Yngya and the Yngya boss fight begins. |
| 4 | 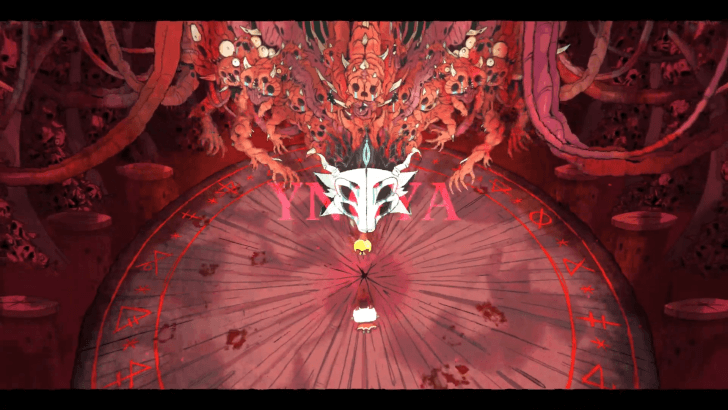 As you deplete Yngya's health, the disciples will exit her body one by one. Before her HP drops completely, the fight will end and Yngya will turn into a Follower. |
| * | It is possible to complete this fight without attacking Yngya, since Yngya will drain her own HP periodically to produce Rotten enemies. Doing so will reward you with the hidden achievement Respect Thy Mother. However, this method will make the fight much longer and requires you to continuously dodge her attacks so that you are not defeated before the fight ends. ▶︎ All Woolhaven Achievements |
| 5 | 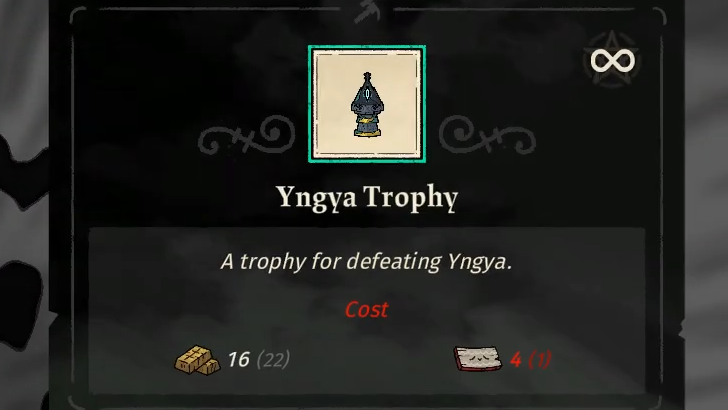 At the end of the battle, you will recieve the Yngya Trophy decoration. The credits will then roll, ending the story of the Woolhaven DLC. |
| 6 | Now that you've finished the story, endless mode for Ewefall and The Rot will unlock. This allows you to go through these dungeons continuously, even after facing the dungeon bosses. You can also finish rebuilding Woolhaven if you haven't done so yet, and complete the quest boards of the disciples such as the one for the Legendary Weapons. |
Cult of the Lamb Related Guides

Lands of the Old Faith: All Dungeons
All Woolhaven Dungeons
| Woolhaven Dungeons | |
|---|---|
| Ewefall | The Rot |
Comment
Author

The Rot Walkthrough, Bosses, and Resources
Rankings
- We could not find the message board you were looking for.
Gaming News


Popular Games

Genshin Impact Walkthrough & Guides Wiki
Umamusume: Pretty Derby Walkthrough & Guides Wiki
Crimson Desert Walkthrough & Guides Wiki
Monster Hunter Stories 3: Twisted Reflection Walkthrough & Guides Wiki
Honkai: Star Rail Walkthrough & Guides Wiki
Pokemon Pokopia Walkthrough & Guides Wiki
The Seven Deadly Sins: Origin Walkthrough & Guides Wiki
Wuthering Waves Walkthrough & Guides Wiki
Zenless Zone Zero Walkthrough & Guides Wiki
Arknights: Endfield Walkthrough & Guides Wiki


Recommended Games
Fire Emblem Heroes (FEH) Walkthrough & Guides Wiki
Diablo 4: Vessel of Hatred Walkthrough & Guides Wiki
Cyberpunk 2077: Ultimate Edition Walkthrough & Guides Wiki
Yu-Gi-Oh! Master Duel Walkthrough & Guides Wiki
Super Smash Bros. Ultimate Walkthrough & Guides Wiki
Pokemon Brilliant Diamond and Shining Pearl (BDSP) Walkthrough & Guides Wiki
Elden Ring Shadow of the Erdtree Walkthrough & Guides Wiki
Monster Hunter World Walkthrough & Guides Wiki
The Legend of Zelda: Tears of the Kingdom Walkthrough & Guides Wiki
Persona 3 Reload Walkthrough & Guides Wiki


All rights reserved
Copyright Massive Monster 2022. All Rights Reserved.
The copyrights of videos of games used in our content and other intellectual property rights belong to the provider of the game.
The contents we provide on this site were created personally by members of the Game8 editorial department.
We refuse the right to reuse or repost content taken without our permission such as data or images to other sites.