List of Puzzles and Solutions
★ Game is Now Live on All Platforms!
☆ Safe and Chest Unlock Codes
★ Tips and Tricks for Getting Started
☆ Installation Errors Guide | Best Settings
★ All Characters | All Locations | All Puzzles
This is a list of all puzzles in Indiana Jones and the Great Circle. Check out our complete list of puzzles and how to solve them!
Prologue Puzzle
| Puzzle | Location and Solution |
|---|---|
 Golden Idol Golden Idol |
Location: Deep in a temple in the jungles of South America.
1. Disarm the traps. Look at the distinct markings on the right tiles. 2. Switch the sandbag with the idol, then make a run for it. |
Marshall College Puzzle
| Puzzle | Location and Solution |
|---|---|
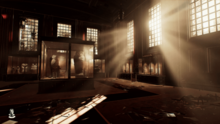 The Exhibit The Exhibit |
Location: In the exhibit room of the Marshall College in Conneticut.
1. Place the artifacts in the right order. 2. At the leftmost display shelf place the Bastet Statue, then Terracotta Relief. 3. On the next display shelf, start with the Funerary Mask, leave a space, then the Ivory case at the very end. |
Prologue and Marshall College Guide
The Vatican Puzzles
Vatican Adventure Puzzles
| Puzzle | Location and Solution |
|---|---|
 Sacred Wounds Sacred Wounds |
Location: In a secret underground chamber under the Tower of Nicholas V.
1. Pour wine on the golden basins, wait until the wine leaves a residue. 2. Take note of the residue, as well as the marked body part of Christ on the mural. 3. Match the numbers found on the basin with levers on the depicted image of the crucified Christ. |
 Fountain of Confession Fountain of Confession |
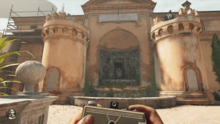
Location: Located past the Vatican Garden in the Vatican City.
1. Have the two dragon statues face each other. 2. Move the lever to see different sides of the puzzle. 3. On the right side of the puzzle, have the water pass from the man's bucket to the boy. 4 On the left side of the puzzle, make a path for the boat piece to move across the wall relief. 5. Push the statues into position to open the gate. |
 Gold Path Trial Gold Path Trial |
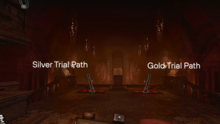
Location: Found in the Secret Monastery located underneath the Fountain of Confession.
1. Reach the far-right corner of the room to enter the control hall with the chains. 2. Align the pillars so that each pillar ignites the appropriate vent. 3. Pull the lever by the door and escape the room. |
 Silver Path Trial Silver Path Trial |
Location: Found in the Secret Monastery located underneath the Fountain of Confession.
1. Reach the far-left corner of the room to enter hall with two stone tablets. 2. Take the first tablet to the central mechanism. 3. Take the second tablet to the mechanism on the other side. |
 Bulls of Blood Bulls of Blood |
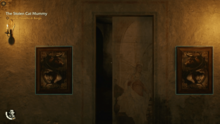
Location: Inside the Castel Sant'Agenlo
1. Rotate the two bull portraits so that the red bulls are looking at each other. 2. The hint to this puzzle can be found on the table across from the wall. |
Vatican Mystery Puzzles
| Puzzle | Location and Solution |
|---|---|
 Secret of Secrets Secret of Secrets |
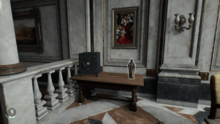
Location: Found in an office to the west of the Sistine Chapel's main hall.
1. Find the two notes in the office giving hints to the safe combination. 2. Inspect the statues of the saints. Use the notes you found to decode the symbols and figure out the safe combination. |
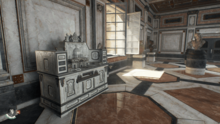 House of God House of God |
Location: Found in an art gallery on the second floor of the Apostolic Palace.
1. Move the lever to open compartments on either side of the puzzle box. 2. Get objects from the left side compartments and insert them into other parts of the puzzle box. |
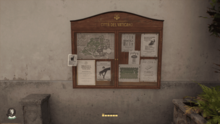 A Free Spirit A Free Spirit |
Location: Found along Via Di Belvedere.
1. Check out the missing cat poster on the bulletin board in front of the Tower of Nicholas V. 2. Take pictures of the cats in the area using your camera until you find Signor Smushki, the black cat, along the rooftops. 3. Post a photo of Signor Smushki onto the missing cat poster. |
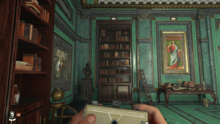 A Snake in the Garden A Snake in the Garden |
Location: Found inside Father Ventura's office on the second floor of the Apostolic Palace.
1. Pull a book from the book shelf in the office to begin the puzzle. 2. Check the note on the table for the clue. 3. Check the spines of the books in the bookshelf. They must be pulled in the correct order. |
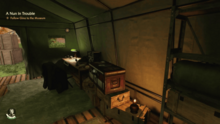 A Date to Remember A Date to Remember |
Location: Found in the restricted areas of Belvedere Courtyard and the Museum Wing.
1. Gather documents from tents in the Belvedere Courtyard Military Zone and the Museum Wing. 2. Use these documents to figure out the code for the locked container inside a tent in the Museum Wing. |
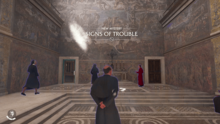 Signs of Trouble Signs of Trouble |
Location: This mystery unlocks only after completing the A Nun in Trouble fieldwork. This mystery begins with a note slipped inside the Bible in the Sistine Chapel.
1. Read the note inside the Bible. 2. Acquire a Blackshirt Disguise. This is optional but recommended. 3. Go to the dig site in the Apostolic Palace. 4 Find and crack the safe. 5. Return the information in the Bible in the Sistine Chapel. |
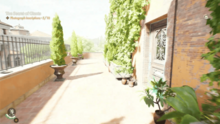 Father and Son Father and Son |
Location: Found in a room outside Borgia Tower after completing A Nun in Trouble.
1. Use Giuliana's key to unlock the room outside the third floor of Borgia Tower. 2. Find the Italian Poem and Polybius Square Diagram from the desk drawers to figure out the safe code. 3. Input the code into the safe to complete the puzzle and collect the rest of the notes for the mystery. |
Vatican Chest Puzzles
| Puzzle | Location and Solution |
|---|---|
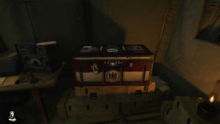 Belvedere Courtyard Chest Belvedere Courtyard Chest |
Location: Found in one of the tents in the Belvedere Courtyard.
1. Locate the hint in the form of a ticket stub in the nearby area. 2. Unlock the chest with the code from the hint. |
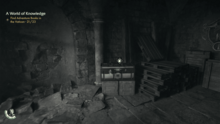 Post Office Cellar Lockbox Post Office Cellar Lockbox |
Location: Found in the cellar beneath the post office along Via Di Belvedere. The Cellar Key is required to access this area, which can be obtained in A Savage Discovery.
1. Defeat the guard inside the cellar. 2. Once defeated, take the note from his body to figure out the code to the locked chest in the cellar. |
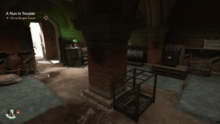 Museum Safe Museum Safe |
Location: Found in a garden storage room connected to the museum. You can reach this safe during the A Nun in Trouble fieldwork, or return here afterward by going through the door in the garden of Via di Belvedere.
1. Turn off the green lamp in the room to see the safe code. 2. Input the code into the museum safe. |
Gizeh Puzzles
Gizeh Adventure Puzzles
| Puzzle | Location and Solution |
|---|---|
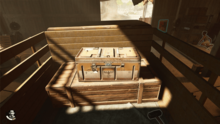 Nazi Vehicle Garage Chest Nazi Vehicle Garage Chest |
Location: Inside the Nazi Vehicle Garage
1. Find the note inside the garage. 2. Open the chest with the code from the note. 3. Take the Harvest Stele. |
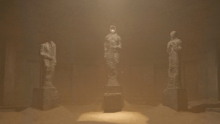 Chamber of Resonance Chamber of Resonance |
Location: Found underneath the great pyramid west of the Nazi compound.
1. Examine the tablets on the wall. 2. Find the missing piece of one of the tablets. 3. Recite the words on the tablet in the correct order. |
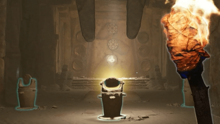 Three Eyed Gate Three Eyed Gate |
Location: Found in the underground cave system beneath the pyramid.
1. Find a way to get more light rays into the chamber. 2. Make the light hit the panels on the side of the door to match the three locks. |
Gizeh Fieldwork Puzzles
| Puzzle | Location and Solution |
|---|---|
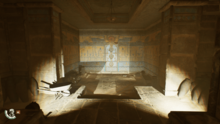 Secret of the Queen Mother Mural Secret of the Queen Mother Mural |
Location: Found in sublevel 1 of the excavation site for the Tomb of Khentkawes.
1. The mural glyphs should be in this order: bird at the top, snake in the middle, and fish at the bottom. 2. Once the pieces are all in place, follow the light to a breakable wall. 3. Break the wall, grab the Light Stele, then make your escape. |
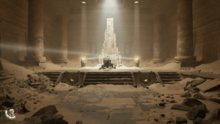 Gold Mask Mirror Puzzle Gold Mask Mirror Puzzle |
Location: Found inside the Great Sphinx during the Sanctuary of the Guardians fieldwork. This is the first of two mirror puzzles in this area.
1. Move the mirrors near the large stone structure so that they hit the mirrors near the door diagonally. 2. Move the mirrors near the door so that they hit the gold circles at the base of the platform diagonally. |
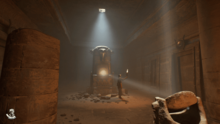 Statue of Light Statue of Light |
Location: Found inside the Great Sphinx during the Sanctuary of the Guardians fieldwork. This is the second of two mirror puzzles in this area.
1. Move the mirror to shine light on the gold disc above the left door to open it. 2. Help Gina up into the hole above the right door, then place the mirror she slides to you into the slot in the left room. 3. Shine the light onto the mirror Gina is holding. |
Gizeh Mystery Puzzles
| Puzzle | Location and Solution |
|---|---|
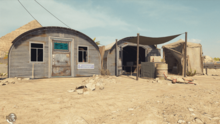 Cloud Atlas Cloud Atlas |
Location: Found inside a weather station in northwest of the Gizeh Workers' Area.
1. Find the two notes in the station. 2. Match the cloud data logbook with the numerical classifaction of clouds in the status page. 3. Open the chest with the code from the two notes. |
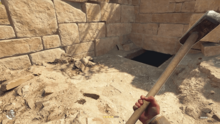 Seat of Eternity Seat of Eternity |
Location: Found in a small tomb northwest of the Great Sphinx.
1. Locate the four canopic jars. 2. Place them in the right order to open the sarcophagus. |
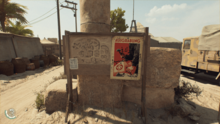 Fortune's Reach Fortune's Reach |
Location: Found near Nawal's tent in the Worker's Area.
1. Pick up the Wanted Poster from the bulletin board. 2. Take a picture of the spilled red paint and footsteps south from Nawal’s tent. 3. Follow the footsteps to an underground opening south of the Worker’s Area. 4 Pick up the note inside. |
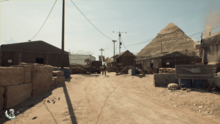 Bright Future Bright Future |
Location: The letter that starts this mystery is found in the Nazi Vehicle Garage. The chest you need to open is located along the main road between the Great Sphinx and the Tomb of Khentkawes.
1. Get Pohl's Letter and the Nazi Note from the Nazi Vehicle Garage restricted area. 2. Find the locked crate at the midpoint of the Sphinx and Khentkawes, and enter the code. 3. Run away before the dynamites inside detonate. |
Gizeh Chests and Miscellaneous Puzzles
| Puzzle | Location and Solution |
|---|---|
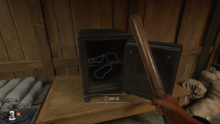 Nazi Compound Safe Nazi Compound Safe |
Location: Inside the Nazi Compound, located in the building where Hoss' office is located.
1. The safe can be found in the back part of the main floor. 2. The note containing the code can be found on the second floor near the telephone. 3. Input the code 40926 to open the safe. Claim the gun, money, and Ancient Relic inside. |
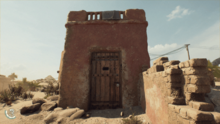 Locked House Locked House |
Location: Found southwest of Gizeh Village.
1. Climb onto the roof of the locked house using the boxes and broken wall on the side. 2. Get the Discarded Key from the bird’s nest on the roof. 3. Unlock the door using the Discarded Key. |
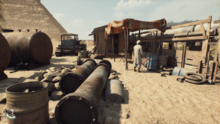 Wehrmacht Chest Wehrmacht Chest |
Location: Found in a shed requiring the Wehrmacht Key in the elevated area between the Nazi Vehicle Garage and the Great Pyramid Excavation Site.
1. Pick up the note inside the shed for a clue to the code. 2. Check the cards on the table for the code. Use your camera to zoom in if you’re having trouble seeing the card numbers. 3. Enter the code into the chest in this room. |
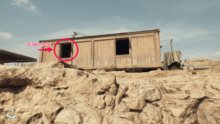 Egyptian Numeral Chest Egyptian Numeral Chest |
Location: Found in a small room inside the wooden house near the Tomb of Khentkawes that’s accessible through a window
1. Get the Numeral Basics note from the shelf. 2. Pick up the clipboard with the Egyptian Numeral Code, and use the other note to decipher the number combination. 3. Enter the code into the chest in this room. |
The Himalayas Puzzles
Himalayas Adventure Puzzles
| Puzzle | Location and Solution |
|---|---|
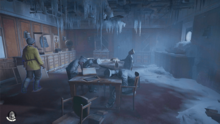 Kummetz Cipher Kummetz Cipher |
Location: Found in the Officer's Quarters on the KMS Kummetz
1. Take the four code wheels and put them in the machine. 2. Take note of the Captain's Code and turn the wheels to match the captain's code. 3. Match the result with the code tables found in the room. 4 Input the correct number on the door. |
Sukhothai Puzzles
Sukhothai Adventure Puzzles
| Puzzle | Location and Solution |
|---|---|
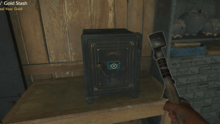 Voss' Gold Stash Safe Voss' Gold Stash Safe |
Location: Found deep inside Voss' camp in Sukhothai.
1. Take out the guard in the room where the safe is in. 2. Get the code to the safe from the pocket of the knocked out guard. 3. Open the safe with the pre-made combination and take all the gold. |
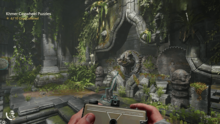 Hidden Gate Hidden Gate |
Location: Found in a hidden chamber in the northern region of Sukhothai. Requires the Rebreather to get to this place.
1. Turn on the main gear. 2. Align the cogwheels in both the left and right gear. 3. Open the gate. |
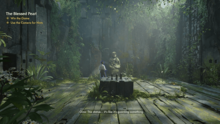 Nephilim Game Nephilim Game |
Location: Found at the top of the hidden pyramid in Sukhothai.
1. Gather all the game pieces. 2. Solve the puzzle by placing the game pieces in such a way that all the stone figures will face the statue. |
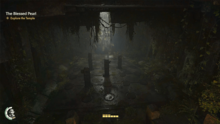 The Great Game The Great Game |
Location: Found inside the hidden temple in Wat Mahathat
1. Find the entrance to the Hidden Temple. 2. Observe the great game, wait until the cutscene plays out. 3. Direct the people in the correct placements to turn the stone figures and unlock the door. |
Sukhothai Fieldwork Puzzles
| Puzzle | Location and Solution |
|---|---|
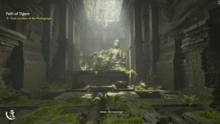 Khmer Pipeworks Khmer Pipeworks |
Location: Found deep inside Wat Si Sawai during The Kid Who Vanished fieldwork.
1. Turn on the faucet. 2. Gather all the pipes. 3. Arrange the pipes so that the water flows into the three drains. |
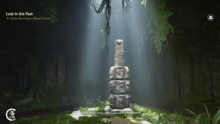 Prayer Wheel Prayer Wheel |
Location: Found inside a temple in Wat Sa Si in the Lost in the Past fieldwork in Sukhothai
1. When you've escaped the dream loop, you will encounter the Prayer Wheel. 2. Consult with your journal to learn the Adamic symbols for “exodus”, “temple”, and “rebirth”. 3. Rotate the discs on the prayer wheel so that the three symbols align with each other. |
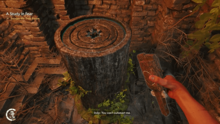 Symbol Pedestal Symbol Pedestal |
Location: Found inside the secret Khmer Vault in the A Study in Fear fieldwork
1. Find the three keys for the symbol pedestals. 2. Use the keys on the pedastal to stop one or two of the spinning discs. 3. Align the symbols on the pedastal using the keys to get out of the tomb. |
Sukhothai Discovery Puzzles
| Puzzle | Location and Solution |
|---|---|
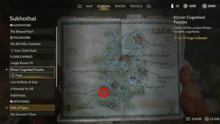 Khmer Cogwheel Puzzles Khmer Cogwheel Puzzles |
Location: Found in multiple locations all across Sukhothai.
1. Collect all 10 Khmer Cogwheels scattered throughout Sukhothai. 2. Solve gear puzzles at each location to get an Ancient Relic. 3. Solve the final Khmer Gear Puzzle west of Voss' Camp when you collect all 10 cogwheels. |
Sukhothai Mystery Puzzles
| Puzzle | Location and Solution |
|---|---|
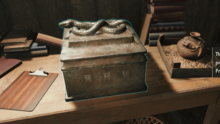 The Serpent's Chest The Serpent's Chest |
Location: This chest is found in Voss' Camp in Sukhothai, but requires three keys from previous regions.
1. Find the note and the chest in Voss' Camp when you steal his gold stash. 2. Find the key in the Necropolis in the Vatican. 3. Get the key from a wealthy trader in Shanghai. 4 Find the key buried somewhere in Gizeh. 5. Return to Voss' Camp and unlock the Serpent's Chest |
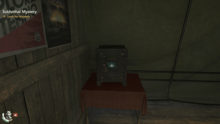 A Game of Wits A Game of Wits |
Location: The safe is found in a barracks in the northern part of Voss' Camp in Sukhothai
1. Solve the Mak-Yek Puzzle. 2. Open the chest with the combination. |
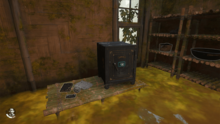 Path of Tigers Path of Tigers |
Location: Found in a flooded hut near Tongdang's hut.
1. Inspect the photograph and the safe to start the mystery. 2. Find the location of the photograph. 3. Return to the safe with the code. |
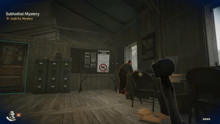 Monkey Business Monkey Business |
Location: Found in the Fascist Armory in Wat Mahathat
1. Take a picture of the monkey warning on the second floor of the building. 2. Follow the monkeys' trail out of the camp. 3. Retrieve the Equipment Room key and return to the camp to unlock the Equipment Room. |
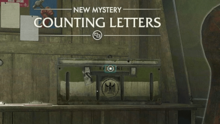 Counting Letters Counting Letters |
Location: Found in a tent in Wat Mahathat
1. Infiltrate the Nazi Camp in Wat Mahathat. 2. Decipher the code needed for the chest. 3. Open the chest and claim your rewards. |
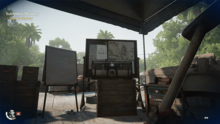 Timely Arrival Timely Arrival |
Location: Found in a tent in Wat Chana Songkhram
1. Infiltrate the Nazi Camp in Wat Chana Songkhram. 2. Decipher the code needed for the chest. 3. Open the chest and claim your rewards. |
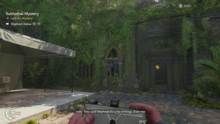 Elephant in the Room Elephant in the Room |
Location: Found ina Buddhist shrine north of Voss' Camp
1. Gather all 3 Elephant Statues. 2. Place all 3 Statues in the niches beneath the Buddha statue. 3. Discover the secrets of the Shrine. |
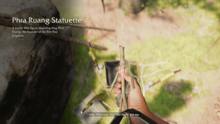 Child's Play Child's Play |
Location: Found in the village in Sukhothai
1. Find the bottle in the water by near where Uncle Sunan is fishing. This will be west of Indy's Hut in the Village. 2. Follow the simple instructions of the childish treasure hunt. 3. Enjoy the perks of getting the Jumbo Shove adventure book! |
Indiana Jones and the Great Circle Related Guides

| All Categories | |
|---|---|
 Puzzles Puzzles |
 Locations Locations |
 Tips and Tricks Tips and Tricks |
 Books Books |
 News News |
|
Comment
Really enjoyed this post very informative and engaging. By the way, alles gute und liebe zum geburtstag to anyone celebrating today, wishing you lots of happiness and success! https://geburtstagswünsche.io/
Author
Indiana Jones and the Great Circle Walkthrough & Guides Wiki
List of Puzzles and Solutions
Rankings
- We could not find the message board you were looking for.
Gaming News
Popular Games

Genshin Impact Walkthrough & Guides Wiki

Umamusume: Pretty Derby Walkthrough & Guides Wiki

Crimson Desert Walkthrough & Guides Wiki

Monster Hunter Stories 3: Twisted Reflection Walkthrough & Guides Wiki

Honkai: Star Rail Walkthrough & Guides Wiki

Pokemon Pokopia Walkthrough & Guides Wiki

The Seven Deadly Sins: Origin Walkthrough & Guides Wiki

Wuthering Waves Walkthrough & Guides Wiki

Zenless Zone Zero Walkthrough & Guides Wiki

Arknights: Endfield Walkthrough & Guides Wiki
Recommended Games

Fire Emblem Heroes (FEH) Walkthrough & Guides Wiki

Diablo 4: Vessel of Hatred Walkthrough & Guides Wiki

Cyberpunk 2077: Ultimate Edition Walkthrough & Guides Wiki

Yu-Gi-Oh! Master Duel Walkthrough & Guides Wiki

Super Smash Bros. Ultimate Walkthrough & Guides Wiki

Pokemon Brilliant Diamond and Shining Pearl (BDSP) Walkthrough & Guides Wiki

Elden Ring Shadow of the Erdtree Walkthrough & Guides Wiki

Monster Hunter World Walkthrough & Guides Wiki

The Legend of Zelda: Tears of the Kingdom Walkthrough & Guides Wiki

Persona 3 Reload Walkthrough & Guides Wiki
All rights reserved
© 2024 ZeniMax Media Inc. All Rights Reserved.
The copyrights of videos of games used in our content and other intellectual property rights belong to the provider of the game.
The contents we provide on this site were created personally by members of the Game8 editorial department.
We refuse the right to reuse or repost content taken without our permission such as data or images to other sites.


![Death Stranding 2: On The Beach [PC] Review | A Port That Delivers](https://img.game8.co/4447392/15310a0c9aa1b6843bb713b2ea216930.jpeg/show)


Love the retro vibes in this! Using a vintage photo booth http://www.beautyplus.com/vintage-photo-booth style really adds charm and nostalgia to photos it makes every shot feel fun and timeless.