The Vatican City Guide
★ Game is Now Live on All Platforms!
☆ Safe and Chest Unlock Codes
★ Tips and Tricks for Getting Started
☆ Installation Errors Guide | Best Settings
★ All Characters | All Locations | All Puzzles
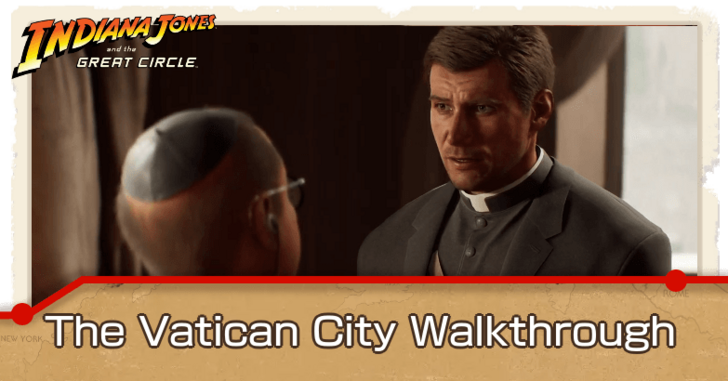
This is a complete walkthrough and area guide for The Vatican City in Indiana Jones and the Great Circle. Read on for a detailed guide for The Vatican City, all puzzles and solutions, and all Adventure Books you can find in this chapter!
List of Contents
Vatican City Guide
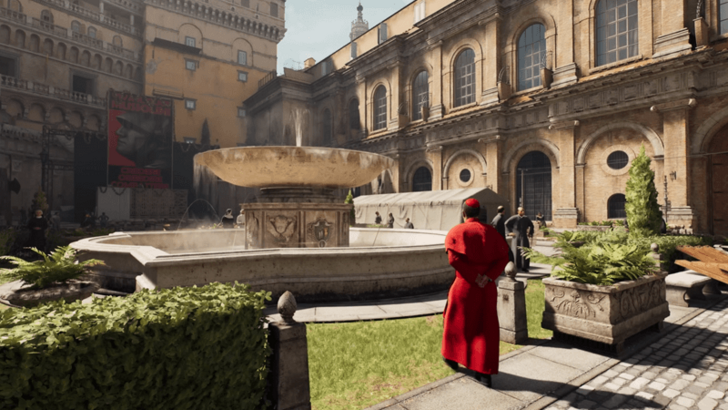
The Vatican City, Italy
| Chapter 2: The Vatican City, Italy | |
|---|---|
 |
|
| Locations | ・The Vatican, Italy |
Vatican Walkthrough
| Objectives | |
|---|---|
| 1 | After the transition finishes, you will be in Castel Sant'Angelo, just outside the Vatican. Here, you will face your first enemy. Climb up the fortress, then drop down to the Chruch of the Condemed, to continue your journey. |
| 2 | Climb to the top of the castle in Bastione San Giovanni. After going through the window, you will have to face a group of enemies to get the Captain's Key. You can find the Lucky Hat Adventure Book on a nearby desk in the captain's office. Note: You can also find the Bulls of Blood puzzle in this area. |
| 3 | Zipline down to Bastione San Marco. After fighting two fascists in the storage room, you can get Punch Out I on top of some boxes. After walking on an outdoor hallway, you will meet Father Antonio and be transported to the Vatican City. |
| 4 | Your first mission in the Vatican is to explore the underground section of the Apostolic Library Use the Giant's Pendant to open a secret passage. |
| 5 | Sneak to the Post Office to buy a Camera from Ernesto. It costs 379 Euros. Use it to take the photos of four inscriptions around the Vatican. |
| 6 | The clues will lead you to the Tower of Nicholas V. Father Antonio will also give you a bottle of Wine. By using the Wine, you can gain access to the Underworld and solve the Sacred Wounds Puzzle. ▶ Sacred Wounds Puzzle Solution |
| 7 | After you recieve your next clue, you will have to find a way back to the Vatican. You will have to go up aganist two enemy encounters to exit the level. Before you go back to Father Antonio's office, you will meet Gina, your future companion. Note: Ernesto will start selling maps for the collectibles and Adventure Books in the Vatican |
| 8 | After talking to Father Antonio, head to the Vatican Gardens to complete the Fountain of Confession puzzle. Gina will join you when you unlock it. When you solve it, an underground passage will open. To advance further, you will have to complete the Silver Path Trial and the Gold Path Trial. ▶ Fountain of Confession Puzzle Solution |
| 9 | You will enter a secret Monastery. After some investigation, you will unlock the Treasure Chamber. When you get the Cat Mummy, you will have to fight Locus, the intruder from the Marshal College section. |
| 10 | After you beat Locus, a lengthy cutscene will play to introduce Emmerich Voss, the main antagonist. When it ends, you will make your way to his airship from the Rooftop of St. Peter's Basilca. After you enter the airship, the game will transition to the next location. |
Vatican City Puzzles
| Puzzle | Location and Solution |
|---|---|
 Sacred Wounds Sacred Wounds |
Location: In a secret underground chamber under the Tower of Nicholas V.
1. Pour wine on the golden basins, wait until the wine leaves a residue. 2. Take note of the residue, as well as the marked body part of Christ on the mural. 3. Match the numbers found on the basin with levers on the depicted image of the crucified Christ. |
 Belvedere Courtyard Chest Belvedere Courtyard Chest |
Location: Found in one of the tents in the Belvedere Courtyard.
1. Locate the hint in the form of a ticket stub in the nearby area. 2. Unlock the chest with the code from the hint. |
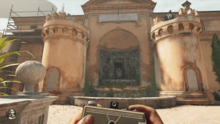 Fountain of Confession Fountain of Confession |
Location: Located past the Vatican Garden in the Vatican City.
1. Have the two dragon statues face each other. 2. Move the lever to see different sides of the puzzle. 3. On the right side of the puzzle, have the water pass from the man's bucket to the boy. 4 On the left side of the puzzle, make a path for the boat piece to move across the wall relief. 5. Push the statues into position to open the gate. |
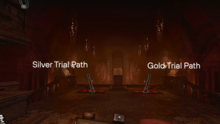 Gold Path Trial Gold Path Trial |
Location: Found in the Secret Monastery located underneath the Fountain of Confession.
1. Reach the far-right corner of the room to enter the control hall with the chains. 2. Align the pillars so that each pillar ignites the appropriate vent. 3. Pull the lever by the door and escape the room. |
 Silver Path Trial Silver Path Trial |
Location: Found in the Secret Monastery located underneath the Fountain of Confession.
1. Reach the far-left corner of the room to enter hall with two stone tablets. 2. Take the first tablet to the central mechanism. 3. Take the second tablet to the mechanism on the other side. |
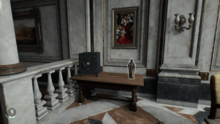 Secret of Secrets Secret of Secrets |
Location: Found in an office to the west of the Sistine Chapel's main hall.
1. Find the two notes in the office giving hints to the safe combination. 2. Inspect the statues of the saints. Use the notes you found to decode the symbols and figure out the safe combination. |
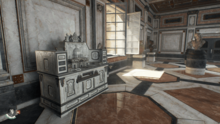 House of God House of God |
Location: Found in an art gallery on the second floor of the Apostolic Palace.
1. Move the lever to open compartments on either side of the puzzle box. 2. Get objects from the left side compartments and insert them into other parts of the puzzle box. |
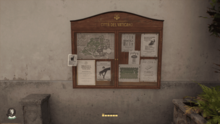 A Free Spirit A Free Spirit |
Location: Found along Via Di Belvedere.
1. Check out the missing cat poster on the bulletin board in front of the Tower of Nicholas V. 2. Take pictures of the cats in the area using your camera until you find Signor Smushki, the black cat, along the rooftops. 3. Post a photo of Signor Smushki onto the missing cat poster. |
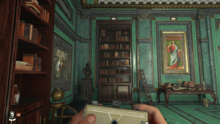 A Snake in the Garden A Snake in the Garden |
Location: Found inside Father Ventura's office on the second floor of the Apostolic Palace.
1. Pull a book from the book shelf in the office to begin the puzzle. 2. Check the note on the table for the clue. 3. Check the spines of the books in the bookshelf. They must be pulled in the correct order. |
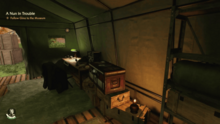 A Date to Remember A Date to Remember |
Location: Found in the restricted areas of Belvedere Courtyard and the Museum Wing.
1. Gather documents from tents in the Belvedere Courtyard Military Zone and the Museum Wing. 2. Use these documents to figure out the code for the locked container inside a tent in the Museum Wing. |
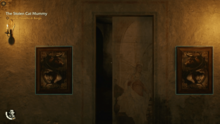 Bulls of Blood Bulls of Blood |
Location: Inside the Castel Sant'Agenlo
1. Rotate the two bull portraits so that the red bulls are looking at each other. 2. The hint to this puzzle can be found on the table across from the wall. |
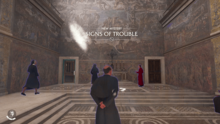 Signs of Trouble Signs of Trouble |
Location: This mystery unlocks only after completing the A Nun in Trouble fieldwork. This mystery begins with a note slipped inside the Bible in the Sistine Chapel.
1. Read the note inside the Bible. 2. Acquire a Blackshirt Disguise. This is optional but recommended. 3. Go to the dig site in the Apostolic Palace. 4 Find and crack the safe. 5. Return the information in the Bible in the Sistine Chapel. |
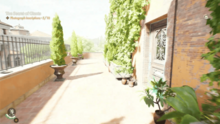 Father and Son Father and Son |
Location: Found in a room outside Borgia Tower after completing A Nun in Trouble.
1. Use Giuliana's key to unlock the room outside the third floor of Borgia Tower. 2. Find the Italian Poem and Polybius Square Diagram from the desk drawers to figure out the safe code. 3. Input the code into the safe to complete the puzzle and collect the rest of the notes for the mystery. |
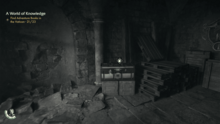 Post Office Cellar Lockbox Post Office Cellar Lockbox |
Location: Found in the cellar beneath the post office along Via Di Belvedere. The Cellar Key is required to access this area, which can be obtained in A Savage Discovery.
1. Defeat the guard inside the cellar. 2. Once defeated, take the note from his body to figure out the code to the locked chest in the cellar. |
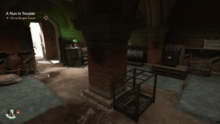 Museum Safe Museum Safe |
Location: Found in a garden storage room connected to the museum. You can reach this safe during the A Nun in Trouble fieldwork, or return here afterward by going through the door in the garden of Via di Belvedere.
1. Turn off the green lamp in the room to see the safe code. 2. Input the code into the museum safe. |
Vatican City Adventure Books
| ✔ | Book | Location | Book Type | Area | Adventure Points | How to Find | Effect |
|---|---|---|---|---|---|---|---|
| Brawler I | The Vatican | Brawling | Bastione San Marco | 200 | On a box located in the room before you arrive at the Passetto Di Borgo, just before you meet Antonio in the Main Story. | Deal increased damage in armed and hand-to-hand combat. | |
| Brawler II | The Vatican | Brawling | Belvedere Courtyard | 400 | Found inside a tent in Belvedere Courtyard. Inside the restricted area | Deal increased damage in armed and hand-to-hand combat. | |
| Climbing Ace I | The Vatican | Fitness | Belvedere Courtyard | 100 | Found on top of a barrel near a man having his coffee break. | Drain less stamina and enables faster movement by using L while ledge climbing. | |
| Cutman I | The Vatican | Fitness | Sistine Chapel | 250 | Complete the Secret of Secrets Puzzle | Improved health bar regeneration efficiency | |
| Fruit Bag | The Vatican | Packing | Apostolic Palace | 250 | Found on a patio once you escape the Necropolis and after your interaction with Gina Lombardi. | Carry twice the amount of fruit. | |
| Hardboiled I | The Vatican | Survival | Underground Boxing Ring | 350 | Buy from the Underground Boxing Ring for 720 euros | Harden protection by merging two health bars into one. | |
| Iron Grip I | The Vatican | Fitness | Apostolic Palace | 225 | The Mad Priest Field Work is needed to obtain | Indy can clinch enemies for longer | |
| Lucky Hat I | The Vatican | Survival | Captain's Room (Capitano) | 125 | Found in the same room as the Captain's Key. | After being knocked out, Indy can pick up his fedora using X, giving him a second chance at the fight. Lucky Hat is disabled while Indy's Outfit Fortitude is on cooldown. | |
| Marshall College Guide | The Vatican | Exploration | Apostolic Library | - | Complete the A Savage Discovery to obtain | Shows the locations of Notes in Marshall College | |
| Pep I | The Vatican | Fitness | Belvedere Courtyard | 275 | Found inside a tent in Belvedere Courtyard. | Add a boost to stamina recovery speed. | |
| Punch Out I | The Vatican | Brawling | Castel Sant'Angelo | 25 | Found on top of a Box near the Guard House Key | Restore stamina when an enemy is knocked out. | |
| Sawbones I | The Vatican | Packing | Underground Boxing Ring | 250 | Buy from the Underground Boxing Ring for 400 euros | Bandage inventory capacity is increased by one. | |
| Splinter Smash | The Vatican | Combat | Belvedere Courtyard | 300 | Found inside a locked chest in a tent in Belvedere Courtyard. The combination to the chest can be found on the Ticket Stub found in the same area. | The last hit before an improvised weapon breaks deals additional dammage. | |
| Street Scrapper I | The Vatican | Combat | Post Office | 250 | Post Office Cellar Lockbox Code | Deal increased damage with one and two handed melee weapons | |
| Throttle | The Vatican | Combat | Borgia Courtyards | 200 | The A Nun in Trouble Field Work is needed to obtain. | Knock out unware light-weight and medium-weight enemies with a whip pull | |
| Vatican Artifacts | The Vatican | Exploration | Post Office | - | Buy from Ernesto after obtaining the camera for 300 euros. | Shows the locations of Artifacts in the Vatican | |
| Vatican Books | The Vatican | Exploration | Post Office | - | Buy from Ernesto after obtaining the camera for 300 euros. | Shows the locations of Books in the Vatican | |
| Vatican Medicine | The Vatican | Exploration | Museum Wing | - | Obtain by completing A Date to Remember Field Work. It will be in a locked chest with a code of 6380 | Shows the locations of Medicine Bottles in the Vatican | |
| Vatican Mysteries | The Vatican | Exploration | Post Office | - | Buy from Ernesto after obtaining the camera for 300 euros. | Shows the locations of Mysteries of the Vatican | |
| Vatican Notes | The Vatican | Exploration | Post Office | - | Buy from Ernesto after obtaining the camera for 600 euros. | Shows the locations of Notes in the Vatican | |
| Vatican Relics | The Vatican | Exploration | Belvedere Courtyard | - | Obtain by completing House of God Puzzle | Shows the locations of Relics in the Vatican |
Vatican City Journal Notes
| ✔ | Collectible | Location | Item Type | Area | Quest | How to Find |
|---|---|---|---|---|---|---|
| Fountain Underground Map | The Vatican | Map | Fountain Underground | The Stolen Cat Mummy | Automatically obtained by getting to the area. | |
| Necropolis Lower Map | The Vatican | Map | Necropolis Lower | The Stolen Cat Mummy | Automatically obtained by getting to the area. | |
| Underworld Map | The Vatican | Map | Underworld | The Stolen Cat Mummy | Automatically obtained by getting to the area. | |
| Library Map | The Vatican | Map | Library | The Stolen Cat Mummy | Automatically obtained by getting to the area. | |
| Vatican City Map | The Vatican | Map | Apostolic Library | The Stolen Cat Mummy | Next to some candles before you first head out to the City. | |
| Castel Sant'Angelo | The Vatican | Map | Castel Sant'Angelo: Capella | The Stolen Cat Mummy | Located across from the Rampart Key. On top of a Prayer Kneeler under a Crucifix. | |
| Atonement Prayer | The Vatican | Adventure | Fountain Underground: Secret Monastery | The Stolen Cat Mummy | Use your whip to cross to the other balcony, you can find the paper at the end of the path. | |
| Chariot Card | The Vatican | Adventure | Outside Fountain of Confession | The Stolen Cat Mummy | On a stone bench found outside the Fountain of Confession. | |
| Ziggurat Dig Report | The Vatican | Adventure | Treasure Chamber | The Stolen Cat Mummy | Found in a shelf next to an old vase in the bottom right corner of the map. | |
| Artifacts List | The Vatican | Adventure | Treasure Chamber | The Stolen Cat Mummy | Found on top of a desk in the bottom right corner of the map. | |
| Rossi's Letter | The Vatican | Adventure | Treasure Chamber | The Stolen Cat Mummy | Found on top of some books in the bottom right corner of the map. | |
| Vatican Secrets | The Vatican | Adventure | Treasure Chamber | The Stolen Cat Mummy | Obtained after reading the letter to Brother Locus. | |
| Biblia Sacra Cover | The Vatican | Adventure | Scriptorium | The Stolen Cat Mummy | Found on top of a podium in the Scriptorium. | |
| Laetus' Letter | The Vatican | Adventure | Scriptorium | The Stolen Cat Mummy | Found on top of a desk in the Scriptorium. | |
| Strange Writing Page | The Vatican | Adventure | Scriptorium | The Stolen Cat Mummy | Found on top of a desk in the Scriptorium. | |
| Trials of Augur | The Vatican | Adventure | Fountain Underground | The Stolen Cat Mummy | Take a photo of the statue of the three priests holding an inscribed tablet. | |
| Gold Path Plaque | The Vatican | Adventure | Fountain Underground | The Stolen Cat Mummy | Take a photo of the Gold Path plaque before the central puzzle area. | |
| Gold Path Forge | The Vatican | Adventure | Fountain Underground | The Stolen Cat Mummy | Take a photo of the Gold Path forge after the central puzzle area. | |
| Silver Path Plaque | The Vatican | Adventure | Fountain Underground | The Stolen Cat Mummy | Take a photo of the Silver Path plaque before the central puzzle area. | |
| Silver Path Forge | The Vatican | Adventure | Fountain Underground | The Stolen Cat Mummy | Take a photo of the Silver Path forge after the central puzzle area. | |
| Courtyard Plaque | The Vatican | Adventure | Fountain Underground | The Stolen Cat Mummy | Take a photo of the plaque in between the levers you need to pull to get the keys. | |
| Strange Mural | The Vatican | Adventure | Tower of Nicholas V: Sewers | The Stolen Cat Mummy | Takje a photo of the mural where you unlock the entrance to the Underworld with the wine. | |
| Priestess Card | The Vatican | Adventure | Apostolic Palace | The Stolen Cat Mummy | In the chapel filled with nuns, in one of the church pews. | |
| Mario's Note | The Vatican | Adventure | Castel Sant'Angelo | The Stolen Cat Mummy |
Posted on a wall next to a gate and a Martble Bust.
Prerequisite:
• Captain's Key |
|
| Explorer's Journal | The Vatican | Adventure | Underworld | The Stolen Cat Mummy | From the Sacred Wounds Mural, head in and take the first turn left that you see. Afterwards, take the first right and inside the room there will be a hole on the wall to your left. Climb up the hole and it will take you to a room where the page can be found on the floor near the gate. | |
| Trapped Account | The Vatican | Adventure | Underworld | The Stolen Cat Mummy | Grab the bust from the Holy Chalice mural, and take it to a podium further in. Can be found if you head in and take the first turn right that you see. | |
| Ark of Bulrushes Rotations | The Vatican | Adventure | Fountain of Confession | The Stolen Cat Mummy | Automatically obtained after solving the Ark of Bulrushes Puzzle. | |
| The Ark of Bulrushes | The Vatican | Adventure | Fountain of Confession | The Stolen Cat Mummy | Rotate the gate and take a photo of the Ark of Bulrushes puzzle. (You can return and take photos of them on the side if you solved the puzzle) | |
| The Baptism | The Vatican | Adventure | Fountain of Confession | The Stolen Cat Mummy | Rotate the gate and take a photo of the baptism statues. (You can return and take photos of them on the side if you solved the puzzle) | |
| Fountain Gate | The Vatican | Adventure | Fountain of Confession | The Stolen Cat Mummy | Take a photo of the three statues after solving the Fountain Puzzle. | |
| Left Tower Inscription | The Vatican | Adventure | Fountain of Confession | The Stolen Cat Mummy | Take a photo of the inscription under the white dragon. | |
| Right Tower Inscription | The Vatican | Adventure | Fountain of Confession | The Stolen Cat Mummy | Take a photo of the inscription under the black dragon. | |
| Fountain of Confession | The Vatican | Adventure | Fountain of Confession | The Stolen Cat Mummy | Take a photo of the central fountain with the dragon. | |
| Laura Photograph | The Vatican | Adventure | Apostolic Palace | The Stolen Cat Mummy | Automatically obtained during the quest "The Stolen Cat Mummy" | |
| Lockpicking Nun | The Vatican | Adventure | Apostolic Palace | The Stolen Cat Mummy |
Automatically obtained during the quest "A Nun in Trouble"
Prerequisite:
• Progress the quest "A Nun in Trouble" |
|
| Warrior Giant's Parchment | The Vatican | Adventure | Underworld | The Stolen Cat Mummy | Inside the Tomb of the Wasrrior Giant, automatically obtained as part of the story. | |
| Paranoid Writing | The Vatican | Adventure | Underworld | The Stolen Cat Mummy | From the Sacred Wounds Mural, head in and take the first turn left that you see. Afterwards, keep walking forward until you see a burnable crawl space. Head in and you should drop down to a room with the Paranoid Writing on the floor. | |
| Anointment of Jesus | The Vatican | Adventure | Underworld | The Stolen Cat Mummy | Photo of the mural to the right of the Walking on Water mural. Found behind a gate. | |
| Walking on Water | The Vatican | Adventure | Underworld | The Stolen Cat Mummy | Photo of the mural to the right of the Sacred Wounds mural. | |
| Holy Chalice | The Vatican | Adventure | Underworld | The Stolen Cat Mummy | Photo of the mural to the left of the Sacred Wounds mural. | |
| Sacred Wounds Mural | The Vatican | Adventure | Underworld | The Stolen Cat Mummy | Central mural in the puzzle when you head down the Underworld. | |
| Body of Christ | The Vatican | Adventure | Underworld | The Stolen Cat Mummy | Photo of the mural further to the left of the Holy Chalice mural. The gate will lock behind you when you first get here. | |
| Spear of Longinus | The Vatican | Adventure | Underworld | The Stolen Cat Mummy | Head past to the left of the Body of Christ Mural, the one is a statue instead. Right next to a breakable wall. | |
| Crescenzo's Map | The Vatican | Adventure | Below the Apostolic Library | The Stolen Cat Mummy | On the desk in front of a skeleton. | |
| Mad Scribbles | The Vatican | Adventure | Below the Apostolic Library | The Stolen Cat Mummy | On the desk in front of a skeleton. | |
| Father Antonio | The Vatican | Adventure | Apostolic Library | The Stolen Cat Mummy | Take a photo of Antonio | |
| De Vito's Letter | The Vatican | Adventure | Castel Sant'Angelo | The Stolen Cat Mummy | On a desk under a lamp. Found near the Punch Out I Book. | |
| Caruso's Letter | The Vatican | Adventure | Castel Sant'Angelo: Capella | The Stolen Cat Mummy | On top of a box in the room next to where you found the Castel Sant'Angelo Map. | |
| Ipeo Card | The Vatican | Fieldwork | Apostolic Palace | The Mad Priest | On a red bench near the Green Office with the Dragon Statue. | |
| Contraband List | The Vatican | Fieldwork | Belvedere Courtyard | The Mad Priest | Stuck on a box when you exit out of the Apostolic Library. | |
| Confiscation Manifest | The Vatican | Fieldwork | Apostolic Palace | The Mad Priest | Beside a bust next to the Iron Grib I Book. | |
| Crescenzo's Diary | The Vatican | Fieldwork | Apostolic Palace | The Mad Priest | Inside a ration box. Automatically obtained while progressing the Mad Priest quest. | |
| Ventura's Letter | The Vatican | Fieldwork | Apostolic Library | The Mad Priest | On Antonio's Desk after you see him and Father Ventura arguing | |
| Catherine's Letter | The Vatican | Fieldwork | Post Office | The Mad Priest | Found on a desk inside the Post Office. | |
| Dig Site Schedule | The Vatican | Fieldwork | Excavation Site | A Savage Discovery |
On the desk with the typewriter.
Prerequisite:
• Blackshirt Outfit(optional) |
|
| Sidney's Letter (Vatican) | The Vatican | Fieldwork | Blackshirt Barracks | A Savage Discovery |
In the room where Sidney was held captive.
Prerequisite:
• Blackshirt Outfit(optional) |
|
| Fool Card | The Vatican | Fieldwork | Outside Sistine Chapel | A Savage Discovery | From the board where you meet Professor Savage, there is a barrel where you can find this item.. | |
| Theft Report | The Vatican | Fieldwork | Belvedere Courtyard | A Savage Discovery | Located at the first tent after stepping out of the Apostolic Library. On a pile of documents next to an oil lamp. | |
| Giuliana's Information | The Vatican | Fieldwork | Borgia Tower 5F | A Nun in Trouble | Given by Giuliana after being saved. Automatically obtained. | |
| Interrogation Document | The Vatican | Fieldwork | Borgia Tower 5F | A Nun in Trouble | Inside the room where Giuliana was held captive. On top of a box. | |
| Tower Card | The Vatican | Fieldwork | Borgia Tower 2F | A Nun in Trouble | Climb up from the 1F, and turn left. It will be on a small table. | |
| Gold Ring | The Vatican | Fieldwork | Museum Stockroom | A Nun in Trouble | Pick up the ring near the smear of blood on the floor. Required to progress the quest "A Nun in Trouble" | |
| Blood | The Vatican | Fieldwork | Museum Stockroom | A Nun in Trouble | Take a photo of the smear of blood on the floor. Required to progress the quest "A Nun in Trouble" | |
| Footprints | The Vatican | Fieldwork | Museum Stockroom | A Nun in Trouble | Take a photo of the floor with the white footprints. | |
| Castello Photograph | The Vatican | Fieldwork | Museum Stockroom | A Nun in Trouble | Given by Gina, required to progress the quest "A Nun in Trouble" | |
| Identification Card | The Vatican | Fieldwork | Museum Stockroom | A Nun in Trouble | On the floor in between some dividers, required to progress the quest "A Nun in Trouble" | |
| Gina's Note | The Vatican | Fieldwork | Museum Stockroom | A Nun in Trouble | On a box next to a lamp, required to progress the quest "A Nun in Trouble" | |
| Handprint | The Vatican | Fieldwork | Museum Stockroom | A Nun in Trouble | On the wall, required to progress the quest "A Nun in Trouble" | |
| Piece of Cloth | The Vatican | Fieldwork | Museum Stockroom | A Nun in Trouble | On the floor, required to progress the quest "A Nun in Trouble" | |
| Mother-in-Law's Letter | The Vatican | Fieldwork | Sistine Chapel | A Nun in Trouble | On the floor after punching the cheating guy in the Confessional. | |
| Tenth Inscription | The Vatican | Fieldwork | Excavation Site | The Secret of Giants | Tucked away in a corner next to one of the doors leading to the Apostolic Palace. | |
| Ninth Inscription | The Vatican | Fieldwork | Washing Tent | The Secret of Giants | Next to an impassable gate. | |
| Eighth Inscription | The Vatican | Fieldwork | Via Di Belvedere: Cellar | The Secret of Giants |
You need to progress through the quest, "A Savage Discovery". Inside the Cellar, near a ration box.
Prerequisite:
• Cellar Key |
|
| Seventh Inscription | The Vatican | Fieldwork | Outside the Fountain of Confession | The Secret of Giants | Facing the Fountain, turn left and head up the staircase. | |
| Sixth Inscription | The Vatican | Fieldwork | Museum Wing | The Secret of Giants | Right next to an impassable gate up a set of stairs. | |
| Fifth Inscription | The Vatican | Fieldwork | Sewers | The Secret of Giants |
Located just after you complete the climbing section in the sewers.
Prerequisite:
• Obtain the Sewer Key from Antonio in The Mad Priest |
|
| Fourth Inscription | The Vatican | Fieldwork | Borgia Courtyards | The Secret of Giants | Head out the window behind the Basilica at the Apostolic Palace and turn right. Climb up the wall with your whip. | |
| Third Inscription | The Vatican | Fieldwork | Belvedere Courtyard | The Secret of Giants | Climb up the scaffolding behind the Stage Construction. Turn right and it will be next to an impassable gate. | |
| Second Inscription | The Vatican | Fieldwork | Belvedere Courtyard | The Secret of Giants | Under the fountain. Facing across the Apostolic Library. | |
| First Inscription | The Vatican | Fieldwork | Garden | The Secret of Giants | Can be found at the northeastern part of the garden. | |
| Ancient Relic 10 (Vatican) | The Vatican | Discoveries | Treasure Chamber | Riddles of the Ancients | Can be found on a shelf beside a desk with the Artifacts List. | |
| Ancient Relic 9 (Vatican) | The Vatican | Discoveries | Fountain Underground | Riddles of the Ancients | Pass through the first set of Pendulum blades and the Relic will be in the pit below the second set of pendulum blades. | |
| Ancient Relic 8 (Vatican) | The Vatican | Discoveries | Fountain Underground | Riddles of the Ancients | Located in a secret area in the Gold Path. Find the crawlspace and place the bust on the | |
| Ancient Relic 7 (Vatican) | The Vatican | Discoveries | Necropolis Lower | Riddles of the Ancients | You need to solve the two Marble Bust puzzle with the breakable wall. | |
| Ancient Relic 6 (Vatican) | The Vatican | Discoveries | Necropolis Lower | Riddles of the Ancients | From the room with two whip grapples, climb the highest one and it will be in the room to the right of the Nike Statue. | |
| Ancient Relic 5 (Vatican) | The Vatican | Discoveries | Necropolis Lower | Riddles of the Ancients | In the room past where you have to swing through the chandelier. Use a bust to open the gate on the right and the Relic will be on the floor. | |
| Ancient Relic 4 (Vatican) | The Vatican | Discoveries | Necropolis Lower | Riddles of the Ancients | Past the hole in the wall with flowing water. You need to throw a torch through a hole in the adjacent room. | |
| Ancient Relic 3 (Vatican) | The Vatican | Discoveries | Necropolis Lower | Riddles of the Ancients | After the Tomb of the Warrior Giant collapses, use your whip to slowly descend and there will be a hole in the wall you can swing to where this Relic can be found in. | |
| Ancient Relic 2 (Vatican) | The Vatican | Discoveries | Apostolic Library | Riddles of the Ancients |
Reward by Antonio after completing the quests "The Secret of Giants"
Prerequisite:
• Complete the The Secret of Giants |
|
| Ancient Relic 1 (Vatican) | The Vatican | Discoveries | Below the Apostolic Library | Riddles of the Ancients | On a shelf next to some old lab equipment. | |
| Golden Xiphos | The Vatican | Discoveries | Sistine Chapel | Lost Artifacts of Europe | Enter the chapel from Borgia Courtyard and turn to the left. There is an upside down painting that you can flip over and the Golden Xiphos will be hidden behind it. | |
| Parade Helmet | The Vatican | Discoveries | Tower of Nicholas V | Lost Artifacts of Europe | After you unlock the Underworld. platform up the staircase. The helmet will be at the top. | |
| Venus Figurine | The Vatican | Discoveries | Borgia Tower 5F | Lost Artifacts of Europe | Behind a breakable wall where Giuliana was held captive. Use a two-handed weapon to break it. | |
| Drinking Horn | The Vatican | Discoveries | Museum | Lost Artifacts of Europe | Inside the safe at the storage room exit. The code is 7171. | |
| Bronze Mirror | The Vatican | Discoveries | Tower of Nicholas V: Sewers | Lost Artifacts of Europe | Past the bridge, beat up the fascist and break the wall behind him with a Two-handed Weapon. Head inside and the Bronze Mirror will be at the end of the path.. | |
| Medicine 15 (Vatican) | The Vatican | Discoveries | Belvedere Courtyard: Blackshirt Camp | A Remedy for All | Inside the tent with a ton of blue barrels. Located southeastern area of the camp. | |
| Medicine 14 (Vatican) | The Vatican | Discoveries | Blackshirt Barracks | A Remedy for All |
Inside the locked area with the sign saying "Atenzione"
Prerequisite:
• Blackshirt Key |
|
| Medicine 13 (Vatican) | The Vatican | Discoveries | Apostolic Palace | A Remedy for All | On a table inside the Green Room with the Dragon Statue. | |
| Medicine 12 (Vatican) | The Vatican | Discoveries | Sewers | A Remedy for All |
Located just after you complete the climbing section in the sewers.
Prerequisite:
• Obtain the Sewer Key from Antonio in The Mad Priest |
|
| Medicine 11 (Vatican) | The Vatican | Discoveries | Washing Tent | A Remedy for All | Right across the Washing Tent, on a bench. | |
| Medicine 10 (Vatican) | The Vatican | Discoveries | Area Outside Agency Room | A Remedy for All |
Near the zipline, on top of a crate.
Prerequisite:
• Complete A Nun in Trouble |
|
| Medicine 9 (Vatican) | The Vatican | Discoveries | Excavation Site | A Remedy for All | On top of a bench inside the rest area. | |
| Medicine 8 (Vatican) | The Vatican | Discoveries | Behind Post Office | A Remedy for All | On top of a crate, near where the window cleaners are. | |
| Medicine 7 (Vatican) | The Vatican | Discoveries | Apostolic Palace | A Remedy for All |
Past the door guarded by multiple Fascist and the dog.
Prerequisite:
• Blackshirt Outfit(optional) |
|
| Medicine 6 (Vatican) | The Vatican | Discoveries | Outside the Tower of Nicholas V | A Remedy for All | Past the guards, right outside the 2F entrance of the Tower of Nicholas V | |
| Medicine 5 (Vatican) | The Vatican | Discoveries | Outside Sistine Chapel | A Remedy for All |
Next to a fascist guarding the door to the Borgia Tower.
Prerequisite:
• Blackshirt Outfit(optional) |
|
| Medicine 4 (Vatican) | The Vatican | Discoveries | Blackshirt Barracks | A Remedy for All |
On a table in the second floor next to a guitar.
Prerequisite:
• Blackshirt Outfit(optional) |
|
| Medicine 3 (Vatican) | The Vatican | Discoveries | Outside Sistine Chapel | A Remedy for All | From the board where you meet Professor Savage, head west and it should be on a table near some gossiping ladies. | |
| Medicine 2 (Vatican) | The Vatican | Discoveries | Belvedere Courtyard | A Remedy for All | On a table inside a tent across the fast travel street sign. | |
| Medicine 1 (Vatican) | The Vatican | Discoveries | Via Di Belvedere | A Remedy for All | At a gated storage area southwest of the Pharmacy. | |
| Treasure Chamber | The Vatican | Discoveries | Treasure Chamber | Field Notes | Position yourself at the center of the Treasure Chamber. Take a photo of the central table with the horse statue. | |
| Metatron Statue | The Vatican | Discoveries | Fountain Underground: Secret Monastery | Field Notes | Takle a photo of the angel statue behind the altar. | |
| Ornamented Gate | The Vatican | Discoveries | Fountain Underground | Field Notes | Take a photo of the gate where you need to insert the Silver and Gold Keys. | |
| Pendulum Trap | The Vatican | Discoveries | Fountain Underground | Field Notes | Position yourself before the first pendulum before jumping. | |
| Oceanus | The Vatican | Discoveries | Necropolis Lower | Field Notes | Third flooded room after dropping into the hole after the Tomb collapses. Position yourself in between the two torches to obtain this photo. | |
| Window Cleaning | The Vatican | Discoveries | Sistine Chapel Repair Area | Field Notes | Position yourself up the scaffolding under the chandelier and point the camera up. | |
| Secret Room | The Vatican | Discoveries | Borgia Tower 5F | Field Notes | Behind a breakable wall where Giuliana was held captive. Use a two-handed weapon to break it. | |
| Cacio e Pepe Recipe | The Vatican | Discoveries | Borgia Tower 3F | Field Notes | Swing to the door that requires Giuliana's Key, and turn right. You can climb up the scaffolding to a small area where this will be on top of a crate. | |
| Vatican Apostolic Library | The Vatican | Discoveries | Apostolic Library | Field Notes | Can be photographed by standing at the area across Antonio's office. | |
| Fixture Work | The Vatican | Discoveries | Apostolic Library | Field Notes | Take a photo of the maintenance worker fixing the sconce near Antonio's Office. | |
| Gizeh Postcard | The Vatican | Discoveries | Castel Sant'Angelo | Field Notes | On the bottom bunk at the western area at the barracks. | |
| Cobblestone Workers | The Vatican | Discoveries | Outside Tower of Nicholas V | Field Notes | They are located behind some Blackshirts. | |
| Facade Painting | The Vatican | Discoveries | Roof Next to Post Office | Field Notes | You can zip from the balcony where oyu dropped from to get the Coffee Break photo to get the proper position for this photo. | |
| Coffee Break | The Vatican | Discoveries | Balcony East of Garden | Field Notes | Climb up the scaffold iin the garden and head towards the Pharmacy. You will see a guy in a vest eating a croissant. | |
| Belvedere Courtyard | The Vatican | Discoveries | Belvedere Courtyard | Field Notes | Position yourself on the balcony past the nearby inscription. You should be next to a street lamp. | |
| Washing Tent | The Vatican | Discoveries | Washing Tent | Field Notes | Can be found where you can obtain the Blackshirt Outfit. Take a photo of the tent. | |
| Sistine Chapel Ceiling | The Vatican | Discoveries | Sistine Chapel | Field Notes | Take a photo of the ceiling in the chapel, no specific angles required. | |
| Sister Catherine | The Vatican | Discoveries | Sistine Chapel | Field Notes | Take a photo of Sister Catherine. | |
| Vatican Excavation | The Vatican | Discoveries | Apostolic Palace | Field Notes | Head out the window closest to the one with only one guard. | |
| Shanghai Article | The Vatican | Discoveries | Apostolic Palace | Field Notes | After completing the Underworld section of the The Stolen Cat Mummy quest, found in the eqipment storage room where Gina enters. | |
| Anchored Airship | The Vatican | Discoveries | Apostolic Palace | Field Notes | After the first cutscene with Gina, you can take a photo of the airship. | |
| Chapel Altar | The Vatican | Discoveries | Apostolic Palace | Field Notes | In the chapel filled with nuns. Located in the room before you first encounter Gina. | |
| Dragon Statue | The Vatican | Discoveries | Apostolic Palace | Field Notes | Take a photo of the Dragon Statue in the Green Room | |
| Stolen Artifacts | The Vatican | Discoveries | Apostolic Palace | Field Notes | Take a photo of the shelves in the location you unlock while doing the Mad Priest sidequest. Position youself next to the door to the Excavation Site. | |
| Marble Statue | The Vatican | Discoveries | Apostolic Palace | Field Notes | Located at the room left of the Basilica. | |
| Stage Construction | The Vatican | Discoveries | Belvedere Courtyard | Field Notes | Position yourself next to the guitar near the bald guy that is setting up. | |
| Propaganda Flyer | The Vatican | Discoveries | Castel Sant'Angelo: Capella | Field Notes |
Once you obtain the Blackshirt Key from the Washing Tent, head back to Caste Sant'Angelo and there will be a locked gate there where you can sue the key. The flyer will be on top of a crate.
Prerequisite:
• Requires Blackshirt Key |
|
| Pope Article | The Vatican | Discoveries | Castel Sant'Angelo: Capella | Field Notes | On top of a crate, on the room above where you get the Rampart Key and the Castel Sant'Angelo Map. | |
| Vatican Seal | The Vatican | Discoveries | Apostolic Palace | Field Notes | In the ceiling of the hallway where there are three Blackshirts guarding the Green Room with the dragon. | |
| Lovers' Tomb | The Vatican | Discoveries | Necropolis Lower | Field Notes | From the room past the gate locked by a bust guarded by two fascists, there will be a crawl space and you can take a photo of the mural inside. | |
| Nike Statue | The Vatican | Discoveries | Necropolis Lower | Field Notes | From the room with two whip grapples, climb the highest one and it will be up there. | |
| Jerusalem Cross | The Vatican | Discoveries | Underworld | Field Notes | From where you got the Burial Chamber Key, head past the gate and there will be a staircase leading down to the pillar. The Jerusalem Cross should be one of the stone engravings on the wall under there. | |
| Sewer Bridge | The Vatican | Discoveries | Tower of Nicholas V: Sewers | Field Notes | After going down from the Tower staircase, you can eaily position yourself to take a photo of the bridge. | |
| Saltimbocca alla Romana Recipe | The Vatican | Discoveries | Via Di Belvedere | Field Notes | On a bench across the gate from the garden. | |
| Adjusting Painting | The Vatican | Discoveries | Apostolic Library | Field Notes | Take a photo of the two priests trying to adjust the framed photo near the staircase. | |
| Teacher and Apprentice | The Vatican | Discoveries | Apostolic Library | Field Notes |
Take a photo of Sideney and Professor Savage in the Apostolic Library.
Prerequisite:
• Complete the Quest: A Savage Discovery |
|
| Valeria | The Vatican | Discoveries | Pharmacy | Field Notes | Talk to her first since she will not be available to photos beforehand. | |
| Lockbox Note | The Vatican | Discoveries | Via Di Belvedere: Cellar | Field Notes |
You need to progress through the quest, "A Savage Discovery". Defeat the Fascist that arrives after getting the Stone Slate.
Prerequisite:
• Cellar Key |
|
| Swiss Guard Postcard | The Vatican | Discoveries | Excavation Site | Field Notes |
On the leftmost desk in front of a locked box.
Prerequisite:
• Blackshirt Outfit(optional) |
|
| Roman Murals | The Vatican | Discoveries | Museum | Field Notes | Take a photo of the floor right in front of the busts in the Museum. | |
| Ornate Door | The Vatican | Discoveries | Belvedere Courtyard: Blackshirt Camp | Field Notes | Inside the camp of the Blackshirts in Belvedere Courtyard. | |
| St. Peter Postcard | The Vatican | Discoveries | Blackshirt Barracks | Field Notes |
On a desk on the floor above where Sidney was held captive.
Prerequisite:
• Blackshirt Outfit(optional) |
|
| Tales of Dread #3 | The Vatican | Discoveries | Blackshirt Barracks | Field Notes |
On a bench near a Ration Box.
Prerequisite:
• Blackshirt Outfit(optional) |
|
| Tales of Dread #2 | The Vatican | Discoveries | Belvedere Courtyard: Blackshirt Camp | Field Notes | Inside the tent in the southeastern portion of the camp. | |
| Boxing Ring | The Vatican | Discoveries | Underground Fight Club | Field Notes |
Take a photo of the Boxing Ring
Prerequisite:
• Requires Blackshirt Outfit |
|
| Study Group | The Vatican | Discoveries | Apostolic Library | Field Notes | Take a photo of the three nuns studying. | |
| Tomb of the Warrior Giant | The Vatican | Discoveries | Underworld | Field Notes |
From where you got the Burial Chamber Key, head south and head through the arch with the III label. Follow the path making sure not to fall on the foggy gap, so use your whip to cross the gap.
Prerequisite:
• Burial Chamber Key |
|
| Tomb Fresco | The Vatican | Discoveries | Underworld | Field Notes | From where you got the Burial Chamber Key, head south and head through the arch with the III label. Follow the path making sure not to fall on the foggy gap, so use your whip to cross the gap. Find a burnable door to your left. | |
| Antonio | The Vatican | Discoveries | Apostolic Library | Field Notes | Take a photo of Antonio in his Office. | |
| Bird Feeding | The Vatican | Discoveries | Garden | Field Notes | There is a priest feeding a pigeon in the garden west of the Pharmacy. | |
| Great Tower Hall | The Vatican | Discoveries | Tower of Nicholas V | Field Notes | You need to be on the third floor entrance. Take a photo of the large thing covered in a sheet. | |
| Angry Note | The Vatican | Discoveries | Outside Tower of Nicholas V | Field Notes | Stuck on a sewer gate across the Tower. | |
| Ernesto | The Vatican | Discoveries | Post Office | Field Notes | Can be obtained as soon as you get the camera from him. | |
| Risotto ai Funghi Recipe | The Vatican | Discoveries | Post Office | Field Notes | Found on a small desk when you enter one home after getting past the enemy with the dog. | |
| Ticket Stub | The Vatican | Discoveries | Belvedere Courtyard | Field Notes | Found in a drawer inside a tent in Belvedere Courtyard. | |
| Briscola Flyer | The Vatican | Discoveries | Apostolic Library | Field Notes | On a desk next to the priest who is studying alone. | |
| Tales of Dread #1 | The Vatican | Discoveries | Castel Sant'Angelo | Field Notes | On a desk at the Fascists' storarge area. | |
| Valeria's Letter | The Vatican | Discoveries | Castel Sant'Angelo | Field Notes | On a desk near a fireplace. Room can be found south The Bulls of Blood Paintings. | |
| Russo's Note | The Vatican | Mysteries | Castel Sant'Angelo | The Bulls of Blood | On a desk right next to a candle | |
| Cesare Borgia's Letter | The Vatican | Mysteries | Castel Sant'Angelo | The Bulls of Blood | In the hidden room after aligning the Bulls of Blood Paintings. | |
| Angel Courtyard Map | The Vatican | Mysteries | Castel Sant'Angelo | The Bulls of Blood | On a desk under a lamp. Guarded by a sleeping Fascist and in front of the Bulls of Blood paintings. | |
| Red Bulls Card | The Vatican | Mysteries | Castel Sant'Angelo | The Bulls of Blood | On a desk under a lamp. Guarded by a sleeping Fascist and in front of the Bulls of Blood paintings. | |
| Giovanni's Letter | The Vatican | Mysteries | Museum Wing | A Date to Remember |
Obtained after opening the locked box. Code is 6380.
Prerequisite:
• Blackshirt Outfit(optional) |
|
| Code Lookup Table | The Vatican | Mysteries | Museum Wing | A Date to Remember |
Inside the drawer of the desk located inside the tent.
Prerequisite:
• Blackshirt Outfit(optional) |
|
| Calendar Page | The Vatican | Mysteries | Museum Wing | A Date to Remember |
On the desk located inside the tent.
Prerequisite:
• Blackshirt Outfit(optional) |
|
| Secret Delivery Letter | The Vatican | Mysteries | Museum Wing | A Date to Remember |
On the desk located inside the tent.
Prerequisite:
• Blackshirt Outfit(optional) |
|
| Hidden Note | The Vatican | Mysteries | Sistine Chapel | Secret of Secrets | In the safe along with the Books. | |
| Planetary Chart | The Vatican | Mysteries | Sistine Chapel | Secret of Secrets | In the desk within the same room needed to solve the puzzle. | |
| Nicoletti's Letter | The Vatican | Mysteries | Sistine Chapel | Secret of Secrets | On a deak across the safe you need to solve to complete the quest. | |
| Cleaning Note | The Vatican | Mysteries | Apostolic Palace | House of God | Found on top of the Basilica puzzle. Can be quickly accessed by climbing the scaffolding at Belvedere Courtyard. | |
| Black and White Cat | The Vatican | Mysteries | Pharmacy Garden | A Free Spirit |
Can be found under the tree.
Prerequisite:
• Talk to Valeria at the Pharmacy |
|
| Orange Cat | The Vatican | Mysteries | Via Di Belvedere | A Free Spirit | On the rooftops above under some vines. | |
| White Cat | The Vatican | Mysteries | Via Di Belvedere | A Free Spirit | On the rooftops, should be on top of a chimney. | |
| Signor Smushki | The Vatican | Mysteries | Via Di Belvedere | A Free Spirit | On the rooftops across from where you find the Orange Cat. | |
| Brown Cat | The Vatican | Mysteries | Garden | A Free Spirit | Climb up the scaffold and it will be sitting on a scaffolding bench. | |
| Mussolini's Letter | The Vatican | Mysteries | Apostolic Palace | A Snake in the Garden | Complete the Bookscase Puzzle. | |
| Bookcase Note | The Vatican | Mysteries | Apostolic Palace | A Snake in the Garden | On the desk next to the typewriter inside the Green Room with the Dragon Statue. | |
| Senior Report | The Vatican | Mysteries | Agency Room | Father and Son |
Inside the safe.
Prerequisite:
• Complete A Nun in Trouble |
|
| Junior Report | The Vatican | Mysteries | Agency Room | Father and Son |
Inside the safe.
Prerequisite:
• Complete A Nun in Trouble |
|
| Office Photograph | The Vatican | Mysteries | Agency Room | Father and Son |
Inside the safe.
Prerequisite:
• Complete A Nun in Trouble |
|
| Siwa Photograph | The Vatican | Mysteries | Agency Room | Father and Son |
Inside the safe.
Prerequisite:
• Complete A Nun in Trouble |
|
| Polybius Square Diagram | The Vatican | Mysteries | Agency Room | Father and Son |
Inside the desk with the typewriter on it.
Prerequisite:
• Complete A Nun in Trouble |
|
| Italian Poem | The Vatican | Mysteries | Agency Room | Father and Son |
Inside the desk across the safe.
Prerequisite:
• Complete A Nun in Trouble |
|
| Contact's Message | The Vatican | Mysteries | Excavation Site | Signs of Trouble | Inside the safe located at the rest area. | |
| Gina's Request | The Vatican | Mysteries | Sistine Chapel | Signs of Trouble |
Slipped inside a Bible on the altar.
Prerequisite:
• Complete A Nun in Trouble |
Indiana Jones and the Great Circle Related Guides
All Locations and Chapters
| All Locations | |
|---|---|
| Prologue & Marshall College |
The Vatican City |
| Gizeh | The HImalayas |
| Shanghai | Sukhothai |
| Iraq | |
Comment
Author
Indiana Jones and the Great Circle Walkthrough & Guides Wiki
The Vatican City Guide
improvement survey
03/2026
improving Game8's site?

Your answers will help us to improve our website.
Note: Please be sure not to enter any kind of personal information into your response.

We hope you continue to make use of Game8.
Rankings
- We could not find the article you were looking for.
- We could not find the message board you were looking for.
Gaming News
Popular Games

Genshin Impact Walkthrough & Guides Wiki

Honkai: Star Rail Walkthrough & Guides Wiki

Umamusume: Pretty Derby Walkthrough & Guides Wiki

Pokemon Pokopia Walkthrough & Guides Wiki

Resident Evil Requiem (RE9) Walkthrough & Guides Wiki

Monster Hunter Wilds Walkthrough & Guides Wiki

Wuthering Waves Walkthrough & Guides Wiki

Arknights: Endfield Walkthrough & Guides Wiki

Pokemon FireRed and LeafGreen (FRLG) Walkthrough & Guides Wiki

Pokemon TCG Pocket (PTCGP) Strategies & Guides Wiki
Recommended Games

Diablo 4: Vessel of Hatred Walkthrough & Guides Wiki

Fire Emblem Heroes (FEH) Walkthrough & Guides Wiki

Yu-Gi-Oh! Master Duel Walkthrough & Guides Wiki

Super Smash Bros. Ultimate Walkthrough & Guides Wiki

Pokemon Brilliant Diamond and Shining Pearl (BDSP) Walkthrough & Guides Wiki

Elden Ring Shadow of the Erdtree Walkthrough & Guides Wiki

Monster Hunter World Walkthrough & Guides Wiki

The Legend of Zelda: Tears of the Kingdom Walkthrough & Guides Wiki

Persona 3 Reload Walkthrough & Guides Wiki

Cyberpunk 2077: Ultimate Edition Walkthrough & Guides Wiki
All rights reserved
© 2024 ZeniMax Media Inc. All Rights Reserved.
The copyrights of videos of games used in our content and other intellectual property rights belong to the provider of the game.
The contents we provide on this site were created personally by members of the Game8 editorial department.
We refuse the right to reuse or repost content taken without our permission such as data or images to other sites.


![Everwind Review [Early Access] | The Shaky First Step to A Very Long Journey](https://img.game8.co/4440226/ab079b1153298a042633dd1ef51e878e.png/thumb)

![Monster Hunter Stories 3 Review [First Impressions] | Simply Rejuvenating](https://img.game8.co/4438641/2a31b7702bd70e78ec8efd24661dacda.jpeg/thumb)


