★ Season 3 is live as of January 23, 2024!
┗ S3 Journey | S3 Questline | S3 Battle Pass
★ Season 3 Class Tier List | Best Season 3 Blessings
★ Learn more about Seneschal Companions
┗ Governing Stones | Tuning Stones
★ Vaults | Nightmare Vaults | Arcane Tremors

This is a Season 1 Arc Lash endgame build for Sorcerer in Diablo 4 (D4) that was created by Stoyven. This is a melee-oriented Basic Skill build that focuses on Arc Lash and The Barber Malignant Heart to create huge burst windows capable of clearing even the toughest challenges. Read on to learn all the Gears, Skills, Aspects that you will need and how to play the build for Season 1 (Version 1.1).
List of Contents
| Jump to a Section! | |||||
|---|---|---|---|---|---|
This Sorcerer build was made by Stoyven. Check out Stoyven's Youtube Channel for more Sorcerer builds and other Diablo IV related content.
This is a melee-oriented endgame build that revolves around Lightning Damage with the use of Arc Lash and several other Aspects, Skills, and Paragon Nodes. This idea is further improved by Malignant Hearts, such as The Barber and Tal’Rasha to achieve a maximized burst damage output.
Aside from dealing high burst damage, the build was also tweaked for high survivability with the presence of numerous Damage Reductions found in the Affixes and Paragon Nodes. You will find this build consistent and durable due to the defensive choices that goes well with the overall synergy of things.
This build was constructed to bring out the maximum potential of a Basic Skill to conquer even the highest challenges in the game.
| Jump to a Section! | |||||
|---|---|---|---|---|---|
| Skill | Upgrade Path | ||
|---|---|---|---|
|
(5 Points) |
→ |
|
|
|
(2 Points) |
→ |
|
|
|
(5 Points) |
→ |
|
|
|
(5 Points) |
→ |
|
|
|
(1 Point) |
→ |
|
|
|
(1 Point) |
→ |
|
- |
| Pure Arc Lash Passives | ||
|---|---|---|
|
(3 Points) |
(1 Point) |
(1 Point) |
|
(3 Points) |
(3 Points) |
(1 Point) |
|
(3 Points) |
(1 Point) |
(3 Points) |
|
(1 Point) |
(3 Points) |
(3 Points) |
|
(1 Point) |
||
| Recommended Skill Progression | ||||
|---|---|---|---|---|
| Lv.2 | Lv.3 | Lv.4 | Lv.5 | |
| | | | | |
| Lv.6 | Lv.7 | Lv.8 | Lv.9 | |
| | | | | |
| Lv.10 | Lv.11 | Lv.12 | Lv.13 | |
| | | | | |
| Lv.14 | Lv.15 | Lv.16 | Lv.17 | |
| | | | | |
| Lv.18 | Lv.19 | Lv.20 | Lv.21 | |
| | | | | |
| Lv.22 | Lv.23 | Lv.24 | Lv.25 | |
| | | | | |
| Lv.26 | Lv.27 | Lv.28 | Lv.29 | |
| | | | | |
| Lv.30 | Lv.31 | Lv.32 | Lv.33 | |
| | | | | |
| Lv.34 | Lv.35 | Lv.36 | Lv.37 | |
| | | | | |
| Lv.38 | Lv.39 | Lv.40 | Lv.41 | |
| | | | | |
| Lv.42 | Lv.43 | Lv.44 | Lv.45 | |
| | | | | |
| Lv.46 | Lv.47 | Lv.48 | Lv.49 | |
| | | | | |
| Renown Skill Points (Lv50 Onwards) | ||||
| R1 | R2 | R3 | R4 | |
| | | | | |
| R5 | R6 | R7 | R8 | |
| | | | | |
| R9 | R10 | |||
| | | |||
| Arc Lash Enchantment Slots | |
|---|---|
|
(Level 15) |
(Level 30) |
Fire Bolt Enchantment is extremely valuable because it will allow you to make use of the Devouring Blaze Skill Passive which will increase your Critical Strike Damage. In addition, this Enchantment makes all of your damaging skills deal Burning damage thus giving you consistent access to Fire element for an additional damage bonus from the Tal’Rasha Malignant Heart.
Flame Shield is a very important Enchantment when tackling higher tiers of Nightmare Dungeons as this will ensure that you survive an unexpected one shot kill. Just be wary of its cooldown and play safe whenever this enchantment is down.
| Jump to a Section! | |||||
|---|---|---|---|---|---|
| Weapon | Aspects and Affixes |
|---|---|
| Dagger | You deal (25-35)% more damage to Immobilized, Stunned, or Frozen enemies. ・+X% Damage to Close (Inherent) ・+X% Vulnerable Damage ・+X% Basic Skill Damage ・+X Intelligence ・+X All Stats |
| Focus | You deal (11-20)% increased damage to Vulnerable enemies while you have Barrier. ・+X% Cooldown Reduction (Inherent) ・+X% Cooldown Reduction ・+X% Basic Skill Attack Speed ・+X% Critical Strike Chance ・+X% Basic Skill Damage |
| Equipment | Aspects and Affixes |
|---|---|
| Helmet | You gain (0.25-0.50)% increased Armor for 4 seconds when you deal any form of damage, stacking up to (66)%. ・+X% Cooldown Reduction ・+X% Basic Skill Attack Speed ・+X Intelligence ・+X All Stats |
| Chest | After using Teleport, Close enemies are Pulled to you and Stunned for (XX) seconds, but Teleport's cooldown is increased by 20%. ・+X Intelligence ・+X% Damage to Close Enemies ・+X% Damage to Stunned Enemies ・+X Rank to Glass Cannon Passive |
| Gloves | Deal (15-25)% increased damage while you have a Barrier active. ・+X% Critical Strike Chance ・+X% Attack Speed ・+X% Lightning Critical Strike Damage ・+X All Stats |
| Pants | Basic Skills grant 20% Damage Reduction for (XX) seconds. ・While Injured, Your Potion Also Grants (XX)% Maximum Life as Barrier (Inherent) ・+X% Damage Reduction from Close Enemies ・+X% Damage Reduction from Distant Enemies ・+X% Damage Reduction ・+X Intelligence |
| Boots | Your Critical Strike Chance is increased by (20-30)% of your Movement Speed bonus. ・Evade Grants +(XX)% Movement Speed for 1 Second (Inherent) ・+X% Movement Speed ・+X% Movement Speed for 6 Seconds After Killing an Elite ・+X% Shrine Buff Duration ・+X% Slow Duration Reduction |
| Jewelry | Aspects and Affixes |
|---|---|
| Amulet | Basic skills gain (15-30)% Attack Speed. ・+X% Resistance to All (Inherent) ・+X% Cooldown Reduction ・+X Ranks to All Defensive Skill ・+X Ranks to Devouring Blaze Passive ・+X% Movement Speed |
| Ring | Distant enemies have a 8% chance to be Stunned for 2 seconds when they hit you. You deal (10-20)% increased damage to Stunned enemies. ・+X% Resistance (Inherent) ・+X% Resistance (Inherent) ・+X% Critical Strike Damage ・+X Maximum Life ・+X% Vulnerable Damage ・+X% Critical Strike Chance |
| Ring | Skills deal up to (10-20)% increased damage based on your available Primary Resource when cast, receiving the maximum benefit while you have full Primary Resource. ・+X% Resistance (Inherent) ・+X% Resistance (Inherent) ・+X% Critical Strike Damage ・+X Maximum Life ・+X% Vulnerable Damage ・+X% Critical Strike Chance |
| Jump to a Section! | |||||
|---|---|---|---|---|---|
| Item Type | Effect |
|---|---|
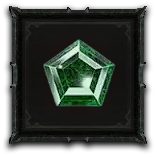 Royal Emerald (Weapon) Royal Emerald (Weapon) |
+12.0% Critical Strike Damage to Vulnerable Enemies |
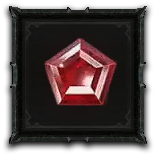 Royal Ruby (Armor) Royal Ruby (Armor) |
4.0% Maximum Life |
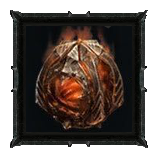
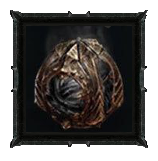 The Barber The Barber |
Type: Wrathful Critical Strikes and all subsequent damage within 2.0-4.0 seconds is absorbed by your target. Then, the absorbed damage erupts onto surrounding enemies. Stored damage is increased by 10% per second. |
 Tempting Fate Tempting Fate |
Type: Vicious You gain 40-60% Critical Strike Damage but your Non-Critical Strikes deal 20-15% less damage. |
| Tal’Rasha |
Type: Vicious For each unique element you deal damage with, you deal 7-12% increased damage for 3-10 seconds. |
For the Gems section of the build, you would want to get Emerald for an additional to Critical Strike Damage to Vulnerable enemies. This will have a high uptime since enemies will mostlikely be dealt with before the Vulnerable application from Frost Nova expires. This works even on bosses, as Vulnerable can be applied any opponent.
Ruby, on the other hand, is valuable as Sorcerers have relatively low health. Your Barrier coming from Protection Skill Passive also scales off Maximum HP, making this welcome addition for survivability!
For the Malignant Hearts, Tal'Rasha will give a huge damage boost due to the build's usage of Fire, Ice, and Lightning Elements. Partner this with arguably one of the best offensive hearts in the game, The Barber and you get a remarkable increase in your burst damage. In addition, you get a 4th stack for Tal'Rasha due to The Barber procs being considered as Shadow Damage.
Last but not the least, slot in Tempting Fate to get more value out of your Critical Strikes. This will go well the build's high Critical Strike Chance coming from your Affixes and the Esu's Heirloom Unique. Complete this arrangement, and you've got yourself a build ready to take on even the highest tiers of Nightmare Dungeons!
| Jump to a Section! | |||||
|---|---|---|---|---|---|
| No. | Board | Essential Nodes |
|---|---|---|
| 1 | Starting Board | Flamefeeder (Glyph) Elementalist (Rare) Elemental Balance (Rare) |
| 2 | Burning Instinct | Destruction (Glyph) Smoldering Embers (Rare) Cinders (Rare) Culler (Rare) Kindling (Rare) Safeguard (Rare) |
| 3 | Static Surge | Control (Glyph) Overwhelming (Rare) Incapacitate (Rare) |
| 4 | Frigid Fate | Tactician (Glyph) Oppressive (Rare) Weakness (Rare) Chilling (Rare) |
| 5 | Ceaseless Conduit | Exploit (Glyph) Galvanic Catalyst (Rare) |
| 6 | Enchantment Master | Elementalist (Glyph) Elemental Balance (Rare) |
| 7 | Searing Heat | Territorial (Glyph) Combustion (Rare) Ashes (Rare) |
| Arc Lash Build Tips |
|---|
|
|
| 1 | Cast Ice Blades to activate its passives and to get an additional Tal’Rasha stack from using an Ice element |
|---|---|
| 2 | Use Teleport to close the gap between you and the enemies while grouping them up and stunning them from the Raiment of the Infinite's effect. |
| 3 | Cast Frost Nova to freeze enemies and make them Vulnerable through the Mystical Frost Nova Passive |
| 4 | Spam your main damaging skill, Arc Lash, to deal damage to the enemies |
| 5 | Activate Unstable Currents, if available, to significantly boost your overall damage |
| 6 | Cast Flame Shield as needed for survivability |
There are a lot of sources for Damage Reductions in this build and it would be wise to keep them up for survivability. Always make sure to keep enemies close and burning to maintain your Damage Reduction coming from your affixes and paragon nodes.
When you're about to jump in a group of elites, it's recommended to activate the Damage Reduction coming from the Aspect of Might before diving in. You can do this by holding Shift + Basic Skill Key using a Keyboard or simply click your alloted Basic Skill Button on a Controller.
When facing enemies on higher Nightmare Dungeons Tiers, it's best to learn how to kite mobs to prevent yourself from dying to their attacks. Release your full combo and then disengaging to a safe distance once the enemies' Crowd Control ends. Continue dodging while waiting for your cooldowns to come back up then cycle through your combo again to secure the kill.
This Arc Lash build also has a variation that can definitely take on Uber Lilith! Check out this video of Stoyven's fight against the infamous final boss.
There are two Aspects being slotted in for the Uber Lilith Variation of the build, namely the Aspect of Binding Embers and the Aspect of Inner Calm.
The Aspect of the Binding Embers will replace the Aspect of Disobedience slotted in the Helm. Defensives are not a priority in the fight against Uber Lilith, so additional Crowd Control through Immobilize is a great addition to help deplete her stagger bar.
Lastly, the Aspect of Inner Calm will replace the Aspect of Retribution. This is a better overall damage-boosting aspect since you'll be stationary a lot of times during the fight.

| No. | Board | Essential Nodes |
|---|---|---|
| 3 | Enchantment Master | Control (Glyph) Swift Conjurer (Rare) Conjurer (Rare) |
For the Paragon Board, the only change that is needed for the battle against Uber Lilith would be the 3rd Board. Swap out Static Surge for Enchantment Master for the additional Attack Speed you can get from the Swift Conjurer Rare Paragon Node and surrounding Magic Nodes.

| Season 3 Leveling Builds | |||||
|---|---|---|---|---|---|
| Barbarian HoTA | Sorcerer Chain Lightning | ||||
| Rogue Twisting Blades | Necromancer Blood Surge | Druid Poison Creeper | |||
| All Classes | |||||
|---|---|---|---|---|---|
| List of Builds | ||
|---|---|---|
 Arc Lash Charged Bolts Arc Lash Charged Bolts
(PVE) |
 Ball Lightning Ball Lightning
(PVE) |
 Blizzard Blizzard
(PVE) |
 Chain Lightning Chain Lightning
(PVE) |
 Fireball Fireball
(PVE) |
 Fireball Meteor Fireball Meteor
(PVE) |
 Sorcerer Leveling Sorcerer Leveling
(Leveling) |
||

Season 1 Arc Lash Endgame and Uber Lilith Build

Genshin Impact Walkthrough & Guides Wiki

Honkai: Star Rail Walkthrough & Guides Wiki

Pokemon Scarlet and Violet (SV) Walkthrough & Guides Wiki

FF7 Rebirth Walkthrough & Guides Wiki

Stellar Blade Walkthrough & Guides Wiki

Monster Hunter Rise: Sunbreak Walkthrough & Guides Wiki

Persona 3 Reload Walkthrough & Guides Wiki

Palworld Walkthrough & Guides Wiki

Pokemon UNITE Walkthrough & Guides Wiki

Call of Duty Modern Warfare 3 (MW3) Walkthrough & Guides Wiki

Elden Ring Walkthrough & Guides Wiki

Super Smash Bros. Ultimate Walkthrough & Guides Wiki

Pokemon Legends: Arceus Walkthrough & Guides Wiki

FF7 Remake Walkthrough & Guides Wiki

New Pokemon Snap Walkthrough & Guides Wiki

Hyrule Warriors: Age of Calamity Walkthrough & Guides Wiki

The Legend of Zelda: Breath of the Wild Walkthrough & Guides Wiki
©2022 BLIZZARD ENTERTAINMENT, INC. ALL RIGHTS RESERVED.
All trademarks referenced herein are the properties of their respective owners.
The copyrights of videos of games used in our content and other intellectual property rights belong to the provider of the game.
The contents we provide on this site were created personally by members of the Game8 editorial department.
We refuse the right to reuse or repost content taken without our permission such as data or images to other sites.


What potion did the player use against Lilith?