How to Beat Dire Maul Dungeon
★ Check out our masterfully crafted builds: List of Builds
★ See our Tier Lists: Minis Tier List | Leaders Tier List
★ Learn how to play with our Tips & Tricks Guides!
★ Look for Guildmates in our Guild Board!

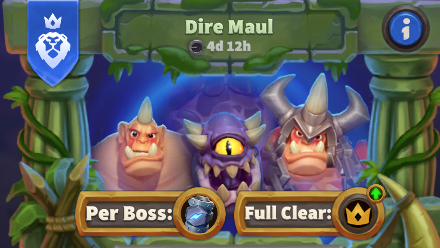
Dire Maul is a Dungeon in Warcraft Rumble. Read on to learn more about Dire Maul, the bosses encountered in the dungeon, the best relics to use, the best builds to mobilize, how to beat this dungeon, and the rewards for beating Dire Maul.
List of Contents
Dire Maul Overview and Rewards
Dungeon Details
| Dire Maul Dungeon Info | |
|---|---|
 |
|
| Starting Period | December 3, 2023 |
| Ending Period | December 9, 2023 |
| Modifiers Available | None |
| Featured Family | Alliance |
Eligible Leaders
| Leader | Leader Ability |
|---|---|
|
|
Arcane Brilliance Increases the Level of your Spells by 3 while Jaina is in play. |
|
|
Holy Light Heals all nearby friendly units. |
|
|
Master Assassin Maiev's cost is reduced by 1 for each Unbound troop you play. |
Rewards
| All Rewards | ||
|---|---|---|
XP |
Arc Energy |
Army Upgrade Slot |
Dire Maul Dungeon Bosses
Here are the Bosses you'll play against in Dire Maul:
Stomper Kreeg
| Boss | Description |
|---|---|
 Stomper Kreeg |
Kreeg's army is a bit touchy - damage them enough and they go berserk and attack everything in sight. |
Stomper Kreeg's Minis are very easily agitated. Attacking them in any way will cause them to gain Bloodlust and attack everything near them. The trick is to have a ranged mini attack an enemy melee unit to make it attack its own allies.
Immol'thar
| Boss | Description |
|---|---|
 Immol'thar |
Immol'thar has eyes everywhere - they wander the area and appear after you play any unit. |
With Immol'thar as the boss, you'll be forced to deal with its eyes that spawn everywhere on the map. These eyes spawn near units that you put on the battlefield, then explode once they make contact with your Mini.
Immol'thar's eyes can't really be defeated but you can mitigate the damage they cause to your Minis by having Tirion nearby to heal your allied Minis after they've been damaged.
King Gordok
| Boss | Description |
|---|---|
 King Gordok |
King Gordok is strong, but his lieutenants can be “persuaded” to rise against him. |
King Gordok is a strong and tanky boss whose attacks get faster the every time he hits an enemy. To make matters worse, he's backed up by an ogre mage with great range.
To take him down, you'll need to employ his lieutenants that are stationed at the left and right side of the map. Get them to join your army by taking bringing their health down to 10%.
Dire Maul Best Relics
The Relics that you will get for each map in the dungeon are random. It isn't guaranteed that you will get the three relics that we recommend. If the following Relics do not show up on your dungeon, feel free to use any Relic that you think would work best with your army.
Gauntlets of Determination
| Relic | Description |
|---|---|
 Gauntlets of Determination Gauntlets of Determination
|
Your Leader gains 1 Level each time they are deployed. |
Gauntlets of Determination is a great relic to have in this dungeon and for Tirion himself. With this in your arsenal, Tirion will last longer in battle because of the increased stats that he gets from leveling up each time he's deployed. This will also let ally Minis near him live longer due to the healing that Tirion provides.
Glazed Cannon
| Relic | Description |
|---|---|
| Glazed Cannon | Your non-spell minis have half as much Health and deal double Damage. |
Glazed Cannon is also a great Relic for this dungeon. Your Minis will have less health but they will deal double damage to enemies. You can prevent them from dying by placing your main damage dealers behind your tanks. Make sure they're backed up by Tirion, so he can heal them if they get damaged!
Inspiring Parchment
| Relic | Description |
|---|---|
| Inspiring Parchment | Deploying your Leader grants Bloodlust to nearby allies. |
Lastly, we recommend having Inspiring Parchment as one of your Relic because of the Bloodlust it provides your Minis. With it, Tirion doesn't only provide healing for your Minis but also increased damage output!
Dire Maul Best Dungeon Builds
Tirion Fordring Best Build for Dire Maul Dungeon
| Rangers Deck Build | |||
|---|---|---|---|
|
|
|
|
|
|
|
|
|
|
How to Beat Dire Maul
You can complete the Dire Maul Dungeon by following the set of objectives below:
Stomper Kreeg Tips
The dungeon's first map will pit you against Stomper Kreeg and his army that gain Bloodlust every time they're attacked. Here are the things you can do to defeat Stomper Kreeg and his army:
- Defend Your Base From the First Wave of Enemies
- Claim Towers in Both Lanes
- Use Ranged Units to Aggro Enemies
Defend Your Base From the First Wave of Enemies
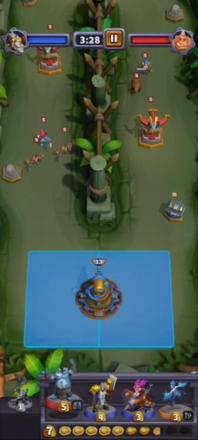
Your battle against Stomper Kreeg will start with him having units on the battlefield already. It's best to deal with these enemies first before you go on the offensive because they can deal a number on your base if they're not taken care of right away.
We recommend having the Ogre Mage deal with the enemies on the left because of its AoE attack. Then, you can have Tirion with another Mini that can deal damage deal with the enemies on the right.
You can claim the nearby chest to get extra gold and deploy more units!
Claim Towers in Both Lanes
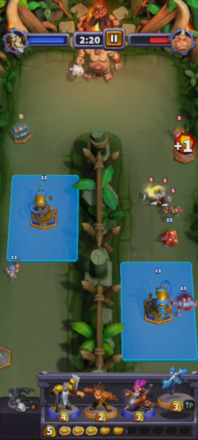
Once the first wave of enemies has been dealt with, it's time to go on the offensive.
Claim both towers in the left and right lane to gain control of the map. Doing so will prevent Stomper Kreeg from overhwelming you. It will also help close the distance between you and Stomper Kreeg!
Use Ranged Units to Aggro Enemies
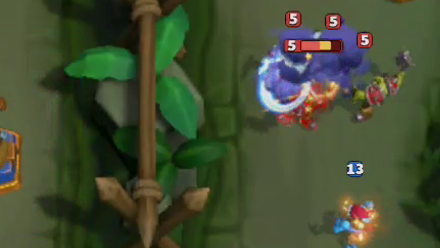
Because of Stomper Kreeg's ability, your enemies will gain Bloodlust every time they're attacked. This might be scary but you can actually use it to your advantage.
Have your ranged units attack incoming enemy melee units to trigger their rage and have them fight each other. Use this time to deploy a tank unit between the enemies and your ranged unit to further push the lane.
Immol'thar Tips
The second map of the dungeon features Immol'thar, an enemy boss that spawns eyes everywhere on the map which explode upon contact with your Minis. Here are two ways you can deal with Immol'thar:
Prioritize Getting the Left Meeting Stone
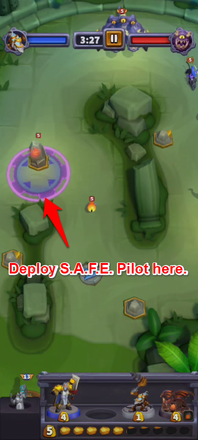
We recommend prioritizing the left Meeting Stone to close the distance between you and Immol'thar. You can easily do this by deploying a S.A.F.E. Pilot to it!
Don't forget about the right lane though! Defend it with all your might before going all out on the offensive from the left Meeting Stone.
Always Have Tirion Back Up Your MInis

Keeping your army healthy can be difficult because of the eyes Immol'thar spawns on the map. You can solve this problem by having Tirion back up your Minis as much as possible, so he can heal them if their health gets low.
King Gordok Tips
The third map of the dungeon features King Gordok who is assisted by two lieutenants who will slowly advance towards your tower.
The map is smaller and there's a risk of getting overwhelmed by enemies on all sides. We recommend the following strategies:
- Defend Your Base From the First Wave of Enemies
- Have the Two Lieutenants Join Your Army
- Claim the Central Tower
- Overwhelm King Gordok
Defend Your Base From the First Wave of Enemies
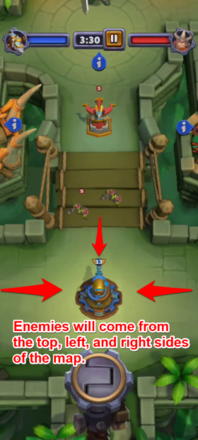
Start by placing your strongest and tankiest minis on all three sides of your tower. Your main goal is to block enemy advancement while also slowly pushing towards the left and right lanes.
Quilboar is great at heading off enemies trying to advance since it will usually draw aggro from enemies provided they are far from the tower. You can also place this mini right beside the advancing enemies since it's Unbound.
Have the Two Lieutenants Join Your Army
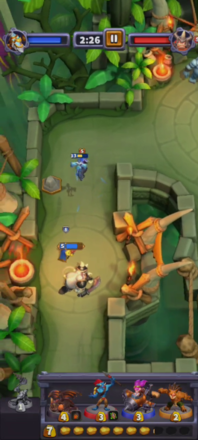
The two advancing Lieutenants are the biggest threat to your tower so prioritize attacking these with your minis.
Once you defeat them, they will take a few seconds to restore their health then join your forces to attack King Gordok! Keep these newfound allies well-guarded and supported by your minis since they can deal significant damage against the boss.
Claim the Central Tower
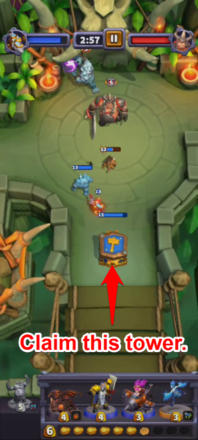
Once the Lieutenants are on your side, focus on taking the central tower just north of your base. The boss has a habit of spawning minis in front of it, which is in range of your tower's attacks.
Claiming this tower will help whittle down the boss' forces and give you a closer area to place your slower minis such as the Ogre Mage and Drake.
Overwhelm King Gordok
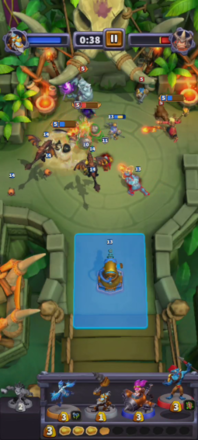
With the Lieutenants turned to your side and the central tower captured, focus on placing as many minis as possible to overwhelm the boss.
Distracting the boss with Quilboar can help weaker minis such as the Harpies and Darkspear Troll deal as much damage as possible, while also giving the Lieutenants freedom to attack the boss with their stronger attacks.
Warcraft Rumble Related Guides

All Dungeon Guides
| Dungeons | |
|---|---|
| Blackfathom Deeps | Dire Maul |
Comment
Author
How to Beat Dire Maul Dungeon
improvement survey
03/2026
improving Game8's site?

Your answers will help us to improve our website.
Note: Please be sure not to enter any kind of personal information into your response.

We hope you continue to make use of Game8.
Rankings
- We could not find the message board you were looking for.
Gaming News
Popular Games

Genshin Impact Walkthrough & Guides Wiki

Honkai: Star Rail Walkthrough & Guides Wiki

Umamusume: Pretty Derby Walkthrough & Guides Wiki

Pokemon Pokopia Walkthrough & Guides Wiki

Resident Evil Requiem (RE9) Walkthrough & Guides Wiki

Monster Hunter Wilds Walkthrough & Guides Wiki

Wuthering Waves Walkthrough & Guides Wiki

Arknights: Endfield Walkthrough & Guides Wiki

Pokemon FireRed and LeafGreen (FRLG) Walkthrough & Guides Wiki

Pokemon TCG Pocket (PTCGP) Strategies & Guides Wiki
Recommended Games

Diablo 4: Vessel of Hatred Walkthrough & Guides Wiki

Cyberpunk 2077: Ultimate Edition Walkthrough & Guides Wiki

Fire Emblem Heroes (FEH) Walkthrough & Guides Wiki

Yu-Gi-Oh! Master Duel Walkthrough & Guides Wiki

Super Smash Bros. Ultimate Walkthrough & Guides Wiki

Pokemon Brilliant Diamond and Shining Pearl (BDSP) Walkthrough & Guides Wiki

Elden Ring Shadow of the Erdtree Walkthrough & Guides Wiki

Monster Hunter World Walkthrough & Guides Wiki

The Legend of Zelda: Tears of the Kingdom Walkthrough & Guides Wiki

Persona 3 Reload Walkthrough & Guides Wiki
All rights reserved
©2023 Blizzard Entertainment, Inc.
The copyrights of videos of games used in our content and other intellectual property rights belong to the provider of the game.
The contents we provide on this site were created personally by members of the Game8 editorial department.
We refuse the right to reuse or repost content taken without our permission such as data or images to other sites.





![Monster Hunter Stories 3 Review [First Impressions] | Simply Rejuvenating](https://img.game8.co/4438641/2a31b7702bd70e78ec8efd24661dacda.jpeg/thumb)


