List of All Silver Lining Missions and Side Missions
★ Get 100% District Completion with our Location Guides!

This is a guide for all the Missions for Silver Lining DLC in Spider-Man Remastered including Side Missions. Read on to learn more about each Mission, its objectives, and how to complete them!
List of Contents
Silver Lining Walkthrough
| Jump to Section | ||
|---|---|---|
| Old Friends | Season 3 | Rio Bravo |
| Together But Alone | Humanitarian Aid | Trust Issues |
| Getting Deep | One Plus One Equals Win | - |
Old Friends
| Step | Objective |
|---|---|
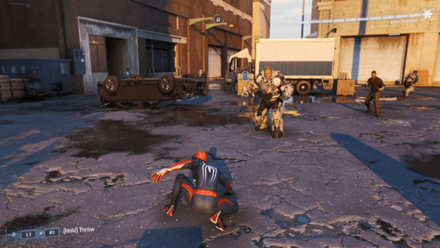
| 1 | Clear the Area of Enemies The enemies presented here will have mostly be armed with both Sable Weaponry as well as armor similar to the one Hammerhead wore in Bring Down the Hammer. These enemies hit harder and are much more difficult to completely bring down, so be sure to use gadgets or suit powers that deactivate their tech such as Electric Webs. |
| 2 | Follow the Captured Cop to the Rooftops After clearing the ground area of enemies, a cop will be taken by a Jetpack variant enemy – follow them up to the roof, where you will find an "ambush" waiting for you. Take them out to trigger a cutscene. TIP: For the Jetpack variants, it is best to try and immobilize them with Web Bombs and Electric Webs first to limit the amount of movement they can make in the air. |
| 3 | Fight Off Sable After the short cutscene, Sable will hop down to the rooftop with you, forcing you to square off against her. |
Old Friends Mission Walkthrough and Guide
Season 3
| Step | Objective |
|---|---|
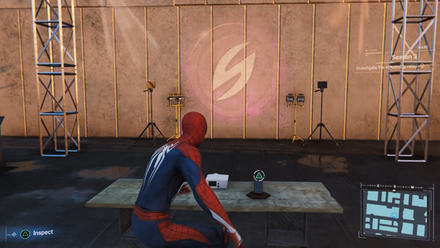
| 1 | Interact with the Table Once you arrive at the location, interact with the table in front of the wall art to unlock Screwball Challenges. |
Season 3 Mission Walkthrough and Guide
Rio Bravo
| Step | Objective |
|---|---|
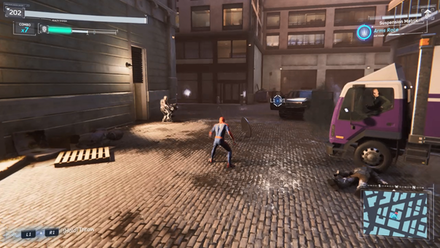
| 1 | Don't Allow the Thugs to Break Through In a similar mission as the beginning section of Bring the Hammer Down, this mission will simply be about preventing the thugs from breaking into the driver's compartment of the truck. Several waves of tough enemies will come after you – the mission ends once they are all defeated. TIP: Use gadgets or suit abilities to immobilize enemies long enough for you to take one or two of them out. |
Rio Bravo Mission Walkthrough and Guide
Together But Alone

| Step | Objective |
|---|---|
| 1 | Follow and Stop the Trucks Upon the end of the cutscene, immediately jump off and start swinging towards the convoy. You'll have to stop at least two of the vehicles, which prompts Silver Sable to show up. |
| 2 | Destroy the Drones After you have disabled more trucks, the mobsters will start using drones to try and shoot Sable down. Swing close to the flight of drones to destroy them – this makes another wave of drones to appear, so get close to Sable's aircraft and web-zip towards it, where you can destroy the drones from its wing. After the drones are down, take care of the last truck to end the mission. |
Together But Alone Mission Walkthrough and Guide
Humanitarian Aid

| Step | Objective |
|---|---|
| 1 | Save the Soldier Upon arriving at the area, you'll find a Sable soldier being harassed by several mobsters – web-zip to the armored Brute to make fighting them easier. After taking out the mobsters, the mission will end. |
Humanitarian Aid Mission Walkthrough and Guide
Trust Issues
| Step | Objective |
|---|---|
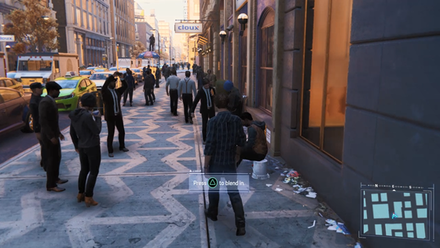
| 1 | Tail Hammerhead's Men At the start of the mission, you'll be tasked with following Hammerhead's men. Follow them through the streets – from time to time, you'll be prompted to "blend in" to hide from them whenever they get suspicious. Once they enter a parking lot, do not follow. Instead, turn and enter an alleyway on the street across from the lot, then climb up to the roof. Web-zip to the rooftop across and listen in on the thug's conversation in the alley below. |
| 2 | Defeat the Thugs Afterwards, clear out the parking lot of the Thugs. The elevated parking to the side of the lot will have vehicles that have their trunks presented to you – use your senses to highlight the ones you'll have to search through for the laptop you need to progress the mission. |
| 3 | Clear Out the Alley Once the laptop is secure, follow the point on your map until you reach an alley. You'll have to defeat the thugs here – start by taking out the Brute near the head of the alley to make the fight easier for you. A cutscene will play afterward. |
| 4 | Chase After Silver Sable After the cutscene, follow Silver Sable up to the top of the Colexco Tower. Her jet will be trapped by four generators on the rooftop – manually aim and fire your web shooters at them to destroy them, then clear out the enemies. |
Trust Issues Mission Walkthrough and Guide
Getting Deep
| Step | Objective |
|---|---|
| 1 | Follow the Path Once you get inside the sewers, simply follow the linear path before you until you reach a large, cavernous area filled with several goons. |
| 2 | 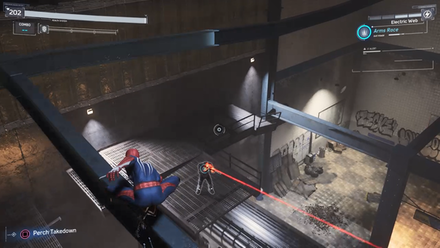 Defeat the Thugs You can either take the enemies out quietly or head on – either way, once you defeat the enemies, use your senses to highlight several wires. Follow these to a train car that's sticking out of a tunnel – pull it out then go in. |
| 3 | Inspect the Evidences Follow the revealed tunnel path until you reach an area with a Digboy. You can deal with the enemies here however you wish – use your senses to highlight several items in the room that you'll have to inspect. Once done, you'll hear Sable shouting, so follow the electric wires once more to her. |
| 4 | Defeat the Enemies with Sable After the short cutscene that sees Sable freed, several Thugs will enter the room. Defeat them all to trigger another cutscene. |
| 5 | Climb Up to the Roof You'll find yourself above ground after the cutscene – you'll notice a building ahead of you with several yellow threads hanging on its side. Climb this building, then follow the threads to a homicide scene where you'll find an audio recorder. Inspect it to end the mission. |
Getting Deep Mission Walkthrough and Guide
One Plus One Equals Win

| Step | Objective |
|---|---|
| 1 | Attach and Run Diagnostics on the Laser At Sable's base, you'll be prompted to assist her with attaching and then running diagnostics on the laser weapon of her aircraft. These objectives will be marked on your hud, where you'll be interrupted by Hammerhead's arrival after completing them. |
| 2 | Take Down Hammerhead Hammerhead will come to interrupt your tests with Sable – defeating him will complete the mission, and thus complete the Silver Lining DLC. |
One Plus One Equals Win Mission Walkthrough and Guide
List of All Silver Lining Missions
Main Missions
| No. | Mission |
|---|---|
| 1 | Old Friends |
| 2 | Season 3 |
| 3 | Rio Bravo |
| 4 | Together But Alone |
| 5 | Humanitarian Aid |
| 6 | Trust Issues |
| 7 | Getting Deep |
| 8 | One Plus One Equals Win |
Side Missions
| All Side Missions | ||
|---|---|---|
| Wrap Party | Aiding a Human | Scales of Justice |
Spider-Man Remastered Related Guides

Complete Story Walkthrough and All Missions
Mission Walkthroughs
| Main Campaign Missions | ||
|---|---|---|
| Main Campaign | ||
| DLC Missions | ||
| The Heist | Turf Wars | Silver Lining |
Author
List of All Silver Lining Missions and Side Missions
improvement survey
03/2026
improving Game8's site?

Your answers will help us to improve our website.
Note: Please be sure not to enter any kind of personal information into your response.

We hope you continue to make use of Game8.
Rankings
- We could not find the message board you were looking for.
Gaming News
Popular Games

Genshin Impact Walkthrough & Guides Wiki

Honkai: Star Rail Walkthrough & Guides Wiki

Umamusume: Pretty Derby Walkthrough & Guides Wiki

Pokemon Pokopia Walkthrough & Guides Wiki

Resident Evil Requiem (RE9) Walkthrough & Guides Wiki

Monster Hunter Wilds Walkthrough & Guides Wiki

Wuthering Waves Walkthrough & Guides Wiki

Arknights: Endfield Walkthrough & Guides Wiki

Pokemon FireRed and LeafGreen (FRLG) Walkthrough & Guides Wiki

Pokemon TCG Pocket (PTCGP) Strategies & Guides Wiki
Recommended Games

Diablo 4: Vessel of Hatred Walkthrough & Guides Wiki

Cyberpunk 2077: Ultimate Edition Walkthrough & Guides Wiki

Fire Emblem Heroes (FEH) Walkthrough & Guides Wiki

Yu-Gi-Oh! Master Duel Walkthrough & Guides Wiki

Super Smash Bros. Ultimate Walkthrough & Guides Wiki

Pokemon Brilliant Diamond and Shining Pearl (BDSP) Walkthrough & Guides Wiki

Elden Ring Shadow of the Erdtree Walkthrough & Guides Wiki

Monster Hunter World Walkthrough & Guides Wiki

The Legend of Zelda: Tears of the Kingdom Walkthrough & Guides Wiki

Persona 3 Reload Walkthrough & Guides Wiki
All rights reserved
© 2022 MARVEL
© 2020 Sony Interactive Entertainment LLC
Created and developed by Insomniac Games, Inc.
The copyrights of videos of games used in our content and other intellectual property rights belong to the provider of the game.
The contents we provide on this site were created personally by members of the Game8 editorial department.
We refuse the right to reuse or repost content taken without our permission such as data or images to other sites.


![Monster Hunter Stories 3 Review [First Impressions] | Simply Rejuvenating](https://img.game8.co/4438641/2a31b7702bd70e78ec8efd24661dacda.jpeg/thumb)


