This survey will take about 1 minute.
Your answers will help us to improve our website.
Spider-Man Remastered
List of All Main Campaign Missions and Side Missions
★ Get 100% District Completion with our Location Guides!

This is a guide for all the Missions for the Main Campaign in Spider-Man Remastered including Side Missions. Read on to learn more about each Mission, its objectives, and how to complete them!
List of Contents
Act 1 Missions Walkthrough
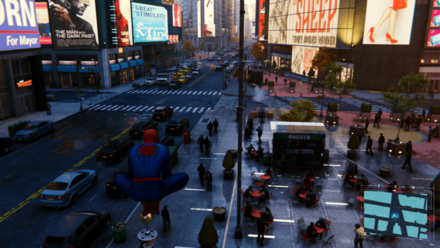
Clearing the Way
| Step | Objective |
|---|---|
| 1 | Swing to the Location After the opening cutscene, you'll be given an opportunity to learn how to swing properly through the streets of New York. Follow the on-screen instructions for How to Swing, which will eventually lead you to Times Square. |
| 2 | Fight Off Fisk's Thugs Once you arrive at Times Square, there will be several of Fisk's Thugs waiting around the area who will attempt to take you down. This will also be an opportunity for you to learn how to fight. |
| 3 | Swing to Fisk Tower When the Thugs have been defeated, swing to the marked location (Fisk Tower) to finish the Mission. |
Clearing the Way Mission Walkthrough and Guide
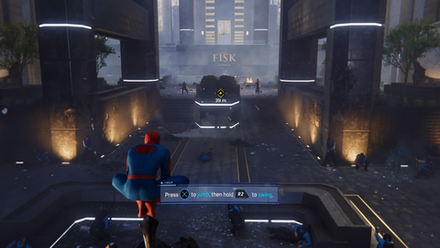
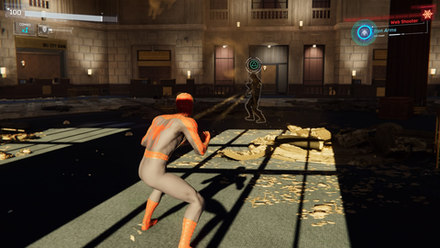
The Main Event
| Step | Objective |
|---|---|
| 1 | Defeat Fisk's Guards Several of Fisk's guards will be in the atrium shooting at police. Swing towards them and fight them. You'll also learn new mechanics here such as healing. |
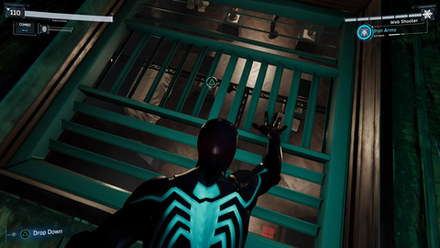
| 2 | Crawl Through a Vent After clearing the area, head into the elevator shaft and reach the top vent. Crawl through the vent until you reach its end, then exit it. |
| 3 | Clear More of Fisk's Guards After exiting the vent, several of Fisk's guards will be in the area. Clear them out to continue the mission. |
| 4 | Enter the Server Room Enter another vent to reach the server room. You'll learn to do Vent Takedowns in the process. Upon reaching the room, clear the area of guards then stop files from getting deleted from the server. |
| 5 | Continue Through the Building Proceed up the building floors while rescuing civilians trapped by rubble and clearing out more enemies. You'll eventually reach Fisk's office. |
| 6 | Destroy Fisk's Turrets Several turrets will appear and fire at you. Web them up then pull them out to destroy them. |
| 7 | Defeat Fisk Fight Fisk and defeat him. Several of his guards will appear during the fight. Clear them out before focusing on Fisk again. |
The Main Event Mission Walkthrough and Guide
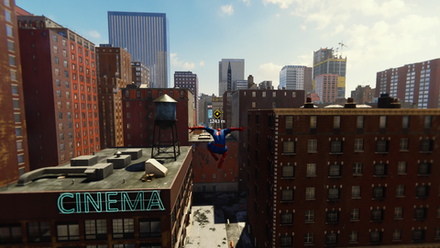
My OTHER Other Job
| Step | Objective |
|---|---|
| 1 | Swing to Octavius Labs Swing towards the marker on your map. Follow the on-screen instructions to learn how to Point Jump. |
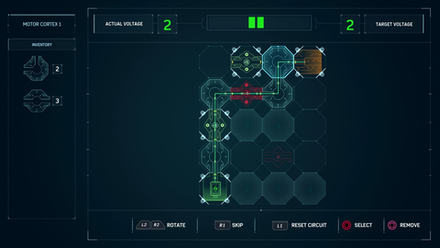
| 2 | Solve the Circuit Project Puzzles You'll be introduced to Circuit Project puzzles. This involves selecting cables to guide voltage to an endpoint. These may also require you to hit a voltage target number. |
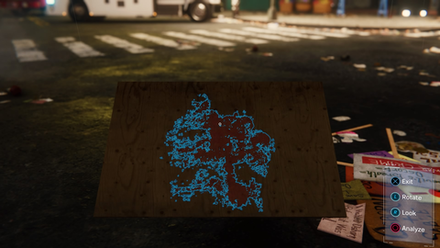
| 3 | Solve the Spectrograph Puzzle After completing the CIrcuit Projects, head to the next marker to work on a Spectrograph. This involves matching fragments to an original pattern. |
| 4 | Exit the Lab Once you've completed the puzzles, exit the lab to complete the mission. |
My OTHER Other Job Mission Walkthrough and Guide
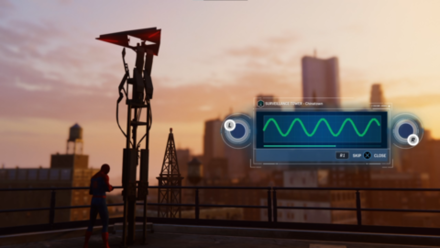
Keeping the Peace
| Step | Objective |
|---|---|
| 1 | Unscramble the First Radio Tower After talking to Yuri, you'll be tasked with unscrambling the Radio Tower on the roof. To do so, you'll need to match the wavelengths by using the left stick to change the width and the right stick to change the height. |
| 2 | Stop Two Crimes Nearby Once the Radio Tower's unscrambled, two crimes will appear nearby. Take out the thugs in each to earn Crime Tokens that go towards unlocking Suits and Suit Mods. |
| 3 | Unscramble the Second Radio Tower Reach the second Radio Tower and do the same process of unscrambling it. |
| 4 | Reach a Nearby Signal and Get your Backpack Swing to an RFID signal that appears near the Radio Tower. You'll find a Backpack here, unlocking the Backpack Collections. |
| 5 | Stop a Robbery You'll be alerted to a robbery. Get to the store and defeat the thugs in the area. |
| 6 | Unscramble the Third Radio Tower Swing to the final Radio Tower and unscramble it. |
Keeping the Peace Mission Walkthrough and Guide
Something Old, Something New
| Step | Objective |
|---|---|
| 1 | Reach Otto's Lab to Fix the Suit Swing to Octavius Industries and enter the office to fix the suit. A cutscene will start. |
| 2 | Unlock the Advanced Suit After checking your email, follow the on-screen instructions to unlock a new suit - the Advanced Suit. |
Something Old, Something New Mission Walkthrough and Guide
Fisk Hideout
| Step | Objective |
|---|---|
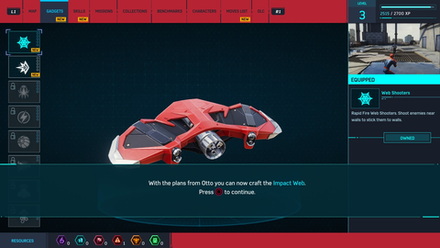
| 1 | Construct Impact Web After reaching the Fisk Hideout site, follow the on-screen instructions to build the Impact Web gadget. |
| 2 | Fend Off Enemies You'll need to fight six waves of enemies. Focus on thugs with guns to make combat easier. |
| 2 | Use Battle Focus Use the Battle Focus suit power to help in completing the Side Objective of doing 10 Finishers. |
Fisk Hideout Mission Walkthrough and Guide
Landmarking
| Step | Objective |
|---|---|
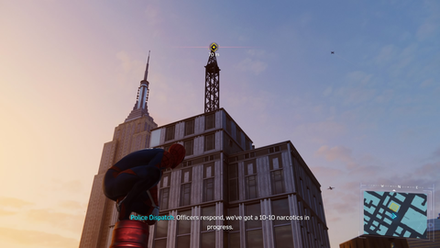
| 1 | Reach the Empire State Building Swing to the Empire State Building. You'll pass by several Radio Towers along the way. |
| 2 | Take a Picture of the Building Follow the on-screen instructions to take a picture of it. This unlocks Landmarks on the map. |
Landmarking Mission Walkthrough and Guide
For She's a Jolly Good Fellow
| Step | Objective |
|---|---|
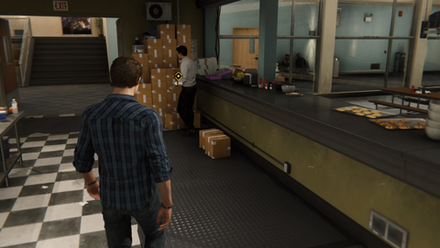
| 1 | Meet with Martin Li After arriving at F.E.A.S.T., head to the kitchen to meet with Mr. Li. A cutscene will start where Peter talks to Aunt May. |
| 2 | Exit F.E.A.S.T. Once the cutscene ends, just exit the building to continue the Main Story. |
For She's a Jolly Good Fellow Mission Walkthrough and Guide
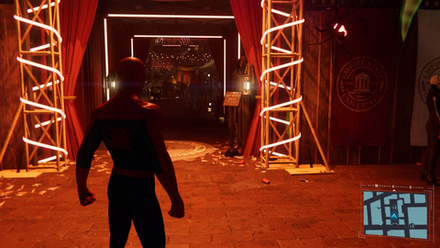
Don't Touch the Art
| Step | Objective |
|---|---|
| 1 | Sneak Through the Vents Get into the auction house using a vent on the roof. Follow the objective marker until you reach an opening. |
| 2 | Distract a Demon Then Take Him Out Shoot your web on the floor to distract the Demon and then knock him out quietly. Head to the next vent after doing so. |
| 3 | Continue Moving Through the Auction House As you move through rooms, use Stealth Takedowns to knock enemies out without alerting others. You'll end up in a storage area as you follow the objective markers. |
| 4 | Clear the Storage Area There will be two Demons left in the room. Distract one by firing web at a crate, then do Stealth Takedowns on both of them. After that, examine a camera to trigger a cutscene where you'll meet MJ. |
| 5 | Take Pictures of Auction House Pieces As MJ, follow the curator around as she shows you various pieces. |
| 6 | Take a Picture of the Statue After some photos, MJ will notice a statue hidden in an office. Take a picture of it then follow the objective marker once you're asked to leave to trigger a cutscene. |
| 7 | Sneak Into the Office Follow the objective markers while staying behind cover to sneak past the curator. Wait for her to turn away from you before moving forward then get behind the bar area to enter the office. |
| 8 | Fix the Statue Once inside, look at pictures and pamphlets to know the statue's original orientation. Start fixing it by bringing the left arm down. Then, turn its head the opposite way before closing its mouth. Finally, bring the right arm up and make the palm face forward. |
| 9 | Pick Up the Right Weapon Once the orientation's fixed, head to the table with weapons and select the one at the far right. |
| 10 | Place the Weapon in the Left Hand Place it in the statue's left hand to complete its look. This will unlock a drawer containing several files |
| 11 | Take Enemies Out Stealthily Back as Spider-Man, hop on to the rafters of the next room you enter. Do Stealth Takedowns from here so as not to alert other Demons. |
| 12 | Clear the Remaining Demons After clearing the first room, drop down from the rafters and move to the next area. You'll need to continue using stealth so that the hostages aren't killed. |
| 13 | Fend Off Enemy Waves After a cutscene, more enemies will appear but you'll no longer have to use stealth. Defeat them using all the tools in your disposal. |
Don't Touch the Art Mission Walkthrough and Guide
A Shocking Comeback
| Step | Objective |
|---|---|
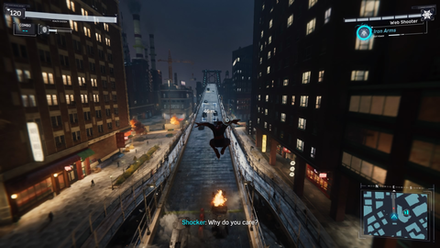
| 1 | Chase the Shocker Swing through the city to chase the Shocker. Make sure you don't lose sight of him since that can result in failing the mission. |
| 2 | Evade the Missiles Evade the missiles headed towards you by pressing Dodge when your spidey-sense appears. This is indicated by glowing white lines that show around your head. You'll be knocked away if you get hit, slowing you down. |
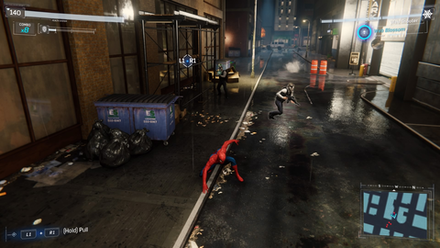
| 3 | Webstrike to Catch Him Once you're near the Shocker, press Web Strike to knock him down. |
A Shocking Comeback Mission Walkthrough and Guide
The Mask
| Step | Objective |
|---|---|
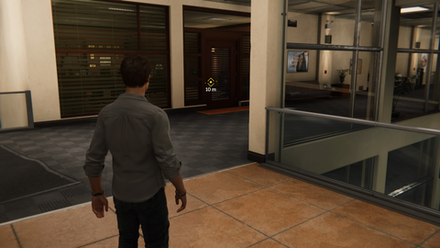
| 1 | Head to Mr. Li's Office Immediately after entering F.E.A.S.T., head up to the second floor using the stairs to your left. Mr. Li's office will be right across you. |
| 2 | Exit F.E.A.S.T. After talking to Mr. Li, exit the building to complete the mission. |
The Mask Mission Walkthrough and Guide
Day to Remember
| Step | Objective |
|---|---|
| 1 | Head to Octavius Industries Swing your way to Octavius Industries and enter the lab. This will trigger a cutscene. |
Day to Remember Mission Walkthrough and Guide
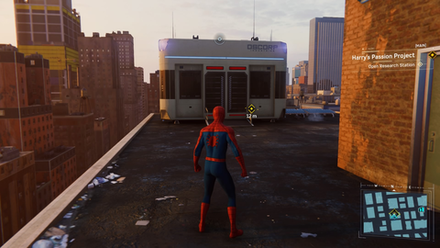
Harry's Passion Project
| Step | Objective |
|---|---|
| 1 | Head to Harry's Research Station Swing your way to Harry's nearby Research Station. Enter it to mark them all on your map. You do not need to complete the activity to finish the mission. |
Harry's Passion Project Mission Walkthrough and Guide
Financial Shock
| Step | Objective |
|---|---|
| 1 | Defeat The Shocker Once you enter the bank, you'll be confronted by The Shocker. Defeat him by throwing debris and objects at him when he's recuperating or distracted. For the final phase of the fight, bring down the bank's chandelier and let it fall on him. |
Financial Shock Mission Walkthrough and Guide
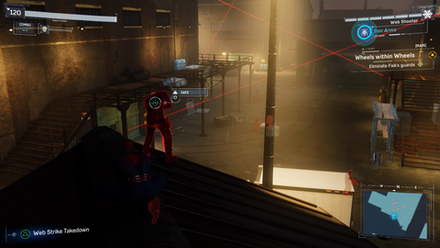
Wheels within Wheels
| Step | Objective |
|---|---|
| 1 | Take Out the Snipers The area outside the warehouse will be guarded by Fisk's thugs. You'll need to clear them out to enter. Take out the snipers first to make the fight easier. |
| 2 | Fight the Remaining Guards Once the snipers are gone, you'll be free to fight the other guards. |
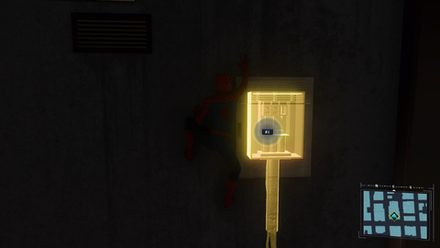
| 3 | Enter the Warehouse Head to the roof of the warehouse and enter it through a vent. |
| 4 | Use Electric Web to Open the Gate Let Jefferson Davis in by crafting Electric Web, then firing at the junction box that opens the gate. |
| 5 | Open the Hidden Container Once Davis finds a locked container, use your AR to see the cables that lead to the junction box that opens it. Go up to the second level to find the junction box on a wall. Fire at it with Electric Web. |
| 6 | Look for Another Hidden Container Head to the second level on the opposite side of the warehouse. The other hidden container will be here. |
| 7 | Help Davis Up Pull a lift up to help Davis get to the second level. |
| 8 | Find the Junction Box that Opens the Container Use your AR to see the cables going to the box. They'll lead you up to the warehouse's rafters, with the junction box found above the lift. Fire your Electric Web at the right time to get past the fan blocking it. |
| 9 | Pull Up the Other Lift While the container will be empty, you'll see cables that lead to another junction box. It'll be across the container, on the first level but blocked by a lift. Pull on the lift to raise it. |
| 10 | Fire at the Junction Box With the lift raised, fire at the junction box with Electric Web to open a hidden tunnel. |
| 11 | Get to the Stash Get through the tunnel by crawling on the wall while helping Davis get past debris. |
| 12 | Exit the Hidden Area With the stash already raided, exit the area through a nearby door. |
| 13 | Fight the Demons Fight the demons to stop them from escaping. |
| 14 | Chase the Truck Swing through the city to chase the truck with weapons. Make sure you dodge incoming missiles. |
| 15 | Stop the Truck Get on the truck and take out the enemies inside. While trying to take out the driver, the truck will crash with an oil tanker. Complete the QTEs that follow. |
Wheels within Wheels Mission Walkthrough and Guide
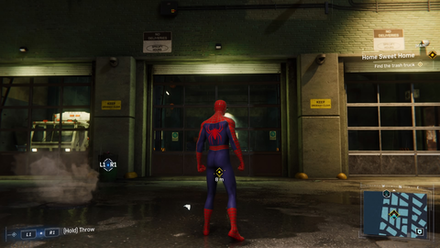
Home Sweet Home
| Step | Objective |
|---|---|
| 1 | Head to the Sanitation Garage Follow the objective marker to track down the dump truck that took your gear. This will lead you to the Empire Sanitation garage. |
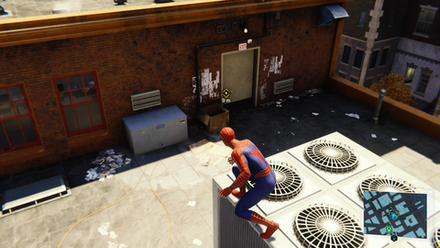
| 2 | Enter the Garage Facing the garage, head to the right side of the building and enter it through a vent. Check the dump truck inside for your gear. |
| 3 | Check the First Truck Exit the building and head to the new objective marker. Once you arrive, there will be two trucks close to each other that you'll need to check. The first will be right in front of Leo's. |
| 4 | Check the Second Truck The second truck will be near the first, just around the corner. |
| 5 | Take Out the Thugs at the Incinerator Area Go to the next objective marker. You'll find some thugs beating up a worker when you arrive. Take them out. |
| 6 | Find Your Gear in the Trash Clear the pile of trash to find your gear. |
| 7 | Fight More Thugs Craft a Web Bomb then use it to fight more thugs that arrive. |
| 8 | Head to MJ's Place Swing to MJ's place to see if you can stay over. |
Home Sweet Home Mission Walkthrough and Guide
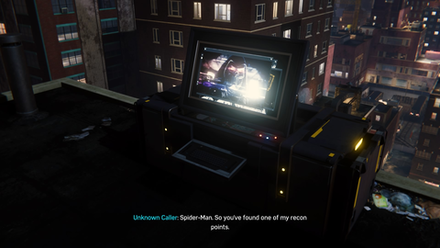
Stakeout
| Step | Objective |
|---|---|
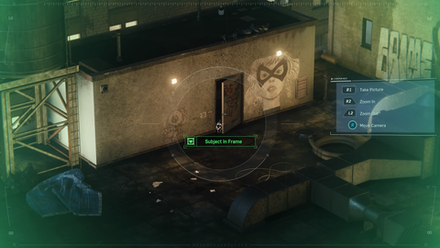
| 1 | Take a Picture of a Cat Figure Use the camera left by Black Cat to zoom in to the rooftop of the building across from you. You'll see a door that's slightly open with a cat figure peeking out. Take a picture of it. |
| 2 | Check your Map for Black Cat Stakeout Locations Completing this mission will unlock Stakeout locations on your map. |
Stakeout Mission Walkthrough and Guide
Couch Surfing
| Step | Objective |
|---|---|
| 1 | Head to Aunt May's Office Upon entering F.E.A.S.T., head to the second floor using the stairs to your left. Aunt May's office will be nearby. You can look around the office before going to sleep. |
| 2 | Sleep on the Couch Go to the couch to finally get some rest. A cutscene will start when you wake up. |
| 3 | Exit F.E.A.S.T. Exit F.E.A.S.T. to complete the mission. |
Couch Surfing Mission Walkthrough and Guide
Straw, Meet Camel

| Step | Objective |
|---|---|
| 1 | Enter the Construction Site Follow objective markers through the construction site. Along the way, take out Demons patrolling the area. |
| 2 | Take Out Demons from the Beams You can use construction beams to do Stealth Takedowns on Demons. |
| 3 | Protect the Fisk Guard Fight off the Demons trying kill Fisk's guard. |
| 4 | Clear Out the Demons Several objective markers will appear. Head to each one and clear out any Demons in the area. Use AoE abilities such as Web Blossom to clear each area quickly. |
| 5 | Fight the Demon Brute Fire webs at the Demon Brute to slow him down and make him vulnerable to your attacks. After beating him and the remaining guards, head to the top of the construction site. |
| 6 | Stop the Crane from Falling After you reach the roof, the helicopter will try to escape, causing severe damage. Follow a series of QTEs to stop the crane from falling to the ground. |
| 7 | Chase the Helictoper Swing through the city and chase the helicopter down. Make sure you avoid incoming missiles. |
| 8 | Get Across the Building After landing inside a building, jump through falling debris to get to the helicopter. |
| 9 | Take Out the Engines Take out the engines on both sides of the helicopter by following the button prompts that appear. |
| 10 | Web Up the Helicopter Spam your web shooter to stop the helicopter from falling. |
Straw, Meet Camel Mission Walkthrough and Guide
And the Award Goes to...
| Step | Objective |
|---|---|
| 1 | Enter the Damaged Store Upon waking up, head to your left to enter a store with a damaged exterior. |
| 2 | Go Through the Store Make your way through the store. You'll have to hop over some debris and get under a car along the way. |
| 3 | Exit the Store Once you reach the end of the store, you'll see an opening to your right. You'll spot Miles' mom trapped under debris. |
| 4 | Help Miles' Mom Follow the button prompts to get Miles' mom out of the debris. |
| 5 | Get Over the Blocked Path Climb the fallen structure nearby to get past the debris blocking your way. |
| 6 | Drop Down and Crawl Through the Car Once the Demons arrive, drop down from the structure and get behind cover. Get in the overturned car to your right and make your way to the other side. |
| 7 | Move From Cover to Cover Stay behind cover to avoid being spotted. Wait for the Demons to turn away before moving forward. You can gauge where they're looking by where their flashlight's pointing. |
| 8 | Wait for Demons to Move Once you come upon debris that you'll have to hop over, wait for the Demons nearby to leave the area. You can move to the next set of cover once they do. |
| 9 | Go up the Fallen Scaffolding Get to higher ground by moving to the fallen scaffolding in front of you. |
| 10 | Cross the Beam Use the beam to get to the other side without being spotted. |
| 11 | Move to the Next Set of Cover After you drop down from the scaffolding, wait for the nearby Demon to turn away before moving forward. |
| 12 | Go up the Steps Once you're at the last set of cover, go up the stairs to reach the final objective marker. |
And the Award Goes to... Mission Walkthrough and Guide
Act 2 Missions Walkthrough
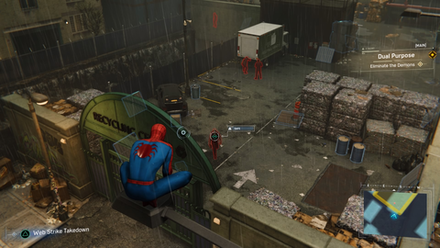
Dual Purpose
| Step | Objective |
|---|---|
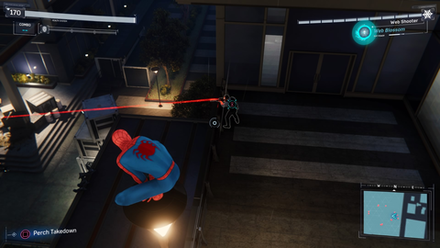
| 1 | Take Down the First Guard From your starting point, you can safely do a Web Strike Takedown or a Perch Takedown on the guard closest to you. |
| 2 | Take Out the Two Guards Behind a Truck Your next targets will be two guards fiddling with a truck. Zip to the lamppost above them. Distract one by shooting web at the pile of garbage to your right. You'll be able to take both down safely. |
| 3 | Take Out the Brute From the lamppost, zip to the lamppost right across from you. Once the brute walks under you, do a Perch Takedown. |
| 4 | Defeat the Remaining Guards There will be a few guards left that are separate from one another. Take them down to clear the area. |
| 5 | Power up the First Junction Box After checking the gate, use AR to find nearby junction boxes. The first will be marked as an objective. Use Electric Webs to power them up. |
| 6 | Power up the Second Junction Box The second box will be across from the first one, below a lamppost. |
| 7 | Power up the Third Junction Box The third will be near the truck where you took out the two guards. |
| 8 | Power up the Final Junction Box The final one will be on a wall across the third box, hidden behind some crates. |
| 9 | Enter the Facility Follow the objective markers to a vent that lets you inside. Crawl through the vent then drop down to a room. |
| 10 | Check for Clues Investigate the room for clues. Once you've cleared it, you'll need to head to another facility. Exit the building. |
Dual Purpose Mission Walkthrough and Guide
Hidden Agenda
| Step | Objective |
|---|---|
| 1 | Enter Mr. Li's Office Head to the second floor of F.E.A.S.T. to Mr. Li's office. It'll be locked so you'll have to crawl through a nearby vent. |
| 2 | Short Out the Junction Box While crawling through the vent, malfunctioning electrical wires will block your way. Fire Electric Web at the junction box across you to short it out. |
| 3 | Get the Key in Mr. Li's Desk After dropping into Mr. Li's office, open a drawer in his desk to grab a notebook. This will contain a key needed to unlock a secret panel. |
| 4 | Use the Key on the Shrine Use the key to unlock a nearby shrine, revealing a puzzle. |
| 5 | Solve the Yin and Yang Puzzle You'll need to solve the puzzle by forming a yin and yang. This gives you access to a secret room. |
| 6 | Investigate the Secret Room Enter the secret room and look for any clues that point to Mr. Li's plans. |
| 7 | Fire at the First Junction Box After setting off a trap, you'll need to fire Electric Web at two junction boxes to turn it off. The first will be on the wall to your left. |
| 8 | Fire at the Second Junction Box The second will be on the opposite wall, in a corner. |
| 9 | Leave the Room After disabling the trap, exit through a floor grate that leads to a storage room. Push away the items blocking the door to exit and complete the mission. |
Hidden Agenda Mission Walkthrough and Guide
A Fresh Start
| Step | Objective |
|---|---|
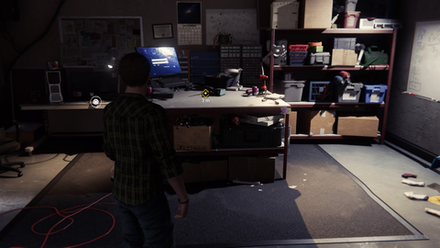
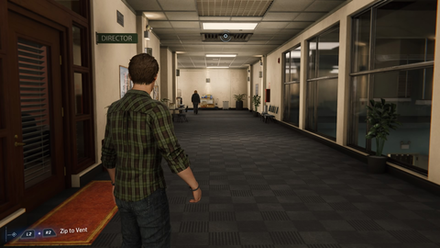
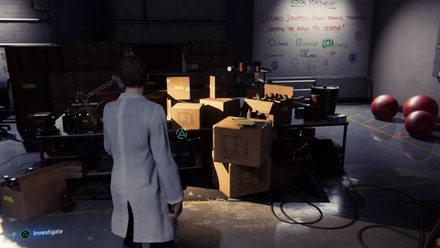
| 1 | Check On the Lab Head to a table that's piled with opened boxes to see what Dr. Octavius brought. |
| 2 | See the New Tech Go to the objective marker and observe as Dr. Octavius tries to demonstrate the new technology he's built. |
| 3 | Solve the Circuit Project Puzzle Solve the Circuit Project puzzle to fix the issue with the mechanical arm. |
| 4 | Exit the Lab Leave the lab to complete the mission. |
A Fresh Start Mission Walkthrough and Guide
Dinner Date
| Step | Objective |
|---|---|
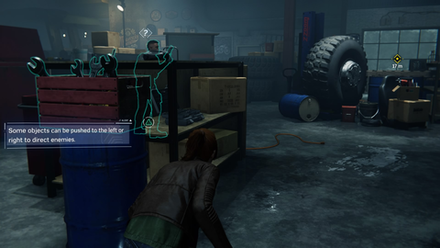
| 1 | Push the Toolbox From the starting point, push the nearby toolbox in either direction to distract the guard. Take the path opposite from where the toolbox landed. |
| 2 | Avoid Making Noise Follow objective markers through the garage. Don't hit anything that can cause noise such as boxes to avoid unwanted attention. |
| 3 | Push Another Toolbox Similar to the first toolbox, push it to distract the nearby guard. It may be easier to take the left side of the cover. |
| 4 | Go to the Generator Make your way through stacks of boxes. Once past them, you'll notice a generator to your right. Wait for the guard to turn away then head straight to it. |
| 5 | Turn Off the Generator Distract the guard on the ramp ahead of you by turning off the generator. Head to the left side of the cover to avoid being spotted. |
| 6 | Head Through the Next Area From the ramp, head straight in between two piles of boxes in the next area. Wait until the guard is turned away before moving. |
| 7 | Inspect Supplies Move from cover to cover until you reach several barrels with cases on top of them. Inspect the supplies. |
| 8 | Distract Another Guard From the barrels, move to another set of cover with a toolbox. Take the left side and push it over. This will distract the guard and give you an opening to the office room. |
| 9 | Enter the Office Make your way to the office. |
| 10 | Take a Picture of Blueprints Take a shot of some blueprints when you enter the office. |
| 11 | Pick Up a Transmitter Inspect the table for any evidence and pick up some transmitters. |
Dinner Date Mission Walkthrough and Guide
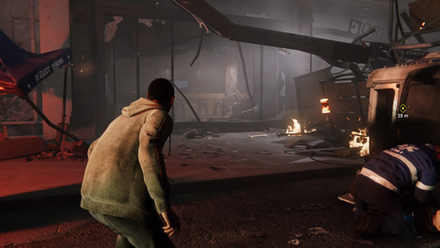
Up the Water Spout...
| Step | Objective |
|---|---|
| 1 | Take Out the Demons When you arrive at the building, there will be several demons guarding it outside. Fight them to gain entry. |
| 2 | Talk to a Downed Guard Follow the objective markers through to the parking garage. Approach a wounded guard. |
| 3 | Fight the Demons Demons will arrive after talking to the guard. Fight off each wave of them. |
| 4 | Go Up the Elevator Shaft Climb or run up several sets of elevator shafts to get to Standish's floor level. You'll need to take down any enemies that try to stop you and take cover from falling debris along the way. |
| 5 | Take Down the Two Demons Nearby Once you drop into Standish's level, two Demons will be nearby, approaching the elevator. Do Stealth Takedowns on both of them. |
| 6 | Zip to Another Beam Zip to the beams on the right side of the level. |
| 7 | Take Out the Demon Under You After zipping to the beam, you'll notice a Demon doing patrols under you. Do a Stealth Takedown on him. |
| 8 | Take Out the Demon Outside Standish's Office Walk across the beam then take out the Demon guarding Standish's office. |
| 9 | Bring Down a Chandelier You'll notice three enemies walking around the area, but they'll often converge under a nearby chandelier. Bring it down on them once they're all under it or near it to knock them out. |
| 10 | Zip Across to Another Beam Zip to the beam on the other side of the level, near the top-left corner. |
| 11 | Take Out the Two Demons Two Demons will be under you talking. Distract one of them by firing web at an object. Do Stealth Takedowns on both. |
| 12 | Take Out the Reinforcements After taking out the first set of guards, reinforcements will arrive. Prioritize taking out the brute first by doing a Stealth Takedown using a beam he's under. The remaining Demons will be isolated so you can do Web Strike Takedowns on each. |
| 13 | Stop the Ambush While trying to rescue Standish, more Demons will try to stop you. Defeat them all. |
| 14 | Save Standish Follow a set of QTEs to save Standish from falling down the burning building. |
Up the Water Spout... Mission Walkthrough and Guide
What's in the Box?
| Step | Objective |
|---|---|
| 1 | Open the Box Approach the box once you reach the objective marker. |
| 2 | Check Your Map for Taskmaster Challenges Completing this mission unlocks Taskmaster Challenges all over the map. Complete these to unlock tokens for further upgrades. |
What's in the Box? Mission Walkthrough and Guide
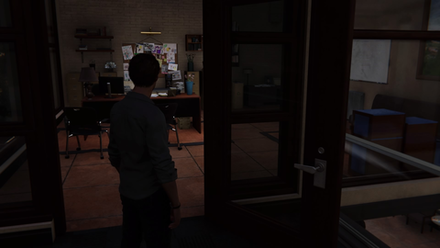
Back to School
| Step | Objective |
|---|---|
| 1 | Enter the School Follow the objective markers into the school grounds until you reach the House of Mirrors on the left side of the campus. |
| 2 | Stop the Mysterio Impersonator Chase the Mysterio impersonator into the House of Mirrors to see if they're Dr. Delaney. |
| 3 | Get to the Vulture Impersonator Do parkour to reach the Vulture impersonator. |
| 4 | Head to the Dance Floor Make your way to the dance floor to get to Dr. Delaney. Someone in a Rhino costume will try to stop you. Follow the button prompts to web him up. |
| 5 | Get Inside the Building Enter the building Dr. Delaney was taken in through a window. |
| 6 | Fight the Demons Stop the Demons from harming civilians by knocking them all out. |
| 7 | Short Out the Electricity Crawl through a nearby vent. Fire Electric Web at a junction box to short out the electricity in a room. |
| 8 | Take Out the Demons As you crawl through the vents, you'll spot Demons under you. Do Stealth Takedowns on them. Drop down into the room and take out the remaining enemies. |
| 9 | Crawl on the Wall Leave the room through a window and crawl on the side of the wall to reach Dr. Delaney. |
| 10 | Fight More Demons After Dr. Delaney's killed, you'll need to fight some Demons to get out of the room. |
| 11 | Exit the Building Leave the building into the school grounds. |
| 12 | Subdue the Mind-Controlled Citizens Subdue all of the civilians in the area that have been mind-controlled by Mr. Li. You'll need to web up the Rhino impersonator to knock him down. |
Back to School Mission Walkthrough and Guide
Spider-Hack
| Step | Objective |
|---|---|
| 1 | Hack the First Security Module Crawl on the side of Oscorp Tower and hack a security module. |
| 2 | Follow the Wires Follow the wires and continue crawling on the building to get to the second security module. Make sure you don't get spotted by the guards' laser sights. |
| 3 | Hack the Second Security Module Similar to the first, follow the button prompt to hack another security module. |
| 4 | Continue Following Wires You'll need to follow wires again, but you'll have the added obstacle of drones with spotlights. Avoid getting spotted by these. |
| 5 | Hack the Third Security Module Do the same process for the third security module. |
| 6 | Hack the Final Security Module Follow more wires to the last security module. A helicopter will also start patrolling. |
| 7 | Get Into the Office Drop on a landing and enter the building through a vent. Crawl through it to get to Osborn's office. |
| 8 | Access Osborn's Computer Use Osborn's computer to learn what Devil's Breath is. |
Spider-Hack Mission Walkthrough and Guide
Uninvited
| Step | Objective |
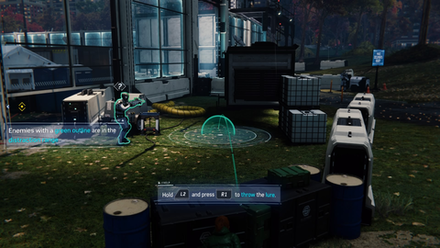
|---|---|
| 1 | Distract the Guard Use a lure to distract the guard at the entrance and get into the outpost. |
| 2 | Distract the Guard at the Stairs Take a path behind some cover until you're behind a few barrels, with the guard nearby. Throw a lure in front of him to clear the way up some stairs. |
| 3 | Take a Picture After going up the stairs, take a picture of a monitor. Follow the objective markers down to a new area. |
| 4 | Turn Off the Generator Turn off the generator to distract the guard in the tent. |
| 5 | Go Through the Tent Sneak through the tent and avoid alerting the guard inside. |
| 6 | Distract the Patrolling Guard In the next area, throw a lure once a guard that's moving around starts approaching you. |
| 7 | Go Into the Container With the guard distracted, you should have a direct path to follow the objective marker through a container. |
| 8 | Get Behind the Truck To get to the next marker, get behind a truck and use it as cover by moving alongside it. Go up a set of stairs after. |
| 9 | Push the Toolbox Distract the nearby guard by pushing a toolbox down. Use cover to get past him while he's distracted. |
| 10 | Distract the Guard Near the Stairs Throw a lure to distract the guard blocking your way to the stairs. |
| 11 | Take Another Picture Take a picture of a second monitor. |
| 12 | Turn Off Another Generator Distract the guard in the tent by turning off the generator powering it. |
| 13 | Go Through the Tent Duck through the tent and stick to the right side. Continue moving past it. |
| 14 | Get Behind Cover Stick to the right side, behind a structure, until you get to cover that's near your final objective marker. |
| 15 | Distract the Guard Near the Tent Throw a lure to distract the guard blocking your way to the tent. |
| 16 | Enter the Tent Go past the guard and enter the tent to complete the mission. |
Uninvited Mission Walkthrough and Guide
Strong Connections
| Step | Objective |
|---|---|
| 1 | Solve the Circuit Project Puzzles After talking to Dr. Octavius, help him out by solving three Circuit Project puzzles. |
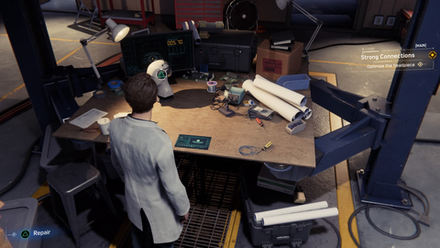
| 2 | Enter Dr. Octavius' Office After watching Dr. Octavius test the device, enter his office to look at some materials. You can also look around the lab to see some new items. |
| 3 | Exit the Lab Exit the lab to complete the mission. |
Strong Connections Mission Walkthrough and Guide
First Day
| Step | Objective |
|---|---|
| 1 | Protect Miles Protect Miles from some thugs. |
| 2 | Head Down the Street As Miles, follow the objective marker down the street into a market. Continue through it until you end up at a checkpoint. |
| 3 | Hack the Drone Hack the nearby drone to freely go over the barricade. |
| 4 | Move Behind Cover Go over the barricade and continue moving through the next area while behind cover. |
| 5 | Hack the Monitor Distract the nearby guard by hacking the monitor. Move past him to the next set of cover. |
| 6 | Hack the Unpowered Drone A guard will be blocking your way to some fences ahead. Hack the unpowered drone across from you to cause a distraction, then move past him to the fences. |
| 7 | Choose a Path After entering the next area, you'll be free to choose from two paths. The first involves going under a gate while the second has you climbing up some scaffolding. Both paths require hacking. |
| 8 | Hack the Truck Get past the last guard by hacking the truck behind him. Hop over the wall while he's distracted. |
| 9 | Head to F.E.A.S.T. There will be no more guards blocking your way, so you'll be free to enter F.E.A.S.T. |
| 10 | Exit F.E.A.S.T. After a cutscene, you'll be playing as Peter again. Exit F.E.A.S.T. to complete the mission. |
First Day Mission Walkthrough and Guide
Collision Course
| Step | Objective |
|---|---|
| 1 | Reach the Truck Chase the truck around the city. Swing close enough that you can zip to it. |
| 2 | Defeat the Demons Fight off Demons on top of the truck. |
| 3 | Stop the Cars After clearing out the Demons, two cars will start following behind the truck. Zip to them to stop them. |
| 4 | Get Back on the Truck Zip back to the truck and fight of additional Demons. |
| 5 | Stop Mister Negative Follow the QTE prompts to try to get into the front seats of the truck. |
| 6 | Follow Mister Negative After waking up, you'll need to follow Mister Negative as he teleports around his world. |
| 7 | Throw the Mask Back Pull on the floating mask and throw it back at Mister Negative. |
| 8 | Fight the Minions Mister Negative will summon enemies for you to fight. Take them all out. |
| 9 | Throw Projectiles at the Giant Mask Follow the QTE prompts during a short battle against Mister Negative. He'll teleport away and summon a giant mask. Throw the flaming debris back at it to destroy it. You'll wake up after it explodes. |
Collision Course Mission Walkthrough and Guide
The One That Got Away
| Step | Objective |
|---|---|
| 1 | Look for the Dispersal Device Look around the area for a device that can hold Devil's Breath. You'll find it across your starting point, on the left side of the room. |
| 2 | Point Out the Drones Look ahead to point out the drones to Spider-Man. |
| 3 | Point Out the Vent Look behind you to your right to point out the vent. |
| 4 | Request a Distraction Once Spider-Man's in position, request a distraction so that you can get to the tablet. |
| 5 | Get the Tablet Walk past the civilians to get the tablet. |
| 6 | Go Up the Stairs After getting free of the Demons, go up the nearby stairs. There will be a Demon at the center staircase so take the ones on the side. |
| 7 | Distract the Guards at the Top of the Stairs Use a lure to distract one of the Demons and lead him away from the other. Ask Spider-Man to take them both out. |
| 8 | Distract the Guards Near the Monitors Toss another lure near one of the monitors. This will separate the two Demons, making them safe to knock down. |
| 9 | Distract the Guards at the Barricades Stick to the right side of the floor until you reach a set of barricades. Toss another lure to the cover to your left to distract one of the Demons. Let Spider-Man take them out. |
| 10 | Request a Distraction Once Li and other Demons arrive, request a distraction to give you an open path to the bomb. |
| 11 | Remove the Battery Wires Flip the bomb over to the side with black wires. Take out the first and third wires in any order to disable the batteries. |
| 12 | Remove the Fan Wire Take out the second wire to disable the fan. |
| 13 | Remove the Last Wire Take out the final wire to defuse the bomb. |
| 14 | Take Out Demons on the Upper Area Take out all the Demons on the upper area first. Zip to flag poles and rafters to do Perch Takedowns. |
| 15 | Take Out Demons on the Center Floor Lure Demons to the monitors and drag them down to take out the ones at the center floor. |
| 16 | Fight Reinforcements Once the hostages are safe, defeat all the reinforcements that arrive. |
| 17 | Defeat Mister Negative Follow the objective markers into the train. Fight and defeat Mister Negative. |
The One That Got Away Mission Walkthrough and Guide
Breakthrough
| Step | Objective |
|---|---|
| 1 | Solve the Circuit Project Puzzles After a cutscene, you'll need to fix the interface by solving three Circuit Project puzzles. This triggers a final cutscene and completes the mission. |
Breakthrough Mission Walkthrough and Guide
Reflection
| Step | Objective |
|---|---|
| 1 | Enter F.E.A.S.T. Enter F.E.A.S.T. to start a cutscene where you talk to Aunt May. After a news report showing the truck carrying Devil's Breath was attacked, Peter will leave. This completes the mission. |
Reflection Mission Walkthrough and Guide
Out of the Frying Pan...
| Step | Objective |
|---|---|
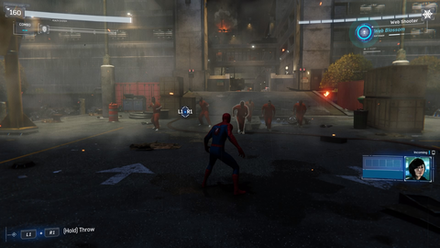
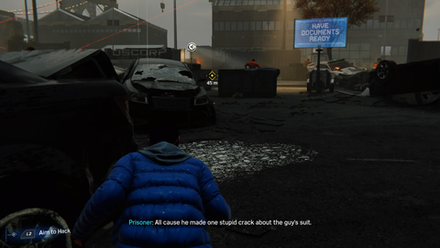
| 1 | Fight the Prisoners Several prisoners will start charging at you. Take them all out. |
| 2 | Continue Through the Courtyard Make your way through prison courtyard and knock down any inmates you see along the way. |
| 3 | Open the Door Follow the objective marker and pull the door open with your webs. |
| 4 | Rescue the Guard Zip to the vehicle being surrounded by prisoners and save the guard. Continue fighting other prisoners in the area. |
| 5 | Stop the Helicopter Follow the button prompts to stop the helicopter from escaping. |
| 6 | Fight Raft Prisoners Once you're in the Raft, fight off all the prisoners that attack you. |
| 7 | Continue Through the Raft Follow Electro through the Raft, while taking down prisoners along the way. |
| 8 | Chase Electro Swing on the sides of the structure to chase Electro around the area. Make sure to avoid any falling debris. |
| 9 | Chase Electro to the Roof Run on the walls to reach Electro. Dodge from side to side to avoid the debris he launches at you. A cutscene will start once you reach the top. |
Out of the Frying Pan... Mission Walkthrough and Guide
Act 3 Missions Walkthrough
| Jump to Section | ||
|---|---|---|
| ...Into the Fire | Picking up the Trail | Streets of Poison |
| Supply Run | Heavy Hitter | Step Into My Parlor... |
| The Heart of the Matter | Pax in Bello | |
...Into the Fire
| Step | Objective |
|---|---|
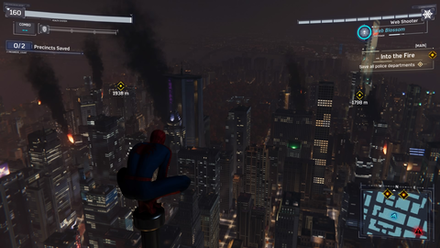
| 1 | Head to the East Objective Marker You'll be given two precincts to go to. While you can choose either one, the Upper East Side precinct is nearer. |
| 2 | Disable the First Transformer Once you reach the precinct, head down from your starting point to the nearest transformer. Take out the enemies there then fire your webs at the transformer to destroy it. |
| 3 | Disable the Second Transformer Head to the rooftop across the first transformer. Do the same process here. |
| 4 | Disable the Third Transformer Head down to the street below to disable another transformer. |
| 5 | Disable the Fourth Transformer Swing to the last rooftop with a transformer. There will also be a brute here. |
| 6 | Disable the Last Transformer The last transformer will be tied to a helicopter that's circling you. Shoot at the transformer after dodging rockets to disable it. This will be easier if you have the Threat Sensors suit mod. |
| 7 | Take Out the Demons Finish helping this precinct by taking out the Demons on the street. |
| 8 | Head to the Next Precinct Swing your way to the next objective marker. |
| 9 | Take Out the Rioters There will be several groups of rioters around the precinct. Go to each one and take them all out. |
| 10 | Take Out the Rioters on the Rooftops Head up to several rooftops and fight the rioters there, especially those with RPGs. |
| 11 | Fight the Sable Mercenaries As you clear the rooftops, Sable mercenaries with jetpacks will arrive. Take them out by doing a Web Strike to get to them then continuing with a combo in midair. |
| 12 | Head to the Veterans Center Swing your way to Harlem to get to the Veterans Center, where Aunt May and Miles are stuck in a fire. |
| 13 | Save Miles and Aunt May Once you get to the rooftop of the building, a cutscene will start, completing the mission. |
...Into the Fire Mission Walkthrough and Guide
Picking up the Trail
| Step | Objective |
|---|---|
| 1 | Pick Up the Sign After talking to a cop, go to the center of the crime scene. Pick up a campaign sign and flip it over to see the residue of Devil's Breath. |
| 2 | Solve the Spectrograph Puzzle Solve the puzzle to form the trail of Devil's Breath/ |
| 3 | Take the Left Trail Two trails of Devil's Breath will appear. It'll be quicker if you follow the trail that goes left. |
| 4 | Follow the Trail that Goes Up the Building The trail will diverge again in two directions. Follow the trail that goes right and up a building. |
| 5 | Get to the Rooftop Go up to the rooftop of the building then enter a vent. |
| 6 | Power the Electricity Fire electric webs at a junction box to power the electricity in the room. |
| 7 | Investigate the Lair Look around Dr. Octavius' lair for evidence. |
| 8 | Check the Map A map will be on the other side of the room, with a UV lightbeside it. |
| 9 | Power the Junction Box Behind You After the UV light doesn't work, turn around to a junction box behind you, in the corner of the room. Rip off the cover then fire electric web at it. |
| 10 | Check the Map Again Go back to the map where the UV light will now be working. The map will show the targets of your enemies and where they're headed. |
| 11 | Open the Case Go back near the entrance of the lair, where you'll open a case. It will turn out to be a bomb. A cutscene will start. |
| 12 | Defeat Electro Defeat Electro by firing webs at him and destroying the generators that give him energy. When he's weakened, follow the QTE prompts to knock him down permanently. |
| 13 | Defeat Vulture Defeat Vulture by throwing his missiles back at him. Do a finisher once your Focus Bar is full. |
Picking up the Trail Mission Walkthrough and Guide
Streets of Poison
| Step | Objective |
|---|---|
| 1 | Get to High Ground Swing through the park and get to the top of the building in the distance. Avoid landing in the poison streets. |
| 2 | Solve the Spectrograph puzzle Solve the puzzle to determine the components of an antidote. |
| 3 | Reach the First Component Swing across the city to get to a greenhouse that has the first component. Use construction cranes to swing if you're too far from a building. |
| 4 | Enter the Greenhouse Enter the greenhouse and try to get the component. |
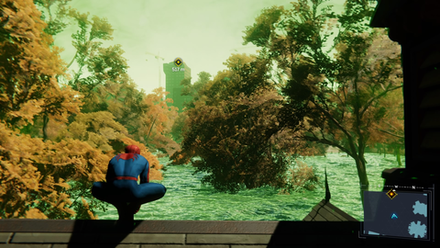
| 5 | Follow Otto Follow Otto as you go through a hallucinated area. |
| 6 | Get the First Component Reach the end of the area and pick up the Eclipta Alba. |
| 7 | Swing to the Next Component Swing your way to the next objective marker. Make sure to dodge the scorpion tails that will pop out of the poison streets. |
| 8 | Enter the Research Station Go in the Research Station to get the next component. |
| 9 | Follow Otto Again You'll end up in another hallucination. Follow Otto again through the area. |
| 10 | Get the Second Component After swinging and climbing your way to the end of the area, pick up the component. |
| 11 | Reach the Lab Swing your way to Octavius Labs to complete the antidote. |
| 12 | Get Through the Last Hallucination After entering the lab, you'll end up in another hallucination. Follow the objective markers to make your way through it. |
| 13 | Fight the Scorpion Illusions As you go through the area, Scorpion illusions will appear to fight you. Beat them by webbing them up to make them vulnerable to a combo. Make sure to dodge their acid. |
| 14 | Make the Antidote Reach the end of the area to make an antidote. |
| 15 | Exit the Lab Leave the lab to complete the mission. |
Streets of Poison Mission Walkthrough and Guide
Supply Run
| Step | Objective |
|---|---|
| 1 | Move to the Next Set of Cover From your starting point, head through to the next set of cover behind the car and some cases. |
| 2 | Hack the Lights Distract the convict by hacking the nearby lights. This should give a free path. |
| 3 | Head Over the Wall Head past the convict and hop over a broken wall. |
| 4 | Check for Antibiotics Check some medical supplies nearby for antibiotics. You'll find none. |
| 5 | Distract the Convict There'll be a convict blocking your way to the objective marker. You can hack either a downed drone or a fire alarm to distract him. Head straight past him when he's turned away. |
| 6 | Hack the Lights Distract another convict by hacking the lights to his side. Head straight past him after. |
| 7 | Hack the Downed Drone Continue moving until you come upon some crates as cover. Hack a nearby downed drone to distract the convict and get to a tent. |
| 8 | Check for Antibiotics Check the supplies in the tent for antibiotics. You'll find none again. |
| 9 | Hack Another Drone A convict will be blocking your way to the next tent. Hack the downed drone nearby to distract him. |
| 10 | Move Through the Wreckage Sneak past the convict and crawl through a car to the other side of the wreckage. Avoid getting spotted by a sniper's laser sight. |
| 11 | Get the Antibiotics Get the antibiotics nearby. |
| 12 | Hack the Lights Distract Rhino by hacking the lights behind him. Sneak past him and go into a drain area. |
| 13 | Exit the Drain Get to the end of the drain and crawl out. |
| 14 | Crawl Over Boxes Get to the other side of some boxes by crawling over them. |
| 15 | Hide Behind Crates You'll come upon an area with crates on both sides. Pick one side and get behind a set of crates. Rhino will alternately smash through each side of crates. Sneak past him while he's turned away and destroying the other side. |
| 16 | Go Up a Container Follow the objective marker and use a container as a ramp. |
| 17 | Enter Another Drain Follow the marker to another drain you'll have to go through. |
| 18 | Distract Rhino After exiting the drain, distract Rhino by hacking the lights near him. |
| 19 | Enter a Container Enter a container on the other side of the area. |
| 20 | Make Rhino Destroy the Boxes Boxes will be blocking your way to the exit. Hack the small generator to trick Rhino into destroying them. This gives you a free path to the exit, completing the mission. |
Supply Run Mission Walkthrough and Guide
Heavy Hitter

| Step | Objective |
|---|---|
| 1 | Defeat Rhino Defeat Rhino by luring him into heavy objects that you can pull down to stun him. Prioritize beating Rhino first since he fights upfront and closer to you compared to Scorpion. |
| 2 | Defeat Scorpion Similar to the Scorpion illusions in Streets of Poison, you can defeat Scorpion by webbing him up to restrict his movement. |
Heavy Hitter Mission Walkthrough and Guide
Step Into My Parlor...

| Step | Objective |
|---|---|
| 1 | Try to Enter the Security Area From the starting point, go through the lobby and try to enter the security area. The guard there will deny you entry. |
| 2 | Cause a Distraction Start talking to people in the area to cause a disturbance. This will allow you time to enter the security area. |
| 3 | Get the Stun Gun Pick up the stun gun near the entrance of the security area. |
| 4 | Stun the Guard Use the stun gun on the Sable guard that appears. |
| 5 | Knock Out Another Guard Throw a lure behind the guard to distract him, then sneak up behind and stun him. |
| 6 | Turn On the Alarm Enter the control room and knock down the guard inside. Go to the control panel and trigger an alarm that causes Norman to take the elevator down. |
| 7 | Enter the Elevator Exit the security area and sneak into the elevator. |
| 8 | Investigate the Penthouse Look around Norman's penthouse for any blueprints or evidence. |
| 9 | Check the Blueprints and Helmet Nearby As you investigate, you'll come upon some blueprints and a helmet. Equip the helmet to see a hidden room that's blocked off. |
| 10 | Approach the Painting Approach the painting pull a panel to reveal a keypad. You'll need to find the code to unlock it. |
| 11 | Enter the Next Area of the Penthouse Once you've investigated everything in the first room, the next area will unlock. |
| 12 | Enter Norman's Room Make your way through the next area, past a large living room with a TV. There will be an open door leading to Norman's room. |
| 13 | Get the Key Behind the Picture Go to the picture of Norman's wife and turn it around. A key to Harry's room will be taped here. |
| 14 | Enter Harry's Room Make your way to Harry's room. You can explore the room for any clues to his whereabouts. |
| 15 | Read Harry's Journal Read Harry's journal to find out the code to the keypad. |
| 16 | Sneak Past Sable Guards After exiting Harry's room, you'll find guards patrolling the area. Move from cover to cover when they're turned away to get past them. |
| 17 | Stun the Guard at the Center of the Room Back at the first area, there will be two guards, one patrolling the outskirts and one at the center. Go to the center floor and stick to cover. Stun the guard there while the other's not looking. |
| 18 | Move Near the Keypad Use the couch as cover then move near the keypad. Wait for the patrolling guard to move past it, then approach it to enter the code. |
| 19 | Enter the Secret Room Get in the secret room and investigate it. |
| 20 | Turn On the Center Table Approach the center table and turn on a 3D map. Adjust the settings to what's shown in the image to find the location of the antiserum. |
| 21 | Exit the Secret Room Leave the secret room. You'll spot a guard patrolling nearby, knock him out. |
| 22 | Continue to the Next Area Move through the Penthouse into the next area. Use lures to distract any guards blocking your path. |
| 23 | Get to the Balcony Reach the balcony and knock out the guard there to complete the mission. |
Step Into My Parlor... Mission Walkthrough and Guide
The Heart of the Matter
| Step | Objective |
|---|---|
| 1 | Take Out the Snipers Take out the snipers on the rooftops to make fighting the remaining Demons easier. |
| 2 | Fight the Demons Fight all the other Demons in the area. |
| 3 | Fight the Sable Forces Take out the Sable mercenaries that arrive. |
| 4 | Make your Way Through the Facility Enter the facility and head downwards by following the objective markers to get to Osborn. Avoid touching the parts that have been infected by Mister Negative's powers. |
| 5 | Jump to the Area Below Drop down to a shaft to encounter Mister Negative. |
| 6 | Follow Mister Negative Once you're drawn into his world again, follow him through the area to escape it. |
| 7 | Defeat Mister Negative Defeat Mister Negative by dodging his attacks and attacking him when he's weakened. |
The Heart of the Matter Mission Walkthrough and Guide
Pax in Bello
| Step | Objective |
|---|---|
| 1 | Enter the Lab Enter the lab to start a cutscene. You'll build a suit that can counter Doctor Octavius' tentacles. |
| 2 | Defeat Doctor Octavius Beat Doctor Octavius by webbing up his tentacles to restrict his movement then string combos on him to deal damage. |
Pax in Bello Mission Walkthrough and Guide
List of All Main Campaign Missions
Main Missions
| No. | Mission |
|---|---|
| 1 | Clearing the Way |
| 2 | The Main Event |
| 3 | My OTHER Other Job |
| 4 | Keeping the Peace |
| 5 | Something Old, Something New |
| 6 | Fisk Hideout |
| 7 | Landmarking |
| 8 | For She's a Jolly Good Fellow |
| 9 | Don't Touch the Art |
| 10 | A Shocking Comeback |
| 11 | The Mask |
| 12 | Day to Remember |
| 13 | Harry's Passion Project |
| 14 | Financial Shock |
| 15 | Wheels within Wheels |
| 16 | Home Sweet Home |
| 17 | Stakeout |
| 18 | Couch Surfing |
| 19 | Straw, Meet Camel |
| 20 | And the Award Goes to... |
| 21 | Dual Purpose |
| 22 | Hidden Agenda |
| 23 | A Fresh Start |
| 24 | Dinner Date |
| 25 | Up the Water Spout... |
| 26 | What's in the Box? |
| 27 | Back to School |
| 28 | Spider-Hack |
| 29 | Uninvited |
| 30 | Strong Connections |
| 31 | First Day |
| 32 | Collision Course |
| 33 | The One That Got Away |
| 34 | Breakthrough |
| 35 | Reflection |
| 36 | Out of the Frying Pan... |
| 37 | ...Into the Fire |
| 38 | Picking up the Trail |
| 40 | Supply Run |
| 41 | Heavy Hitter |
| 39 | Streets of Poison |
| 42 | Step Into My Parlor... |
| 43 | The Heart of the Matter |
| 44 | Pax in Bello |
Side Missions
Spider-Man Remastered Related Guides

Complete Story Walkthrough and All Missions
Mission Walkthroughs
| Main Campaign Missions | ||
|---|---|---|
| Main Campaign | ||
| DLC Missions | ||
| The Heist | Turf Wars | Silver Lining |
Author

List of All Main Campaign Missions and Side Missions
Please participate in our site
improvement survey
03/2026
improvement survey
03/2026
Would you assist in
improving Game8's site?
improving Game8's site?

×
We are listening to our users' valuable opinions and discussing how to act on them.
The information collected through this survey will be used for the purpose of improving our services. In addition, the information will only be disclosed a part of a statistic in a format that will not allow identification of personal information.
Begin Survey
Not Now
×
Please rate each item regarding Game8.co's Advertisements.
Amount of Ads
Very Dissatisfied
Somewhat Dissatisfied
Fine
Somewhat Satisfied
Highly Satisfied
Placement of Ads
Timing of Ad Display
Ad Loading Speed
Safeness of Ads
Content of Ads
×
Please rate each item regarding Game8.co's Quality of Articles.
Amount of information
Very Dissatisfied
Somewhat Dissatisfied
Fine
Somewhat Satisfied
Highly Satisfied
Frequency of updates
Speed of new information
Accuracy of articles
Understandibility of articles
Readability of sentences
×
Please rate each item regarding Game8.co's Usability of the Site.
Ease of finding information
Very Dissatisfied
Somewhat Dissatisfied
Fine
Somewhat Satisfied
Highly Satisfied
Loading Speed
Use of Color
Font Size
Visibility of Images
Easy to Understand Layout
×
Please rate each item regarding Game8.co's Message Boards, Comments.
Ease of Writing
Very Dissatisfied
Somewhat Dissatisfied
Fine
Somewhat Satisfied
Highly Satisfied
Readability
Ease in Finding Information
Comment Quality
Comment Quantity
Admin Response
×
Please rate each item regarding Game8.co's Site's new design.
Please rate our site's new design
Very Dissatisfied
Somewhat Dissatisfied
Fine
Somewhat Satisfied
Highly Satisfied
Do you think that the website's design change makes the site easier to use?
Has the new design made it easier for you to find information on the site?
Has the new design improved the overall visual appeal of the site?
How would you rate your overall satisfaction with the new design of the site?
×
How likely are you to recommend Game8 to someone you know?
Very Unlikely
0
1
2
3
4
5
6
7
8
9
10
Very Likely
If you have other opinions regarding potential improvement to the website, please share them with us. We would appreciate your honest opinion.
Note: This is a free response section, so you can proceed without entering anything.
Note: Please be sure not to enter any kind of personal information into your response.
Note: Please be sure not to enter any kind of personal information into your response.
×
Thank You
×
Thank you for participating in our survey! Your answers will help us to improve the quality of our website and services.
We hope you continue to make use of Game8.
We hope you continue to make use of Game8.
Close
Rankings
- We could not find the message board you were looking for.
Gaming News


![Monster Hunter Stories 3 Review [First Impressions] | Simply Rejuvenating](https://img.game8.co/4438641/2a31b7702bd70e78ec8efd24661dacda.jpeg/thumb)
Popular Games

Genshin Impact Walkthrough & Guides Wiki
Honkai: Star Rail Walkthrough & Guides Wiki
Umamusume: Pretty Derby Walkthrough & Guides Wiki
Pokemon Pokopia Walkthrough & Guides Wiki
Resident Evil Requiem (RE9) Walkthrough & Guides Wiki
Monster Hunter Wilds Walkthrough & Guides Wiki
Wuthering Waves Walkthrough & Guides Wiki
Arknights: Endfield Walkthrough & Guides Wiki
Pokemon FireRed and LeafGreen (FRLG) Walkthrough & Guides Wiki
Pokemon TCG Pocket (PTCGP) Strategies & Guides Wiki


Recommended Games
Diablo 4: Vessel of Hatred Walkthrough & Guides Wiki
Cyberpunk 2077: Ultimate Edition Walkthrough & Guides Wiki
Fire Emblem Heroes (FEH) Walkthrough & Guides Wiki
Yu-Gi-Oh! Master Duel Walkthrough & Guides Wiki
Super Smash Bros. Ultimate Walkthrough & Guides Wiki
Pokemon Brilliant Diamond and Shining Pearl (BDSP) Walkthrough & Guides Wiki
Elden Ring Shadow of the Erdtree Walkthrough & Guides Wiki
Monster Hunter World Walkthrough & Guides Wiki
The Legend of Zelda: Tears of the Kingdom Walkthrough & Guides Wiki
Persona 3 Reload Walkthrough & Guides Wiki


All rights reserved
© 2022 MARVEL
© 2020 Sony Interactive Entertainment LLC
Created and developed by Insomniac Games, Inc.
The copyrights of videos of games used in our content and other intellectual property rights belong to the provider of the game.
The contents we provide on this site were created personally by members of the Game8 editorial department.
We refuse the right to reuse or repost content taken without our permission such as data or images to other sites.