★ Season 3 is live as of January 23, 2024!
┗ S3 Journey | S3 Questline | S3 Battle Pass
★ Season 3 Class Tier List | Best Season 3 Blessings
★ Learn more about Seneschal Companions
┗ Governing Stones | Tuning Stones
★ Vaults | Nightmare Vaults | Arcane Tremors
This is a Season 2 Corpse Explosion Blight endgame build and prepared for the new Abattoir of Zir for the Necromancer in Diablo 4 (D4).This build utilizes several Shadow DoT and Lucky Hit modifiers for a DoT centric build. Read on for the complete list of Vampiric Powers, Skills, and Aspects you need and how to play the build for Season 2 and clear the new Abattoir of Zir (AoZ).
List of Contents
| Strengths |
|---|
|
✔️High and Consistent Damage ✔️High Survivability ✔️Easy Resource Management |
Blight Corpse Explosion plays almost identically to the well known Infinimist Build but with a twist of having Blight in its build. This means that its much more resource hungry than Infinimist (which doesn't use much resource at all) in exchange of a DPS boost. This means that this build variant suffers from a bit of durability loss in exchange of more fire power.
While we do mention that this build suffers a bit of durability loss than Infinimist, it doesn't mean that this build is suddenly the most fragile build in the game. We utilize a lot of lucky Hit to reduce our cooldowns from Decrepify which translates to more uptime for Blood Mist and Bone Storm which also translates to a higher survivability.
Corpse Explosion Blight build uses several resource regenerating aspects and uniques to resolve our Essence management issues. We use Tibault's Will for free Essence whenever we dodge thanks to the Invulnerability from Metamorphosis and also maximize our corpse consumption with Corpse Explosion which gives us free essence from Grim Harvest. Very minor but Lidless Wall can also regenerate a bit of Essence on Lucky Hit which means the higher our Lucky hit chance is, the more consistent the build becomes.
| Weaknesses |
❌Cooldown-Reliant ❌Low Burst Potential ❌Lucky Hit Dependent |
|---|
While we do have several lucky hit modifiers to reduce our cooldown, having an awkward timing of not being able to refresh all our cooldowns after a mob group encounter makes us very vulnerable. Without Bone Storm and Blood Mist, we become an extremely easy target with not much ways to answer threats as we don't have an instant method to kill threats and generate corpses to start up our combo.
To clear Abattoir of Zir, you'll need to defeat enough enemies to summon the Blood Seekers that will hunt you and defeat them in under 10 minutes. This is plenty of time so avoid rushing in if your cooldowns are unavailable and pace yourself properly when navigating the endgame dungeon.
This is a given with DoT builds where we have consistent damage but low burst potential. This may cause us to struggle with enemies that have high HP and against bosses/elites. This is much more true against Blood Seekers.
Much life Infinimist, the Blight Corpse Explosion build is Lucky Hit dependent. If you don't have a decent amount of Lucky Hit Chance, the build will straight up, not function. This is also the reason we utilize certain affixes from defensive armor options like helms and even the Greaves of Empty Tomb to further ramp up our Lucky Hit Chance.
| Jump to a Section! | |||||
|---|---|---|---|---|---|
| Build Overview and Summary | |||||
|---|---|---|---|---|---|
 Corpse Explosion Blight Corpse Explosion Blight | Tier: Focus: PVE Playstyle: Solo and Party | ||||
| Active Skills | |||||
| Passive Skills | |||||
| Build Overview and Summary | |||||
|---|---|---|---|---|---|
| Corpse Explosion Blight | Tier: Focus: PVE Playstyle: Solo and Party | ||||
| Aspects and Uniques | |||||
| Build Overview and Summary | |||||
|---|---|---|---|---|---|
| Corpse Explosion Blight | Tier: Focus: PVE Playstyle: Solo and Party | ||||
| Stat Priorities | Recommended Gems | ||||
| ・Cooldown Reduction ・Vulnerable Damage ・Critical Strike Chance ・Intelligence ・Lucky Hit Chance ・Damage Reduction ・Damage Reduction while Fortified ・Damage Reduction from Close Enemies ・Armor | |||||
This build aims to utilize several Shadow DoT to increase our mob clearing capability. We also maximize our Lucky Hit Chance to trigger several Lucky Hit triggers for our build that will supplement our DPS even further. Said Lucky Hit triggers include X'Fal's Corroded Signet, Decrepify Cooldown triggers, Lidless Wall's Bone Storm, and additional essence regeneration from Aspect of the Long Shadow
| Jump to a Section! | |||||
|---|---|---|---|---|---|
| Skill | Upgrade Path | ||
|---|---|---|---|
|
(1 Point) |
→ |
|
|
|
(1 Point) |
→ |
|
|
|
(4 Points) |
→ |
|
|
|
(5 Points) |
→ |
|
|
|
(1 Point) |
→ |
|
|
|
(1 Point) |
→ |
|
|
|
(1 Point) |
→ |
|
|
| Corpse Explosion Blight Passives | ||
|---|---|---|
|
(3 Points) |
(3 Points) |
(3 Points) |
|
(3 Points) |
(3 Points) |
(1 Points) |
|
(1 Points) |
(3 Points) |
(4 Points) |
|
(1 Point) |
(3 Points) |
(3 Points) |
|
(1 Point) |
||
| Note that this is an endgame build and its skill build progression is not ideal to be followed as a new character |
| Recommended Skill Progression | ||||
|---|---|---|---|---|
| Lv.2 | Lv.3 | Lv.4 | Lv.5 | |
| | | | | |
| Lv.6 | Lv.7 | Lv.8 | Lv.9 | |
| | | | | |
| Lv.10 | Lv.11 | Lv.12 | Lv.13 | |
| | | | | |
| Lv.14 | Lv.15 | Lv.16 | Lv.17 | |
| | | | | |
| Lv.18 | Lv.19 | Lv.20 | Lv.21 | |
| | | | | |
| Lv.22 | Lv.23 | Lv.24 | Lv.25 | |
| | | | | |
| Lv.26 | Lv.27 | Lv.28 | Lv.29 | |
| | | | | |
| Lv.30 | Lv.31 | Lv.32 | Lv.33 | |
| | | | | |
| Lv.34 | Lv.35 | Lv.36 | Lv.37 | |
| | | | | |
| Lv.38 | Lv.39 | Lv.40 | Lv.41 | |
| | | | | |
| Lv.42 | Lv.43 | Lv.44 | Lv.45 | |
| | | | | |
| Lv.46 | Lv.47 | Lv.48 | Lv.49 | |
| | | | | |
| Renown Skill Points (Lv50 Onwards) | ||||
| R1 | R2 | R3 | R4 | |
| | | | | |
| R5 | R6 | R7 | R8 | |
| | | | | |
| R9 | R10 | |||
| | | |||
|
|
→ | Warrior (Reaper) |
Sacrifice |
|---|---|---|---|
| → | Mage (Cold) |
Sacrifice | |
|
|
→ | Blood | Sacrifice |
We sacrifice Reaper, Cold Mage, and Blood Golem for Shadow Damage, Vulnerable Damage, and extra HP respectively for the following reasons.
| Jump to a Section! | |||||
|---|---|---|---|---|---|
| Vampiric Power Cost |
Effect Explanation |
|---|---|
 Flowing Veins Flowing Veins
|
You deal 60% increased Damage Over Time to enemies that are moving or affected by a Vampiric Curse.
DoT damage bonus for our DoT-focused build. |
 Metamorphosis Metamorphosis
|
When you Evade you turn into a cloud of bats, becoming Unstoppable for 4 seconds. Enemies along your path take 160% Physical damage and are inflicted with Vampiric Curse.
Mandatory to this build and its synergy with Tibault's Will. Gives us a free Unstoppable trigger to gain all of Tibault's Will's bonus damage output. |
 Domination Domination
|
You deal 24% increased damage to enemies who are Stunned, Immobilized, Frozen, or Feared. If they're also Injured and not an Elite, they're instantly killed.
Corpse Tendrils stuns enemies which can increase our damage output tremendously with Domination. |
 Prey on the Weak Prey on the Weak
|
You deal 16% increased damage to Vulnerable enemies. Enemies are Vulnerable while affected by a Vampiric Curse from your other Vampiric Powers.
We apply vulnerable easily thanks to Corpse Tendrils which translates to a steady damage output bonus from Prey on the Weak. |
 Anticipation Anticipation
|
Your Ultimate Skills gain 20% Cooldown Reduction. Your Ultimate Skills gain 12% increased damage for each nearby enemy affected by your Damage Over Time effects.
Faster Bone Storm cooldown to increase our survivability. |
| 7 | 5 | 4 | Total Pacts Required: 16 |
List of Vampiric Powers and Pacts Explained
| Jump to a Section! | |||||
|---|---|---|---|---|---|
| Weapon | Aspects and Affixes |
|---|---|
| Wand | Each time the Shadowblight Key Passive deals damage to enemies, it increases the next Shadowblight's damage within 10 seconds by (20-40)%, stacking up to 5 times. ・+ Lucky Hit Chance (Inherent) ・+ Intelligence ・+ Damage to Slowed Enemies ・+ Damage Over Time ・+ Damage to Crowd Controlled Enemies |
| Shield |
Lidless Wall
Lucky Hit - While you have an active Bone Storm, hitting an unaffected enemy has a (5-25)% chance to spawn an additonal storm at their location. Each of your active Sacrifice bonuses increases the chance by 25% and the total additional Bone Storms you can have by +1. ・+ 60% Blocked Damage Reduction (Inherent) ・+ 20% Block Chance (Inherent) ・+ 80% Mainhand Weapon Damage (Inherent) ・+ Thorns (Inherent) ・+ X% Attack Speed ・+ X% Lucky Hit: Chance to Restore Your Primary Resource ・+ X% Maximum Life ・+ X% Maximum Essence |
| Equipment | Aspects and Affixes |
|---|---|
| Helmet | You gain (0.25-0.50)% increased Armor for 4 seconds when you deal any form of damage, stacking up to (66)%. ・+ X% Total Armor ・+ X Lucky Hit Chance While you Have a Barrier ・+ X% Elemental Resistance ・+ X Max Life |
| Chest | Each time that Bone Storm damages an enemy, gain a Barrier equal to (2-5)% of your Base Life for 10 seconds. ・+ X% Total Armor ・+ X% Damage Reduction from Close Enemies ・+ X% Damage Reduction ・+ X% Damage Reduction from Shadow Damage DoT Affected Enemies |
| Gloves | Instead of detonating immediately, Corpse Explosion summons a Volatile Skeleton that charges at a random enemy and explodes. Corpse Explosion's damage is increased by (30-40)% . ・+ X% Lucky Hit chance ・+ X% Corpse Skill Attack Speed ・+ Lucky Hit: Up to a X% Chance to Stun ・+ Lucky Hit: Up to a X% Chance to Fear |
| Pants |
Tibault's Will
You deal 20-40% increased damage while Unstoppable and for 4 seconds after. When you become Unstoppable, gain 50 of your Primary Resource. ・+X% While injured, Potions restore 20% resource (Inherent) ・+X% Damage Reduction from close enemies ・+X% Potion Capacity ・+X% Damage ・+X% Maximum Resource |
| Boots | Create desecrated ground beneath your Sever spectres as they travel, damaging enemies for (XX) Shadow damage over 2 seconds. ・Attacks reduce evade cooldown by .X seconds ・+ X% Movement Speed ・+ X% Lucky Hit Chance with Shadow Damage ・+ X% Damage Reduction from Shadow Damage DoT Affected Enemies ・+ X Essence Cost Reduction |
| Jewelry | Aspects and Affixes |
|---|---|
| Amulet | You deal (50-120)% increased damage for 6 seconds after the Shadowblight Key Passive damages enemies 10 times. ・+ X% Resist All (Inherent) ・+ X% Damage Reduction ・+ X% Shadow Damage Over Time ・+ X% Darkness Skill Damage ・+ X% Cooldown Reduction |
| Ring |
X'Fal's Corroded Signet
Lucky Hit: Your damage over time effects have up to a 50% chance to erupt, dealing 5.0-6.0 damage of the same type to Nearby enemies. ・+ X% Resistance to Fire Element (Inherent) ・+ X% Resistance to All Element (Inherent) ・+ X% All Stats ・+ X% Damage Over Time ・+ X% Lucky Hit Chance ・+ X% Cooldown Reduction |
| Ring | Bone Storm and Blood Wave are also Darkness Skills, deal Shadow damage, and gain additional effects. Enemies damaged by Bone Storm take 0.43-0.48 Shadow damage over 2 seconds. Blood Wave desecrates the ground it travels over, dealing (YY) Shadow damage over 4 seconds ・+X% Resistance to all Elements (Inherent) ・+X% Resistance to 1 Random Element (Inherent) ・+X% Lucky Hit Chance ・+X% Damage Over Time ・+X% Damage To Shadow Afflicted Enemies ・+X% Shadow Damage |
| Jump to a Section! | |||||
|---|---|---|---|---|---|
| Gem Type | Effect Explanation |
|---|---|
 Royal Amethyst Royal Amethyst
(Weapon) |
+8.0% Damage Over Time
This is a DoT focused build and we do not focus on amplifying our Critical Strike chances. We focus on more consistent DPS and less focus on DPS other than DoT and Shadow bonuses to avoid gaps in damage output. With this setup, Amethyst is a better choice than Emerald despite its synergy with Shadowblight and X'fal. |
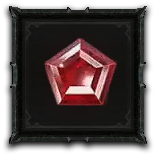 Royal Ruby Royal Ruby
(Armor) |
4.0% Maximum Life
Aside from Necrotic Carapace, we have no consistent way to reach the Fortify status. We use Rubies instead to amplify our max HP values for a more consistent way to survive enemy attacks. |
| (Jewelry) |
+30% Elemental Resistance Gems
Provides 30% Elemental resistance to a chosen element. We highly recommend capping out your elemental Resistance and gems that provide elemental resistances will be the key to doing so. The gems you can use for the three jewelry slots you have are flexible and highly depends on the resistances you currently have. We also recommend supplmenting this with one armor piece (Helm, Torso, or Waist piece) to cap out all of your resistances. |
| Jewelries | 52% Resistances + 12% to Fire and one random Element Our Jewelries should be able to provide at least 55% Resistances to offset the Tier 4 reductions. Couple this with the secondary resistances that ring gives (1 Fire by default from X'Fal) and we should have 12% Resistances to two elements. |
|---|---|
| Paragon Boards | 30% Shadow Resistance + 13.5% to all Resistances We'll be able to easily max out our Shadow Resistance with our Paragon Board providing 30% Shadow Resistance from our pathing and 13.5% resistance to all elements from Erudite nodes. |
| Armor Piece | 60% Resistance to one element. We highly recommend sacrificing one affix from your Helm or Chest piece from the given affixes above and change it with one chosen elemental resistance. This will give you this build roughly 60% resistance to a single element. |
| Gems | +30% Resistances to chosen elements The easiest piece to adjust our resistances. Once the given conditions above are met, you'll be able to find the Elemental Resistances that need help. Shadow will be automatically exempted thanks to our Paragon Board setup but adjust the board nodes and choose more Shadow nodes if the rare nodes are insufficient. The element of your armor piece will also automatically be maxed out thanks to the Erudite nodes + its base 60% bonus which leaves us with three resistances left to fix with our three gem slots. |
| Jump to a Section! | |||||
|---|---|---|---|---|---|
| No. | Board | Essential Nodes |
|---|---|---|
| 1 | Starter Board | Darkness (Glyph) Prime (Rare) Resilience (Rare) Preservation (Rare) Knowledge (Rare) |
| 2 | Flesh-Eater | Tears of Blood (Glyph) Flesh-Eater (Legendary) Erudite (Rare) Targeted (Rare) Stifle (Rare) |
| 3 | Wither | Scourge (Glyph) Wither (Legendary) Gloom (Rare) Malediction (Rare) Lingering Shadows (Rare) Gnawing Darkness (Rare) Dragging Shadows (Rare) |
| 4 | Scent of Death | Control (Glyph) Scent of Death (Legendary) Preservation (Rare) Deathmarked (Rare) Deathbringer (Rare) |

| Board | Starting Board |
|---|---|
| Glyph Socket | Darkness |
| Essential Nodes |
Resilience Prime Preservation Knowledge |
Standard setup for our Starter Board where we take all Rare Nodes except unnecessary magic nodes and all Intelligence nodes in the Glyph area to maximize our Glyph effect.

| Board | Flesh-eater |
|---|---|
| Glyph Socket | Tears of Blood |
| Essential Nodes |
Flesh-Eater Erudite Targeted Stifle |
Highest stat value node for Tears of Blood. We take all nodes under the Tears of Blood radius to maximize the DPS it gives us while also amplifying the Rare nodes in that region.

| Board | Wither |
|---|---|
| Glyph Socket | Scourge |
| Essential Nodes |
Wither Gloom Malediction Gnawing Darkness Lingering Shadows Dragging Shadows |
Another shadow and DoT centric board which we easily welcome in our build.

| Board | Flesh-eater Paragon Board Nodes |
|---|---|
| Glyph Socket | Control |
| Essential Nodes |
Scent of Death Deathmarked Preservation Deathbringer |
| Corpse Explosion Blight Build Tips |
|---|
|
|
| 1 | Always Start with Decrepify |
|---|---|
| 2 | Spread out Blight |
| 3 | Start using Bone Storm if available then spam Corpse Explosion from Corpses generated by Hewed Flesh |
| 4 | Hide from Blood Mist if swarmed |
| 5 | Use Corpse Tendrils regularly and especially if enemies start getting scattered |
| 1 | Immediately use Decrepify and Blight |
|---|---|
| 2 | Use Bone Storm and Approach Melee range |
| 3 | Spam Corpse Explosion as much as you can from Hewed Flesh corpses |
| 4 | Use Blood Mist to dodge lethal attacks |
Our entire playstyle will get weaker if we cannot cycle our Bone Storm and Decrepify is what will help us with this. Always apply Decrepify enemies first to ensure that we can always maximize our Bone Storm's effect.
Blight is our main damage amplification method which will strengthen every kind of DPS we output. Always try to spread out Blight to ensure that our DoT from Corpse Explosoin and other shadow attacks are maximized.
Unlike Infinimist where Blood Mist is both an offensive and defensive tool, our Blood Mist is entirely there to make sure that we have an escape option (it putting you in unstoppable state that amplifies our damage with Tibault is just a bonus). Try to use Bone Storm if you want an offensive and defensive tool at the same time as much as possible.

| Season 3 Leveling Builds | |||||
|---|---|---|---|---|---|
| Barbarian HoTA | Sorcerer Chain Lightning | ||||
| Rogue Twisting Blades | Necromancer Blood Surge | Druid Poison Creeper | |||
| All Classes | |||||
|---|---|---|---|---|---|
| List of Builds | ||
|---|---|---|
 Blood Lance Blood Lance
(PVE) |
 Blood Surge Blood Surge
(PVE) |
 Bone Spear Bone Spear
(PVE) |
 Corpse Explosion Blight Corpse Explosion Blight
(PVE) |
 Infinimist Infinimist
(PVE) |
 Necromancer Leveling Necromancer Leveling
(Leveling) |
 Ring of Mendeln Summoner Ring of Mendeln Summoner
(PVE) |
 Sever Summoner Sever Summoner
(PVE) |
|
How exactly are you getting 60 skill points, when all you get is 58? Kept resetting trying to figure out where I messed up, when it was you who messed up with your math!!!

Corpse Explosion Blight Necromancer Abattoir of Zir Build (Season 2)

Honkai: Star Rail Walkthrough & Guides Wiki

Genshin Impact Walkthrough & Guides Wiki

FF7 Rebirth Walkthrough & Guides Wiki

Pokemon Scarlet and Violet (SV) Walkthrough & Guides Wiki

Palworld Walkthrough & Guides Wiki

Dragon's Dogma 2 (DD2) Walkthrough & Guides Wiki

Persona 3 Reload Walkthrough & Guides Wiki

Monster Hunter Rise: Sunbreak Walkthrough & Guides Wiki

Pokemon UNITE Walkthrough & Guides Wiki

Fire Emblem Heroes (FEH) Walkthrough & Guides Wiki

Elden Ring Walkthrough & Guides Wiki

Pokemon Legends: Arceus Walkthrough & Guides Wiki

FF7 Remake Walkthrough & Guides Wiki

New Pokemon Snap Walkthrough & Guides Wiki

Hyrule Warriors: Age of Calamity Walkthrough & Guides Wiki

Super Smash Bros. Ultimate Walkthrough & Guides Wiki

The Legend of Zelda: Breath of the Wild Walkthrough & Guides Wiki
©2022 BLIZZARD ENTERTAINMENT, INC. ALL RIGHTS RESERVED.
All trademarks referenced herein are the properties of their respective owners.
The copyrights of videos of games used in our content and other intellectual property rights belong to the provider of the game.
The contents we provide on this site were created personally by members of the Game8 editorial department.
We refuse the right to reuse or repost content taken without our permission such as data or images to other sites.


I used this build for inspiration and it ´s not bad, I personally would remove blight and take tendrils instead, as corpse explosion takes no mana blight just takes the mana you use for curses.Corpse explosion deals enough damage imho. Only problem is that you ve no direct damage skill to destroy objects. If you don ´t like tendrils (I think they work awesome with corpse explosion), you could take blood mist for better defence for example instead).