This survey will take about 1 minute.
Your answers will help us to improve our website.
RuneScape Dragonwilds
Highlighting the Problem Walkthrough and Rewards
Highlighting the Problem is a Secondary Quest in RuneScape Dragonwilds that starts in Bramblemead Valley. Here's a walkthrough of the quest, including the clues about the statue, how to charge the Mysterious Orb, and the rewards you can get for completing it!
List of Contents
How to Unlock Highlighting the Problem
Interact with the Statue Northwest of Bramblemead Valley
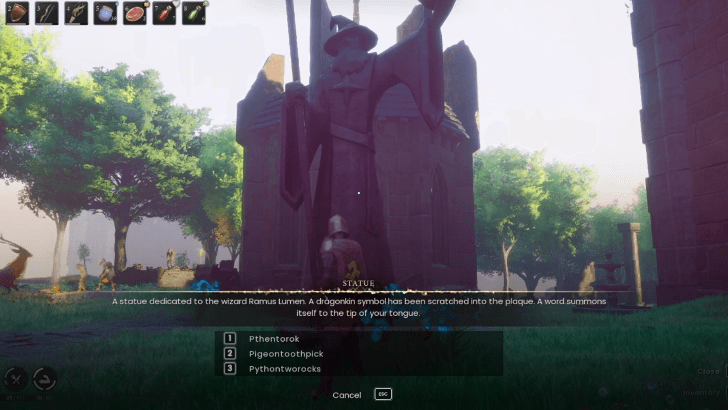
Highlighting the Problem starts by interacting with a wizard statue in a courtyard located northwest of Bramblemead Valley. None of the three choices given will affect the quest, as they are all incorrect answers.
Alternatively, you can go straight inside the vault below the courtyard to find the correct password and start the quest with the first objective halfway done.
Highlighting the Problem Walkthrough
| List of Objectives | ||
|---|---|---|
| 1 | Investigate the Area for Clues About the Statue | |
| 2 | Search the Runecrafting Guild for a Statue | |
| 3 | Find a Way to Charge the Mysterious Orb | |
Investigate the Area for Clues About the Statue
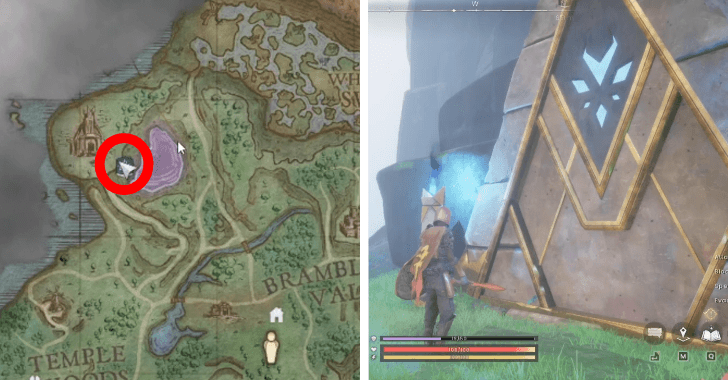
The correct password can be found within the vault beneath the courtyard. Walk towards the east cliff and look for platforms that you can jump down on to reach the lower area. The entrance to the vault is directly southeast of the courtyard, by the lake that you can see on the map.
The rooms inside the vault are riddled with traps and guardian sentinels that increase the dungeon's challenge. We recommend bringing recovery items to heal the damage taken from traps, as well as a bow and arrows to deal with the enemies from a distance and avoid getting swarmed.
| Vault Walkthrough | |
|---|---|
| 1 | 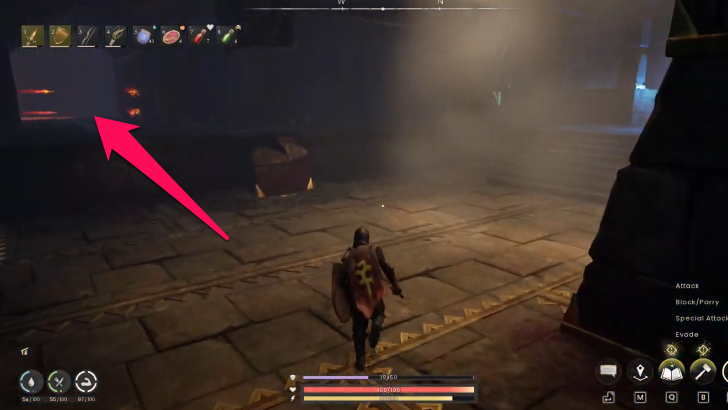 Upon entering the vault, go to the first room and turn left. Pass through the flaming arrow traps and enter the room to your right. |
| 2 | 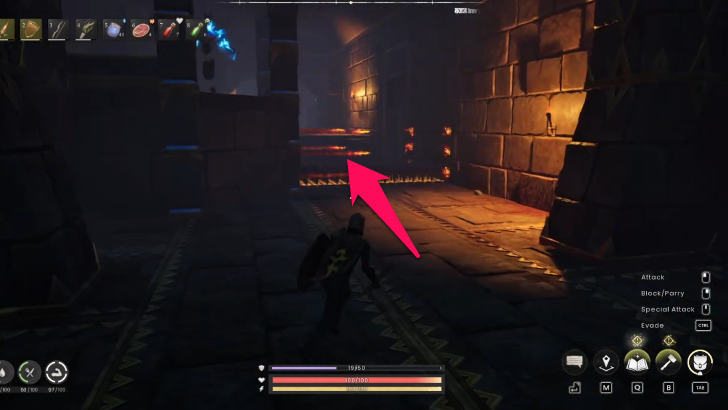 There is another set of flaming arrow traps ahead with spike traps, as well as a guardian that can hurl projectiles from the platform. You can either pass through the traps first and engage it in close combat or snipe it with a bow before moving forward. Continue north to the next room with more vault guardians. |
| 3 | 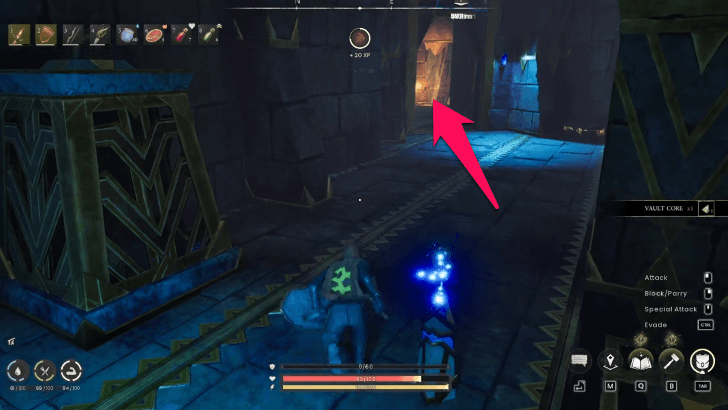 Once it's clear, pass through the doorway in the northeast until you reach a room with giant rats. |
| 4 |  Southwest of this room is an elevated path that you can reach using Windstep. |
| 5 | 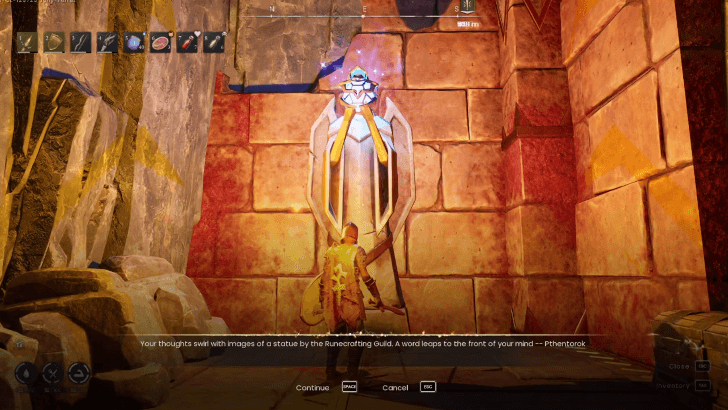 Tucked at the end of this path is a statue that will imprint the password to your mind—Pthentorok. You can continue exploring the vault and finding more loot after getting the password if you want. When you're done, backtrack to the entrance to exit the vault. |
Search the Runecrafting Guild for a Statue
Return to the wizard statue where the quest started and give it the correct password. In return, the mysterious voice within the statue will give you a Mysterious Orb (Uncharged), which you are tasked to charge on three different pedestals around the guild.
Find a Way to Charge the Mysterious Orb
The pedestals are on top of the towers surrounding the statue. The Windstep spell is needed to reach the pedestals and charge the orb.
| How to Charge the Mysterious Orb | |
|---|---|
| 1 | 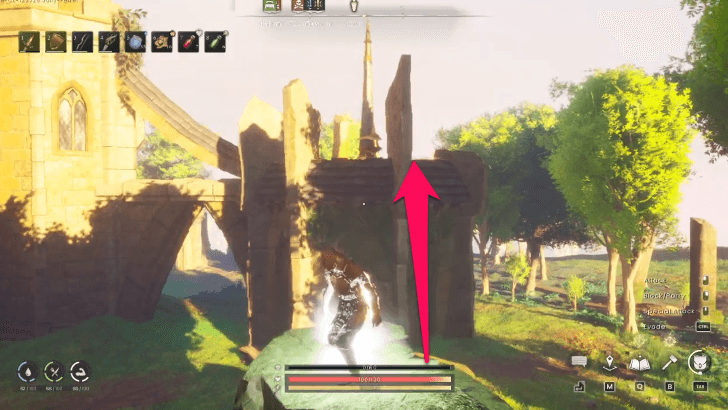 Start by using Windstep on the large rock in front of the statue and jumping onto the tower to the south. Place the orb on the pedestal at the top to charge it. |
| 2 | 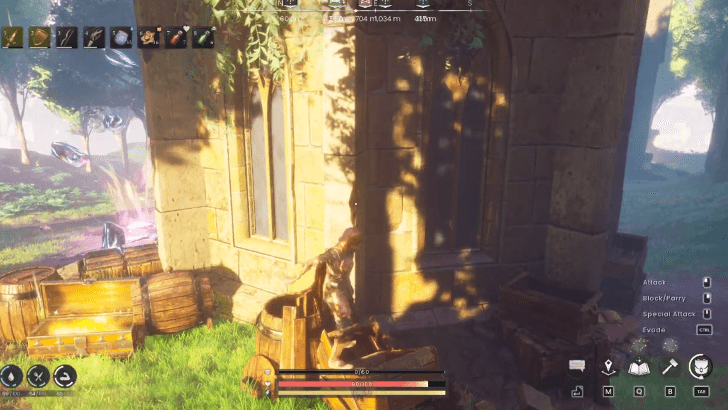 Drop down and go to the tower behind the statue next. You can use the wooden boxes and barrels at the base to gain elevation before using Windstep to reach the top. Charge the orb a second time. |
| 3 | 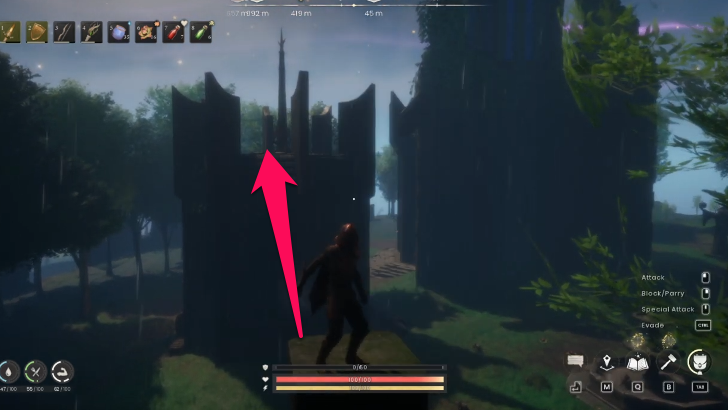 The last pedestal is to the east of the second tower. You can reach it by jumping onto a nearby pillar using Windstep and casting the spell again to reach the tower. |
With Mysterious Orb fully charged, return to the statue to receive your reward and complete the quest!
Highlighting the Problem Rewards
Staff of Light Recipe
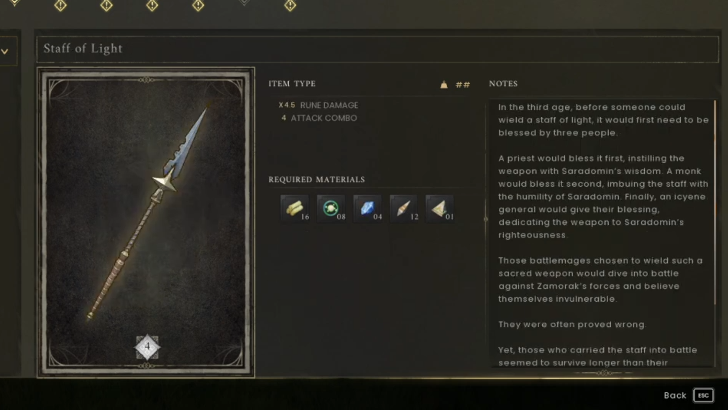
You will unlock the recipe for Staff of Light after returning to the wizard statue with the charged Mysterious Orb. The orb isn't actually needed for the staff, but instead requires a completely different kind of core found in dragonkin vaults.
| Weapon | Materials |
|---|---|
| Staff of Light |
Craft using the Smithing Forge ・Blightwood x 16 ・Wild Anima x 8 ・Sapphire x 4 ・Vault Shard x 12 ・Vault Core x 1 |
RuneScape Dragonwilds Related Guides

List of Side Quests (Secondary Quests)
List of Secondary Quests
| Quest | Region |
|---|---|
| Goblin Diplomacy | Bramblemead Valley |
| Highlighting the Problem | Bramblemead Valley |
| Restless Ghosts | Bramblemead Valley |
| Heartstrings | Fractured Plains |
| Granite Mauled | Fractured Plains |
| Dog Days | Stormtouched Highlands |
Comment
Author

Highlighting the Problem Walkthrough and Rewards
Please participate in our site
improvement survey
03/2026
improvement survey
03/2026
Would you assist in
improving Game8's site?
improving Game8's site?

×
We are listening to our users' valuable opinions and discussing how to act on them.
The information collected through this survey will be used for the purpose of improving our services. In addition, the information will only be disclosed a part of a statistic in a format that will not allow identification of personal information.
Begin Survey
Not Now
×
Please rate each item regarding Game8.co's Advertisements.
Amount of Ads
Very Dissatisfied
Somewhat Dissatisfied
Fine
Somewhat Satisfied
Highly Satisfied
Placement of Ads
Timing of Ad Display
Ad Loading Speed
Safeness of Ads
Content of Ads
×
Please rate each item regarding Game8.co's Quality of Articles.
Amount of information
Very Dissatisfied
Somewhat Dissatisfied
Fine
Somewhat Satisfied
Highly Satisfied
Frequency of updates
Speed of new information
Accuracy of articles
Understandibility of articles
Readability of sentences
×
Please rate each item regarding Game8.co's Usability of the Site.
Ease of finding information
Very Dissatisfied
Somewhat Dissatisfied
Fine
Somewhat Satisfied
Highly Satisfied
Loading Speed
Use of Color
Font Size
Visibility of Images
Easy to Understand Layout
×
Please rate each item regarding Game8.co's Message Boards, Comments.
Ease of Writing
Very Dissatisfied
Somewhat Dissatisfied
Fine
Somewhat Satisfied
Highly Satisfied
Readability
Ease in Finding Information
Comment Quality
Comment Quantity
Admin Response
×
Please rate each item regarding Game8.co's Site's new design.
Please rate our site's new design
Very Dissatisfied
Somewhat Dissatisfied
Fine
Somewhat Satisfied
Highly Satisfied
Do you think that the website's design change makes the site easier to use?
Has the new design made it easier for you to find information on the site?
Has the new design improved the overall visual appeal of the site?
How would you rate your overall satisfaction with the new design of the site?
×
How likely are you to recommend Game8 to someone you know?
Very Unlikely
0
1
2
3
4
5
6
7
8
9
10
Very Likely
If you have other opinions regarding potential improvement to the website, please share them with us. We would appreciate your honest opinion.
Note: This is a free response section, so you can proceed without entering anything.
Note: Please be sure not to enter any kind of personal information into your response.
Note: Please be sure not to enter any kind of personal information into your response.
×
Thank You
×
Thank you for participating in our survey! Your answers will help us to improve the quality of our website and services.
We hope you continue to make use of Game8.
We hope you continue to make use of Game8.
Close
Rankings
- We could not find the message board you were looking for.
Gaming News


![Everwind Review [Early Access] | The Shaky First Step to A Very Long Journey](https://img.game8.co/4440226/ab079b1153298a042633dd1ef51e878e.png/thumb)

![Monster Hunter Stories 3 Review [First Impressions] | Simply Rejuvenating](https://img.game8.co/4438641/2a31b7702bd70e78ec8efd24661dacda.jpeg/thumb)
Popular Games

Genshin Impact Walkthrough & Guides Wiki
Honkai: Star Rail Walkthrough & Guides Wiki
Umamusume: Pretty Derby Walkthrough & Guides Wiki
Pokemon Pokopia Walkthrough & Guides Wiki
Resident Evil Requiem (RE9) Walkthrough & Guides Wiki
Monster Hunter Wilds Walkthrough & Guides Wiki
Wuthering Waves Walkthrough & Guides Wiki
Arknights: Endfield Walkthrough & Guides Wiki
Pokemon FireRed and LeafGreen (FRLG) Walkthrough & Guides Wiki
Pokemon TCG Pocket (PTCGP) Strategies & Guides Wiki


Recommended Games
Diablo 4: Vessel of Hatred Walkthrough & Guides Wiki
Fire Emblem Heroes (FEH) Walkthrough & Guides Wiki
Yu-Gi-Oh! Master Duel Walkthrough & Guides Wiki
Super Smash Bros. Ultimate Walkthrough & Guides Wiki
Pokemon Brilliant Diamond and Shining Pearl (BDSP) Walkthrough & Guides Wiki
Elden Ring Shadow of the Erdtree Walkthrough & Guides Wiki
Monster Hunter World Walkthrough & Guides Wiki
The Legend of Zelda: Tears of the Kingdom Walkthrough & Guides Wiki
Persona 3 Reload Walkthrough & Guides Wiki
Cyberpunk 2077: Ultimate Edition Walkthrough & Guides Wiki


All rights reserved
© 1999 - 2025 Jagex Ltd.
The copyrights of videos of games used in our content and other intellectual property rights belong to the provider of the game.
The contents we provide on this site were created personally by members of the Game8 editorial department.
We refuse the right to reuse or repost content taken without our permission such as data or images to other sites.