This survey will take about 1 minute.
Your answers will help us to improve our website.
RuneScape Dragonwilds
Tips and Tricks: A Complete Beginner's Guide to RuneScape Dragonwilds
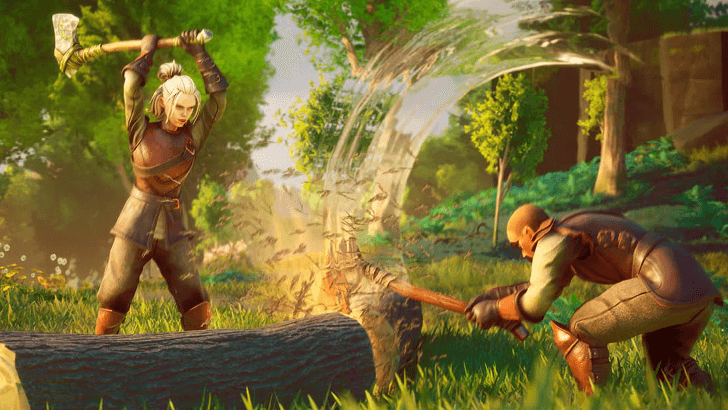
This is a beginner's guide for RuneScape Dragonwilds, with a starter guide for first-time players of survival games, as well as tips for both beginner and experienced players looking for to improve their gameplay.
List of Contents
How to Survive in RuneScape Dragonwilds
| This section is intended for beginners in the Survival genre. If you've already beaten other Survival games like Valheim, feel free to skip to the next section! |
Preparation is Key
If you're jumping into RuneScape Dragonwilds without much experience with Survival games, it's a good idea to understand what this genre entails before getting in too deep, and how it differs from other action and RPG games.
In RuneScape Dragonwilds, you will drop all of your gear every time you die and must return to the spot you died to reclaim it; in the early stages of the game, this can feel like a minor inconvience, but keep in mind that you need to master this mechanic to survive in later stages of the game.
The game will become much easier when approached with the right mentality, so try to follow the steps below and remember them each time you head into a new area.
- Be prepared (to die)
- Don't overextend into danger
- After dying, stay calm and prepare to try again
1. Be Prepared (To Die)
When venturing into harder areas, it's inevitable that you'll fall in battle from time to time. The important thing is to prepare for this to happen and leave backup supplies at your base ahead of time. If you lose everything you own every time you die, it will be difficult to retrieve it with no gear available, especially when trying to retrieve gear from a dangerous new area.
At a minimum, you should have the following ready to go in case you drop all of your gear.
- A backup melee weapon, shield, bow + 99 arrows, and staff
- 50 clean water
- 10+ cooked food items
- at least half of your available Health Potions
2. Don't Overextend into Danger
The further you go into a zone with tougher enemies, the worse position you will be in if you die and need to retrieve them.
Build a Lodestone to create a new Fast Travel point whenever you travel into an unfamiliar area; the game is mercifully generous with Vault Cores, which can be found in Dragonkin Vaults, and will respawn after some time has passed allowing you to re-enter completed Vaults to restock. Carry one of these Vault Cores with you, along with 32 Stones and 20 Rune Essence, when pushing past your boundaries, and use these materials to craft new Lodestones as you progress to mitigate risk.
Once you're secure in the new area, build a new base to reduce the need to fast travel back every time you need to sleep or craft gear.
3. After Dying, Stay Calm and Prepare to Try Again
It can be frustrating to suffer defeat, and it's tempting to try to run back with only a few supplies to grab your gear in a hurry. However, going in underprepared will increase your chances of dying again and losing more supplies.
It's important to give yourself the best possible chance of success in retrieving your gear on each attempt. Even if you do fail again, take the time again to restock and go in with a clear head.
With these tips in mind, it will become much easier to push forward even when you're weaker than the enemies. With a strong supply of backup goods, and effectively placed Lodestones and Bases, you'll be able to gradually increase your strength to handle new areas that you previously couldn't.
Beginner Tips (Tier 1 Areas)
Keep Food, Water, and Rest in the Top Quadrant
| Food | Water | Rest | |
|---|---|---|---|
| 76-100% | 2 HP/s | 6 Sta/s | 100 Sta, 100 Food/Water, 400 Weight |
| 51-75% | 1.5 HP/s | 4.5 Sta/s | |
| 26-50% | 1 HP/s | 3 Sta/s | 80 Sta, 100 Food/Water, 400 Weight |
| 1-25% | 0 HP/s | 0.75 Sta/s | 60 Sta, 75 Food/Water, 300 Weight |
| 0% | Same as 1-25%, and HP gradually drops to 1 | 40 Sta, 75 Food/Water, 250 Weight | |
Although it can be a pain to keep the various bars up, there are significant benefits to making sure all of them stay in the top 25% consistently.
Food provides HP recovery, while Water provides Stamina recovery. When you're in a difficult fight, you want these to recover as quickly as possible, and you never know when you'll be ambushed, so don't let yourself get caught with low recovery rates.
Rest can fall as low as 51% with no drawbacks, but below that point, you'll have lower maximum stamina, and other limits are imposed at 25% and below. Unlocking Summon Shelter at Construction level 20 is recommended as it allows you to Rest anytime without having to return home.
Fast Travel Away from Dragon Attacks, Warbands, and Being Hunted
When you get a notification that you are being hunted, that a warband is attacking your base, or hear the dragon roaring with foreboding music, you can easily escape from the situation if you have a Lodestone nearby by using it to Fast Travel to another area.
Your base will not be destroyed even if you do not defend it. On the contrary, if you stay inside your base, enemies will attack it and destroy the walls and furniture, while if you run away on foot, they will try to chase you down instead of attacking your base. Although it seems counterintuitive, avoiding your base is the best option.
If you don't have a Lodestone yet, the best method if you are not confident that you can defeat all the enemies is to escape from the area, as enemies will only follow you until a certain point, and the dragon attacks only affect a certain radius as well.
Shoot Floating Rune Essence with the Bow to Drop It
At Rune Essence Nodes, the floating Rune Essence rocks can be shot down with a single arrow from the Bow each, then easily mined! You'll need to build a Spinning Wheel to craft the Course Thread needed to craft a Bow.
Switch Your Staff to the Fire Element
By default, your Staff will use the Air Element, but the element can be switched to Fire by right-clicking a Fire Rune and selecting Equip. This allows you to throw long-distance fireballs, as well as use a combo which ends with a fire rain which can stunlock a group of enemies.
The Air Staff does feature a useful secondary attack which can knock down a group of enemies, but the Fire combo is highly effective when you have enough space from the enemy to pull it off; try both elements and choose depending on your preference or the enemies you're facing.
Vault Cores and Chests Respawn
Vault Cores are essential items which can only be found in Dragonkin Vaults; they are used to craft Lodestones, the game's name for Fast Travel points, and endgame gear. Two are found in each Vault, but after some time, they will respawn allowing you to recollect them from a completed Vault. In addition, the majority of the enemies in Vaults will disappear after completing it, making it even easier to return to an earlier Vault and load up on Vault Cores.
Chests around the world and in dungeons also respawn regularly, so mark them on your map for regular collection of easy freebies.
Avoid PVP for Story Playthroughs
When you die in PVP, the player who killed you can rob your gravestone to steal all of your valuable items; this is even more punishing than regular deaths as you have no opportunity to reclaim your lost items.
If you're playing to try to complete the story, this can obviously be a huge penalty, so keep PVP off, especially in a Public server. It's not worth the risk!
Mid-Game Tips (Tier 2 Areas)
Craft Healing Potions at a Brewing Cauldron
Once you've gotten a few materials from the Whispering Swamp such as Clay and Harralander, you can start crafting Healing Potions. You'll need to build a Pottery Wheel to make unfired Clay Vessels, a Kiln to make Charcoal and cook the Clay Vessel, and finally a Brewing Cauldron to brew the potion.
| Healing Potion Recipe | ||
|---|---|---|
| Harralander x1 | Redberries x1 | Clay Vessel x1 |
| - | Charcoal x1 | - |
Craft Antipoison Potions for Whispering Swamp and Gauro Druids
The Antipoison Potion is one of the best potions to keep on-hand throughout the game due to its ability to grant immunity to poison for 5 minutes. This is hugely useful for progressing through the Whispering Swamp, as poison will quickly wear down your health and the swamp water prevents your escape.
In addition, Garou Druids are tough enemies which can throw homing poison arrows at you; one appears as the boss of the Goblin Diplomacy side quests, and others appear in Fractured Plains and later areas, so it's a good idea to pop an Antipoison Potion before engaging with Garou Druids.
Unfortunately, note that Antipoison Potions will not cure poison which has already been inflicted.
| Antipoison Potion Recipe | ||
|---|---|---|
| Harralander x1 | Bittercap Mushroom x1 | Clay Vessel x1 |
| - | Charcoal x1 | - |
Advanced Tips (Tier 3 Areas)
Cheese the Abyssal Demon to Get the Tier 4 Abyssal Whip Weapon
The Abyssal Demon is a boss monster appearing in the northwest section of the Whispering Swamp.
Its primary weakness is that it is unable to attack an enemy that is on top of a roof, so you can use Windstep to jump onto one of the ruins in the area and unleash a rain of arrows onto it. The monster can be easily defeated in this way with no risk of damage to the player; just be sure to find a roof to jump onto before you engage it in battle.
The Abyssal Demon will drop most of the materials required for the Abyssal Whip, a Tier 4 weapon listed as a Masterwork. The only unavailable ingredient should be the 4 Ram Horns, which can be found as a drop from Rams in the Stomtouched Highlands northeast of the Fractured Plains. If you're feeling bold, you can try to reach the area early, drop a Lodestone, and escape; this should allow you easily farm enough Rams to nab an early endgame weapon!
Grind Construction to 40 for the Personal Chest
Even after you've constructed multiple bases, Construction is one of the hardest Skills to max out naturally, but it has two of the most useful Spells in Summon Shelter at level 20, which lets you Rest anywhere, and Personal Chest at level 40, which lets you store supplies to withdraw anywhere.
Fortunately, you can grind Construction XP easily by crafting and deleting structures; deleting them will return all the materials used to make them, allowing you to do this endlessly. However, it's important to note that there is a cooldown on XP gains for the same type of structure.
The best type of structure to farm XP with are floors and roofs; they can be easily stacked on top of each other and when the bottom ones are broken, they will all fall down together. This also allows your Logs to land in the same spot for easy cleanup.
How to Level Up Construction Fast
Prepare a Lodestone in Your Personal Chest
After you unlock the Personal Chest spell, keep 1 Void Core, 32 Stone, and 20 Rune Essence in your Personal Chest at all times. This will allow you to easily place a Lodestone whenever you get too deep into danger and don't want to risk losing your gear, or don't have a needed item and can't proceed, so that you can easily return to your base and come back.
All Tips and Tricks Guides
All Tips and Tricks
RuneScape Dragonwilds Related Links

Guides by Category
| All Categories | |
|---|---|
 News News |
 Tips and Tricks Tips and Tricks |
 Walkthrough Guide Walkthrough Guide |
 Side Quests Side Quests
|
 Maps and Locations Maps and Locations |
 Potions Potions |
 Crafting Materials Crafting Materials |
 Cooking Recipes Cooking Recipes |
 Skills Skills |
 Vaults Vaults
|
 Weapons Weapons |
 Armor Armor
|
 Crafting Crafting |
 Tools Tools
|
Comment
Author

Tips and Tricks: A Complete Beginner's Guide to RuneScape Dragonwilds
Please participate in our site
improvement survey
03/2026
improvement survey
03/2026
Would you assist in
improving Game8's site?
improving Game8's site?

×
We are listening to our users' valuable opinions and discussing how to act on them.
The information collected through this survey will be used for the purpose of improving our services. In addition, the information will only be disclosed a part of a statistic in a format that will not allow identification of personal information.
Begin Survey
Not Now
×
Please rate each item regarding Game8.co's Advertisements.
Amount of Ads
Very Dissatisfied
Somewhat Dissatisfied
Fine
Somewhat Satisfied
Highly Satisfied
Placement of Ads
Timing of Ad Display
Ad Loading Speed
Safeness of Ads
Content of Ads
×
Please rate each item regarding Game8.co's Quality of Articles.
Amount of information
Very Dissatisfied
Somewhat Dissatisfied
Fine
Somewhat Satisfied
Highly Satisfied
Frequency of updates
Speed of new information
Accuracy of articles
Understandibility of articles
Readability of sentences
×
Please rate each item regarding Game8.co's Usability of the Site.
Ease of finding information
Very Dissatisfied
Somewhat Dissatisfied
Fine
Somewhat Satisfied
Highly Satisfied
Loading Speed
Use of Color
Font Size
Visibility of Images
Easy to Understand Layout
×
Please rate each item regarding Game8.co's Message Boards, Comments.
Ease of Writing
Very Dissatisfied
Somewhat Dissatisfied
Fine
Somewhat Satisfied
Highly Satisfied
Readability
Ease in Finding Information
Comment Quality
Comment Quantity
Admin Response
×
Please rate each item regarding Game8.co's Site's new design.
Please rate our site's new design
Very Dissatisfied
Somewhat Dissatisfied
Fine
Somewhat Satisfied
Highly Satisfied
Do you think that the website's design change makes the site easier to use?
Has the new design made it easier for you to find information on the site?
Has the new design improved the overall visual appeal of the site?
How would you rate your overall satisfaction with the new design of the site?
×
How likely are you to recommend Game8 to someone you know?
Very Unlikely
0
1
2
3
4
5
6
7
8
9
10
Very Likely
If you have other opinions regarding potential improvement to the website, please share them with us. We would appreciate your honest opinion.
Note: This is a free response section, so you can proceed without entering anything.
Note: Please be sure not to enter any kind of personal information into your response.
Note: Please be sure not to enter any kind of personal information into your response.
×
Thank You
×
Thank you for participating in our survey! Your answers will help us to improve the quality of our website and services.
We hope you continue to make use of Game8.
We hope you continue to make use of Game8.
Close
Rankings
- We could not find the message board you were looking for.
Gaming News


![Everwind Review [Early Access] | The Shaky First Step to A Very Long Journey](https://img.game8.co/4440226/ab079b1153298a042633dd1ef51e878e.png/thumb)

![Monster Hunter Stories 3 Review [First Impressions] | Simply Rejuvenating](https://img.game8.co/4438641/2a31b7702bd70e78ec8efd24661dacda.jpeg/thumb)
Popular Games

Genshin Impact Walkthrough & Guides Wiki
Honkai: Star Rail Walkthrough & Guides Wiki
Umamusume: Pretty Derby Walkthrough & Guides Wiki
Pokemon Pokopia Walkthrough & Guides Wiki
Resident Evil Requiem (RE9) Walkthrough & Guides Wiki
Monster Hunter Wilds Walkthrough & Guides Wiki
Wuthering Waves Walkthrough & Guides Wiki
Arknights: Endfield Walkthrough & Guides Wiki
Pokemon FireRed and LeafGreen (FRLG) Walkthrough & Guides Wiki
Pokemon TCG Pocket (PTCGP) Strategies & Guides Wiki


Recommended Games
Diablo 4: Vessel of Hatred Walkthrough & Guides Wiki
Fire Emblem Heroes (FEH) Walkthrough & Guides Wiki
Yu-Gi-Oh! Master Duel Walkthrough & Guides Wiki
Super Smash Bros. Ultimate Walkthrough & Guides Wiki
Pokemon Brilliant Diamond and Shining Pearl (BDSP) Walkthrough & Guides Wiki
Elden Ring Shadow of the Erdtree Walkthrough & Guides Wiki
Monster Hunter World Walkthrough & Guides Wiki
The Legend of Zelda: Tears of the Kingdom Walkthrough & Guides Wiki
Persona 3 Reload Walkthrough & Guides Wiki
Cyberpunk 2077: Ultimate Edition Walkthrough & Guides Wiki


All rights reserved
© 1999 - 2025 Jagex Ltd.
The copyrights of videos of games used in our content and other intellectual property rights belong to the provider of the game.
The contents we provide on this site were created personally by members of the Game8 editorial department.
We refuse the right to reuse or repost content taken without our permission such as data or images to other sites.