★ Season 3 is live as of January 23, 2024!
┗ S3 Journey | S3 Questline | S3 Battle Pass
★ Season 3 Class Tier List | Best Season 3 Blessings
★ Learn more about Seneschal Companions
┗ Governing Stones | Tuning Stones
★ Vaults | Nightmare Vaults | Arcane Tremors
This is a Season 2 Blood Lance endgame build for Necromancer in Diablo 4 (D4) that focuses on utilizing blood skills and Blood Orbs to trigger extra effects on your combos. Read on for the complete list of Vampiric Powers, Skills, and Aspects you need and how to play the build for Season 2 and the new Abattoir of Zir (AoZ) endgame dungeon!
List of Contents
| Strengths |
|---|
|
✔️Strong AoE damage
✔️Decent Sustain from Blood Orbs
✔️Easy to Manage Resources
|
The Blood Lance's damage comes from its Lance propagation mechanic where hitting a lanced enemy would cause the said lance to pierce the target which effectively doubles our DPS. This can repeat continiously until several enemies are getting hit by Blood Lances per cast.
With Aspects, this becomes easier to do which allows us to demolish mob groups easily.
Blood Lance naturally spawns Blood Orbs on the ground and our aspect will allow us to consume the said Blood Orbs without picking them up. This gives us free sustain while also using our Core Skill to attack enemies which keeps us topped up in HP without losing DPS.
We have several ways to restore Essence and even if we run out of crowd control to replenish our said essence using Umbral Aspect, we have an insane amount of Attack Speed that allows us to spam Hemorrhage to quickly refill our Essence to full.
| Weaknesses |
❌Suffers Against Blood Seekers in Abattoirs of Zir
❌Fragile When Bone Storm is on Cooldown
❌Damage Ramps Up Slowly
|
|---|
Since Blood Lance's mechanic gets stronger the more enemies are lanced due to its propagation mechanic, the opposite is also true where we actually lose out on damage the fewer enemies there are on the field. Our DPS isn't high when fighting few numbers of elites.
Even if we can keep our HP topped up with sustain from Blood Orbs, we are still susceptible to burst damage from big mobs or sudden burst of damage from elites. Its recommended to play around your cooldowns which is why Decrepify is extremely valuable in our build to reduce Bone Storm's cooldown which can mean more uptime.
Most of our Attack Speed comes from external effects such as from the Aspect of Rathma's Chosen which requires us to overpower to give us Attack Speed as well as Ravenous which requires a lucky hit trigger. This means that our build's DPS is low when initiating fights but quickly gets higher once the said conditions are met.
| Jump to a Section! | |||||
|---|---|---|---|---|---|
| Build Overview and Summary | |||||
|---|---|---|---|---|---|
 Blood Lance Blood Lance | Tier: Focus: PVE Playstyle: Solo and Party | ||||
| Active Skills | |||||
| Passive Skills | |||||
| Build Overview and Summary | |||||
|---|---|---|---|---|---|
| Blood Lance | Tier: Focus: PVE Playstyle: Solo and Party | ||||
| Aspects and Uniques | |||||
A Blood Lance-focused build that utilizes Overpower mechanics and the Blood Lance propagation methods via aspects and blood orb aspects to quickly multiply our damage! We utilize several new Uniques such as the Banished Lord's Talisman and supriringly, the Blood Artisan's Cuirass as well for unique combos using this blood orb and blood lance build!
| Jump to a Section! | |||||
|---|---|---|---|---|---|
| Skill | Upgrade Path | ||
|---|---|---|---|
|
(1 Point) |
→ |
|
|
|
(1 Point) |
→ |
|
|
|
(1 Point) |
→ |
|
|
|
(5 Points) |
→ |
|
|
|
(Ultimate) |
→ |
|
|
| Blood Lance Passives | ||
|---|---|---|
|
(3 Points) |
(3 Points) |
(1 Point) |
|
(3 Points) |
(1 Point) |
(3 Points) |
|
(3 Points) |
(3 Points) |
(3 Points) |
|
(3 Points) |
(3 Points) |
(3 Points) |
|
(1 Point) |
||
| Recommended Skill Progression | ||||
|---|---|---|---|---|
| Lv.2 | Lv.3 | Lv.4 | Lv.5 | |
| | | | | |
| Lv.6 | Lv.7 | Lv.8 | Lv.9 | |
| | | | | |
| Lv.10 | Lv.11 | Lv.12 | Lv.13 | |
| | | | | |
| Lv.14 | Lv.15 | Lv.16 | Lv.17 | |
| | | | | |
| Lv.18 | Lv.19 | Lv.20 | Lv.21 | |
| | | | | |
| Lv.22 | Lv.23 | Lv.24 | Lv.25 | |
| | | | | |
| Lv.26 | Lv.27 | Lv.28 | Lv.29 | |
| | | | | |
| Lv.30 | Lv.31 | Lv.32 | Lv.33 | |
| | | | | |
| Lv.34 | Lv.35 | Lv.36 | Lv.37 | |
| | | | | |
| Lv.38 | Lv.39 | Lv.40 | Lv.41 | |
| | | | | |
| Lv.42 | Lv.43 | Lv.44 | Lv.45 | |
| | | | | |
| Lv.46 | Lv.47 | Lv.48 | Lv.49 | |
| | | | | |
| Renown Skill Points (Lv50 Onwards) | ||||
| R1 | R2 | R3 | R4 | |
| | | | | |
| R5 | R6 | R7 | R8 | |
| | | | | |
| R9 | R10 | |||
| | | |||
Note that this is an endgame build and its skill build progression is not ideal to be followed as a new character
|
|
→ | Warrior (Defenders) |
Sacrifice |
|---|---|---|---|
| → | Mage (Bone) |
Sacrifice | |
|
|
→ | Iron | Sacrifice |
We sacrifice all of our Summons for this build. We chose Defenders for the Abattoir of Zir variant for the extra resistance to avoid getting killed easily. We chose Mage Bone as our next sacrifice naturally for the Overpower damage bonus and lastly. We Sacrifice the Iron Golem for the extra Critical Strike Damage.
| Jump to a Section! | |||||
|---|---|---|---|---|---|
| Vampiric Power Cost |
Effect Explanation |
|---|---|
 Sanguine Brace Sanguine Brace
|
When you kill an enemy, Fortify for 6% of your Base Life. While you have more Fortify than half of your Maximum Life, you gain 8% Critical Strike Chance.
Increases our Fortify Rate due to its Fortification bonus on kill. With this build, this is basically a free 8% Critical Strike Chance bonus. |
 Blood Boil Blood Boil
|
When your Core Skills Overpower an enemy, you spawn 3 Volatile Blood Drops. Collecting a Volatile Blood Drop causes it to explode, dealing 60% Physical damage around you. Every 20 seconds, your next Skill is guaranteed to Overpower.
Adds one more guaranteed Overpower Proc to our build. This means we can quickly apply an Overpower proc with Rathma's Vigor, 6 Blood Lances, and Blood Boil for three ways to Overpower! |
 Domination Domination
|
You deal 24% increased damage to enemies who are Stunned, Immobilized, Frozen, or Feared. If they're also Injured and not an Elite, they're instantly killed.
A straight up bonus damage when we use Corpse Tendrils. |
 Metamorphosis Metamorphosis
|
When you Evade you turn into a cloud of bats, becoming Unstoppable for 4 seconds. Enemies along your path take 160% Physical damage and are inflicted with Vampiric Curse.
Applies Vampiric Curse but our main goal is its secondary part of treating enemies with Vampiric Curse as vulnerable. This is our main way of applying Vulnerable in this build and it synergizes well with Flickerstep to reduce our Blood Wave cooldown as well. |
 Ravenous Ravenous
|
Lucky Hit: Up to a 20% chance to increase your Attack Speed by 40% of your Total Movement Speed for 6 seconds.
Partners well with Metamorphosis. Every enemy you dash into will now take 16% bonus damage! |
| Total Pacts Required |
List of Vampiric Powers and Pacts Explained
| Jump to a Section! | |||||
|---|---|---|---|---|---|
| Weapon | Aspects and Affixes |
|---|---|
| Sword | Whenever your Blood Skills Overpower you gain (20-50)% Attack Speed for 4 seconds. ・+ Critical Strike Damage (Inherent) ・+ Core Skill Damage ・+ Intelligence ・+ Overpower Damage ・+ Critical Strike Damage |
| Off Hand |
Lidless Wall
Lucky Hit - While you have an active Bone Storm, hitting an unaffected enemy has a (5-25)% chance to spawn an additonal storm at their location. Each of your active Sacrifice bonuses increases the chance by 25% and the total additional Bone Storms you can have by +1. ・+ 60% Blocked Damage Reduction (Inherent) ・+ 20% Block Chance (Inherent) ・+ 80% Mainhand Weapon Damage (Inherent) ・+ Thorns (Inherent) ・+ X% Attack Speed ・+ X% Lucky Hit: Chance to Restore Your Primary Resource ・+ X% Maximum Life ・+ X% Maximum Essence |
| Equipment | Aspects and Affixes |
|---|---|
| Helmet | Basic Skills grant 20% Damage Reduction for (XX) seconds. ・+ Max Life ・+ Total Armor ・+ Damage Reduction ・+ Damage Reduction While Fortified |
| Chest | You gain (0.25-0.50)% increased Armor for 4 seconds when you deal any form of damage, stacking up to (66)%. ・+ Max Life ・+ Total Armor ・+ Damage Reduction ・+ Damage Reduction While Fortified |
| Gloves | Blood Lance will consume Blood Orbs to also conjure lances from them. Each additional Blood Lance deals (20-50)% of normal damage and prioritizes targeting un-lanced enemies. ・+ Attack Speed ・+ Critical Strike Chance ・+ Overpower Damage ・+ Blood Lance Rank |
| Pants | Each time that Bone Storm damages an enemy, gain a Barrier equal to (2-5)% of your Base Life for 10 seconds. ・Potion Grants Movespeed (Inherent) ・+ Max Life ・+ Total Armor ・+ Damage Reduction ・+ Damage Reduction While Fortified |
| Boots |
Flickerstep
Each enemy you Evade through reduces your active Ultimate Cooldown by 2-4 seconds, up to 10 seconds. ・+ Attacks Reduce Evade's Cooldown (inherent) ・+ All Stats ・+ Movement Speed ・+ Ultimate Skill Damage ・+ Damage Reduction from Close Enemies |
| Jewelry | Aspects and Affixes |
|---|---|
| Amulet |
・+ Critical Strike Chance ・+ Overpower Damage ・+ Resource Reduction ・+ Rank to All Core Skills |
| Ring | Restore (XX) of your Primary Resource when you Crowd Control an enemy. ・+ Critical Strike Chance ・+ Overpower Damage ・+ Critical Strike Damage ・+ Attack Speed |
| Ring | Gain (10-20)% increased Critical Strike Chance for 6 seconds when you cast Corpse Tendrils. You deal (20-40)% bonus Critical Strike Damage to enemies damaged by Corpse Tendrils. ・+ Critical Strike Chance ・+ Overpower Damage ・+ Critical Strike Damage ・+ Attack Speed |
| Jump to a Section! | |||||
|---|---|---|---|---|---|
| Item Type | Effect Explanation |
|---|---|
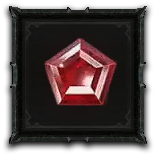 Royal Ruby Royal Ruby
(Weapon) |
+24.0% Overpower Damage
Goes without saying that Ruby will be our main jewelry for our weapons due to the build's focus on Overpower Damage and this gem just makes it better. |
|
Royal Ruby
(Armor) |
4.0% Maximum Life
Ruby gives you max HP which is a more reliable source of defense than the other gem counterpart. This is much more true with the Blood Lance build as Overpower scales with HP! |
| (Jewelry) |
+30% Elemental Resistance Gems
Provides 30% Elemental resistance to a chosen element. We highly recommend capping out your elemental Resistance and gems that provide elemental resistances will be the key to doing so. The gems you can use for the three jewelry slots you have are flexible and highly depends on the resistances you currently have. We also recommend supplmenting this with one armor piece (Helm, Torso, or Waist piece) to cap out all of your resistances. |
For maxing out our resistances, we immediately start at 44% Base resistance thanks to our Book of the Dead, Paragon Board, and maxed out Jewelries. We need to further supplement this by adding specific elemental jewels as we'll also be getting 12% bonus resistance to two random elements from our rings.
| Jewelries | 52% from our base all resistance bonuses and +12% to two random elements. |
|---|---|
| Paragon Board | 12% bonus to all resistances from the Bone Graft and Bloodbath Erudite nodes. |
| Book of the Dead | 20% resistance bonus from sacrificing our Warrior (Defender) which gets amplified further by 60% from memento mori passive for a total of 32% |
| Jewelry Slot | We can slot in some Diamonds to bring these resistances to a 60% average but if we want to cap it out, we'll have to play around the bonuses from the two extra resistances from our rings and supplement it with elemental jewels to cover for the neglected elements. This can bring us to an elemental set of three 70% elemental resists and two 56%. |
| Jump to a Section! | |||||
|---|---|---|---|---|---|
| All Paragon Boards |
|---|
| Full Paragon Board Display (External Link) |
| No. | Board | Essential Nodes |
|---|---|---|
| 1 | Starting Board |
Control (Glyph) Prime (Rare) Knowledge (Rare) Preservation (Rare) |
| 2 | Blood Begets Blood |
Tears of Blood (Glyph) Blood Begets Blood (Legendary) Blood-Empowered (Rare) Blooddrinker (Rare) Invigorated (Rare) Aggression (Rare) |
| 3 | Bloodbath |
Dominate (Glyph) Bloodbath (Legendary) Hardened (Rare) Remedy (Rare) Powerhouse (Rare) Guarded Advance (Rare) Thick Hide (Rare) |
| 4 | Bone Graft |
Essence (Glyph) Erudite (Rare) Reinvigorate(Rare) |
| Board | Starting Board |
|---|---|
| Glyph Socket | Control |
| Essential Nodes |
Resilience Prime Preservation Knowledge |
Our Starting Board this time sacrifices Erudite and focuses on three Rare Nodes which are Prime, Knowledge, and Preservation to maximize our damage.
| Board | Blood Begets Blood |
|---|---|
| Glyph Socket | Tears of Blood |
| Essential Nodes |
Tears of Blood (Glyph) Blood Begets Blood (Legendary) Blood-Empowered (Rare) Blooddrinker (Rare) Invigorated (Rare) Aggression (Rare) |
Blood Begets Blood is our choice for the Tears of Blood Glyph. This is the Blood board that we can use to maximize Tears of Blood's effectivenes. For our Rare Nodes, we focus on taking all offensive Nodes to ramp up our damage to be able to handle the elites in AoZ and the defensive bonuses from this board is mainly HP that enemies can tear trough easily.
| Board | Bloodbath |
|---|---|
| Glyph Socket | Dominate |
| Essential Nodes |
Dominate (Glyph) Bloodbath (Legendary) Hardened (Rare) Remedy (Rare) Powerhouse (Rare) Guarded Advance (Rare) Suffused Resilience (Rare) Thick Hide (Rare) |
Our main board that powers the build. We took all offensive Rare Nodes in this board to further strengthen our Blood-centric build with the exception of Suffused Resilience which we took for extra resistances for our build.
| Board | Bone Graft |
|---|---|
| Glyph Socket | Essence |
| Essential Nodes |
Essence (Glyph) Bone Graft (Legendary) Erudite (Rare) Reinvigorate (Rare) |
Our last Board is mainly taken just for the one unique Rare Node in this board which is Reinvigorate. Reinvigorate grants us 4 Essence per kill from its Rare Node and two Magic Nodes combined. This allows us to spam our Blood Lance against mob groups much easier.
For our glyph and nodes around it, we chose Essence to further amplify our critical strikes and only took Erudite as the value of Shaper of Bone is minimized as we do not use bone skills in this build.
| Necromancer Blood Lance Build Build Tips |
|---|
|
|
This is as simple as the playstyle goes to some degree. Your main goal is to keep shooting Blood Lances at enemies. Try to focus on positioning yourself so that the Blood Lance will be able to hit enemies behind it as well due to its piercing effects.
The Build's Main goal is to propagate the Blood Lance and ensure that every cast will make the Blood Lance (and Blood Orbs) to shoot Blood Lances as well which can quickly multiply the amount of DPS you can output.
Bone Storm is our main source of survivability and Critical Strike Chance. We want Bone Storm to be active as much as possible so prioritize using Decrepify to lower your Bone Storm's cooldown whenever possible
We do not recommend diving into enemies but always take Flickerstep into consideration once enemies start swarming you to get a hefty amount of Cooldown reduction for your Bone Storm.
Corpse Tendrils is an amazing tool for amplifying your offensive capabilities. You gain extra critical strike chance and damage from it thanks to aspect of Grasping Veins. It also groups enemies in one location which makes it easier to propagate Blood Lance to enemies which indirectly multiplies your DPS when clearing mob groups.

| Season 3 Leveling Builds | |||||
|---|---|---|---|---|---|
| Barbarian HoTA | Sorcerer Chain Lightning | ||||
| Rogue Twisting Blades | Necromancer Blood Surge | Druid Poison Creeper | |||
| All Classes | |||||
|---|---|---|---|---|---|
| List of Builds | ||
|---|---|---|
 Blood Lance Blood Lance
(PVE) |
 Blood Surge Blood Surge
(PVE) |
 Bone Spear Bone Spear
(PVE) |
 Corpse Explosion Blight Corpse Explosion Blight
(PVE) |
 Infinimist Infinimist
(PVE) |
 Necromancer Leveling Necromancer Leveling
(Leveling) |
 Ring of Mendeln Summoner Ring of Mendeln Summoner
(PVE) |
 Sever Summoner Sever Summoner
(PVE) |
|

Blood Lance Necromancer Abattoir of Zir Build (Season 2)

Honkai: Star Rail Walkthrough & Guides Wiki

Genshin Impact Walkthrough & Guides Wiki

FF7 Rebirth Walkthrough & Guides Wiki

Pokemon Scarlet and Violet (SV) Walkthrough & Guides Wiki

Palworld Walkthrough & Guides Wiki

Dragon's Dogma 2 (DD2) Walkthrough & Guides Wiki

Persona 3 Reload Walkthrough & Guides Wiki

Monster Hunter Rise: Sunbreak Walkthrough & Guides Wiki

Pokemon UNITE Walkthrough & Guides Wiki

Fire Emblem Heroes (FEH) Walkthrough & Guides Wiki

Elden Ring Walkthrough & Guides Wiki

Pokemon Legends: Arceus Walkthrough & Guides Wiki

FF7 Remake Walkthrough & Guides Wiki

New Pokemon Snap Walkthrough & Guides Wiki

Hyrule Warriors: Age of Calamity Walkthrough & Guides Wiki

Super Smash Bros. Ultimate Walkthrough & Guides Wiki

The Legend of Zelda: Breath of the Wild Walkthrough & Guides Wiki
©2022 BLIZZARD ENTERTAINMENT, INC. ALL RIGHTS RESERVED.
All trademarks referenced herein are the properties of their respective owners.
The copyrights of videos of games used in our content and other intellectual property rights belong to the provider of the game.
The contents we provide on this site were created personally by members of the Game8 editorial department.
We refuse the right to reuse or repost content taken without our permission such as data or images to other sites.