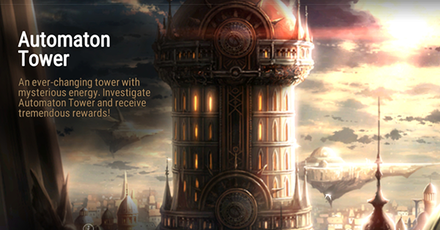
Automaton Tower Floor 15 Guide
We regret to announce that we are ending the coverage of Epic Seven. Thank you for all the support in reading our coverage of updates, event guides and character releases for Epic Seven.

This article will help provide you with info regarding Automaton Tower Floor 15. Including Enemies, active Monster Devices, as well as Rewards. Read on for more information on how to clear these certain floors within this section.
| Previous Floors | Next Floor |
|---|---|
| Floor 14 | Floor 16 |
Automaton Tower Floor 15 Guide
| Difficulty | Active Monster Devices | Rewards |
|---|---|---|
| 1 | lv.65 Accessory Chest | |
| 2 | Equipment Conversion Gem Selection Chest | |
| 3 | Equipment Conversion Gem Selection Chest | |
| 4 | Equipment Conversion Gem Selection Chest |
| Recommended Type | A High Speed & Attack Team |
|---|---|
| Recommended Team Composition | A High Speed Cleave Hero, paired with a good Debuffer, another Attacker that can attack multiple enemies and deal damage based on a percentage of the caster's attack. A good support unit will definitely help as well for those peskier floors. |
| Tips for Clearing | ・Strong multiple target Attacks ・Try and finish off enemies in the first turn. |
| Recommended Heroes | |||
|---|---|---|---|
 Arbiter Vildred Arbiter Vildred |
 Iseria Iseria |
 Baiken Baiken |
 Tamarinne Tamarinne |
 Blood Blade Karin Blood Blade Karin |
 Bellona Bellona |
 Dizzy Dizzy |
 Angelic Montmorancy Angelic Montmorancy |
Tips before Challenging
| Monsters are immune to stun as well as take reduced damage from attacks that cause damage proportional to max health. →Prioritize bringing heroes that don't deal damage proportional to their max health. Or, just power through this by making sure your heroes have a high enough Attack that this won't even be a problem. |
| Heroes recover less health. →Using Heroes with increased stats in both Speed and Attack, you can limit the chances monsters have attacking you. You won't need to recover health if you don't get it. |
| Monsters have increased Effectiveness and Effect Resistance. →Use Critical Hit Chance as well as Speed to your advantage and brute strength your way to defeat the monsters immediately. Eventually, you'll be able to find devices that can provide debuffs that ignore Effect Resistance against monsters. |
Enemies
| Enemies | ||
|---|---|---|
 Phantom Purrgis Phantom Purrgis |
 Phantom Specimen Sez Phantom Specimen Sez |
 Phantom Ruele of Light Phantom Ruele of Light |
This stage, being another boss stage can be pretty problematic.
First thing, Phantom Purrgis has a Counterattack skill that can target all enemies. Phantom Specimen Sez's S3 has a Penetrate Effect while being able to inflict Stun with his other skills.. Making matters worse, Ruele of Light is a support healer that can both Heal and provide Barriers to her allies, while also being one of the few heroes that can actually revive dead allies, restoring them to full health and granting them invincibility for 1 turn.
For now focus any and all attacks on Phantom Ruele of Light. Her Heals, Barriers as well as Revive can be very annoying and prolong the fight, longer than it should.
While this goes on, mitigate any damage from Phantom Purrgis and Phantom Specimen Sez with your own healers and try and cleanse any stuns that might happen.
Once you've dispatched Phantom Ruele of Light, the fight becomes a bit more straightforward, as long as you don't become complacent.
Shift your fous onto Phantom Specimen Sez. Be mindful of his S3 and make sure to mitigate damage with heals.
Once disposed of, focus on Phantom Purrgis.
Attack him with everything you've got, and heal when you can!
And when done, you can take a breather since you've past the halfway mark of the Automaton Tower.
Related Links
Automaton Tower Floors 1~25 Guide
| Previous Floors | Next Floor |
|---|---|
| Floor 14 | Floor 16 |
| List of Devices | Automaton Tower Guides |
| Automaton Tower | |
Comment
Author
Automaton Tower Floor 15 Guide
improvement survey
03/2026
improving Game8's site?

Your answers will help us to improve our website.
Note: Please be sure not to enter any kind of personal information into your response.

We hope you continue to make use of Game8.
Rankings
- We could not find the message board you were looking for.
Gaming News
Popular Games

Genshin Impact Walkthrough & Guides Wiki

Honkai: Star Rail Walkthrough & Guides Wiki

Umamusume: Pretty Derby Walkthrough & Guides Wiki

Pokemon Pokopia Walkthrough & Guides Wiki

Resident Evil Requiem (RE9) Walkthrough & Guides Wiki

Monster Hunter Wilds Walkthrough & Guides Wiki

Wuthering Waves Walkthrough & Guides Wiki

Arknights: Endfield Walkthrough & Guides Wiki

Pokemon FireRed and LeafGreen (FRLG) Walkthrough & Guides Wiki

Pokemon TCG Pocket (PTCGP) Strategies & Guides Wiki
Recommended Games

Diablo 4: Vessel of Hatred Walkthrough & Guides Wiki

Fire Emblem Heroes (FEH) Walkthrough & Guides Wiki

Yu-Gi-Oh! Master Duel Walkthrough & Guides Wiki

Super Smash Bros. Ultimate Walkthrough & Guides Wiki

Pokemon Brilliant Diamond and Shining Pearl (BDSP) Walkthrough & Guides Wiki

Elden Ring Shadow of the Erdtree Walkthrough & Guides Wiki

Monster Hunter World Walkthrough & Guides Wiki

The Legend of Zelda: Tears of the Kingdom Walkthrough & Guides Wiki

Persona 3 Reload Walkthrough & Guides Wiki

Cyberpunk 2077: Ultimate Edition Walkthrough & Guides Wiki
All rights reserved
© Smilegate Megaport
The copyrights of videos of games used in our content and other intellectual property rights belong to the provider of the game.
The contents we provide on this site were created personally by members of the Game8 editorial department.
We refuse the right to reuse or repost content taken without our permission such as data or images to other sites.


![Everwind Review [Early Access] | The Shaky First Step to A Very Long Journey](https://img.game8.co/4440226/ab079b1153298a042633dd1ef51e878e.png/thumb)

![Monster Hunter Stories 3 Review [First Impressions] | Simply Rejuvenating](https://img.game8.co/4438641/2a31b7702bd70e78ec8efd24661dacda.jpeg/thumb)


