How to Beat Brave Diver
The Game8 TRIBE NINE Team has ended coverage as of June 30, 2025. Information on certain pages may no longer be up-to-date. TRIBE NINE is also scheduled to end service on November 27, 2025. Thank you for your continued support!
Brave Diver is a boss in Chapter 2 of TRIBE NINE. Read on to see how to beat Brave Diver, its location, the best team and characters to use against it, its attack patterns, as well as tips on how to defeat Brave Diver.
Brave Diver Counter Team Comp
Kazuki as Shield
| Brave Diver Counter Team Comp | ||
|---|---|---|
| (Player) | Shield | |
 Tsuruko Semba Tsuruko Semba
|
 Kazuki Aoyama Kazuki Aoyama
|
 Yutaka Gotanda Yutaka Gotanda
|
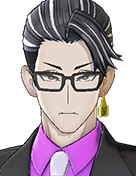
In this team comp, you will mostly benefit from Kazuki Aoyama's ability to grant a shield (Deflect Shield) to party members, providing the team with added durability.
It's also recommended to use long-range attackers against Brave Diver as they can easily counter Brave Diver's attacks.
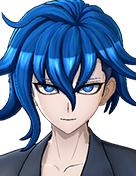
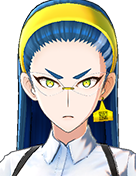
Tsuruko Semba is recommended as the player's character. She is a long-range attacker who is mobile, and has the ability to create distance from Brave Diver. Moreover, Tsuruko is also a highly valuable support character capable of recovering allies' HP.
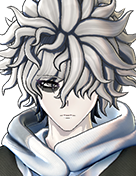
Yutaka Gotanda is recommended as another long-range attacker particularly for his high survivability, mobility, and high damage output.
Roku as Tank
| Brave Diver Counter Team Comp | ||
|---|---|---|
| (Player) | Tank | |
|
Tsuruko Semba
|
 Roku Saigo Roku Saigo
|
Kazuki Aoyama
or Yutaka Gotanda
|
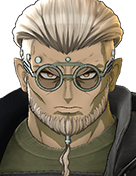
This team comp benefits from Roku Saigo serving as the team's tank, along with his skill Shock Absorber which reduces the damage taken from Brave Diver's attacks.
| Player Character | Explanation |
|---|---|
| Tsuruko Semba | ・Good long-range attacker who is also agile and can move around while attacking. ・ Has valuable support skills. ┗ Can deploy a field that offers recovery for the entire team. ┗ Ultimate Skill greatly recovers allies' HP when it falls below 50%. |
| Yutaka Gotanda | ・High mobility, damage output, and survivability. ・His ultimate skill increases his own critical rate. |
 Tsuki Iroha Tsuki Iroha | ・Good long-range attacker, very useful against aggressive bosses who fight close-range. ・Her tactical skills can easily disrupt the enemy's posture, opening up opportunities to perform Chain Skills. ・Ultimate Skill has high damage output. |
| 2nd & 3rd Members | Explanation |
| Roku Saigo | ・Extremely good as a tank. Defense stats are high, making him highly durable. ・His Primary and Secondary Attacks can inflict [Attention] and attract the enemy's attacks. His [Attention] is effective against Sui's 3 Consecutive Attack. |
| Kazuki Aoyama | ・Excellent damage reduction by shield ・High break performance and strong tension management. It is easier to use ultimates, making it easier to deal damage to the entire formation. |
| Tsuruko Semba | ・Can deal damage from a distance while deploying a recovery field for the team. Mostly for this reason, you should prioritize having Koishi on your team. |
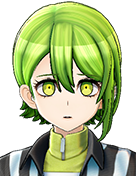 Koishi Kohinata Koishi Kohinata | ・Healing ability has a wide area-of-effect. ・Very good support character especially for tanks such as Roku, especially during this battle against Brave Diver. |
 Minami Oi Minami Oi | ・Has recovery ability with secondary attack. ・When Chain Skills are activated, Minami can give allies a shield and reduce the damage the team takes. |
 Q Q | ・Good tank but has less survivability than Roku. It's recommended to team him up with characters with recovery skills, like Koishi and Tsuruko. |
How to Beat Brave Diver
| How to Beat Brave Diver |
|---|
|
|
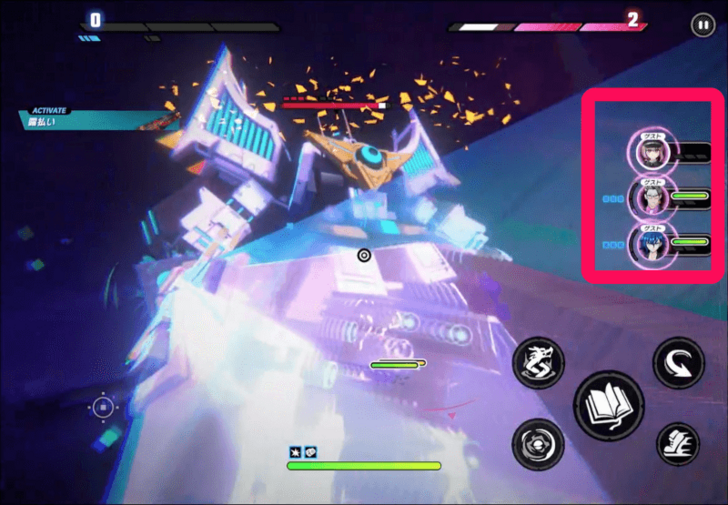
Counterattack Melee/Charge Attacks and Dodge Homing Attacks
Brave Diver's set of attacks mostly consist of melee attacks and charge attacks, as well as homing attacks. Generally, it is recommended to dodge the homing attacks, and counterattack
It's recommended to dodge Brave Diver's homing attacks such as the Homing Bullet.
It's recommended to counterattack Brave Diver's charge attacks and melee/close-range attacks as it opens up opportunities to do more damage and leave Brave Diver more vulnerable.
Use Chain Skills And Follow Up With Attacks
Effectively performing chain skills may temporarily incapacitate and down Brave Diver. This opens up a chance to use secondary attacks and other skills that are likely to leave Brave Diver even more vulnerable.
So, it's recommended to always follow up and deal damage after using Chain Skills.
Avoid Attacks During Enemy Tension Phase EXTREME, or Counterattack If Able
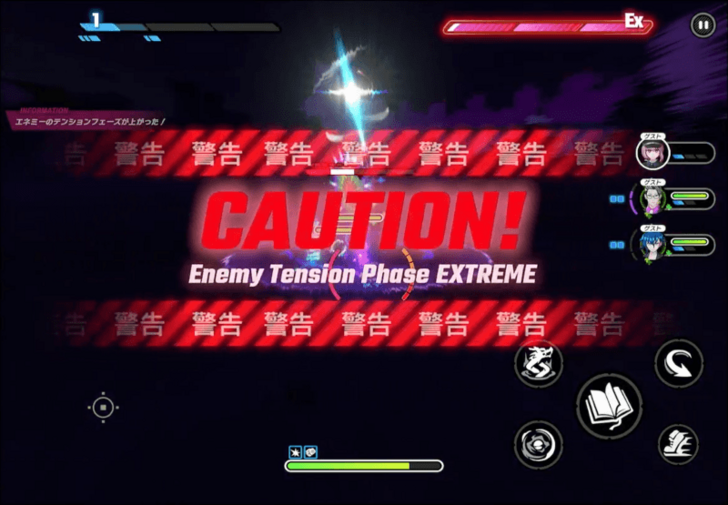
During Enemy Tension Phase EXTREME, Brave Diver's attack pattern will change for a certain period of time, making them highly unpredictable. So, do your best to avoid Brave Diver's relentless attacks as much as possible, and counter charge attacks if you are able to.
Use Long-Range Attackers
| Recommended Long-Range Attackers | ||
|---|---|---|
|
Tsuruko Semba
|
Tsuki Iroha
|
Yutaka Gotanda
|
If your characters aren't powerful enough yet, try using long-range attackers especially those who will appear as guest characters. In particular, Tsuruko and Tsuki are highly recommended as very good long-range attackers for this battle.
As Brave Diver excels in close-range fights, using these characters will make winning easier. Brave Divers' attack motions are also fast, so if you are fighting at close range you may not be able to avoid these attacks and receive great damage.
Use Kazuki or Roku for Added Team Durability
| Other Recommended Characters | |
|---|---|
|
Kazuki Aoyama
|
Roku Saigo
|
Kazuki and Roku are also highly recommended characters to use for their abilities to protect the team.
Kazuki can deploy a shield to all party members while being an adept attacker. Meanwhile, Roku acts as the team's tank who has the ability to reduce damage taken from enemy attacks via his skill, Shock Absorber.
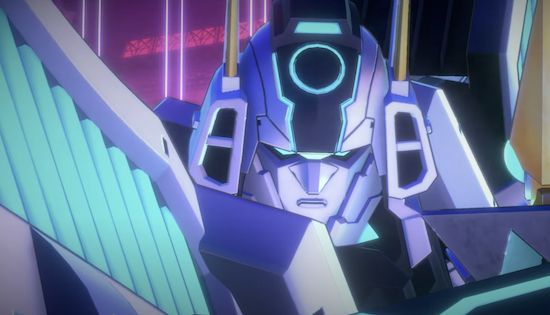
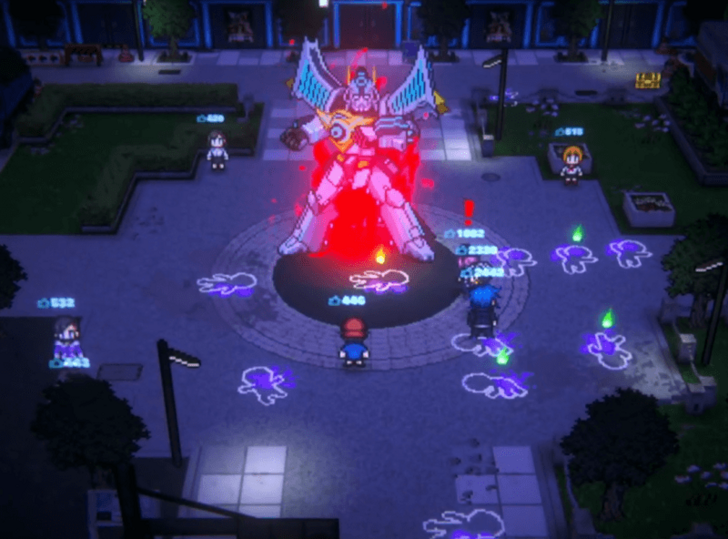
Brave Diver Abilities and Attack Patterns
| Brave Diver Abilities and Attack Patterns |
|---|
|
|
Charge
This is a frequently used attack where Brave Diver starts off by taking up his sword and loading up, and then charging at the player while taking a swing with its sword.
To land a counter on this Charge move, time your Counterattack before the sword makes contact with you when Brave Diver takes a swing.
For this reason, it is recommended to control a long-range attacker as they can easily counter Brave Diver's "Charge" attack. And it's also worth noting that Brave Diver starts off the battle with this very attack.
Homing Bullet
Brave Diver often follows up "Charge" with "Homing Bullets". After firing the bullets, Brave Diver ends the move by closing the distance then slashing at the player.
It is recommended to dodge Brave Diver's homing attack, but you can still attempt to counter it all the same.
Spin Slash
The Spin Slash starts with a wind-up animation where Brave Diver slowly rotates and glides its body before charging towards you with a slash of its sword.
It is recommended to control a long-range character as it'd make countering this attack relatively easy. But if you get hit with the Sping Slash, Brave Diver will follow up with a stabbing attack, so try to cancel the follow-up attack with a Counterattack if possible.
Piercing Attack
A red WARNING! message will appear before Brave Diver performs the Piercing Attack. It's performed by Brave Diver loading up until its body turns red, and then charging towards you with the point of its sword.
Generally, you can either dodge or counter the attack. Counter the Piercing Attack by pressing the Counterattack just before Brave Diver's sword hits you.
Ranged Slash Wave
The same with the Piercing Attack, a red WARNING! message appears before Brave Diver performs the Ranged Slash Wave.
Brave Diver performs the Ranged Slash Wave by quickly loading up until its body turns red. This animation ends quite quickly. And then, Brave Diver sends out a hurling wave with a slash of its sword.
To counter the Ranged Slash Wave, try dodging away from the hurling wave sent out by Brave Diver to give yourself allowance. And then time the Counterattack just before the wave nearly hits you.
Spinning Blade (Charging)
The Spinning Blade is a move with many attack hits done by Brave Diver as it charges towards you with its spinning sword. It is recommended to actively Counterattack and stay away. You can cancel the Spinning Blade by timing the Counterattack before Brave Diver's spinning sword nearly hits you.
Long-range characters can easily counter the Spinning Blade, so they are also recommended to use.
Clone and AoE Slash Wave
After the CAUTION! sign appears, Brave Diver summons a clone of itself. The Brave Diver clone will launch a wave that has area-of-effect (AoE) damage, indicated by the red light on the ground. Meanwhile, Brave Diver itself will perform an attack after it has summoned its clone, so there are two attacks you will have to counter or avoid.
Make sure to stay outside the area that the red light occupies to avoid the clone's AoE Slash Wave. It is also recommended that you continuously evade and prepare to counterattack Brave Diver.
Second Form
Brave Dive enters its second form when its Tension is at EXTREME. During this phase, Brave Diver changes its appearance and becomes more erratic. Brave Diver's attack pattern will also change for a certain period of time in its second form.
It is recommended to avoid Brave Diver's attacks if you are unfamiliar with the attack pattern. But you can also try countering charge attacks if possible, which may open up oppportunities to hit chain skills or other attacks.
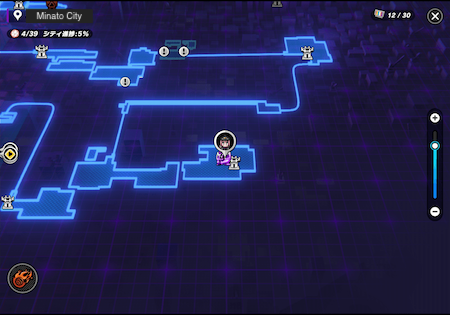
Brave Diver Location
Odaiba: Plaza (Minato City) - Chapter 2
 |
|
| Brave Diver Location | |
|---|---|
 |
 |
Brave Diver is a main story boss that you will fight towards the end of Chapter 2. Brave Diver can be located at Odaiba: Plaza in Minato City.
Chance of Blades Dance Drop
When fighting Brave Diver, there is a chance that Blades Dance will drop.
Blades Dance Rating and Effects
TRIBE NINE Related Guides
All Story Walkthroughs
| All Story Walkthroughs |
|---|
| Chapter 0 |
| Chapter 1 |
| Chapter 2 |
| Chapter 3 |
All Story Bosses
| All Chapter 0 Bosses | |
|---|---|
| Endrone | |
| All Chapter 1 Bosses | |
| S.H.A.R.K. | |
| All Chapter 2 Bosses | |
| Brave Diver | Destroyer |
| Sui Yakumo | - |
| All Chapter 3 Bosses | |
| Rakuzakai | Deadly Red Alert |
| Tentacles | - |
All Graffiti Locations
| All Graffiti Locations | |
|---|---|
| All Shinagawa Graffiti Locations | All Minato Graffiti Locations |
| All Neo Chiyoda Graffiti Locations | - |
Comment
Author
How to Beat Brave Diver
Rankings
- We could not find the article you were looking for.
- We could not find the message board you were looking for.
Gaming News


![Everwind Review [Early Access] | The Shaky First Step to A Very Long Journey](https://img.game8.co/4440226/ab079b1153298a042633dd1ef51e878e.png/thumb)

![Monster Hunter Stories 3 Review [First Impressions] | Simply Rejuvenating](https://img.game8.co/4438641/2a31b7702bd70e78ec8efd24661dacda.jpeg/thumb)
Popular Games

Genshin Impact Walkthrough & Guides Wiki
Honkai: Star Rail Walkthrough & Guides Wiki
Umamusume: Pretty Derby Walkthrough & Guides Wiki
Pokemon Pokopia Walkthrough & Guides Wiki
Resident Evil Requiem (RE9) Walkthrough & Guides Wiki
Monster Hunter Wilds Walkthrough & Guides Wiki
Wuthering Waves Walkthrough & Guides Wiki
Arknights: Endfield Walkthrough & Guides Wiki
Pokemon FireRed and LeafGreen (FRLG) Walkthrough & Guides Wiki
Pokemon TCG Pocket (PTCGP) Strategies & Guides Wiki


Recommended Games
Diablo 4: Vessel of Hatred Walkthrough & Guides Wiki
Fire Emblem Heroes (FEH) Walkthrough & Guides Wiki
Yu-Gi-Oh! Master Duel Walkthrough & Guides Wiki
Super Smash Bros. Ultimate Walkthrough & Guides Wiki
Pokemon Brilliant Diamond and Shining Pearl (BDSP) Walkthrough & Guides Wiki
Elden Ring Shadow of the Erdtree Walkthrough & Guides Wiki
Monster Hunter World Walkthrough & Guides Wiki
The Legend of Zelda: Tears of the Kingdom Walkthrough & Guides Wiki
Persona 3 Reload Walkthrough & Guides Wiki
Cyberpunk 2077: Ultimate Edition Walkthrough & Guides Wiki


All rights reserved
Game Copyright©Akatsuki Games Inc. All Rights Reserved
The content we provide on this site were created personally by members of the Game8 editorial department.
We refuse the right to reuse or repost content taken without our permission such as data or images to other sites.
©Akatsuki Games Inc. (Provider)