How to Beat Sui Yakumo
The Game8 TRIBE NINE Team has ended coverage as of June 30, 2025. Information on certain pages may no longer be up-to-date. TRIBE NINE is also scheduled to end service on November 27, 2025. Thank you for your continued support!
Sui Yakumo is a boss in Chapter 2 of TRIBE NINE. Read on to see how to beat Sui Yakumo, his location, the best team and characters to use against him, its attack patterns, as well as tips on how to defeat Sui Yakumo.
Sui Yakumo Counter Team Comp
2 Long-Range Attackers +1 Tank
| Recommended Team Comp | ||
|---|---|---|
| Long-Range (Player) |
Long-Range | Tank/Shield |
 Tsuki Iroha Tsuki Iroha
|
 Tsuruko Semba Tsuruko Semba
|
 Kazuki Aoyama Kazuki Aoyama
|
This team comp allows you to attack from a distance while safely fighting. While Tsuruko has AoE and ranged attacks, she also has an Invigorating Skill that will come in handy considering that the battle against Sui is lengthy.
Kazuki's shield can provide the team with additional protection and durability. Meanwhile, on top of being an adept ranged attacker, Tsuki's Ultimate will be the main source of damage.
1 Support + 2 DPS
| Recommended Team Comp | ||
|---|---|---|
| Player | DPS | DPS |
 Koishi Kohinata Koishi Kohinata
|
 Yo Kuronaka Yo Kuronaka
|
 Tsuki Iroha Tsuki Iroha
|
In this team comp, the player will serve as the team's support and healer with Koishi's healing abilities. Koishi can also act as a bait, luring Sui while Yo and Tsuki capitalize and do damage.
Tsuki's Ultimate is especially powerful, and so it will be best to use it as much as possible. When Sui approaches with a charge attack, successfully land Counterattacks to activate Chain Skills and create a situation where you can use Tsuki's Ultimate.
| Player Character | Explanation |
|---|---|
 Tsuki Iroha Tsuki Iroha | ・Good long-range attacker, very useful against aggressive bosses who fight close-range. ・Her tactical skills can easily disrupt the enemy's posture, opening up opportunities to perform Chain Skills. ・Ultimate Skill has high damage output. |
 Tsuruko Semba Tsuruko Semba Guest Character | ・Good long-range attacker who is also agile and can move around while attacking. ・Can deploy a field that offers recovery for the entire team. ・Ultimate Skill greatly recovers allies' HP when it falls below 50%. |
 Koishi Kohinata Koishi Kohinata | ・Her healing ability has a wide area-of-effect. |
 Kazuki Aoyama Kazuki Aoyama Guest Character | ・Has a shield that's excellent for the team's overall damage reduction. ・High break performance and strong tension management. ・Damage output increases when Ultimate is activated. ・A melee attack character good at counterattacks and evasion. Highly recommended to action-oriented players. |
| 2nd & 3rd Members | Explanation |
 Tsuruko Semba Tsuruko Semba Guest Character | ・Can deal damage from a distance while deploying a recovery field for the team. Mostly for this reason, you should prioritize having Koishi on your team. |
 Koishi Kohinata Koishi Kohinata | ・Healing ability has a wide area-of-effect. ・Very good support character especially for tanks such as Roku, who will keep Sui's attention, making it easier to attack using long-range characters. |
 Minami Oi Minami Oi | ・Has recovery ability with secondary attack. ・When Chain Skills are activated, Minami can give allies a shield and reduce the damage the team takes. |
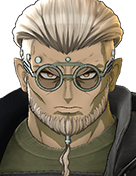 Roku Saigo Roku Saigo | ・Extremely good as a tank. Defense stats are high, making him highly durable. ・His Primary and Secondary Attacks can inflict [Attention] and attract the enemy's attacks. His [Attention] is effective against Sui's 3 Consecutive Attack. |
 Kazuki Aoyama Kazuki Aoyama Guest Character | ・Excellent damage reduction by shield ・High break performance and strong tension management. It is easier to use ultimates, making it easier to deal damage to the entire formation. |
 Yo Kuronaka Yo Kuronaka | ・High break performance and strong tension management. ・Can contribute as a secondary DPS, as his damage output increases when Ultimate is activated. |
How to Beat Sui Yakumo
| How to Beat Sui Yakumo |
|---|
|
|
Be Prepared for Sui's Second Form
When Sui's HP reaches 0 the first time, he will recover his HP to its maximum, and Sui will then enter his second form.
You need to deplete Sui's HP gauge twice. So, be prepared for a lengthy boss fight.
Don't Rush to Win
Throughout the battle, Sui's attack patterns don't change much. So even in his second stage, don't rush to win and be careful to manage your Tension while aiming for counterattacks.
Use Long-Range Attackers
| Recommended Long-Range Attackers | |||||
|---|---|---|---|---|---|
 Tsuruko Semba Tsuruko Semba
|
 Tsuki Iroha Tsuki Iroha
|
||||
| Other Recommended Guest Characters | |||||
 Kazuki Aoyama Kazuki Aoyama
|
|||||
It is recommended to use long-range attackers in this fight as Sui has many hard-to-predict attacks that involve charging in close-range. So utilizing long-range attacks can keep your team safe while also being able to effectively counterattack Sui. Kazuki is also recommended for his ability to deploy a shield that helps reduce damage taken by the team.
Use Healers
| Recommended Healers | |||||
|---|---|---|---|---|---|
 Tsuruko Semba Tsuruko Semba
|
 Koishi Kohinata Koishi Kohinata
|
 Minami Oi Minami Oi
|
|||
Since Sui enters a second stage, this battle is going to take longer than usual to complete. So, it is recommended to also use healers in your team. Use characters with HP recovery skills as Sui has a number of attacks that are hard to avoid and deal a lot of damage.
Sui Yakumo Abilities and Attack Patterns
| How to Beat Sui Yakumo |
|---|
|
|
3 Consecutive Attacks
Sui swings his weapon three times in a row while lunging forward. Take note that Sui always takes a swing at the player's character at the start of the boss battle.
This is an attack with large movements, making it easy to counter. At the start of the match, try to land a counterattack from the get-go, and disrupt Sui and break his posture. Doing this will also help your team build up Tension.
Moreover, you can use characters like Roku Saigo who can use the [Attention] ability to attract attacks, so characters with long-range attacks can deal damage relatively easily.
Charge Attack
As soon as the "WARNING" appears, Sui will jump up and charge at the player character. This is an attack that is diffifult to dodge, but not impossible.
Try to get the timing right for a Counterattack. When your opponent jumps up, turn your gaze towards Sui and wait for one beat before pressing the button to launch a counterattack.
Charge → Release
The "WARNING" sign will appear on the screen and Sui will enter a charging state for approximately 10 seconds.
While Sui is busy charging up, capitalize on your chance to attack him for the first 5-6 seconds. Note that even if you manage to break Sui's posture with your attacks, he can still carry on and perform the full cycle of his Charge→Release attack.
After about 10 seconds, Sui will release energy attacks onto the surrounding area. It is recommended to have your controlled character retreat to the outer perimeter of the field to try and lure Sui's energy attack, creating an opening for your team's main attackers/DPS.
Take note that this attack will be followed up by Sui's Sphere-Throwing Attack.
Orb-Throwing Attack
This is a powerful move that is unleashed after the Charge → Release attack. Sui fires a large number of orb onto various directions towards the outer edges of the field.
For roughly 5 seconds, Sui continuously releases orbs containing white energy zaps that move slowly into the field. Afterwards, he releases orbs that contain black energy zaps that move at high speeds.
Take note that the orbs containing white energy zaps can be destroyed by simply attacking the orbs themselves. It's recommended to destroy as much orbs containing white energy zaps to give your team space in the battlefield and avoid all the orbs coming at you altogether.
Orb-Throwing Attack Becomes More Powerful During Sui's Second Stage
Once you've depleted Sui's HP for the first time and he enters his second stage, his attacks will become stronger. The number of orbs he releases will increase significantly, making them harder to avoid. So destroying nearby orbs is highly recommended as this will make it easier to avoid them later.
Container-Throwing Attack
This attack appears when Sui's Tension is at EXTREME. Sui will jump into the air, pick up a container, and throw it at the player's character.
You cannot counter this move. Instead, opt to try dashing and dodging the attack. If you're close to Sui, you might not be able to avoid him even if you press the dodge button at the right time, so it's also recommended that you keep a certain distance from Sui.
Sui Yakumo Location
Azabu - Chapter 2
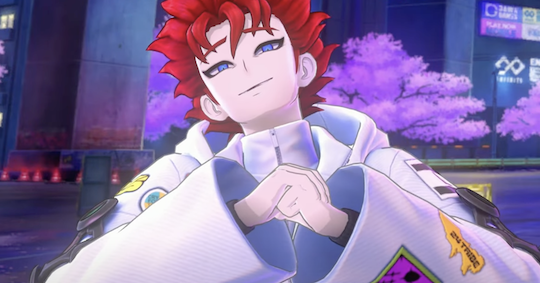
Sui Yakumo is located in Azabu Intersection in Chapter 2. As he is the final boss in Main Story Chapter 2, you will fight him at the end of Chapter 2.
TRIBE NINE Related Guides

All Story Walkthroughs
| All Story Walkthroughs |
|---|
| Chapter 0 |
| Chapter 1 |
| Chapter 2 |
| Chapter 3 |
All Story Bosses
| All Chapter 0 Bosses | |
|---|---|
| Endrone | |
| All Chapter 1 Bosses | |
| S.H.A.R.K. | |
| All Chapter 2 Bosses | |
| Brave Diver | Destroyer |
| Sui Yakumo | - |
| All Chapter 3 Bosses | |
| Rakuzakai | Deadly Red Alert |
| Tentacles | - |
All Graffiti Locations
| All Graffiti Locations | |
|---|---|
| All Shinagawa Graffiti Locations | All Minato Graffiti Locations |
| All Neo Chiyoda Graffiti Locations | - |
Comment
Author
How to Beat Sui Yakumo
Rankings
- We could not find the article you were looking for.
- We could not find the message board you were looking for.
Gaming News
Popular Games

Genshin Impact Walkthrough & Guides Wiki

Honkai: Star Rail Walkthrough & Guides Wiki

Umamusume: Pretty Derby Walkthrough & Guides Wiki

Pokemon Pokopia Walkthrough & Guides Wiki

Resident Evil Requiem (RE9) Walkthrough & Guides Wiki

Monster Hunter Wilds Walkthrough & Guides Wiki

Wuthering Waves Walkthrough & Guides Wiki

Arknights: Endfield Walkthrough & Guides Wiki

Pokemon FireRed and LeafGreen (FRLG) Walkthrough & Guides Wiki

Pokemon TCG Pocket (PTCGP) Strategies & Guides Wiki
Recommended Games

Diablo 4: Vessel of Hatred Walkthrough & Guides Wiki

Fire Emblem Heroes (FEH) Walkthrough & Guides Wiki

Yu-Gi-Oh! Master Duel Walkthrough & Guides Wiki

Super Smash Bros. Ultimate Walkthrough & Guides Wiki

Pokemon Brilliant Diamond and Shining Pearl (BDSP) Walkthrough & Guides Wiki

Elden Ring Shadow of the Erdtree Walkthrough & Guides Wiki

Monster Hunter World Walkthrough & Guides Wiki

The Legend of Zelda: Tears of the Kingdom Walkthrough & Guides Wiki

Persona 3 Reload Walkthrough & Guides Wiki

Cyberpunk 2077: Ultimate Edition Walkthrough & Guides Wiki
All rights reserved
Game Copyright©Akatsuki Games Inc. All Rights Reserved
The content we provide on this site were created personally by members of the Game8 editorial department.
We refuse the right to reuse or repost content taken without our permission such as data or images to other sites.
©Akatsuki Games Inc. (Provider)


![Everwind Review [Early Access] | The Shaky First Step to A Very Long Journey](https://img.game8.co/4440226/ab079b1153298a042633dd1ef51e878e.png/thumb)

![Monster Hunter Stories 3 Review [First Impressions] | Simply Rejuvenating](https://img.game8.co/4438641/2a31b7702bd70e78ec8efd24661dacda.jpeg/thumb)


