Monster Hunter Stories Best Monsters Tier List
★ Get to know all the monsties in the story.
☆ See all weapons and armor you can equip in the game!
★ Answer all felyne quizzes with our cheat sheet!
☆ Find all the poogies scattered all over the game!
★ Farm 10K EXP in just a few minutes!
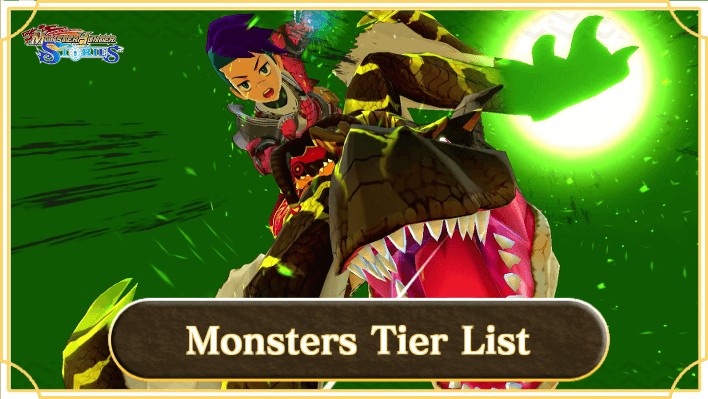
This is a tier list of the best Monsters to hatch in Monster Hunter Stories (MH Stories). Read on for a Monsters tier list, including explanations and the criteria why they are the best Monsters!
 Attention! Attention! |
This page only has information up until Yian Garuga. Please stay tuned for the latest tier updates with more Monsters! |
|---|
Best Monsters Tier List
Share Your Thoughts in the Comment Section
While trying our best to base around objectivity for this tier list, there is still bound to be subjectivity in the tier list. To further improve the list, please share your thoughts in the comment section!
Tier List Explanation
S-Tier
| Monsters | Reasons for Ranking |
|---|---|
 Yian Garuga Yian Garuga
|
・One of the best Technical attackers. ・High damage and outspeeds most encounters. ・Makes full use of the poison status with Poison Tail and Poison Chaser. ・Has the Fly rider ability and is a fast mount. |
 Brute Tigrex Brute Tigrex
|
・Boasts high damage capabilities. ・Has access to Savage Roar, which can trivialize the Agnaktor fight. ・Flexible enough to build Thunder and Ice elements. |
 Ratha Ratha
|
・Earliest Monstie you can get that has Fly. ・Can carry you until High Rank as Ratha is essentially a Rathalos. ・High innate Fire damage. |
 Qurupeco Qurupeco
|
・Has the Monster Call rider ability, allowing you to get more Monsters. ・Possesses the best healing skills and genes. |
A-Tier
| Monsters | Reasons for Ranking |
|---|---|
 Uragaan Uragaan
|
・One of the best tanks. ・Quick Blast activation with Megaton Stomp. ・Suffers from poor damage. |
 Gravios Gravios
|
・High Defense and HP. ・Deals out decent damage with Spreading Beam. ・Suffers from low speed |
 Pink Rathian Pink Rathian
|
・Best Fire Monstie in the early game. ・Has access to Spread Fire Breath. ・Decent Speed attacker. |
 Tigrex Tigrex
|
・Solid Power attacker with high damage. ・Overshadowed by Brute Tigrex. ・Inaccurate with Stampede. |
 Kecha Wacha Kecha Wacha
|
・Can channel Spitball, a strong water attack. ・Fast Technical Attacker. |
 Black Diablos Black Diablos
|
・Boasts the highest damage at this stage of the game. ・One of the most frail Monsters. ・Proper usage of Merciless Horn is required. |
 Shrouded Nerscylla Shrouded Nerscylla
|
・Technical Attacker with high bulk and damage. ・Access to Sleep Needle and Sleep Chaser, a synergistic combo. |
 Purple Ludroth Purple Ludroth
|
・Power Attacker with decent bulk and damage. ・Can channel Poison Spit, a water attack that can poison. |
B-Tier
| Monsters | Reasons for Ranking |
|---|---|
 Rathian Rathian
|
・Average Fire Monstie. ・More reliable with poison, so it needs Poison Chaser for maximum damage. ・Can channel Poison Spike, a solid speed move that can inflict poison. |
 Red Khezu Red Khezu
|
・Strong Thunder Monstie. ・Can channel Savage Thunder Breath, a consistent Thunder move. |
 Diablos Diablos
|
・Solid Power Attacker, but is slow. ・Can channel Power Charge, a move that buffs attack. |
 Barroth Barroth
|
・Early tank Monstie. ・Can channel Mud Throw, a water attack that can inflict Skillseal. |
 Zamtrios Zamtrios
|
・Best early game Ice Monstie. ・Can channel Spread Ice Breath, one of the strongest Ice skills early on. |
 Royal Ludroth Royal Ludroth
|
・Water Monstie with no early Water attacks. ・Water Soak can strengthen your other Thunder Monsters. |
 Blue Yian Kut-Ku Blue Yian Kut-Ku
|
・Can channel Blazeball, a solid Fire skill that can inflict burn. ・Decent Technical attacker. |
 Basarios Basarios
|
・Average Monstie overall. ・Rock Shield is situational to purely physical attackers. |
C-Tier
| Monsters | Reasons for Ranking |
|---|---|
 Cephadrome Cephadrome
|
・Decent Tank with high evasion skills and blinds. ・Subpar damage. |
 Gypceros Gypceros
|
・Can channel Flash, a blind that targets all enemies. ・Outshined by Rathian as a poison Monstie. |
 Khezu Khezu
|
・Can channel Roar, which can be used to set up criticals or obtain specific Monsters. ・No access to early Thunder moves, unlike Red Khezu. |
 Yian Kut-Ku Yian Kut-Ku
|
・First Fire Monstie with decent speed but subpar damage. ・Outshined by Blue Yian Kut-ku with Blazeball. |
 Lagombi Lagombi
|
・An upgrade to Arzuros in terms of damage and element. ・Gives good Ice Element genes. |
 Arzuros Arzuros
|
・Non-Elem Power Attacker. ・Decent regeneration with Honey skills. |
D-Tier
| Monsters | Reasons for Ranking |
|---|---|
 Bulldrome Bulldrome
|
・Boasts high damage with okay speed. ・Dies in only 1-2 hits. |
 Great Jaggi Great Jaggi
|
・Solid coverage of all attack types and has quick levels. ・Weak stats across the board |
 Gendrome Gendrome
|
・High speed and access to paralysis. ・Weak stats across the board. |
 Velocidrome Velocidrome
|
・High speed and Critical genes. ・Weak stats across the board. |
 Iodrome Iodrome
|
・High speed and poison capabilities, but outshined by Rathian ・Weak stats across the board. |
 Apceros Apceros
|
・Best herbivore out of the three ・Herbivore = low combat stats centered around defense and healing. |
 Popo Popo
|
・First tank accessible. ・Herbivore = low combat stats centered around defense and healing. |
 Aptonoth Aptonoth
|
・First power attacker and healer. ・Herbivore = low combat stats centered around defense and healing. |
Tier List Criteria
| Monstie Tier Criteria | |
|---|---|
| The Monsters included here are the cream of the crop. They have some of the best stats, skills, and genes that round them all out, essentially securing the playthrough! | |
| The Monsters in A-tier are some of the stronger Monsters available. They have some of the better stats, skills, and genes available in the game. | |
| The Monsters can be strong with proper set-up and cover only some niches. Most of the Monsters here are used as fodder for solid genes. | |
| The Monsters included here are decent but are hard to set up properly. Also, what they accomplish, some Monsters do better. | |
| The Monsters here are only useful in the early game as they quickly fall off in stats, skills, and genes. | |
Monster Hunter Stories Related Guides

Beginner's Guide: Tips and Tricks
All Tips and Tricks
| General Tips and Tricks | |
|---|---|
| Combat Guide: All Monster Attack Patterns | Trophy List and Guide |
| How to Save Your Game | Character Creation Guide |
| All amiibo Unlocks and Compatibility | Multiplayer Guide: Is Co-Op Available? |
| Eggs and Genes Guides | |
| All Egg Locations and Patterns | Egg Smell and Weight Guide |
| Rite of Channeling and Gene Guide | - |
| Location Guides | |
| All Poogie Locations | All Catavan Locations |
| Barrel Felyne Location and How to Defeat | - |
| Tier List Guides | |
| Best Team | Best Monsters Tier List |
Comment
Im gonna say diablos is the best tank. They have a lot of defense and hp and they also have a good damage. They just a perfect mount for someone who need a sustain monstie. Just build them in power, technical, speed genes sequentially and you have a perfect mount
Author
Monster Hunter Stories Best Monsters Tier List
Rankings
- We could not find the message board you were looking for.
Gaming News
Popular Games

Genshin Impact Walkthrough & Guides Wiki

Umamusume: Pretty Derby Walkthrough & Guides Wiki

Pokemon Pokopia Walkthrough & Guides Wiki

Honkai: Star Rail Walkthrough & Guides Wiki

Monster Hunter Stories 3: Twisted Reflection Walkthrough & Guides Wiki

Arknights: Endfield Walkthrough & Guides Wiki

Wuthering Waves Walkthrough & Guides Wiki

Zenless Zone Zero Walkthrough & Guides Wiki

Pokemon TCG Pocket (PTCGP) Strategies & Guides Wiki

Monster Hunter Wilds Walkthrough & Guides Wiki
Recommended Games

Diablo 4: Vessel of Hatred Walkthrough & Guides Wiki

Cyberpunk 2077: Ultimate Edition Walkthrough & Guides Wiki

Fire Emblem Heroes (FEH) Walkthrough & Guides Wiki

Yu-Gi-Oh! Master Duel Walkthrough & Guides Wiki

Super Smash Bros. Ultimate Walkthrough & Guides Wiki

Pokemon Brilliant Diamond and Shining Pearl (BDSP) Walkthrough & Guides Wiki

Elden Ring Shadow of the Erdtree Walkthrough & Guides Wiki

Monster Hunter World Walkthrough & Guides Wiki

The Legend of Zelda: Tears of the Kingdom Walkthrough & Guides Wiki

Persona 3 Reload Walkthrough & Guides Wiki
All rights reserved
©CAPCOM
The copyrights of videos of games used in our content and other intellectual property rights belong to the provider of the game.
The contents we provide on this site were created personally by members of the Game8 editorial department.
We refuse the right to reuse or repost content taken without our permission such as data or images to other sites.



![The Liar Princess and the Blind Prince Review [PC] | Lovely to Look at but Tedious to Play](https://img.game8.co/4442586/8d95f5faf05780f1765ce7e0938bd825.jpeg/show)
![The Liar Princess and the Blind Prince Review [PC] | Lovely to Look at but Tedious to Play](https://img.game8.co/4442586/8d95f5faf05780f1765ce7e0938bd825.jpeg/thumb)
![Marathon Cryo Archive Map Teased as [REDACTED] on Selection Screen](https://img.game8.co/4442236/6357203e58172f6de57f1991e7c39b22.png/thumb)


Some of the monsters are missing in the list, like Qurupeko's subespecies and normal Nerscylla.