This survey will take about 1 minute.
Your answers will help us to improve our website.
Zelda: Link's Awakening (Remake)
Level 6 - Face Shrine Walkthrough
This is a walkthrough for Face Shrine, the sixth dungeon in The Legend of Zelda: Links Awakening (Remake) for the Nintendo Switch. Use this guide to learn how to reach this dungeon, solve its puzzles, and defeat its bosses.
| ◀︎ Previous Dungeon | Next Dungeon ▶︎︎ |
|---|---|
| Catfish's Maw | Eagle's Tower |
List of Contents
Getting to Face Shrine
Getting to Face Shrine Objectives
| No. | Objective |
|---|---|
| * |  You need a ranged weapon for this dungeon and for the rest of the game. Now that you have obtained the Hookshot, it is possible to complete the Trading Sequence Quest. While it is optional, completing this quest will give you the Boomerang, which, unlike other games in the series, is a very powerful offensive weapon. ▶︎ Trading Sequence Guide |
| * | 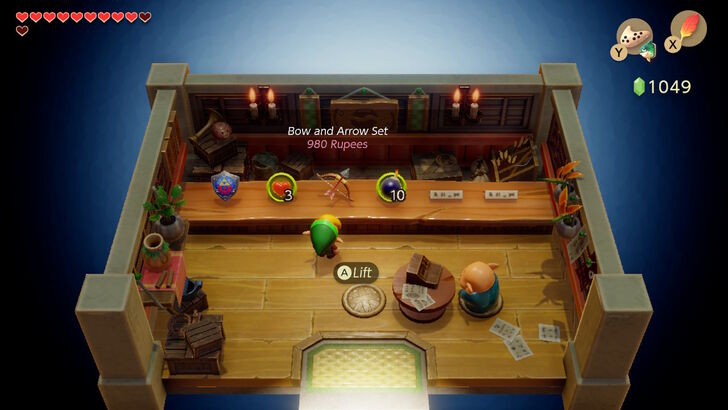 Alternatively, you can buy the Bow and Arrow set already. It can be purchased in the Mabe Village Shop for 980 Rupees. You should buy it before the eight dungeon, Turtle Rock. ▶︎ Rupee Farming Guide |
| 1 |  Warp to Animal Village, and head northwest from the entrance. You will eventually reach a field with several rocks. They look like tires on the map. Pick up the moveable boulders and head east, then south to reach the Ancient Ruins. ▶︎ Warp Point Locations and Map |
| 1.1 | 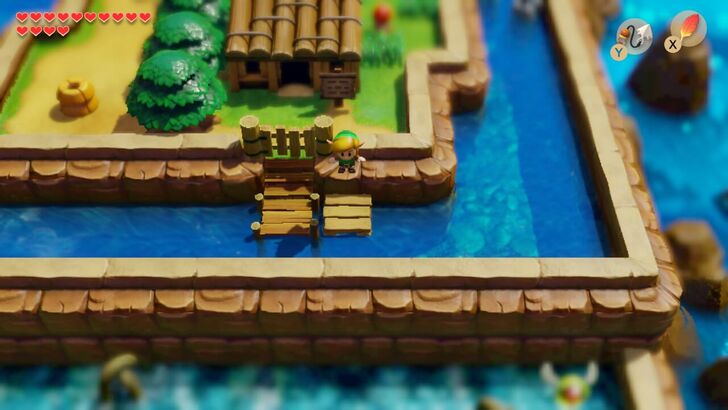 Along the way to the Ancient Ruins, you can move some of the boulders out of the way and head northwest. Go to the stairs facing north that lead into the water, and then swim right toward a cave. Enter it to arrive at a wooden house. Talking to the man inside allows you to play the Rapids Ride Mini-Game. There are many collectibles in this mini-game, such as Heart Pieces, Secret Seashells, and Rupees. ▶︎ Rapids Ride Guide |
| 2 | Ancient Ruins is crawling with Armos. These are foes that appear to be statues, but vibrate and light up when approached. They can be taken out with arrows or with the Boomerang. Go near the Armos to activate them. When you beat them, they will stop blocking the path to the left. |
| 2.1 | 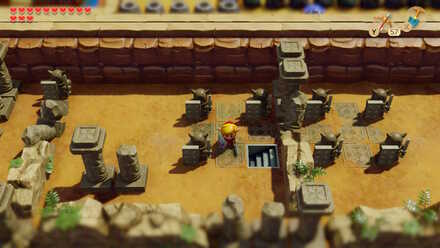 Going to the very center of the ruins and waking up the bottom right Armos reveals a hidden staircase. Going down it will lead to a treasure chest containing Secret Seashell #24. ▶︎ Secret Seashells Locations: Map of All 50 Seashells |
| 3 | 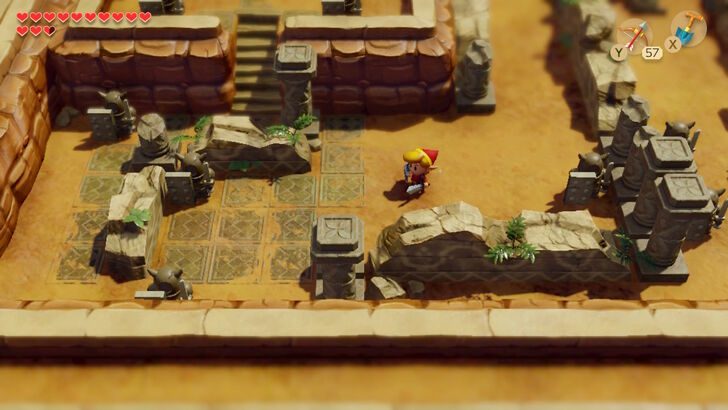 Eventually, as you advance toward the left of the Ancient Ruins, you will reach a large set of stairs in front of the Southern Face Shrine. Enter the shrine, and go past the first room. |
| 4 | 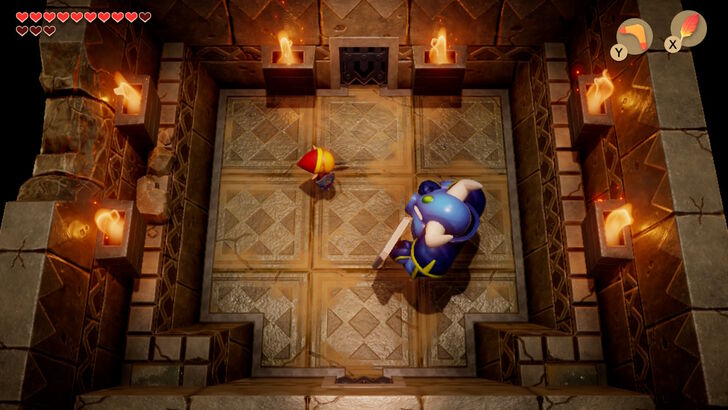 In the next room, you will encounter a mini-boss known as the Armos Knight. Dodge their attacks with the Roc's Feather then attack them with Spin-Attacks. They will drop the Face Key when defeated. ▶︎ Mini-Boss: Armos Knight |
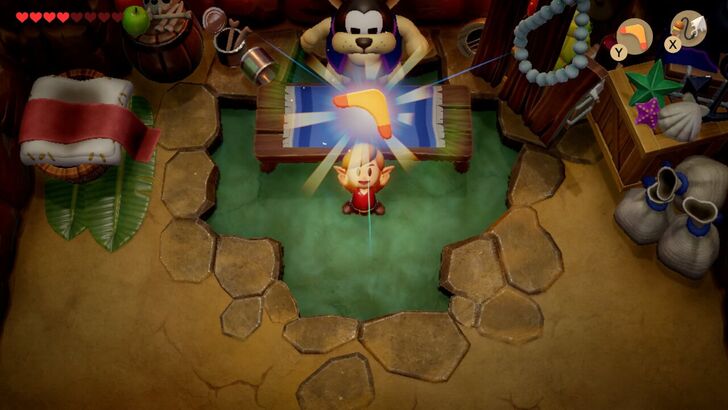
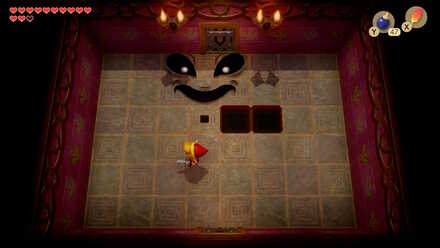
| 5 | 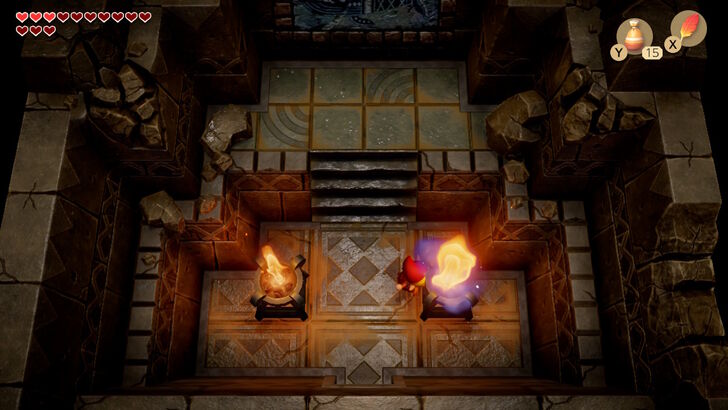 Light the torches with Magic Powder, then go up the stairs. Read the picture here to reveal some very unsettling truths about Koholint Island. |
| 6 |  Leave the Southern Face Shrine and speak with the owl, then head back to the maze with all the boulders. Head toward the upper left corner of the maze, until you reach stairs pointed south leading into the water. |
| 7 | 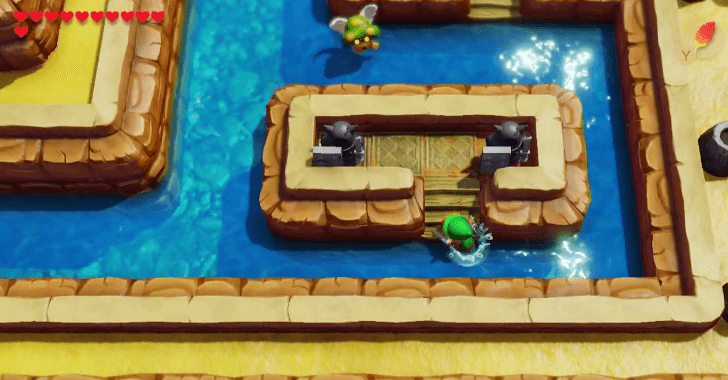 Go down them, and swim to the nearby island with two Armos. Defeat the Armos on the left to reveal a hidden staircase. |
| 8 | 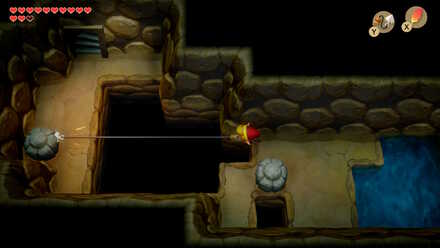 Go down the stairs and swim to the other side. Use your hookshot to cross over the large gap and go up the stairs. |
| 9 | 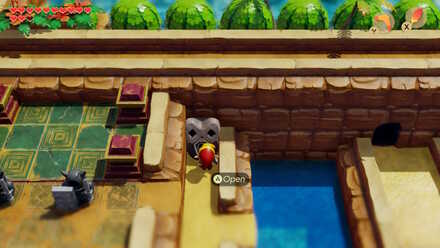 Go right, and use the Face Key to reveal the Face Shrine. Go back toward the cave, climb up the stairs, and enter the shrine. |
Mini-Boss: Armos Knight
Avoid Jump Attack With Roc's Feather
Armos Knight will try and approach you, as well as jump up in the air. When he lands, you will be stunned if you are standing, so use Roc's Feather to jump before he comes down.
Damage With Spin Attack
He can be rather difficult to attack, as he is impervious to most things thanks to his shield. Hold B to charge a Spin Attack and jump before he lands, then unleash the Spin Aattack.
Use Ranged Attacks After Armor Break
Do this a couple times and their shield will break. Now at this point, there are two things that will damage them: Arrows and Spin Attacks. Rrepeatedly attack them until their faceplate breaks. Eventually, they will explode.
Face Shrine Dungeon Walkthrough
| Face Shrine Walkthrough Contents | |
|---|---|
| Map and Items | Objectives |
| Mini-Boss | Boss |
Face Shrine Map and Items
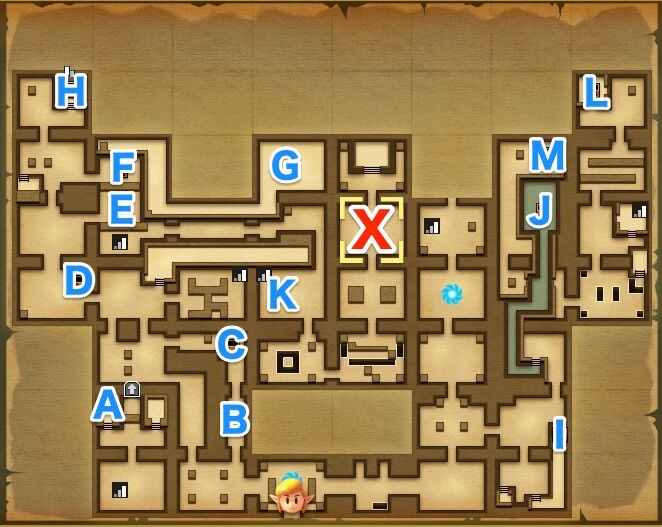
| Location on Map | Item |
|---|---|
| A | Powerful Bracelet |
| B | 50 Rupees |
| C | 100 Rupees |
| D | Map |
| E | Stone Beak |
| F | Compass |
| G | Small Key #1 |
| H | 100 Rupees |
| I | Secret Medecine |
| J | Small Key #2 |
| K | Small Key #3 |
| L | 300 Rupees |
| M | Nightmare Key |
Face Shrine Objectives
| No. | Objective |
|---|---|
| 1 |  Go through the left passage. Skipping the Wizzrobes, continue up and left until you reach the room with the Mask Mimic. Bomb the switch and go through the top right doorway while the orange tiles are raised. |
| 2 | 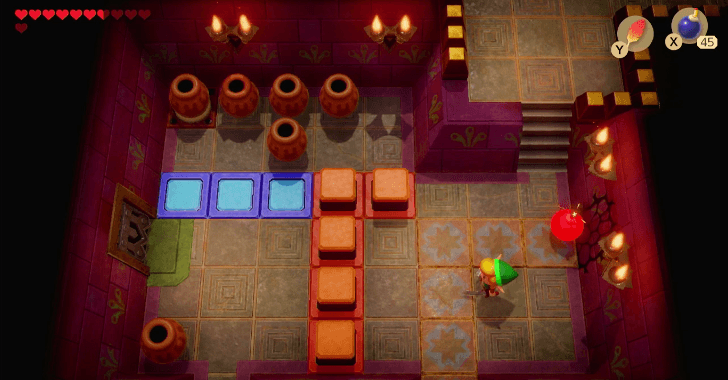 Blow up the cracked wall and go into the next room. Defeat the Zol and go down the staircase that was revealed. Go through the underground passage. |
| 3 | 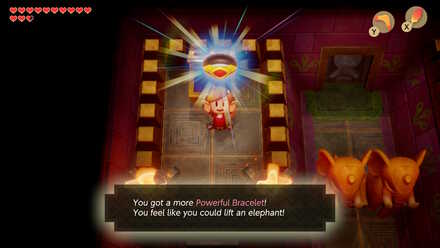 Emerge and defeat the enemies, then go north. Open the chest on the left raised platform to get the Powerful Bracelet. You can now lift the elephant statues in the dungeon. |
| 4 |  Use the revolving door to return to the room with the Mask Mimic. Turn the switch blue, then place a bomb next to it. Go through the top left doorway with the orange tiles raised. |
| 5 | 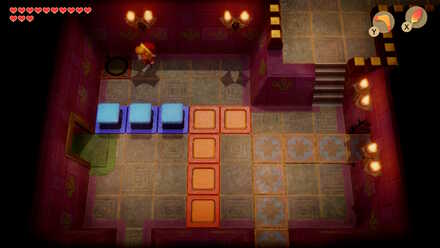 Lift the pot in this room to hit a switch and go into the next room. Defeat the Wizzrobes here and get the Map. Use arrows to shoot them when they appear. You can also use your Hookshot or Boomerang to stun them and follow up with a bomb. |
| 6 | 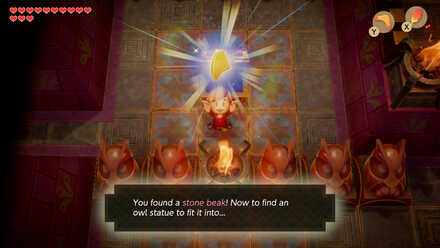 Go north, then east, and open the treasure chest to obtain the Stone Beak. |
| 7 | 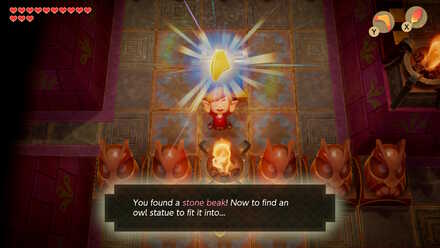 Go to the previous room and throw a pot at the northern doorway. Go into the next room, then through the door on the right side. Open the treasure chest for the Compass. |
| 8 |  Go up the stairs and hit the switch to turn it blue. Continue along the path and reach the room at the end. Defeat the Wizzrobes and pick up Small Key #1. |
| 9 | Return to the switch and turn it orange. Warp back with Manbo's Mambo or return to the dungeon entrance. Go to the right passage. Avoid the Blade Traps by jumping and head to the next room. |
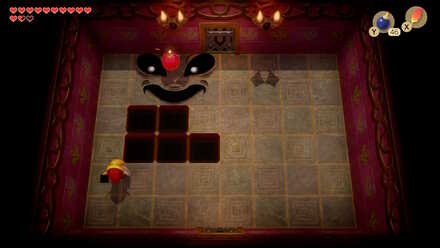
| 10 | Reach the room with the flying tiles. Hold shield to block all its attacks. This will unlock the door. In the next room, throw an elephant statue at the right side doorway, then enter it. |
| 11 |  Defeat the four Wizzrobes and go north. Go down the stairs and follow the path until you reach the chest containing Small Key #2. |
| 12 | Return to the room where you threw the elephant statue in Objective No. 10 and go through the locked door. Bomb the cracked wall and continue forward to fight the Mini-Boss: Rover. |
| 13 | 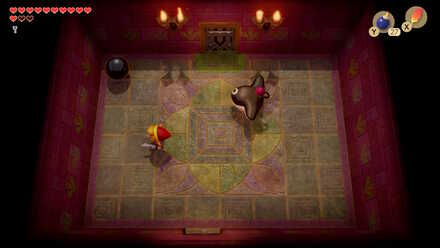 Defeat Rover, and continue forward. Lift the left elephant statue, and go through the underground passage. ▶︎ Smasher Boss Guide |
| 14 | 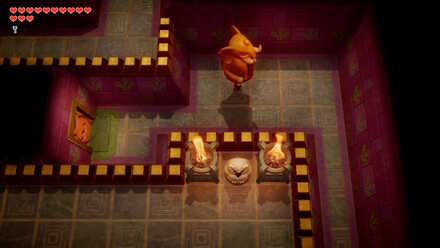 Lift the statue in this room and throw it at the left door. |
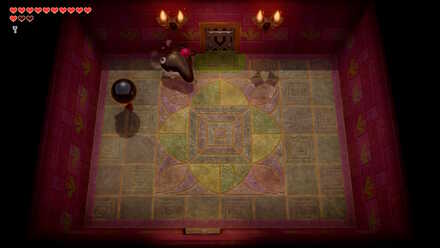
| 15 | 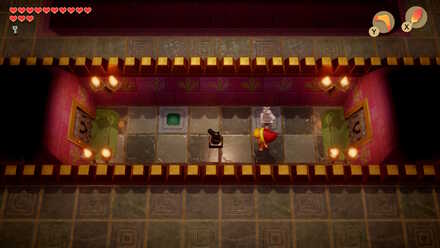 In the next room, destroy all the pots. You need to throw the chess pieces, specifically knights, onto the green spaces. When you throw them, they will always go three spaces forward and one space either left or right if they are white or black, respectively. Stand under one green space and throw the pieces in the direction of the other one to have them land in the spaces. Head to the next room and go down the stairs. |
| 16 | Dash through the passage to avoid the Thwomps, then climb the ladder. |
| 17 | You will encounter three Pols Voice in the next room. They can be defeated by shooting arrows, throwing pots or bombs, stunning them and throwing them at each other, or playing 'Ballad of the Wind Fish'. |
| 18 | 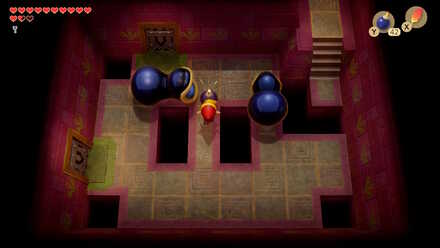 Go to the southward door and fight the two Dodongo Snakes. Drop bombs in front of them, right before they move. Do this three times each to defeat them, then go through the left door. |
| 19 |  Use your hookshot to cross the gap here and get to the other side. Then, unlock the block and continue forward. Lift a pot and you will see a treasure chest. Throw a pot at it to open it and obtain the Nightmare Key. |
| 20 | Warp back to the dungeon entrance, then go through the warp point here to return to where you fought Smasher. Go up to head to the next room. Then, go down the stairs to go through the underground passage once more. When you arrive at the flying stairs, go to the room in the south wall. |
| 21 | 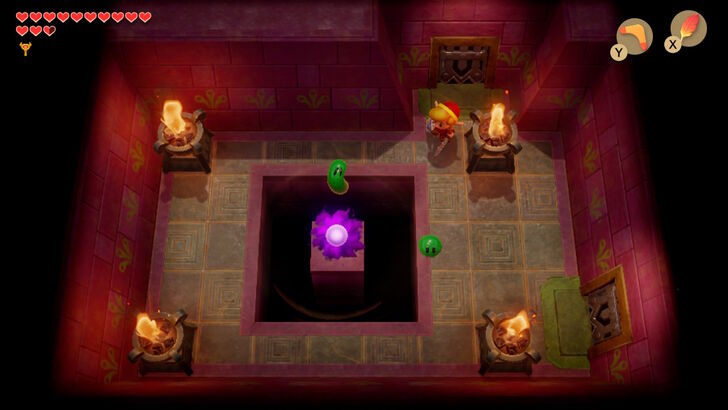 In here, a Vacuum Mouth will try and pull you in to the center of the room. Walk around the room to spawn four Zol. Stick to the wall and let it pull the Zol into the abyss. Once it has pulled them all in, the doors will open, so continue through the right. |
| 22 | 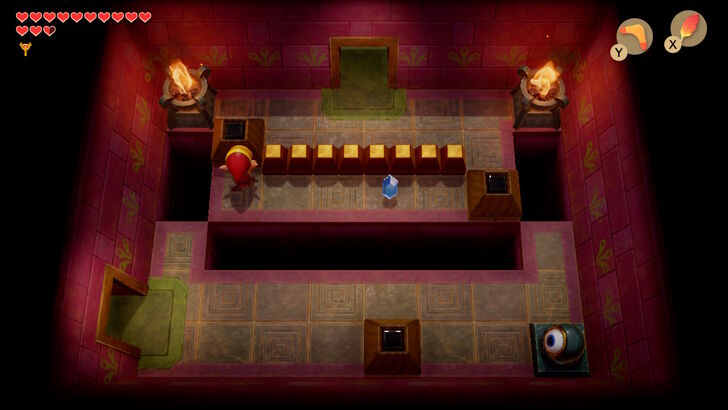 Hop across the gap and take out the Wizzrobe. Watch out for the Beamos's lasers. It cannot be defeated, so hop over them with Roc's Feather. Push either of the blocks out of the way to go into the next room. In this room, you can get Fairies by lighting the torches with Magic Powder or defeating the Sparks with the Boomerang. Unlock the door at the north wall to face the Nightmare. |
| 23 | 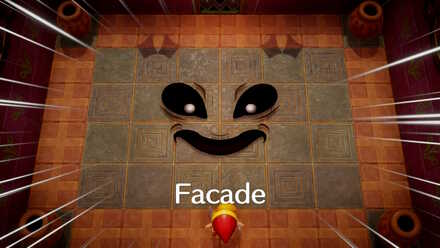 Defeat Facade to get the Coral Triangle. ▶︎ Facade Boss Guide |
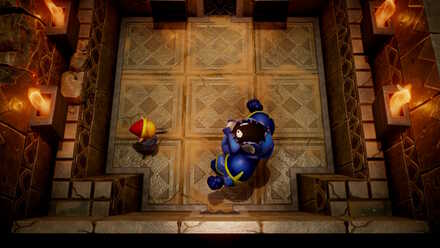
Mini-Boss: Rover
|
 |
Dodge the Ball
They will throw the ball after a few second of holding it. Put some distance between you and him so that the ball is easier to dodge.
Throw It Back at Them
After dodging the ball, then pick it up. when you do this, they will try and run away. Throw it at him, then repeat this process a total of four times until he is defeated.
Face Shrine Nightmare: Facade
Use Bombs
The trick to beating Facade is by dropping or throwing bombs on its face. Be sure not to walk directly into his face, as it can damage you too. As you continue to damage it, it will open up more and more holes in the ground, creating more obstacles to look out for. Although, the strategy remains the same. After about eight bombs or so, Facade will explode.
Shield or Dodge Projectiles
All of Facade's attacks can be shielded. When the battle begins, it will start throwing floor tiles at you, then it will begin throwing pots at you. Once he has run out of things to throw, he will begin opening holes in the floor.
Walk around the room and keep Roc's Feather equipped so you can jump over the gaps if needed.
Link's Awakening Related Guides

List of All Dungeons and Story Walkthrough
All Dungeon Walkthroughs
Author

The Legend of Zelda: Link's Awakening Walkthrough & Guides Wiki
Level 6 - Face Shrine Walkthrough
Please participate in our site
improvement survey
03/2026
improvement survey
03/2026
Would you assist in
improving Game8's site?
improving Game8's site?

×
We are listening to our users' valuable opinions and discussing how to act on them.
The information collected through this survey will be used for the purpose of improving our services. In addition, the information will only be disclosed a part of a statistic in a format that will not allow identification of personal information.
Begin Survey
Not Now
×
Please rate each item regarding Game8.co's Advertisements.
Amount of Ads
Very Dissatisfied
Somewhat Dissatisfied
Fine
Somewhat Satisfied
Highly Satisfied
Placement of Ads
Timing of Ad Display
Ad Loading Speed
Safeness of Ads
Content of Ads
×
Please rate each item regarding Game8.co's Quality of Articles.
Amount of information
Very Dissatisfied
Somewhat Dissatisfied
Fine
Somewhat Satisfied
Highly Satisfied
Frequency of updates
Speed of new information
Accuracy of articles
Understandibility of articles
Readability of sentences
×
Please rate each item regarding Game8.co's Usability of the Site.
Ease of finding information
Very Dissatisfied
Somewhat Dissatisfied
Fine
Somewhat Satisfied
Highly Satisfied
Loading Speed
Use of Color
Font Size
Visibility of Images
Easy to Understand Layout
×
Please rate each item regarding Game8.co's Message Boards, Comments.
Ease of Writing
Very Dissatisfied
Somewhat Dissatisfied
Fine
Somewhat Satisfied
Highly Satisfied
Readability
Ease in Finding Information
Comment Quality
Comment Quantity
Admin Response
×
Please rate each item regarding Game8.co's Site's new design.
Please rate our site's new design
Very Dissatisfied
Somewhat Dissatisfied
Fine
Somewhat Satisfied
Highly Satisfied
Do you think that the website's design change makes the site easier to use?
Has the new design made it easier for you to find information on the site?
Has the new design improved the overall visual appeal of the site?
How would you rate your overall satisfaction with the new design of the site?
×
How likely are you to recommend Game8 to someone you know?
Very Unlikely
0
1
2
3
4
5
6
7
8
9
10
Very Likely
If you have other opinions regarding potential improvement to the website, please share them with us. We would appreciate your honest opinion.
Note: This is a free response section, so you can proceed without entering anything.
Note: Please be sure not to enter any kind of personal information into your response.
Note: Please be sure not to enter any kind of personal information into your response.
×
Thank You
×
Thank you for participating in our survey! Your answers will help us to improve the quality of our website and services.
We hope you continue to make use of Game8.
We hope you continue to make use of Game8.
Close
Rankings
- We could not find the message board you were looking for.
Gaming News


![Everwind Review [Early Access] | The Shaky First Step to A Very Long Journey](https://img.game8.co/4440226/ab079b1153298a042633dd1ef51e878e.png/thumb)

![Monster Hunter Stories 3 Review [First Impressions] | Simply Rejuvenating](https://img.game8.co/4438641/2a31b7702bd70e78ec8efd24661dacda.jpeg/thumb)
Popular Games

Genshin Impact Walkthrough & Guides Wiki
Honkai: Star Rail Walkthrough & Guides Wiki
Umamusume: Pretty Derby Walkthrough & Guides Wiki
Pokemon Pokopia Walkthrough & Guides Wiki
Resident Evil Requiem (RE9) Walkthrough & Guides Wiki
Monster Hunter Wilds Walkthrough & Guides Wiki
Wuthering Waves Walkthrough & Guides Wiki
Arknights: Endfield Walkthrough & Guides Wiki
Pokemon FireRed and LeafGreen (FRLG) Walkthrough & Guides Wiki
Pokemon TCG Pocket (PTCGP) Strategies & Guides Wiki


Recommended Games
Diablo 4: Vessel of Hatred Walkthrough & Guides Wiki
Fire Emblem Heroes (FEH) Walkthrough & Guides Wiki
Yu-Gi-Oh! Master Duel Walkthrough & Guides Wiki
Super Smash Bros. Ultimate Walkthrough & Guides Wiki
Pokemon Brilliant Diamond and Shining Pearl (BDSP) Walkthrough & Guides Wiki
Elden Ring Shadow of the Erdtree Walkthrough & Guides Wiki
Monster Hunter World Walkthrough & Guides Wiki
The Legend of Zelda: Tears of the Kingdom Walkthrough & Guides Wiki
Persona 3 Reload Walkthrough & Guides Wiki
Cyberpunk 2077: Ultimate Edition Walkthrough & Guides Wiki


All rights reserved
© 1993-2019 Nintendo
The copyrights of videos of games used in our content and other intellectual property rights belong to the provider of the game.
The contents we provide on this site were created personally by members of the Game8 editorial department.
We refuse the right to reuse or repost content taken without our permission such as data or images to other sites.
Terrible Guide, very convoluted, barely any navigation on where to got, cant recommend it.