This survey will take about 1 minute.
Your answers will help us to improve our website.
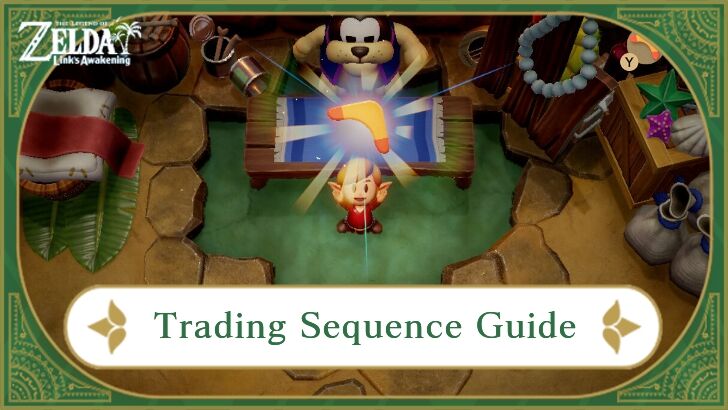
Zelda: Link's Awakening (Remake)
Trading Sequence Guide
This is a guide for the Trading Sequence in The Legend of Zelda: Link's Awakening (Remake) for the Nintendo Switch. Read on to see a full walkthrough for the Trade Quest and how to get each item needed for the Trading Sequence.
What is the Trading Sequence?
Trade Items Until You Get a Boomerang
Trading Sequence is a series of interactions with several characters around Koholint Island. There are a total of 14 trades to complete to get the Boomerang
You can complete the trading sequence as soon as you get the Hookshot in Catfish's Maw. It is a great weapon that can stun and hit enemies at a distance. You will also get the Magnifying Lens here to spot hidden enemies and NPCs.
Trading Sequence Steps
| 1 | 2 | 3 | 4 | 5 |
|---|---|---|---|---|
| Yoshi Doll | Ribbon | Canned Food | Bananas | Stick |
| 6 | 7 | 8 | 9 | 10 |
| Honeycomb | Pineapple | Hibiscus | Letter | Broom |
| 11 | 12 | 13 | 14 | 15 |
| Fishing Hook | Necklace | Mermaid Scale | Magnifying Lens | Boomerang |
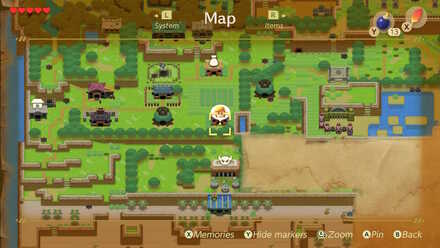
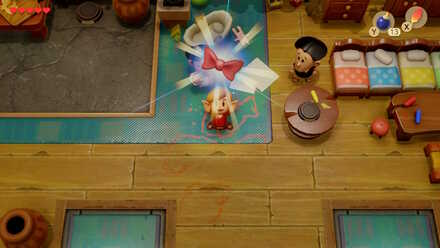
Yoshi Doll in Mabe Village
 |
|
| NPC: Trendy Game Required Item: Rupees Reward: Yoshi Doll Location: Mabe Village Required Equipment: N/A |
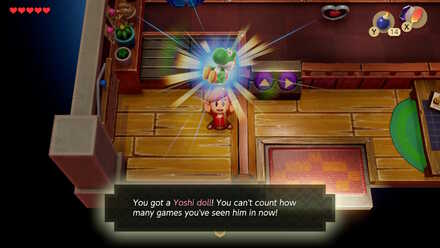 |
| Play the Trendy Game and grab the Yoshi doll. Playing the Trendy Game requires 10 Rupees per attempt. | |
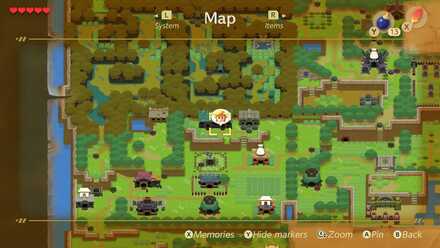
Ribbon in Mabe Village
 |
|
| NPC: Mamasha Required Item: Yoshi Doll Reward: Ribbon Location: Mabe Village Required Equipment: N/A |
 |
| Upon leaving getting the Yoshi Doll, Kidoh will tell you that her mother wants the Yoshi Doll. Proceed north of the Trendy Game and find the house with two entrances. Inside, you will see Mamasha. Give her the Yoshi Doll to receive the Ribbon. | |
Canned Food in Mable Village
 |
|
| NPC: CiaoCiao Required Item: Ribbon Reward: Canned Food Location: Mabe Village Required Equipment: N/A |
 |
| Take the Ribbon to CiaoCiao's House, which is the house guarded by BowWow the Chain Chomp. Enter the door on the right side of the house and speak with the small Chain-Chomp. You will exchange the Ribbon for the Canned Food. | |
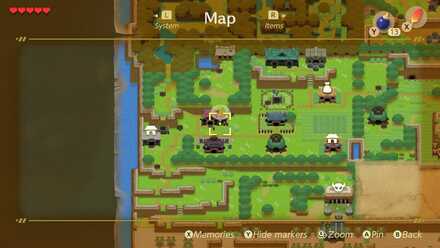
Bananas in Toronbo Shores
 |
|
| NPC: Sale Required Item: Canned Food Reward: Bananas Location: Toronbo Shores Required Equipment: N/A |
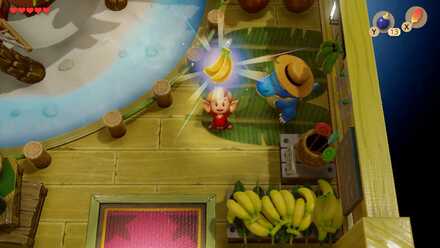 |
| After Receiving the Canned Food from CiaoCiao, go to Sale's house in Toronbo Shores (the house is near several banana trees). There you will receive Bananas for your Canned Food. | |
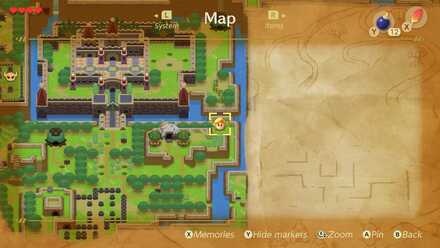
Stick in Ukuku Prairie
 |
|
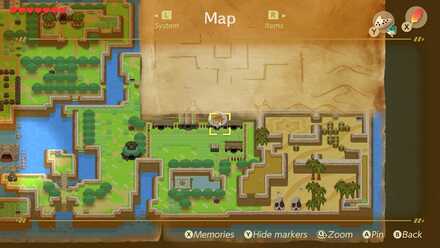
| NPC: Kiki the Monkey Required Item: Bananas Reward: Stick Location: Ukuku Prairie Required Equipment: Bombs |
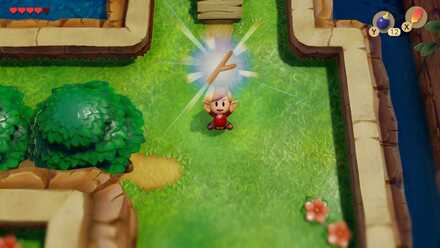 |
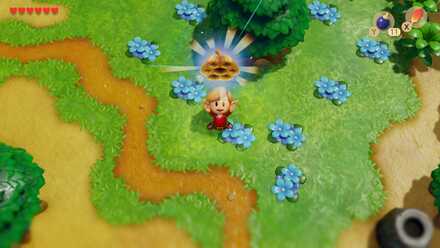
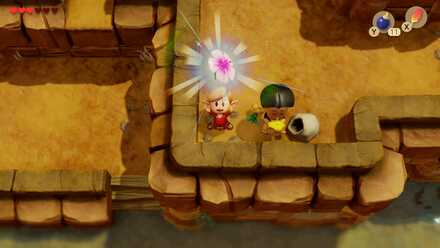
| Go left from the Ukuku Prairie Warp Point, and you will encounter a large skull blocking the way. Use bombs to destroy the skull and clear the path. From there, proceed left and you will see Kiki the Monkey below Kanlet Castle on the right. Trade your Bananas for the Twig. | |
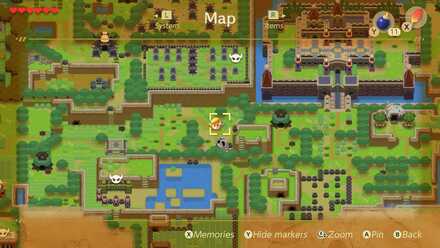
Honeycomb in Ukuku Prairie
 |
|
| NPC: Tarin Required Item: Stick Reward: Honeycomb Location: Ukuku Prairie Required Equipment: N/A |
 |
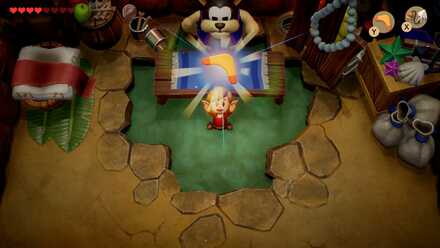
| Talk to Tarin in Ukuku Prairie and let him borrow your Stick to poke the beehive. It will drop the Honeycomb. Tarin will not appear in this area until you complete Key Cavern. | |
Level 3 - Key Cavern Walkthrough
Pineapple in Animal Village
 |
|
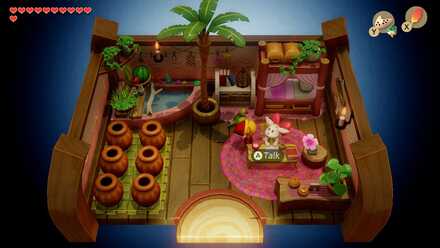
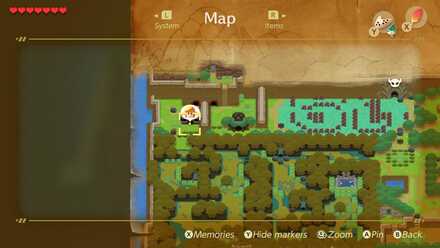
| NPC: Chef Bear Required Item: Honeycomb Reward: Pinapple Location: Animal Village Required Equipment: N/A |
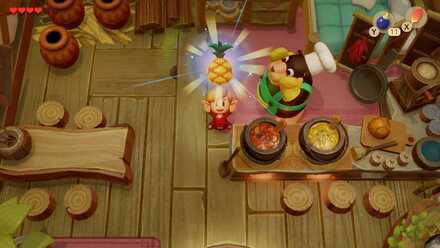 |
| Go to to lower right house in Animal Village and talk to Chef Bear to exchange your Honeycomb for a Pineapple. | |
Hibiscus in Tal Tal Mountain Range
 |
|
| NPC: Papahl Required Item: Pineapple Reward: Hibiscus Location: Tal Tal Mountain Range Required Equipment: N/A |
 |
| Papahl will ask you for vittes. Answer yes to give him your Pineapple. You will then receive a Hibiscus as a reward. | |
Letter in Animal Village
 |
|
| NPC: Christine Required Item: Hibiscus Reward: Letter Location: Animal Village Required Equipment: N/A |
 |
| Talk to Christine and she will take your hibiscus in exchange for a letter that you must give to Mr. Write. Christine can be found in Animal Village, in the third house from the left. | |
Broom in Mysterious Forest
 |
|
| NPC: Mr. Write Required Item: Letter Reward: Broom Location: Mysterious Forest Required Equipment: N/A |
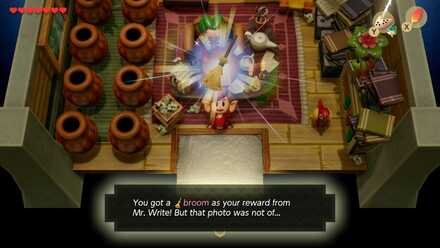 |
| Locate Mr. Write's house by going through the northwest exit of the Mysterious Forest. Speak to him to trade the letter for a Broom. | |
Fishing Hook in Mabe Village or Animal Village
 |
|
| NPC: Grandma Yahoo Required Item: Broom Reward: Fishing Hook Location: Mabe Village (Later Animal Village) Required Equipment: N/A |
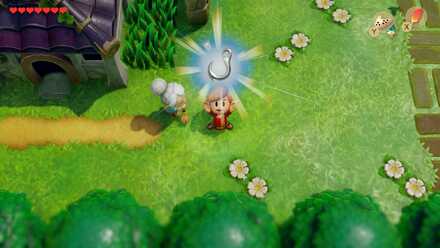 |
| Give the Broom to Grandma Yahoo in Mabe Village, and she will give you the Fishing hook that she found by the riverbank. She moves to Animal Village later in the game. If you do not find her in Mabe Village, go and check by the fourth house in Animal Village. | |
Necklace in Martha's Bay
 |
|
| NPC: Fisherman Required Item: Fishing Hook Reward: Necklace Location: Martha's Bay Required Equipment: Flippers |
 |
| The Fisherman can be seen under the wooden bridge in Martha's Bay. You will need the Flippers to dive under the bridge from the right side. Give him the Fishing hook and you will then receive the Necklace. | |
Mermaid Scale in Martha's Bay
 |
|
| NPC: Mermaid Required Item: Bracelet Reward: Mermaid Scale Location: Martha's Bay Required Equipment: Flippers |
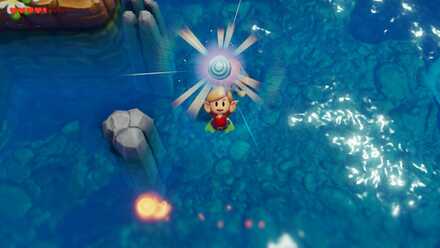 |
| Just above Martha's Bay you will see a mermaid in the middle of the water. She will ask you to give her missing necklace back. Returning it will give you the Scale. | |
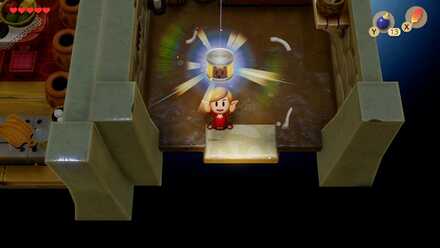
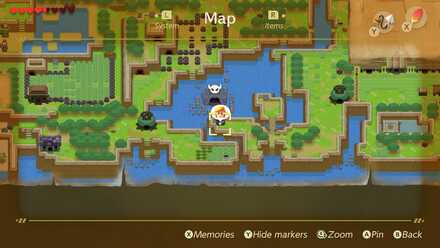
Magnifying Lens in Toronbo Shores
 |
|
| NPC: Mermaid Statue Required Item: Mermaid Scale Reward: Magnifying Lens Location: Martha's Bay Required Equipment: Hookshot |
 |
| Once you have the Hookshot, you can grabble across to the wooden crate and reach a secret area. Use the mermaid scale on the mermaid statue. Inside the cave that appears, there are many invisible enemies. Swing your sword to keep them away. Head north and you will find the Magnifying Lens. |
|
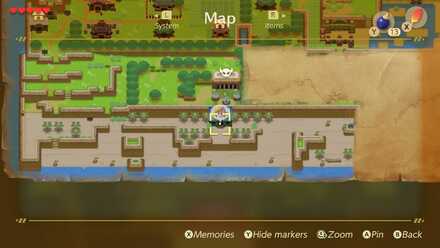
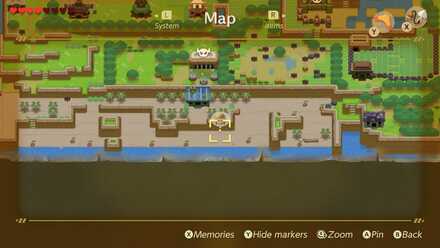
Boomerang in Toronbo Shores
 |
|
| NPC: Giroya Required Item: Shovel Reward: Boomerang Location: Toronbo Shores Required Equipment: Magnifying Lens, Bomb |
 |
| At the bottom area of the Toronbo Shores you will see a cracked wall that you can break using a bomb. After bombing it, step inside and trade your Deluxe Shovel for the Boomerang. You will not see Giroya without the Maynifying Lens. Talk to him again to buy it back for 300 rupees. You can do this for any of your key items that you trade for the Boomerang |
|
Link's Awakening Related Guides
| The Legend of Zelda: Link's Awakening Guides | |
|---|---|
 Walkthrough Walkthrough |
 Trading Sequence Trading Sequence |
 Maps and Locations Maps and Locations |
 Mini-Games Mini-Games |
 Tips and Tricks Tips and Tricks |
 Items and Equipment Items and Equipment |
 Enemies Enemies |
|
Author

The Legend of Zelda: Link's Awakening Walkthrough & Guides Wiki
Trading Sequence Guide
Please participate in our site
improvement survey
03/2026
improvement survey
03/2026
Would you assist in
improving Game8's site?
improving Game8's site?

×
We are listening to our users' valuable opinions and discussing how to act on them.
The information collected through this survey will be used for the purpose of improving our services. In addition, the information will only be disclosed a part of a statistic in a format that will not allow identification of personal information.
Begin Survey
Not Now
×
Please rate each item regarding Game8.co's Advertisements.
Amount of Ads
Very Dissatisfied
Somewhat Dissatisfied
Fine
Somewhat Satisfied
Highly Satisfied
Placement of Ads
Timing of Ad Display
Ad Loading Speed
Safeness of Ads
Content of Ads
×
Please rate each item regarding Game8.co's Quality of Articles.
Amount of information
Very Dissatisfied
Somewhat Dissatisfied
Fine
Somewhat Satisfied
Highly Satisfied
Frequency of updates
Speed of new information
Accuracy of articles
Understandibility of articles
Readability of sentences
×
Please rate each item regarding Game8.co's Usability of the Site.
Ease of finding information
Very Dissatisfied
Somewhat Dissatisfied
Fine
Somewhat Satisfied
Highly Satisfied
Loading Speed
Use of Color
Font Size
Visibility of Images
Easy to Understand Layout
×
Please rate each item regarding Game8.co's Message Boards, Comments.
Ease of Writing
Very Dissatisfied
Somewhat Dissatisfied
Fine
Somewhat Satisfied
Highly Satisfied
Readability
Ease in Finding Information
Comment Quality
Comment Quantity
Admin Response
×
Please rate each item regarding Game8.co's Site's new design.
Please rate our site's new design
Very Dissatisfied
Somewhat Dissatisfied
Fine
Somewhat Satisfied
Highly Satisfied
Do you think that the website's design change makes the site easier to use?
Has the new design made it easier for you to find information on the site?
Has the new design improved the overall visual appeal of the site?
How would you rate your overall satisfaction with the new design of the site?
×
How likely are you to recommend Game8 to someone you know?
Very Unlikely
0
1
2
3
4
5
6
7
8
9
10
Very Likely
If you have other opinions regarding potential improvement to the website, please share them with us. We would appreciate your honest opinion.
Note: This is a free response section, so you can proceed without entering anything.
Note: Please be sure not to enter any kind of personal information into your response.
Note: Please be sure not to enter any kind of personal information into your response.
×
Thank You
×
Thank you for participating in our survey! Your answers will help us to improve the quality of our website and services.
We hope you continue to make use of Game8.
We hope you continue to make use of Game8.
Close
Rankings
- We could not find the message board you were looking for.
Gaming News


![Everwind Review [Early Access] | The Shaky First Step to A Very Long Journey](https://img.game8.co/4440226/ab079b1153298a042633dd1ef51e878e.png/thumb)

![Monster Hunter Stories 3 Review [First Impressions] | Simply Rejuvenating](https://img.game8.co/4438641/2a31b7702bd70e78ec8efd24661dacda.jpeg/thumb)
Popular Games

Genshin Impact Walkthrough & Guides Wiki
Honkai: Star Rail Walkthrough & Guides Wiki
Umamusume: Pretty Derby Walkthrough & Guides Wiki
Pokemon Pokopia Walkthrough & Guides Wiki
Resident Evil Requiem (RE9) Walkthrough & Guides Wiki
Monster Hunter Wilds Walkthrough & Guides Wiki
Wuthering Waves Walkthrough & Guides Wiki
Arknights: Endfield Walkthrough & Guides Wiki
Pokemon FireRed and LeafGreen (FRLG) Walkthrough & Guides Wiki
Pokemon TCG Pocket (PTCGP) Strategies & Guides Wiki


Recommended Games
Diablo 4: Vessel of Hatred Walkthrough & Guides Wiki
Fire Emblem Heroes (FEH) Walkthrough & Guides Wiki
Yu-Gi-Oh! Master Duel Walkthrough & Guides Wiki
Super Smash Bros. Ultimate Walkthrough & Guides Wiki
Pokemon Brilliant Diamond and Shining Pearl (BDSP) Walkthrough & Guides Wiki
Elden Ring Shadow of the Erdtree Walkthrough & Guides Wiki
Monster Hunter World Walkthrough & Guides Wiki
The Legend of Zelda: Tears of the Kingdom Walkthrough & Guides Wiki
Persona 3 Reload Walkthrough & Guides Wiki
Cyberpunk 2077: Ultimate Edition Walkthrough & Guides Wiki


All rights reserved
© 1993-2019 Nintendo
The copyrights of videos of games used in our content and other intellectual property rights belong to the provider of the game.
The contents we provide on this site were created personally by members of the Game8 editorial department.
We refuse the right to reuse or repost content taken without our permission such as data or images to other sites.