Abyss 110 Guide
We regret to announce that we are ending the coverage of Epic Seven. Thank you for all the support in reading our coverage of updates, event guides and character releases for Epic Seven.
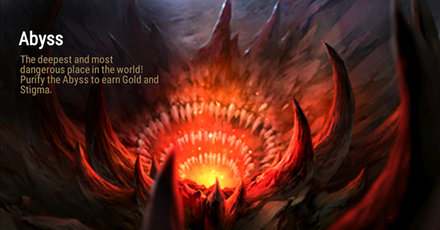
This article will guide you on how to clear Abyss Floor 110 for the game Epic Seven. Read on for more information on how to clear these certain floors within this section.
| Previous Floors | Next Floors |
|---|---|
| Abyss 109 Floor | ~ |
List of Contents
Abyss Floor 110 Guide
| Recommended Type | The Boss is Fire Elemental. Bringing in a Water Elemental Hero will help in increasing DPS against the Boss. |
|---|---|
| Recommended Team Composition | Bring a team that has High Crit Chance as well as Defense Break to help move the battle quicker. Bringing a Hero that can cleanse and heal is also a must. |
| Tips for Clearing | ・High Crit Chance Heroes are a must have.` ・A reliable Soul Weaver is needed for heals and cleansing. |
| Recommended Heroes | ||
|---|---|---|
Tips before Challenging
| Aramintha starts off with Overload and Immunity. →You have to kill the correct Thermal-Powered Energia to get rid of Overload and Immunity. |
| Killing the wrong Thermal-Powered Energia will trigger Aramintha's S2 attacking your whole team and giving them Burn, and the killed Thermal-Powered Energia spawns back in. →Keep a Heal and Cleans ready and just try again, or wait for them to move to see which one buffs Aramintha. |
| When Battle 2 enters the second phase, Magnar of the Flames will cast Immunity on Silver Blade Aramintha with their S2. →Crit both Magnar of the Flames 4 times to transform them to Dazzled Magnar ASAP. |
Battle 1
| Enemies | |
|---|---|
Focus on taking down the Constorum of Revulsion first while keeping your team healthy before going into the next battle.
Using Achates to cheese invincibility works out really well here.
Battle 2
| Enemies | |
|---|---|
First part will feature Aramintha with an overload mechanic.
Aramintha will spawn with three Thermal-Powered Energia, one of whom will provids Aramintha with buffs including an Immunity Buff as well as decreased damage due to Overload.
This part is full on RNG as you have to guess which Thermal-Powered Energia is providing her with the buffs and attacking/killing the wrong one will trigger Aramintha's S2.
It's fine if you choose the wrong one, just make sure you have a Heal & Cleanse on standby.
Once you've killed the correct one, focus all attacks on Aramintha.
When Aramintha's HP falls below 70% HP she'll transform into Silver Blade Aramintha and spawn in 2 Magnar of the Flames.
The Magnar of the Flames will cast Immunity on Silver Blade Aramintha everytime they use their S2. Note that using Non-Attack Skills while Magnar of the Flame is there, he will inflict 1 burn as well as reduce his skill cooldown by 1.
The goal here is to Crit them 4 times to transform them into Dazzled Magnar ASAP.
After that its about staying alive and whittling her HP down.
Keep your team healthy & immunity buff works wonders here especially when Silver Blade Aramintha is about to use her S3.
Eventually the add ons start ticking up and after it hits 2 they'll reapply immunity to SB Aramintha and do a decent amount of damage to your team so be prepared for that.
The fight does start to get scarier so it is a bit of a DPS check as she does get stackable attack buffs.
Recommended Team Build
| Character | Set |
|---|---|
| Speed & Immunity Set | |
| Speed & Resist Set | |
| Speed & Hit Set | |
| Rage & Crit Rate Set |
Related Links
| Previous Floors | Next Floors |
|---|---|
| Abyss 109 Floor | ~ |
Popular Links
 Tier List Tier List |
 Reroll Tier List Reroll Tier List |
 Artifact Tier List Artifact Tier List |
 Heroes Heroes |
 Artifacts Artifacts |
 Monsters Monsters |
 Exclusive Equipments Exclusive Equipments |
 Systems & Terms Systems & Terms |
 Materials Materials |
 Game Walkthroughs Game Walkthroughs |
 Beginner Guide Beginner Guide |
 Events Events |
Comment
Author
Abyss 110 Guide
improvement survey
03/2026
improving Game8's site?

Your answers will help us to improve our website.
Note: Please be sure not to enter any kind of personal information into your response.

We hope you continue to make use of Game8.
Rankings
- We could not find the message board you were looking for.
Gaming News
Popular Games

Genshin Impact Walkthrough & Guides Wiki

Honkai: Star Rail Walkthrough & Guides Wiki

Umamusume: Pretty Derby Walkthrough & Guides Wiki

Pokemon Pokopia Walkthrough & Guides Wiki

Resident Evil Requiem (RE9) Walkthrough & Guides Wiki

Monster Hunter Wilds Walkthrough & Guides Wiki

Wuthering Waves Walkthrough & Guides Wiki

Arknights: Endfield Walkthrough & Guides Wiki

Pokemon FireRed and LeafGreen (FRLG) Walkthrough & Guides Wiki

Pokemon TCG Pocket (PTCGP) Strategies & Guides Wiki
Recommended Games

Diablo 4: Vessel of Hatred Walkthrough & Guides Wiki

Fire Emblem Heroes (FEH) Walkthrough & Guides Wiki

Yu-Gi-Oh! Master Duel Walkthrough & Guides Wiki

Super Smash Bros. Ultimate Walkthrough & Guides Wiki

Pokemon Brilliant Diamond and Shining Pearl (BDSP) Walkthrough & Guides Wiki

Elden Ring Shadow of the Erdtree Walkthrough & Guides Wiki

Monster Hunter World Walkthrough & Guides Wiki

The Legend of Zelda: Tears of the Kingdom Walkthrough & Guides Wiki

Persona 3 Reload Walkthrough & Guides Wiki

Cyberpunk 2077: Ultimate Edition Walkthrough & Guides Wiki
All rights reserved
© Smilegate Megaport
The copyrights of videos of games used in our content and other intellectual property rights belong to the provider of the game.
The contents we provide on this site were created personally by members of the Game8 editorial department.
We refuse the right to reuse or repost content taken without our permission such as data or images to other sites.


![Everwind Review [Early Access] | The Shaky First Step to A Very Long Journey](https://img.game8.co/4440226/ab079b1153298a042633dd1ef51e878e.png/thumb)

![Monster Hunter Stories 3 Review [First Impressions] | Simply Rejuvenating](https://img.game8.co/4438641/2a31b7702bd70e78ec8efd24661dacda.jpeg/thumb)


